

Lake Haiyaha
If you enjoy my posts, please consider signing up below to get email notifications of my latest blogs. I will not share your email.

Chasm Lake
Rocky Mountain National Park
There are plenty of National and State Parks that you can hike in a day and then head off to the next place. These “vacations” are more like “adventures” with checkmarks for each place where you stopped. Although quite fun, the problem at the end of such a trip is being as tired as you were when you started, primarily due to all of the driving. If instead you are looking for an amazing hiking vacation where you can actually slip into relaxation-mode and stay at the same campsite or hotel for several days, Rocky Mountain National Park is simply a fantastic destination.
I’ve been to this National Park three times so far. I was eight-years-old, traveling with my family my first time here (this was also my first time becoming a Junior Ranger). I returned again in March 2015, when we stopped for a short winter hike around Bear Lake. (We were driving our then two and six-year-old sons and two exchange students down to the Grand Canyon - as mentioned above - a “sampling” trip of lots of different places) Then in July 2023, we were blessed to spend five days in this park, staying at Timber Creek Campground - and this is one of my favorite family trips so far. I do struggle to say I’ve ever “completely” explored a National Park, even after such a long stay. I’d like to head back at least once more to cross off two last hikes (mentioned below), as well as enjoy the park in its fall colors.

Elk along the Trail Ridge Road
Planning Your Trip
Before you read any further, if you intend to visit Rocky Mountain National Park, you need to head to the park’s official website and look up information on permits (both to enter the park and to visit certain trailheads and visitor centers). This is a very busy park, and they have tried different things over the recent years, so it’s best to look this up to get current information on what you need to pre-book. I’ll highlight what we needed to do and how we did it as of July 2023 in the relevant sections as I explain each section of the park.
Reference the below interactive map for Rock Mountain National Park Visitor Centers, trailhead locations, lodging, and other nearby activities. Use two fingers on the map to zoom in and look around.
Cities and Lodging Options Near Rocky Mountain National Park
If you are flying instead of driving, the closest major airport to Rocky Mountain National Park is Denver, CO. The airport is about an hour and 35 minutes away from Beaver Meadow Visitor Center (assuming no traffic).
Your best non-camping option for lodging is Estes Park. This is a small city, but it is within minutes of the Beaver Meadows park entrance. There are hotels, restaurants, and a grocery store. This town is too small for a Walmart or Target. If you are looking for something beyond food or basics, then Loveland (~one hour drive) is your closest place to shop.
If the hotels in Estes Park are full, the other city to check out in the summer months is Grand Lake. This is even smaller than Estes Park, and it’s on the west side of the park (while most of the popular hiking is on the east side). The drive up and over the Alpine along Trail Ridge Road is beautiful, but it takes about an to hour drive. Note that Trail Ridge Road closes due to snow (approximately October through May). You will want to stay on the east side of park (Estes Park) in these snowy months.
Camping within Rocky Mountain National Park is going to require a reservation in all campgrounds other than Longs Peak (which is first come, first serve). And you are going to want to book early. Another camping logistic - none of the campgrounds have actual showers, nor are you going to be able to use biodegradable soap. I promise you are going to be ok, and that first shower post-Rocky Mountains is going to feel epic. The elk, or whatever other wildlife enters into your campsite, are worth your sacrifice in smelliness. We used a solar warmed shower bag, and at least had warm water and a towel to wipe the dirt off of us every evening.
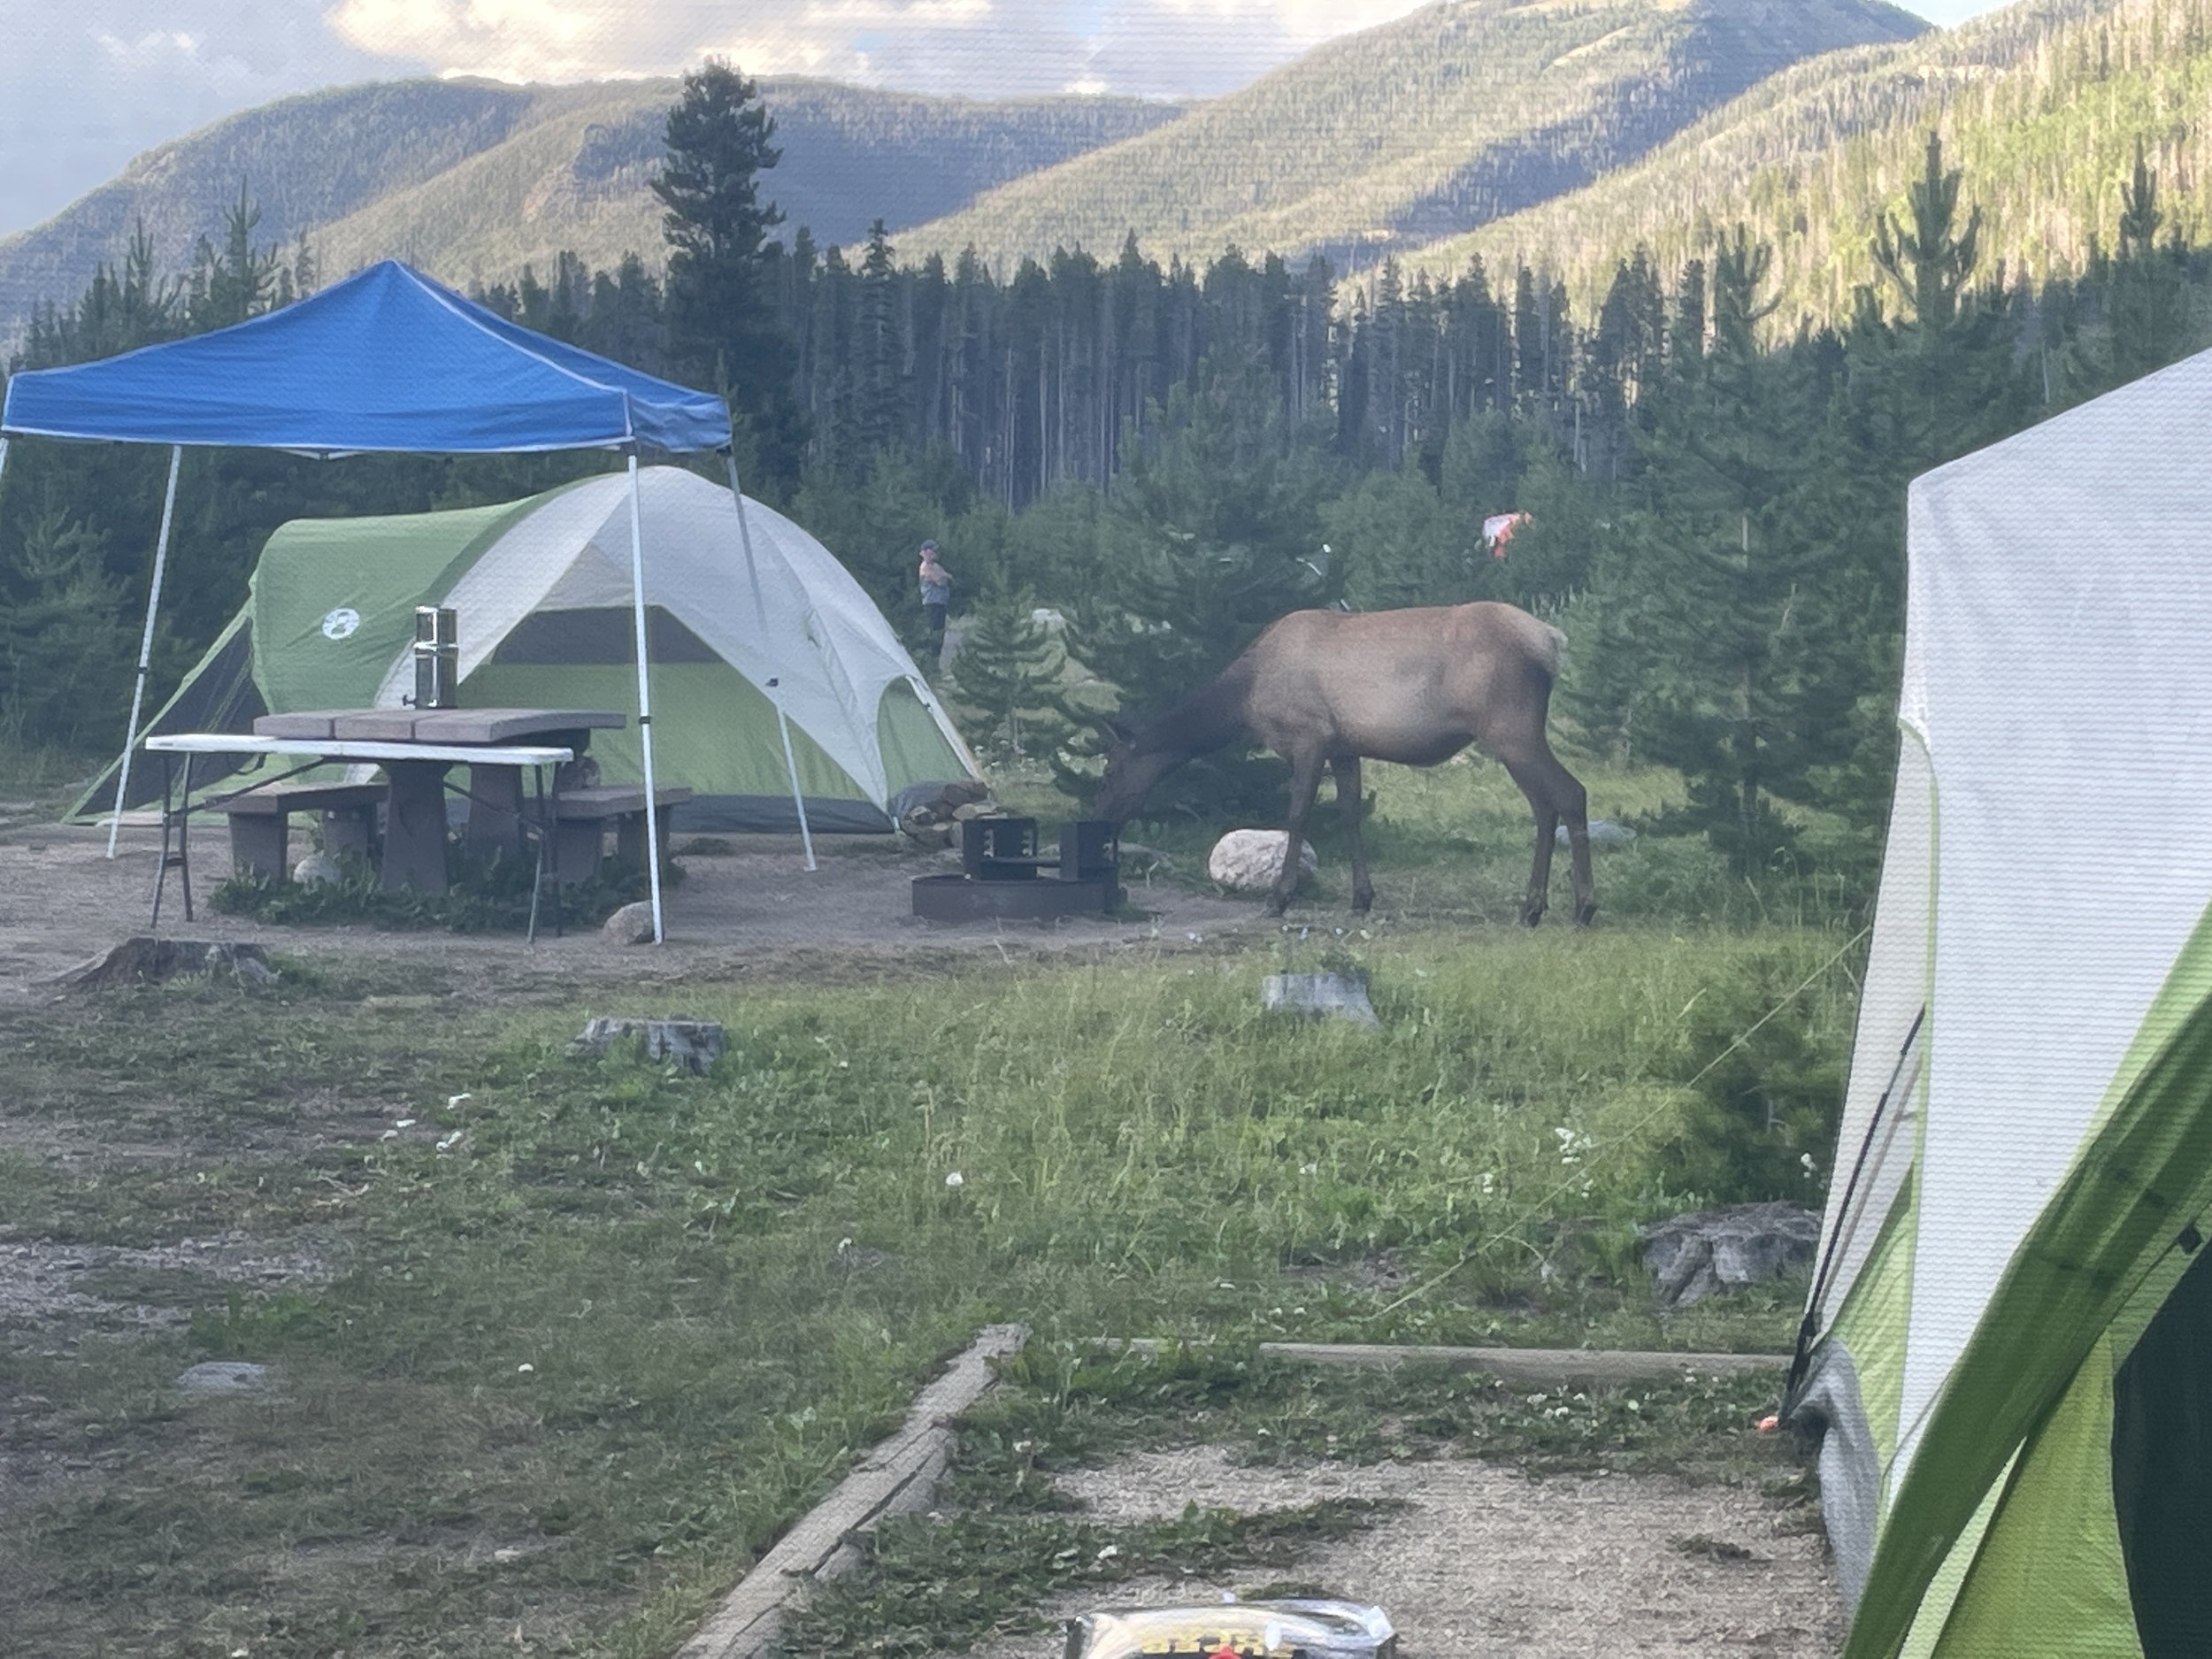
Evening visitors at Timber Creek Campground
As I mentioned, we stayed in Timber Creek Campground. We were struggling to find time for a summer trip between baseball, soccer, and scout camps, and didn’t end up booking until February for a trip in July. There was exactly one campsite available in the entire National Park for the dates we wanted to travel - which was the perfect number (I only needed one site). Timber Creek was awesome - it was quiet except for a bit of road traffic while we were getting supper ready. The upside and downside was needing to drive up and over the Trail Ridge Road through the Alpine to get to the trails on the east side of the park. We did really enjoy this road as we figured out where the animals were - they were much more predictable than I assumed. But it took about an hour every morning and every evening. The best part of Timber Creek were the elk that woke us every morning with bugling and joined us often for breakfast and supper literally in our campsite, and they made our stay unforgettable.
If you book early enough to pick a campground, my recommendation would be Aspenglen, Glacier Basin, or Moraine Park Campgrounds. All three are in the main park on the east-side, and they would result in much less driving needed each day.

Breakfast visitors at Timber Creek Campground - view from our tent (site 94)
Rocky Mountain Nation Park Entrances
There are three main entrances and a fourth one in an isolated portion of the park. A Park Entrance means you need to show your annual National Park Pass (or pay for the day’s entry) and meet the timed entry requirements. In 2023, that meant either arriving in the park before 9am or after 2pm, arriving after 1pm with a campsite reservation for that evening, or having a timed entry permit which can be purchased from the Rocky Mountain National Park website. (If you want to hike any of the trails off of Bear Lake or if you want to visit the Moraine Park Discovery Center, you need a You need a Park Access+ Timed entry to make the turn onto Bear Lake Road - also available on the park’s website).
If you are coming from the west side, the Grand Lake Park Entrance is past both Grand Lake and the Kawuneeche Vistor Center. Our experiences in July 2023 were all toward the evening, and we didn’t have to wait in any line. We just drove up and showed our National Park Pass and timed-entry and drove into the park.
On the east side, Beaver Meadows seems to be the most popular entrance, and in the morning we waited close to 20 minutes to get through the pay entrance. In the evening, it took maybe 5-10 minutes to get through this same line. We drove to Estes Park 3 of our 5 nights after we were done hiking to get ice, ice cream, and other things at the grocery store, and this was simply the most convenient entrance in terms of distance despite the wait.
We drove through the Fall River Entrance twice (also on the east side). This was July 2023 when they were doing some construction and the main park website asked people to avoid this entrance. We did not end up waiting in any line either time. I’m not sure if this is normal, or the result of asking people to go through Beaver Meadows, but it seems like more of a “secret” entrance that might be the best option if you are simply arriving from the east side of the park and you aren’t just driving directly from Estes Park.
The fourth entrance is Wild Basin. This is specific to the Wild Basin Trailhead, a popular trailhead about 35 minutes south of the Beaver Lake entrance. Entering through this entrance station is required to get to the Wild Basin Trailhead. Upon leaving, you will leave the park and have to re-enter through the Beaver Meadows or Fall River entrances.

Coyote off of Trail Ridge Road
Time Needed at Rocky Mountain National Park
If driving, pullouts, and short hikes are your thing, you could see Rocky Mountain National Park in one long day, with a 2 night stay in Estes Park or Grand Lake. If you like longer hikes, or a mixture or moderate and longer hikes, you can easily fill a 5-7 day itinerary filled with different types of scenery each day. I worried a bit that the hikes would all start to blend together at the end of a 5-day trip, and they did not. Each hike felt distinctly different and seemed like we were exploring some place new.
If you are someplace in the middle, maybe with younger kids and looking to do the easy trails and maybe a few of the more moderate hikes, then plan for a 3-4 day trip with 2-3 nights in Estes Park or one of the park’s campgrounds.

Yellow Bellied Marmot playing on the rocks near Lake of Glass
Other Things to Know
I think there are four other useful things to consider if you are planning a trip to Rocky Mountain National Park. The first is where to gas up. If you are going to be in the park for a few days driving between trailheads on different side of the park, you may need to think about where to fuel up. Your two choices are Estes Park and Grand Lake. Gas was priced similarly between cities when we were here. There is nothing in-between these cities.
The second thing is internet access. You likely will not have cell service while in the park. The campgrounds do not have service either. I was able to get internet at all of the Visitor Centers except the Alpine Visitor Center. Your other options are to exit the park and head to Estes Park or Grand Lake.
Third, remember to consider elevation. No matter where you are in this park, you are likely to be impacted by being at a higher elevation than you are used to. It’s going to be a little harder to breathe and take more effort to walk (especially walking up) than what you are likely used to, and you may even find above 8,500ft you struggle with a bit of elevation sickness. If you are planning on spending a few days here, consider how to acclimate quickly. We spent our first day hiking Deer Mountain. This wasn’t my favorite trail, but I think it did help us adjust quickly so we didn’t struggle on the other days. We also spent our nights in the Timber Creek Campground, which is at 8,900ft. This is well above Estes Park, and after that first day we felt decently acclimated.
Lastly, watch the weather. Trail Ridge Road closes due to snow for more than half the year, and it even snowed one day while we were here in July. You are very much in the mountains along this road. If you travel in the summer, pay attention to the clouds as thunderstorms are likely in the afternoon, resulting directly from these mountains - The Alpine Visitor Center has a great Ranger Program where they explain how the mountains make the summer thunderstorms. Hiking earlier in the day is safer but more crowded. Afternoon hikes are less busy, but you have a higher chance of severe danger, particularly if you are above the treeline. If you pick afternoon hikes, watch those clouds and think about where you would take shelter if you need to.

Clark’s Nutcracker near Dream Lake
Hiking at Rocky Mountain National Park
The below map gives a high-level view of where the trailheads, viewpoints, visitor centers, and campgrounds are located. Sometimes it’s nice to simply see where things are at (what’s near what) so you can easily plan your trip. I’ll use the same numbering system throughout the rest of this post. There are hyperlinks - if you click on the trail names, it will bring you to pictures and my trail descriptions.

Visitor Centers (red): A - Beaver Meadows, B - Fall River, C - Alpine, D - Kawuneeche, E - Moraine Park Discovery Center
Park & Ride (red): P
Campgrounds (green): F - Glacier Basin, G - Moraine Park, H - Aspenglen, I - Timber Creek, J - Long’s Peak
Viewpoints (purple): 6 - Sheep Lake, 11 - Many Parks Curve, 12 - Rainbow Curve, 15 - Lava Cliffs, 16 - Gore Range, 18 - Medicine Bow Curve, 19 - Fairview Curve
Red Dashed Box - As of 2023, this area requires a separate Park Access + Timed Entry (permit)
Trailheads (blue): 1 - Wild Basin - Copeland Falls / Calypso Cascades / Ouzel Falls / Ouzel Lake / Bluebird Lake (hard)
2 - Long’s Peak - Peacock Pool / Columbine Falls / Chasm Lake (hard)
3 - Lily Lake - Lily Lake (easy) / Twin Sisters (hard)
4 - Lumpy Ridge - Gem Lake (moderate) *favorite
7 - Alluvial Fan - Horseshoe Falls (easy)
9 - Abandoned Beaver Ponds (easy) *skip
10 - Hidden Valley (easy) *skip
13 - Forest Canyon (easy) *favorite
14 - Tundra Communities / Rock Cut (easy) *favorite
20 - Coyote Valley (easy) *favorite
21 - Tanahutu / North Inlet - Cascade Falls (moderate)
22 - East Inlet - Adam’s Falls (easy)
23 - Fern Lake - The Pool / Fern Falls / Fern Lake / Odessa Lake (moderate to hard)
1 - Wild Basin - Copeland Falls / Calypso Cascades / Ouzel Falls / Ouzel Lake / Bluebird Lake (hard)
Distance - 12.4 miles roundtrip
Elevation Gain - 2,713ft
Trailhead Location - The trailhead is in the southeast corner of Rocky Mountain National Park. According to the park map, there is an entrance station to this trailhead, which means that your timed entry for the park will be checked. Additionally, this trailhead does not connect with the rest of the park. When you exit the trailhead, you will leave the park. If you have additional hikes planned, you will need to re-enter the park through another entrance.
This was one of two hikes we had planned but simply didn’t have time to do as the trailhead was so far in the southeast corner of the park and our campsite was in Timber Creek (on the west side). Next time…
2 - Long’s Peak - Peacock Pool / Columbine Falls / Chasm Lake (hard)

View of Peacock Pool and Columbine Falls
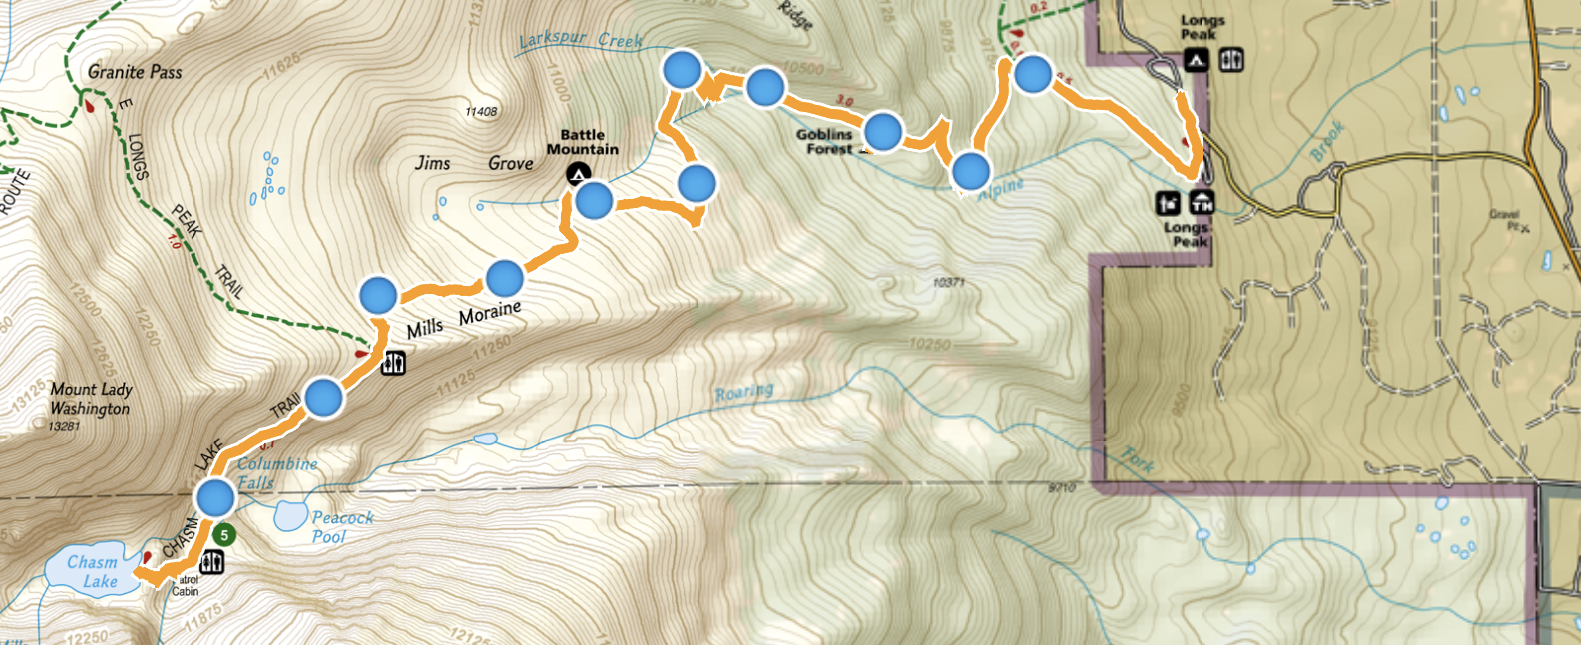
Our trek to Chasm Lake as recorded by GAIA (app)
Distance - 8.64 miles roundtrip
Elevation Gain - 2,449ft
Trailhead Location - This trailhead is on the east side of the park. There is no entrance station on your way to the trailhead. If parking near the trailhead is full, check Long’s Peak Campground - there may be a few additional spots along the road.
Other Information - This hike took us just under 6 hours. The elevation at the start of the trail was 9,405ft, and this trail goes straight up - the whole way. There are moments that it is more steep than others, but it never really flattens out, and the trail never goes down. At the end, to get to Chasm Lake, there is a boulder field that you will climb up and over. This is a tough trail. Additionally, a large portion of this trail is above the treeline. This means that in the case of an electrical storm, you will be the tallest object if lightening strikes. Thunderstorms are common in the afternoons. Watch the weather.
There are pit toilets along this hike. If I remember correctly, there are two. One is near the split for Long’s Peak, and the other is just below the boulder field next to Chasm Lake. There are also pit toilets at the trailhead.

The whole trail is up - Some parts are steeper than others.
The trail to Chasm Lake goes through many different habitats. It starts in the forest, and yes, from the pictures you can see this trail goes up, and up, and then up so more.

Trail follows along Alpine Brook for a bit
About a half mile into the trail, you will come up alongside Alpine Brook. There are a few spots close enough to wet a handkerchief and cool off a bit. The trail crosses over the stream twice.

All water crossings along the trail have a bridge like this one. Your feet should stay dry.
On the other side of these falls, you will pass a sign warning of the hazards of lightning. From this point forward, you will quickly hike up and over the treeline (elevation where trees no longer grow), and you will be the tallest living thing.

The trail to Chasm Lake climbs up and over the treeline.
Above the treeline, you will find yourself in the Alpine Tundra. From here on, this trail is beautiful, the entire way. It’s a hard hike, but the views will distract you.

Chasm Lake Trail - Above the Tree-Line
There are a small handful of trail intersections. They are all marked very clearly. I hike with a GPS map at all times, but even without one, I don’t think there would be a moment on this trail where you could feel lost.

Trail crossings are all well marked.
Below is the intersecting trail to Long’s Peak, the highest mountain and only 14 footer in the park. When I read reviews on Long’s Peak, they all said bring a helmet. Needing head protection from potential trail hazards isn’t quite my kind of hiking, so we skipped that trail and just walked out to Chasm Lake and back.

This is the trail split to Long’s Peak
From the split to Long’s Peak, it’s not quite 0.75 miles to Chasm Lake. At this part in the trail, Peacock Pool is going to be visible off to the left and Columbine Falls is going to come into view ahead shortly. Chasm Lake is in that valley ahead of the trail off to the upper right.

Still going up - but this trail is worth the effort

Peacock Pool (on the Chasm Lake Trail)

Columbine Falls (on the Chasm Lake Trail)
Even though we were hiking at the end of July, there was still one spot with snow. Spikes or poles are helpful in these stretches. We didn’t have either so we crab-walked the section touching the mountain, just behind my son in the picture, to avoid slipping.

Even at the end of July, there was still one sketchy spot in the snow.
This is the one short spot in the trail that it levels out as it follows next to this meandering quiet mountain stream. This was one of my favorite sections of the trail. There was no one around, and it was silent except for the motion of the water and the buzz of a bee or two.

Meandering river in the alpine meadow (Chasm Lake Trail)
There are two parts of the Columbine Falls - one is above the trail and the other is below. The trail crosses over the bottom falls.

Top half of Columbine Falls
An epically difficult trail - You get to the “end” of the trail and there is a sign that states “Chasm Lake” with an arrow pointing up. You look up, and there’s this dramatic boulder field. There’s not really a trail to follow, you just pick your way over the rocks however you are comfortable. The scramble isn’t too terribly hard, but you’ve been hiking up quite awhile at this point in some high elevations. As we say in MN, “Oofta!”

Boulder field at the end of the trail. To get to Chasm Lake, you’ll need to climb up. Chris is in picture, for refence of how steep this hill is (look in the middle right-ish if you don’t see him)
Happily, you really don’t have to walk down much of a hill to get to the lake. It’s pretty much at the end of that boulder field. The view is incredible. We enjoyed this spot for a long time, and despite it being summer, it was just us until the last couple of minutes (which was perfect as we were able to get a family picture). If you are up for the effort, this trail is amazing.

Chasm Lake

Pika on the boulder field on the way back down.
3 - Lily Lake - Lily Lake (easy) / Twin Sisters (hard)
Lily Lake Distance / Elevation Gain - 0.8 miles / N/A
Twin Sisters Distance / Elevation Gain - 7.5 miles round trip / 2,516ft
Trailhead Location - The trailhead is on the east side of the park. This is before the formal Beaver Meadow Entrance.
This was the second of two trailheads that we had planned but were not able to visit. We had planned this for our last day, and no one (including me) wanted to hike up anything more at this point, let alone two mountain peaks after the other intense hiking we had been doing. This blog is too be continued… For sure we will return.
4 - Lumpy Ridge - Gem Lake (moderate) *favorite

Gem Lake
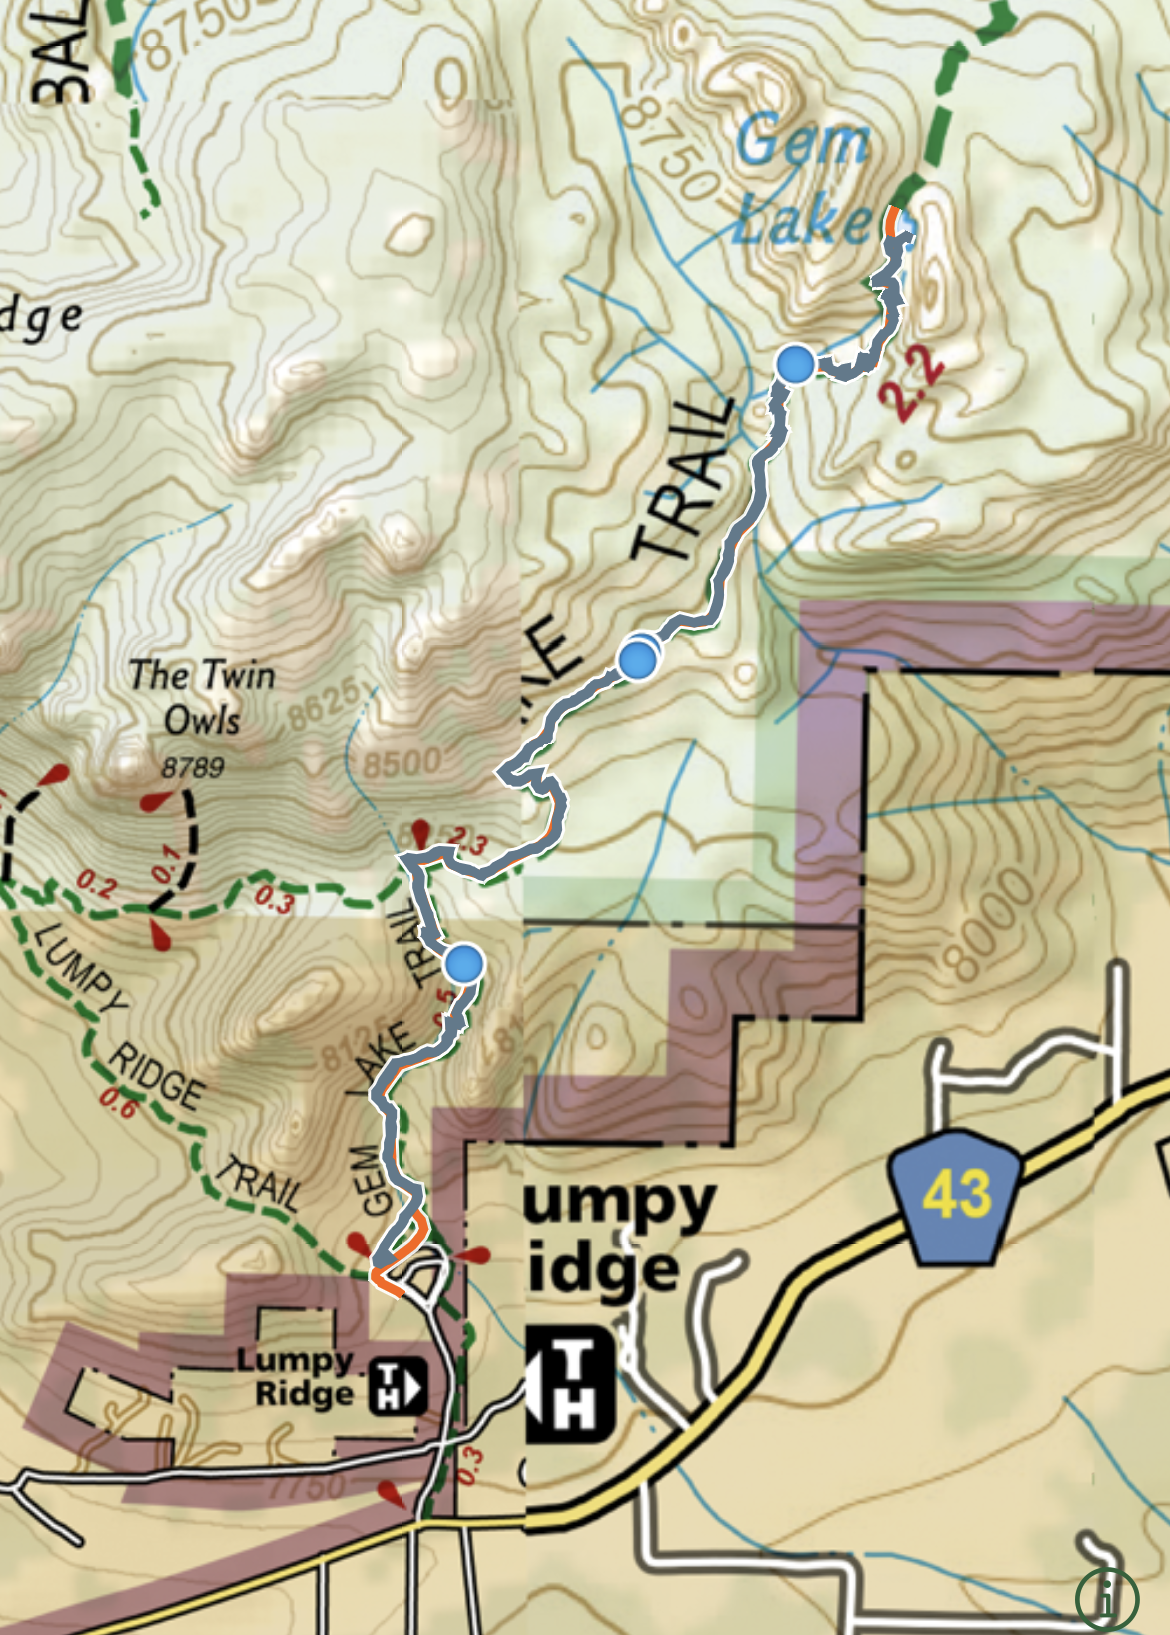
Our trek to Gem Lake as recorded by GAIA (app) - Not sure why my map is shifted a bit in the middle, but the shape of the trail is correct.
Distance - 3.4 miles round trip
Elevation Gain - 973ft
Trailhead Location - This trailhead is on the northeast side of the park and is before you hit any of the of the formal park entrances. The closest visitor center is Fall River.
Other Information - This trail starts at a lower elevation - 7,873ft, which makes it a significantly easier hike than some of the other trails that are included within this post, even with the almost 1,000ft in elevation gain. We spent about 2 hours along this trail. There is a pit toilet, just below the final ascent to Gem Lake.

Gem Lake Trail
Each trail that we hiked in Rocky Mountain National Park was distinctly unique. If you’ve ever been out to Rapid City, SD, you will feel a Black Hills-vibe as you travel along the Gem Lake Trail.

View of Estes Park from Gem Lake Trail
The trail is mostly hard-packed gravel, with some steps built into the boulders. There is no rock scrambling required along this trail, but there are some tree roots to watch out for, and some of the steps are quite steep. With that in mind though, this was a really nice longer hike that was not terribly difficult.

Additional views of the valley from the Gem Lake Trail
Below is the view of Gem Lake from the trail. There is a large rock to sit on at the end. There is also a bit of a sandy beach to the left, and we followed the rocky edge to the right.

Gem Lake
The below picture is from the rock edge wall looking back towards the trail. The water was cool, but not near as cold as Chasm Lake. I think on a warm enough day you could swim here, or at least wade in a ways.

Gem Lake
I noticed this rock with a strange hole in it on our way back down. If anyone has ideas on how that hole formed, I would love to hear it! I still can’t figure this out.
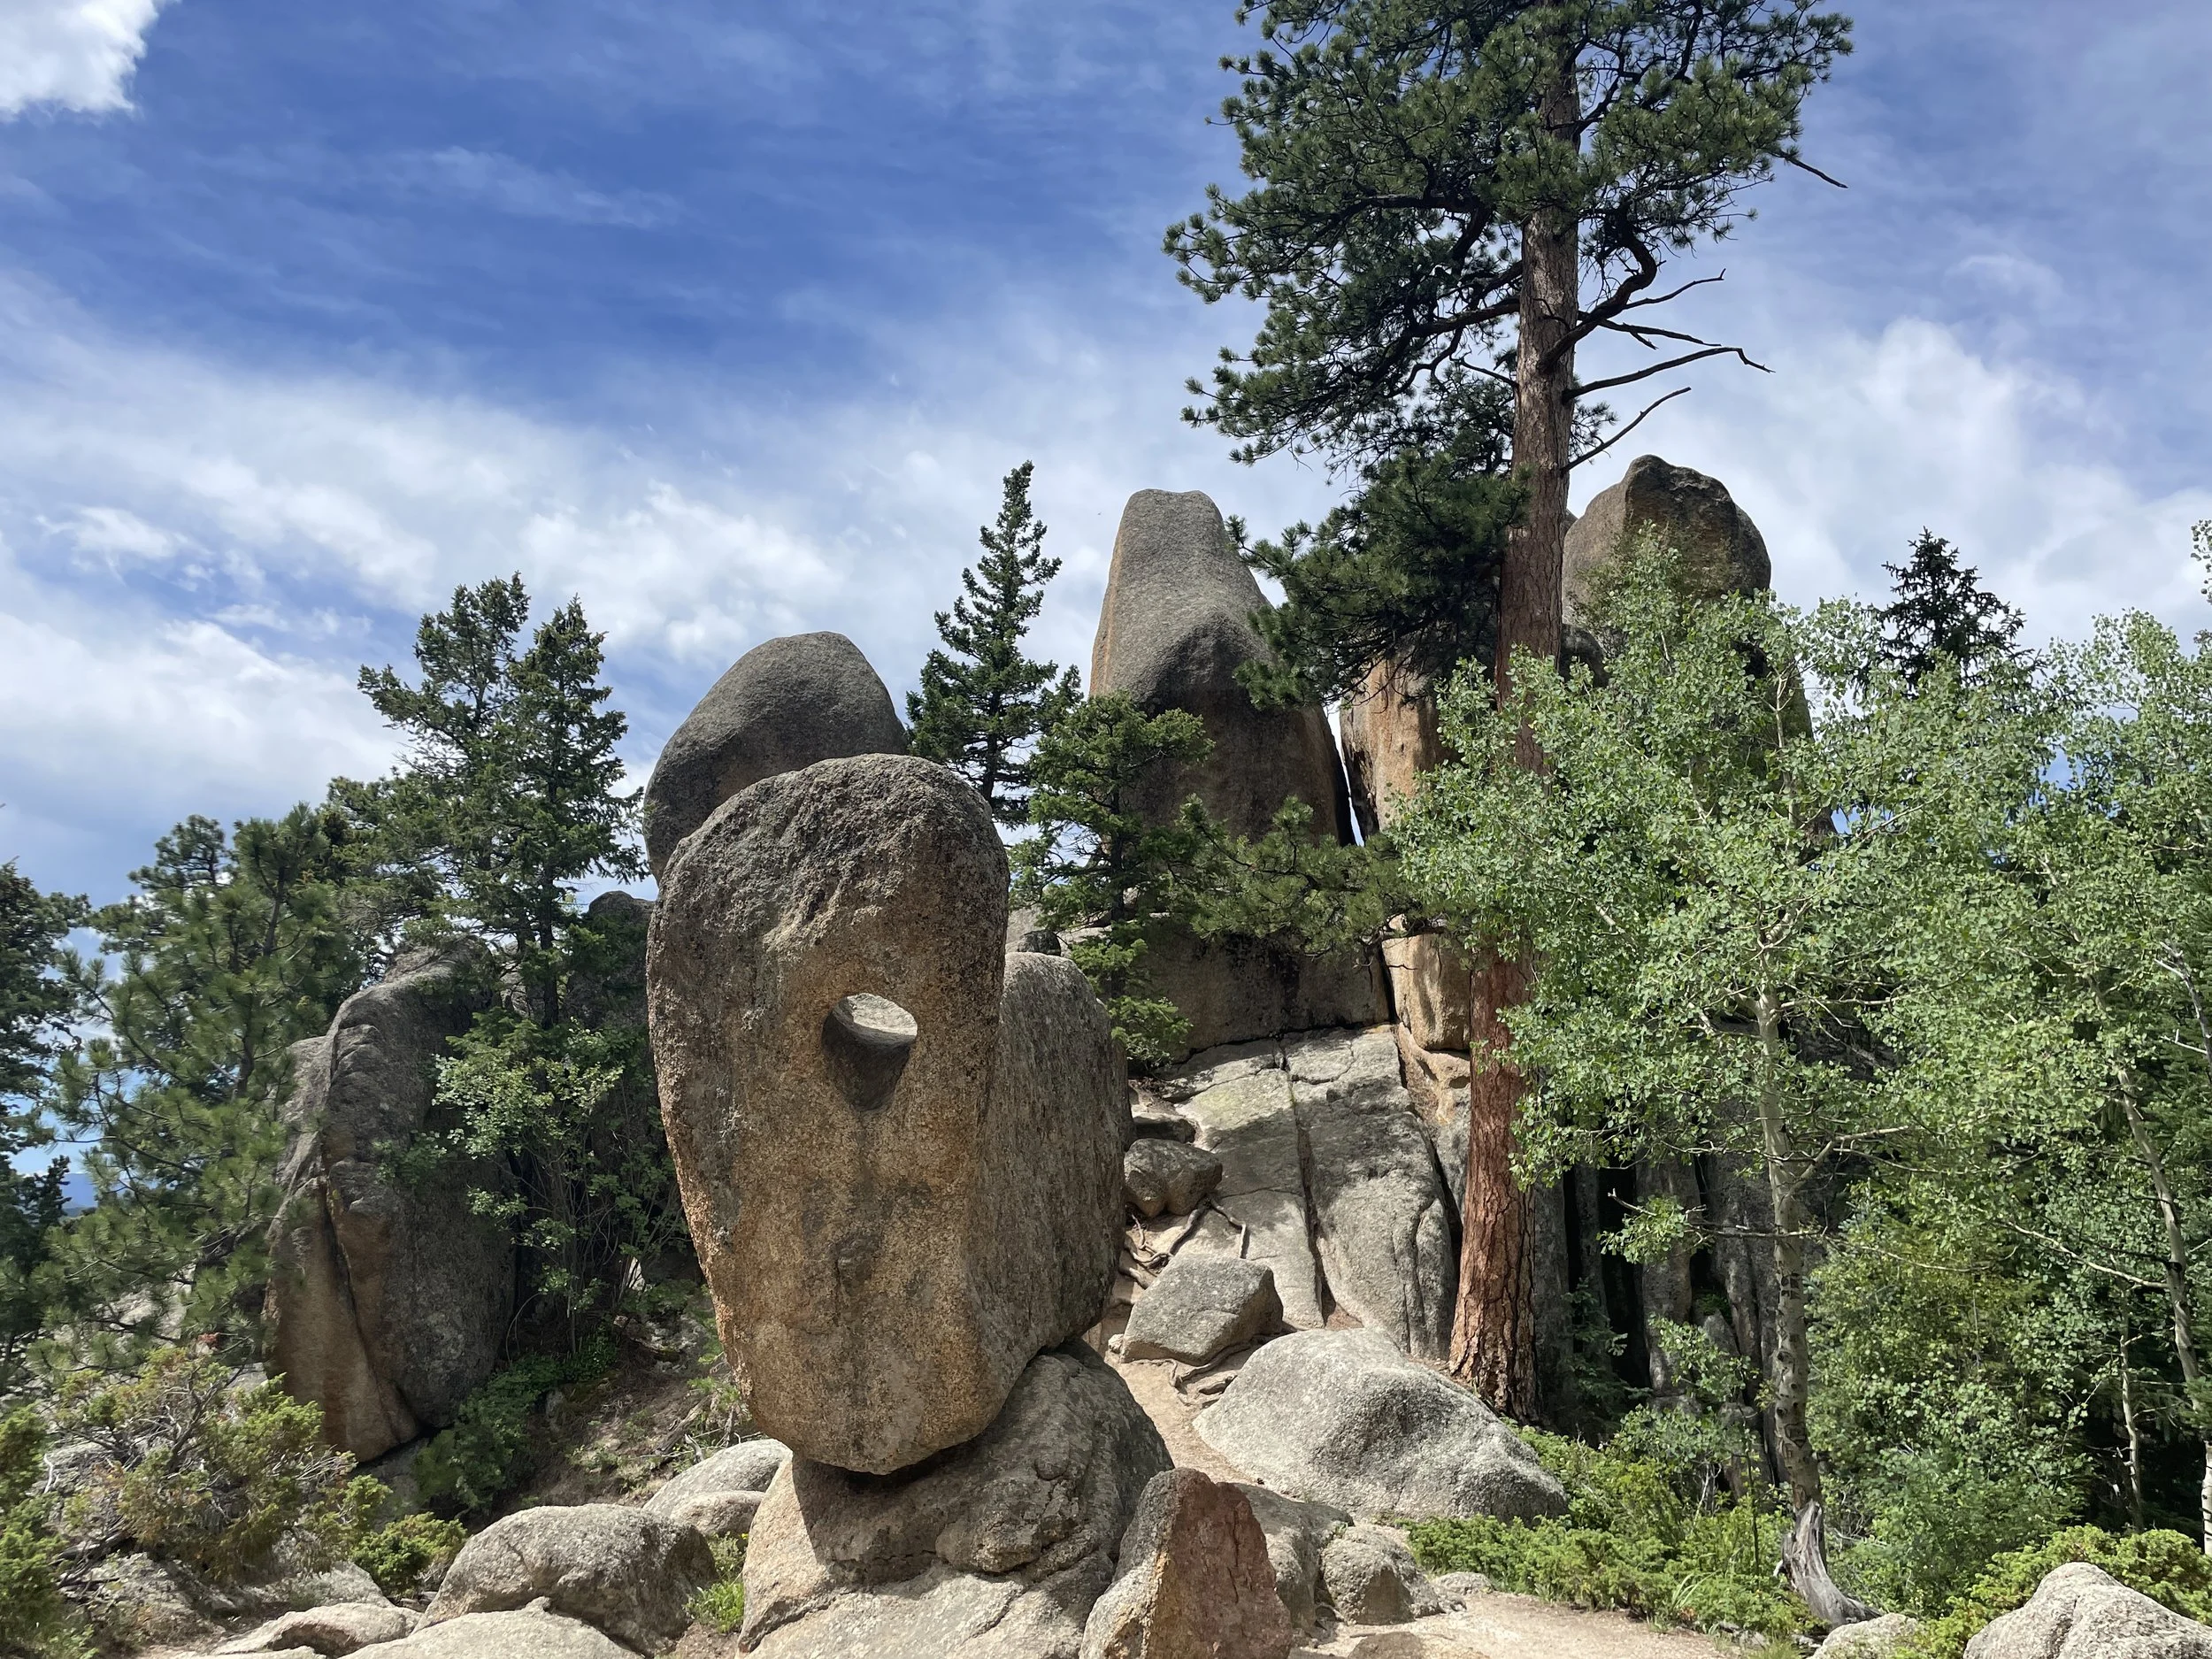
Super curious rock along the Gem Lake Trail
A - Beaver Meadow Visitor Center
Even though it seems like Beaver Meadows Visitor Center would be the main visitor center (simply because most people probably enter through this part of the park), I didn’t find anything noteworthy about this visitor center. The gift store is small and there isn’t much information about the park. I would skip it, unless you need to ask the Park Rangers a question, or if you need to access the internet.
5 - Deer Mountain (moderate)

View from Deer Mountain

Our trek up Deer Mountain as recorded by GAIA (app)
Distance - 6.1 miles round trip
Elevation Gain - 1,221ft
Trailhead Location - The Deer Mountain Trailhead is inside the main part of the park (meaning that you will need to go through an Entrance Station), located about halfway between the Beaver Meadows and Fall River Visitor Centers.
Other Information - The Deer Mountain Trailhead starts out at 8,930ft in elevation. This trail took us just under 3 and a half hours to hike. There are no toilets at the trailhead or along the trail. The closest are located at the Lawn Lake Trailhead (or stop first at one of the visitor centers for flushing bathrooms).

Valley views from the Deer Mountain Trail
Deer Mountain was actually the first hike we did on our July 2023 vacation. We had some longer hikes planned with large elevation gains, and we live in MN which is at pretty low elevation to begin with. We simply needed a “training” hike to start adjusting to the higher elevations. And this was the perfect hike for us for that purpose. This was not a busy trail either. We passed a few people along the way, and there were 3 or 4 other groups of hikers at the top.
The views from the top of Deer Mountain are amazing. The first half of the hike is pretty, and follows along the valley that you drove through to get to the trailhead. Then as the trail goes up, it goes through a forest and there aren’t many views through the trees then until the top. I liked Sky Pond and Odessa Lake better than Deer Mountain for this reason - they are beautiful trails the whole way. But there’s no way we could have just started cold with those more difficult trails. If you intend to hike those harder trails, think through how to acclimate first - this might be a good trail for you as well.
If you are just looking for a moderate hike, my recommendations would be Gem Lake, Emerald Lake, and Lake Haiyaha, rather than Deer Mountain.

White-tailed ptarmigan (snow quail) chick running up the trail ahead of us

Views from the Deer Mountain Trail

At the top of Deer Moutain

At the top of Deer Mountain
B - Fall River Visitor Center
There are some nice displays about animals in the park at the Fall River Visitor Center. Additionally, there is a large gift store next door with basic amenities if you’ve forgotten something. There is internet access at this visitor center as well.
6 - Sheep Lake (viewpoint)
As aptly named, “Sheep Lake” is supposed to be one of your more likely spots to catch a Bighorn Sheep. There are nutrients that the sheep need in the clay around the lake. We drove past Sheep Lake a couple of times but didn’t see any sheep. There are no hikes at this stop - the area is closed for re-growth. It’s just a pullout to watch sheep if they are present.
7 - Alluvial Fan - Horseshoe Falls (easy)

Horseshoe Falls on the Alluvial Fan Trail

Map of our trek to Horseshoe Falls using the GAIA app
Distance - 0.5 miles round trip
Elevation Gain - 123ft
Trailhead Location - There are two parking lots, and the distance to the falls is the same from each parking lot. So if the east parking lot is full, try the west lot. The road is still a two-way road at this point (eventually it switches to a one-way road further down when it becomes Old Fall River Road).
Other Information - This was a pretty spot that we enjoyed for a half hour one afternoon. The trail is paved. You can see the falls from the paved trail. If you want to get closer to the water, it involves walking over some rocks.

The trail is paved - there is some elevation gain though, it’s not flat

A bridge connects the east and west parking lots of the Alluvial Fan Trail

View of the falls from the main trail

Take time to enjoy yourself in a National Park - that’s going to mean figuring out how to get in the waterfall sometimes.
8 - Old Fall River Road - Chasm Falls (easy)

Chasm Falls off of Old Fall River Road

Map of our trek to Chasm Falls on the GAIA app
Distance - 0.14 miles round trip
Elevation Gain - 35ft
Trailhead Location - The trailhead to Chasm Falls is off of Old Fall River Road, a one-way road going east to west that ends at the Alpine Visitor Center.
Other Information - We spent about 10 minutes here. The trail is made of hard dirt and starts off a bit steep. If you want to get closer to the water, you need to walk down the rocks past the viewing platform, which is off-trail.

This is the beginning of the short trail to Chasm Falls. You can see the trail is made of hard dirt, and although the trail only drops 35ft, it does so in a very short distance.

Below Chasm Falls - We walked off-trail past the viewing platform for a short bit to get down to the water. We were trying to touch all of the water sources as we hiked throughout the park.
9 - Abandoned Beaver Ponds (easy) *skip

This is about all of the view of water that you will get from the Abandoned Beaver Pond Trail

Very short trek to the Abandoned Beaver Ponds as recorded by the GAIA app
Distance - 0.14 miles round trip
Elevation Gain - N/A
Trailhead Location - The trailhead to the Abandoned Beaver Ponds is off of Trail Ridge Road. Traveling east-to-west, this is the first pullout (before Hidden Valley)
Other Information - We stopped here — mainly for two reasons 1) even though it said “abandoned” it still had the name “beaver” in it. We thought maybe there would be a dam or something left behind. This ended up not being true. The beaver ponds were here a really long time ago. 2) the trail is along a boardwalk, and I love boardwalks as that typically means the trail goes over water. There simply isn’t much here though. The boardwalk goes to a stream and then stops rather than going over it or along it. It seems as if the boardwalk is more meant to contain visitors and keep us from wandering alongside the water. You might see an interesting bird here, maybe? I would recommend skipping this stop.

An enticing boardwalk at Abandoned Beaver Ponds that simply doesn’t go anywhere

View of the meadow from the end of the trail - I can imagine that there could be birds here or maybe a deer heading down for a drink of water. But we saw neither.
10 - Hidden Valley - Hidden Valley (easy)

Hidden Valley Trail - We had fun balancing along the logs to cross the creek. We didn’t see a more permanent structure for crossing at the far-end of the loop.
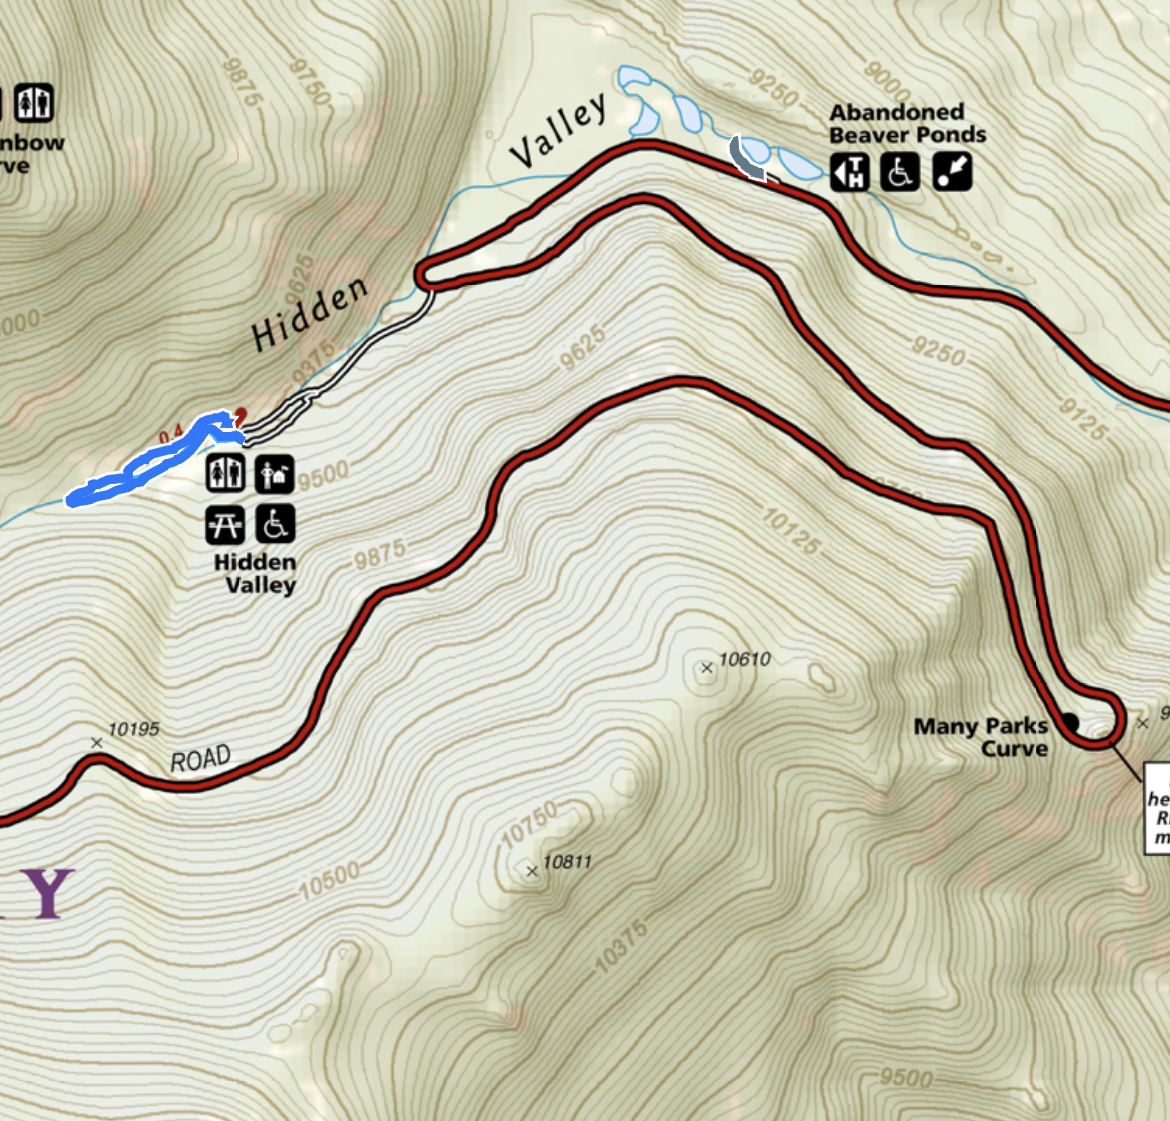
Our walk around Hidden Valley as recorded by the GAIA app
Distance - 0.6 miles round trip
Elevation Gain - 149ft
Trailhead Location - This trailhead is off of Trail Ridge Road, just after the Abandoned Beaver Ponds stop.
Other Information - We stopped at Hidden Valley because it claimed to be the Headquarters for Junior Rangers. That sounded very interesting as I love the National Park Junior Ranger Program, but I never figured out though why it was called their headquarters... The best part of the Hidden Valley stop is that it has flushing toilets and a water-fill station, as well a lot of picnic tables.
As far as the trail, I wasn’t very impressed. Maybe the park will build this out more in the future, but right now it’s just a stream, some rapids, and trees on both sides of a valley. There are better easy hikes around the park.

Hidden Valley Trail

Keep playing the Stick Game for as long as your kids will play with you. This bridge was the one formal crossing of the stream near the bathrooms. We didn’t find an obvious way to cross back over, but found the logs as pictured above.
11 - Many Parks Curve (viewpoint)

View from on top of the rock at Many Parks Curve
The next stop going east-to-west along Trail Ridge Road is Many Parks Curve. This is just a viewpoint. We did notice a couple of times when the park was busier that there were cones set up so you can only get into the parking lot from one direction. If that happens while you are there, drive just a bit further, there is a second parking lot that is just a short walk. The best view does require a short scramble up the rock shown in the picture below.

Said rock that we scrambled up to get pictures from
12 - Rainbow Curve (viewpoint)

View from Rainbow Curve on Trail Ridge Road
Following Trail Ridge Road east-to-west, Rainbow Curve is the next stop. If you are looking for a bathroom, there are pit toilets at this stop. This viewpoint provides a beautiful panorama of the Rocky Mountains.
13 - Forest Canyon Overlook (easy) *favorite

Forest Canyon Overlook
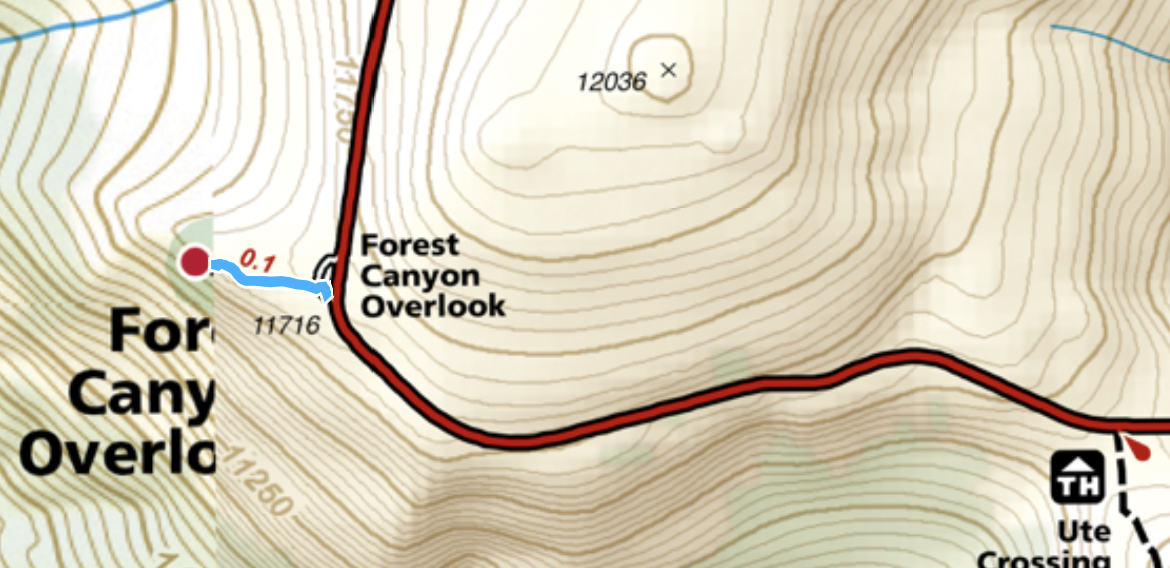
This is a very short walk out to an amazing viewpoint, as recorded on our GAIA app
Distance - 0.26 miles round trip
Elevation Gain - N/A
Trailhead Location - This is the next stop traveling east-to-west from Rainbow Curve
Other Information - I loved this short hike. The Alpine is an amazing habitat. Although this trail is extremely short, we stood in awe at the viewpoint for almost 20 minutes. The trail is very accessible due to being flat, wide, and hard dirt.

Forest Canyon Overlook

Forest Canyon Overlook Viewpoint

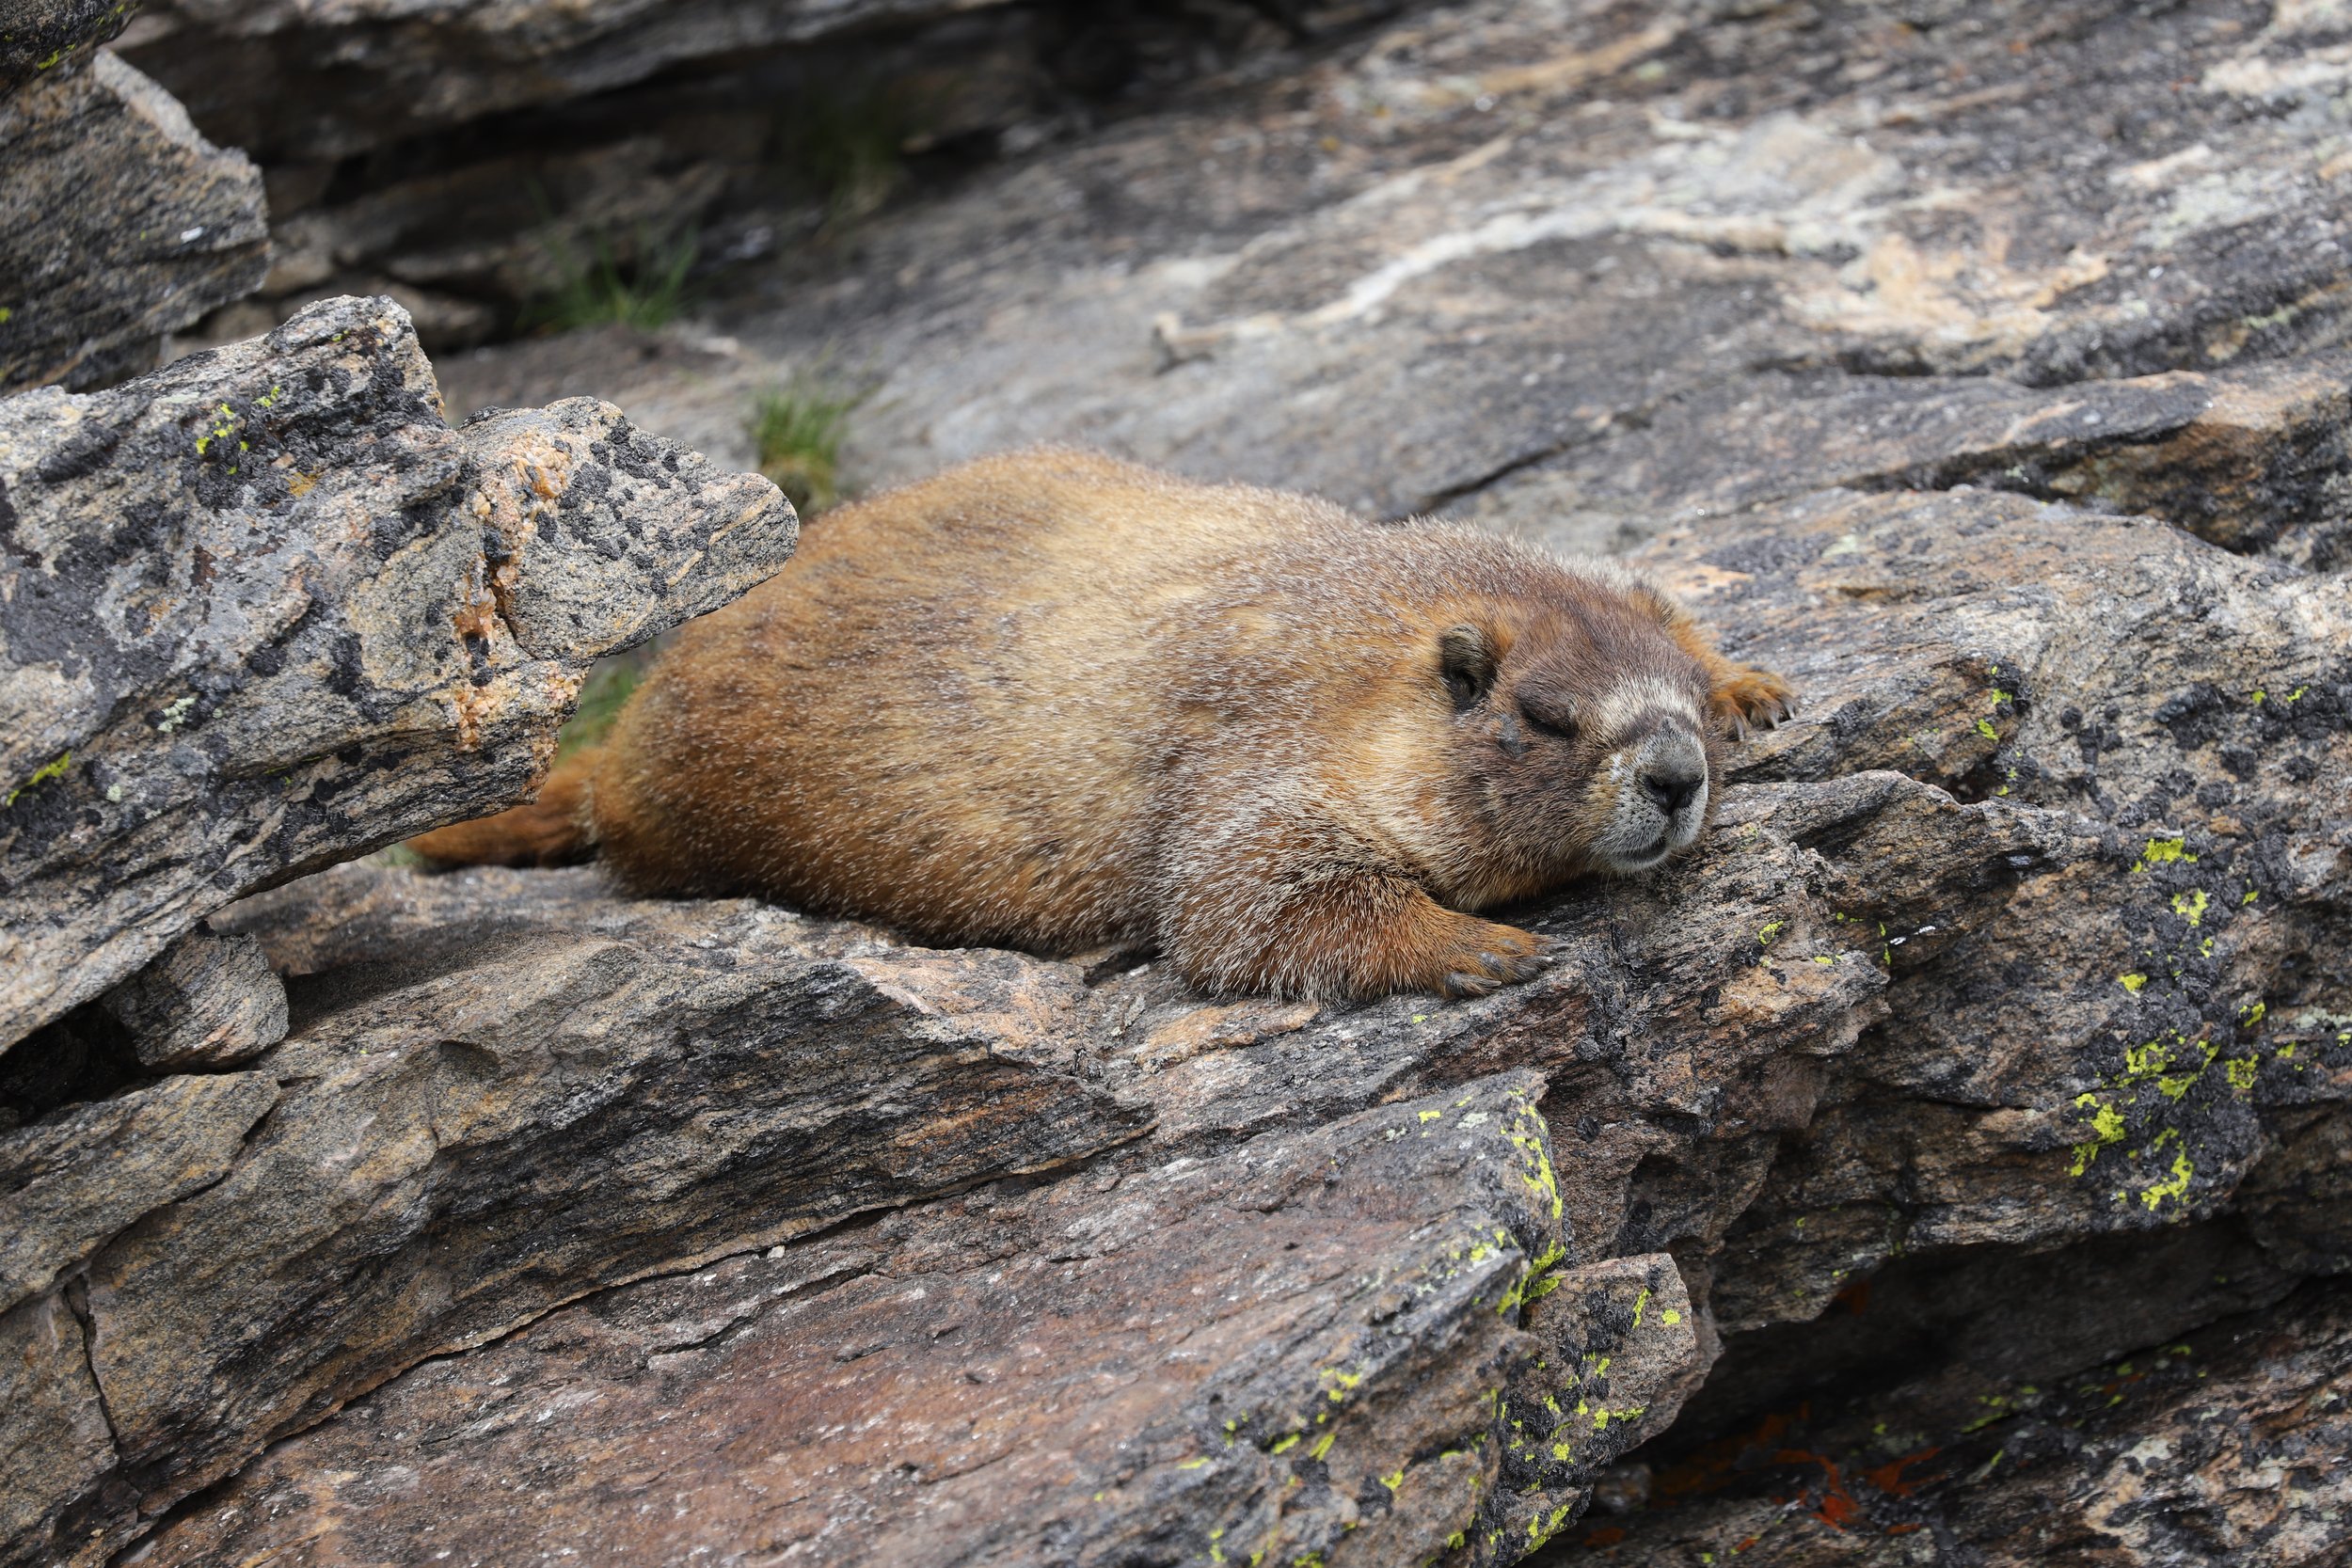
Yellow bellied marmot living at the Forest Canyon Overlook
14 - Rock Cut (viewpoint) & Tundra Communities (easy) *favorite

Rock Cut

Tundra Community Trail as hiked per our GAIA app
Distance - 1.2 miles round trip
Elevation Gain - 184ft
Trailhead Location - This is the next stop after Forest Canyon when driving east-to-west along Trail Ridge Road. Rock Cut is a viewpoint on the south side of the road, sharing the same parking lt. The Tundra Communities trail is on the north side of the road.
Other Information - The easiest place to find a Pika in the park is Rock Cut. Just sit quietly on the wall for a few minutes and you will hear them barking. There is a colony that lives right next to the wall.

Roar! (Pika at Rock Cut)
The Tundra Communities Trail is my favorite easy trail in Rocky Mountain National Park. When I say “easy” though, note that the trail starts at 12,100ft in elevation. So you may be walking quite a bit slower than normal. We had a lot of fun scrambling up the rocks at the end of the trail and watching the herd of elk and marmots. Even though this trail is just over a mile, we enjoyed this part of the park for an hour. And we stopped back at Rock Cut later in the trip just to watch the pikas again. This is an awesome place to stop!

Tundra Communities Trail

Mushroom-shaped rocks formed from lava (light color) and clay (dark color) at the bottom of a sea that now sits on top of a mountain - geology is hard for me to wrap my head around sometimes…

Taking pictures of the elk herd

Exploring the rocks at the end of the Tundra Communities Trail
I’m too sexy for this rock…
15 - Lava Cliffs (viewpoint)

Lava Cliffs
Anything with the word "lava" in it, I'm interested, so I had this viewpoint flagged simply from seeing it on the name of a map... But the first time we drove past it, I looked out and just saw these cliffs, and I was disappointed, and we didn't stop. Five days of driving up and over the alpine, and the 5th day we did stop, assuming the sign would have some information about lava - it doesn't... LOL. It's about migratory birds. I would skip this view point.
16 - Gore Range (viewpoint)

Gore Range is a very pretty overlook, and likely there are elk either here or along the drive between Gore Range and the Alpine Visitor Center, so it's a good place to stop if you see wildlife nearby.
C - Alpine Visitor Center

View from the Alpine Visitor Center
Perhaps I should have organized this post such that it is obvious to drive up the Old Fall River Road, stop at the Alpine Visitor Center, and then drive back down Trail Ridge Road. That probably makes sense for the average visitor who may not decide to travel to the west side the park. Regardless, make sure you stop at Alpine Visitor Center. The Visitor Center itself is small, but there is a really nice gift store, as well as a small amount of food options. The Alpine Ridge Trail takes off from the parking lot, and there are a lot of ranger activities going on at this visitor center throughout the day. Do not expect to have internet access at this visitor center.
17 - Alpine Ridge Trail (moderate)

Alpine Ridge Trail
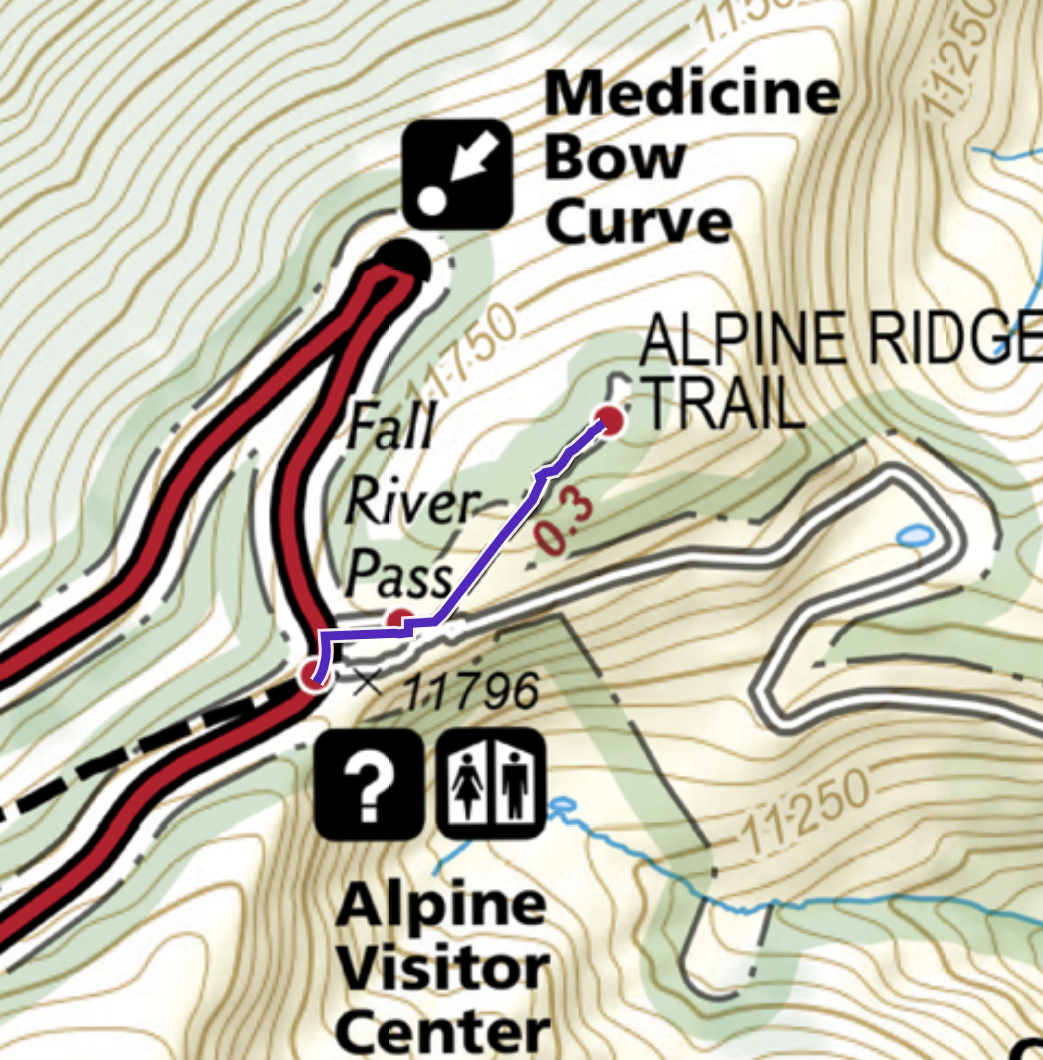
Our trek up the Alpine Ridge Trail as tracked by GAIA app
Distance - 0.6 miles round trip
Elevation Gain - 218ft
Trailhead Location - The trailhead for the Alpine Ridge Trail is in the Alpine Visitor Center parking lot, next to where the Old Fall River Road ends.
Other Information - This might be a short hike, but it’s steep, and it starts at 11,796ft in elevation. The trail has an elevation sign on it, which is the only one I noticed in the park. So if you want that in a picture, you’ll need to climb this trail. Tundra Communities though is actually at a higher elevation, and I liked the view from Tundra Communities a lot better as well.
18 - Medicine Bow Curve (viewpoint)

Medicine Bow Curve
Medicine Bow Curve viewpoint is just west of Alpine Visitor Center, and has a broad view of the mountain peaks and valley below. I liked the viewpoints east of the Alpine Visitor Center better though.
19 - Fairview Curve (viewpoint)

Fairview Curve
Fairview Curve is the last viewpoint on the west side of Trail Ridge Road. The trees cover a lot of the view and you can’t see the mountain peaks from this stop. I would recommend skipping this viewpoint.
20 - Coyote Valley (easy) *favorite

Coyote Valley Trail - Near the headwaters of the Colorado River
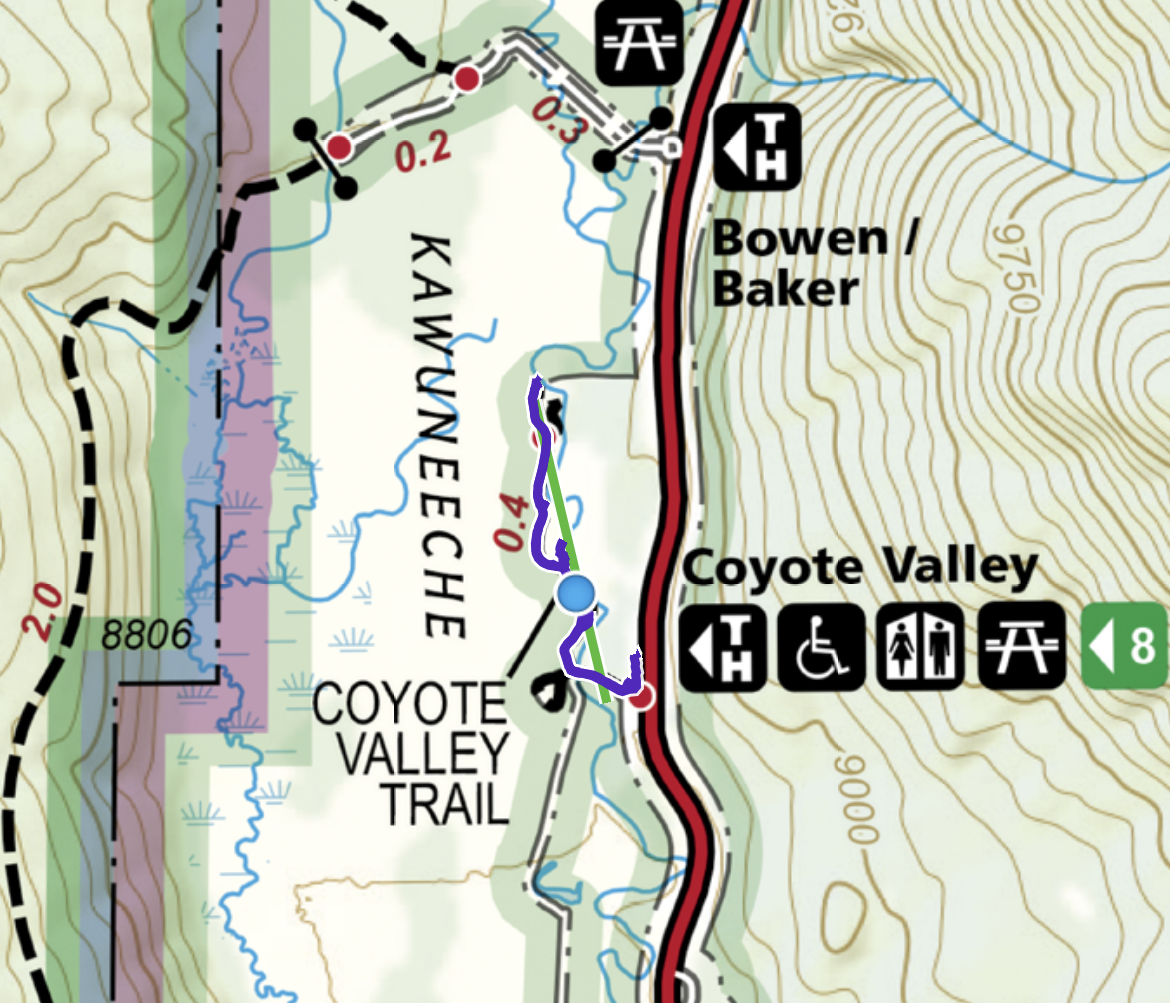
Our Trek along the Coyote Valley Trail per the GAIA app
Distance - 1.2 miles round trip
Elevation Gain - N/A
Trailhead Location - The trailhead for the Coyote Valley is on the west side of the park, south of the Timber Creek Campground.
Other Information - This is a flat and extremely accessible hike. Although it’s not quite the official headwaters of the Colorado River, this portion of the river is impressively small (nothing like what it turns into as it traverses through the Grand Canyon). We saw a moose along the river and hardly ran into another person while we were here. I really enjoyed this quiet trail. We spent about 40 minutes here, and the boys enjoyed wading through the water and skipping stones.
There is an official paved trail that stays more in the meadow, with a handful of views of the river. There is another sandy trail that follows along the river edge the whole way. Walk both trails, make it a loop, and enjoy both the meadow and the river.

Colorado River along the Coyote Valley Trail

Moose eating grass near the river edge
D- Kawuneeche Visitor Center

Hiking outside of the Kawuneeche Visitor Center
The devastation of the 2020 wildfires is everywhere near this visitor center. We stopped here primarily to get internet access to obtain a daily permit plus for the Bear Lake hiking area the next day, but I really liked this small visitor center. It had some information for where to find certain animals that I did not see at other visitor centers. There was also a pretty trail that we walked along for a few moments while we waited for 5:00pm (when the lottery for the next day’s timed-access entry for the Bear Lake hiking area opens).
21 - Tanahutu / North Inlet - Cascade Falls (moderate)
Distance - 6.8 miles round trip
Elevation Gain - 633ft
Trailhead Location - This trailhead is just north of Grand Lake, and it is outside of the formal park entrances.
Other Information - Cascade Falls was not on my hiking itinerary nor did we hike it. But I’m listing it here as all three park rangers I asked for hiking recommendations mentioned this hike as a favorite. 7 miles seemed like a really long hike just to get back and forth to a waterfall from, but if it’s a favorite, the trail itself must be pretty beautiful.
22 - East Inlet - Adam’s Falls (easy)

Adam’s Falls
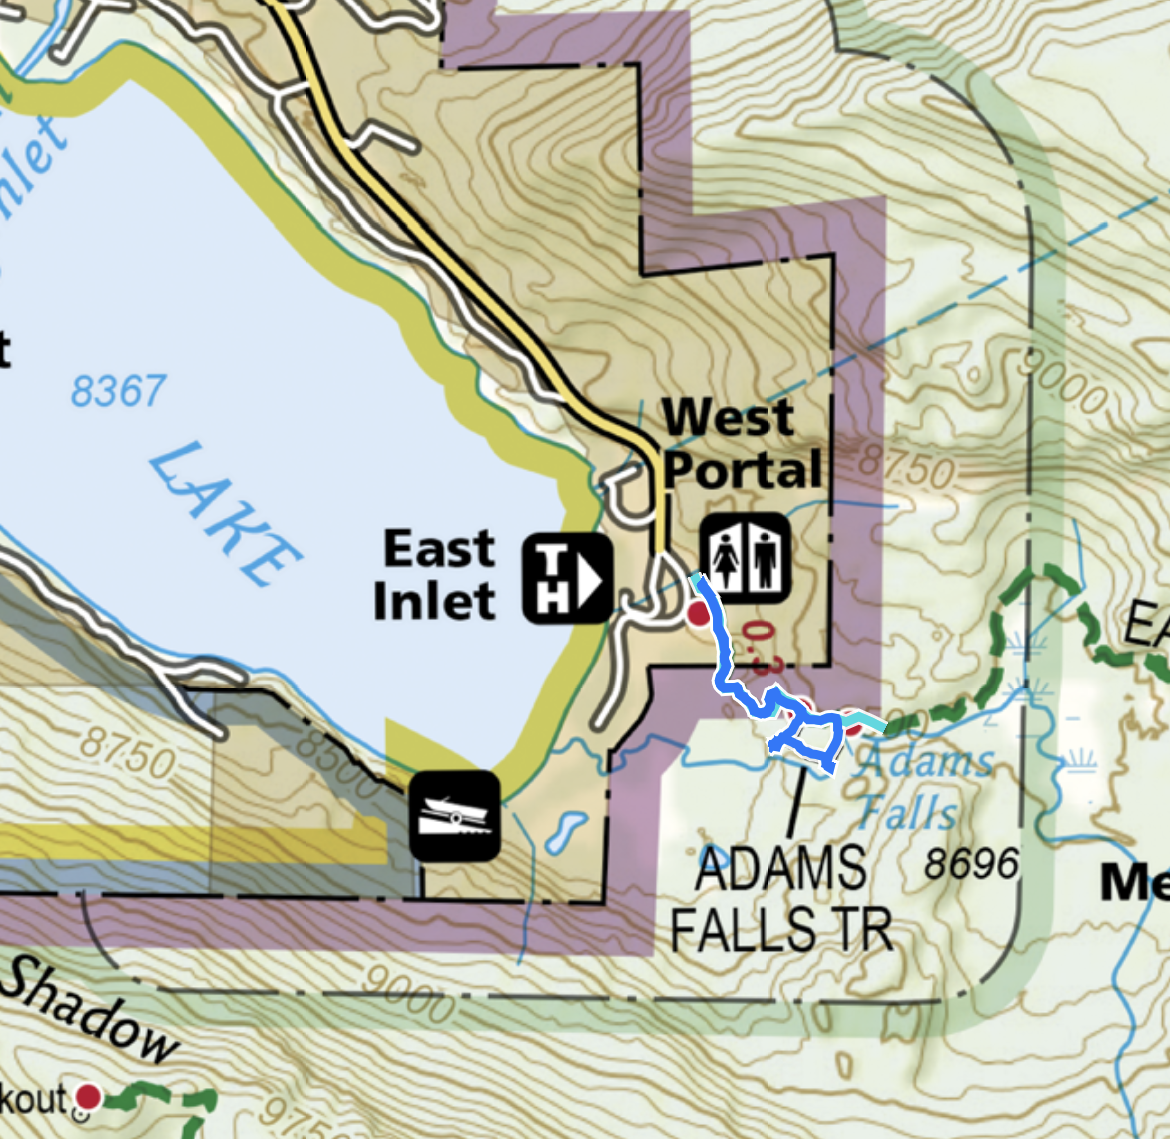
Our hike to Adam’s Falls as recorded by the GAIA App
Distance - 0.84 miles round trip (out and back with a loop at the end)
Elevation Gain - 71ft
Trailhead Location - This trailhead is east of Grand Lake and is outside of the formal park entrances.
Other Information - Adam’s Falls was a fun and easy hike. Once you get to the waterfall, keep going around the small loop. There are some quiet spots you can wade into the water. There were people on this trail, but not crowds, despite it being a short hike.
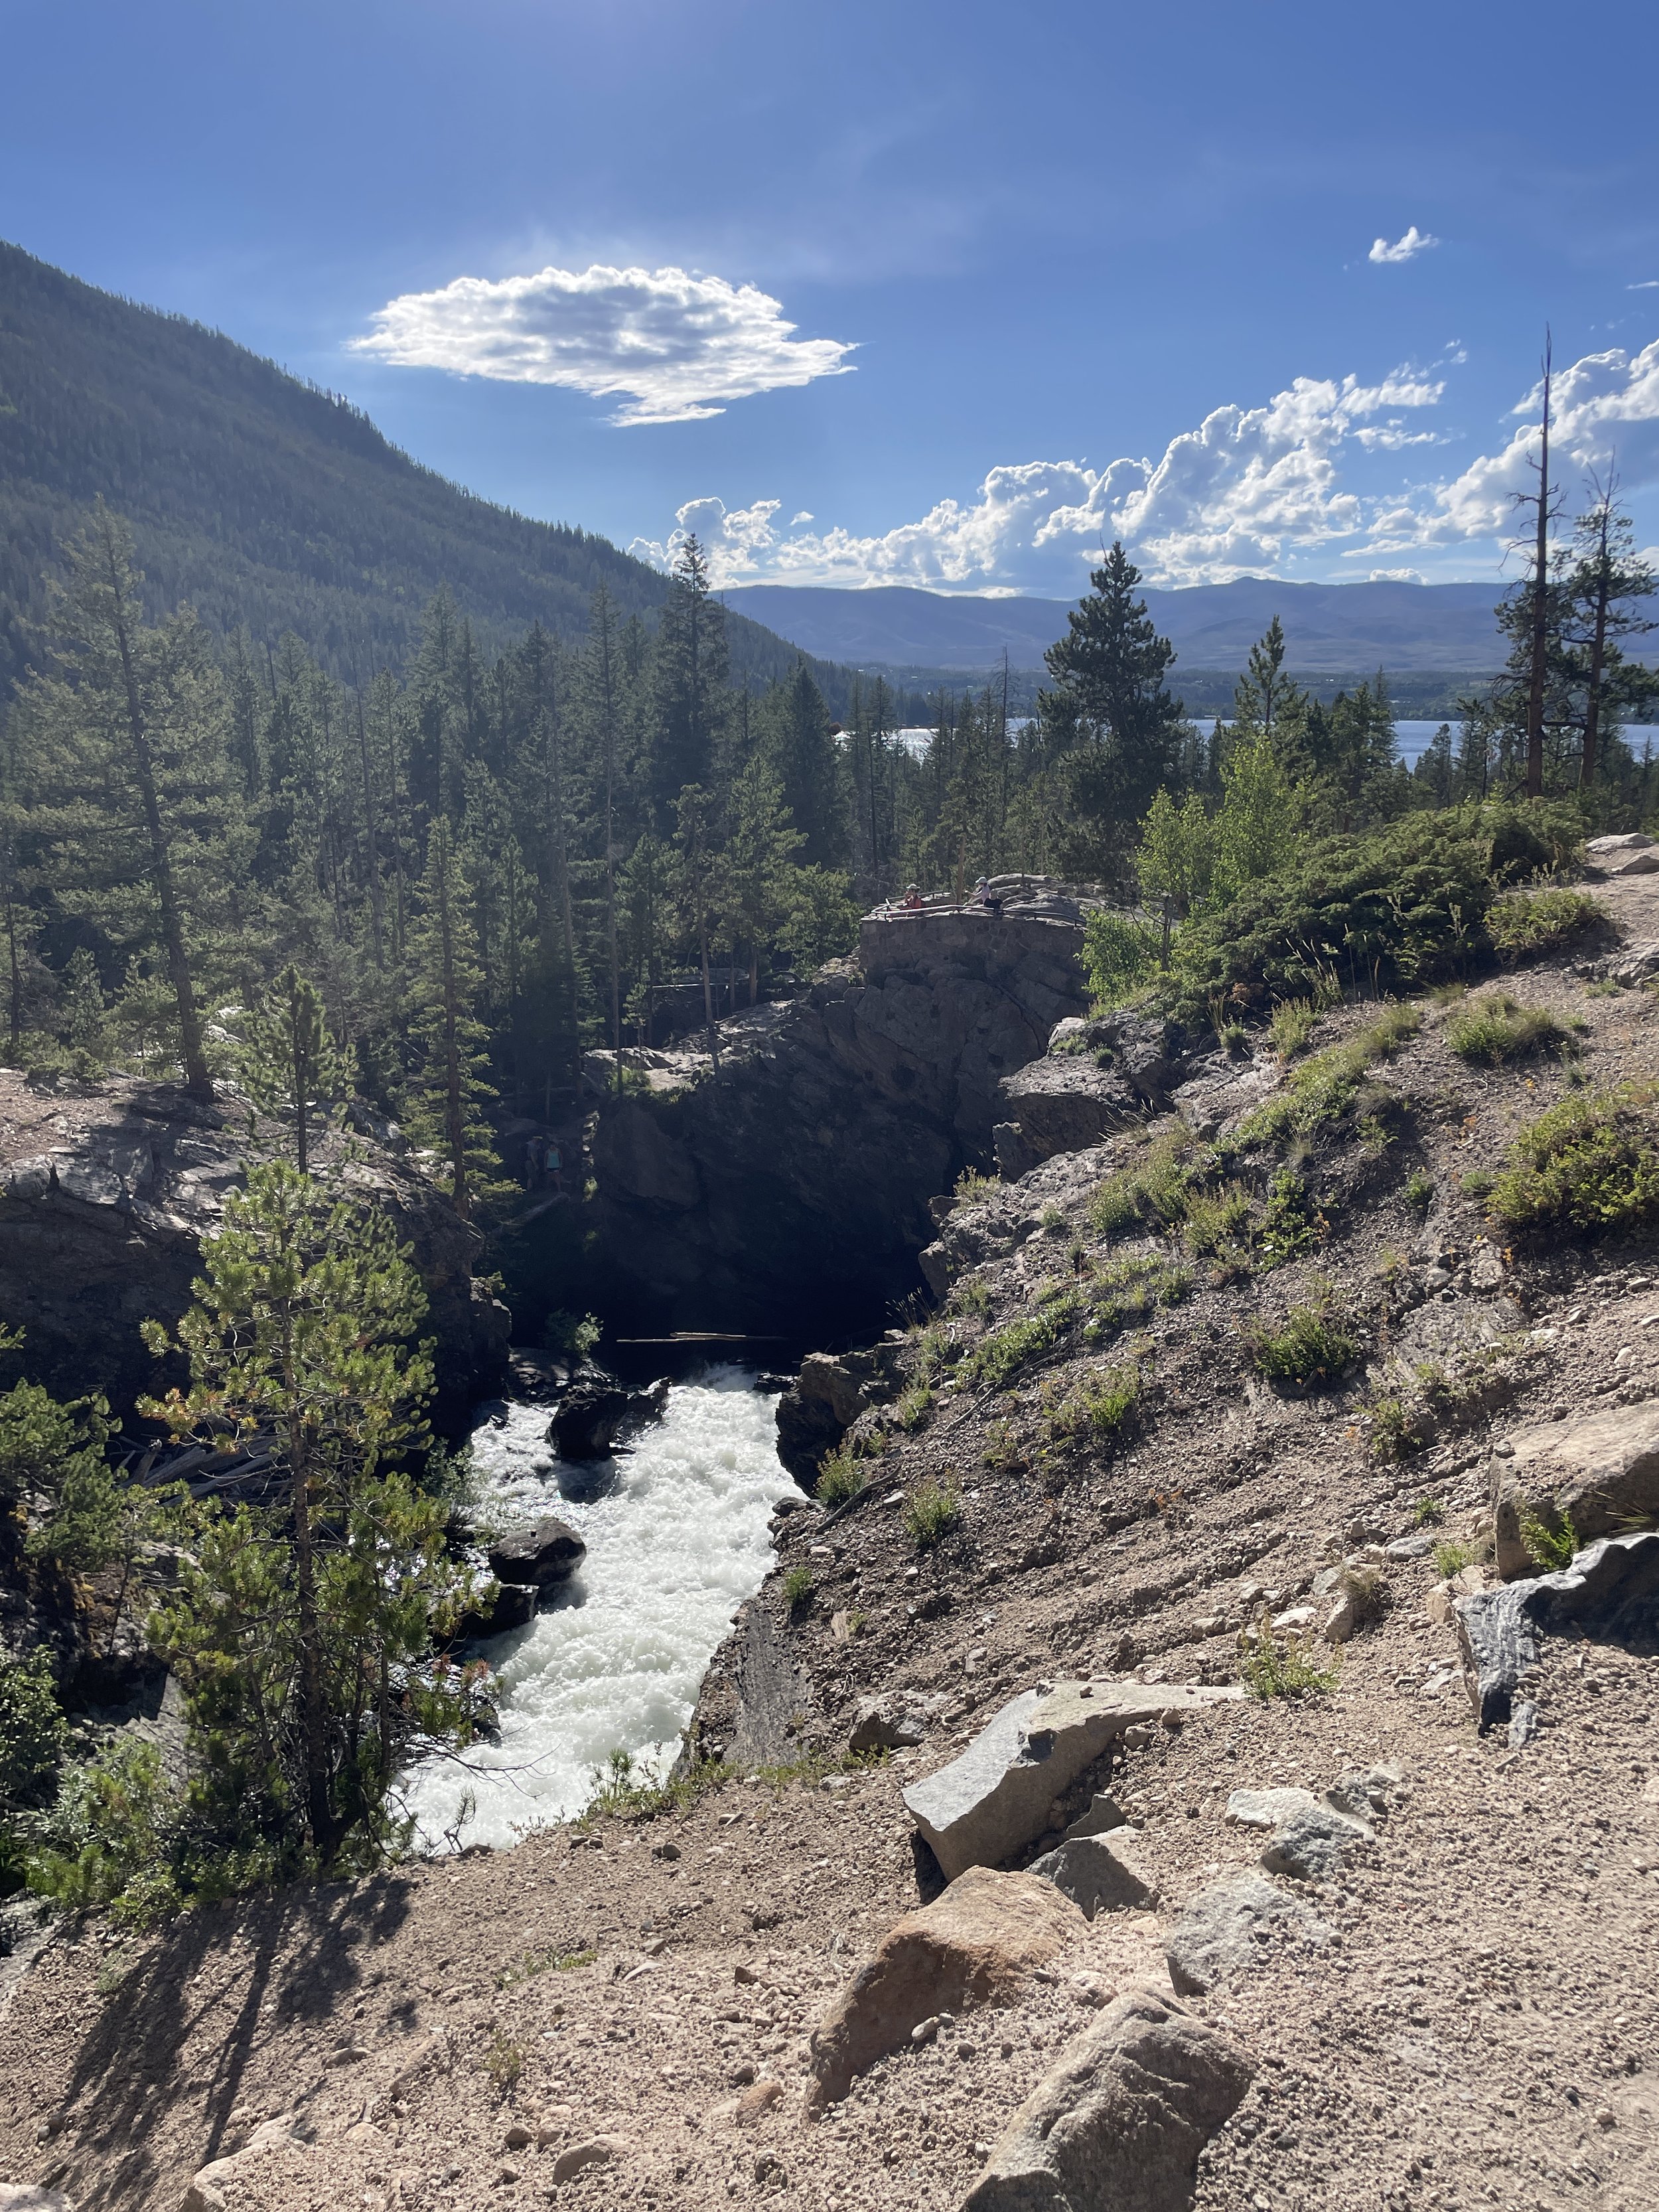
Looking downstream of Adams Falls towards Grand Lake

If you take the short loop above Adam’s Falls, the trail continues along East Inlet, and there are a couple of spots to choose from to wade into the water.
As of 2023, in addition to the Park Access Timed Entry for entry into Rocky Mountain National Park, the following hikes require an additional timed permit (Park Access Plus)
E - Moraine Park Discovery Center

Moraine Park Discovery Center Nature Trail
The best Visitor Center to learn about the Rocky Mountains and how they were formed is the Moraine Park Discover Center; a little frustrating as you need a special timed entry permit plus to enter this part of the park.
There is also a Nature Trail that starts from the visitor center. This loop is 0.45 miles with 100ft in elevation gain. There are some interpretive signs about the plants, but other than that, none of us were impressed. This is listed as an easy trail in the main park information. Skip this trail. Spend your time at Sprague Lake or Bear Lake and head to Alberta Falls if you are looking for an easier hike.
23 - Fern Lake - The Pool / Fern Falls / Fern Lake / Odessa Lake (moderate to hard)

Odessa Lake
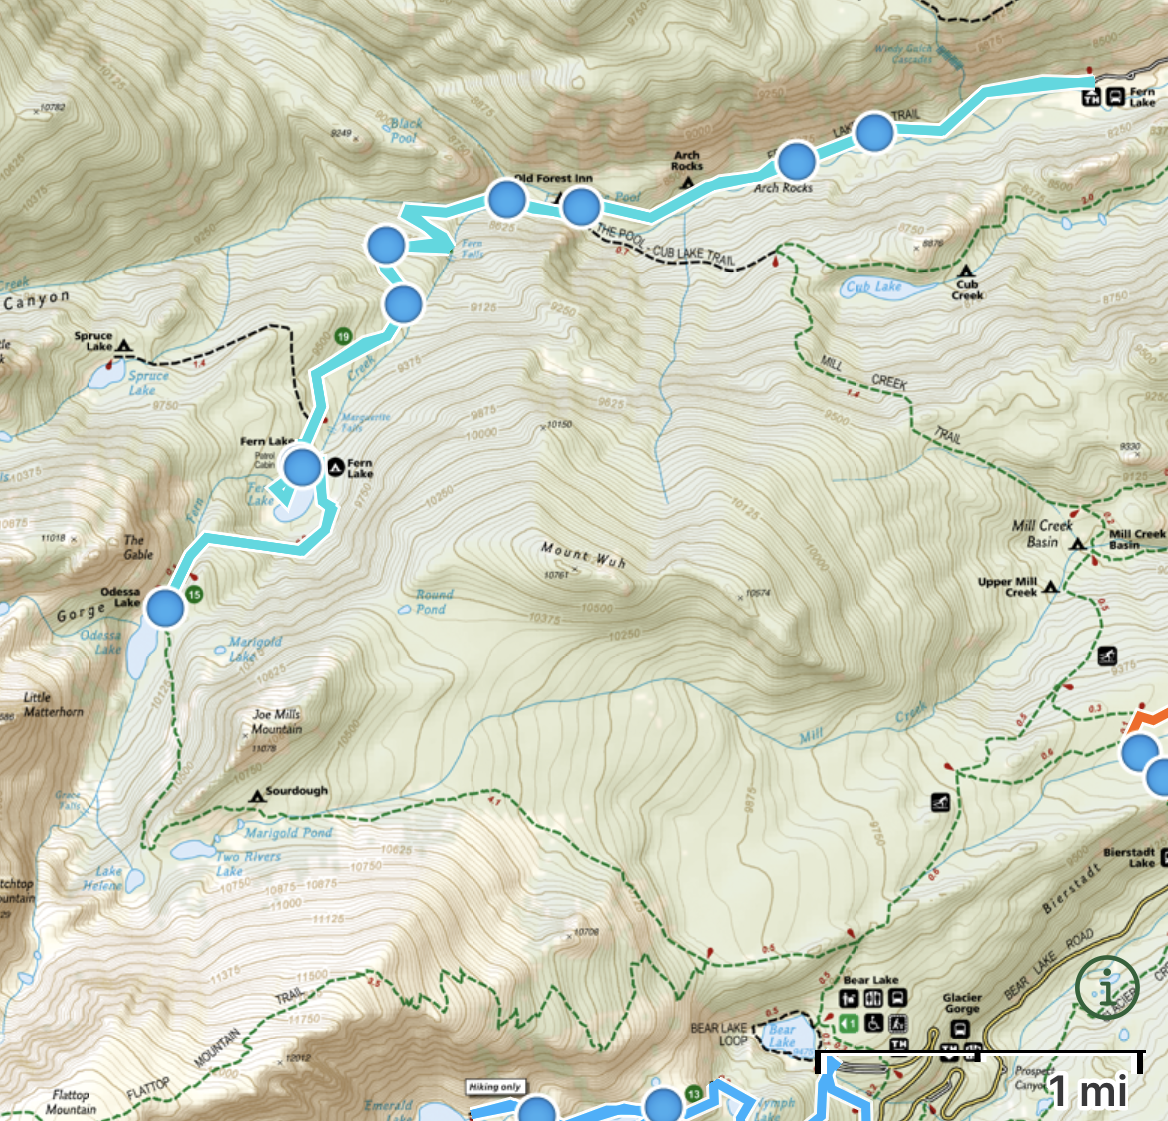
Our hike to Odessa Lake as recorded by the GAIA app. You can see where the trail is with regards to Bierstadt Lake (middle right) and Bear Lake to Emerald Lake (bottom).
Distance - 9 miles (to Odessa Lake) roundtrip
Elevation Gain - 1,850ft
Trailhead Location - The Fern Lake trailhead is off of Bear Lake Road, so to access this trailhead (including if you use the Park & Ride) you need the extra Park Access Plus timed entry. I wouldn’t recommend taking the shuttle to Fern Lake. It only runs once an hour and it drops you off 0.7 miles from the actual trailhead (so add 1.4 miles to your hike). This is not a popular trailhead; there should be parking.
Other Information - As you get towards Fern Falls, you will notice lots of burned trees. This is from the 2020 Kawuneeche Fires. They were stopped by an October snow storm before reaching Bear Lake, the most popular part of the park.
This trail starts at 8,130ft. I would rank this trail as moderate, but long - stretching it to difficult as a result if you head all the way out to Odessa Lake. If you are looking for something shorter, I have the distances to each notable stop in case you decide to turn around early. This hike took us 6 hours. We explored off trail for almost a mile at Fern Lake looking for a male moose (without luck) that some researchers mentioned was living near the lake. That was one of our favorite parts of this trail.
There are pit toilets before the trailhead on the road at the shuttle stop and just past the bridge leading away from Fern Lake.

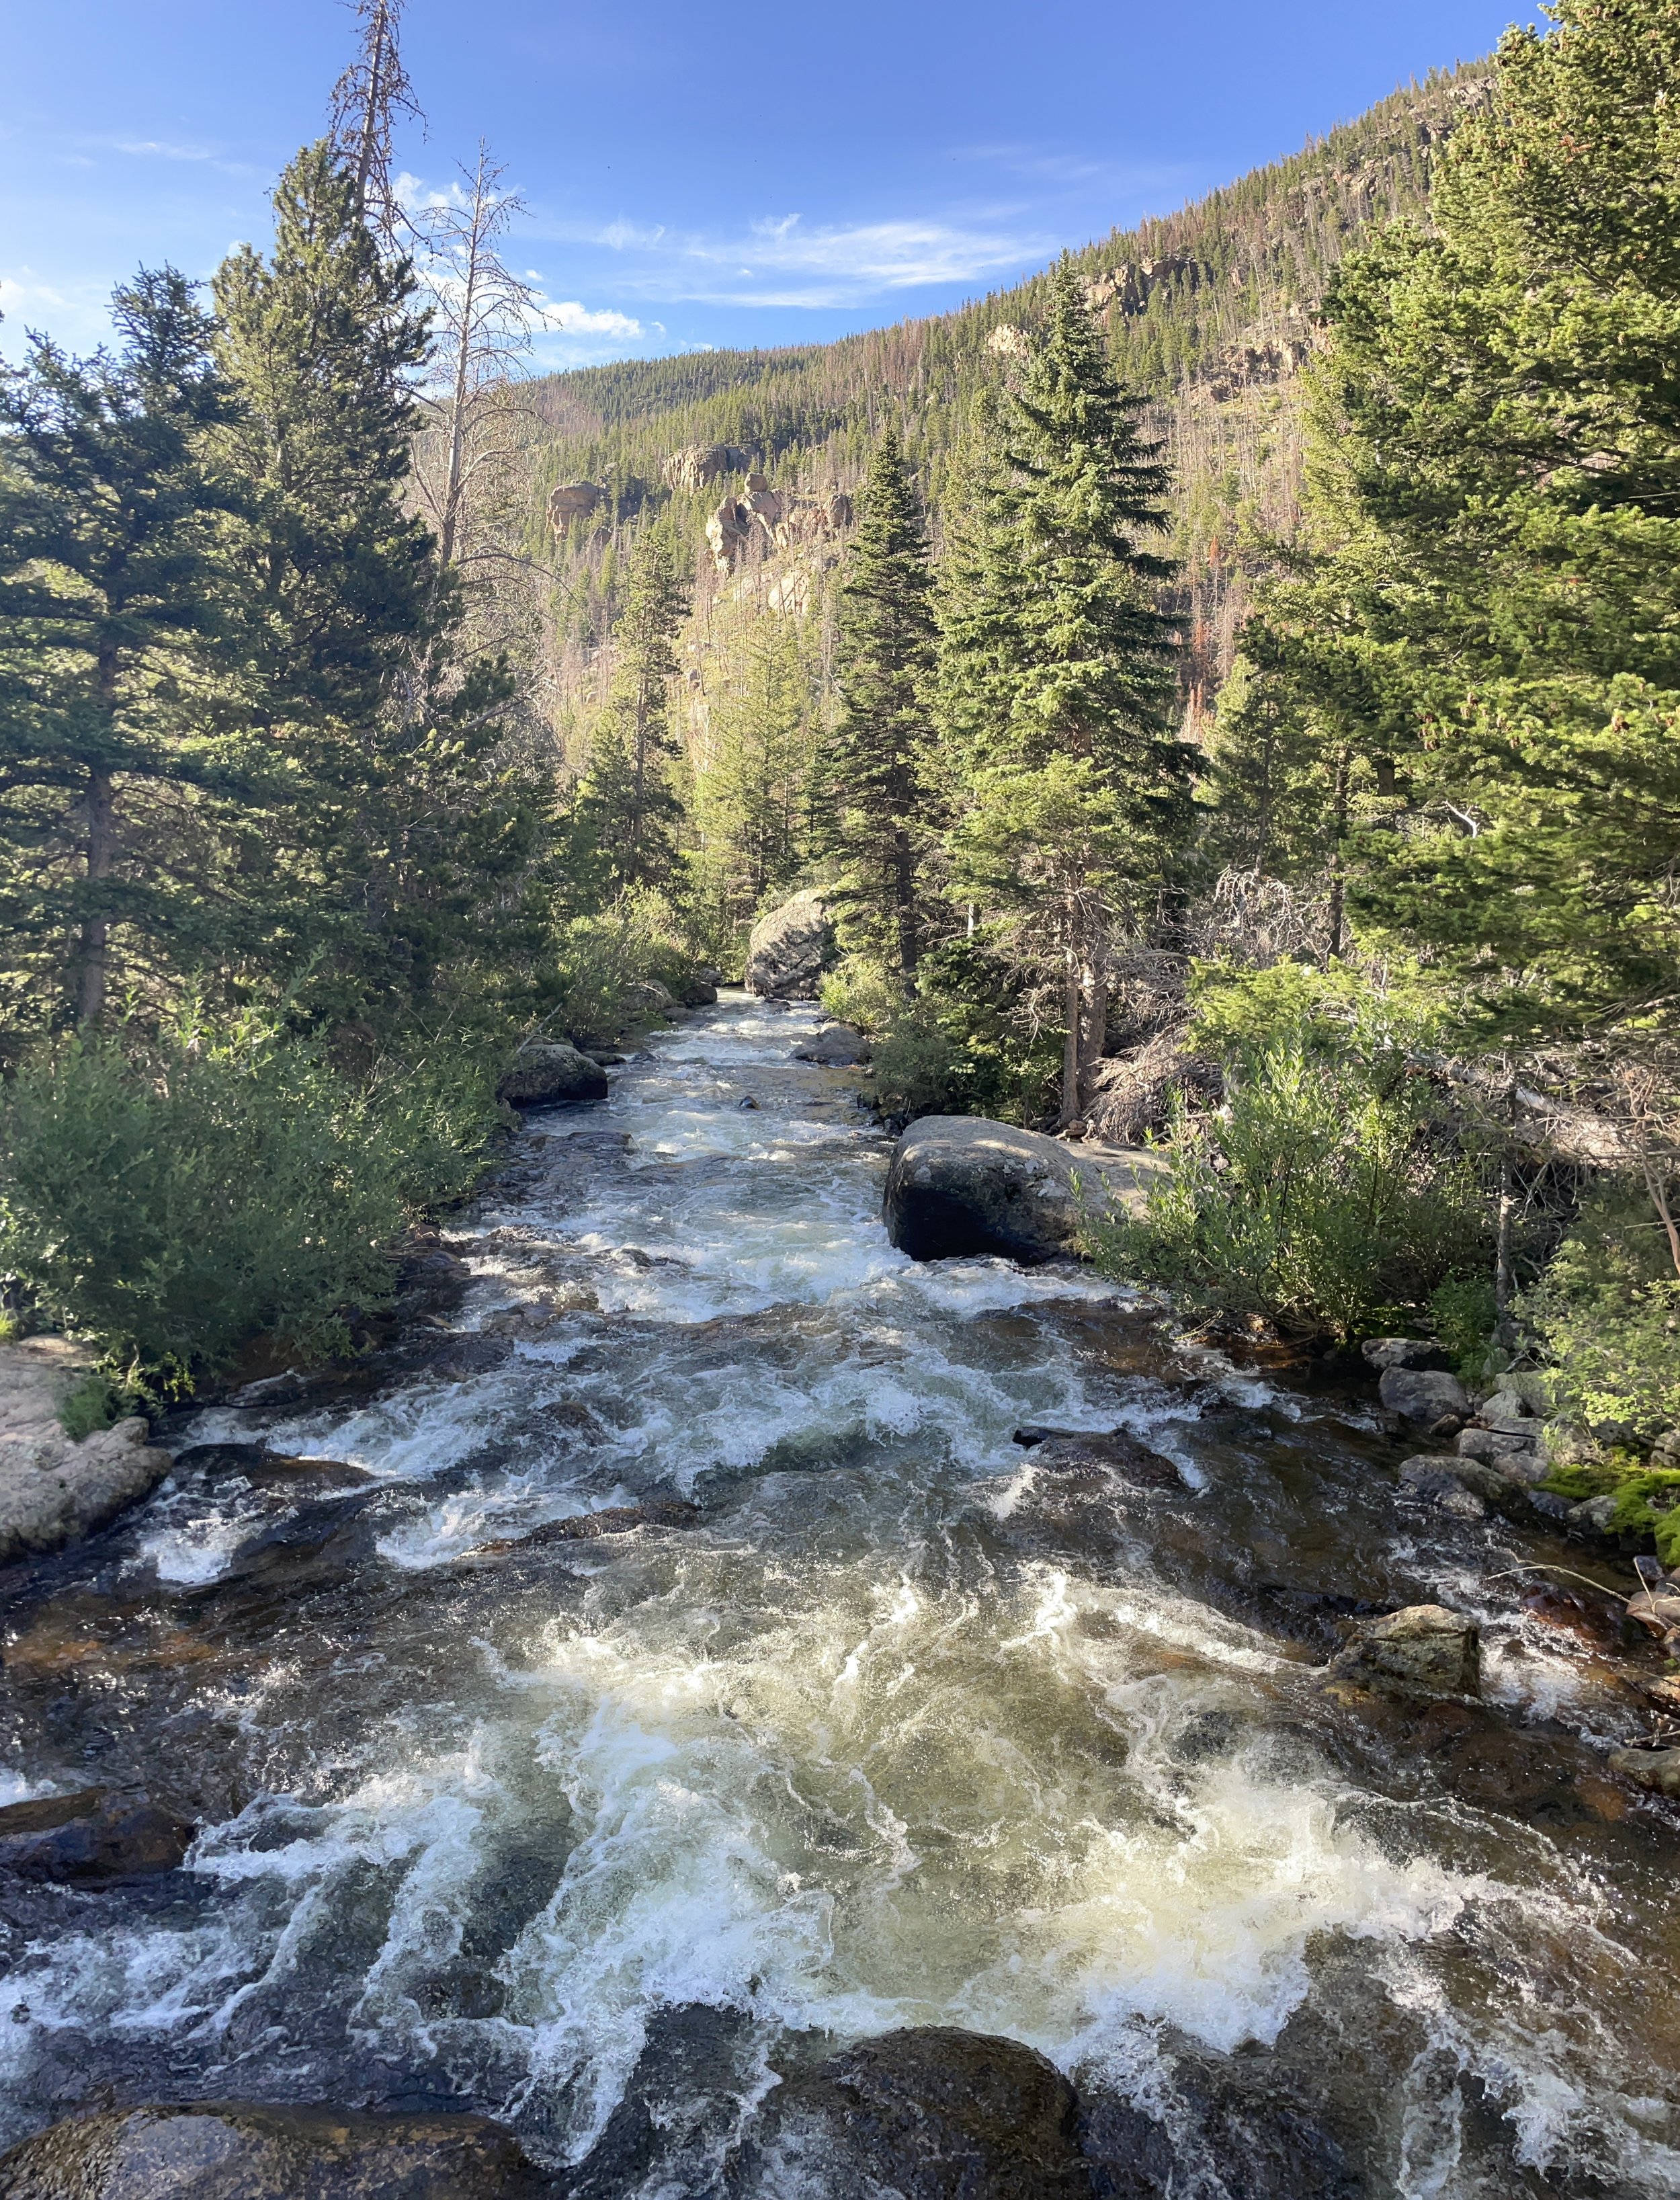
The trail starts out following Fern Creek. There are several points the trail gets close to the creek, but it doesn’t cross it until the Pool.

Fern Creek - You can see a lot of dead trees even at the beginning of this trail. As you get closer to Fern Falls, you can tell this is all the result of the 2020 wildfires.

The trail goes right past Arch Rock. There is a backpacking campground near this rock.
The Pool
The Pool is 1.7 miles from the Fern Lake trailhead, and I would rate this section of the trail as easy. Because it follows along Fern Creek, it stays relatively flat.

The Pool - view from the bridge
View from the same bridge looking downstream

Sun peaking through the trees - we started our hike about 7:30am.

Looking backwards back at the trail
The next section of the trail heads to Fern Falls. This is one mile from The Pool. After you cross this second bridge, the trail leaves the creek for a moment and starts climbing up in elevation.

Second bridge crossing Fern Creek

When you get to this section of the trail, you can see fire damage everywhere. But the wildflowers were beautiful, even amoungst the charred trees.
Fern Falls
Fern Falls is 2.7 miles from the Fern Lake trailhead. The trail climbs up in elevation from The Pool, so I would call this a moderate hike to get to this waterfall. This was my favorite waterfall that we stopped at while in Rocky Mountain National Park. We ran into just one group of hikers along this section of the trail, so if you are looking for a quiet hike, this is a great place to be.

Fern Falls
Fern Lake
Fern Lake is 3.8 miles from the trailhead. To get to Fern Lake from Fern Falls, you will hike an additional mile, mostly uphill. The slope is pretty gentle but there are a few switchbacks. As we hiked this portion of the trail, we talked with a few researchers who were on their way back down after a multi-day trip. The mentioned they had frequently seen 5 moose, including a male, while staying at Fern Lake. We were on the lookout for those moose but were not lucky enough to find any of them.

Fern Lake - a short spur takes you down to the shoreline

While looking for the moose, we explored the southern shoreline off-trail for quite a while. We let the boys split up from us, and we all just had our moment in the woods, crossing logs, playing in the water, walking through the meadow, simply playing in nature.

The logs had fallen in some perfect locations to see different parts of the shoreline and still keep dry feet.

We weren’t in a hurry this day and we really enjoyed some downtime at Fern Lake.
Odessa Lake is just 0.7 miles from Fern Lake. If you’ve made it this far, why not keep going? This is the steepest part of the trail though.

Bridge at the edge of Fern Lake on our way to Odessa Lake. There is a sign for pit toilets just past this bridge on the trail.

As we crossed the bridge, this is another view of a shallower section of Fern Lake.

The Fern Lake Trail follows Fern Creek on its way to Odessa Lake.
The trail returns to following Fern Creek after some initial switchbacks. About here, there is a split in the trail if you are going on the full loop to Bear Lake, the trail to Odessa Lake’s shore is actually a spur. I was a little confused here as there is also a campground, and I wasn’t sure which trail went where. You want to hang to the right and stay right next to this creek. Don’t go up the hill, you will miss the lake.

Keep following Fern Creek right to Odessa Lake. I thought this section of the trail was just as pretty as Odessa Lake.
Odessa Lake
Odessa Lake is 4.5 miles from the Fern Lake Trailhead. The trail stops here. We did notice some people had gone off trail and were on the right side of the lake fishing. If you want to make the full loop towards Bear Lake, then you will retrace your steps back to that split.

Odessa Lake
24 - Sprague Lake (easy)

Sprague Lake

Due to their proximity, both Sprague Lake and Bierstadt Lake are shown on the same map from GAIA. Sprague Lake is the one on the right side (lighter color orange)
Distance - 0.84 miles loop hike
Elevation Gain - N/A
Trailhead Location - There is a large parking lot right next to Sprague Lake and nearby bathrooms. This trailhead is also on the green shuttle (same as Fern Lake), but I don’t think you need to plan to use it. There is plenty of parking.
Other Information - This is a very accessible and easy trail. A park ranger told us if you get there early enough in the morning you might find a moose here. I thought this was a fantastic 20 minute stop.

From the parking lot, the trail crosses over a wide bridge. The trail is hard gravel, flat, and free from obstacles.

Another view of Sprague Lake. The trail follows the shoreline around the entire lake.

Sprague Lake from another view
25 - Bierstadt Lake (moderate)

North side of Bierstadt Lake - visible from a spur trail

Due to their proximity, both Sprague Lake and Bierstadt Lake are shown on the same map from GAIA. Bierstadt Lake is the one on the left side (red-orange in color)
Distance - 3.1 miles loop hike
Elevation Gain - 564ft
Trailhead Location - Bierstadt Lake is along the Bear Lake Shuttle that runs every 15 minutes. If you prefer to park at the Park and Ride, this is an easy trailhead to navigate to. The parking lot is smaller, but this is a less-popular trailhead than some of the others.
Other Information - This hike took us 90 minutes, and it was not a favorite. Although it’s a loop hike, the trail only follows the shore of Bierstadt Lake on the south side for a short bit. There is one viewpoint of the lake on the north side, but it is a spur trail to get there. For the effort of having to walk up 10 switchbacks to gain the 564ft in elevation, I would pick a different hike, like Lake Haiyaha.

There are 10 switchbacks that you will complete to get up to Bierstadt Lake. The meadow and valley are very pretty, but again, there are other parts of the park that I liked better than this trail.

Once you are at the top, the trail enters a dense forest.

The trail passes by Bierstadt Lake along the southside. Then it re-enters the dense forest.
26 - Bear Lake - Bear Lake / Nymph Lake / Dream Lake / Emerald Lake / Lake Haiyaha / The Loch / Timberline Falls / Lake of Glass / Sky Pond / Glacier Gorge / Alberta Falls (easy to hard) *favorite

Trail to Sky Pond next to Timerberline Falls
The Bear Lake trailhead offers a ton of great hiking options. Do not plan to drive to this trailhead; it is the busiest one in the park, even with the timed entry plus limitations. Instead park at the Park and Ride. We were on a bus in 10 minutes both directions.
There are pit toilets at both the Park and Ride and the Bear Lake Trailhead. We did not see any others out on the trails.
Bear Lake Trailhead is at 9,520ft in elevation. An “easy” hike is going to feel a lot harder at this elevation.

Our treks at the Bear Lake Trailhead using the GAIA app.
At the beginning of this post, I mentioned that this was actually my third time to Rocky Mountain National Park. When I was 8, I hiked with my parents out to Emerald Lake, and we hiked Bear Lake when we visited in the winter. When we saw the trail sign, I immediately knew that this was where I had been with my parents. Nymph Lake was exactly as I remembered it, covered in lily pads.
In July 2023, we walked in a big loop of 11.7 mile trek all the way to Sky Pond and stopping at Alberta Falls on the way back. This hike took us seven hours. A tip in raising teenagers - if you want to get your teenagers to talk? Take them on a seven hour hike :) There’s simply nothing else to do.

Regardless of which trail you plan to take, you will start on this boardwalk from the Bear Lake Trailhead

The trails are well marked. I will include both out-and-back and one-way mileage from the trailhead as you can combine several of these places if you are interested in a longer hike.
Bear Lake (easy)
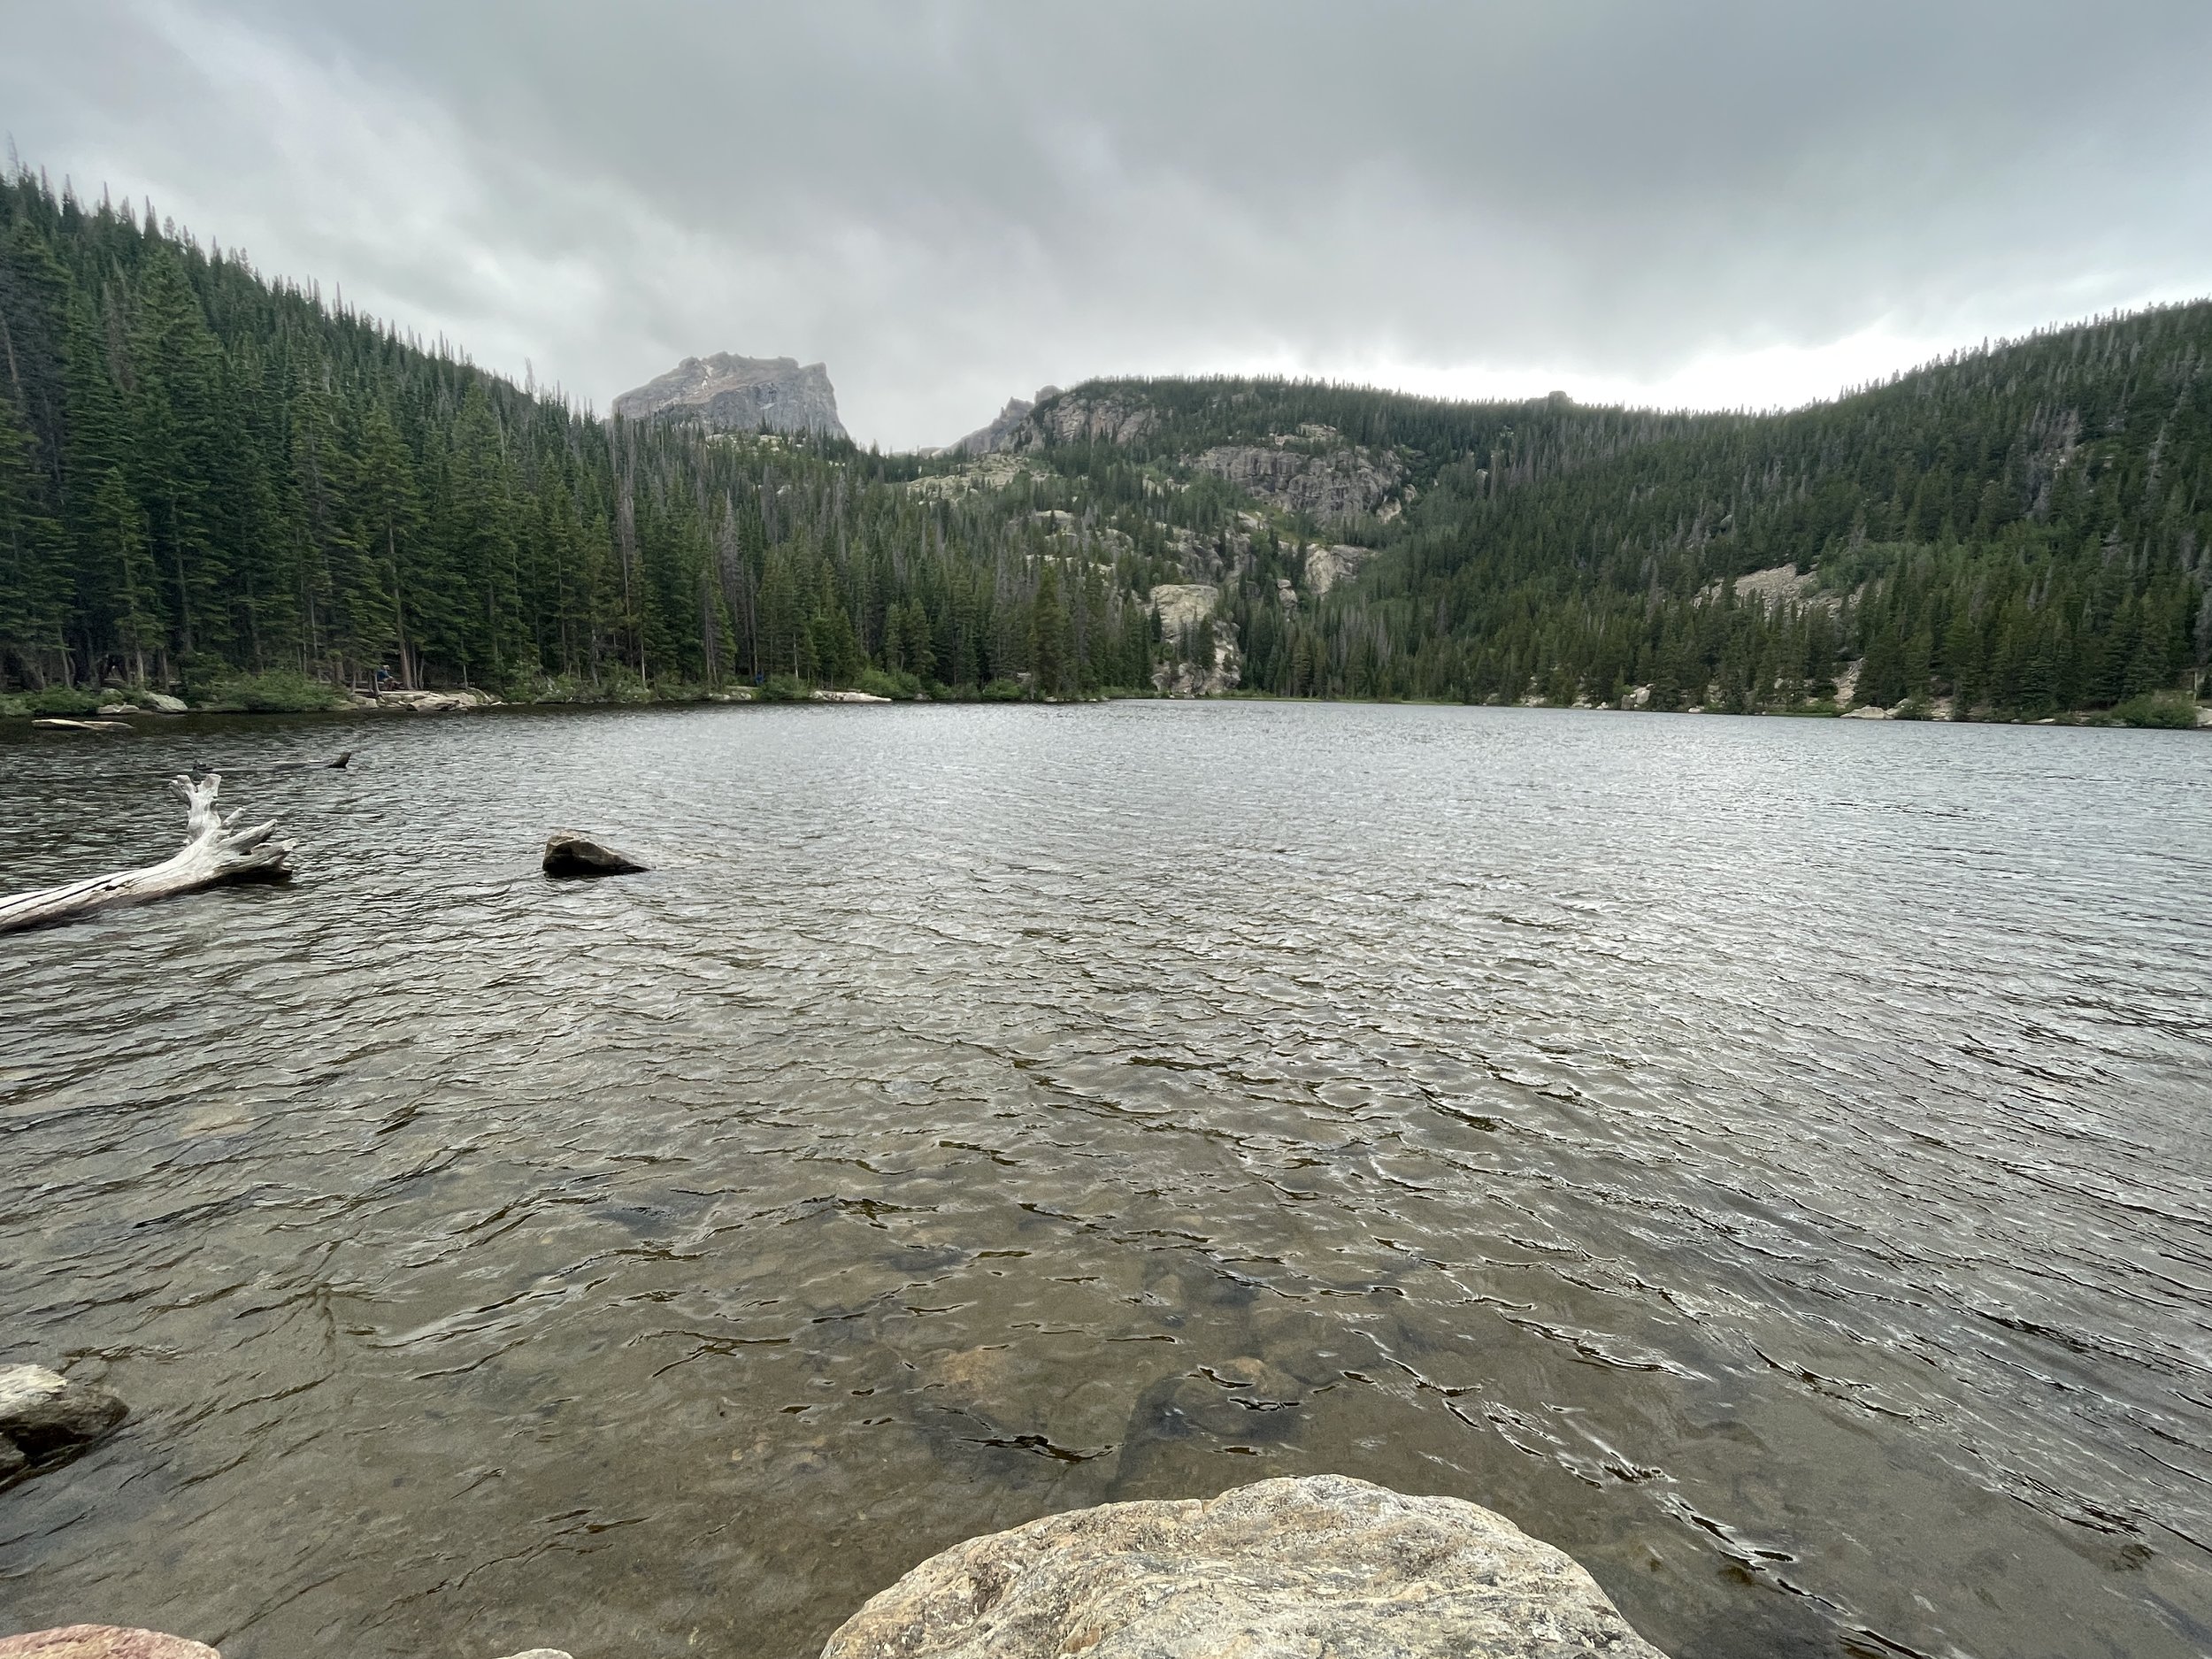
Bear Lake
Distance - 0.7 miles loop hike
Elevation Gain - 50ft
Other Information - Bear Lake is a wide dirt path with some elevation gain. The trail to Bear Lake is wheelchair accessible, but not the entire loop around. This is an extremely busy hike, even in the winter.

Bear Lake in March

Bear Lake
Nymph Lake / Dream Lake / Emerald Lake (moderate)
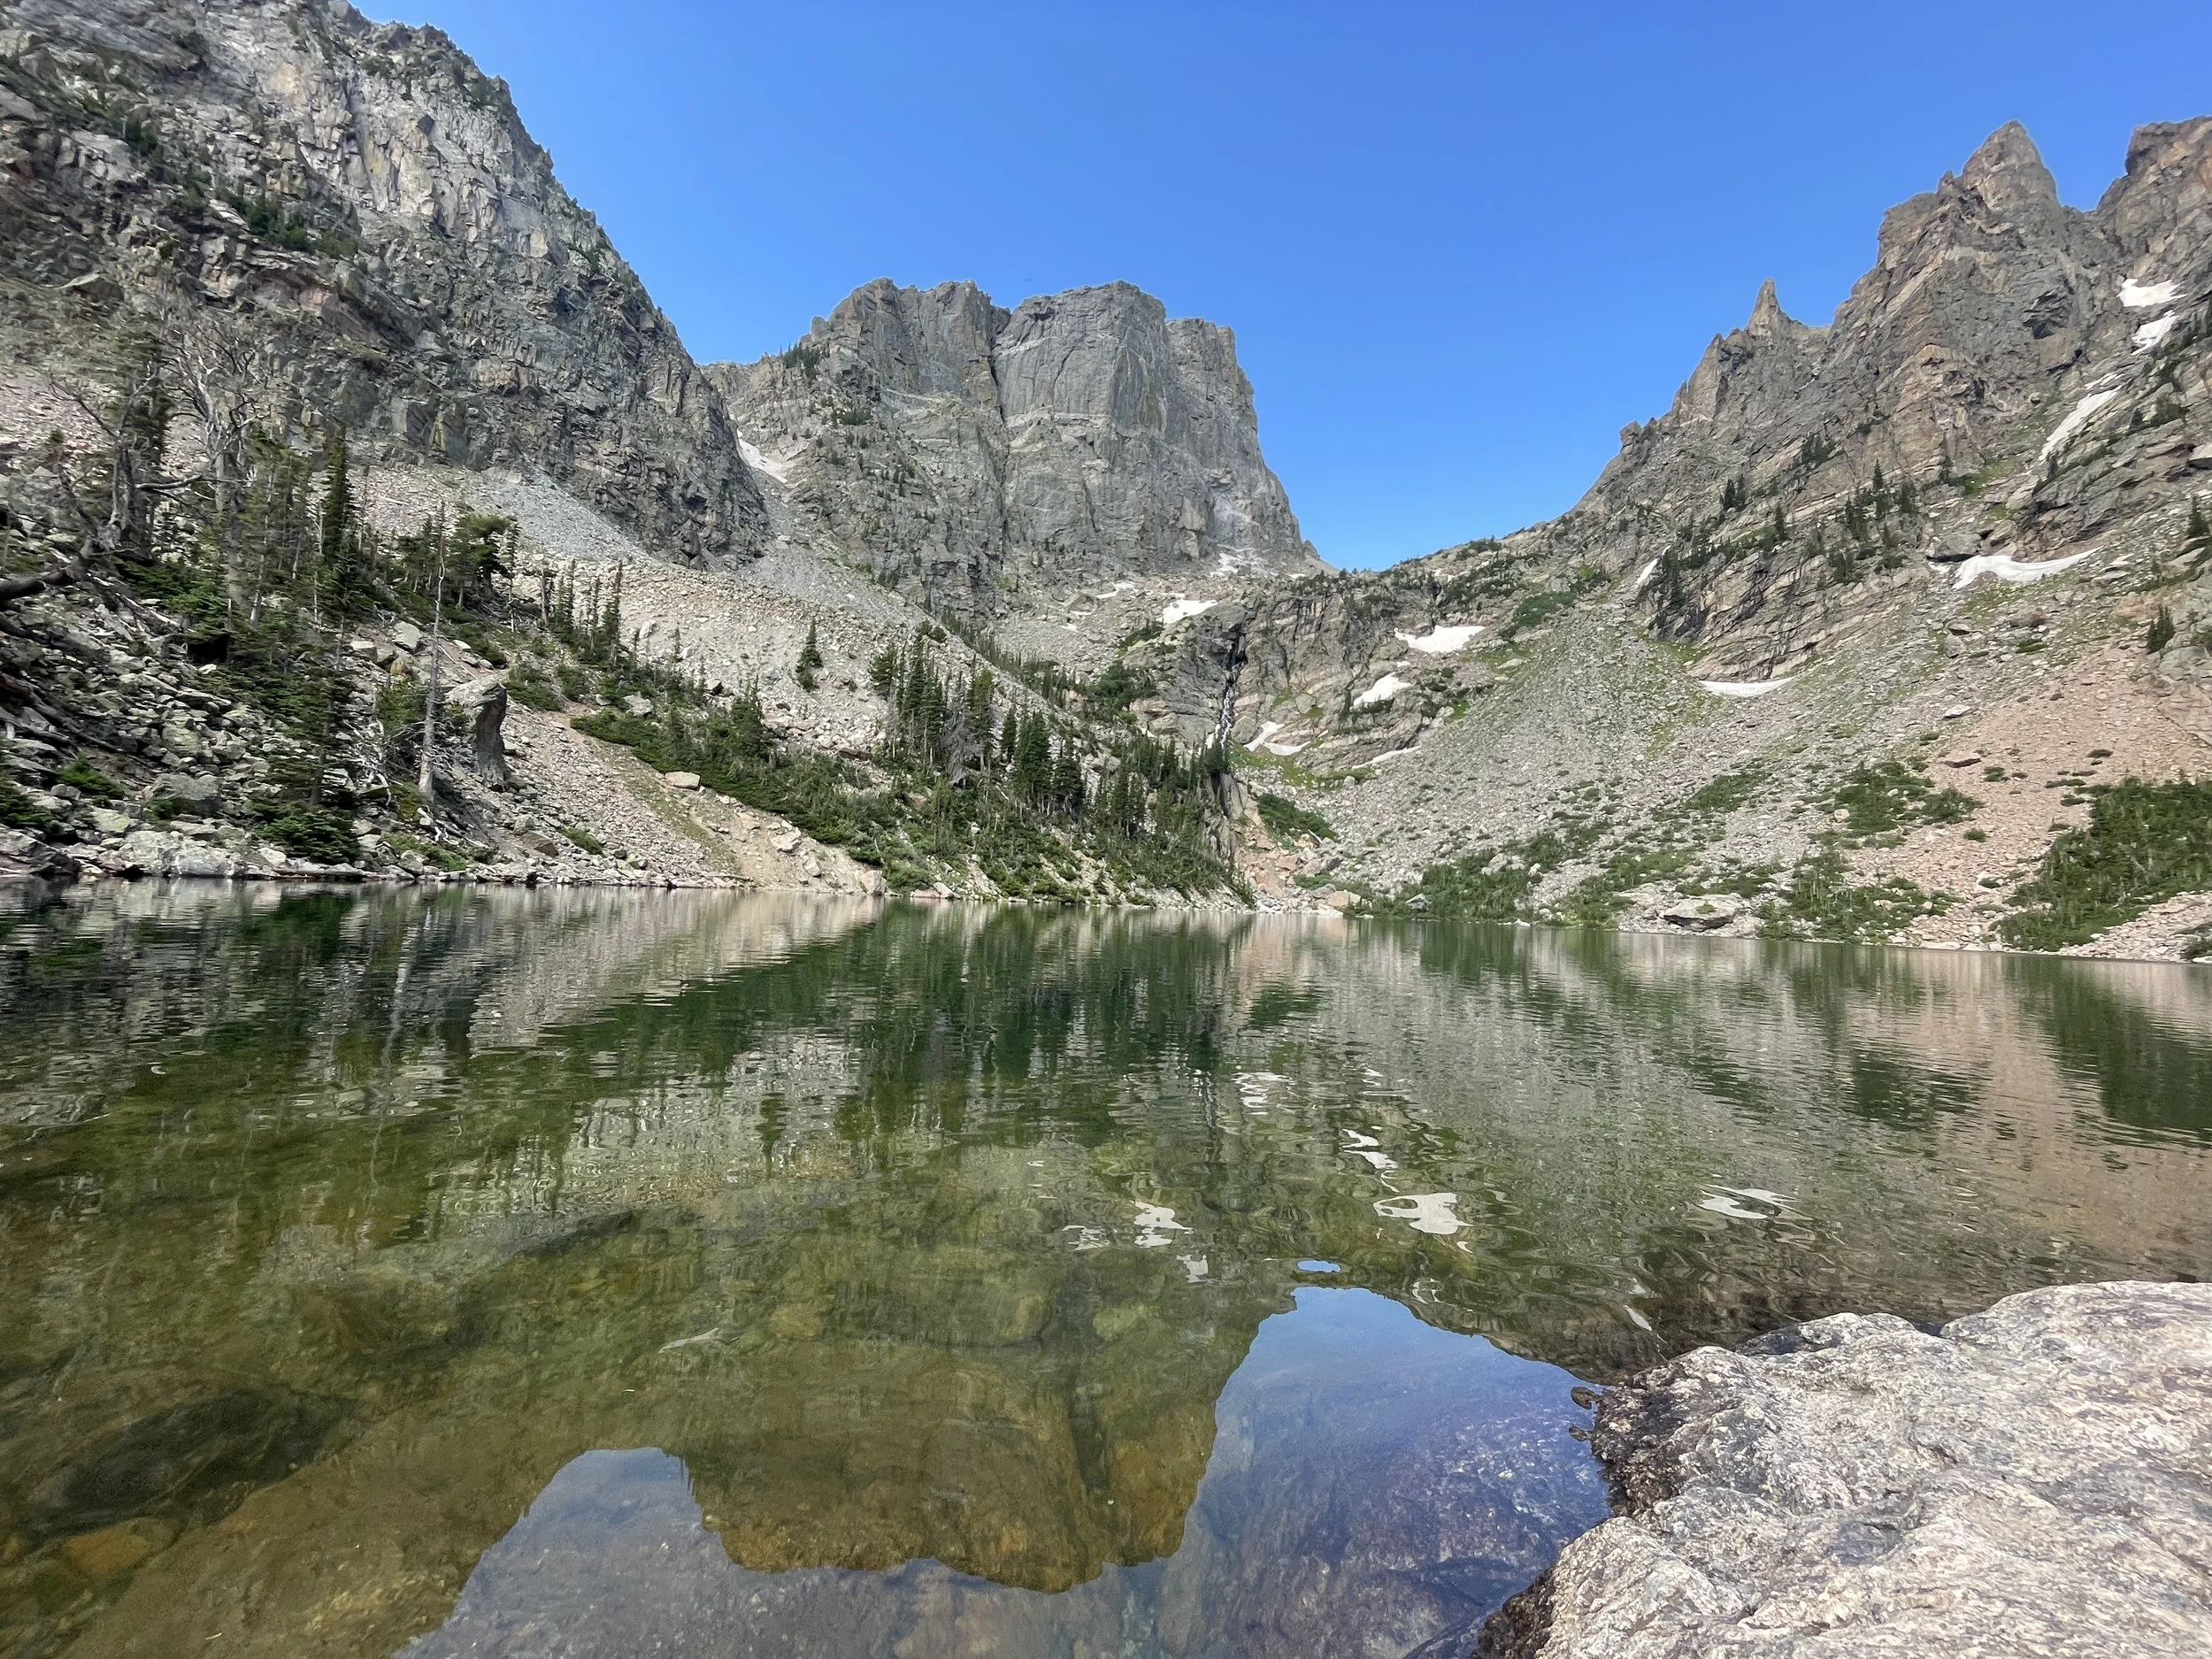
Emerald Lake
Distance - Out and back to Emerald Lake is 3.6 miles
Elevation Gain - ~700ft
Other Information - This trail is going to be covered with people, regardless of what time of day you hike. Even with the people, this is still a really nice hike, and I would suggest including it in your itinerary. On your way to Emerald Lake, you will pass Nymph Lake and Dream Lake.
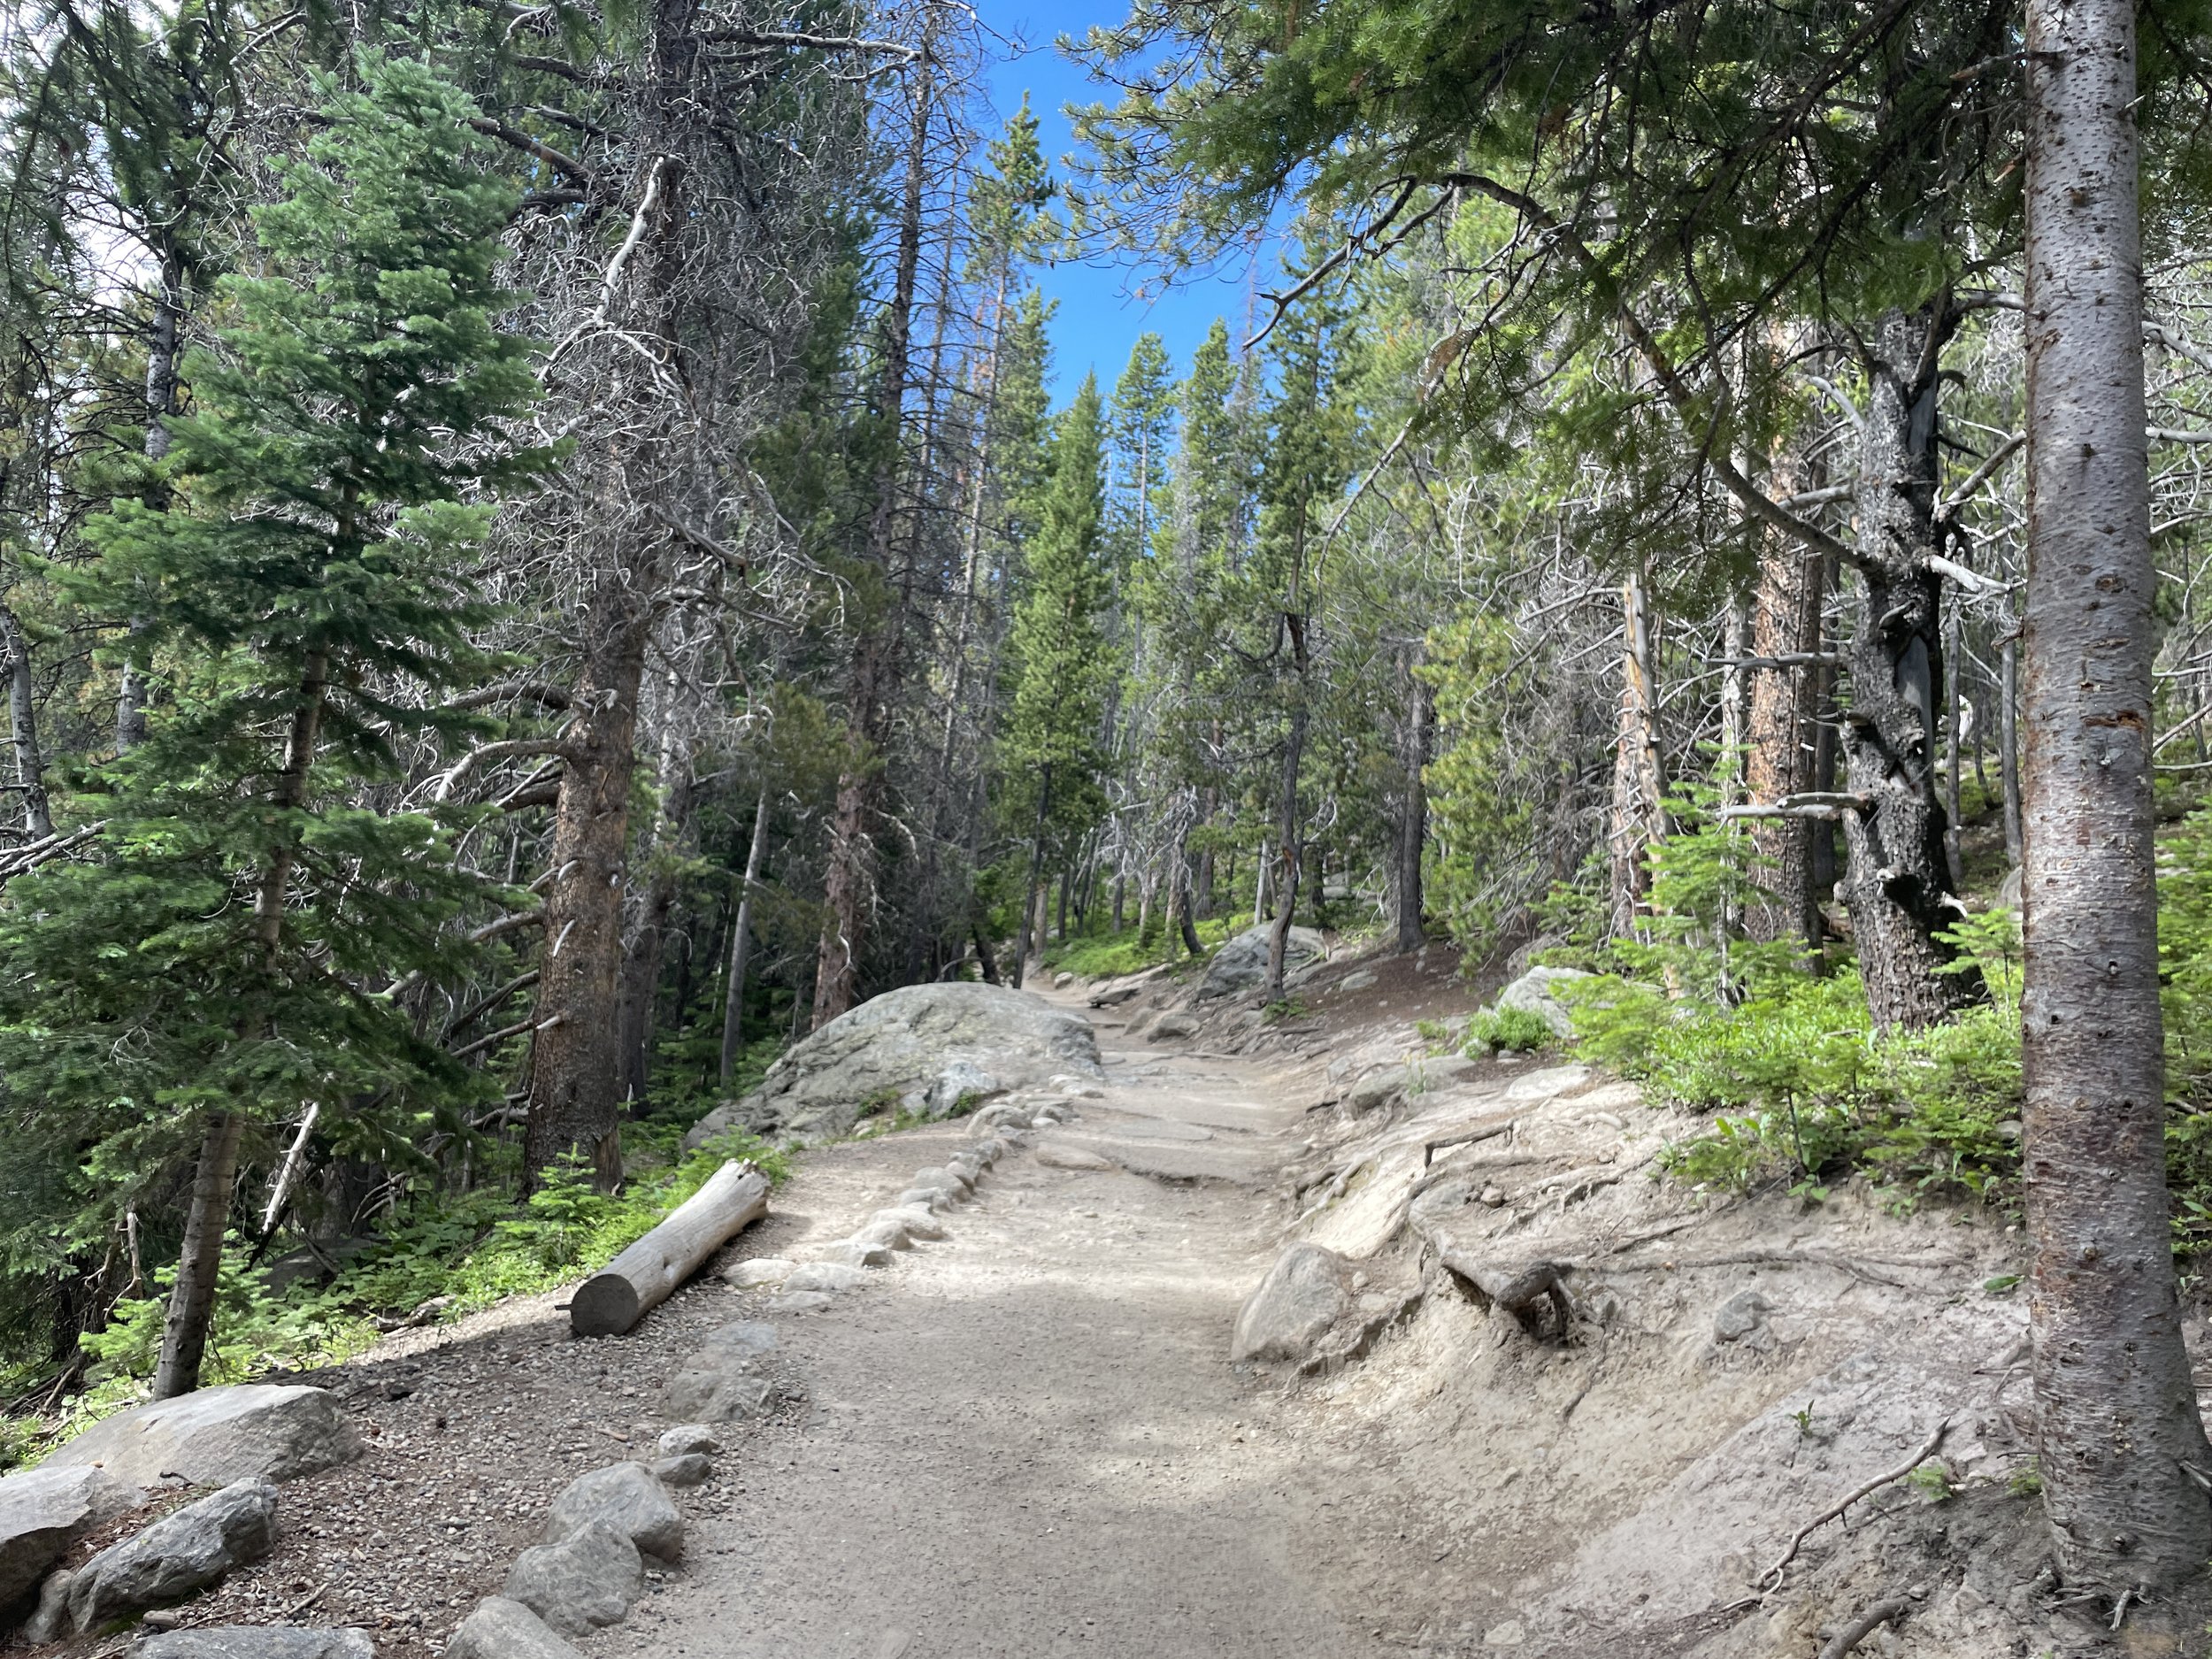
Hiking up to Nymph Lake
There is a steady incline along the trail, but it’s never steep. And there are several spots that flatten back out.

Nymph Lake
Nymph Lake is 0.5 miles from the Bear Lake Trailhead, and just as I remembered it from when I was a young girl - full of lily pads.

Even though it’s busy, this trail is beautiful the whole way - not just at the lakes. This is a pretty view of the valley on the way up to Dream Lake.

When you get close to Dream Lake, the trail will get close to a creek, and there will be two bridges.

Stream near the trail split to Lake Haiyaha
If you are headed to Lake Haiyaha, you will be looking for a sign before the second creek crossing for your trail split. Don’t watch the people, most people are on their way out to Emerald Lake. The trail split is just steps away from Dream Lake, so I would recommend heading there first, and then backtrack.

Dream Lake
Dream Lake is 1.1 miles from the Bear Lake Trailhead. The trail is going to follow the shoreline along the right-side of Dream Lake before taking off to Emerald Lake. Look in the water as you hike, and you’ll likely see trout swimming beside you (and you can cross that animal off of your Junior Ranger Bingo activity).

Looking at the trout along Dream Lake

Trail between Dream Lake and Emerald Lake

There are lots of sections of beautiful boardwalks between Dream Lake and Emerald Lake - yep, I have a thing for boardwalks.

Emerald Lake
Emerald Lake is 1.8 miles from the Bear Lake Trailhead, and this is where the trail ends. There isn’t much ability to maneuver to other parts of the lake unless you plan on swimming - and it’s cold!
Lake Haiyaha (moderate)

Lake Haiyaha
Distance - Out and back to Lake Haiyaha from the Bear Lake Trailhead is 4.4 miles with an elevation gain of about 850ft. From the trail split at Dream Lake to Lake Haiyaha, it’s one mile.
Other Information - There are still going to be people on this trail, but like a quarter of the people that were hiking to Emerald Lake, maybe even less.

There are several more water crossings. All with very shallow and extremely clear water, and beautiful mountain stones.
I think my favorite section of hiking trails in this Bear Lake area is between Dream Lake and Lake Haiyaha. It just feels like a magical part of the forest.

Another creek crossing on the way to Lake Haiyaha

Not Lake Haiyaha yet - keep going
There were several confused people standing next to this small unnamed body of water, thinking this was Lake Haiyaha. It is not. The trail ends here though. To get to Lake Haiyaha, you will need to hop over some boulders that will be straight ahead of you.

Previoulsy mentioned “boulder hopping.” This is the time to get your mountain goat on. Lake Haiyaha is worth it. It’s my favorite lake in Rocky Mountain National Park!

Lake Haiyaha! The only water this color (that I’ve found anyway) in Rocky Mountain National Park.

Pick out your favorite boulder at Lake Haiyaha. Some are high up for quiet views, some are low enough to put your feet in the icy water. Some are perfect for rock jumping (if you are brave enough - I was not…)
The Loch (hard)

The Loch
Distance - It doesn’t make sense to list mileage out and back anymore, as you are likely doing some type of loop if you are out this far from one of the trailheads. The closet trailhead to the Loch is Glacier Gorge (3.1 miles one-way / 1,000ft elevation gain). From Bear Lake Trailhead, it’s 3.9 miles one-way / 1,200ft (add 0.4 miles if you do the spur trail to Lake Haiyaha).
Other Information - To get to the Loch, expect a hard hike at high elevation with lots of switchbacks.

From Lake Haiyaha, the trail descends pretty rapidly into the valley.

Cascading water near the trail

Unnamed pond before reaching the 4-way trail intersection.

This is the 4-way trail split. I really did want to hike to Glacier Gore, Mills Lake, and Black Lake, but our loop was already 11.7 miles, and I don’t think we could have walked another mile, let alone another 5.6 miles. Maybe someday we will find ourselves back on this trail and we could try Black Lake without the trek to Sky Pond. first

When hiking, all things that go down, must go back up. While following this cascading creek, the trail ascends pretty steeply followed by several switchbacks.

The Loch

The Loch
Timberline Falls (hard)

Timberline Falls
Distance - Timberline Falls is about one mile past The Loch, with an elevation gain of about 300 more feet. So if you travelled from Glacier Gorge, it’s 4.1 miles one-way / 1,300ft. Likewise from Bear Lake, it’s 4.9 miles one-way / 1,500ft (add 0.4 miles if you do the spur trail to Lake Haiyaha).
Other Information - In addition to seeing the waterfall, the trail climbs up into the mountains, providing some amazing views of the valley below. This part of the trail is fun, quiet, and gorgeous.

Above the Loch, the trail follows a curvy mountain stream.

View of the valley while climbing up to Timberline Falls

Climbing up towards Timberline Falls

View of Timberline Falls from the trail
I have seen a few pictures on the internet of Timberline Falls head on - I’m not sure how those pictures were taken, as you need to walk through the stream, and the stream was flowing pretty fast; not someplace I’d be interested in falling.
Lake of Glass and Sky Pond (hard)

Sky Pond
Distance - Lake of Glass is 0.2 miles past Timberline Falls, and the trail gains about 330ft in elevation. Sky Pond is just 0.2 miles past Lake of Glass and the trail is flat, so if you make it Lake of Glass, you should continue to Sky Pond as its minimal effort (at least comparatively to what you’ve done so far).
Other Information - To get to Lake of Glass, you are going to need to scramble up the edge of Timberline Falls. You won’t get wet, but this is quite the rock scramble. This section of the trail out to Sky Pond was the most fun - anytime you need to use your hands while hiking, gives hiking an added challenge.

This could be an ominous sign if you’ve come all this way but are not able to get up and over the falls, and you didn’t know about this part of the trail.
Traffic jam at Timberline Falls
Here you can see how the trail goes up the right side of the falls. We waited for about 15 minutes for everyone to come down. When we climbed up, there were just 3 other hikers we ran into at the end of the trail, so despite it being busy in this one spot, we enjoyed Lake of Glass and Sky Pond just ourselves.

Lake of Glass - Up at the top of the falls plus a short walk.

Another view of Lake of Glass

Walking out to Sky Pond - This part of the trail was really pretty and follows these stones most of the way.

The trail continues, marked by stones - I love the creativity of the trail designers

The trail ends here at Sky Pond. Now you get to turn around and hike it back. Go slow as you hike down Timberline Falls.
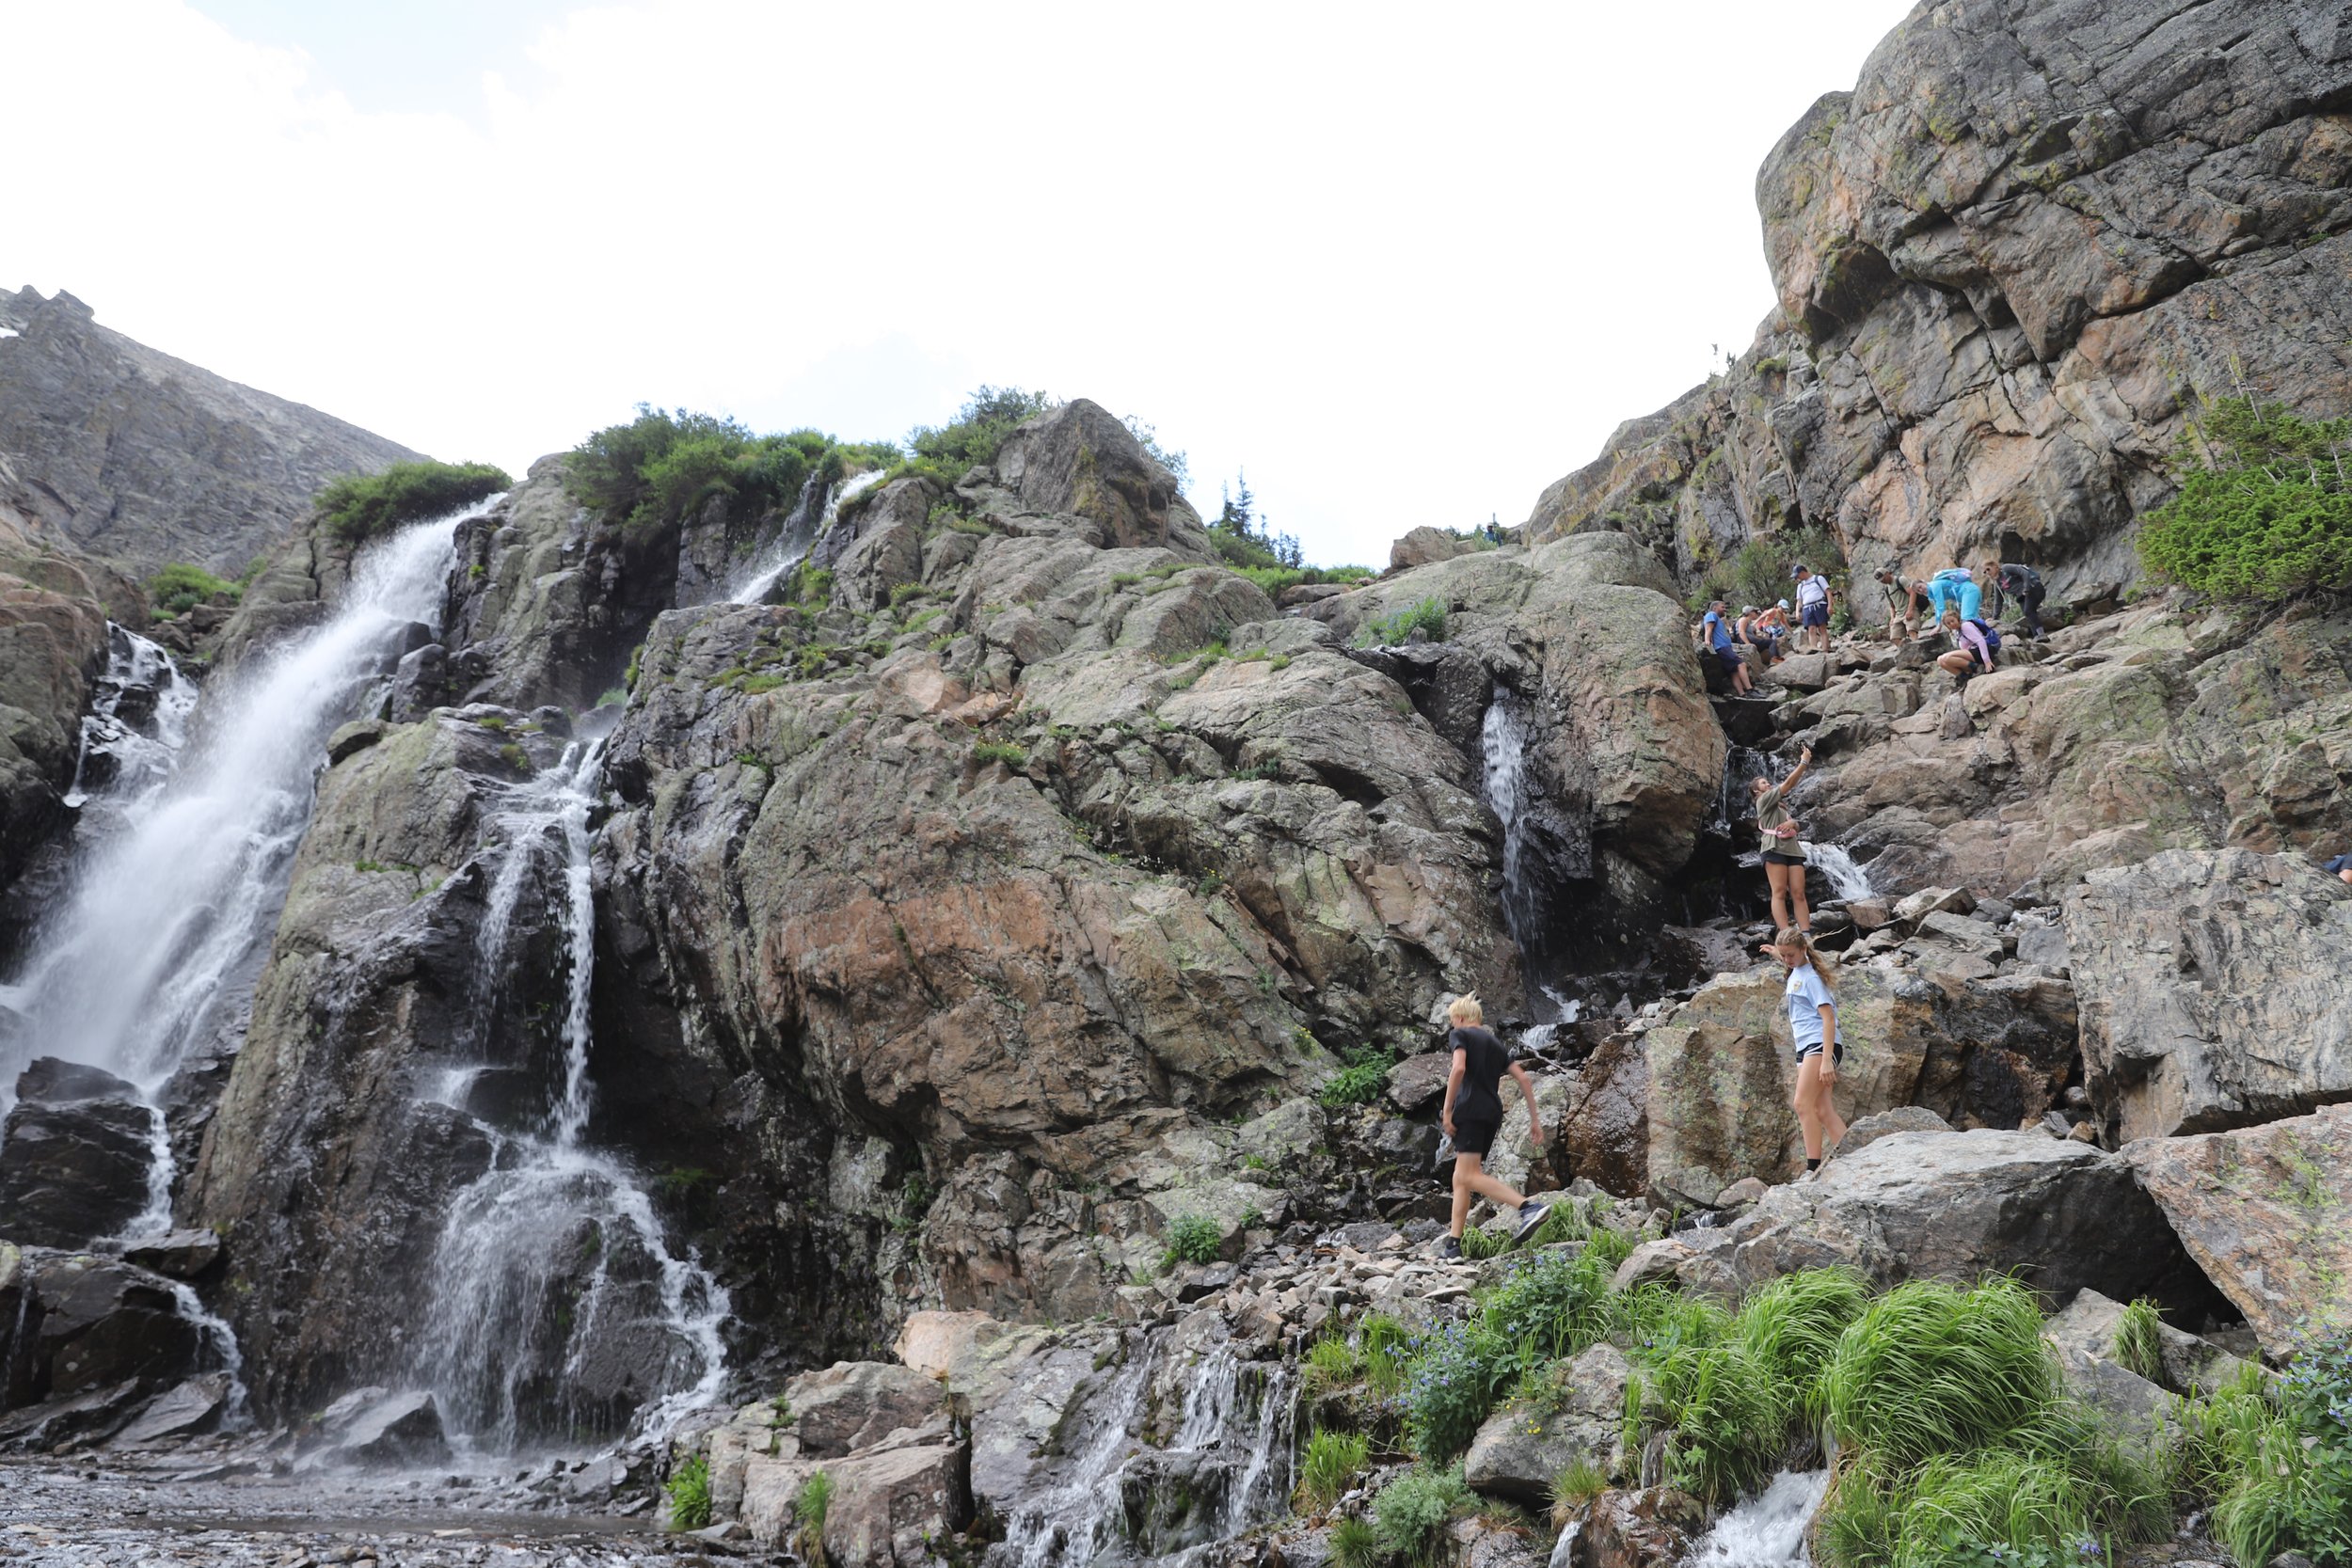
Alberta Falls (easy)
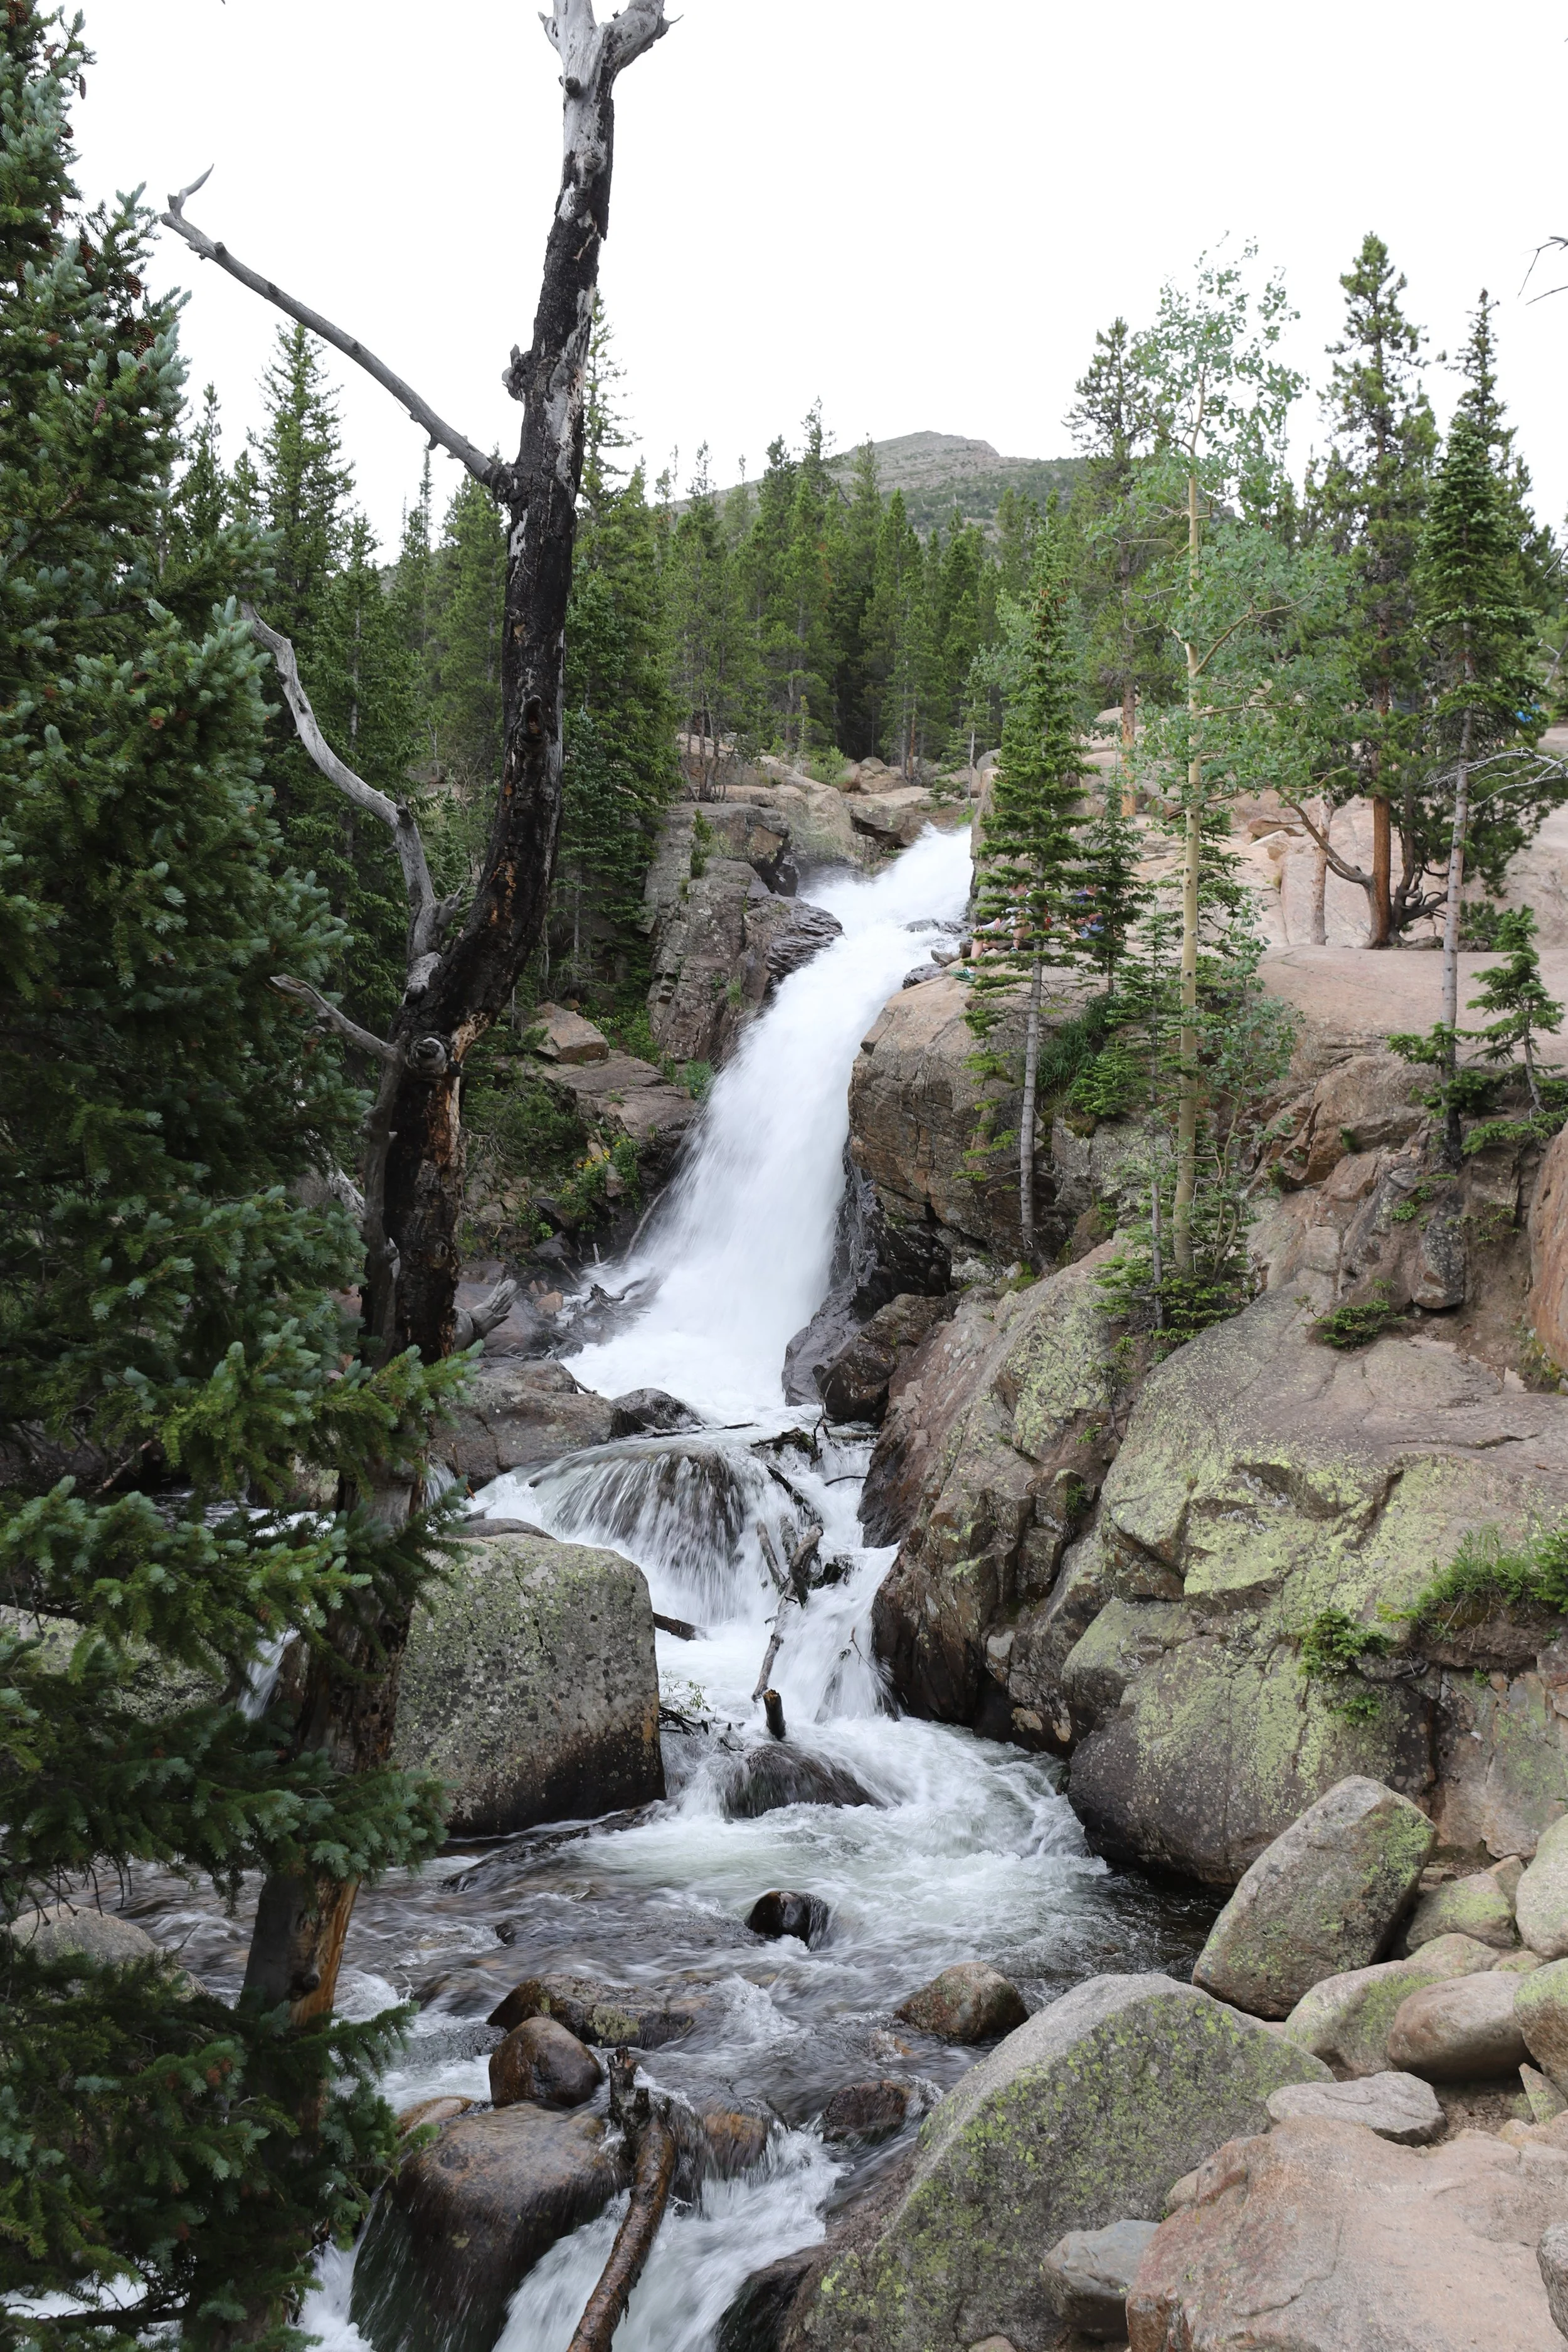
Alberta Falls
Distance - The closest trailhead to Alberta Falls is Glacier Gorge, which provides a 1.2 mile hike roundtrip / 160ft in elevation. You could also hike from Bear Lake (going the other direction), but the trip is 2 miles round trip, and if you are just going to the falls, I’m not sure what benefit you gain in views from starting at Bear Lake. I would save the 0.8 miles of walking for another trail.
Other Information - Simply hiking to Alberta Falls is a nice and easy trail. But, if you have been walking the giant loop, as we did, you are going to feel like you’ve walked into a wall of people as you hit the falls, after walking quietly by yourself for hours.

Hiking from the trail split to Alberta Falls
From that 4-way trail split that you will have walked back to, it’s a largely unexciting trail towards Alberta Falls. The trail goes down at least, so that’s nice. There were a couple of nice views like this one, but honestly we were all pretty tired by this point, and probably not paying too much attention to trees and mountains.

Alberta Falls
Alberta Falls is a nice waterfall, but I liked Fern Falls better because there wasn’t anyone there.. It was a huge transition from being on our own for hours to having people everywhere.

I had to take this picture of Glacier Creek below Alberta Falls - What possible advantage did the water have in flowing this way, versus a straighter line?
The best part of the Bear Lake hiking area is that you can choose your own route based on your interests and abilities. Just make sure to look into the timed entry for this part of the park as you plan your trip. And if you forget or have missed the window, head to one of the visitor centers at 5:00pm (except Alpine which does not have internet access). You might get lucky by getting a next day permit. I missed understanding this and thought we could simply park at the Park and Ride - You need to get a timed entry to even get to the Park and Ride. But we were successful two days in getting next day permits. I would have been crushed if we missed this part of the park.
Other Hiking Options
If you are looking for more hiking suggestions, please check out my below map with additional posts linked to each pin.