
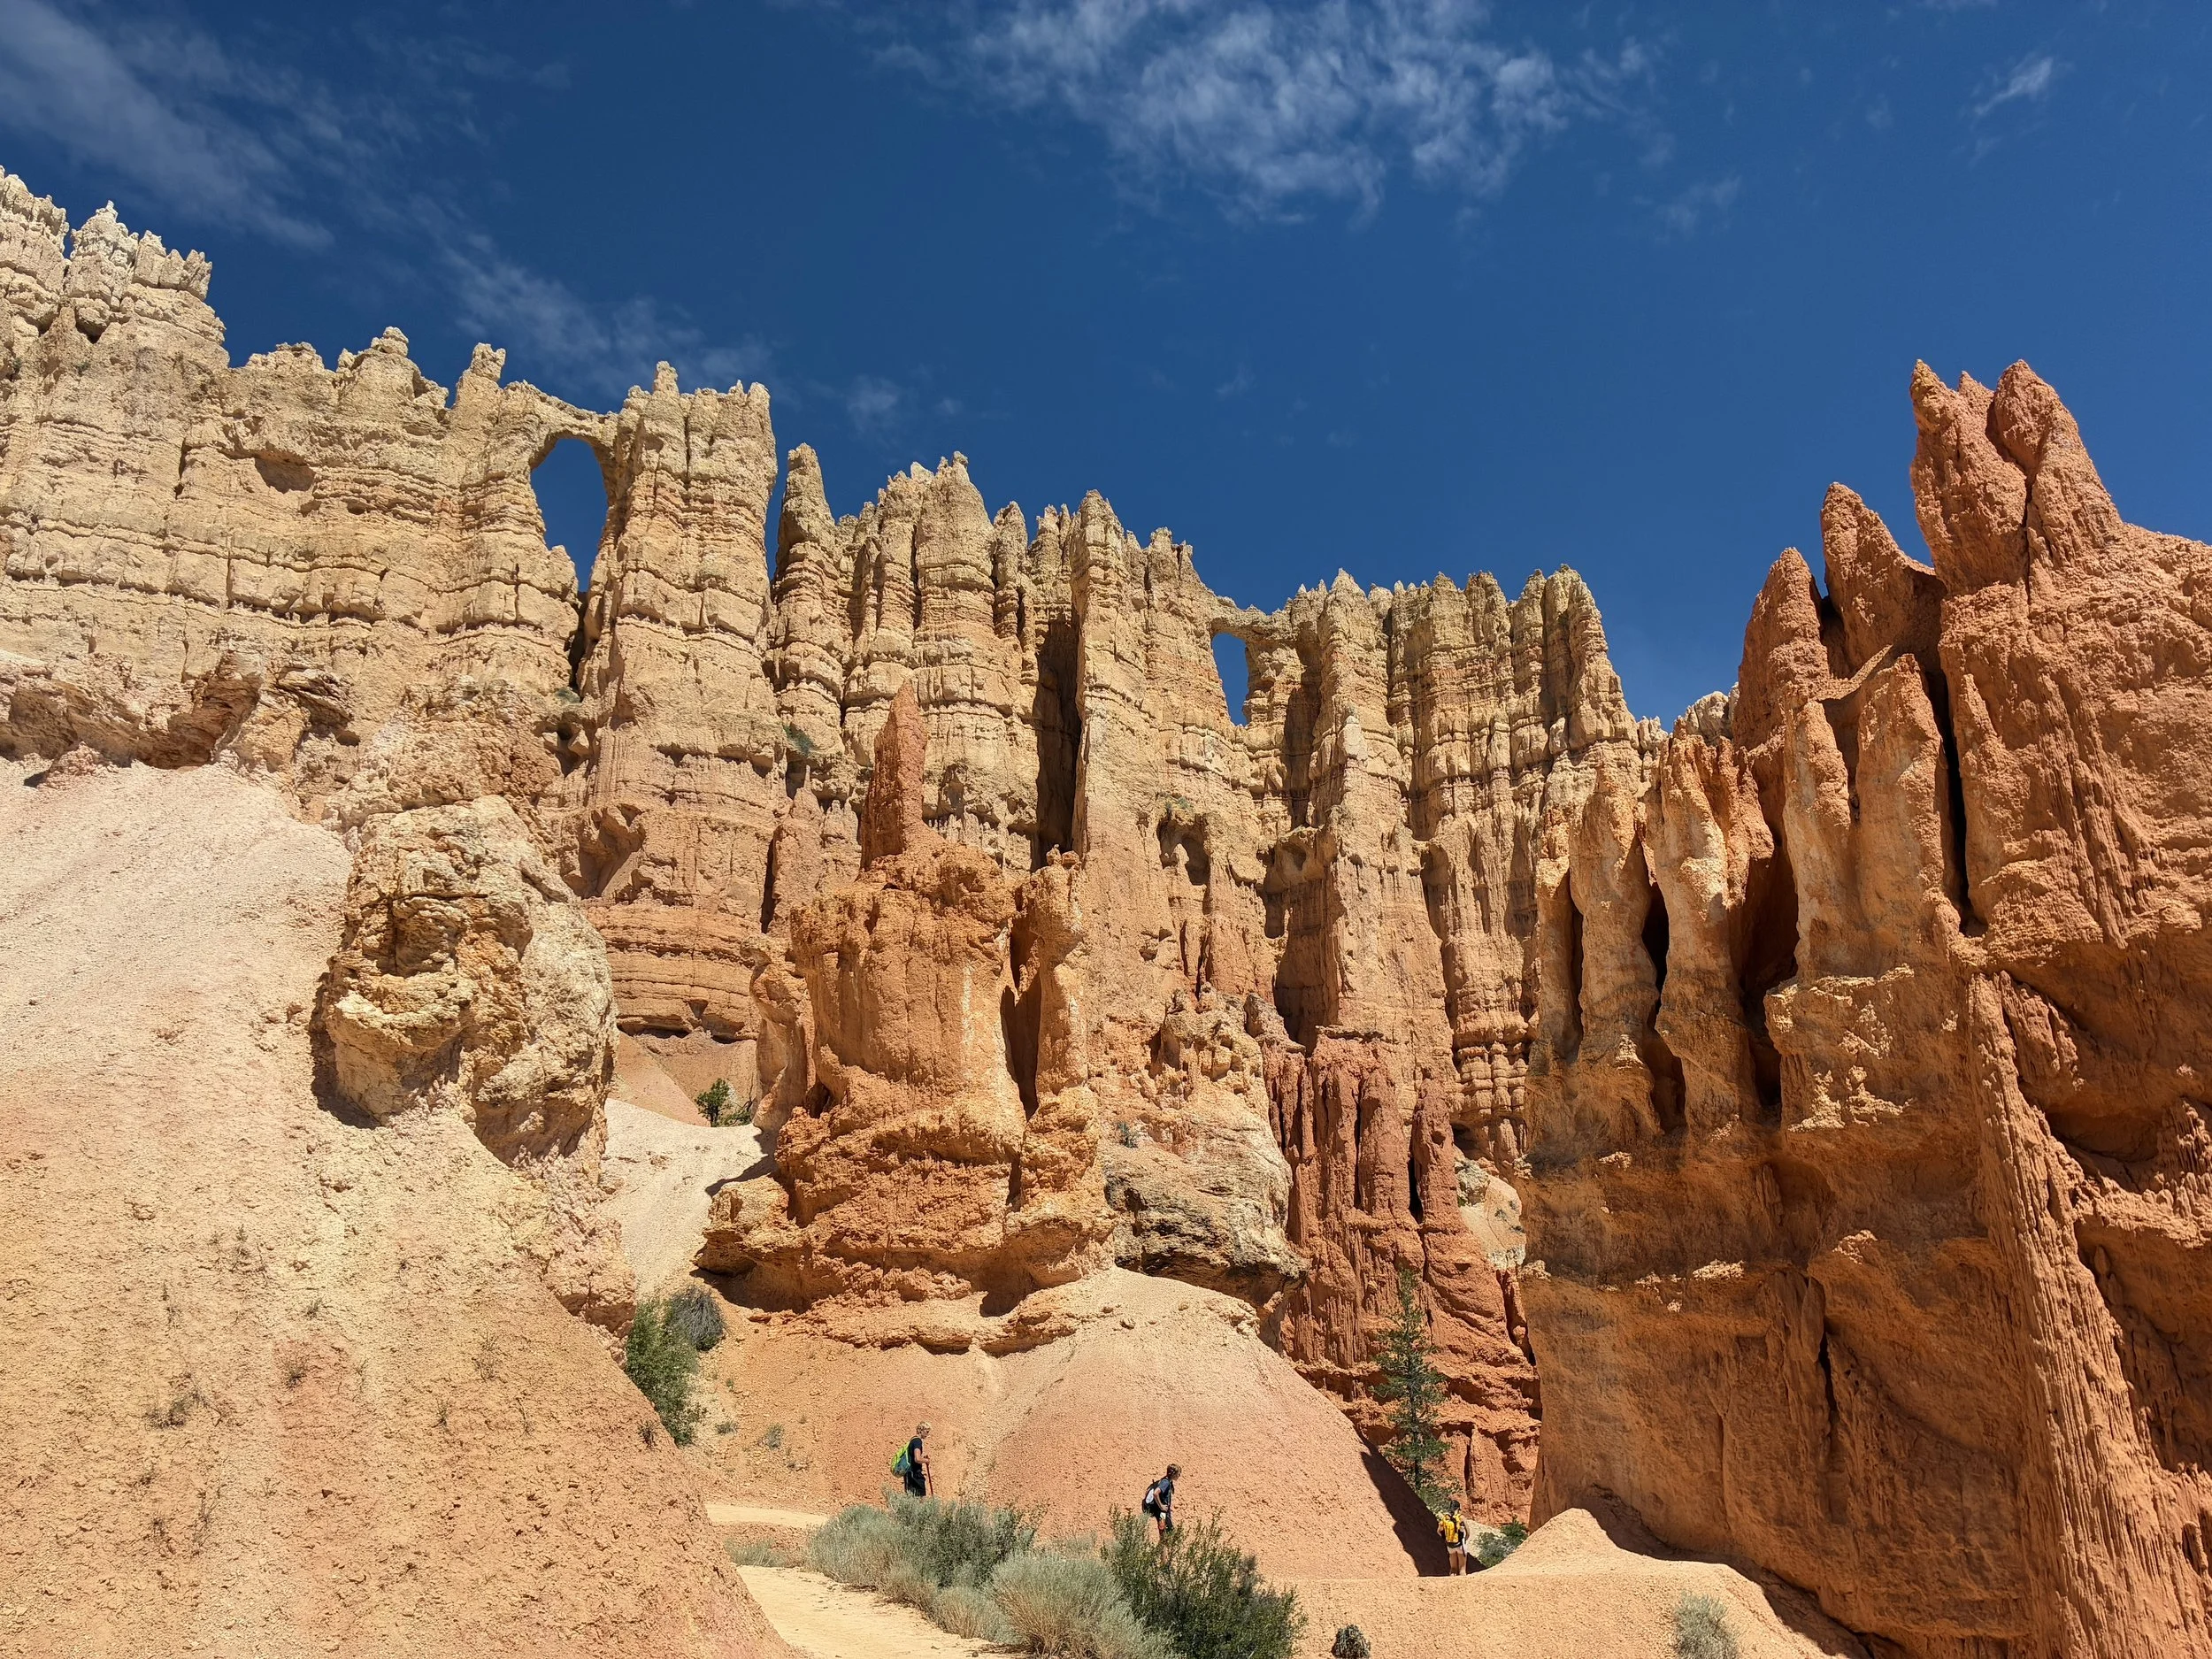
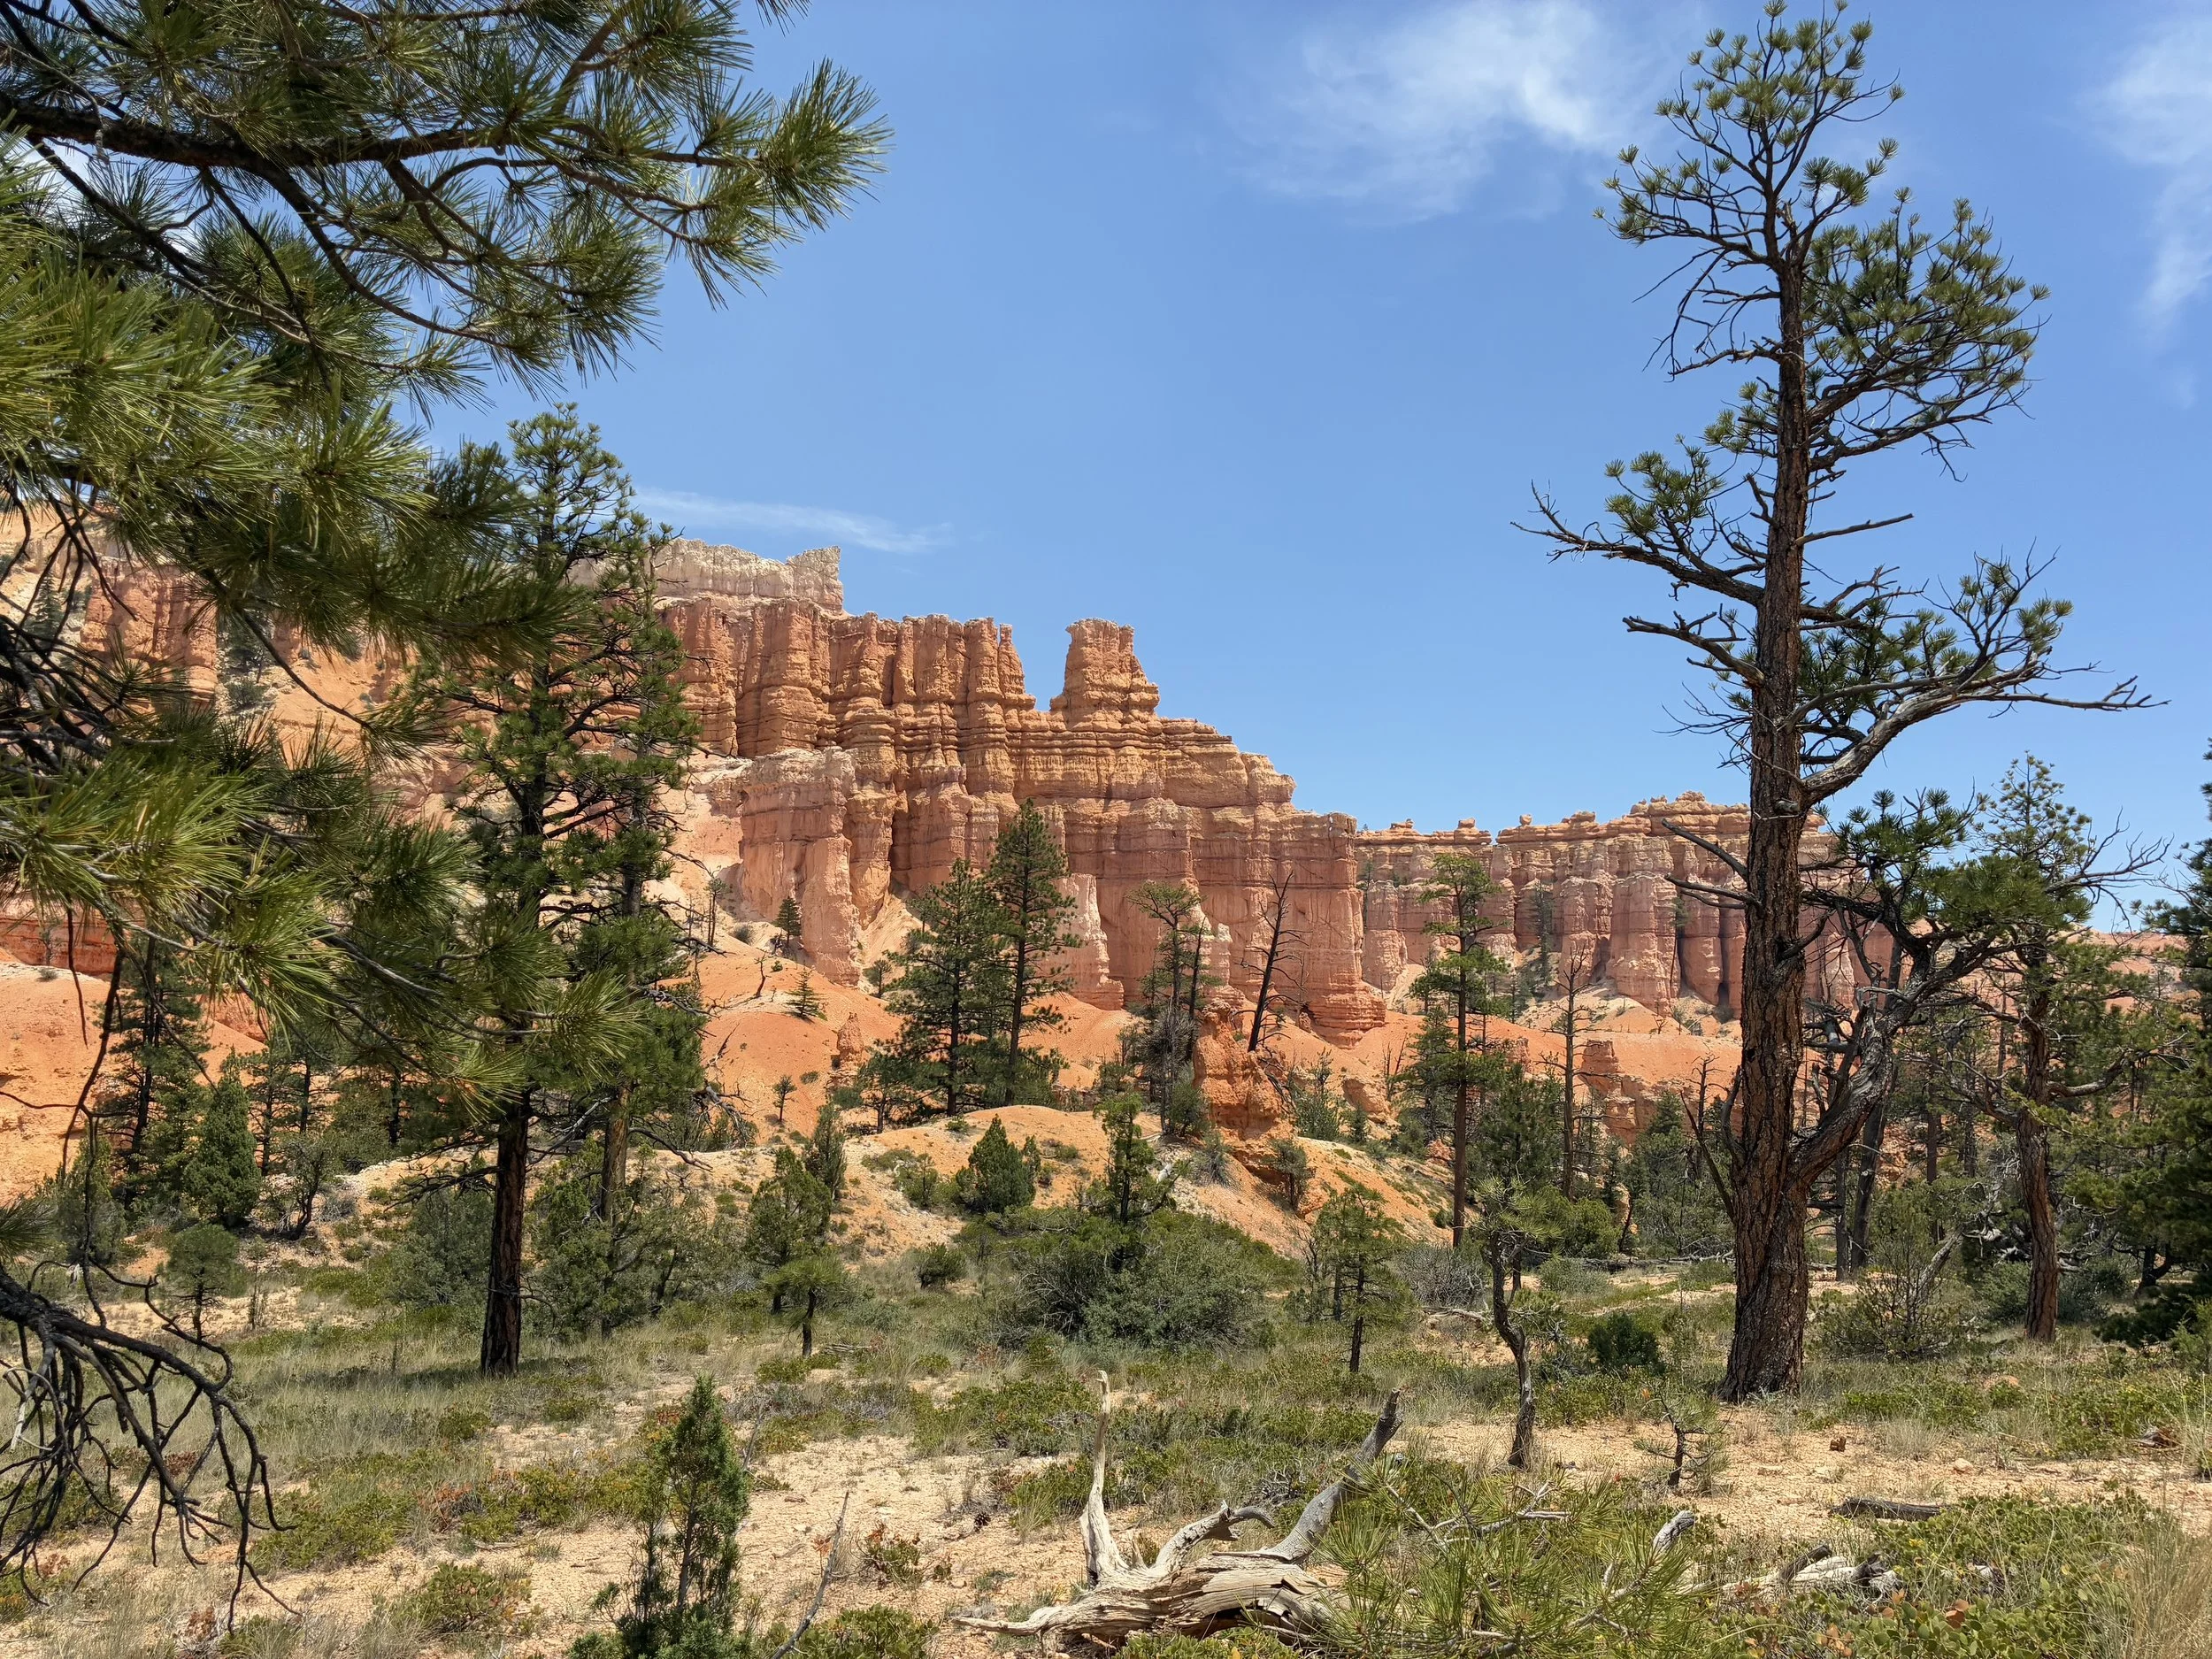
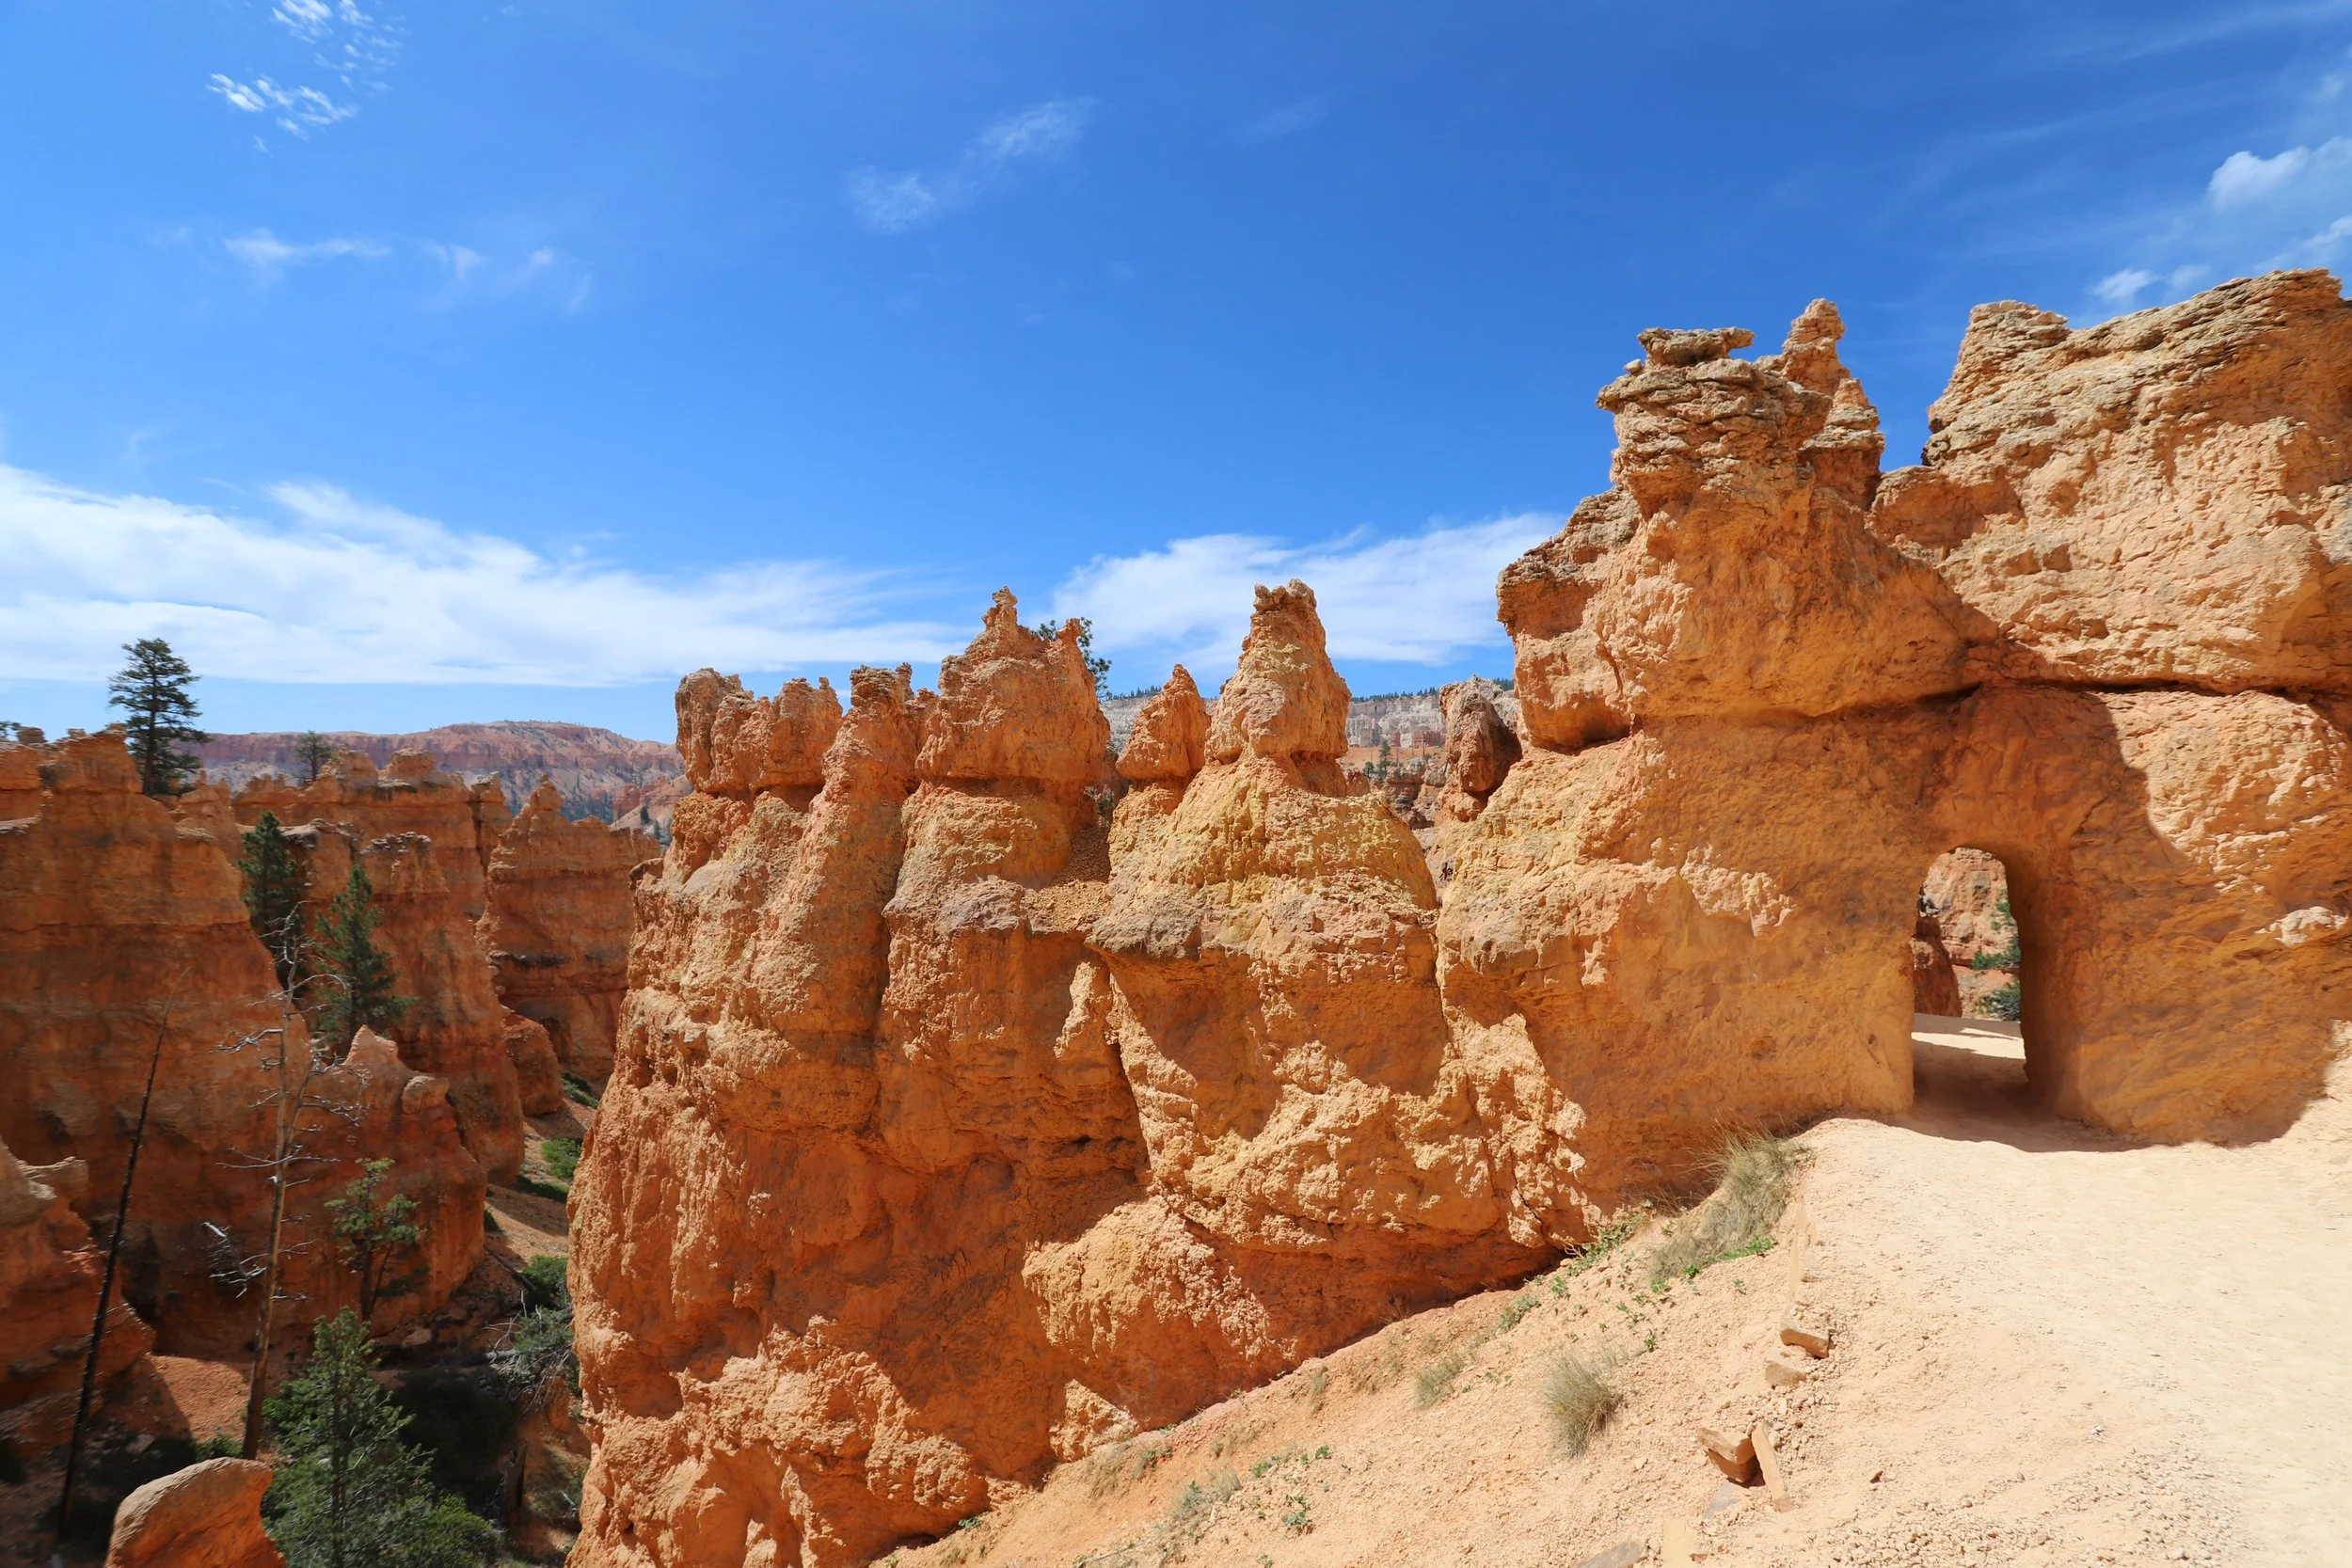
Wall of Windows along Peekaboo Loop Trail - Bryce Canyon
If you enjoy my posts, please consider signing up below to get email notifications of my latest blogs. I will not share your email

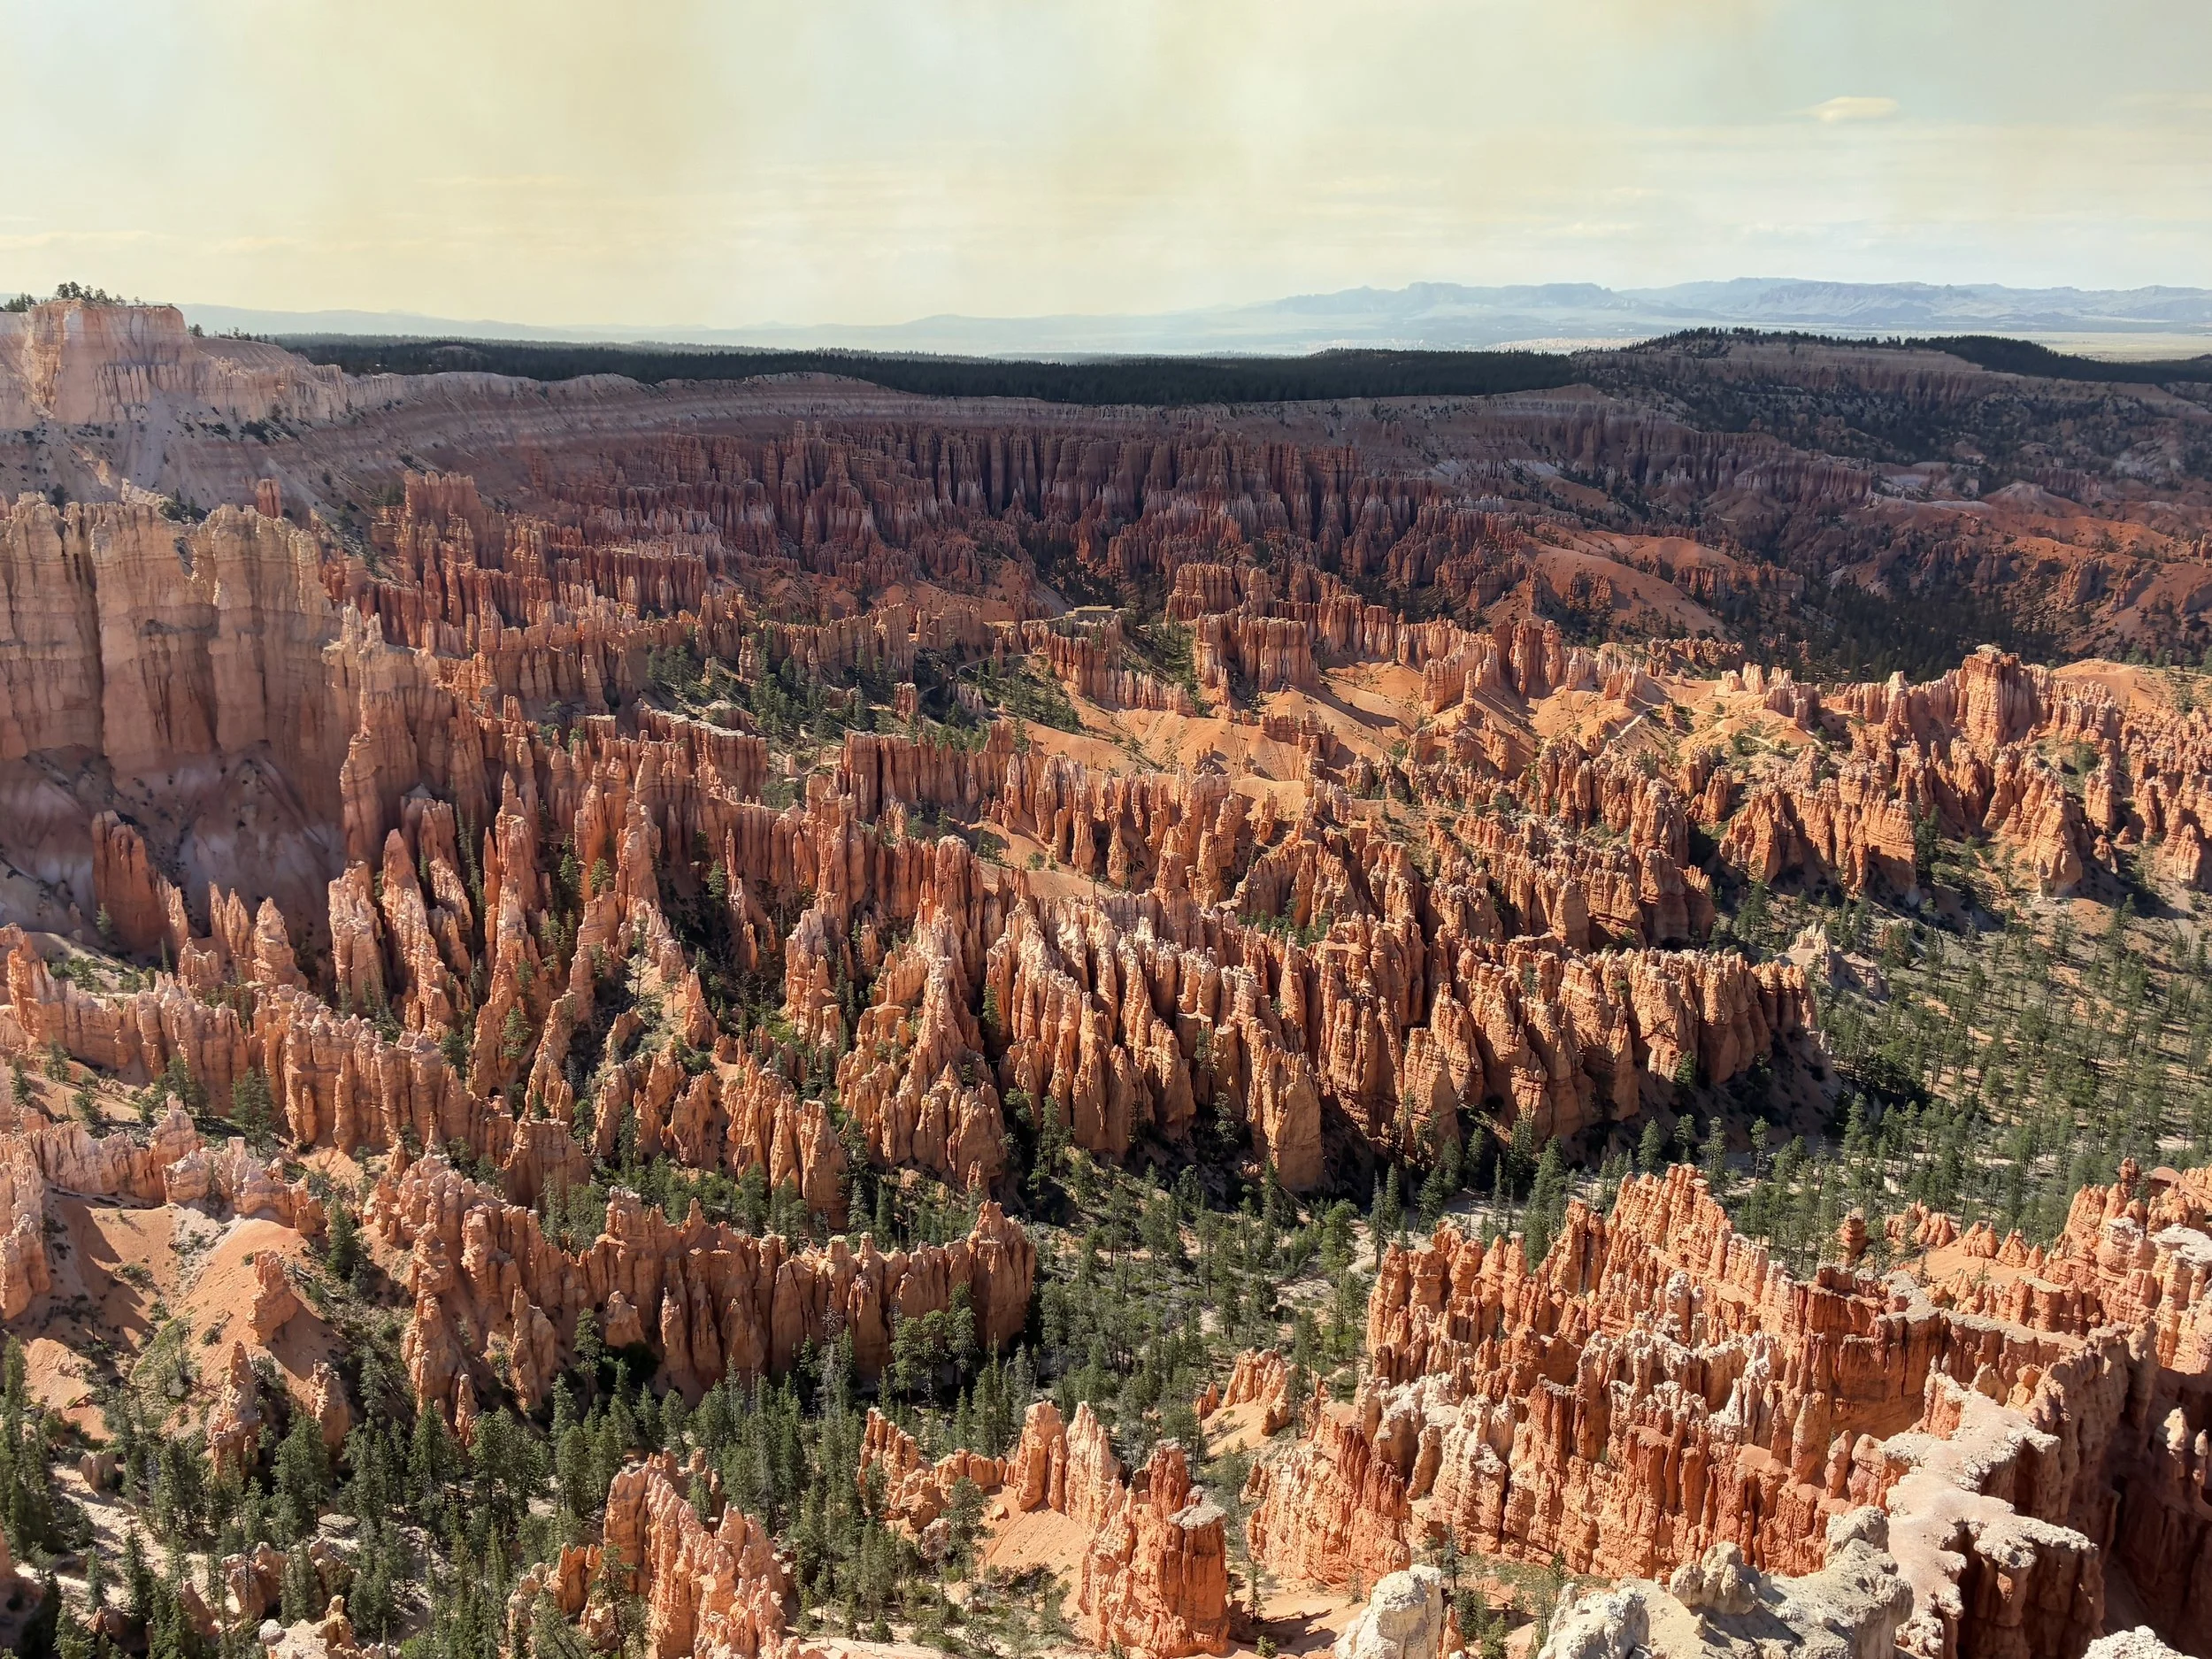
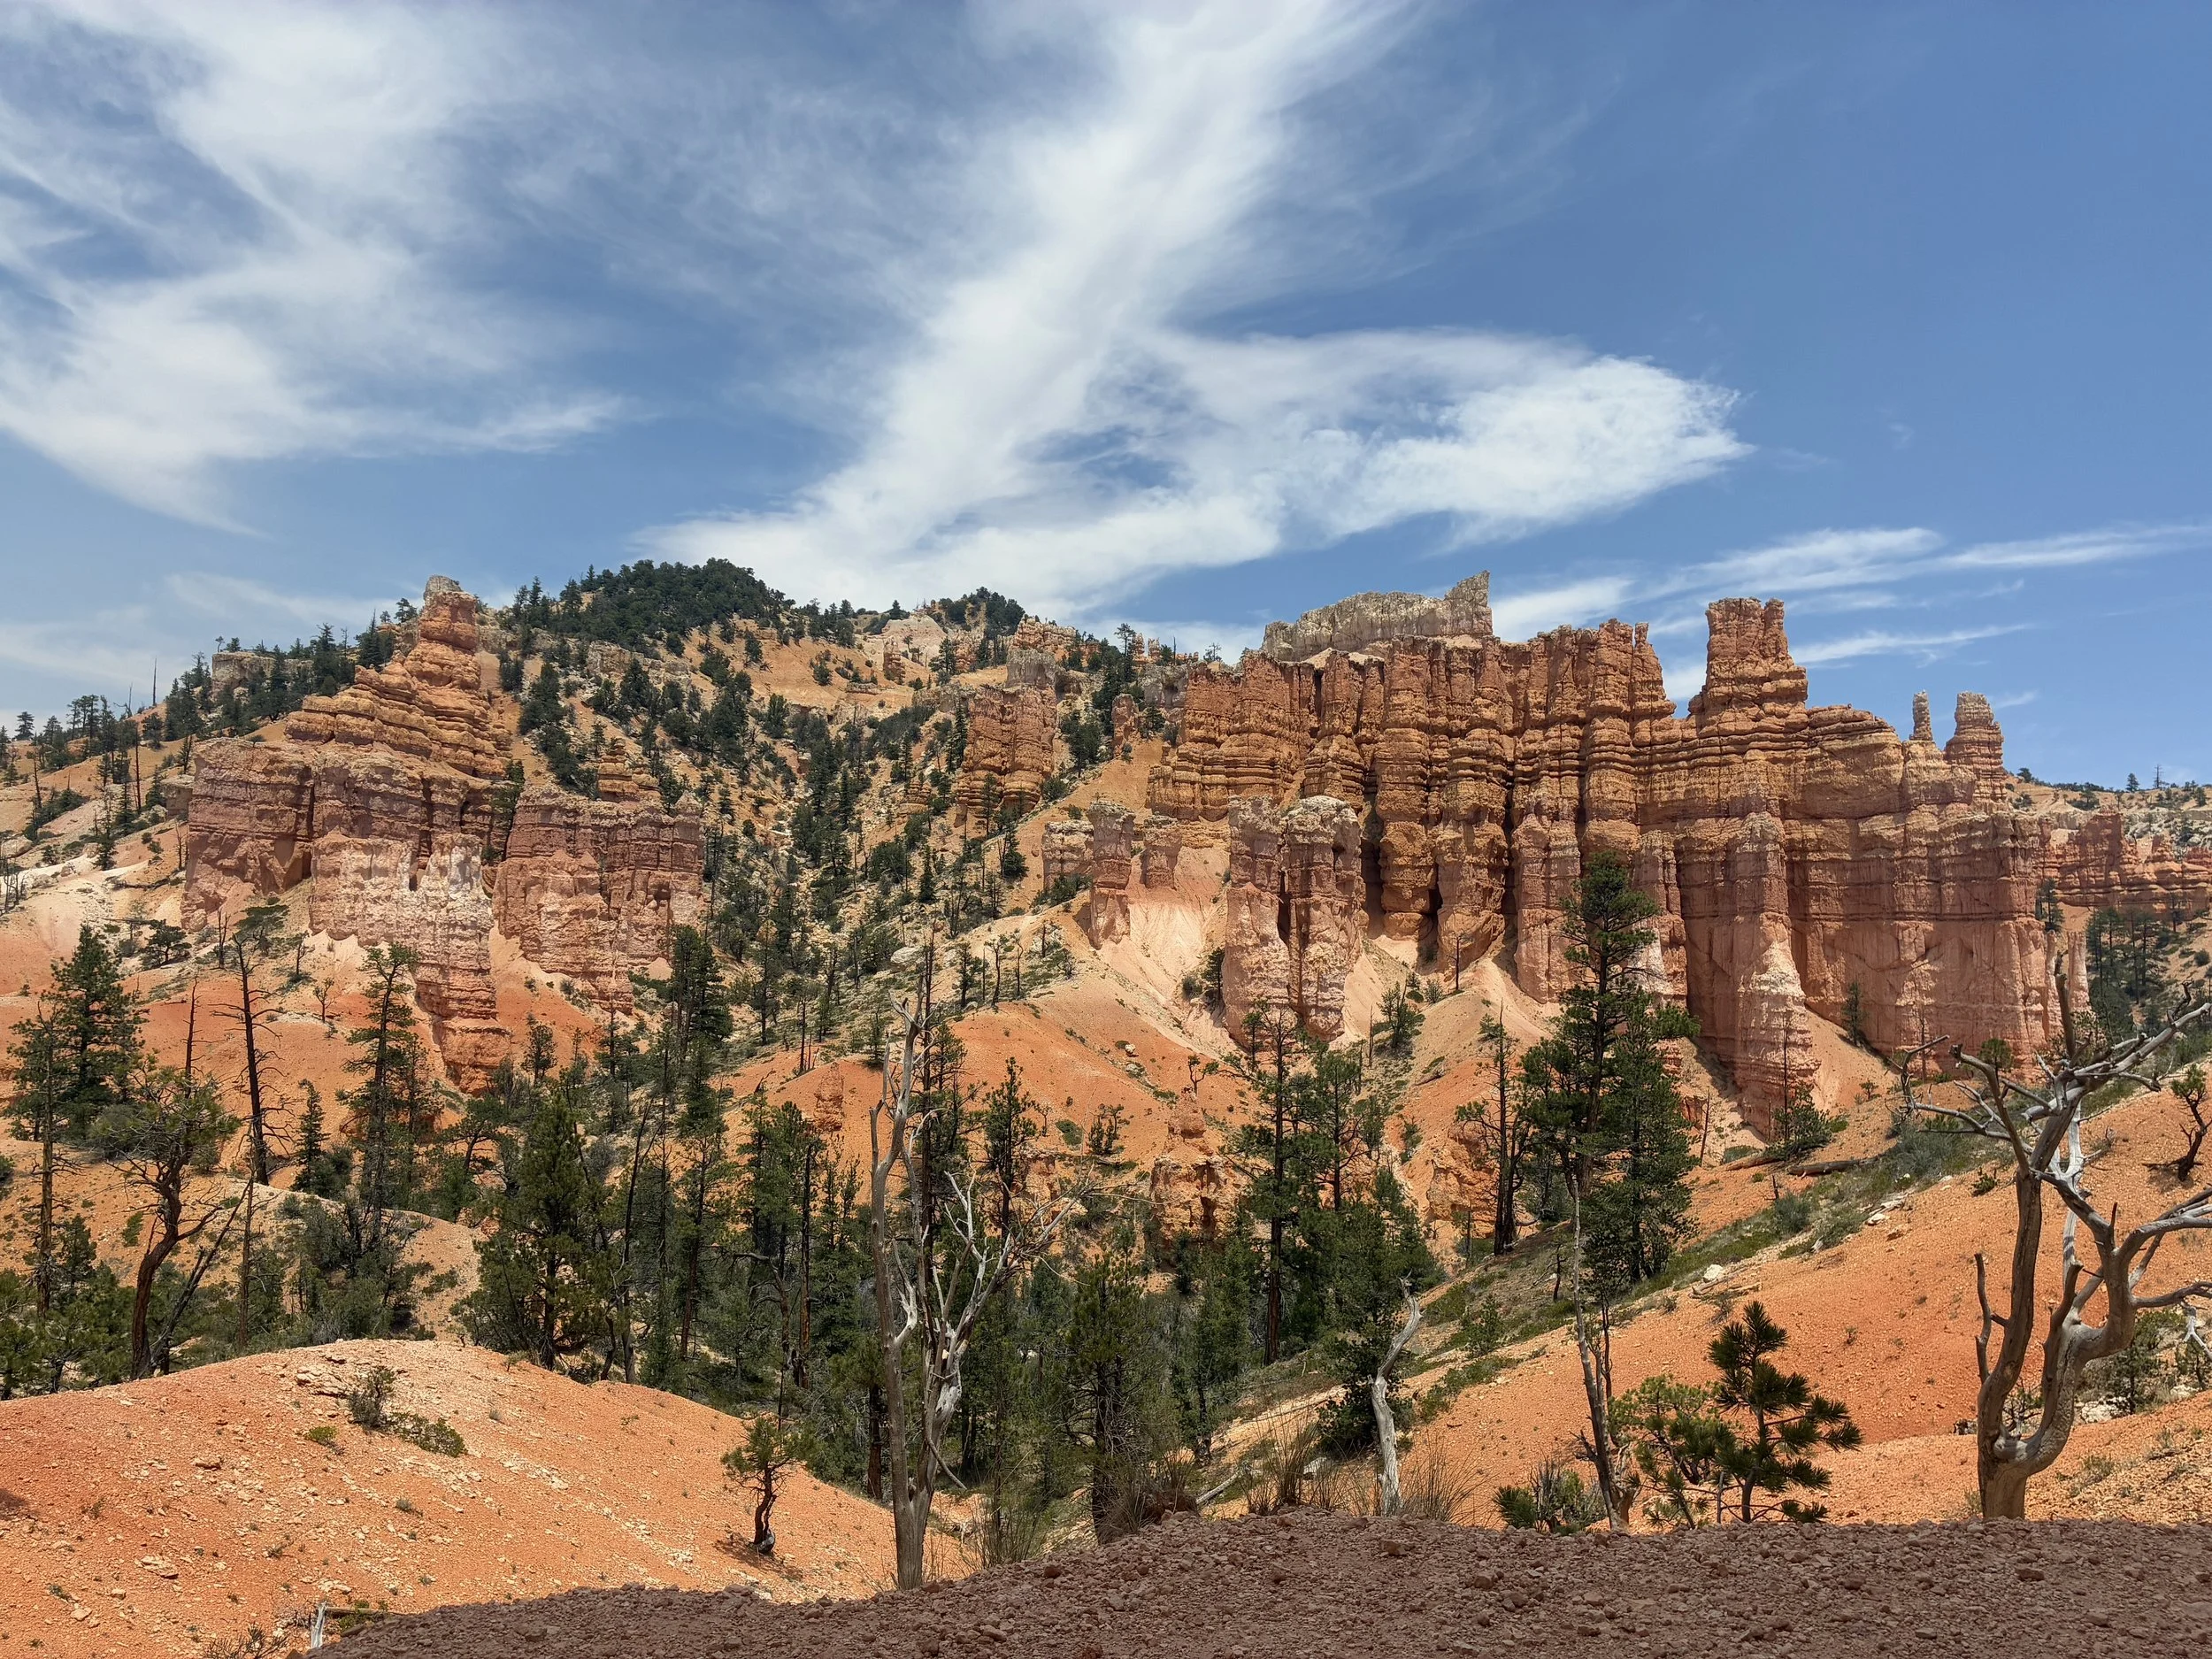
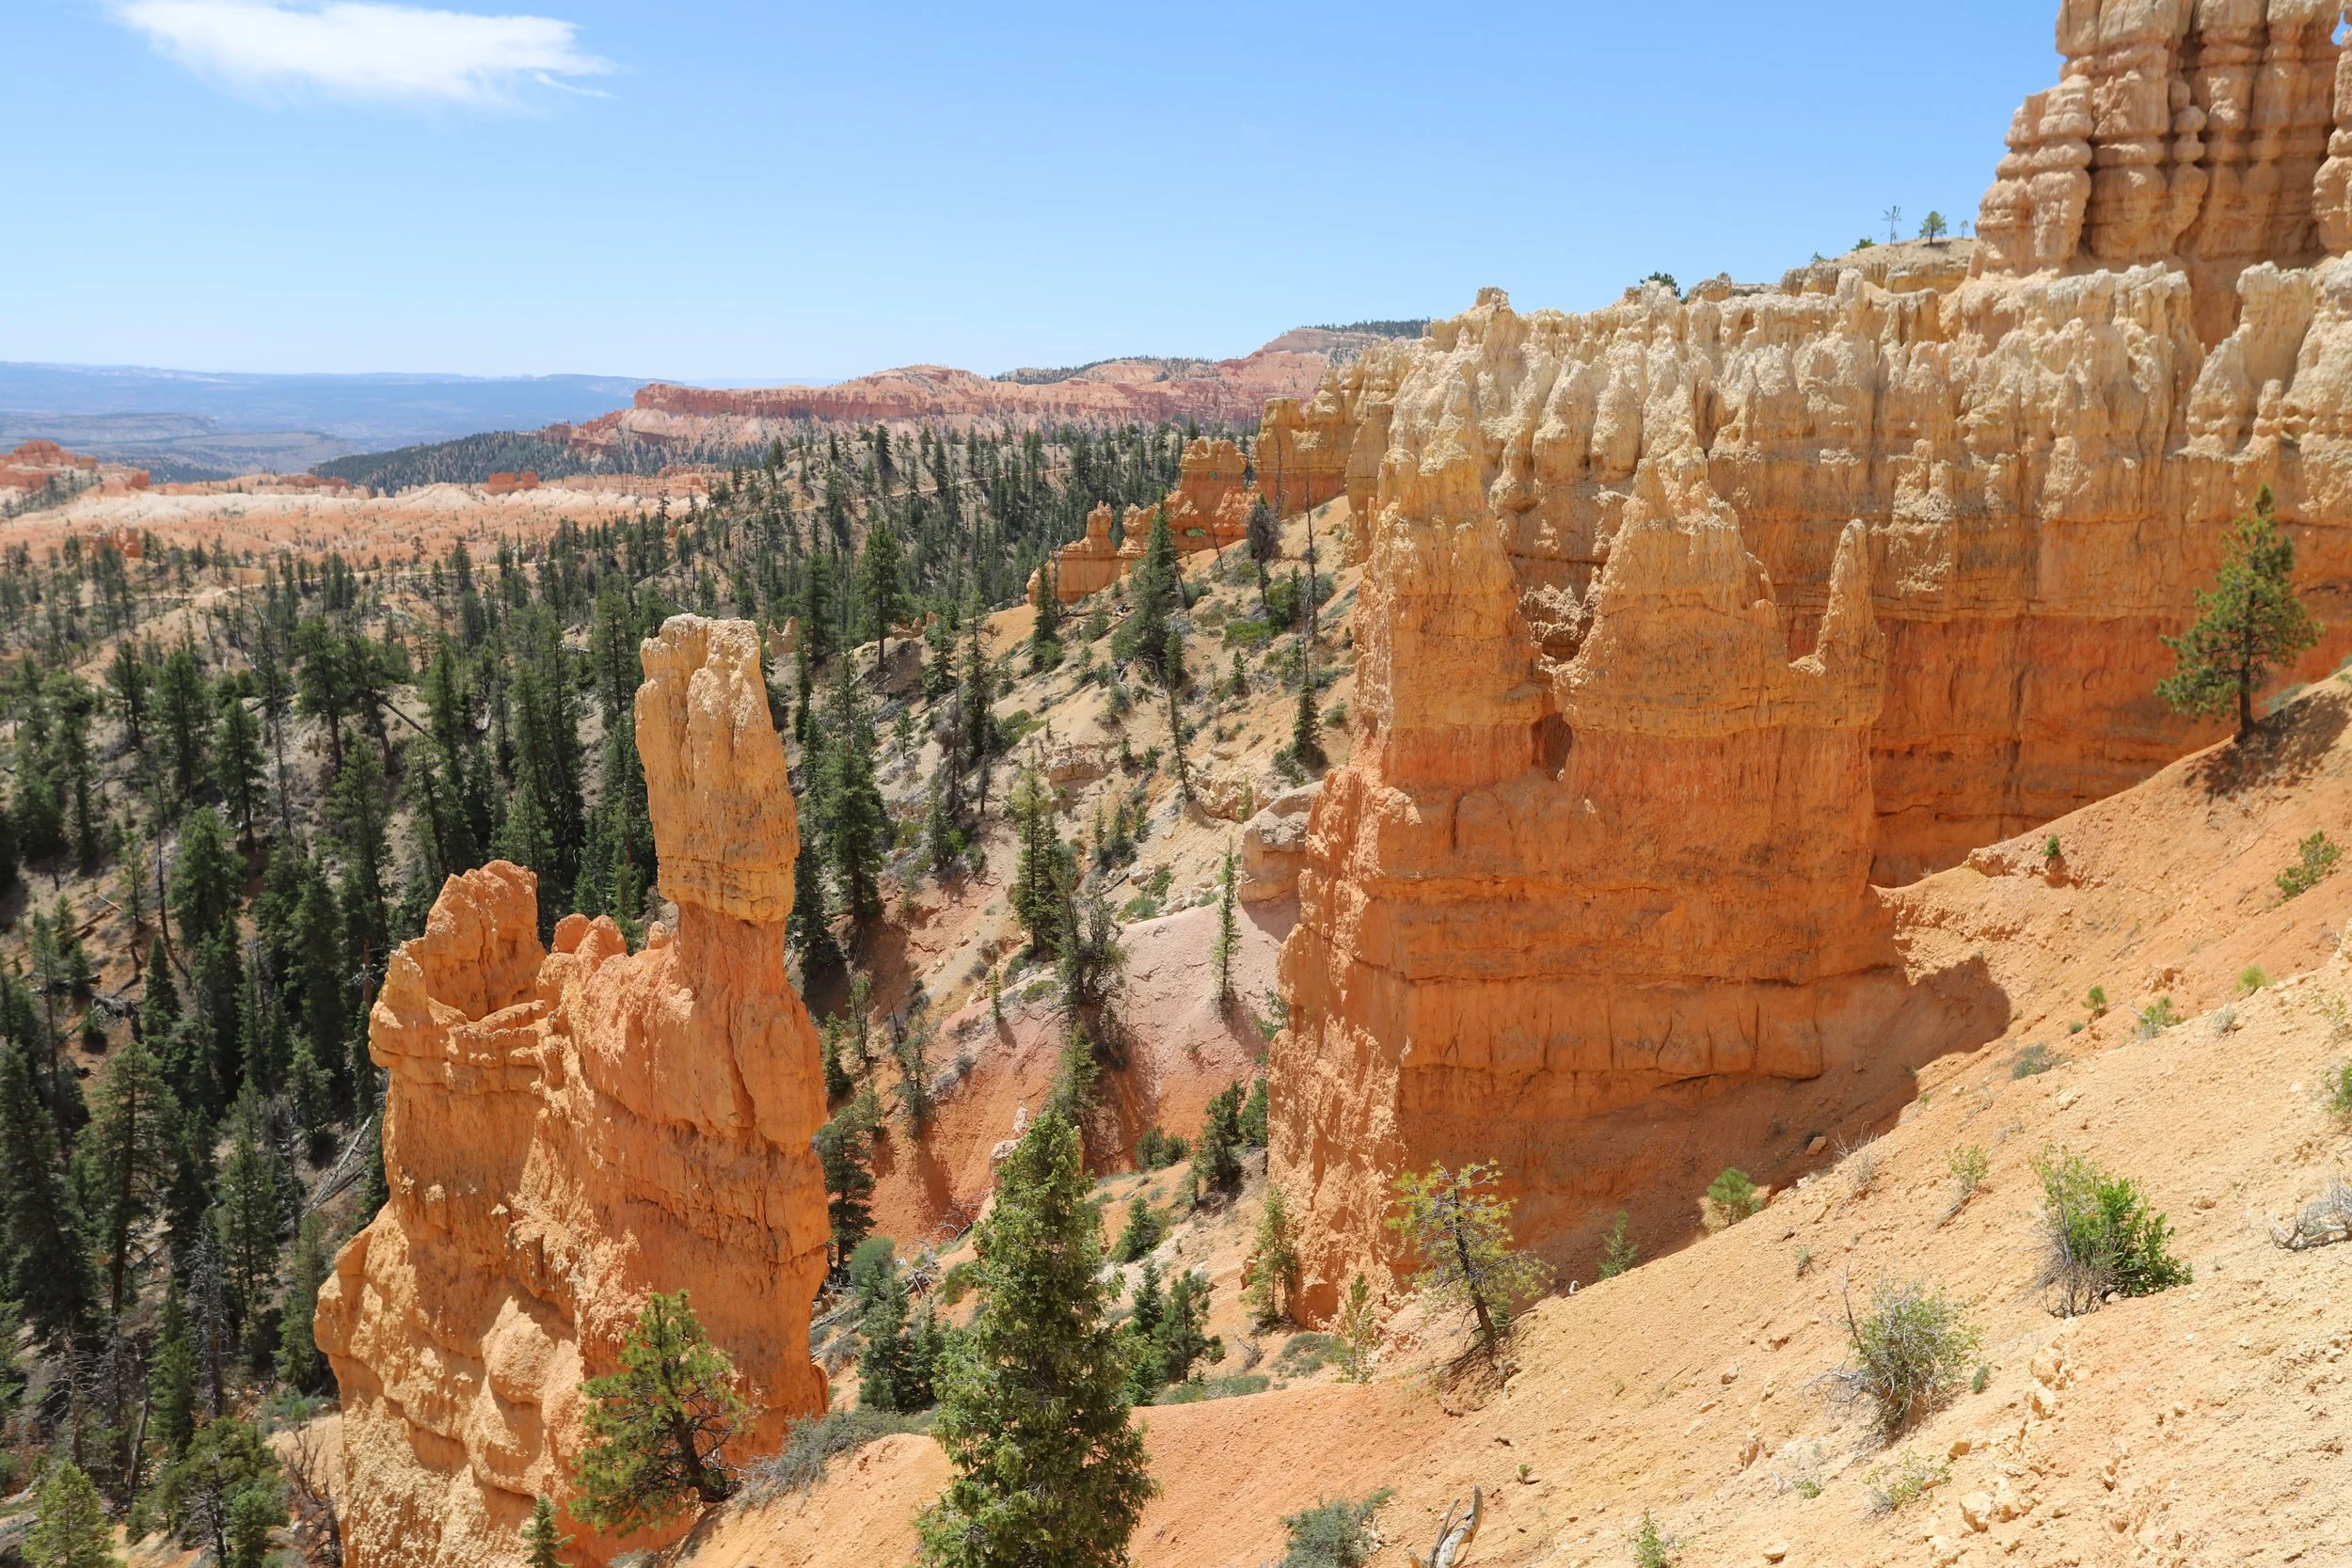
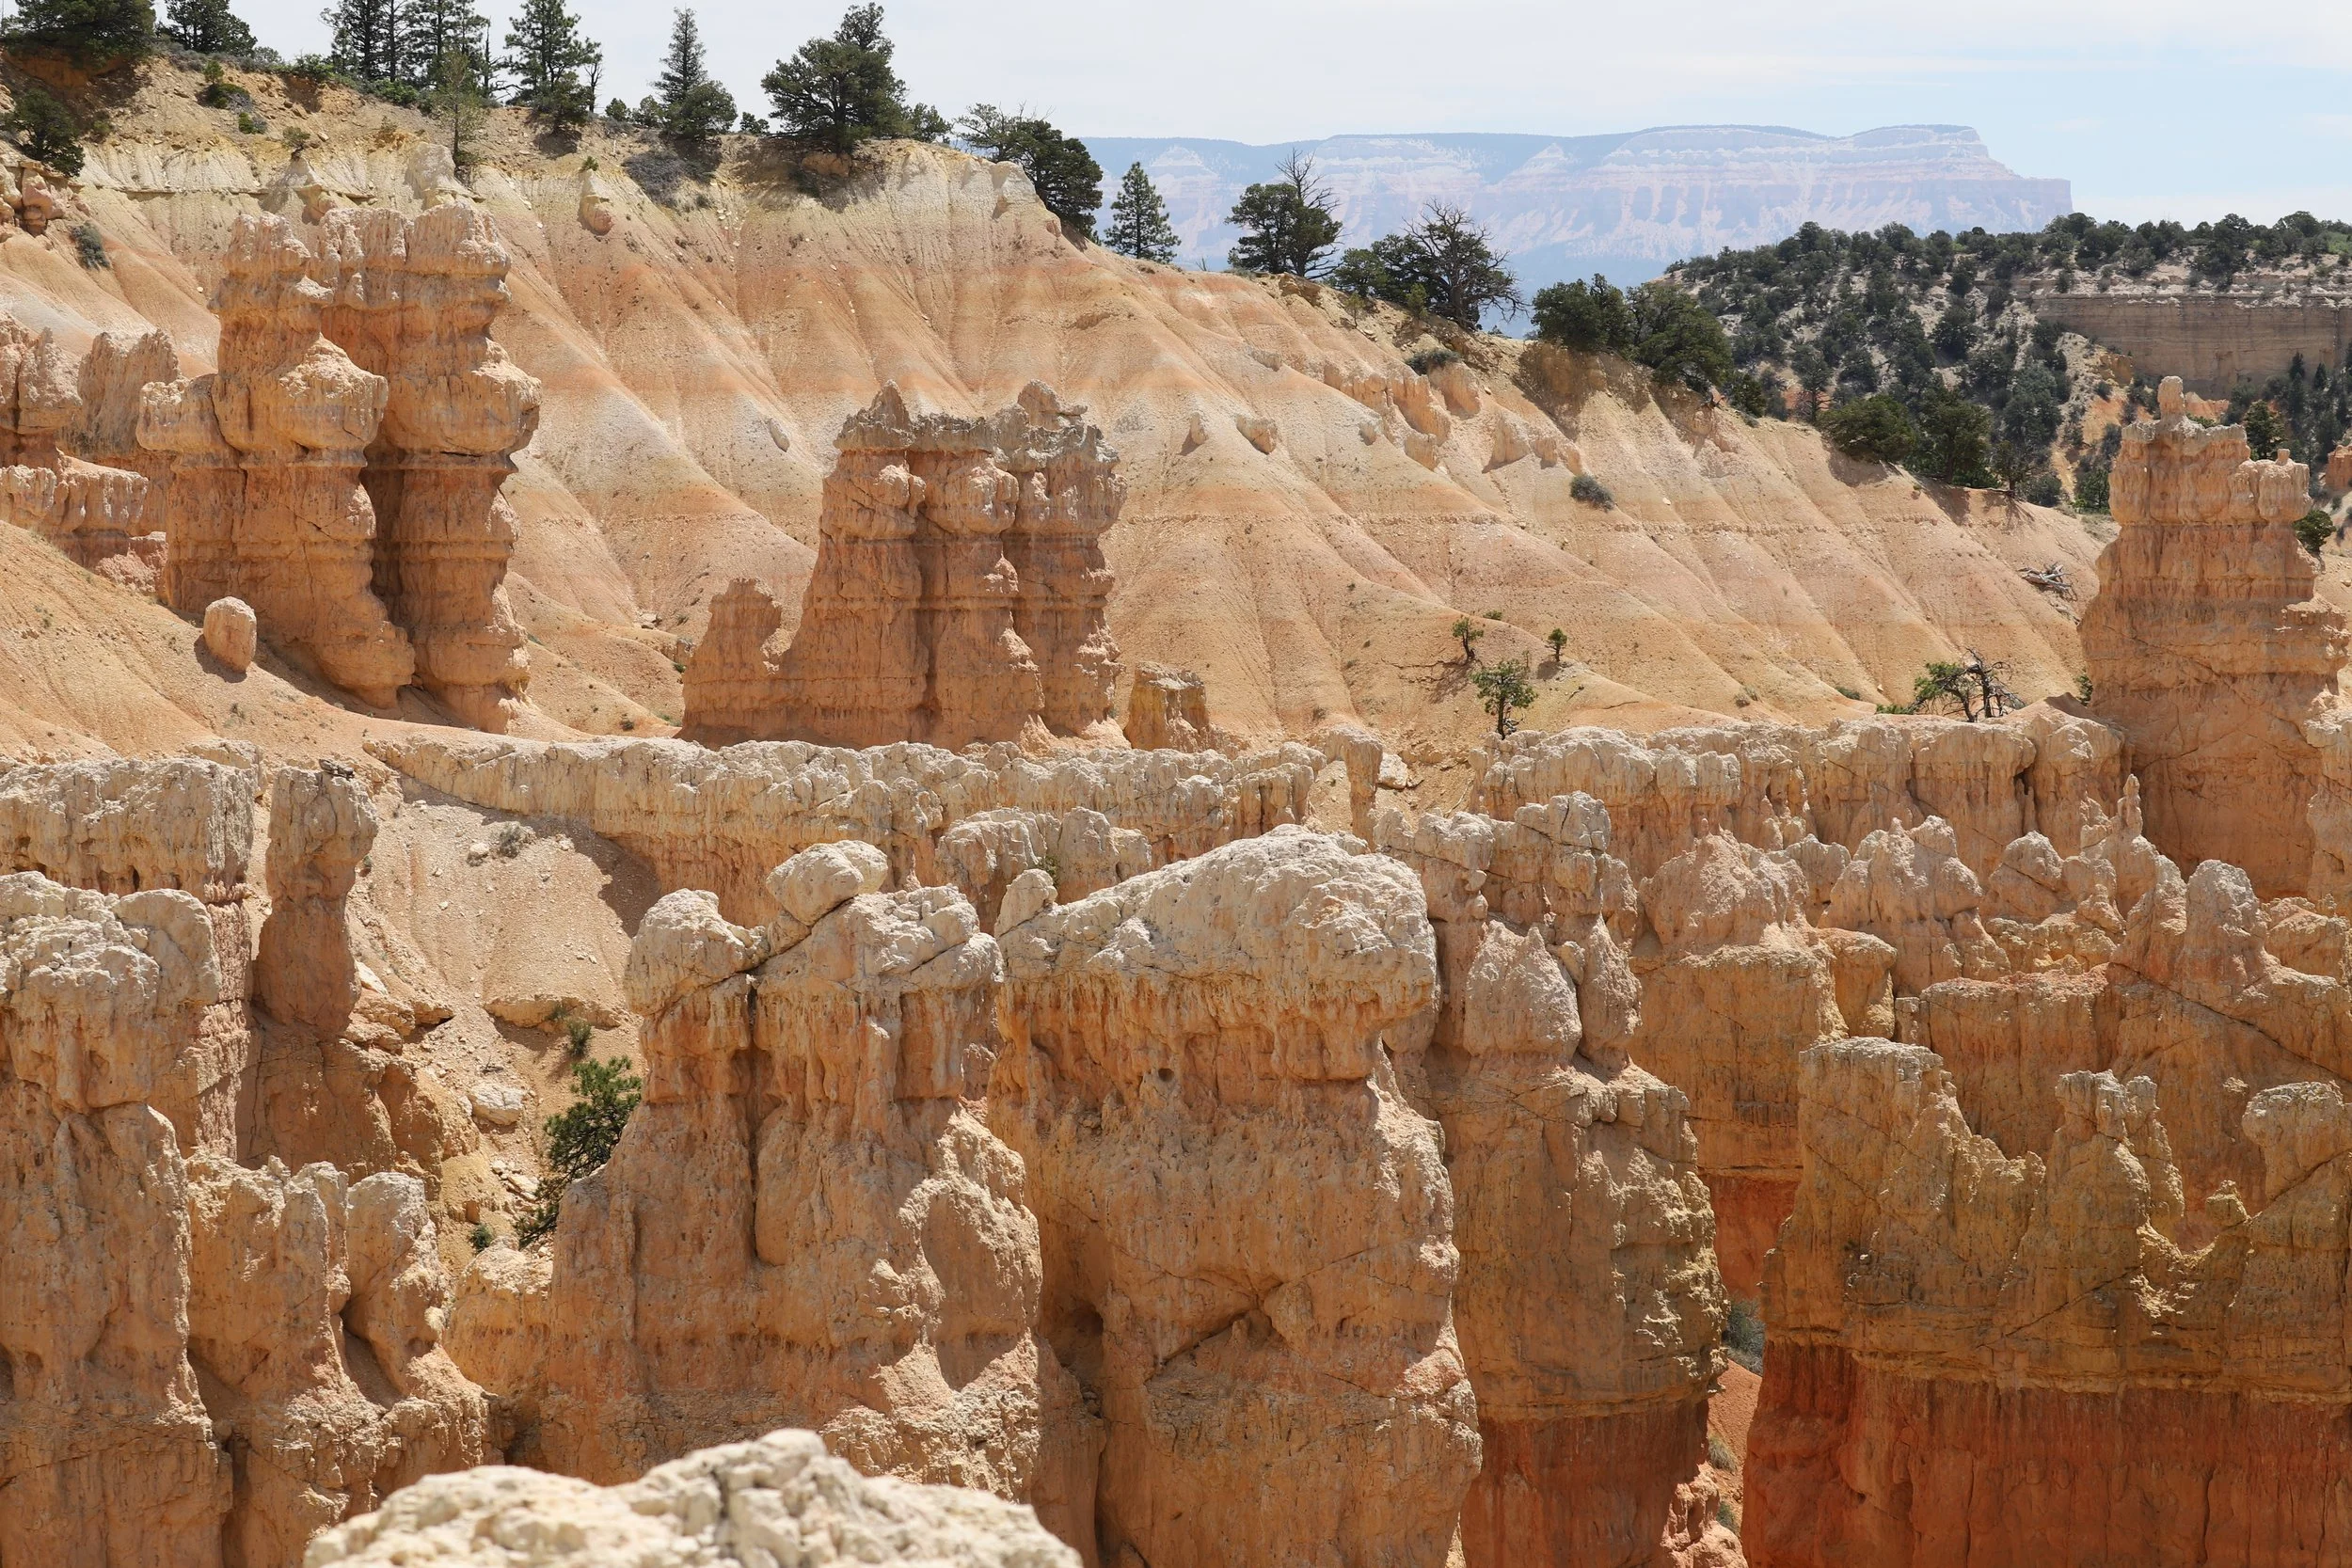
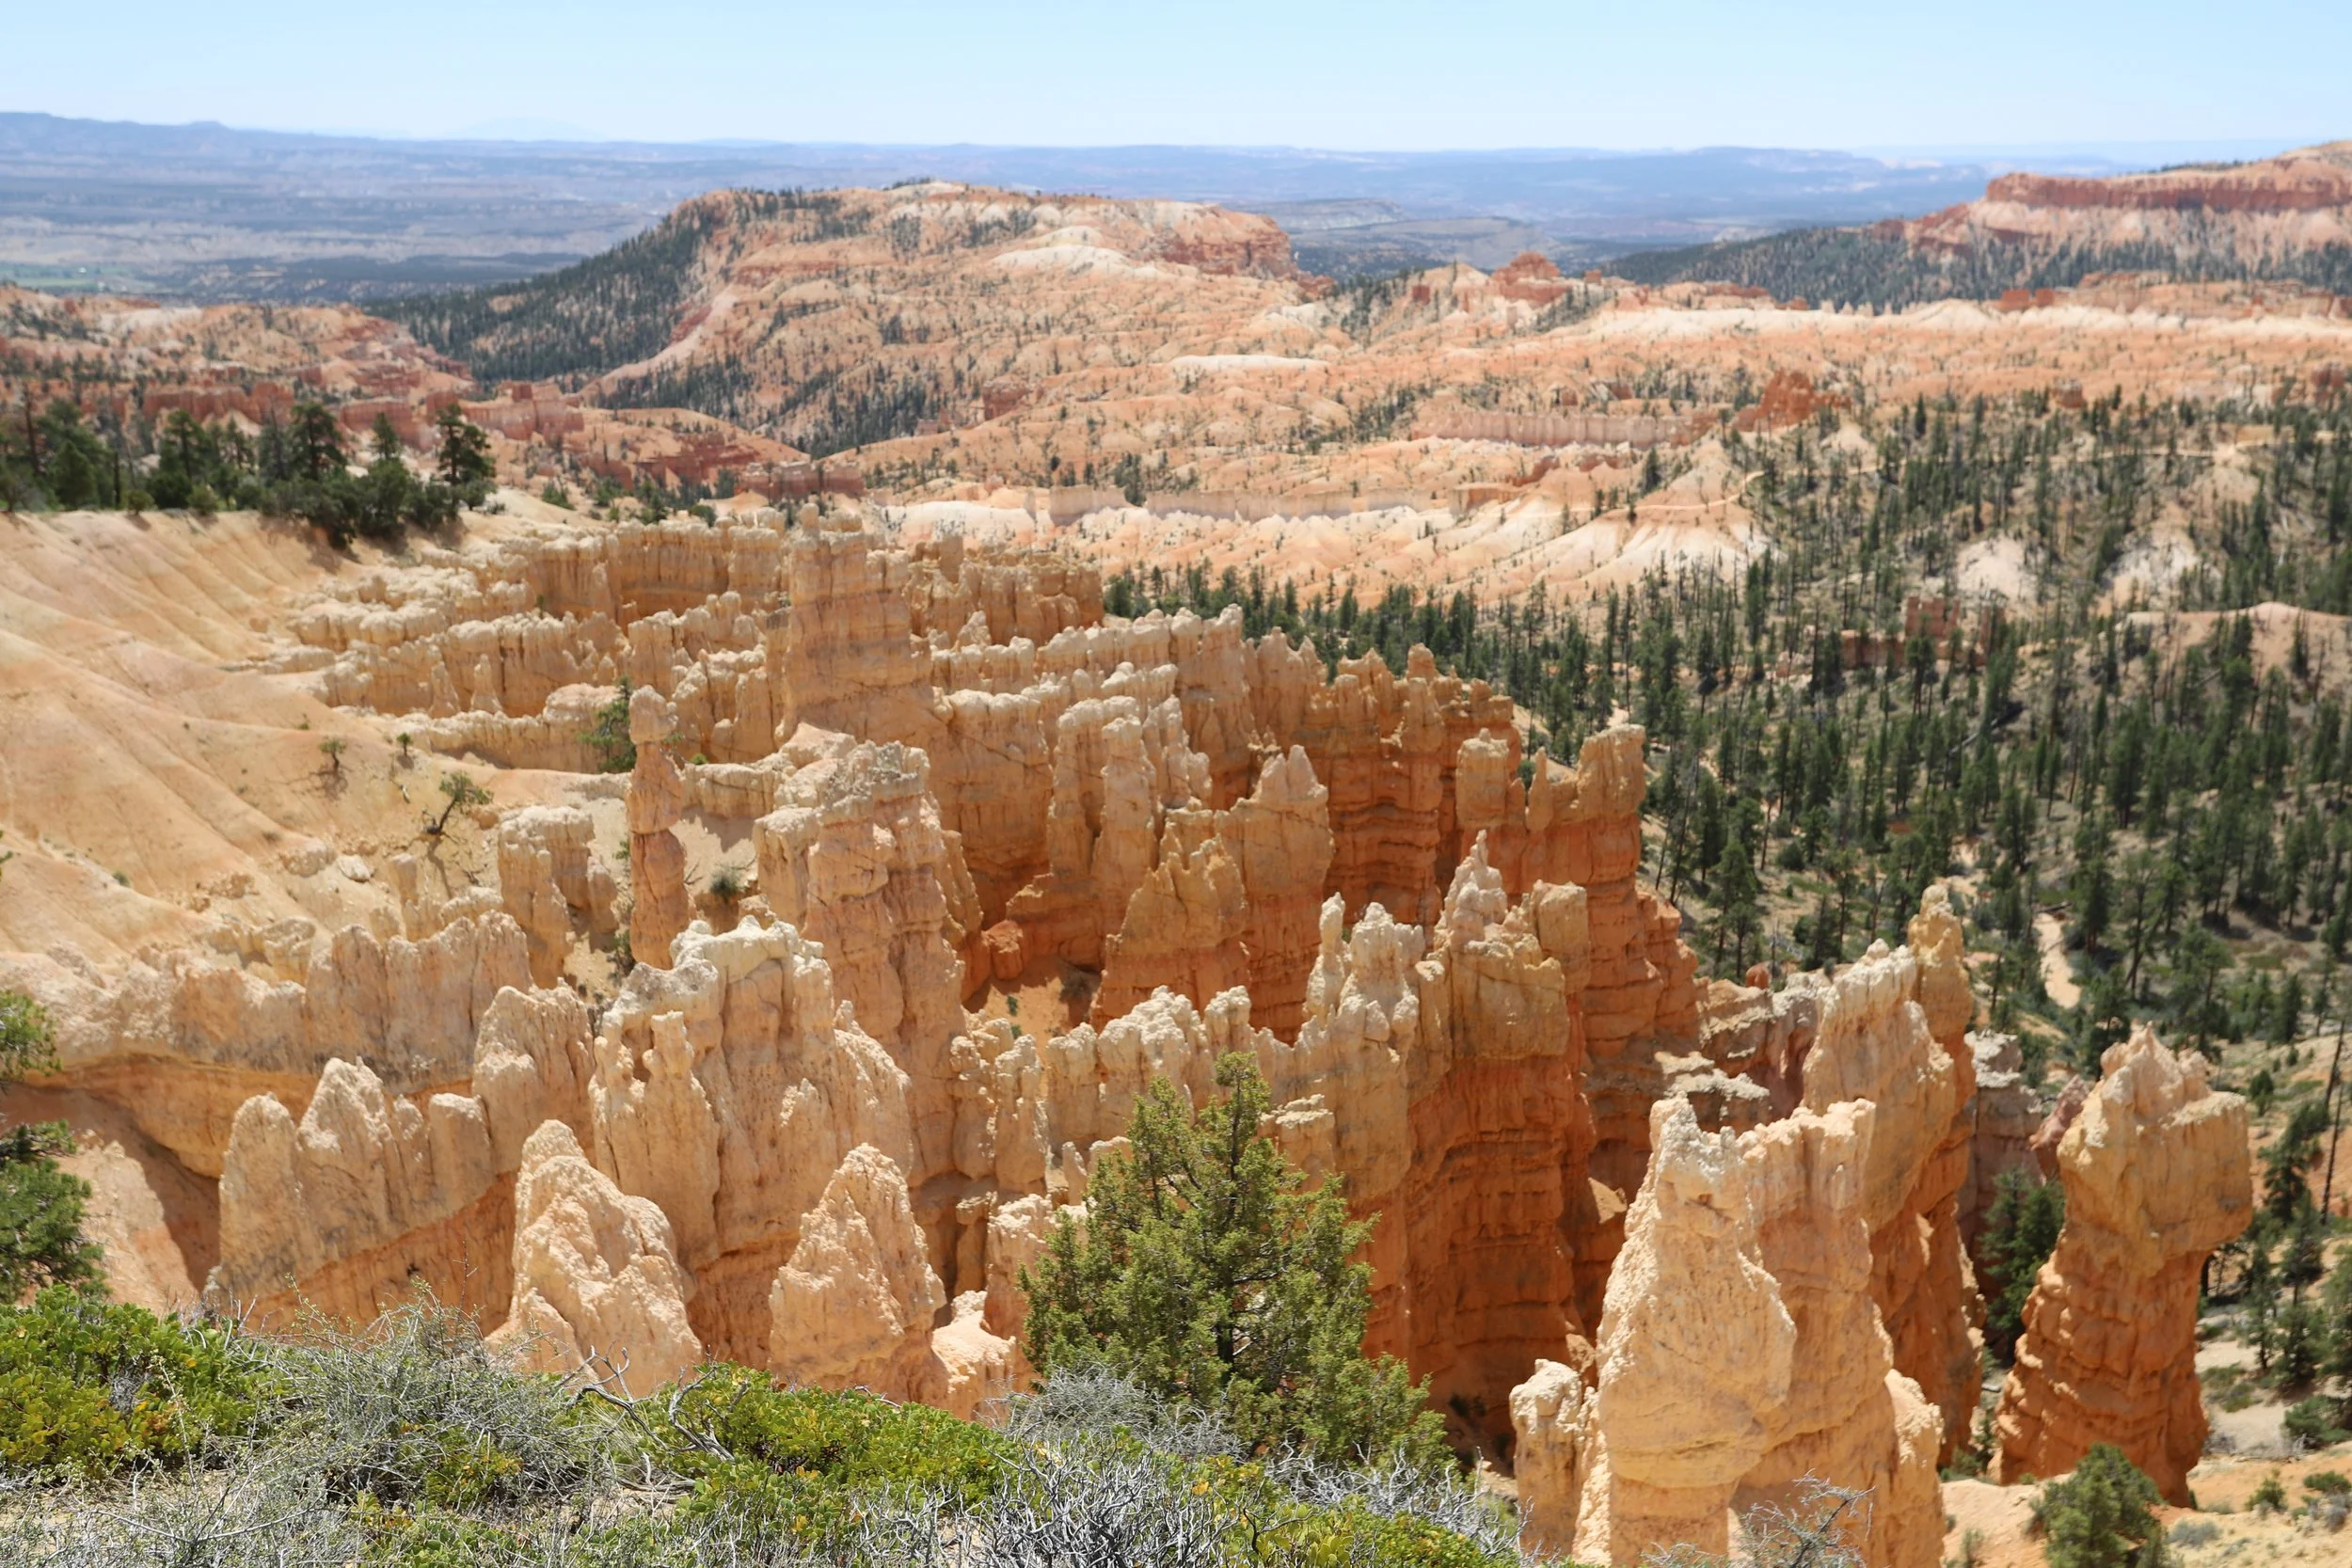
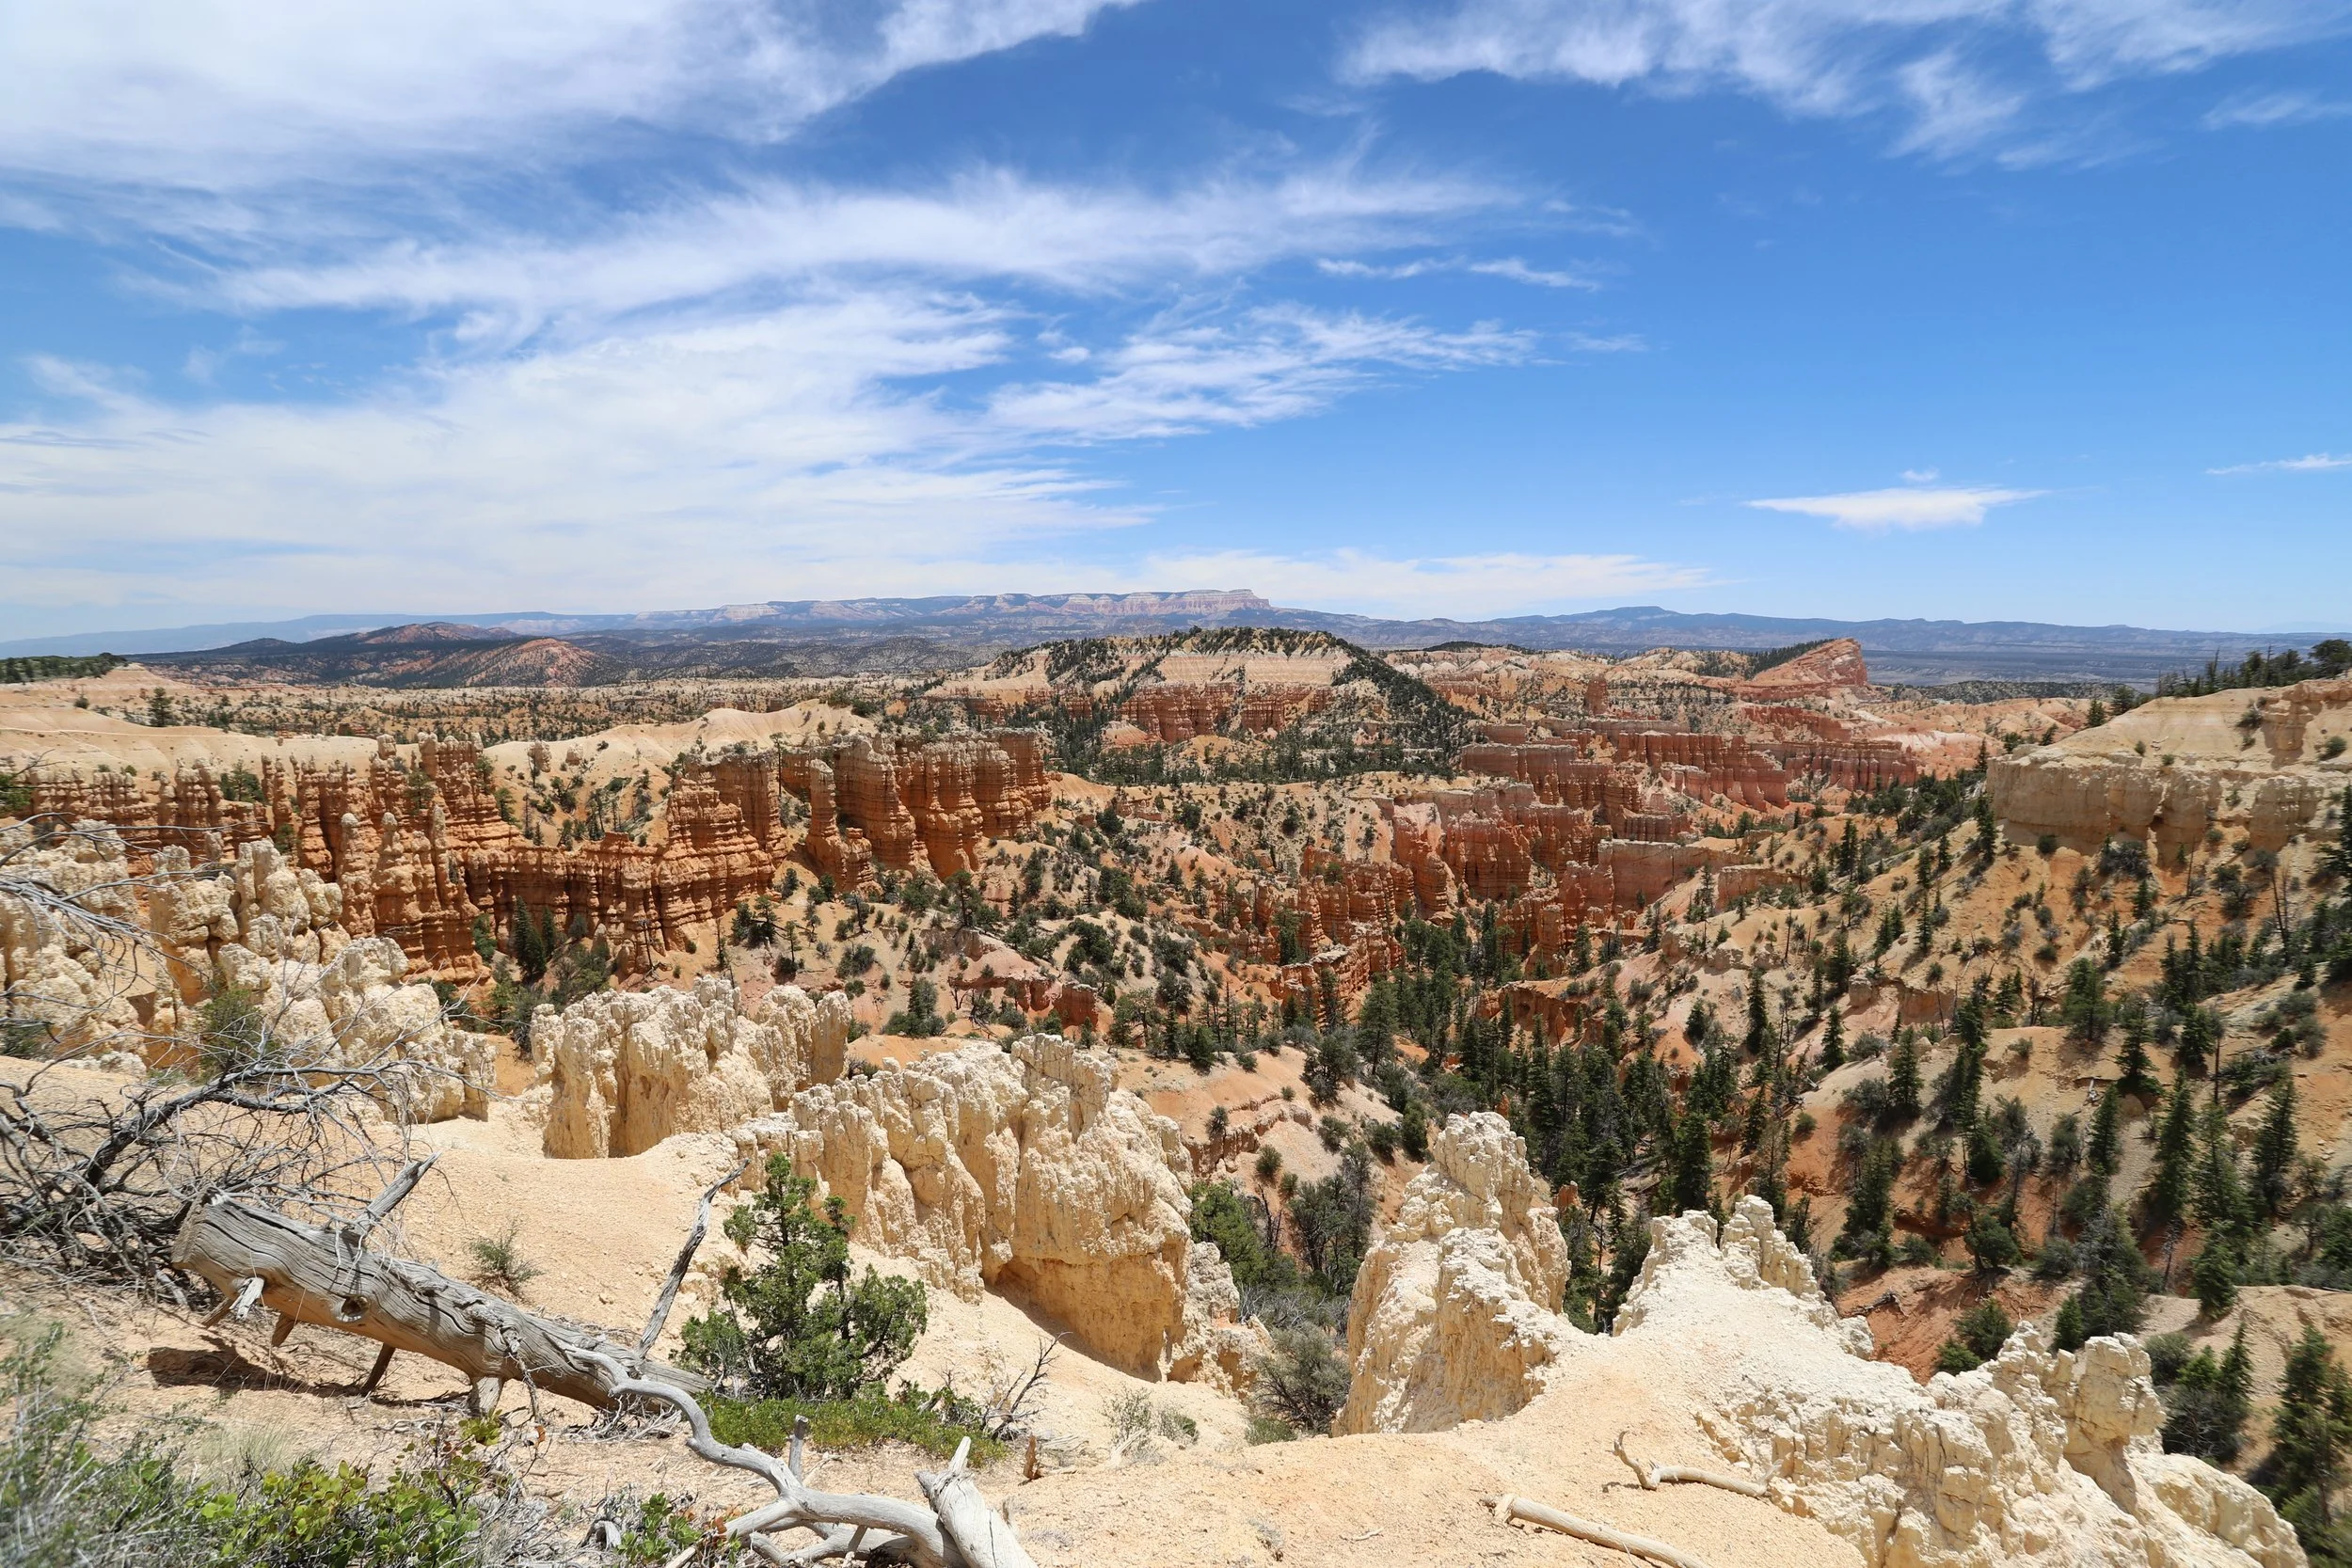
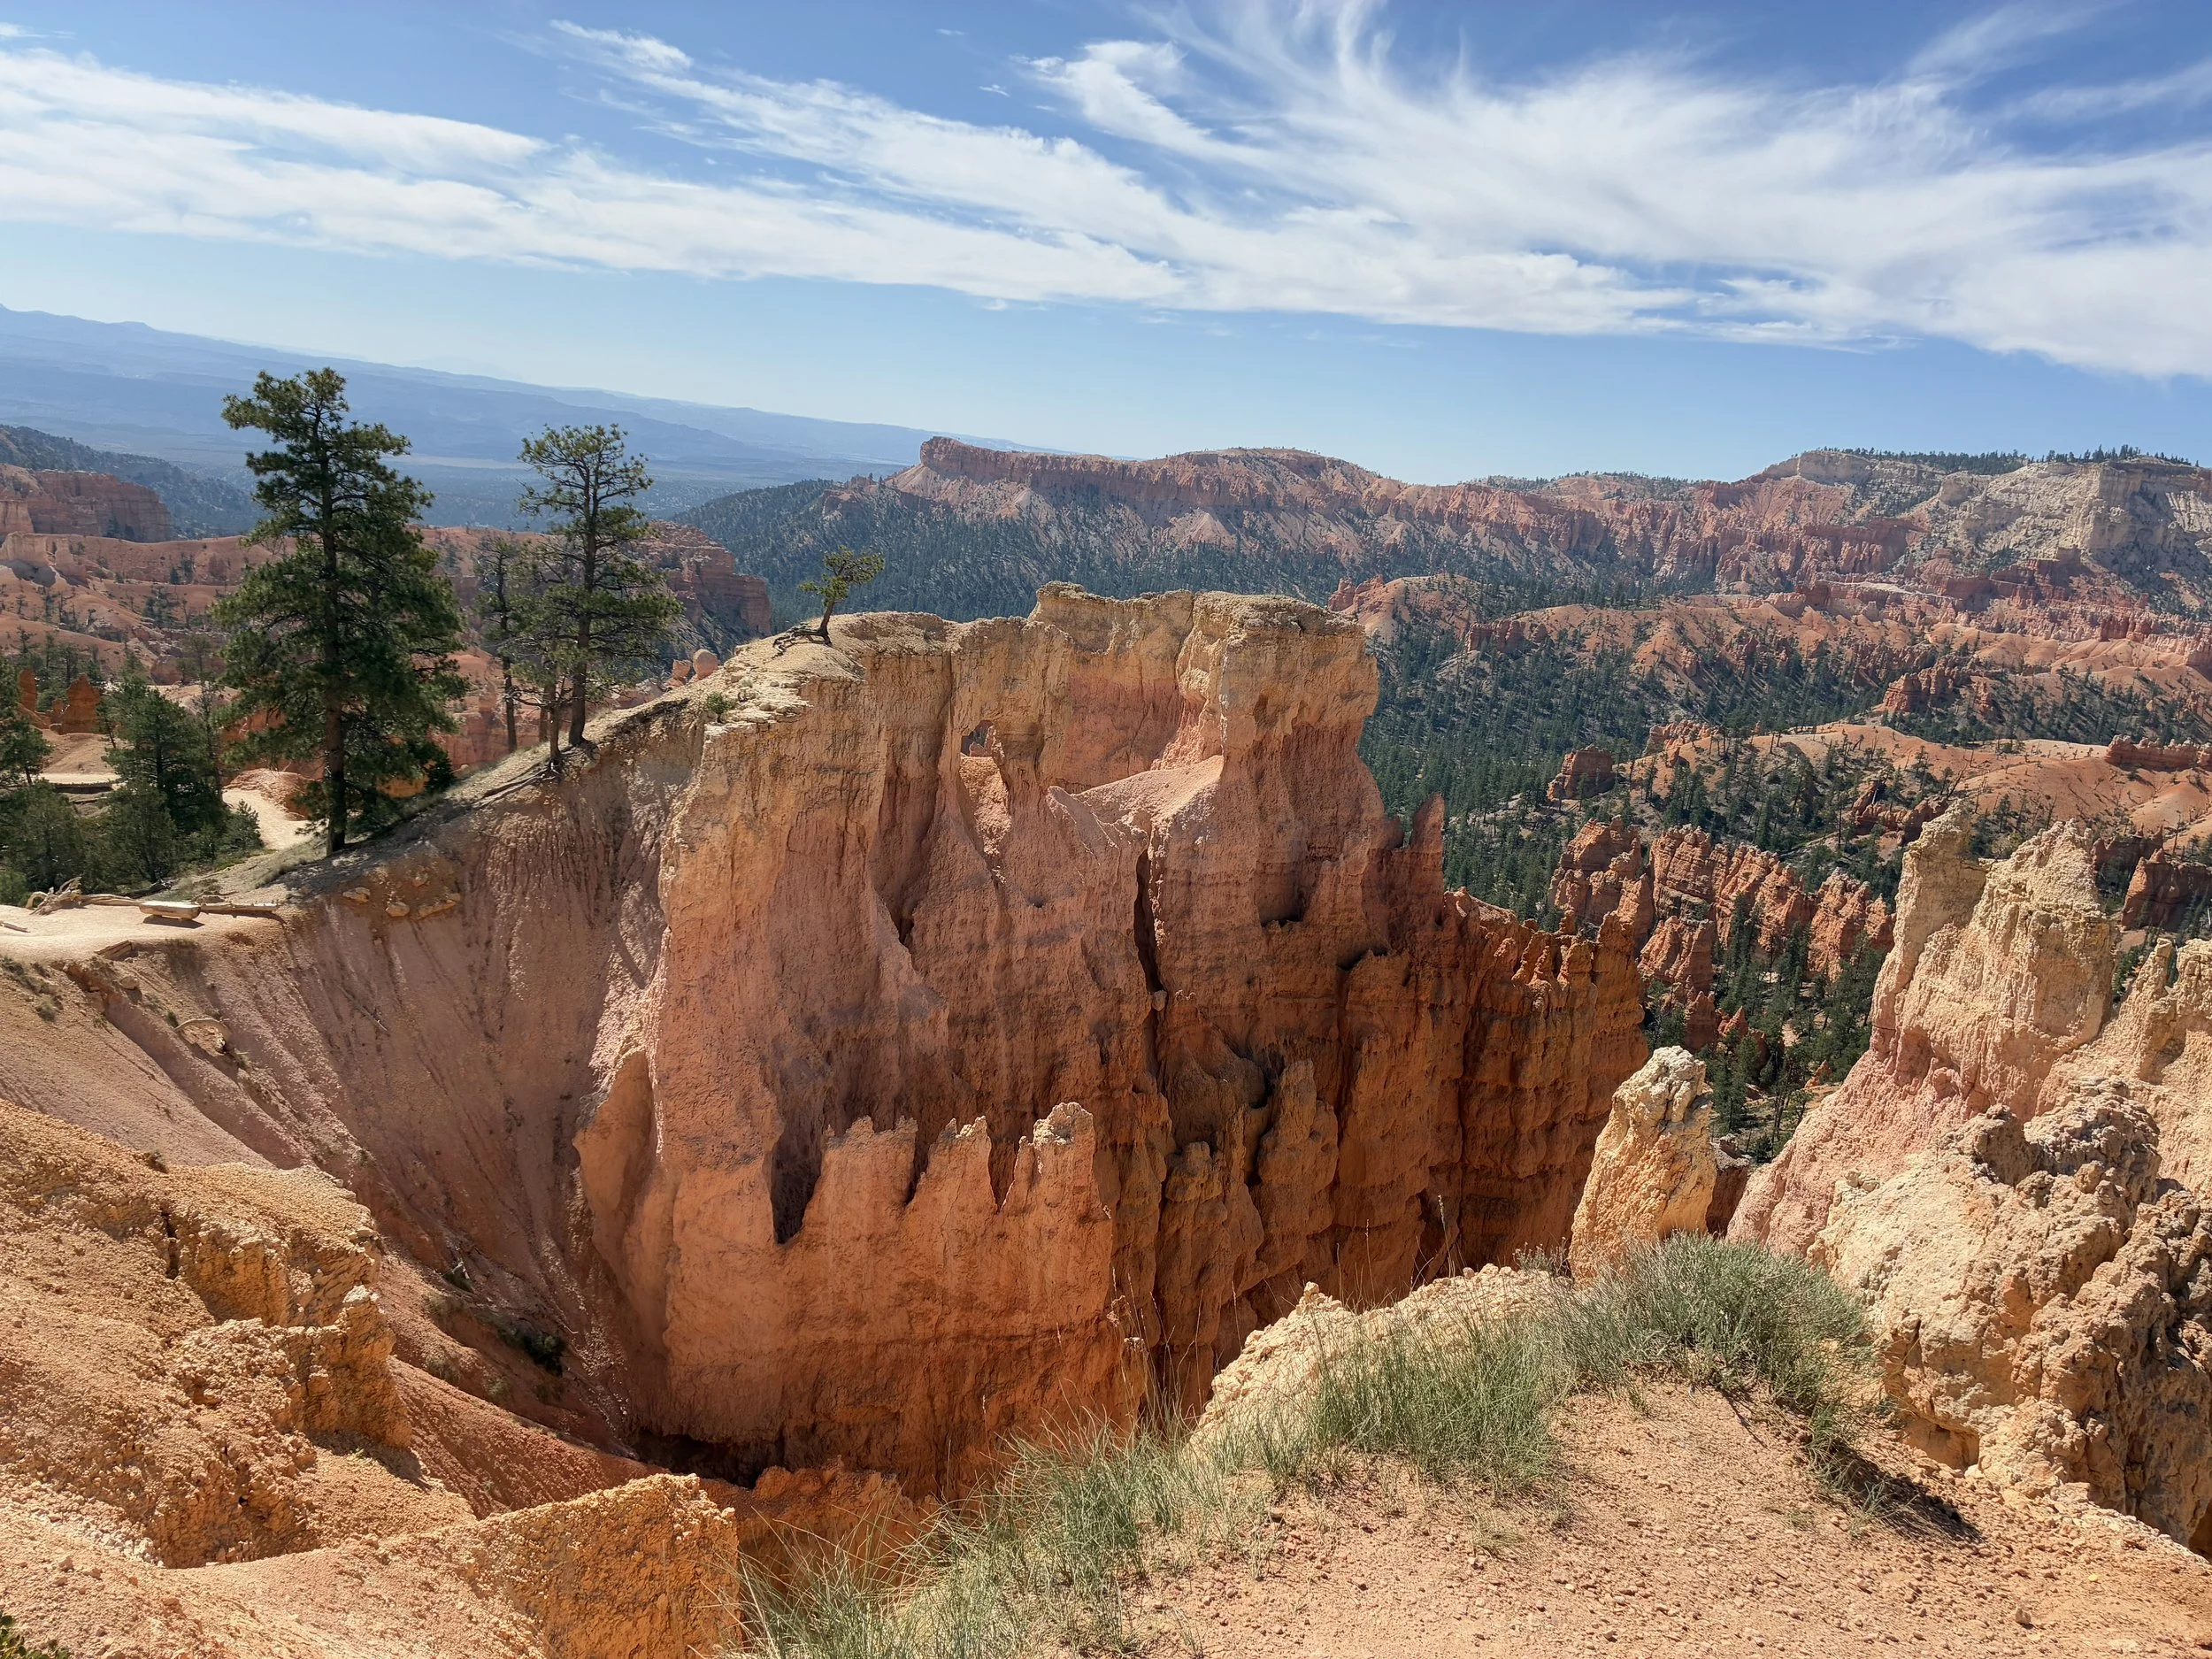
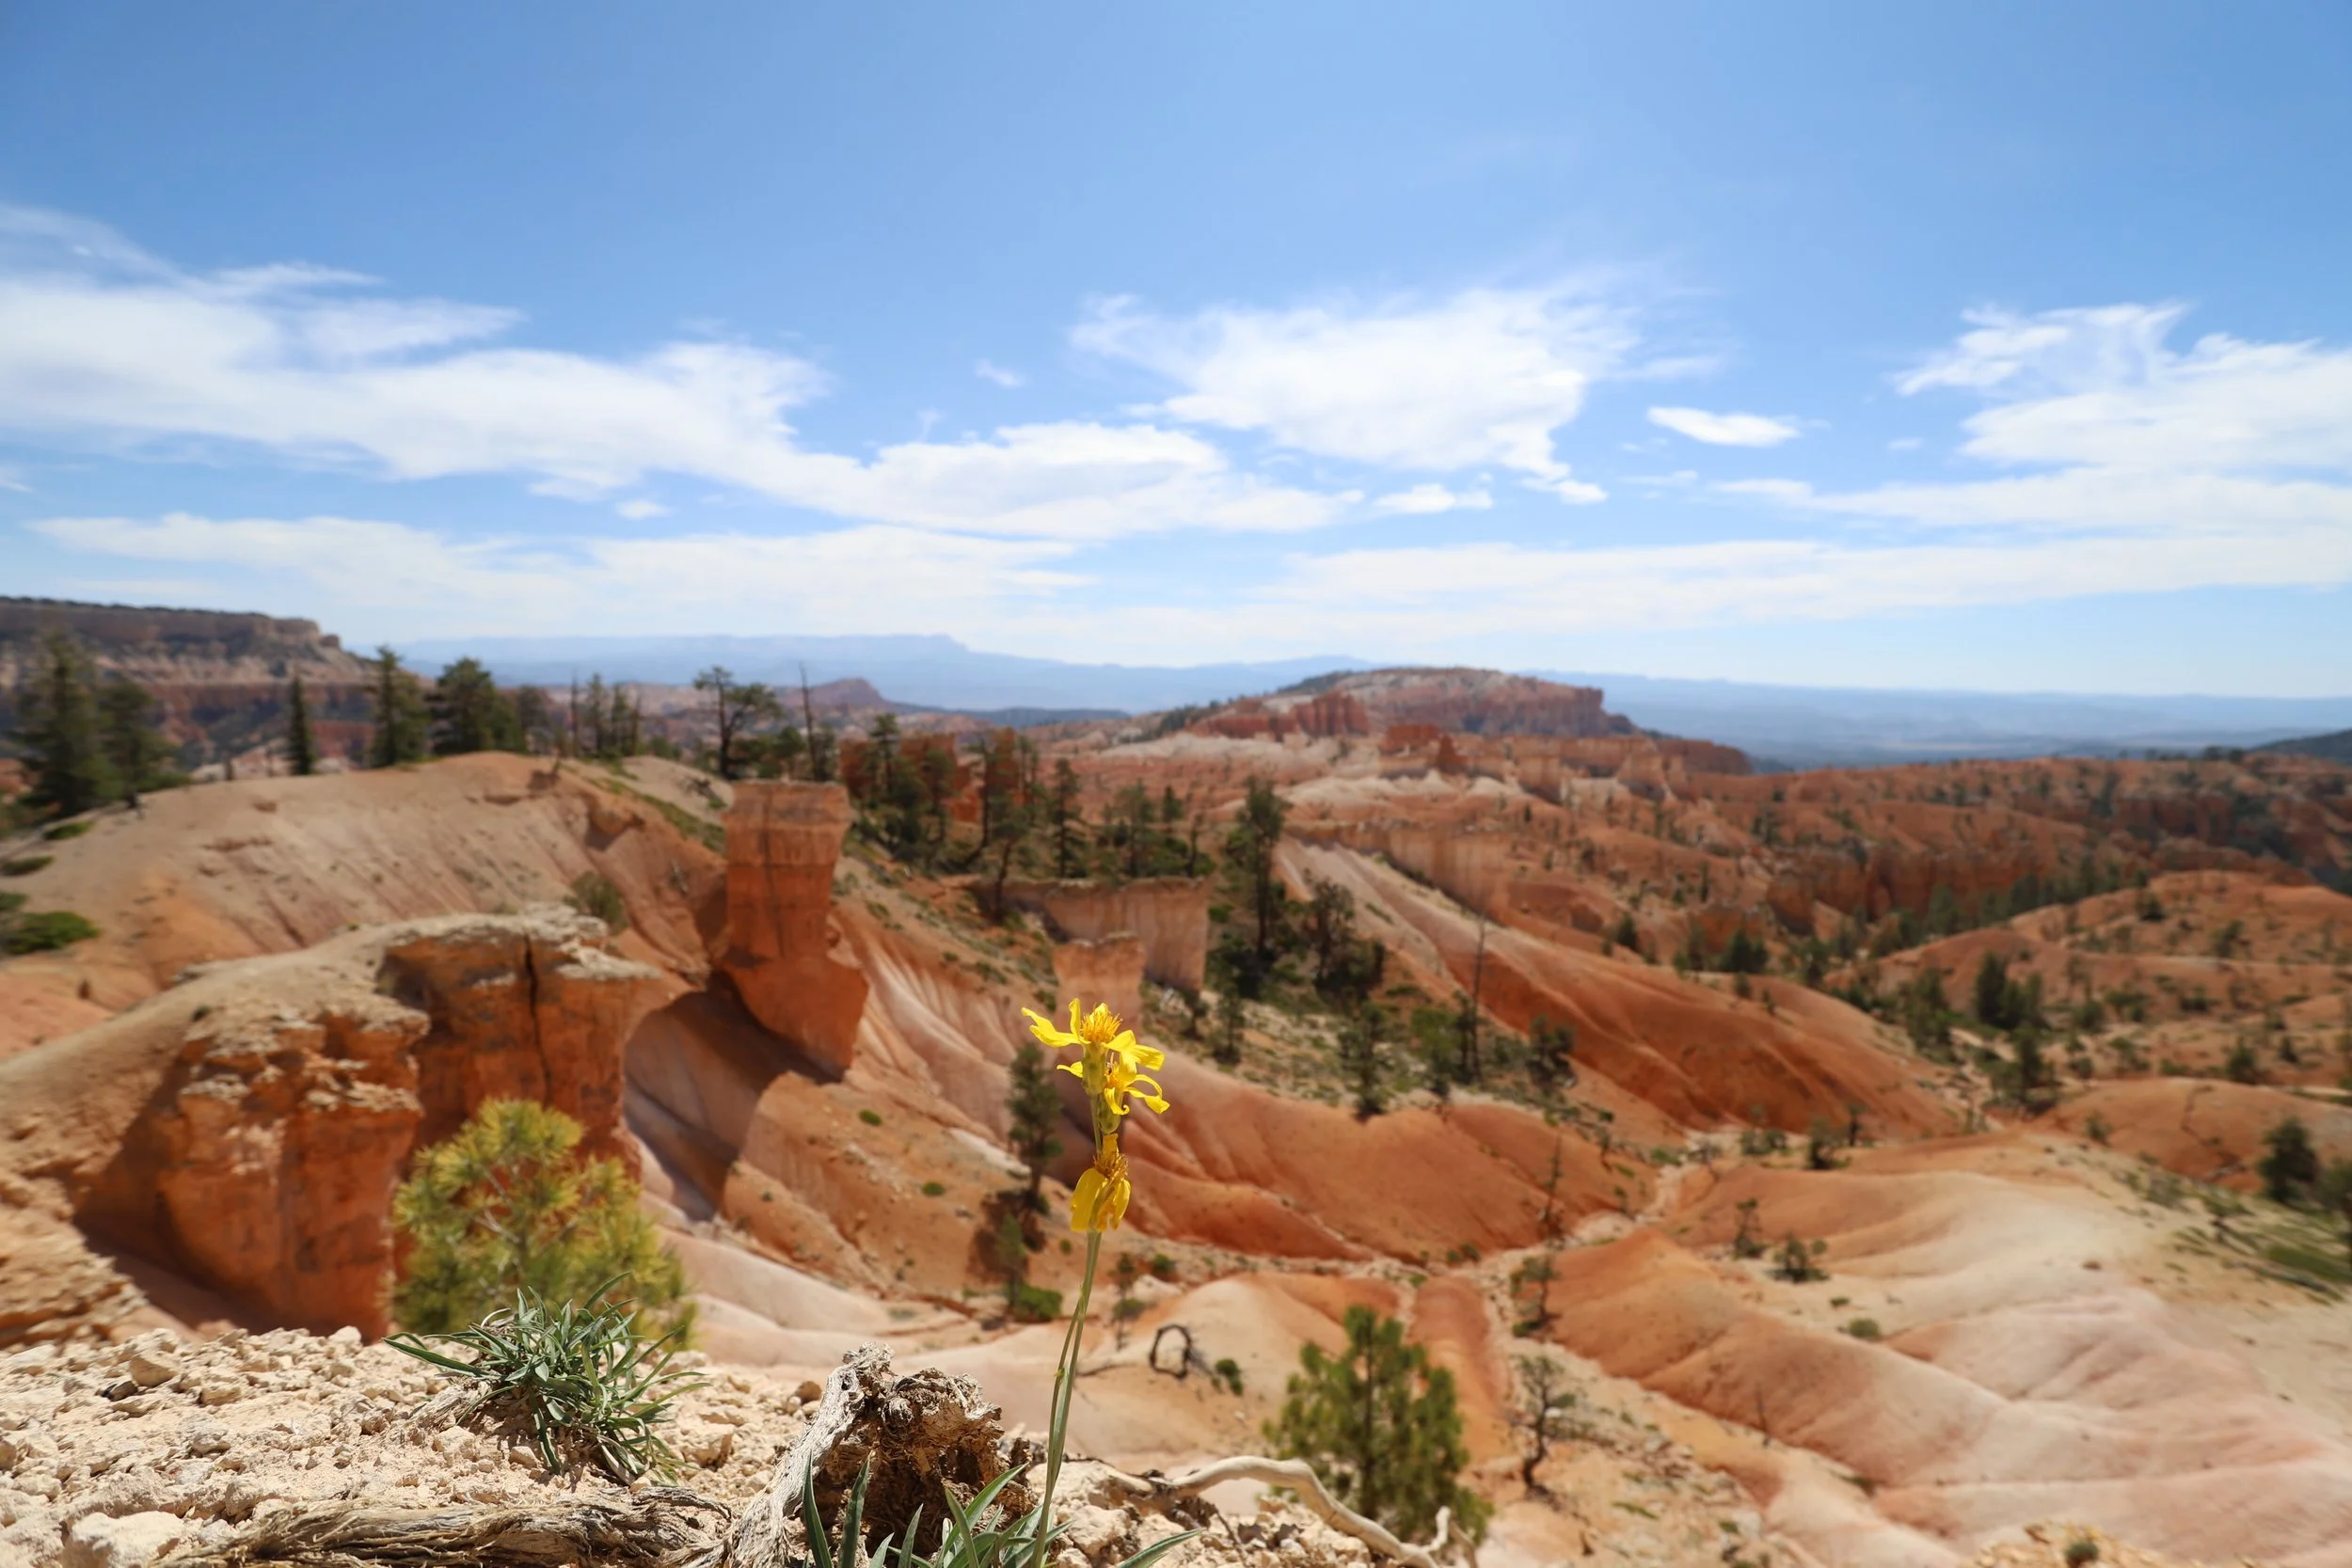
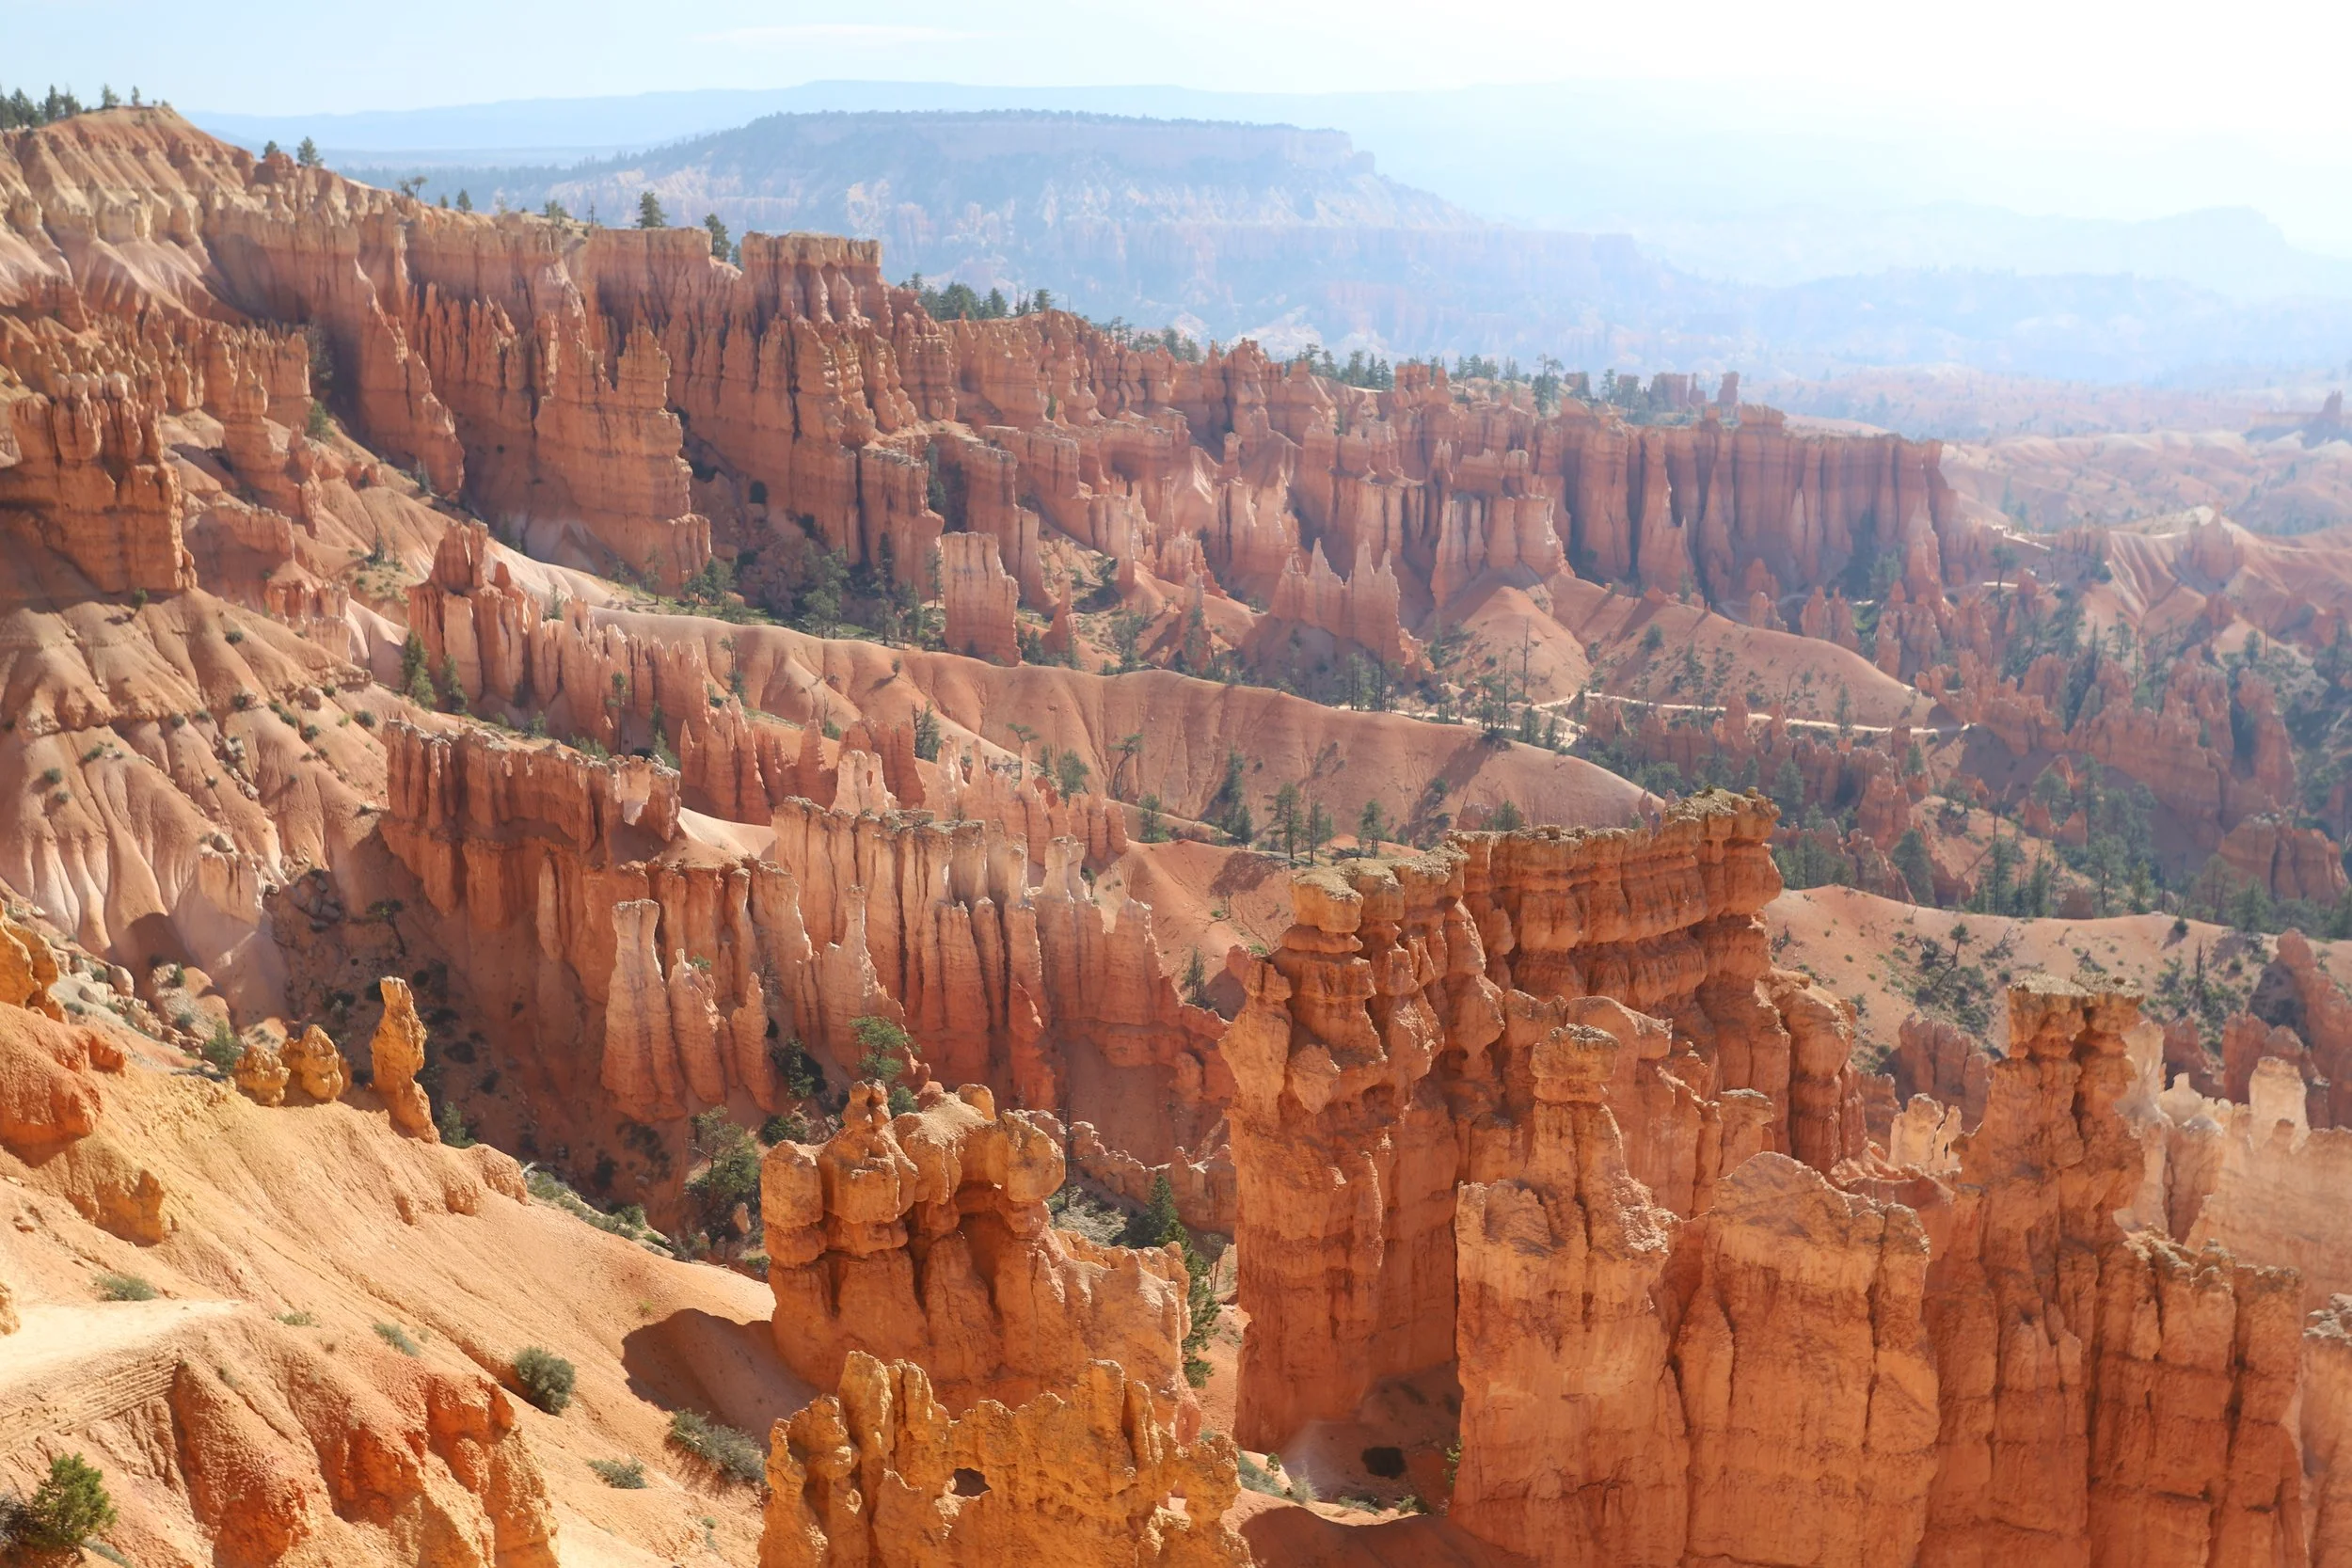
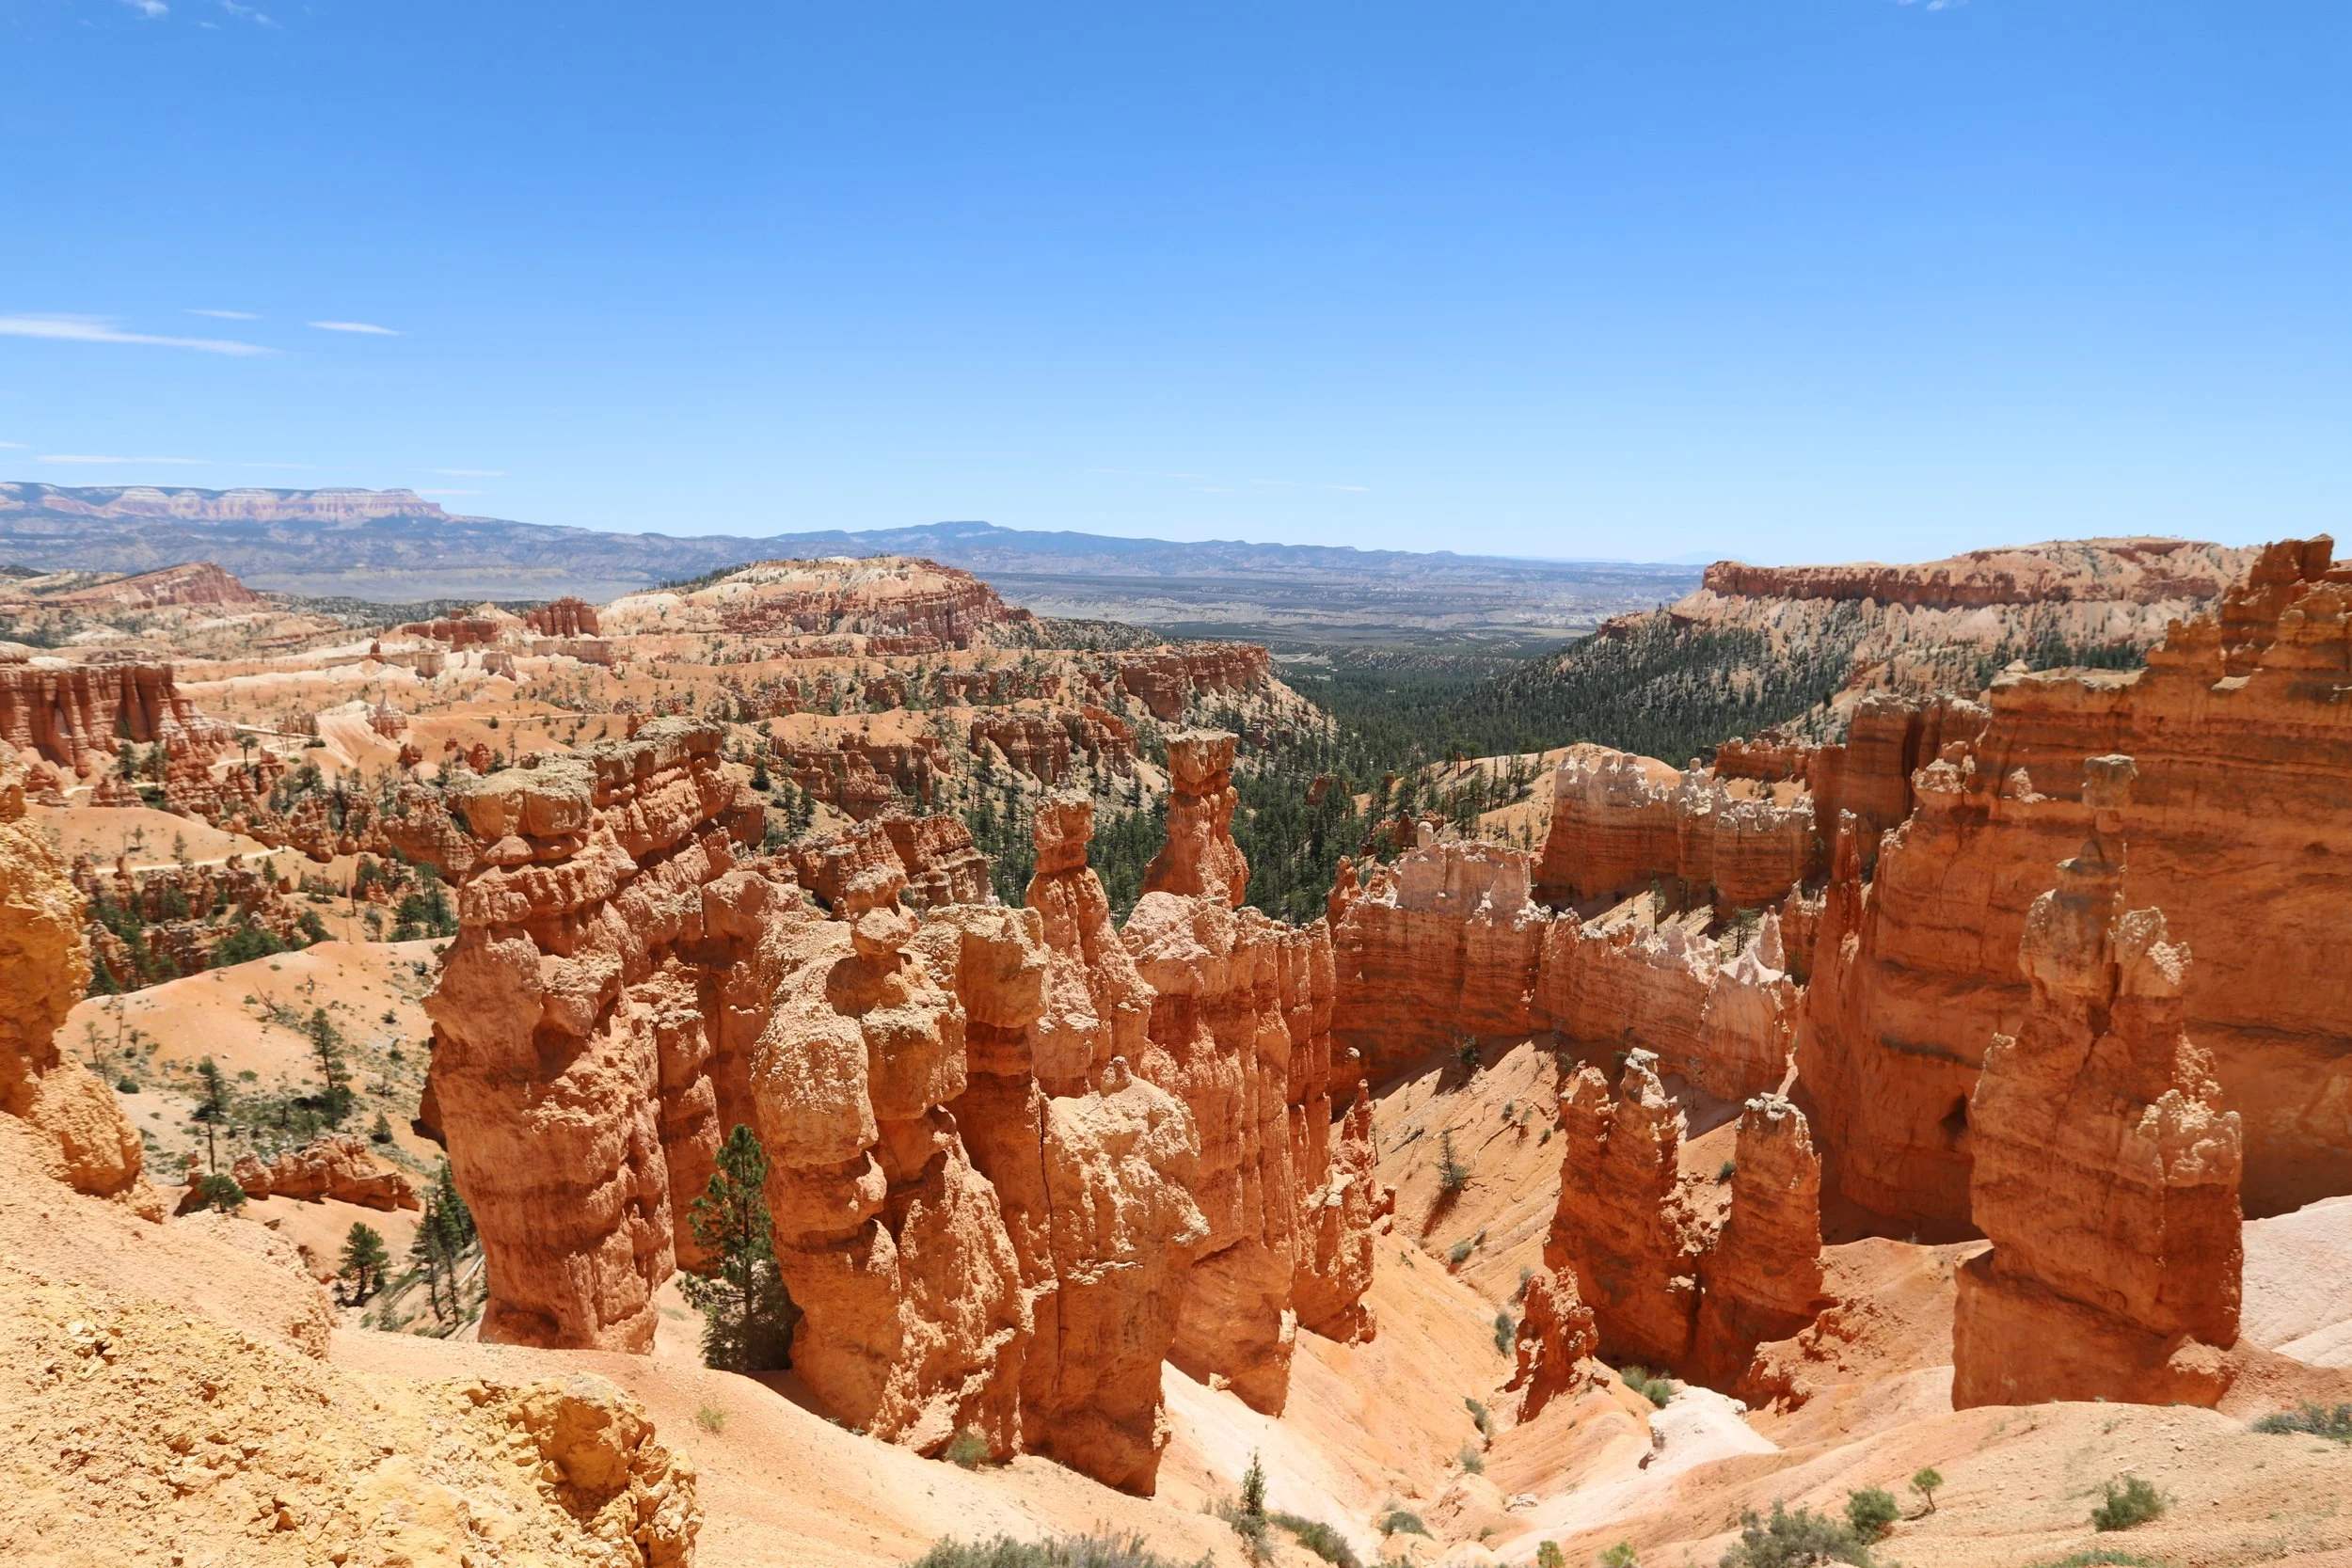
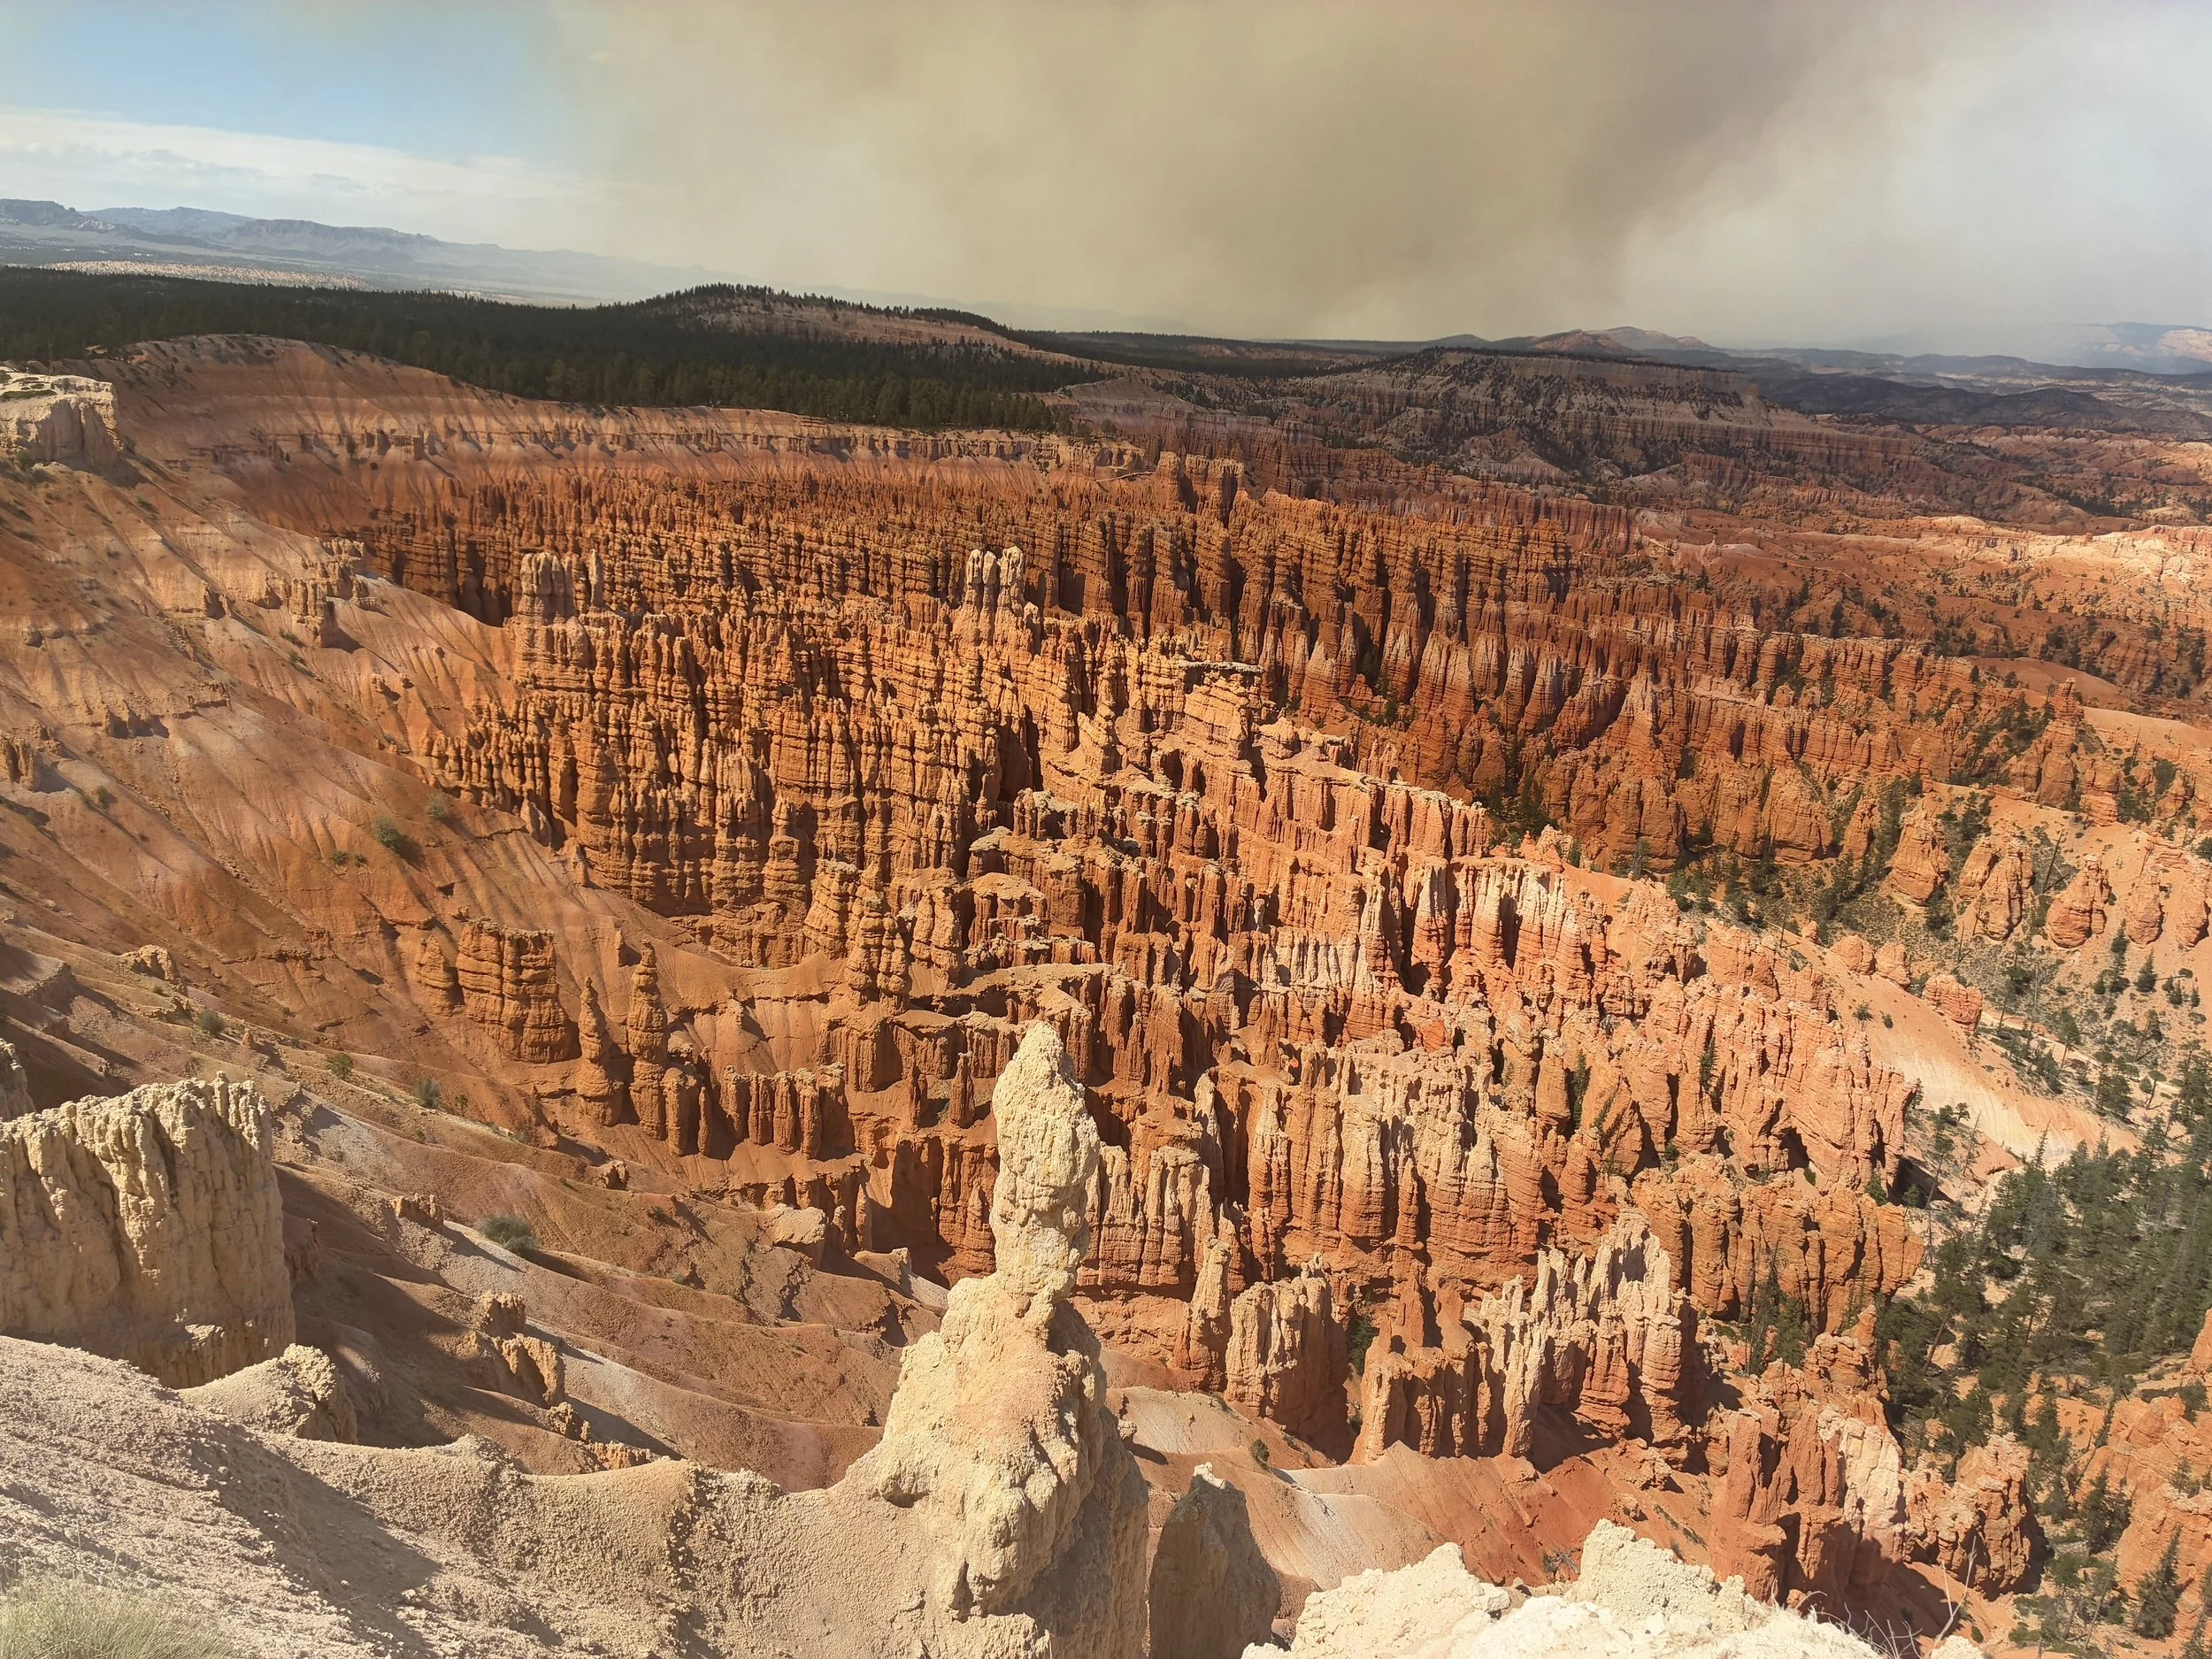
Bryce Canyon, Sunrise Point
Bryce Canyon National Park
Of the five National Parks in Utah, I think Bryce Canyon is the most extreme. The rim of the canyon is over 8000ft in elevation. As a result, Bryce Canyon, on average, receives more than 80 inches of snow each year. Anyone visiting the park October through April is likely to encounter snow, ice, and slippery trails that may require snowshoes or spikes to hike safely. Additionally, most people are simply going to notice being at 8000ft, which has a lower percentage of oxygen than where most of us live. This can result in hikers feeling out of breath and becoming tired more quickly. All trails start at the rim, so the easy, downhill section is first, and the uphill section comes at the end – hiking canyons requires some mental toughness to tackle the hard section at the end. Add in some steep trails and numerous switchbacks, and hiking at Bryce Canyon is no easy feat.
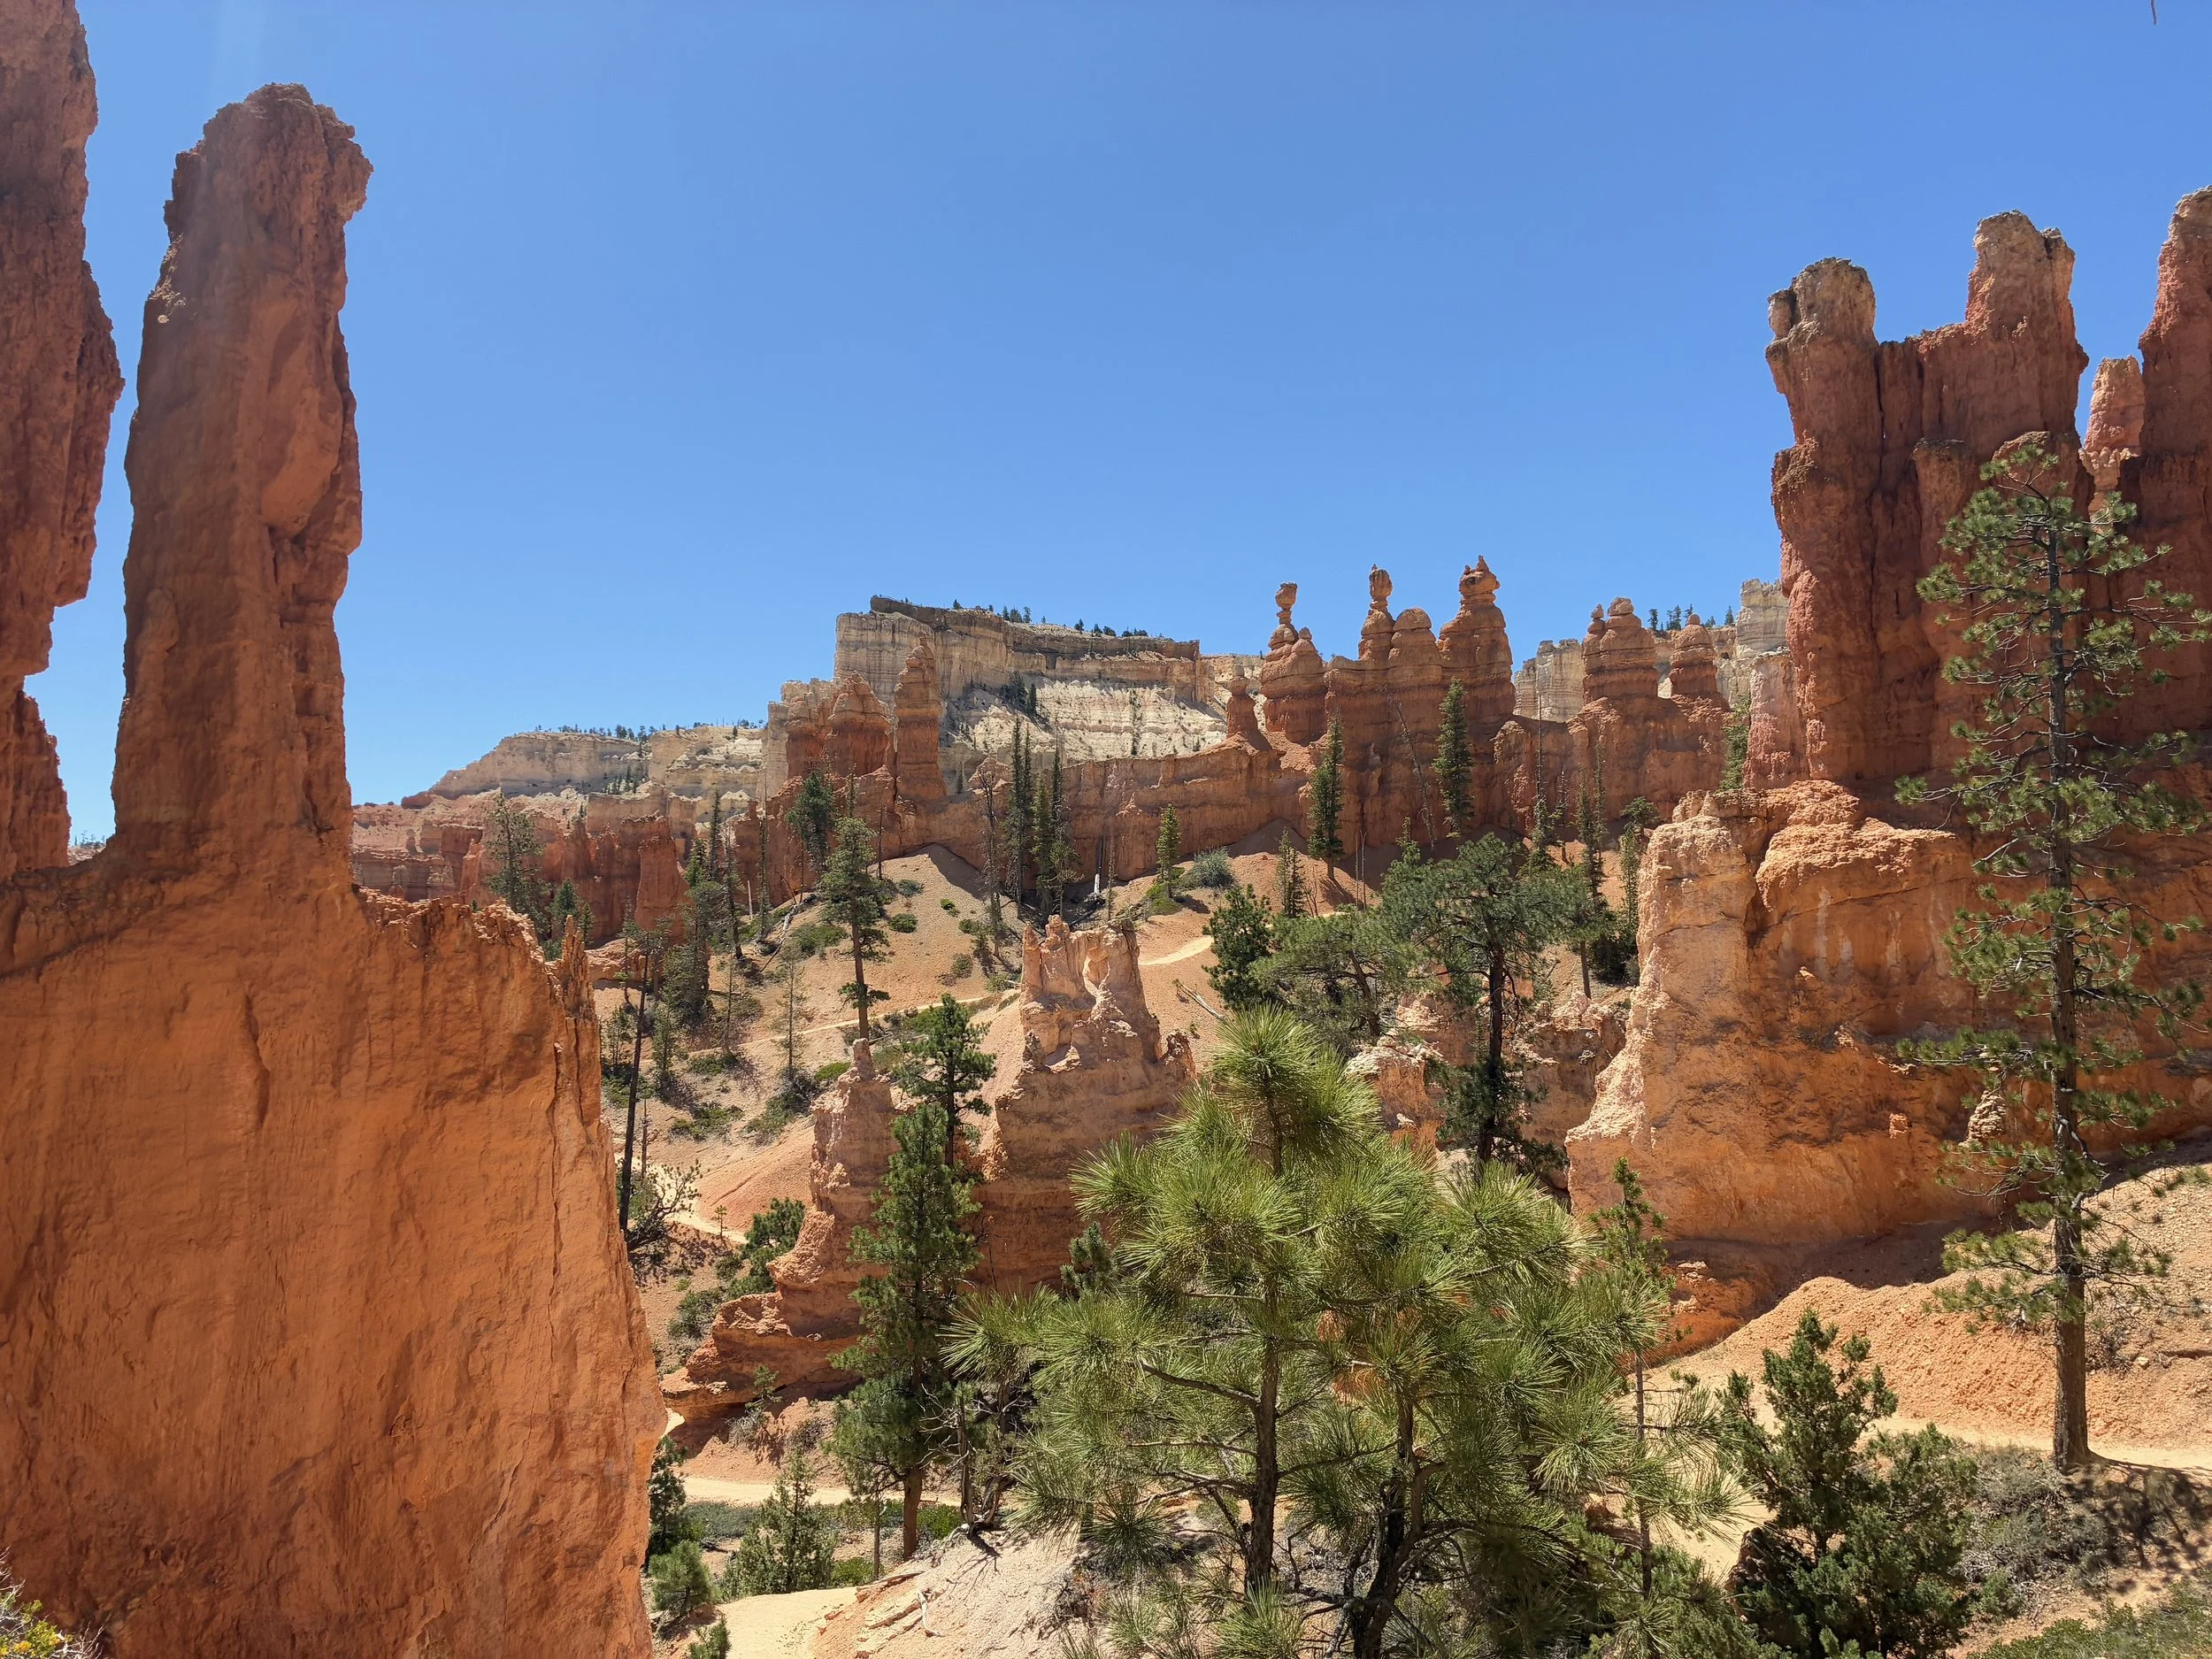
The extremeness of Bryce Canyon is going to result in one of two very different types of experiences at the National Park. The first is a “drive through” sort of vacation. This trip can be phenomenal at any point in the year with little preparation, and a day is enough time. Spend some time at the Visitor Center, and take the shuttle to Sunrise, Sunset, and Bryce Points. Walk along the rim trail in either direction. Take a personal vehicle all the way out to Rainbow Point and enjoy an easy walk along Bristlecone Loop Trail. Stop at Natural Bridge and Fairyland Point on the way out of the park. To dip a toe below the rim, try an out-and-back for a short distance along Queen’s Garden. For someone that wants a harder hike that doesn’t require an entire day investment, follow the Navajo Loop going down the Wall Street Trail. With the hoodoo’s brilliant shades of orange and red and intricate shapes, Bryce Canyon is a place that visitors can expect to fall in love with simply by just peering in from the rim.
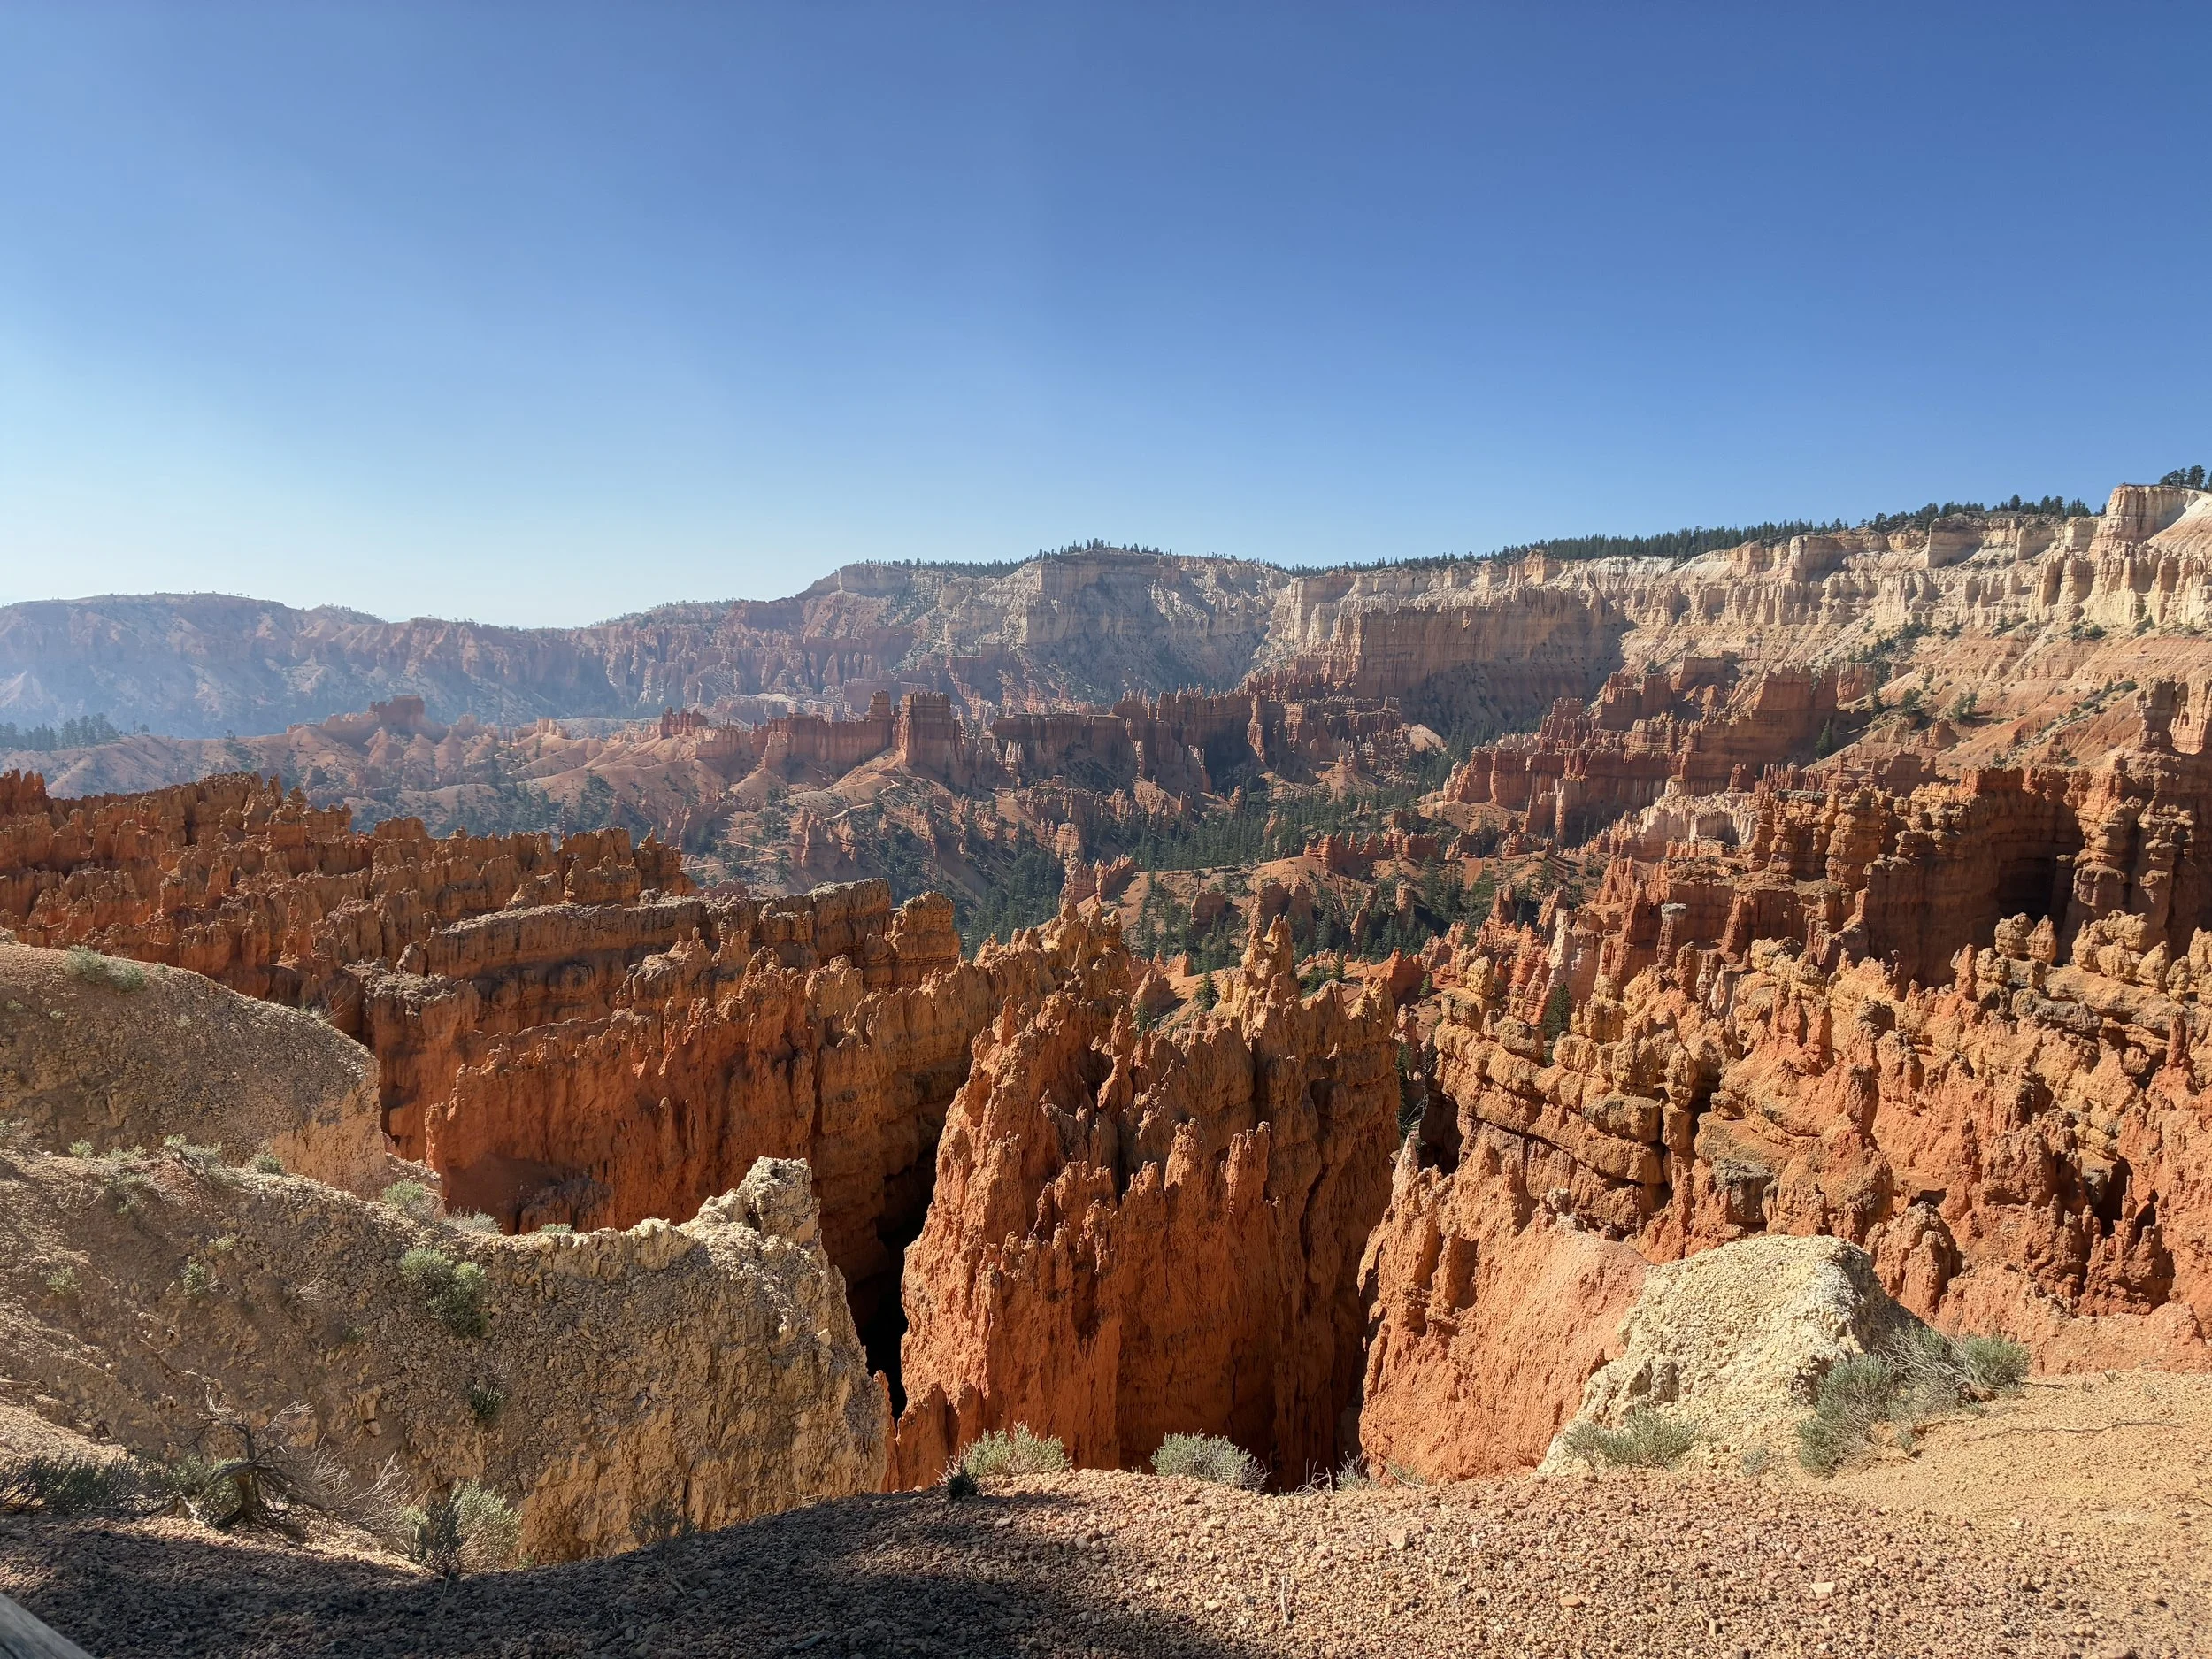
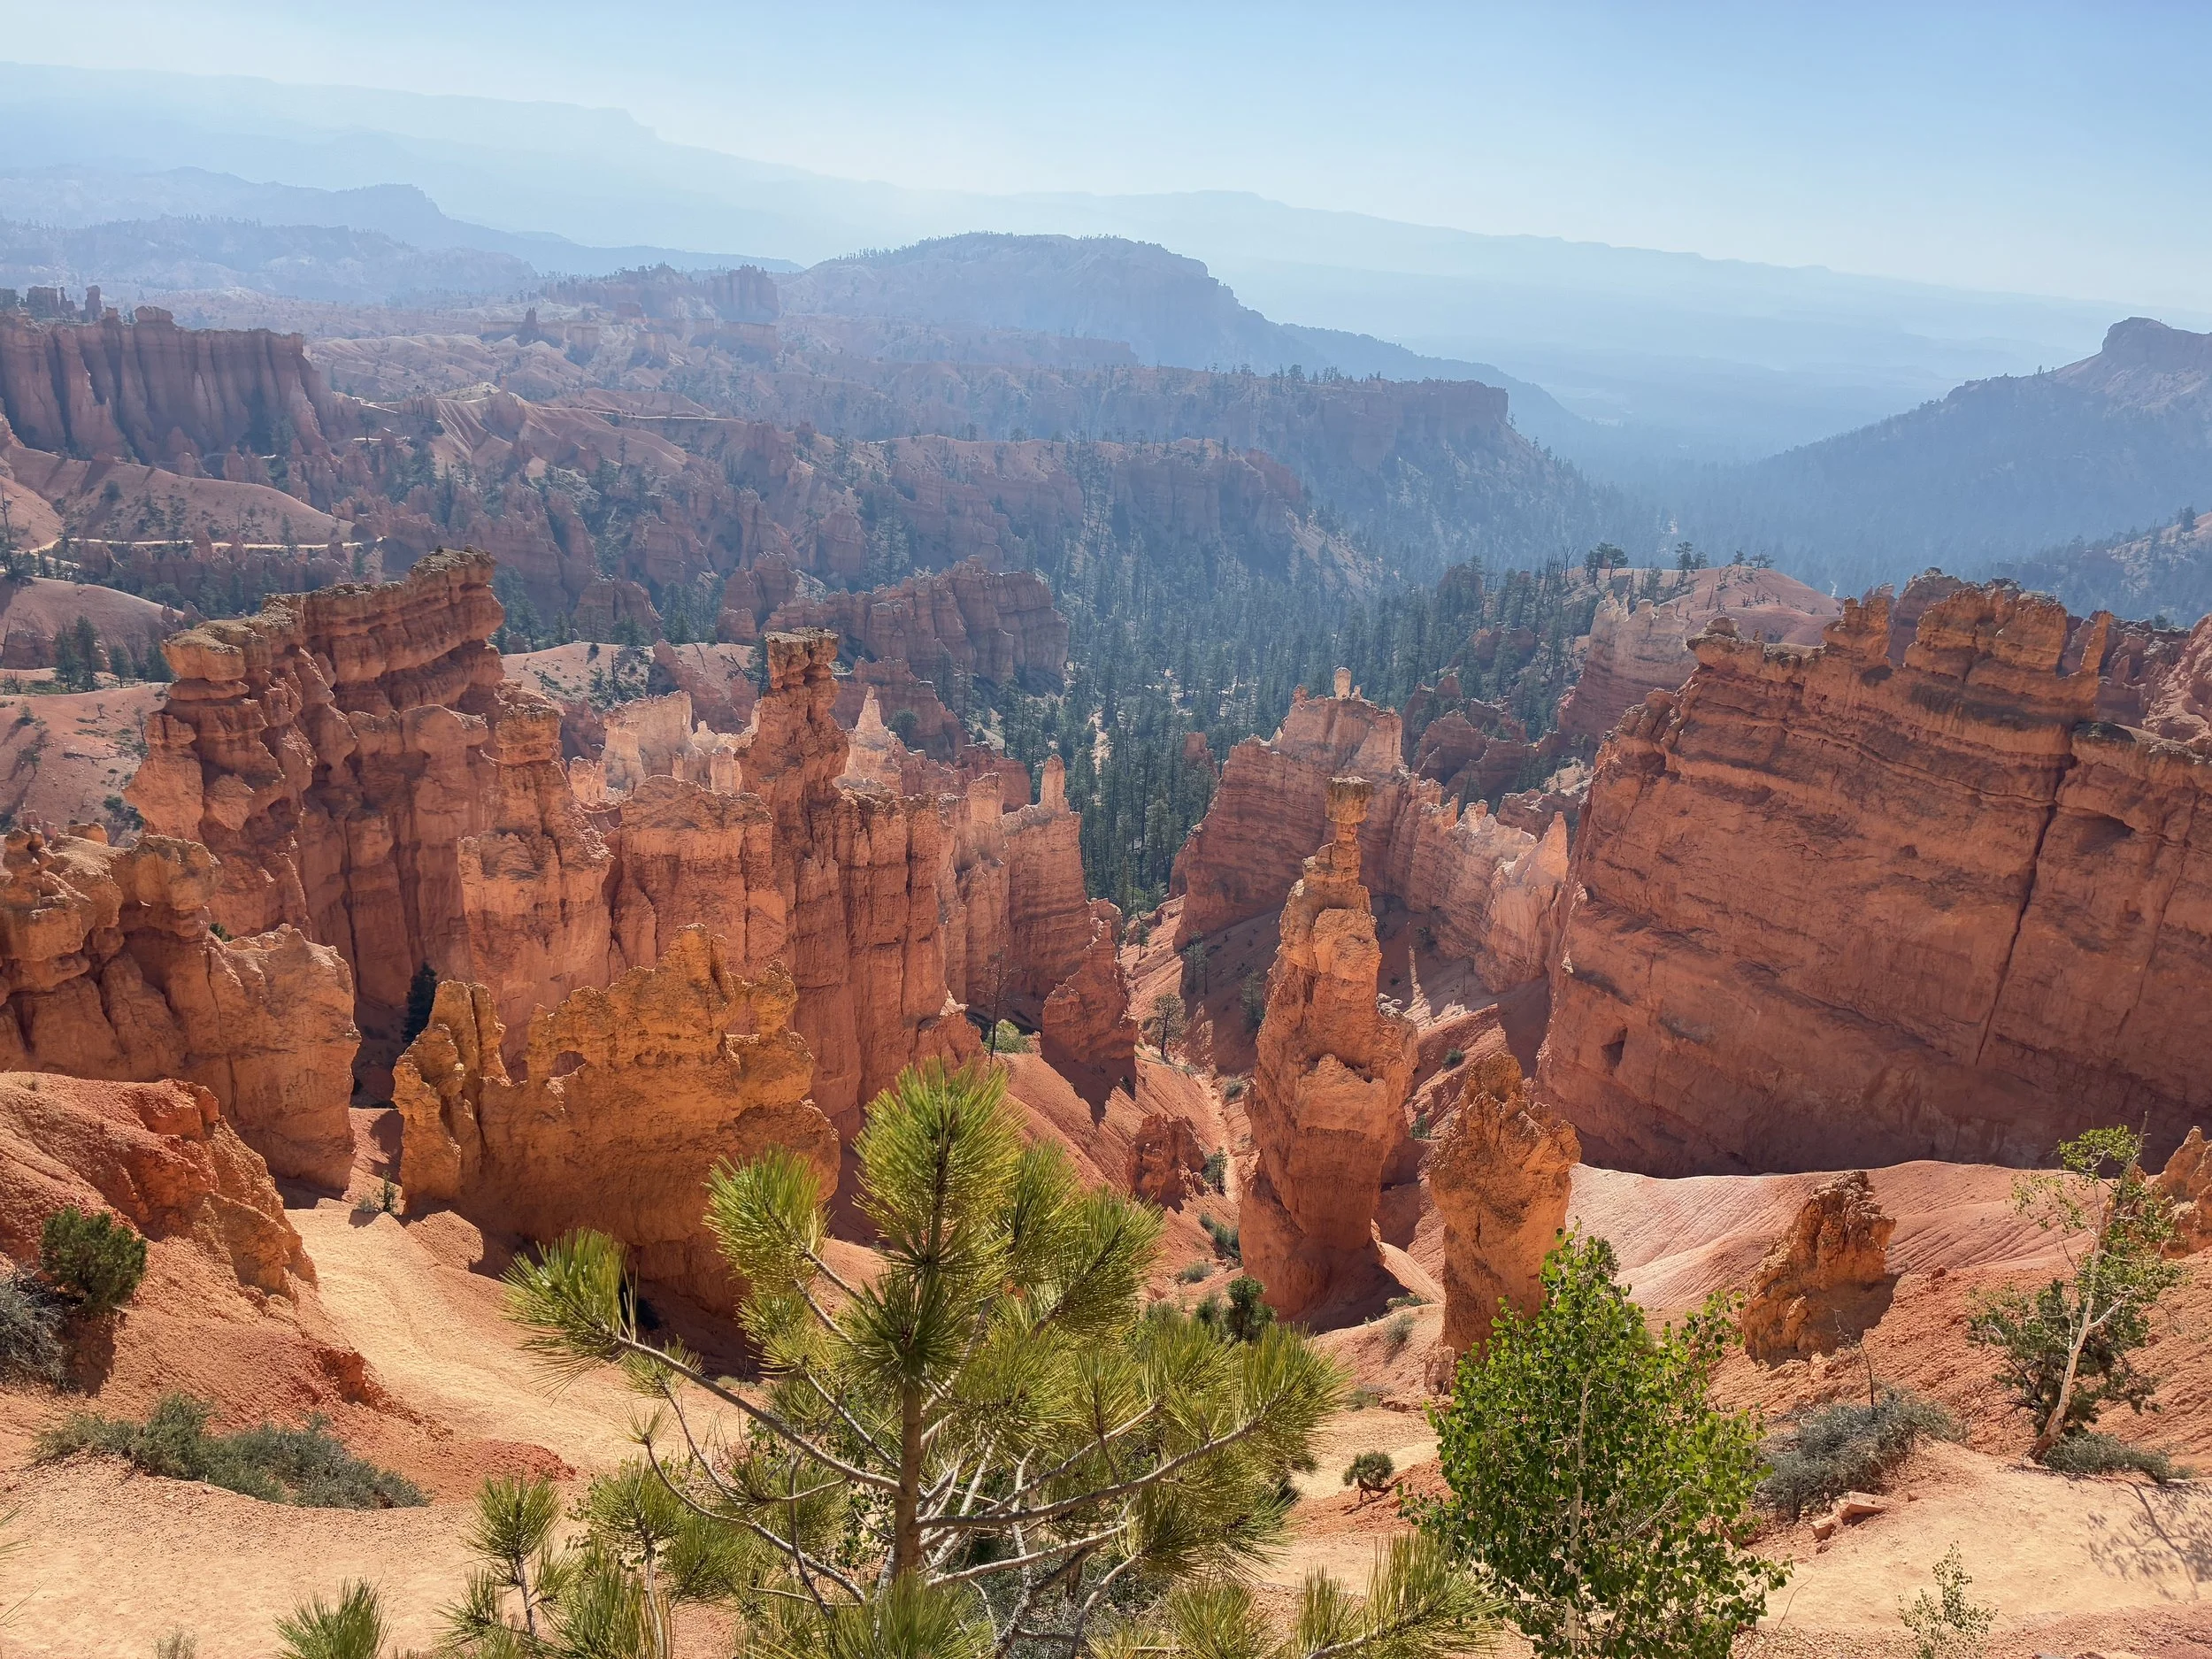
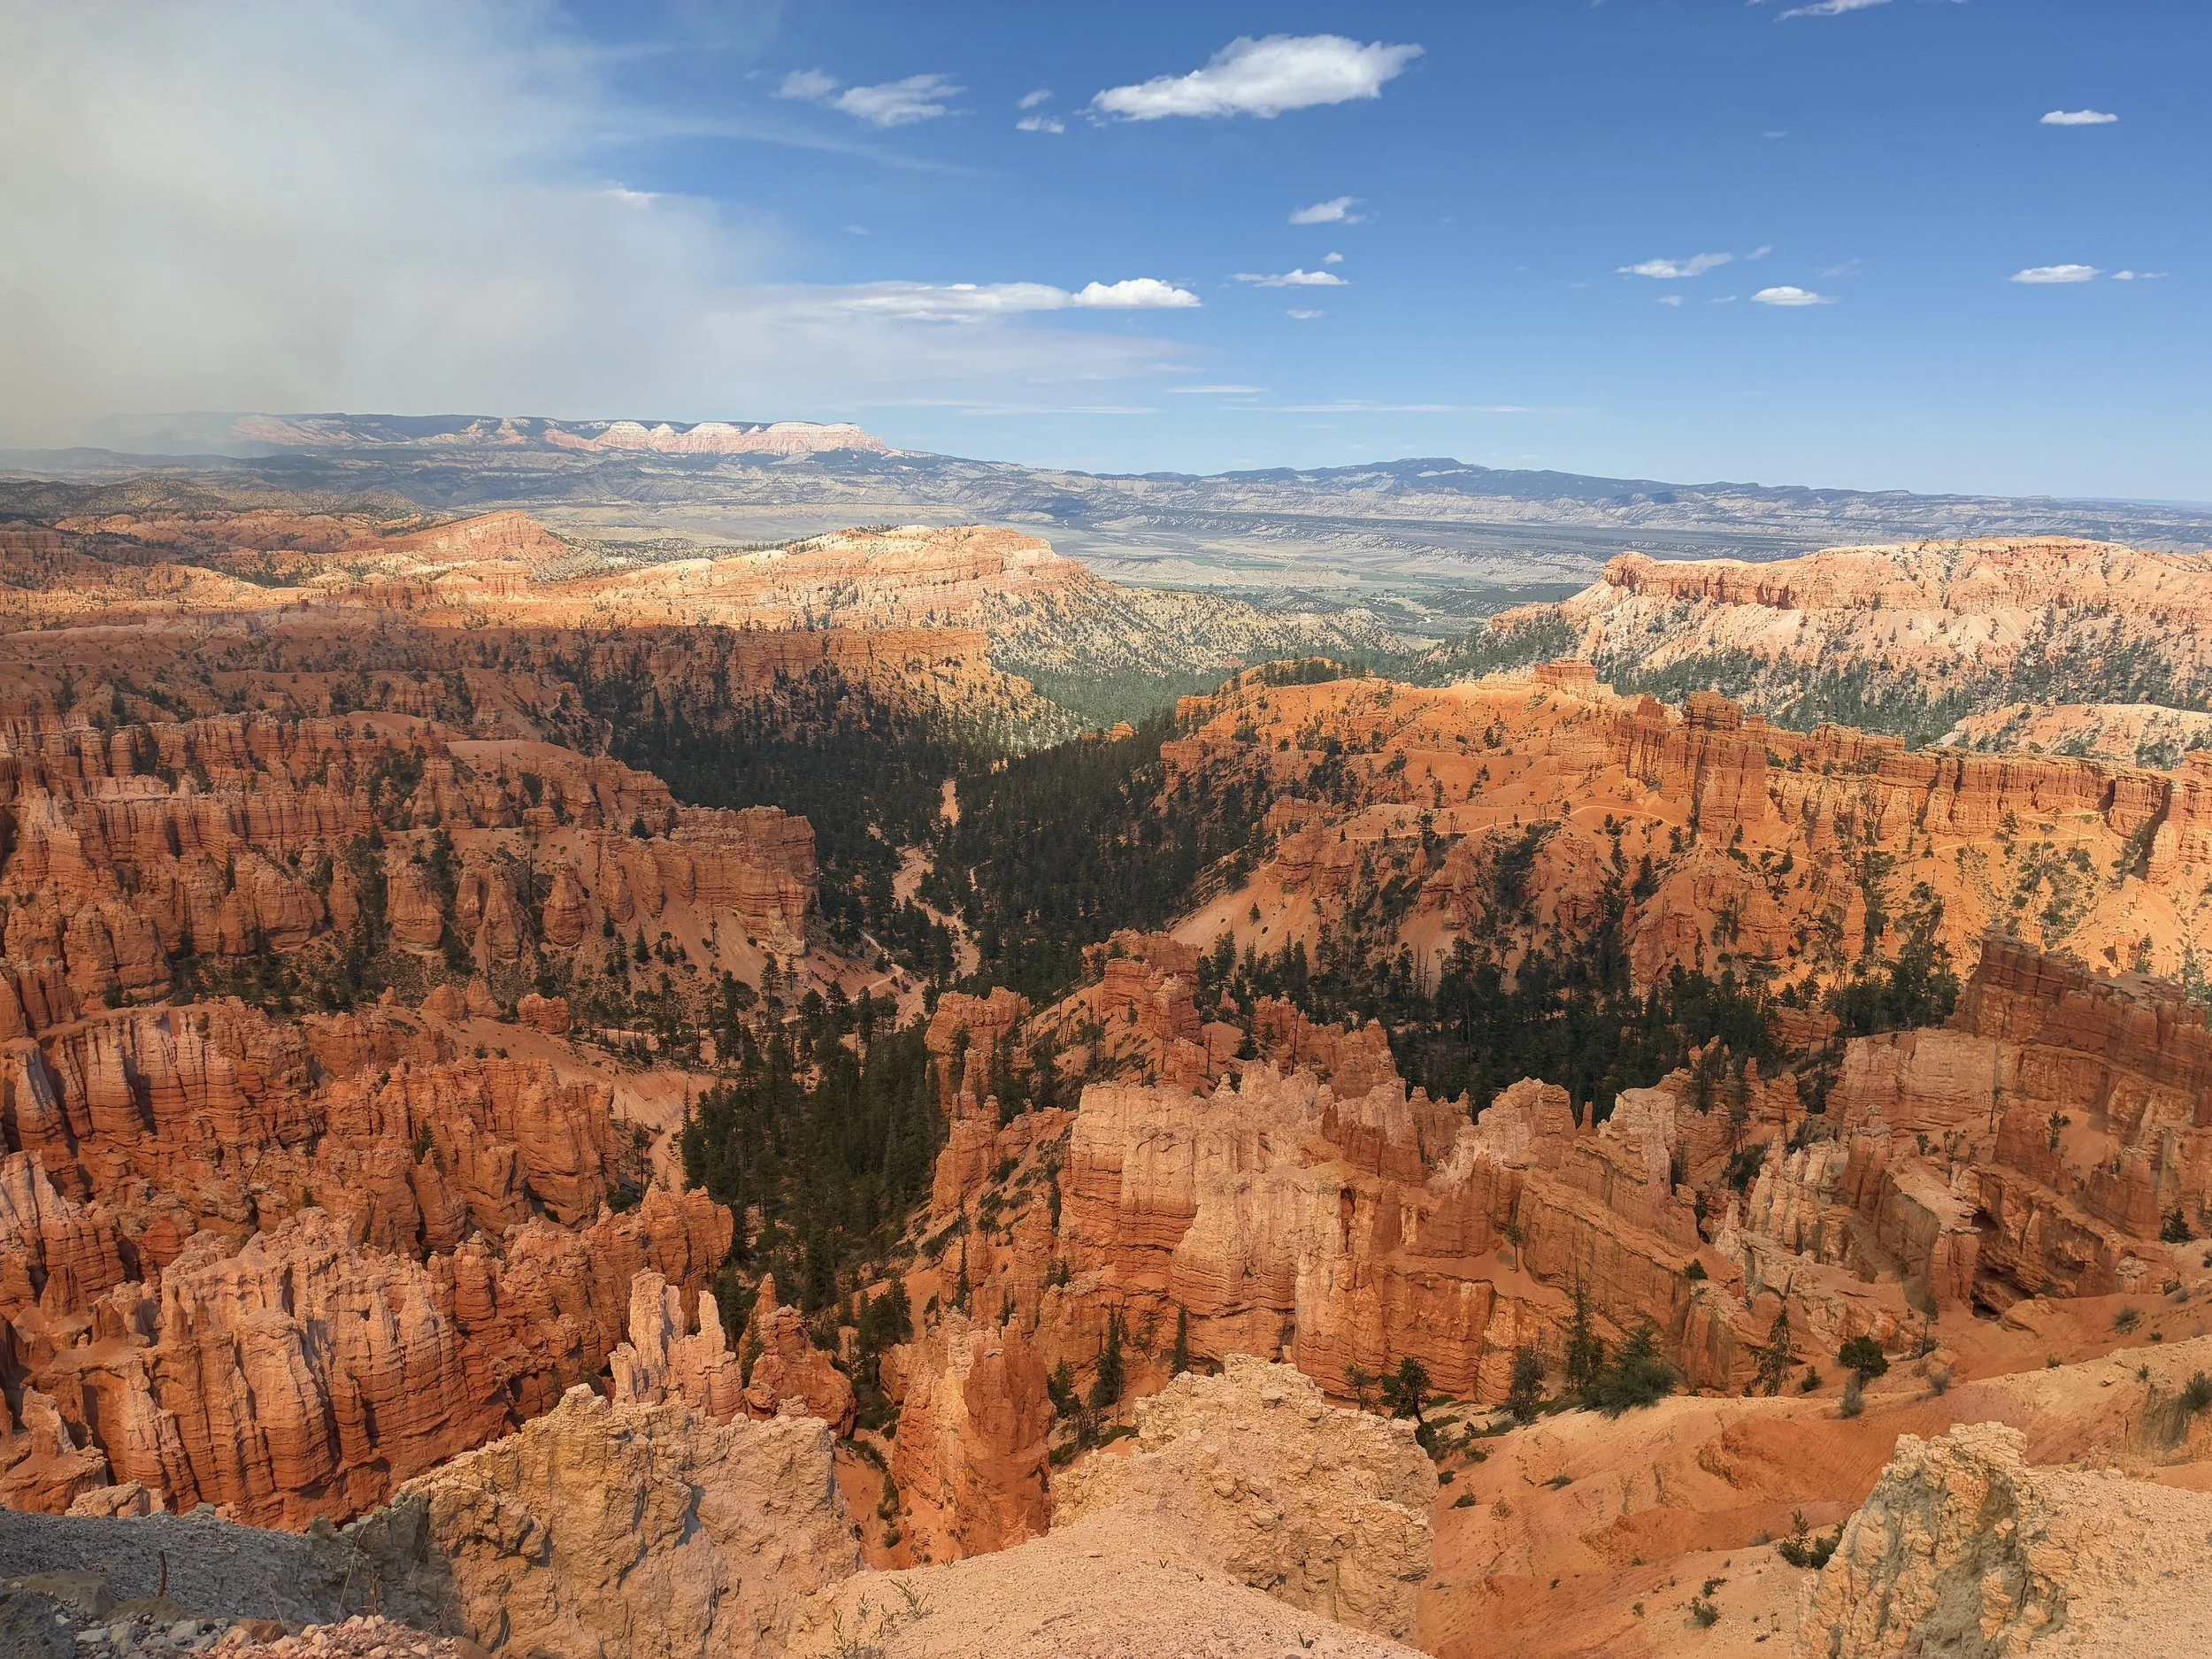
Bryce Canyon, Bryce Point
The second type of Bryce Canyon experience requires some full, rough, and tough days of hiking. Any trail the Park calls “moderate” is actually “hard,” and anything they call “hard” is going to be “extremely strenuous.” It’s all in perspective to the other trails in the park, and there aren’t many truly easy hikes here. Plan for at least two full days to enjoy the trails at Bryce Canyon. One day can be spent hiking along the Fairyland Loop, with a spur out to Tower Bridge, an 8-mile trail with an overall elevation gain of 1,555ft. The second day can be spent hiking some sort of combination of Wall Street, Navajo, Queen’s Garden, or Bryce Point and the Peekaboo Loop. These options result in 4-5.5-mile trails, with elevation gains of over 1,450ft. To fill out the second day (or spill into a third), add the Bristlecone Loop Trail, Mossy Cave, or any section along the Rim Trail (with a shoutout for the Inspiration Point Upper and Lower viewpoints). This is an amazing park to hike in but do realize that these are kick-your-butt sort of trails. Have fun but be warned!
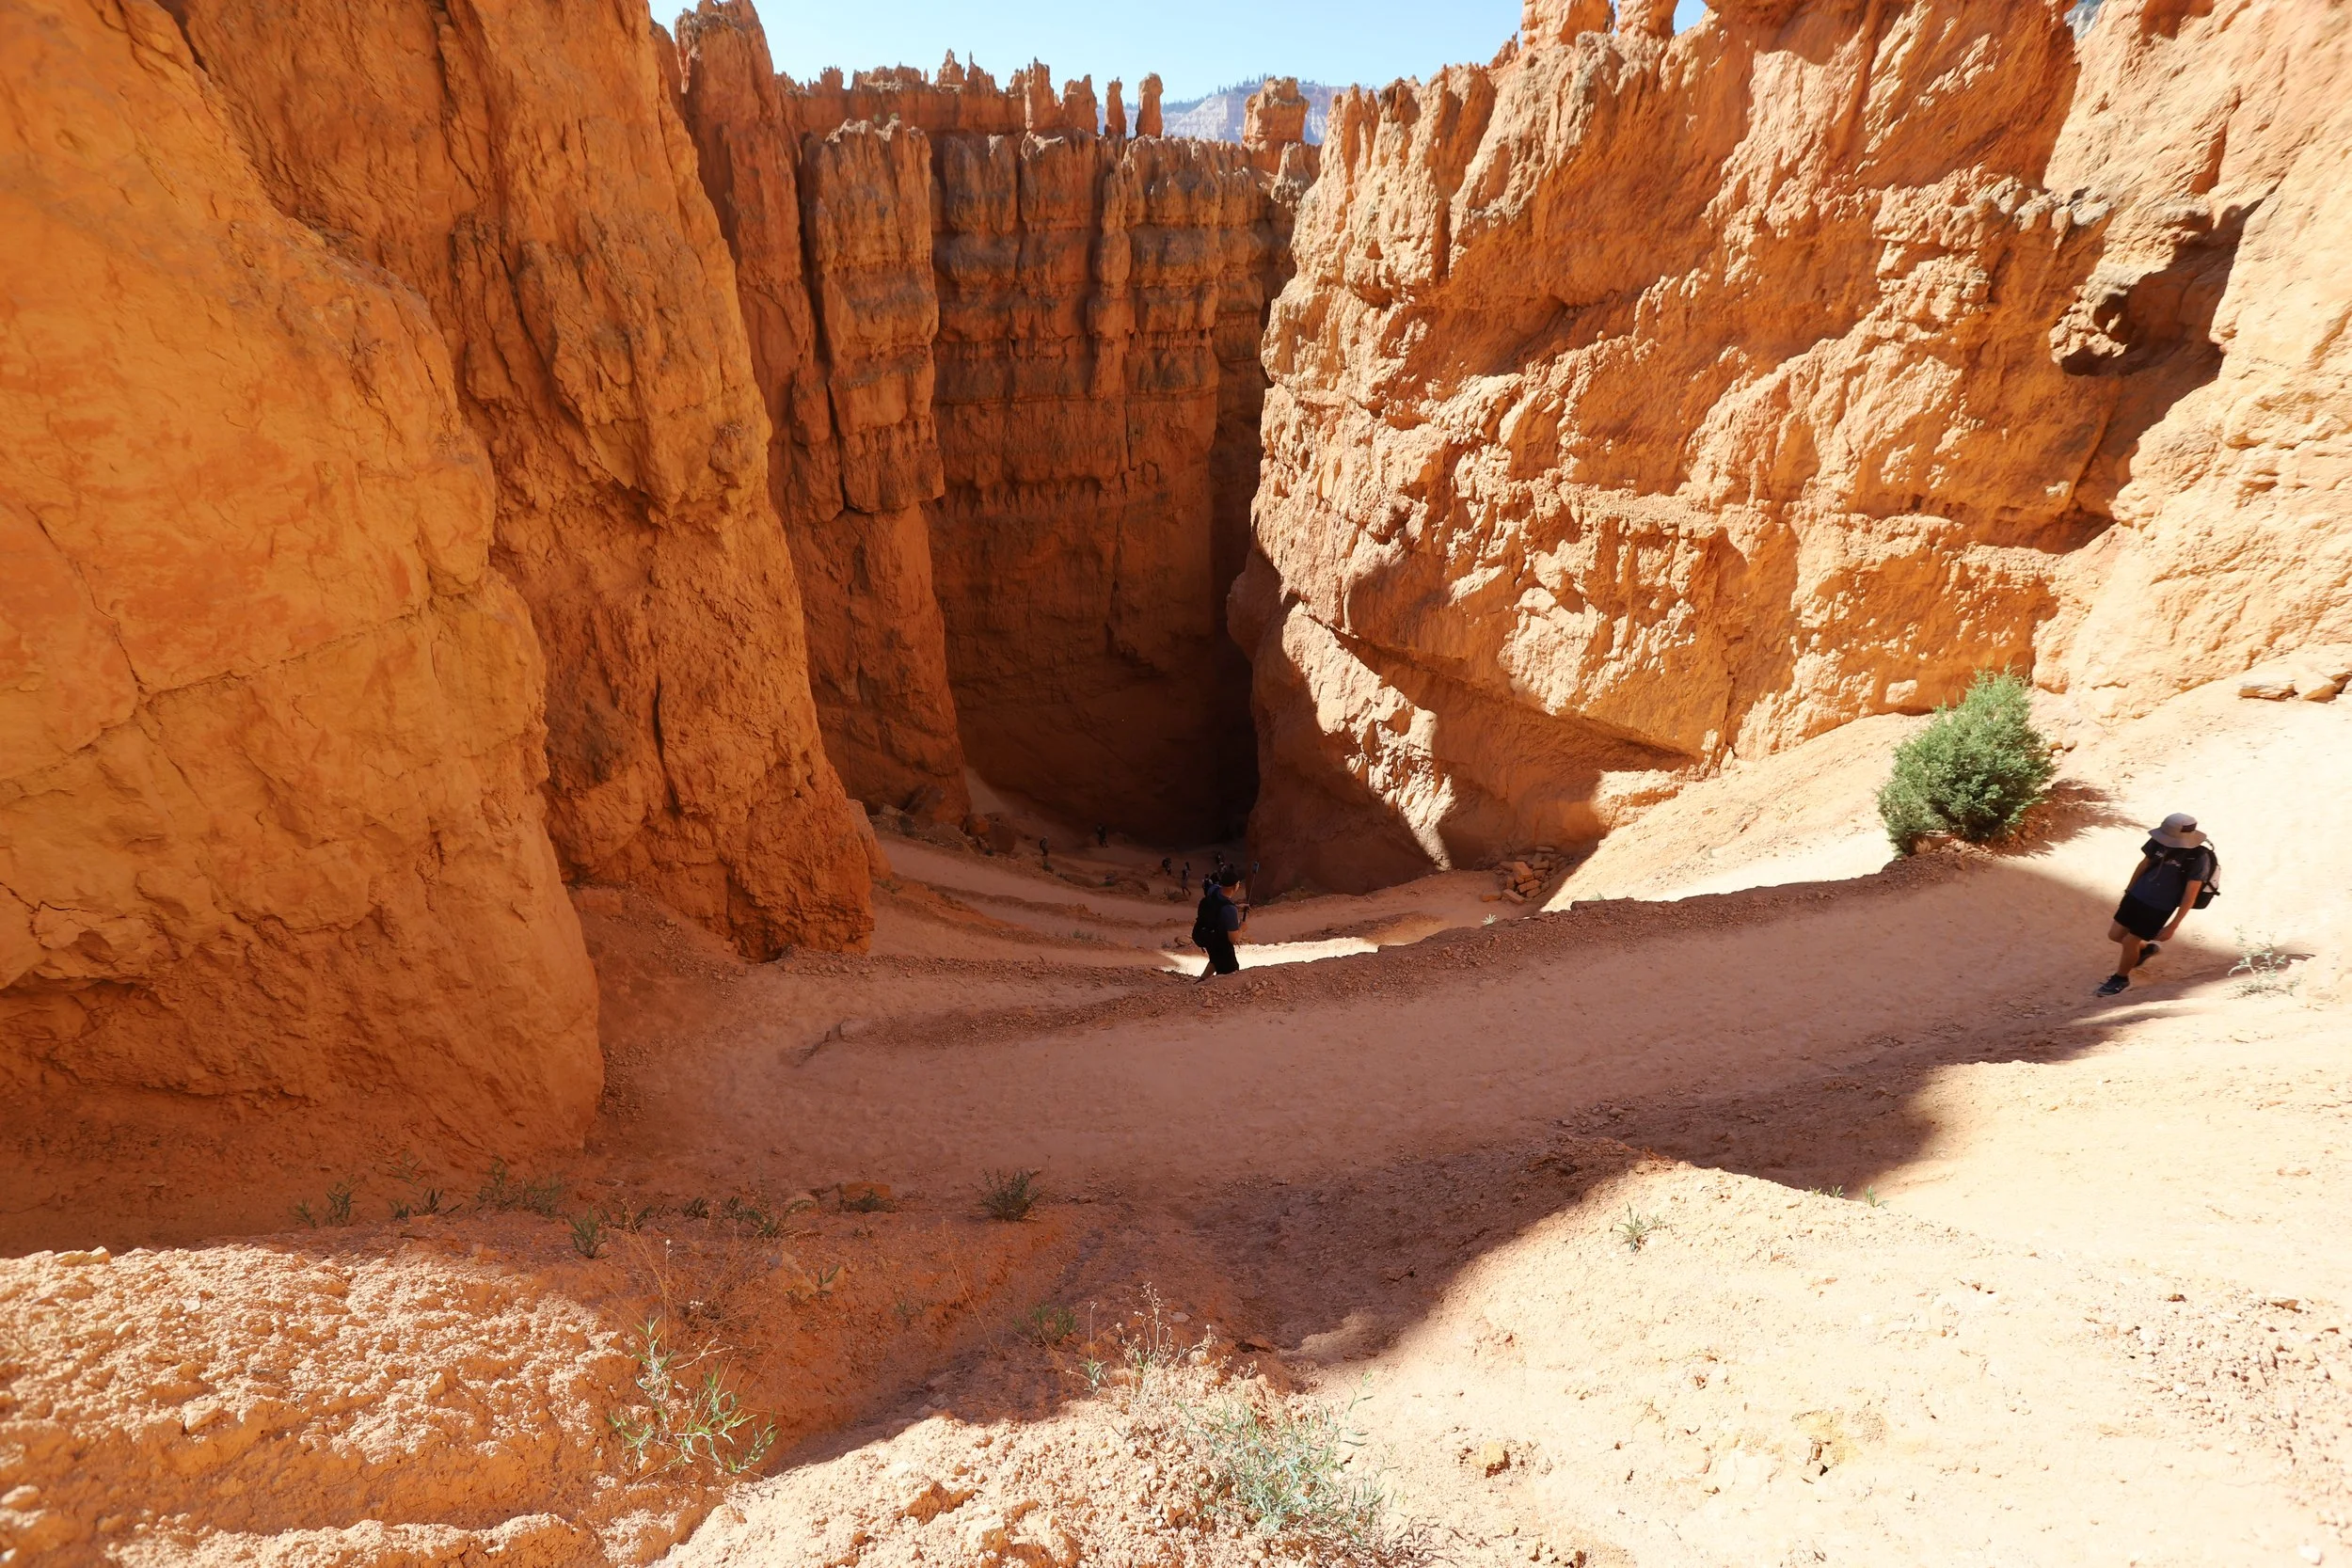
Bryce Canyon - Wall Street (Navajo Loop)
Planning Your Trip at Bryce Canyon
While I would enthusiastically recommend Spring Break trips to Arches, Canyonlands, Capitol Reef, and Zion Nation Parks, for those wanting to hike below the rim, Bryce Canyon is going to be full of snow. Either bring snowshoes or spikes to deal with the slippery trails, or plan on visiting between May and October. For those that just want to enjoy the view from the rim, March/April are fantastic months to visit! The white snow is beautiful against the red / orange hoodoos. (Side note that the summer months wouldn’t be the months I would recommend visiting the other Utah National Parks due to heat. Utah is worth a couple of vacations at different times of the year though.)
The busiest places within Bryce Canyon are likely going to be Sunrise Point and along Queen’s Garden, and Sunset Point and the Wall Street and Navajo Loop. We found the least number of visitors along Fairyland Loop, which we had mostly to ourselves throughout the entire trail.
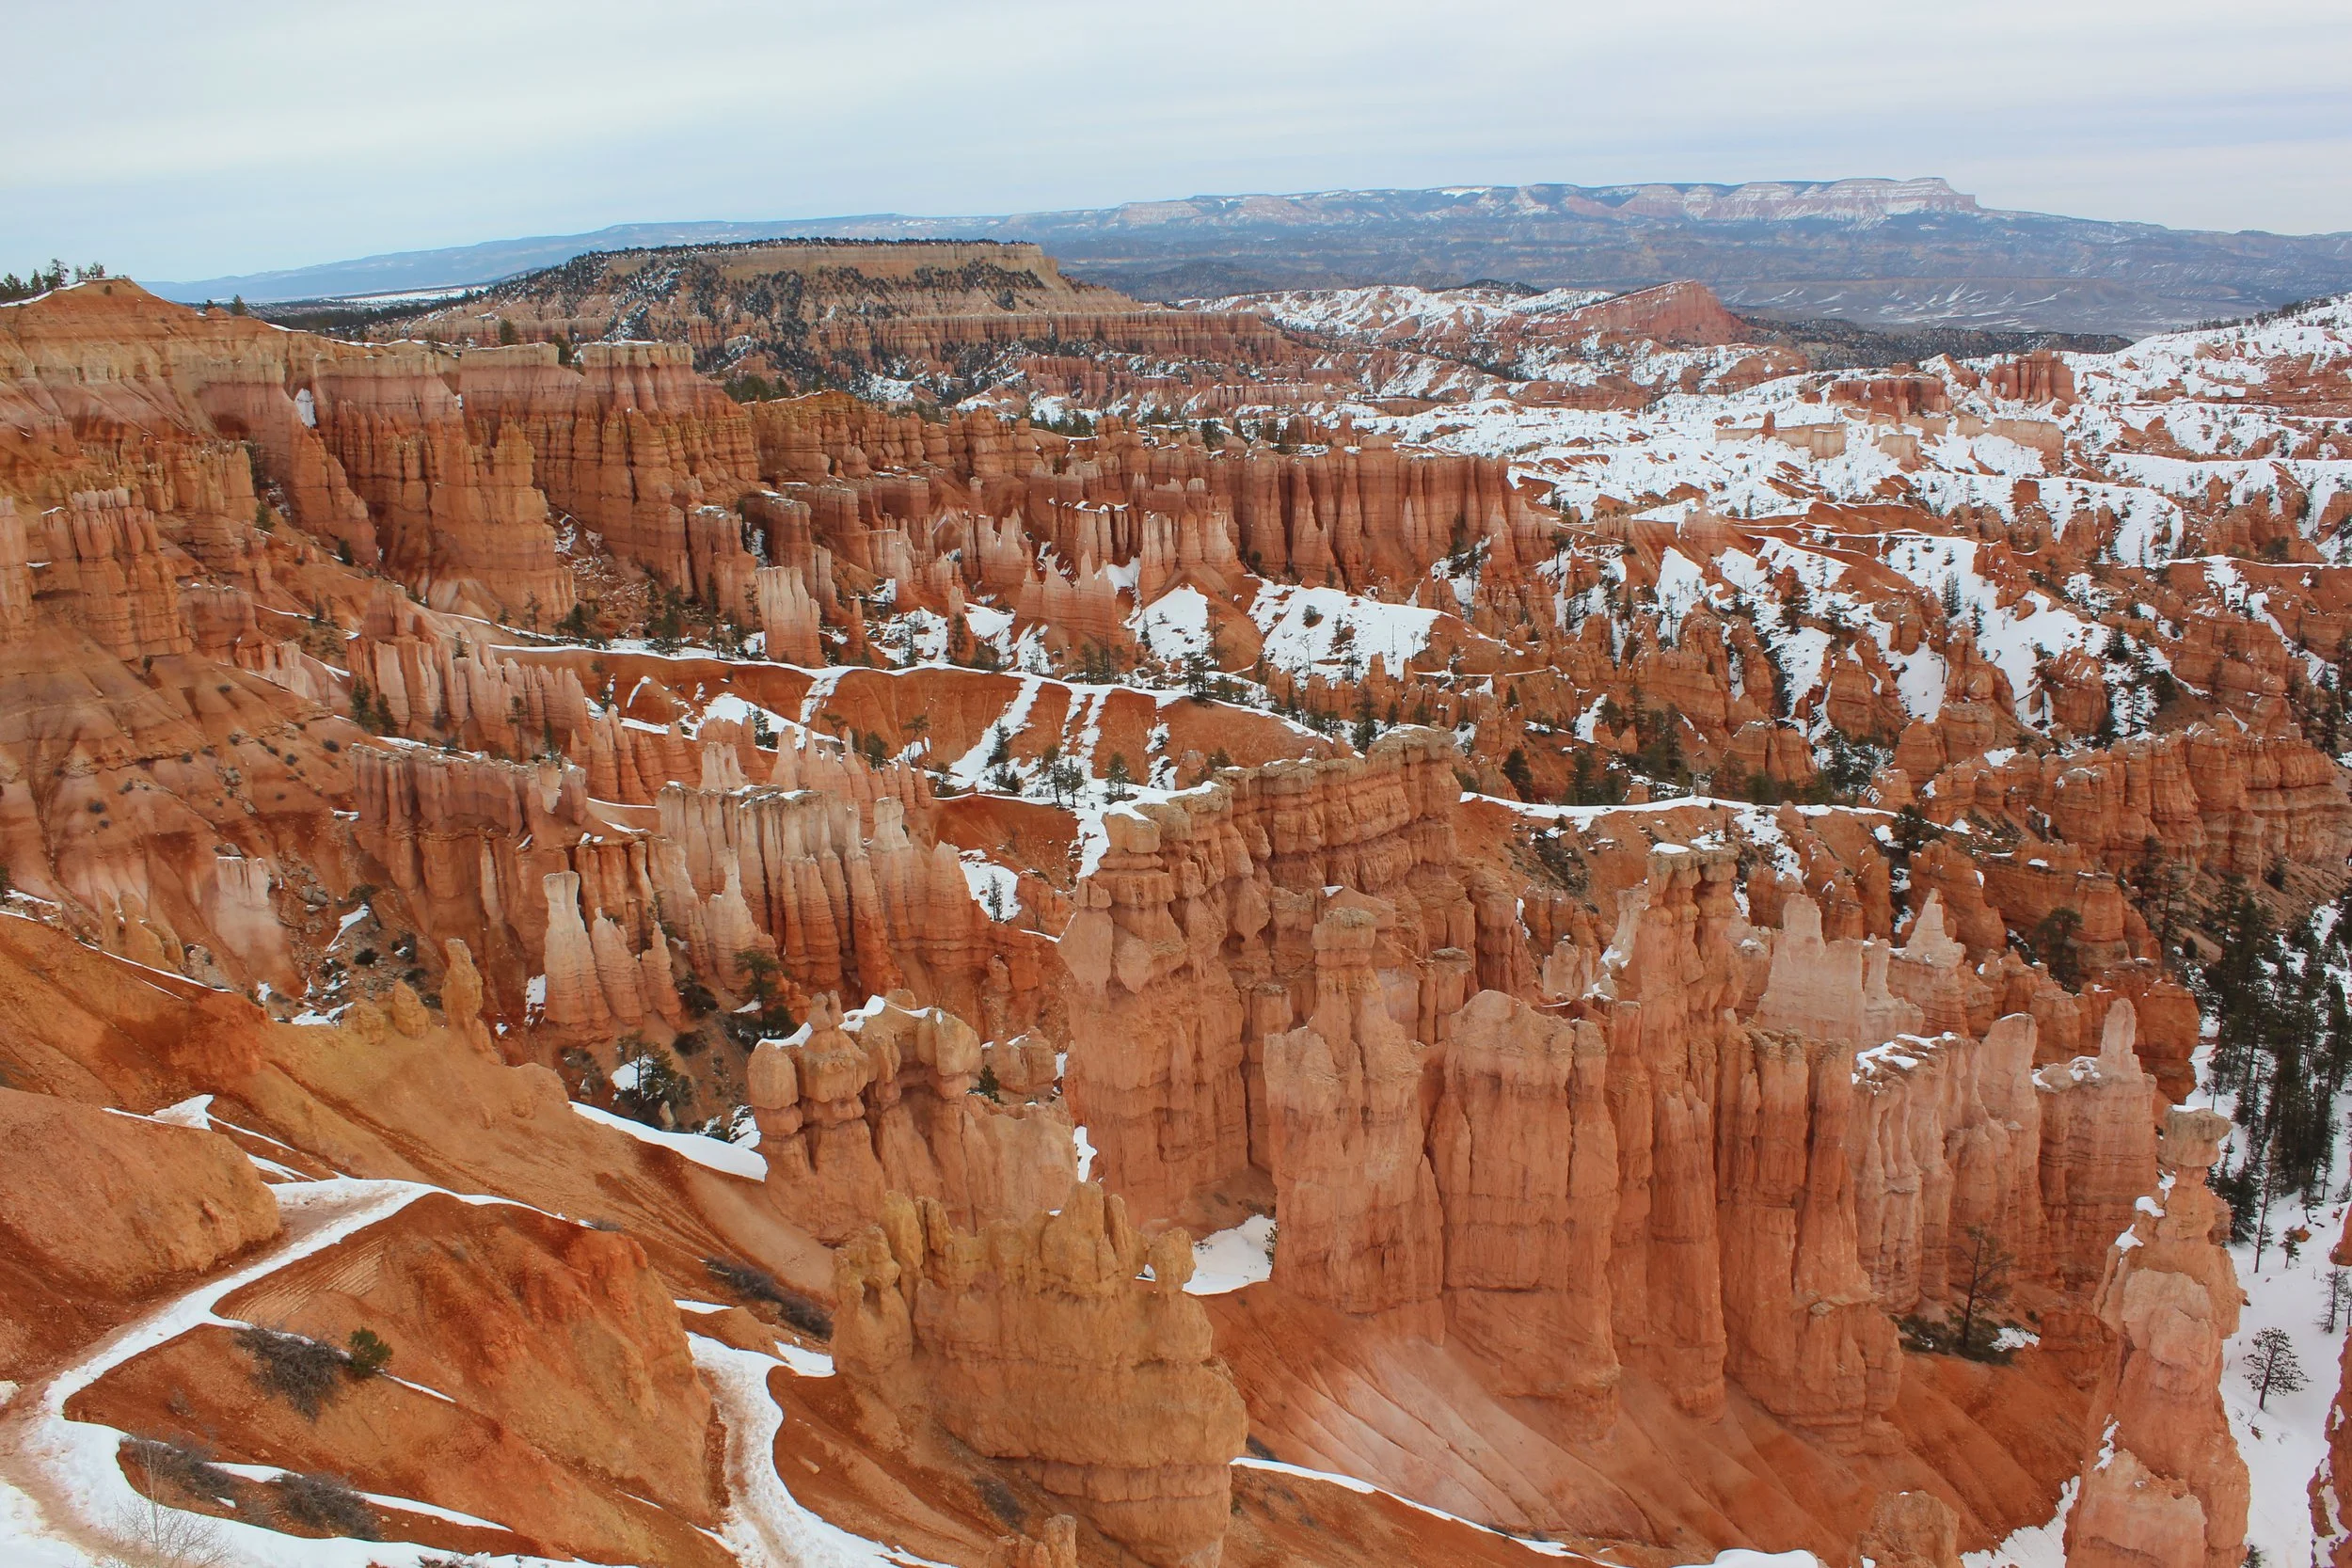
Bryce Canyon - March 2015
Bryce Canyon isn’t actually a “canyon” – it’s not formed by a river. It’s an amphitheater with steps. The hoodoos within the amphitheater have been formed through erosion by snow, ice, rain, and wind. The best amphitheater views are at Fairyland Point, Sunrise Point, Sunset Point, Inspiration Point (Lower and Upper viewpoints), and Bryce Point. Each of these points (excluding Fairyland Point) can be accessible from the bus shuttle which includes stops at Bryce City and the Visitor Center. There is also a Rim Trail that connects these viewpoints, which can be combined with the shuttle for various trail lengths. (Another side note - don’t expect the Rim Trail to be flat. I’m not sure why I imagine “Rim” trails to be flat; probably because I want them to be flat and easy…. Sigh, they never are, and there’s not much easy about Bryce Canyon.)
I think it’s also worth the drive out to Rainbow Point. I really liked the Bristlecone Loop Trail – that one is actually easy, the viewpoints are beautiful, and Bristlecone Pine Trees are some of the oldest trees on our planet. A car is also needed to get to Fairyland Point (on the other side of the Visitor Center). We found Fairyland Point to be quiet without many other tourists, despite it’s close proximity to the rest of the park.
One other fun stop for anyone with a little bit of extra time is Mossy Cave. The hoodoos are not as impressive as parts within the park, but this is the only part of the park to find a small bit of water and a waterfall.
Bryce Canyon, Fairyland Loop
Lodging Options near Bryce Canyon
Within Bryce Canyon, there are two campground options - North Campground and Sunset Campground. In June 2025, we stayed in Loop D of North Campground. It was great! It was quiet, the bathroom was clean, we had a decent sized campsite. There are showers, but it requires a short drive to the General Store, just a few minutes away. The showers require a token, which can be purchased at the General Store. The hours of the showers are limited, and they closed by 8pm when we visited in June. I think the best time of day to shower in a campground is anytime other than the morning. We typically go after we are done hiking in the late afternoon, prior to supper. We did not have a line to wait in any of the nights we stayed here.
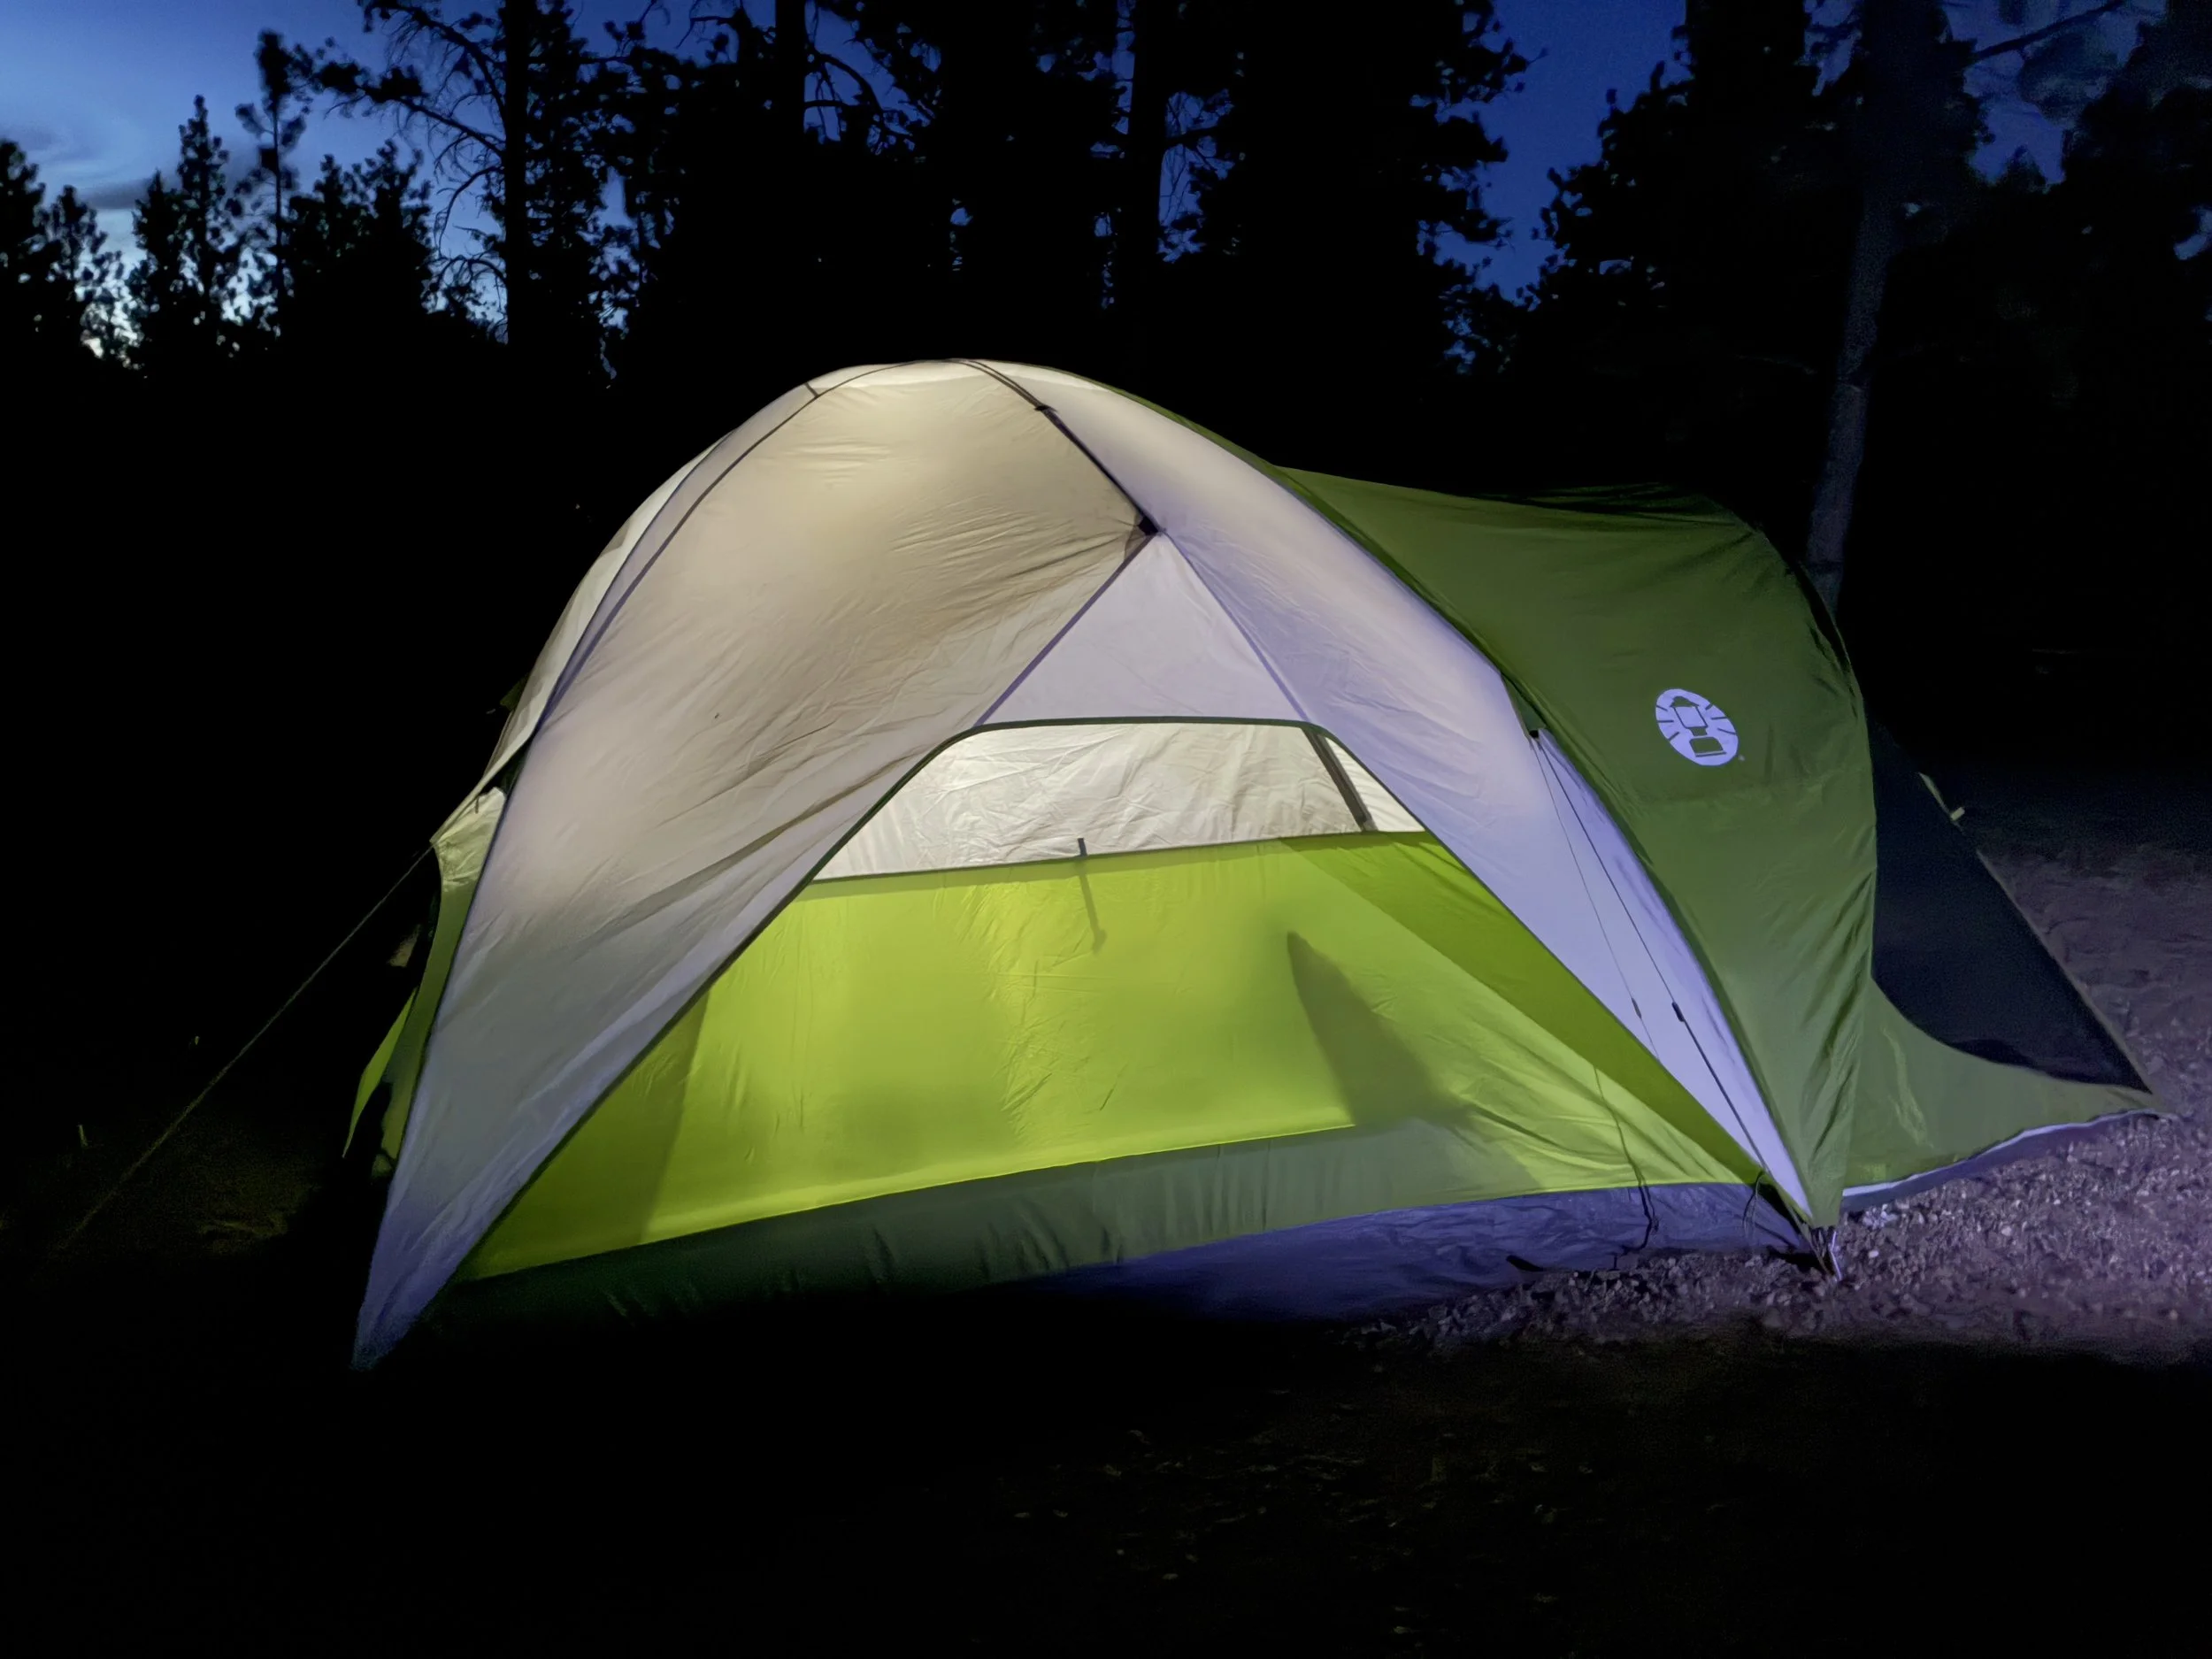
Bryce Canyon - North Campground
Nearby Cities
For anyone looking for a nearby hotel, the closest cities are Bryce Canyon City and Tropic. In March 2015, we stayed at Ruby’s Inn, which was a beautiful hotel! Ruby’s Inn also has a general store which includes groceries. This was a helpful option for us while we camped for several nights and eventually needed to restock some items. The general store also has ice cream treats - potentially helpful information for any parent needing bribery options. Prior to our trip, I’d read good things about the pie at Bryce Canyon Pines. We stopped there on the first night, but the pie slices were between $7-10 / slice, and the pies weren’t homemade. We were a little disappointed.
Hiking at Bryce Canyon National Park
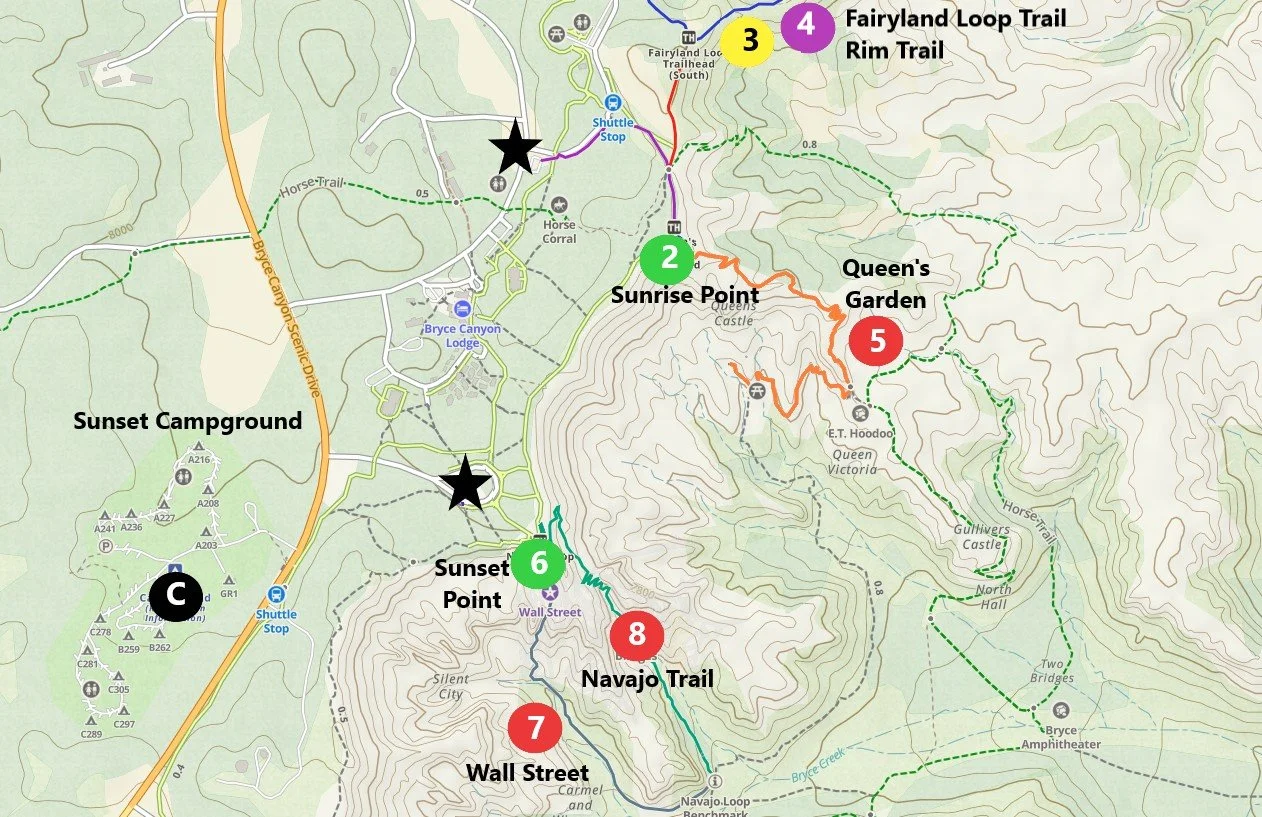
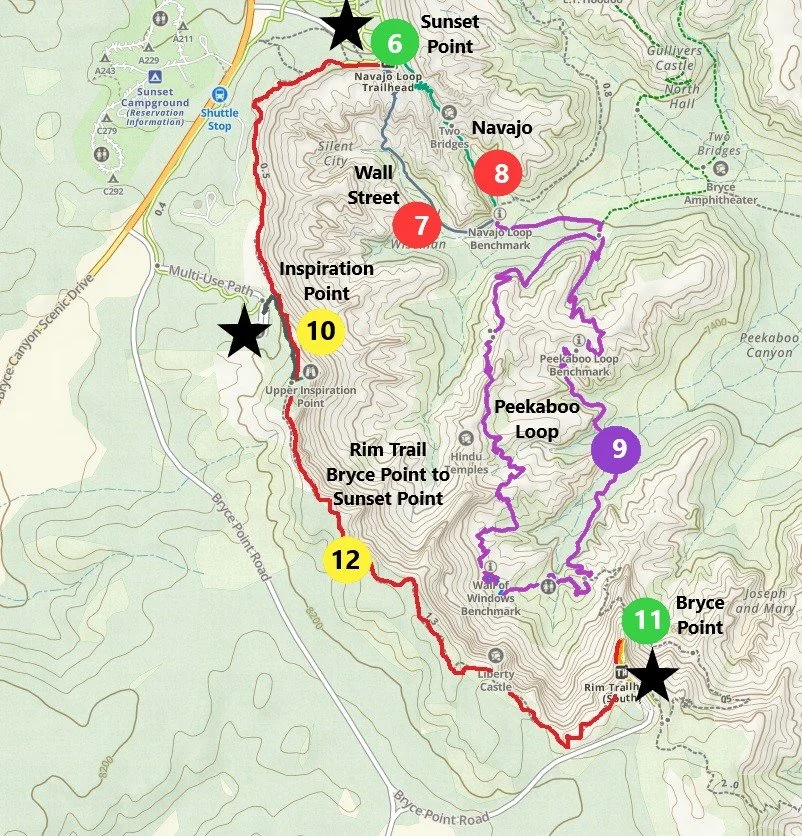
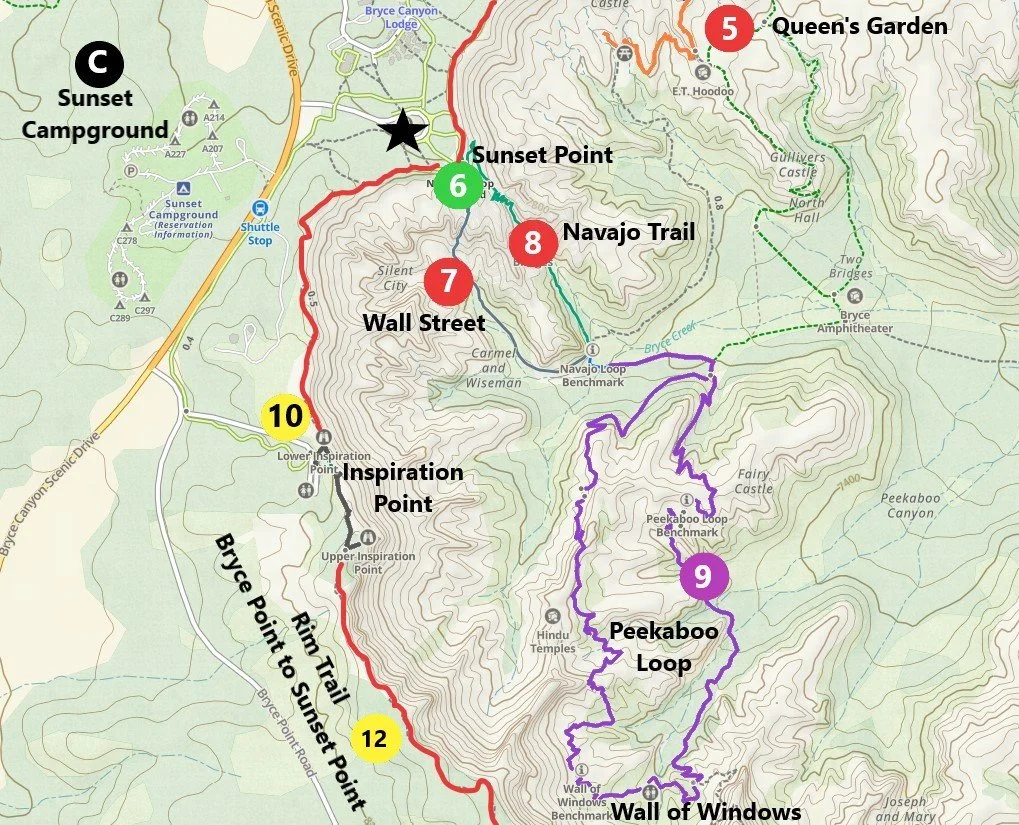
Below is the map I will use in the rest of this post. The colors refer to difficulty. Black – Points of Interest, Blue – Viewpoints with little walking required, Green – Easy trails that are mostly flat and relatively short, Yellow – Moderate trails with some incline in elevation required, Red – Hard / Strenuous trails with switchbacks, steep inclines at high elevation, Purple – Very Strenuous trails with longer mileage in addition to switchbacks, steep inclines, and high elevation.
In the captions below the map are hyperlinks. Click the hyperlink to jump to a particular part of the park. Included will be a map, pictures, and a review of the trail. There will be a Return to Map hyperlink at the end of each section to get back to this section. Otherwise, just scroll down to read the entire post.
To create the specific trail maps below, I use the GAIA app while hiking. I’ve added black stars to indicate where to park.

Places of Interest (black): A - Visitor Center, B - North Campground, C - Sunset Campground
Viewpoints (blue): D - Fairyland Point, E - Swamp Canyon, F - Whiteman, G - Fairview Point, H - Natural Bridge, I - Agua Canyon, J - Ponderosa Canyon, K - Black Birch Canyon, L - Rainbow Point
Easy Trails (green): 1 - Mossy Cave, 2 - Sunrise Point, 6 - Sunset Point, 11 - Bryce Point, 13 - Paria Point, 14 - Piracy Point, 15 - Yovimpa Point, 16 - Bristlecone Loop
Moderate Trails (yellow): 3 - Rim Trail Sunrise Point to Fairyland Point, 10 - Inspiration Point (Lower and Upper viewpoints), 12 - Rim Trail Bryce Point to Sunset Point
Strenuous Trails (red): 5 - Queen’s Garden, 7 - Wall Street, 8 - Navajo
Very Strenuous Trails (purple): 4 - Fairyland Loop, 9 - Peekaboo Loop
1) Mossy Cave
Distance - Approximately 1 mile
Elevation Gain - The trail is flat to the waterfall, but it does require climbing down into the creek. Other than that, this is a fairly accessible trail. To see Mossy Cave or view the waterfall from above, the trail ascends approximately 100ft.
Trailhead Location - Mossy Cave is outside of the main hiking area of Bryce Canyon, which is entered from Utah Highway 63. There is a small parking lot for Mossy Cave directly off of Utah Highway 12, which is not quite 4 miles east of the Highway 63 intersection.
Helpful Information - For anyone wanting to take a dip in the water or climb behind the waterfall, wear a swimsuit and bring a towel. There are no places to change at the trailhead. This is more of a place to splash than swim, but at least it’s a place get wet on a hot day.
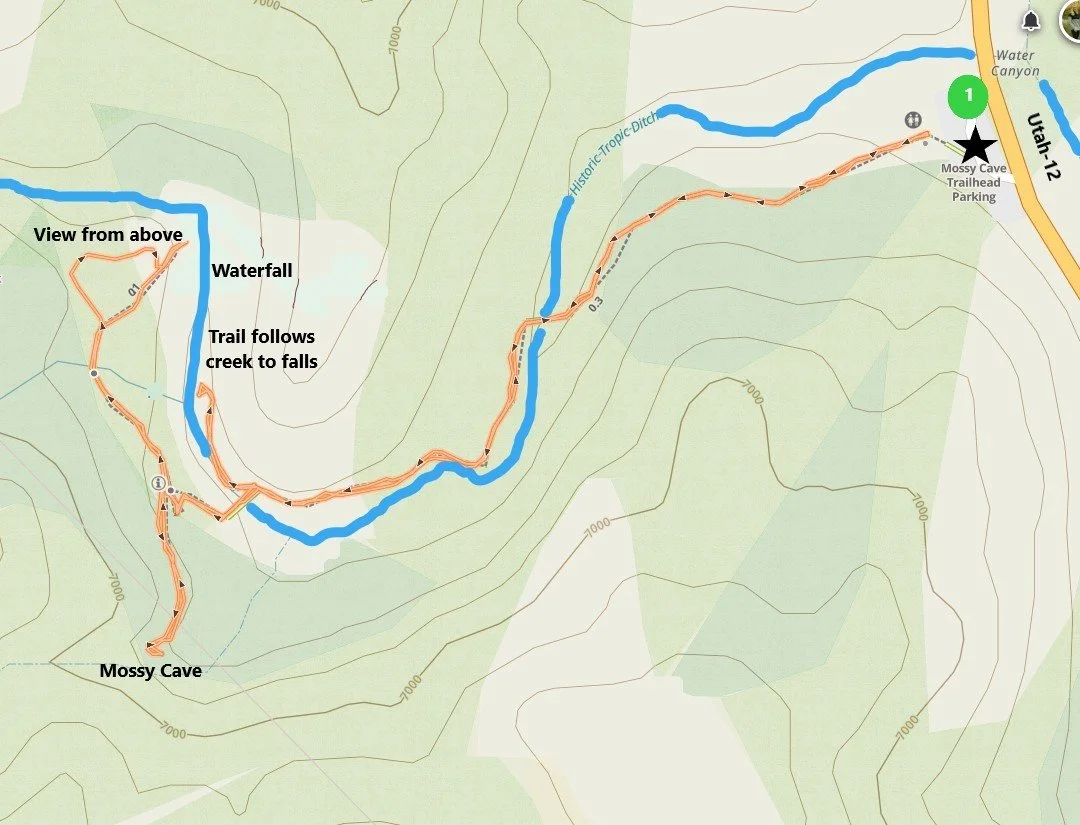
The trail to Mossy Cave and the waterfall (from below and above) is highlighted in light orange.
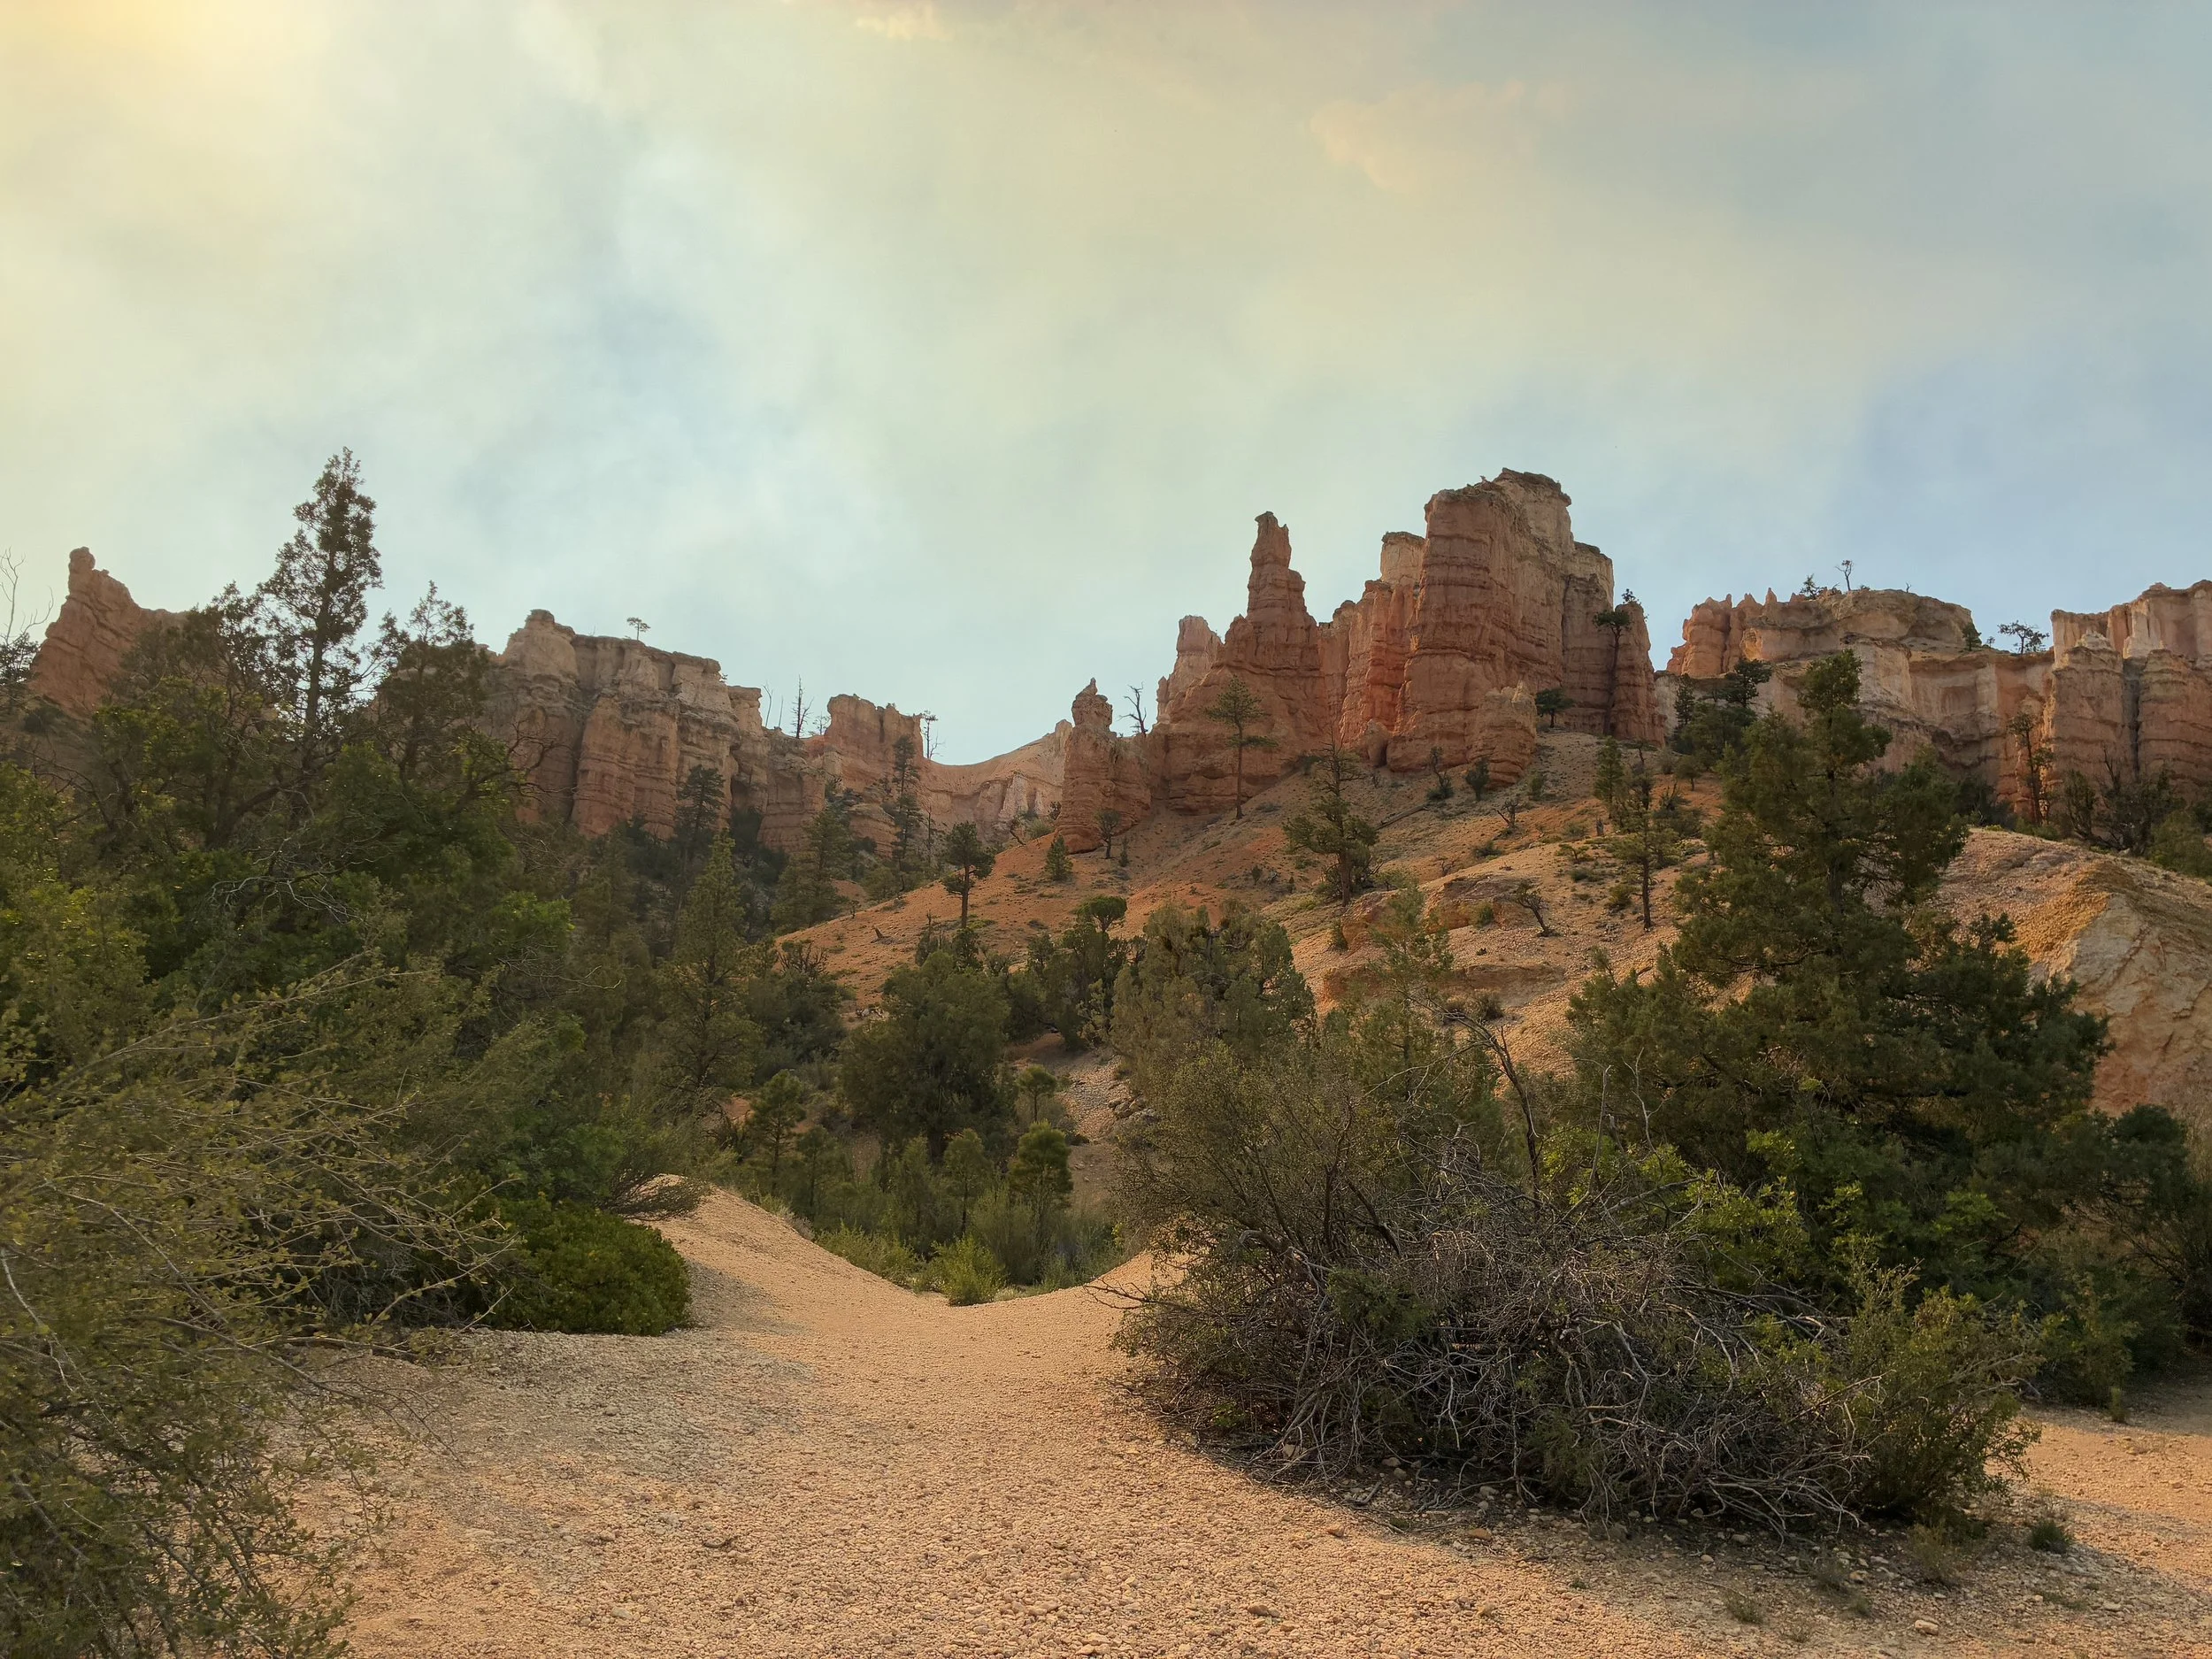
Bryce Canyon – Mossy Cave Trailhead
The Mossy Cave Trail starts at a small parking lot, just off of Utah Highway 12. The trailhead is both marked well and can be found on Google Maps. In general, this trail is easy. It’s short and relatively flat (for anyone just walking to the waterfall). The trail is not paved though, and to get down to the waterfall, the last section follows within the creek. Feet can easily stay dry, but a bit of agility is needed to maneuver all the way to the waterfall.
We visited at the middle of June. Most of the water in the creek had dried up, but there was still a small waterfall, and pool to splash in below it.
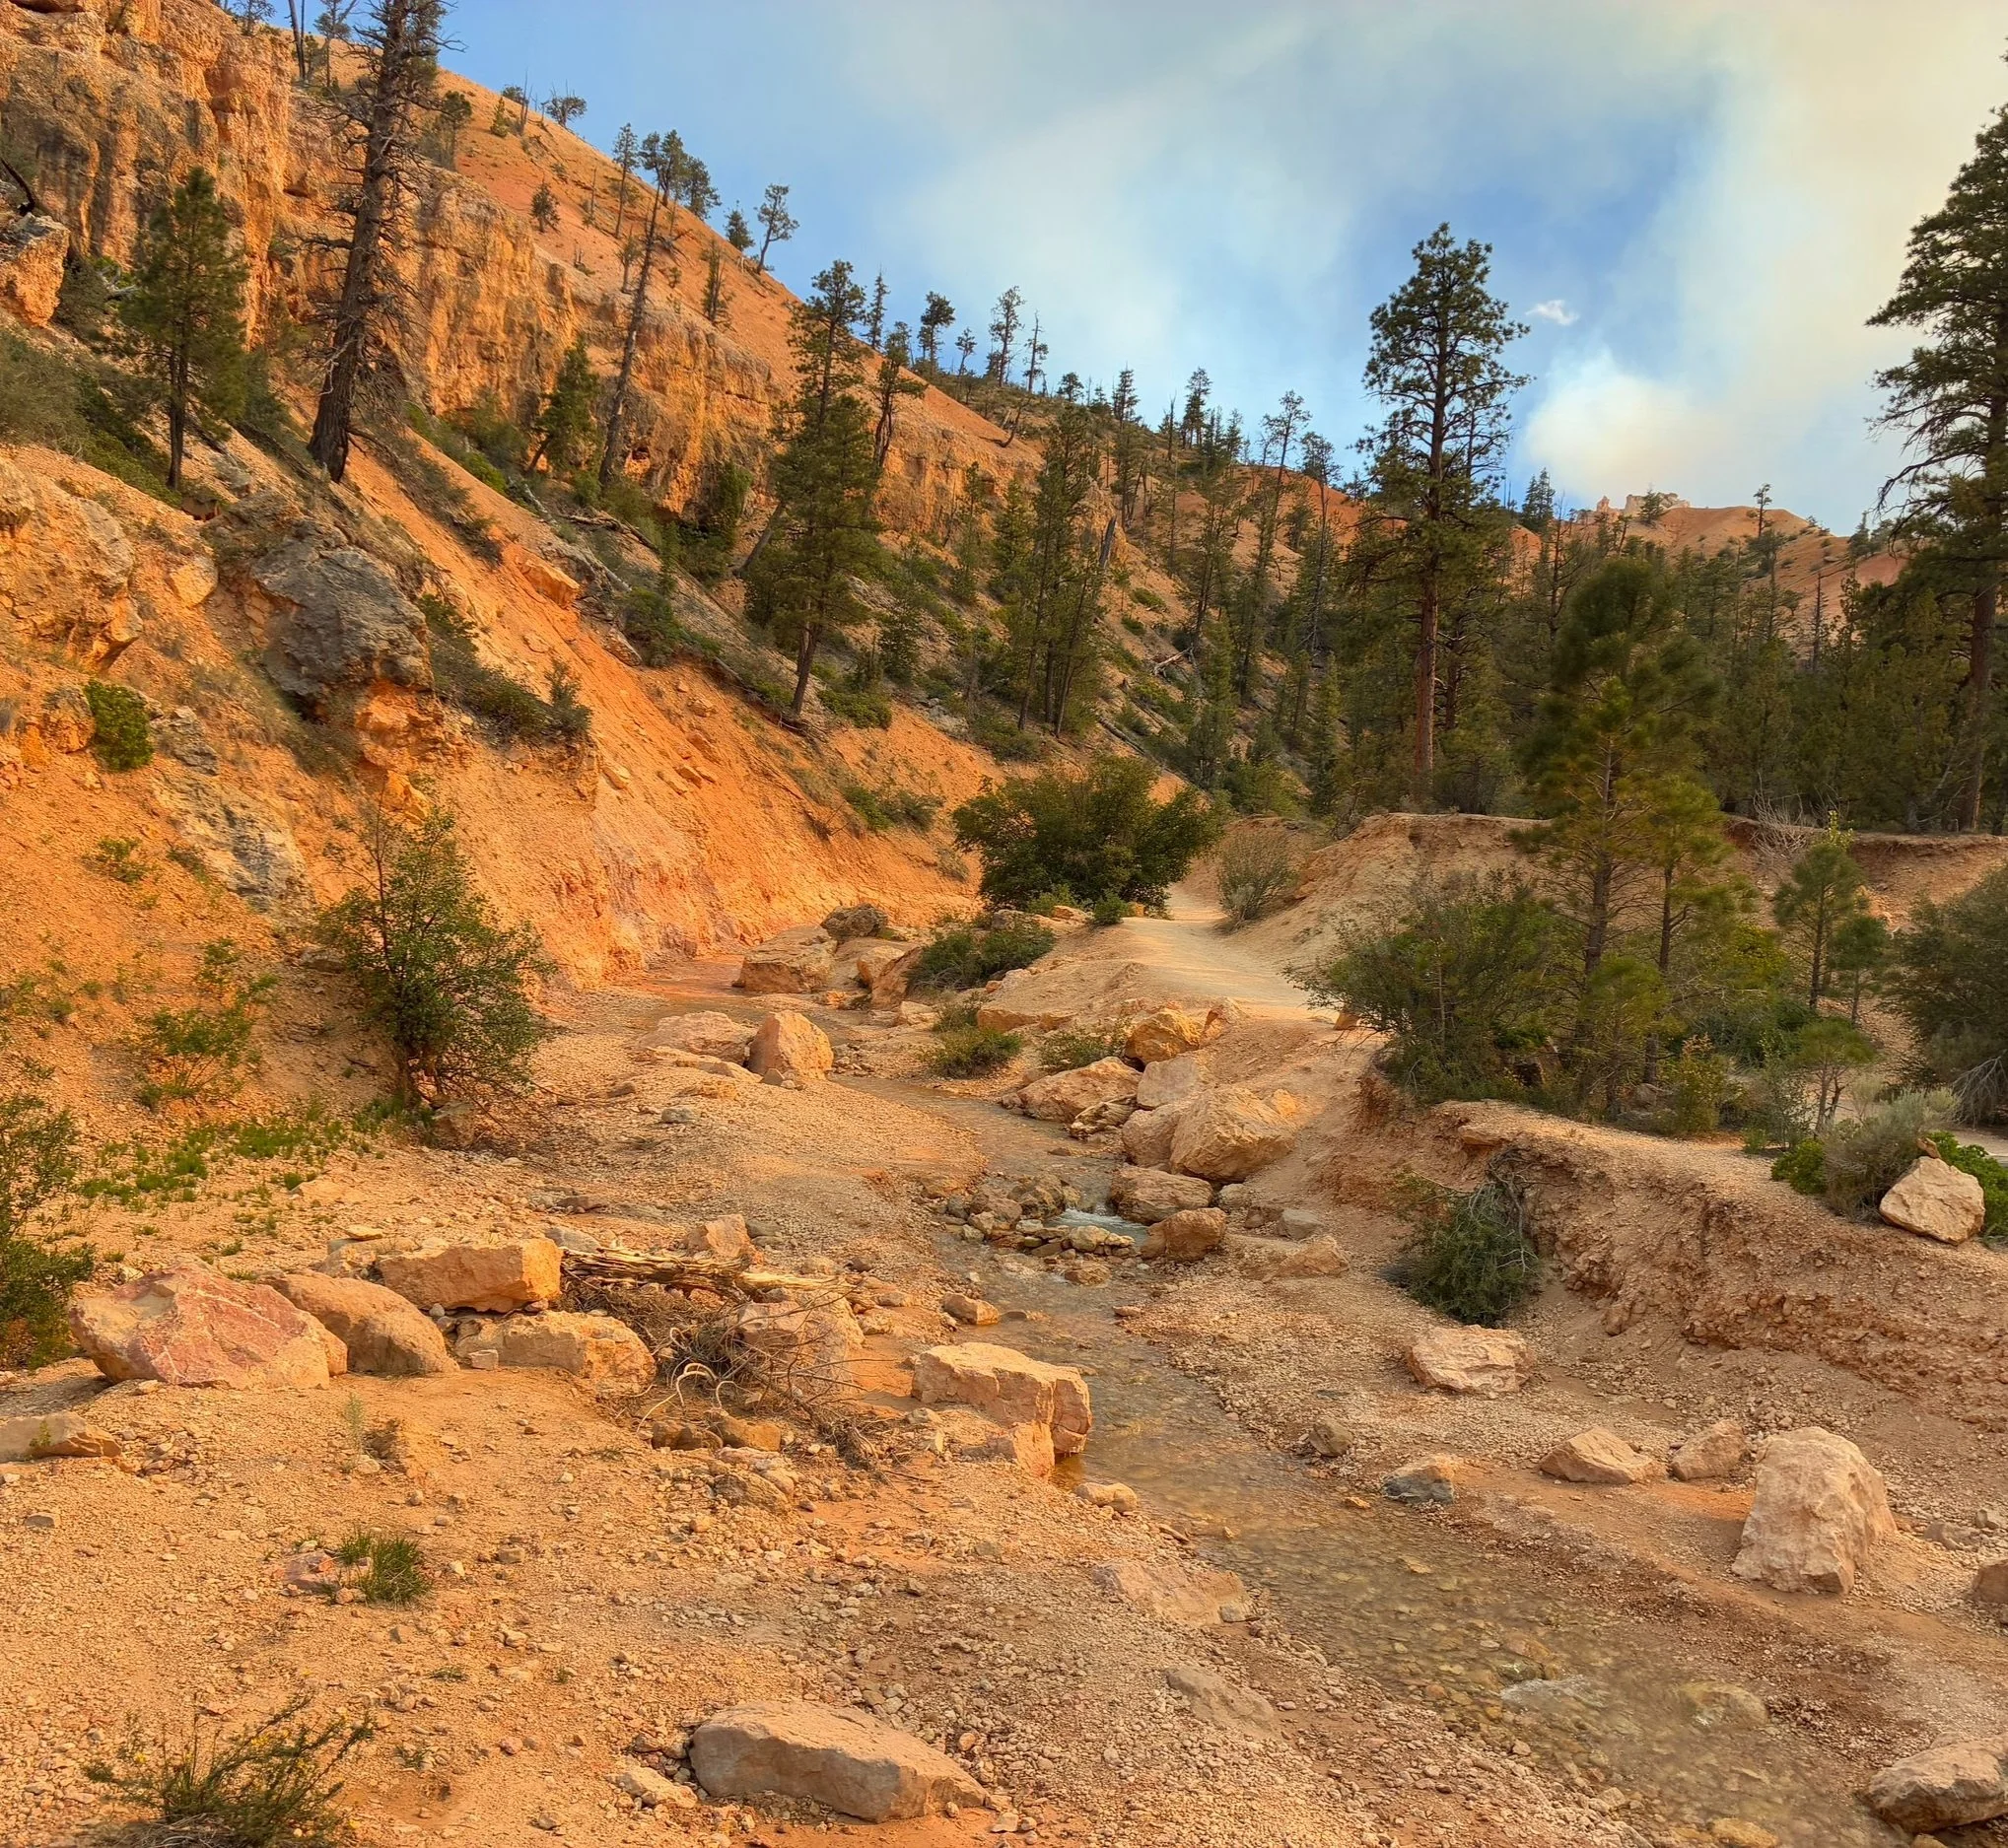
Bryce Canyon, Mossy Cave - This creek is known as “Tropic Ditch”
The trail starts off as hard packed dirt, and it crosses over the creek in two spots, both along wooden bridges.
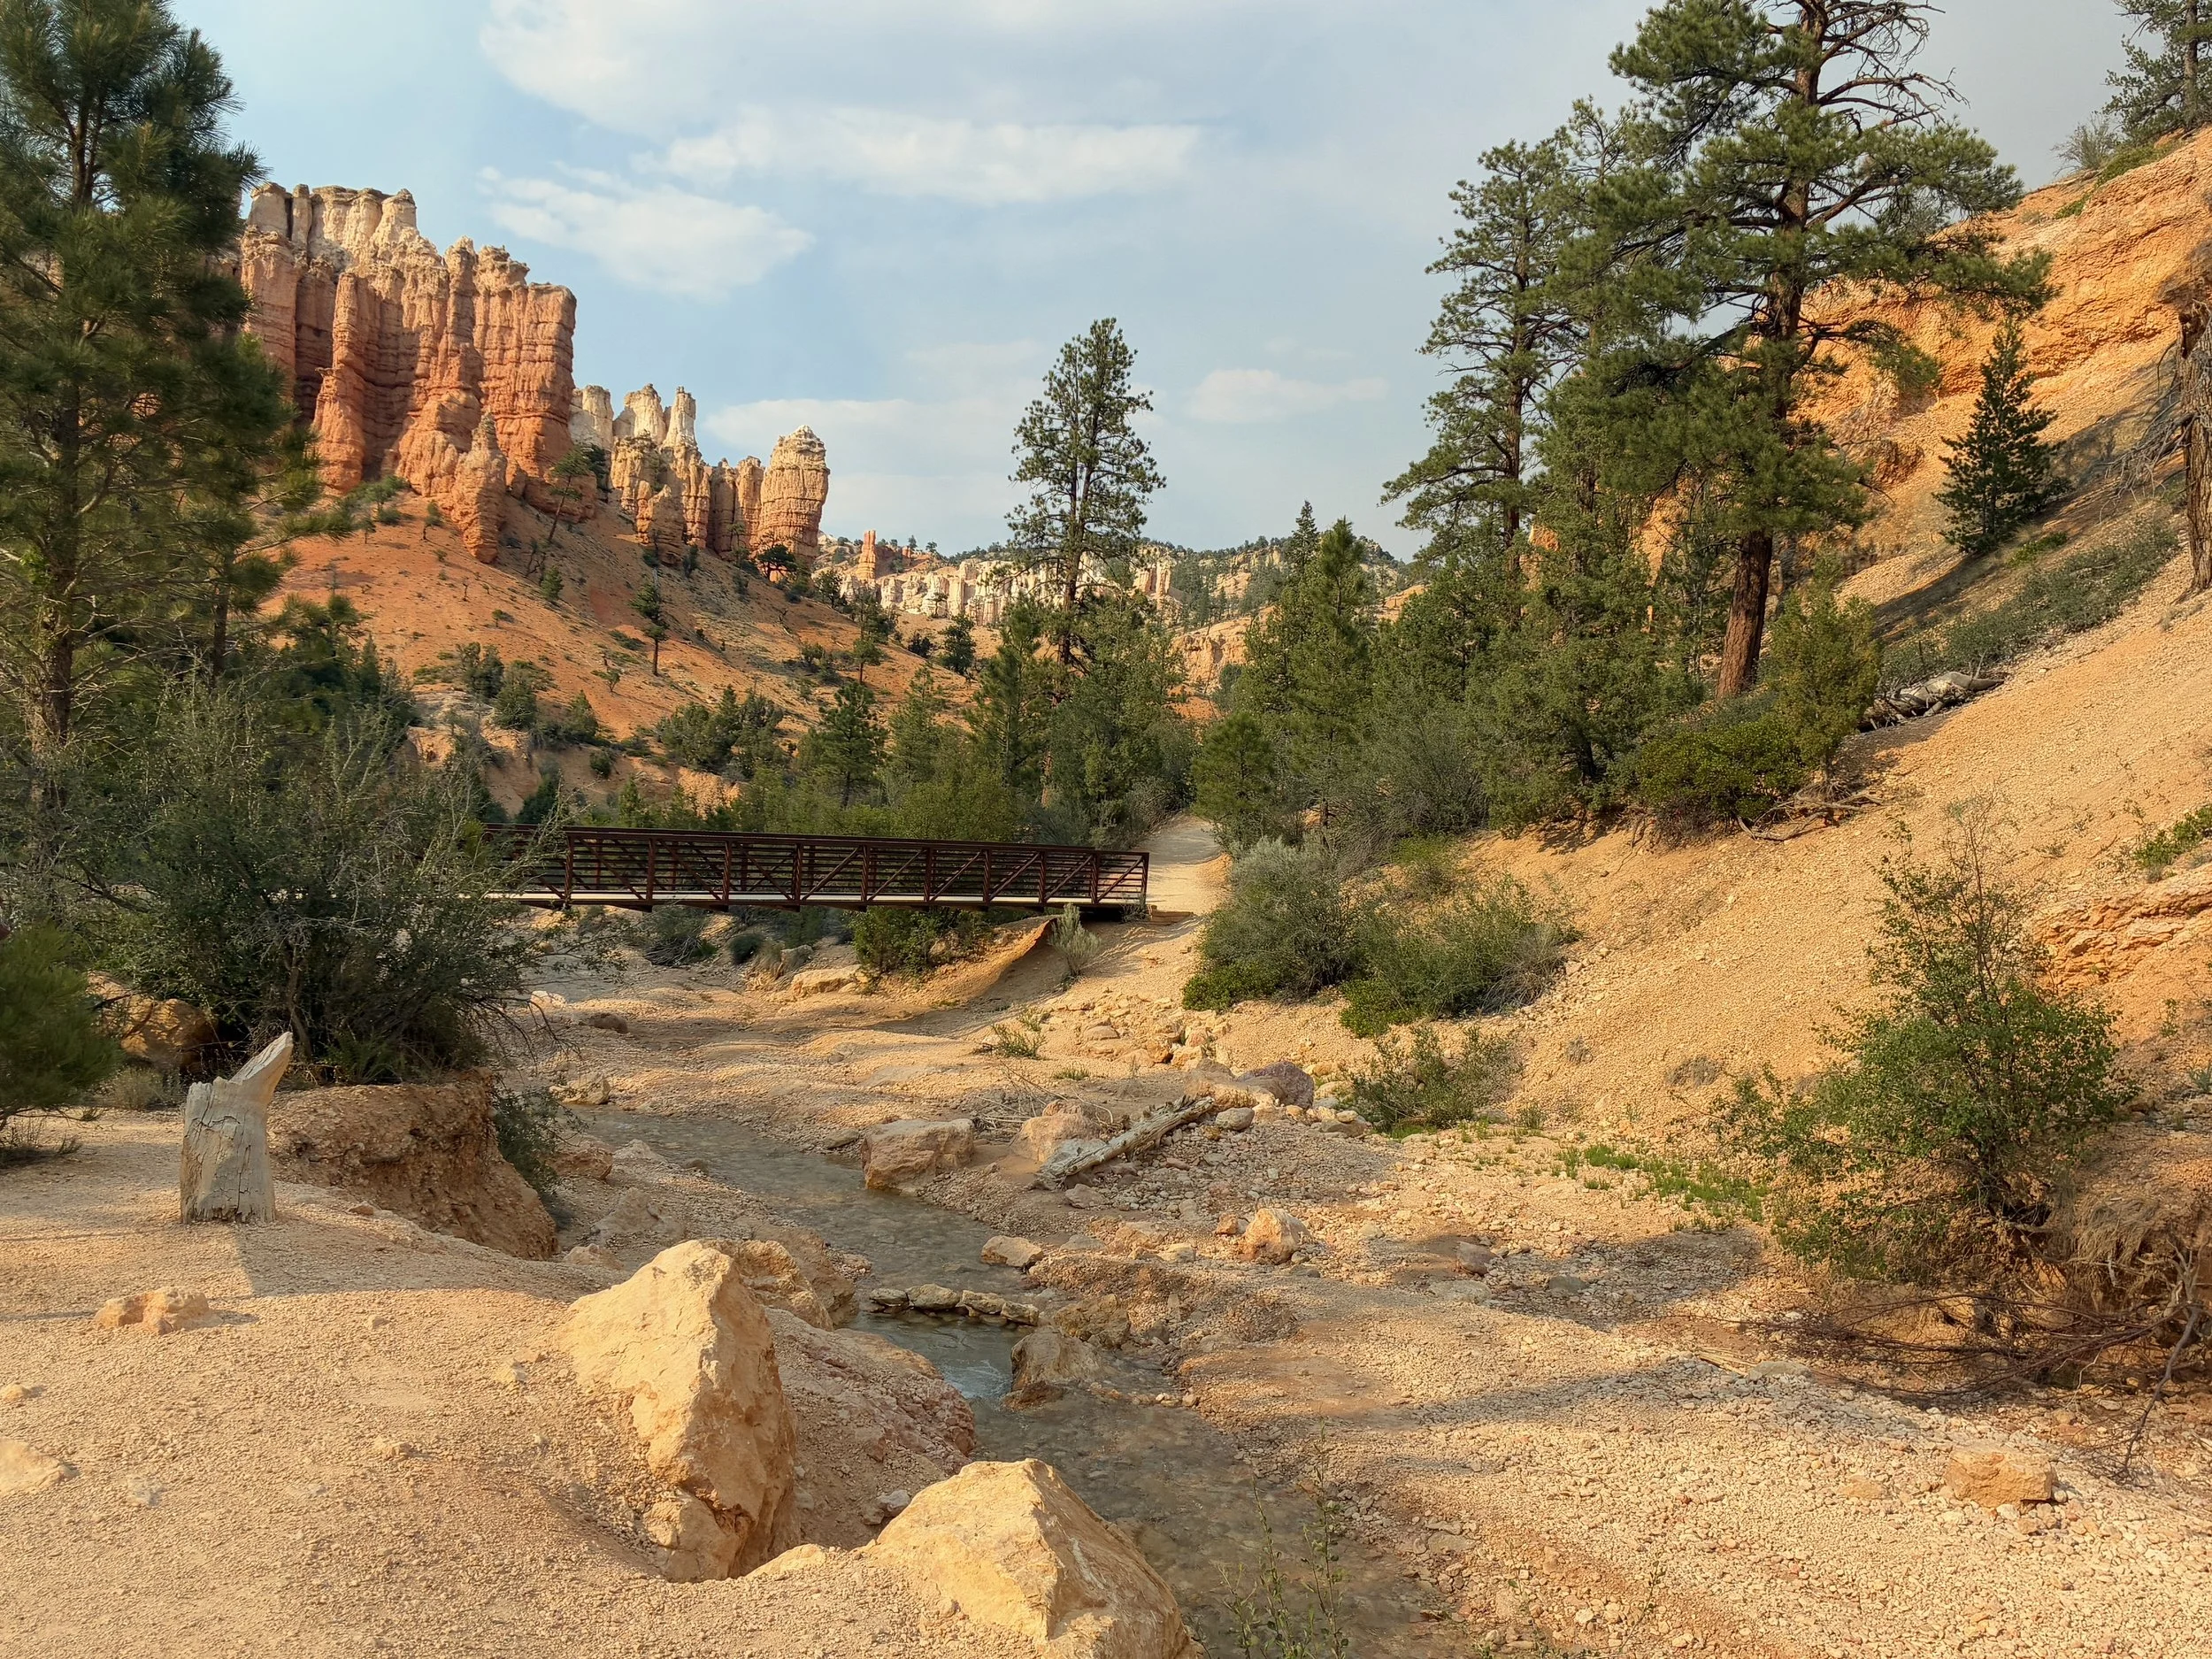
Bryce Canyon, Mossy Cave – First bridge crossing
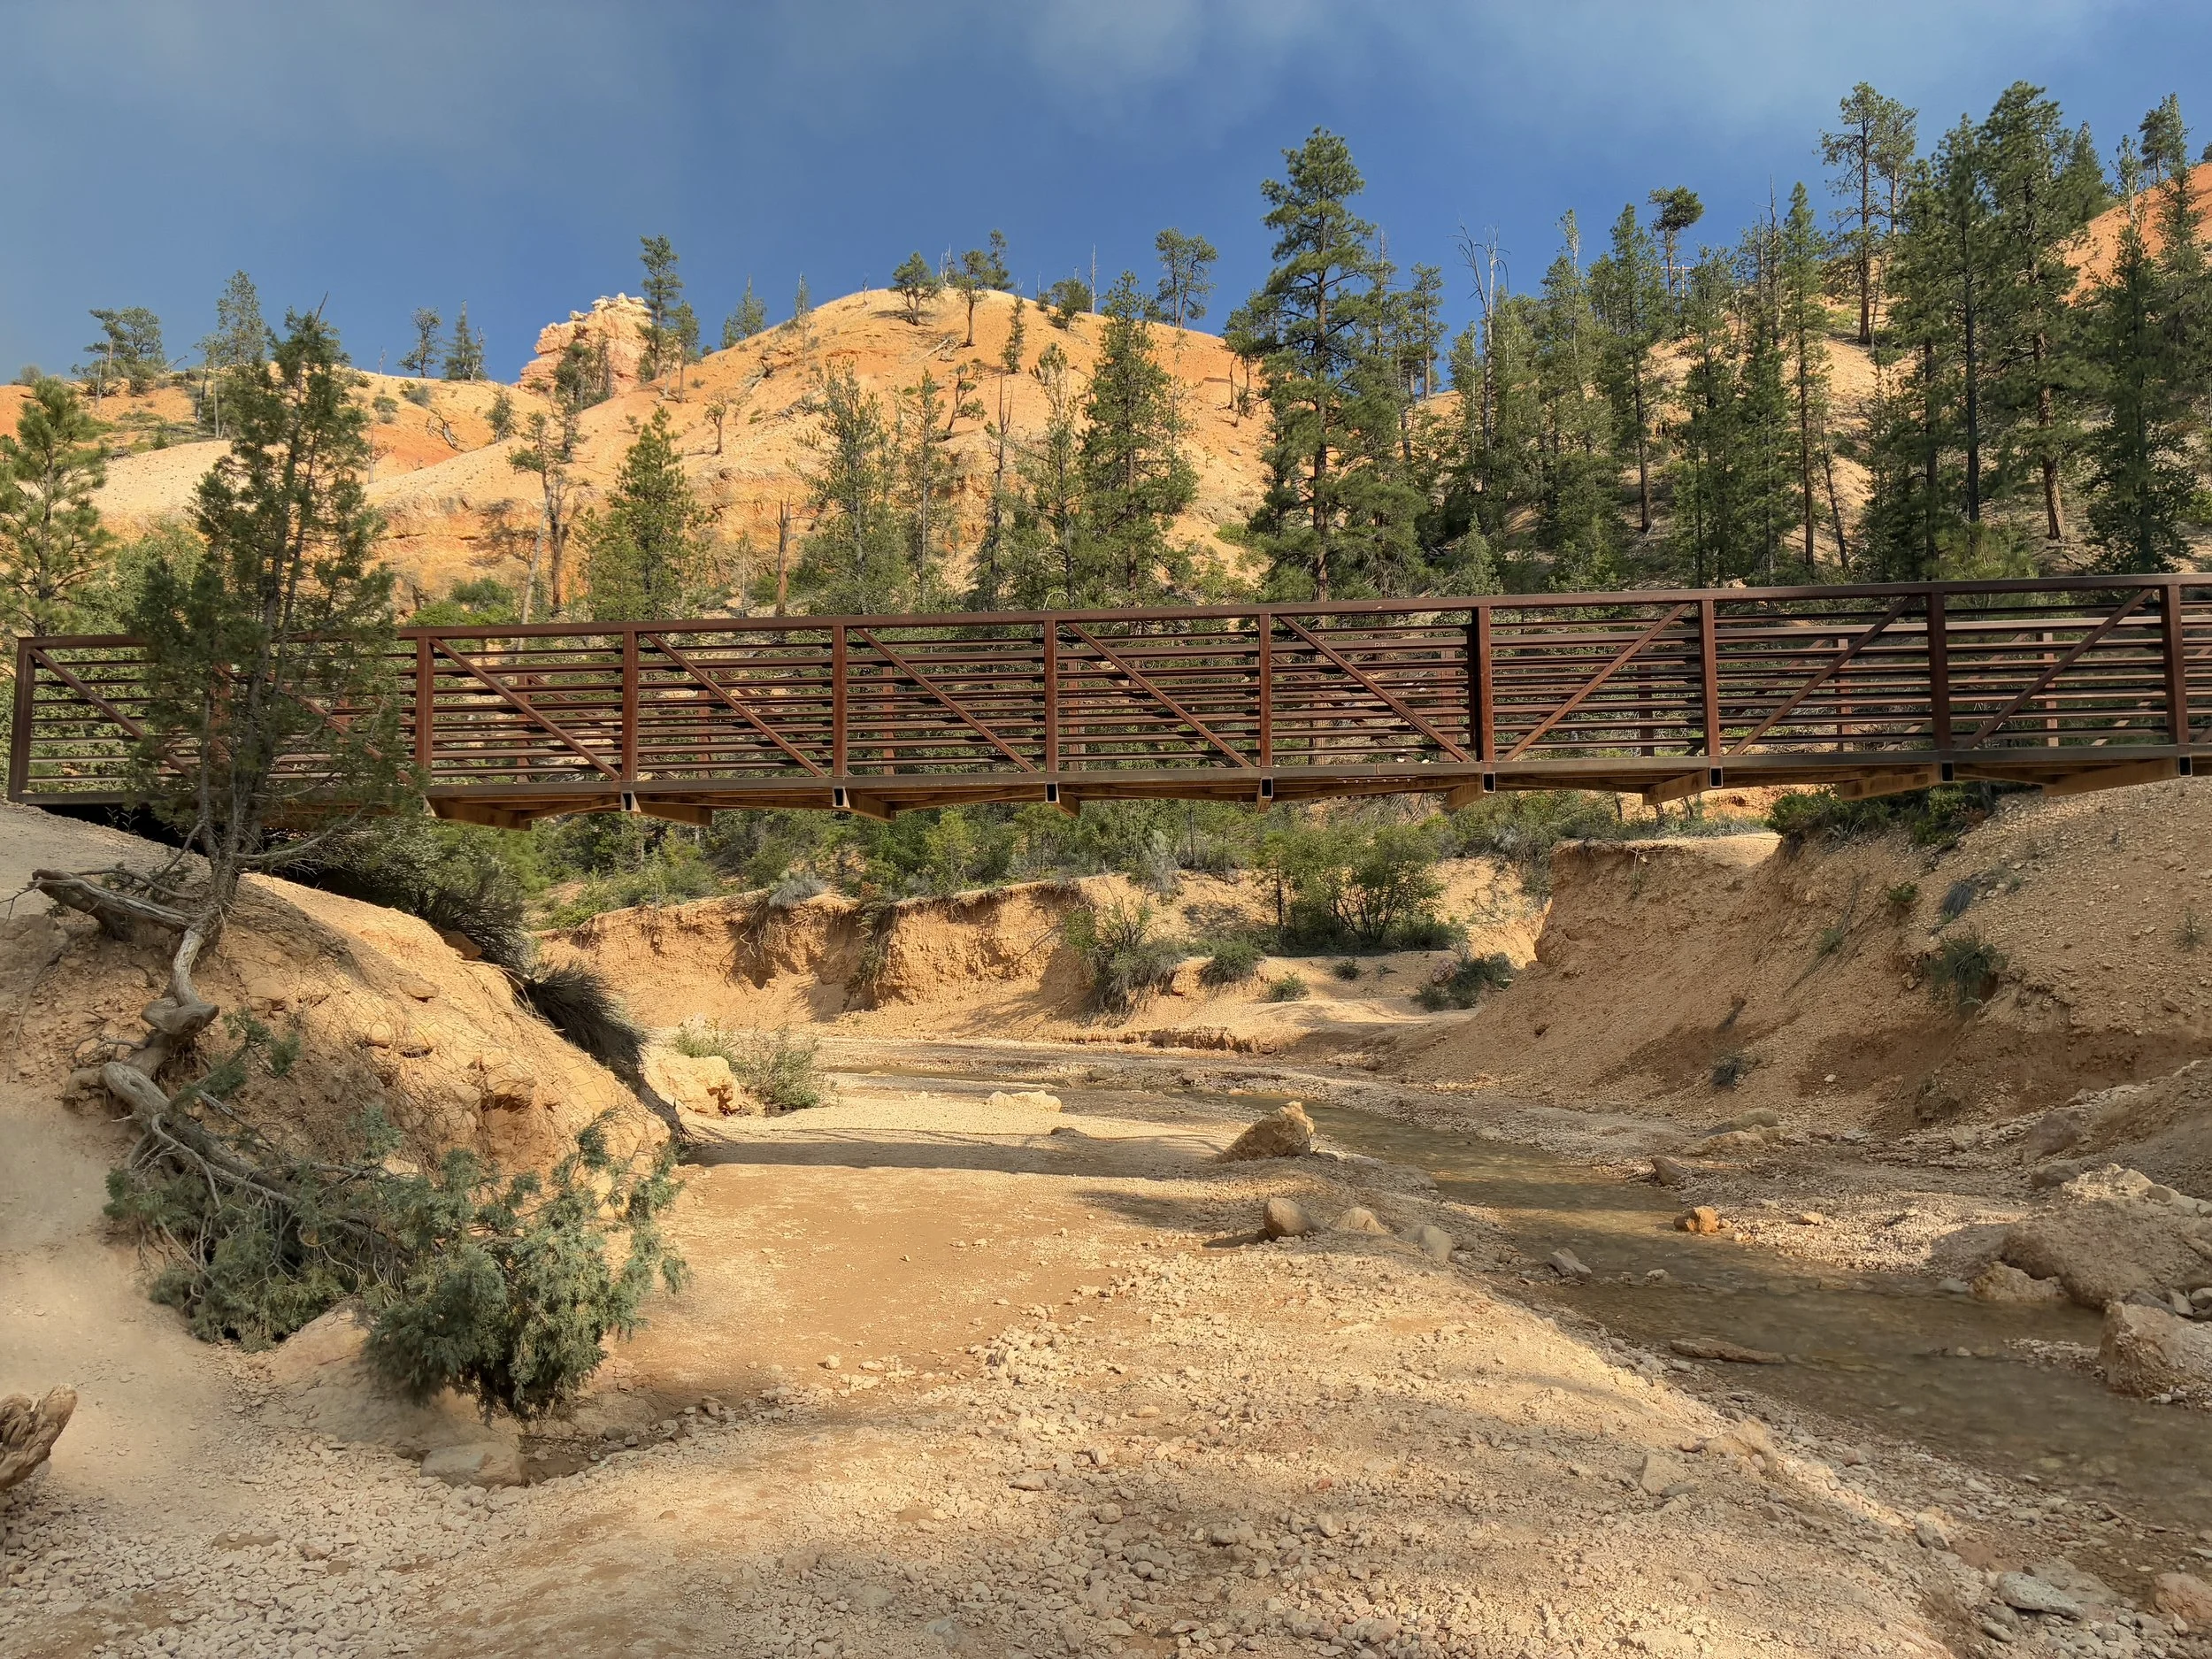
Bryce Canyon, Mossy Cave – Second bridge – Climb down into the creek at this point to get to the waterfall. It doesn’t matter which side of the bridge.
At the second bridge, hop off the trail and scamper down into the creek (on either side of the bridge). The waterfall can be seen in the distance from this second bridge.
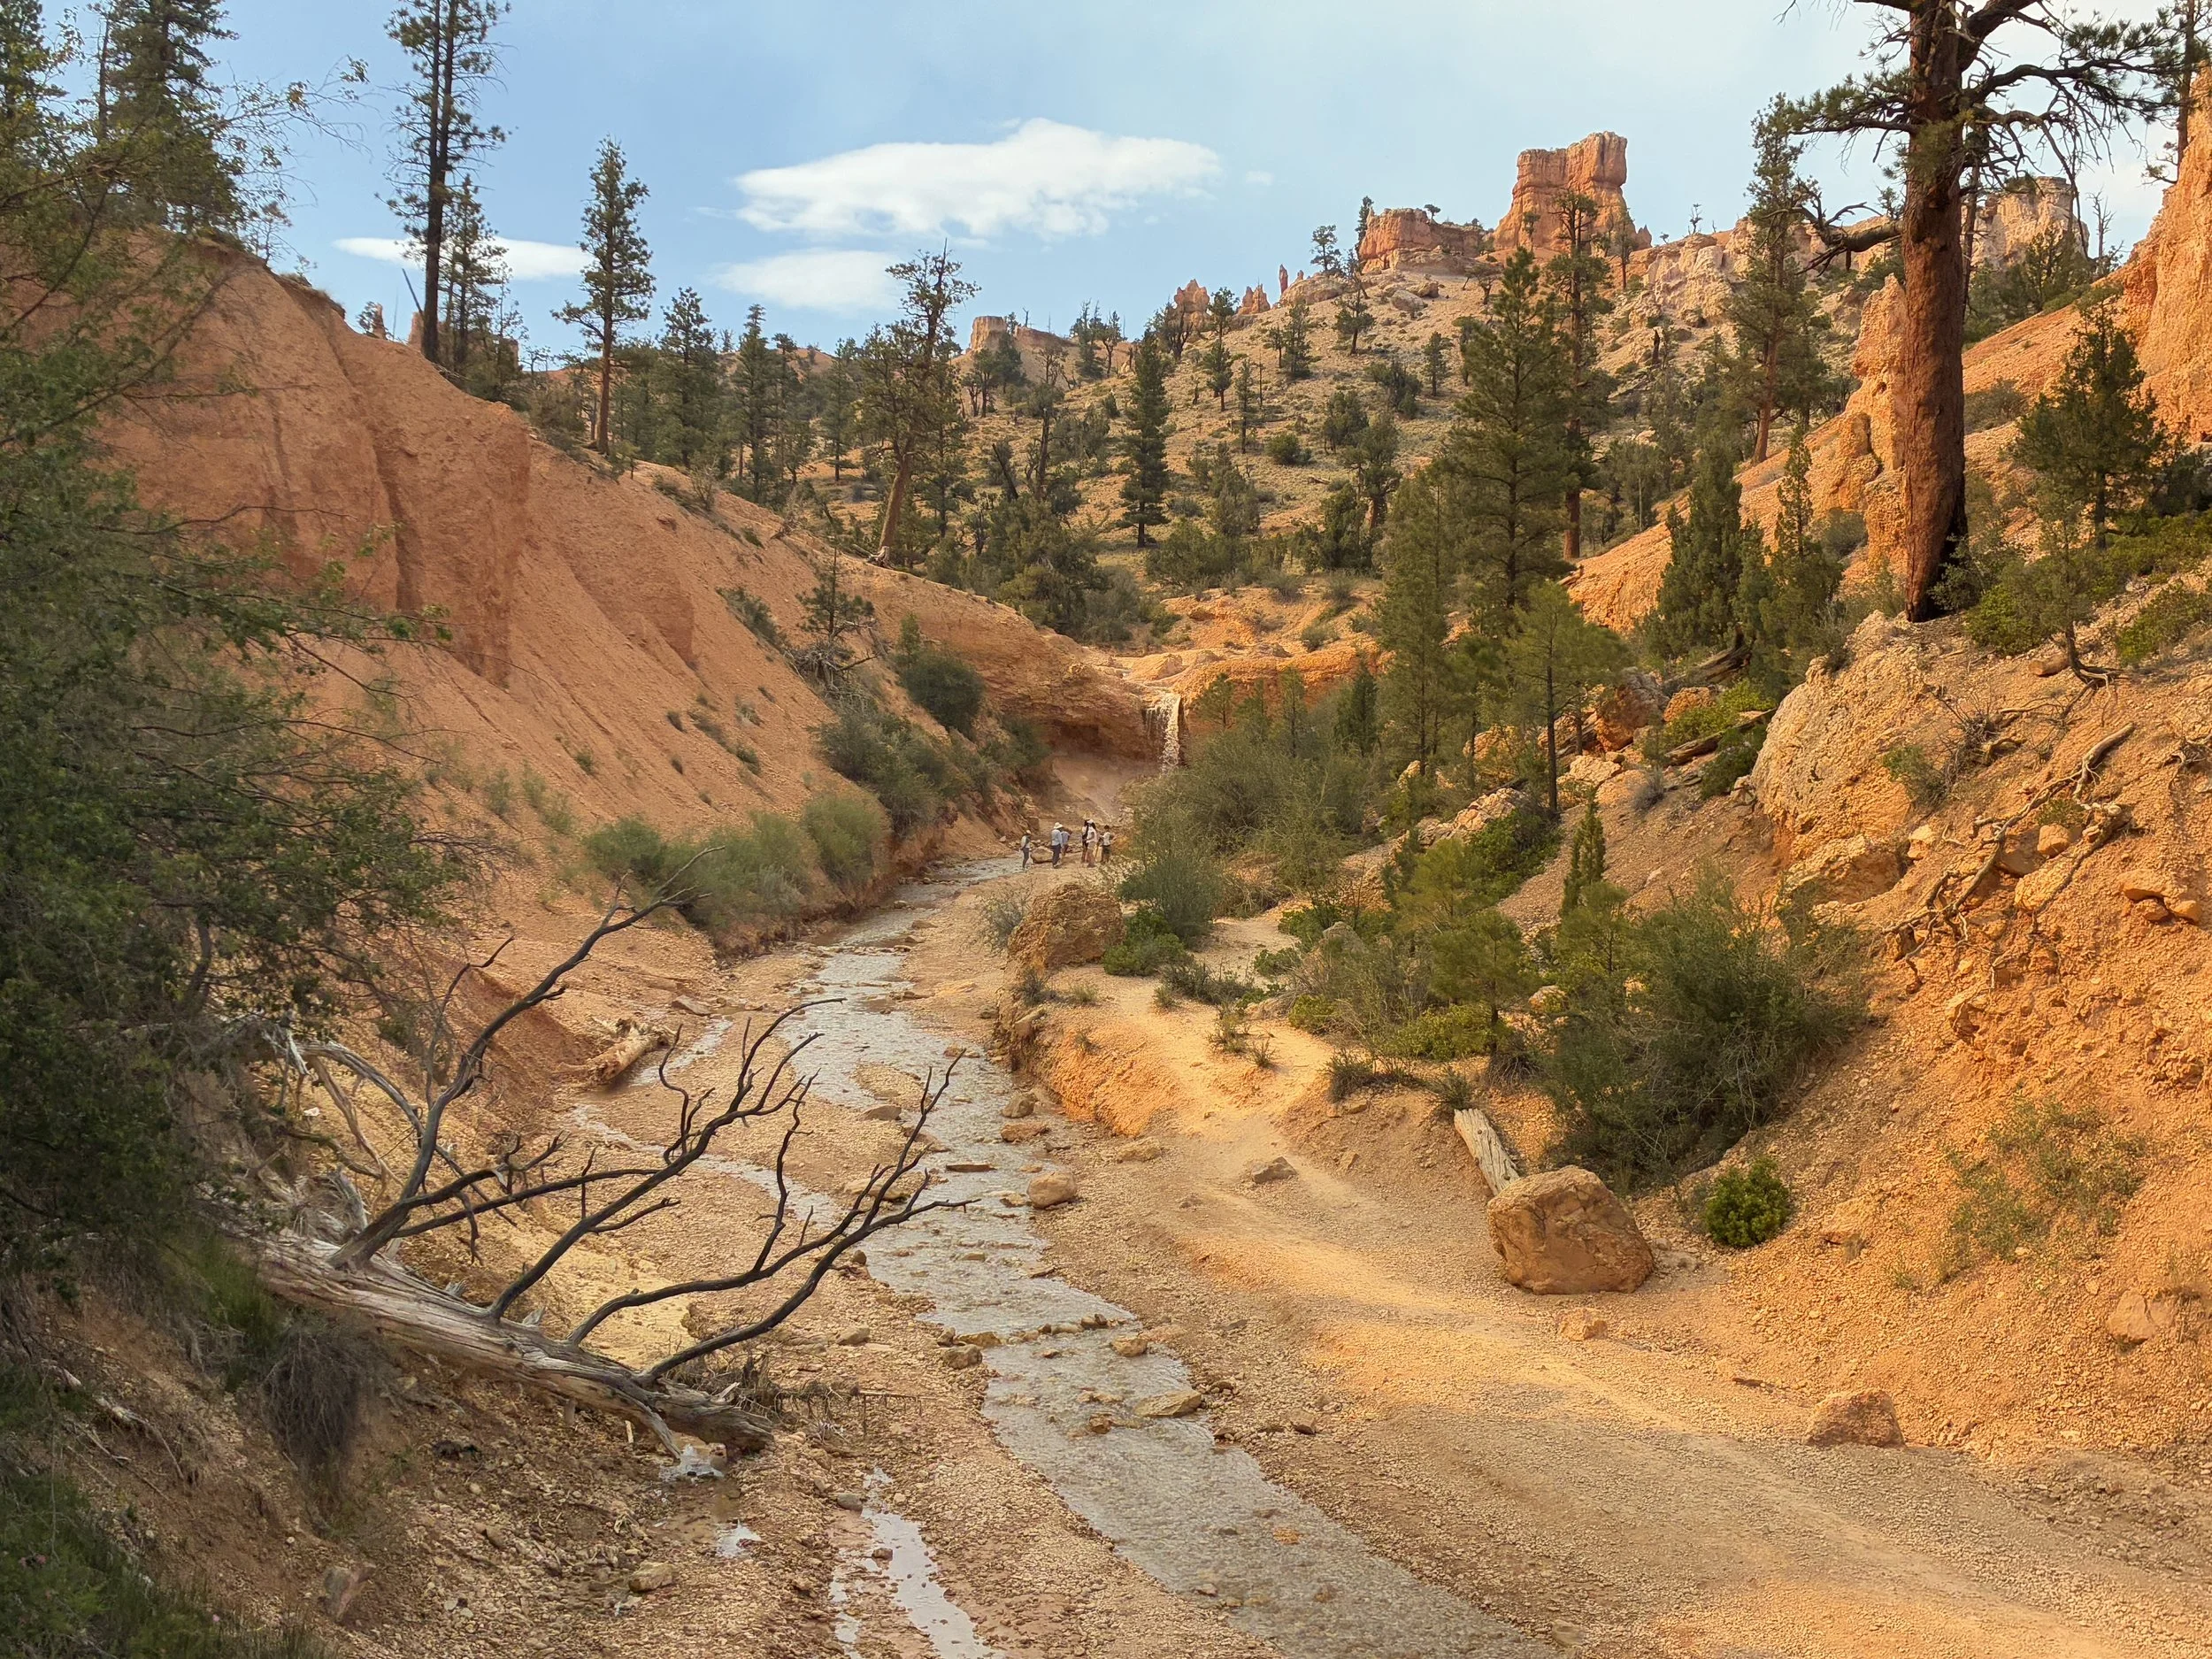
Bryce Canyon, Mossy Cave - The waterfall is just barely visible in this picture
This isn’t a particularly impressive waterfall, but it’s the only waterfall in Bryce Canyon. “Canyon” is a bit misleading to describe this National Park, because it was formed by erosion from wind, ice, snow, and rainfall. There isn’t a river that sits at the bottom, like the Grand Canyon or Zion Canyon. The only water in the park is in this creek, known as Tropic Ditch. This waterway is not natural either. It was formed by settlers diverting water (digging a canal with shovels) from the East Fork of the Sevier River (10 miles away) between 1889 and 1892, to supply water to the town of Tropic.
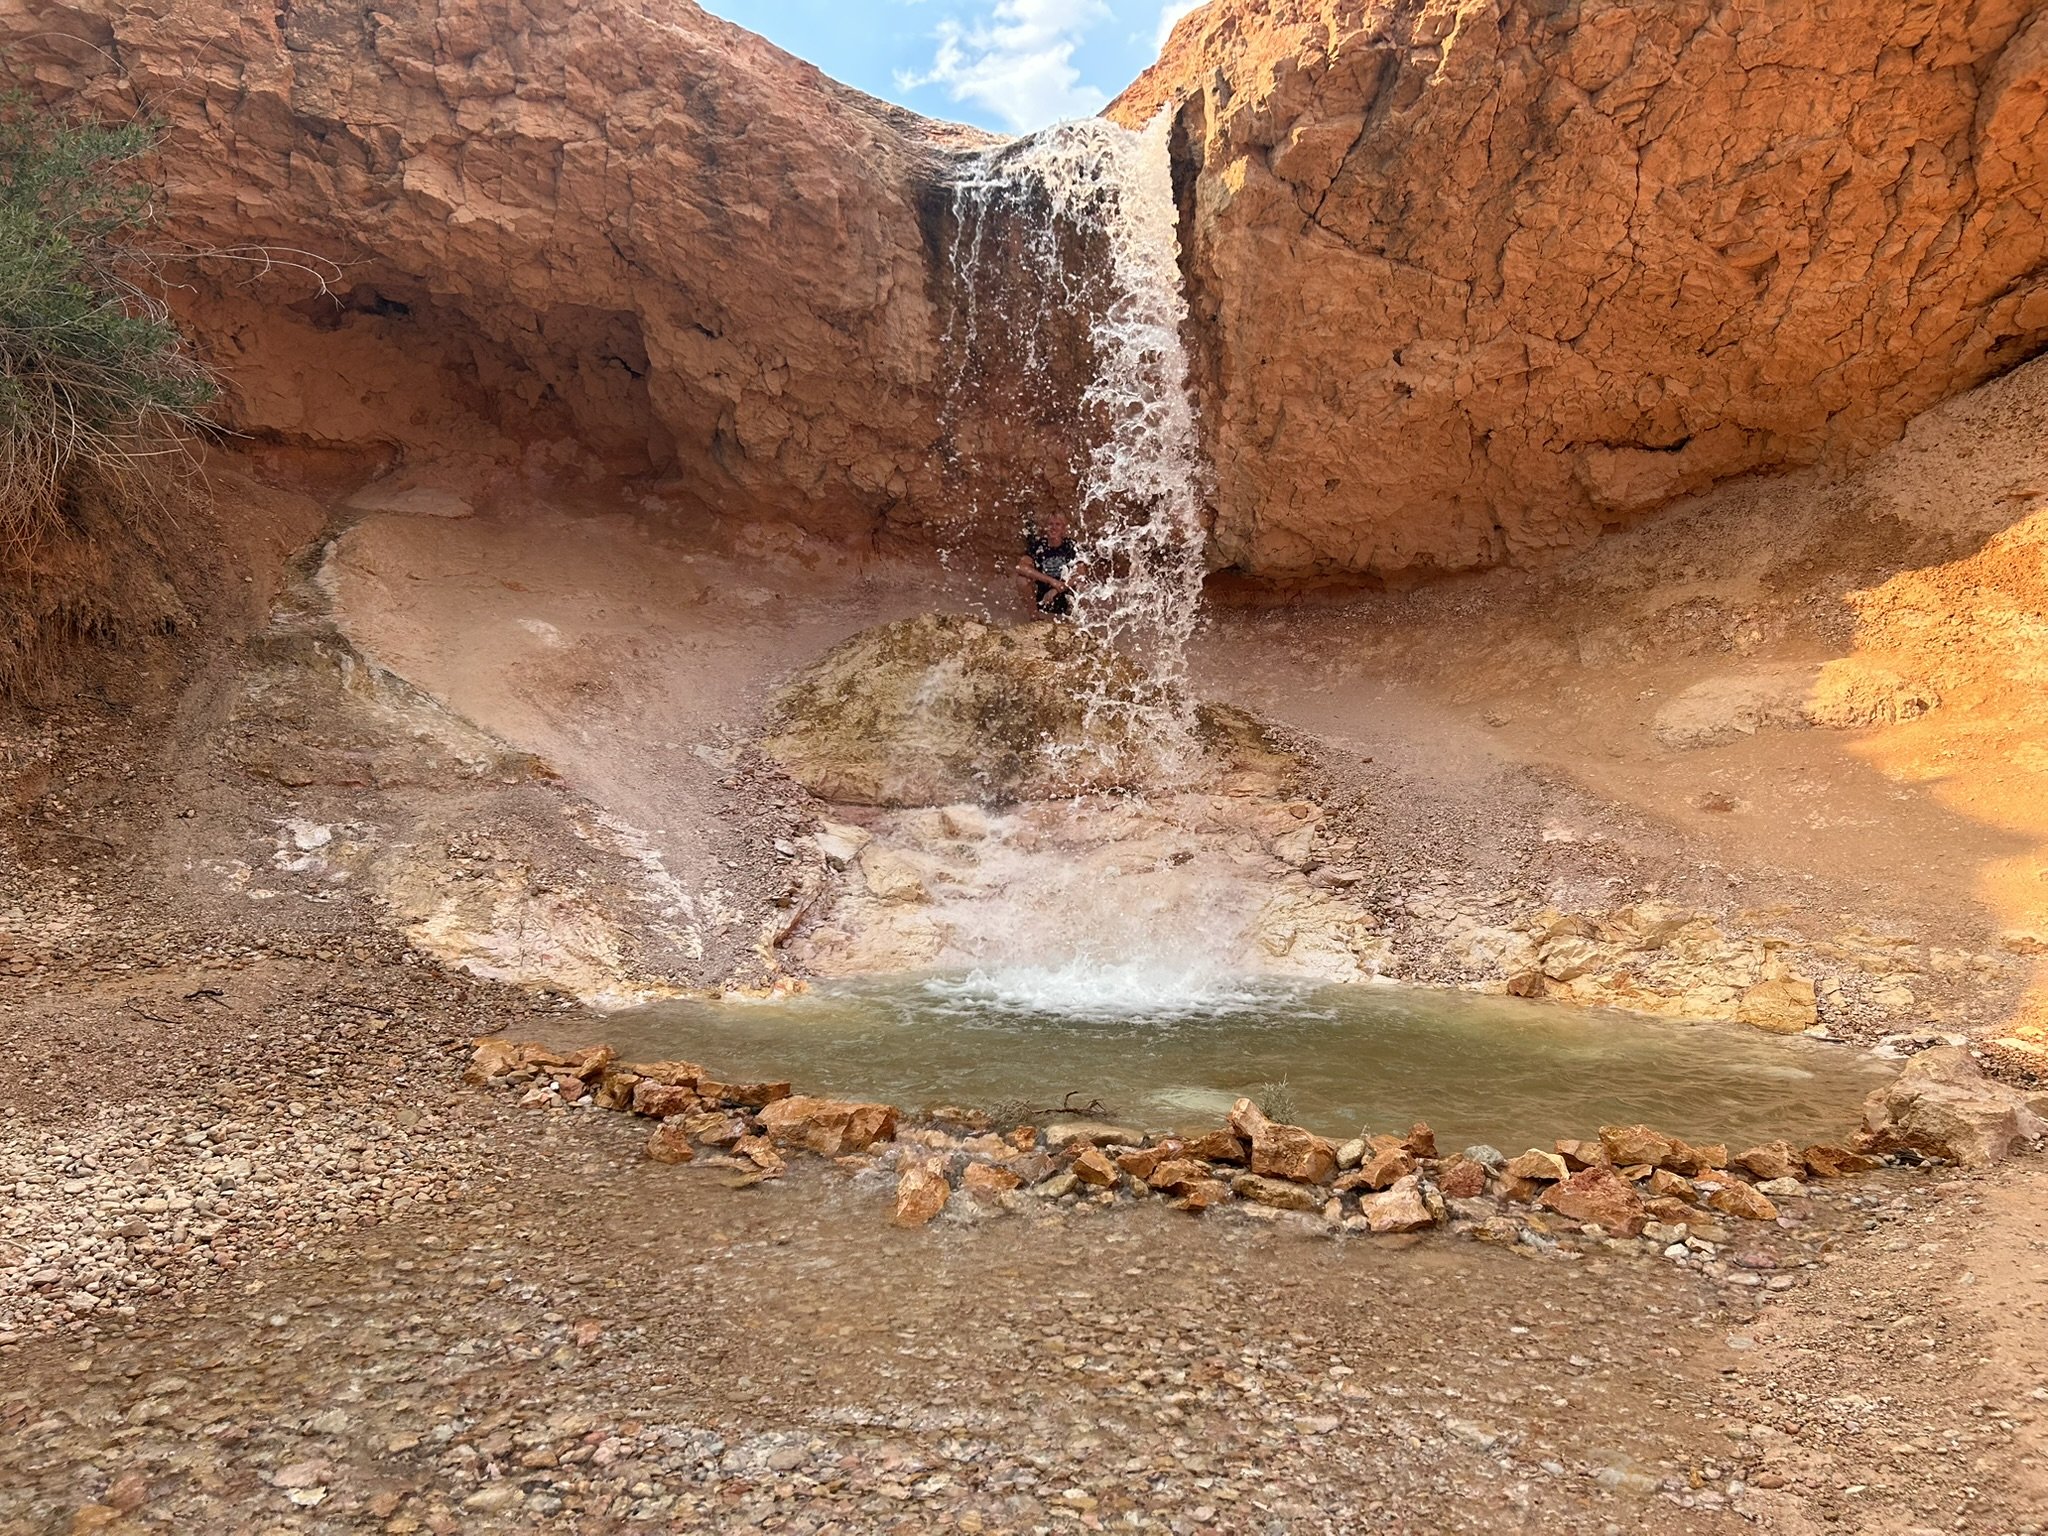
Bryce Canyon, Mossy Cave Waterfall
Mossy Cave isn’t actually a “cave” either… The names of this park describe how things look, not what they actually are. Mossy Cave is more like a small cliff overhang. We weren’t very impressed, and I think this part of the trail could be skipped. But for anyone interested enough to walk a bit further, go back up onto the second bridge, and stay on the left side of the trail when it splits. The cave is easy to spot, and there is a sign.
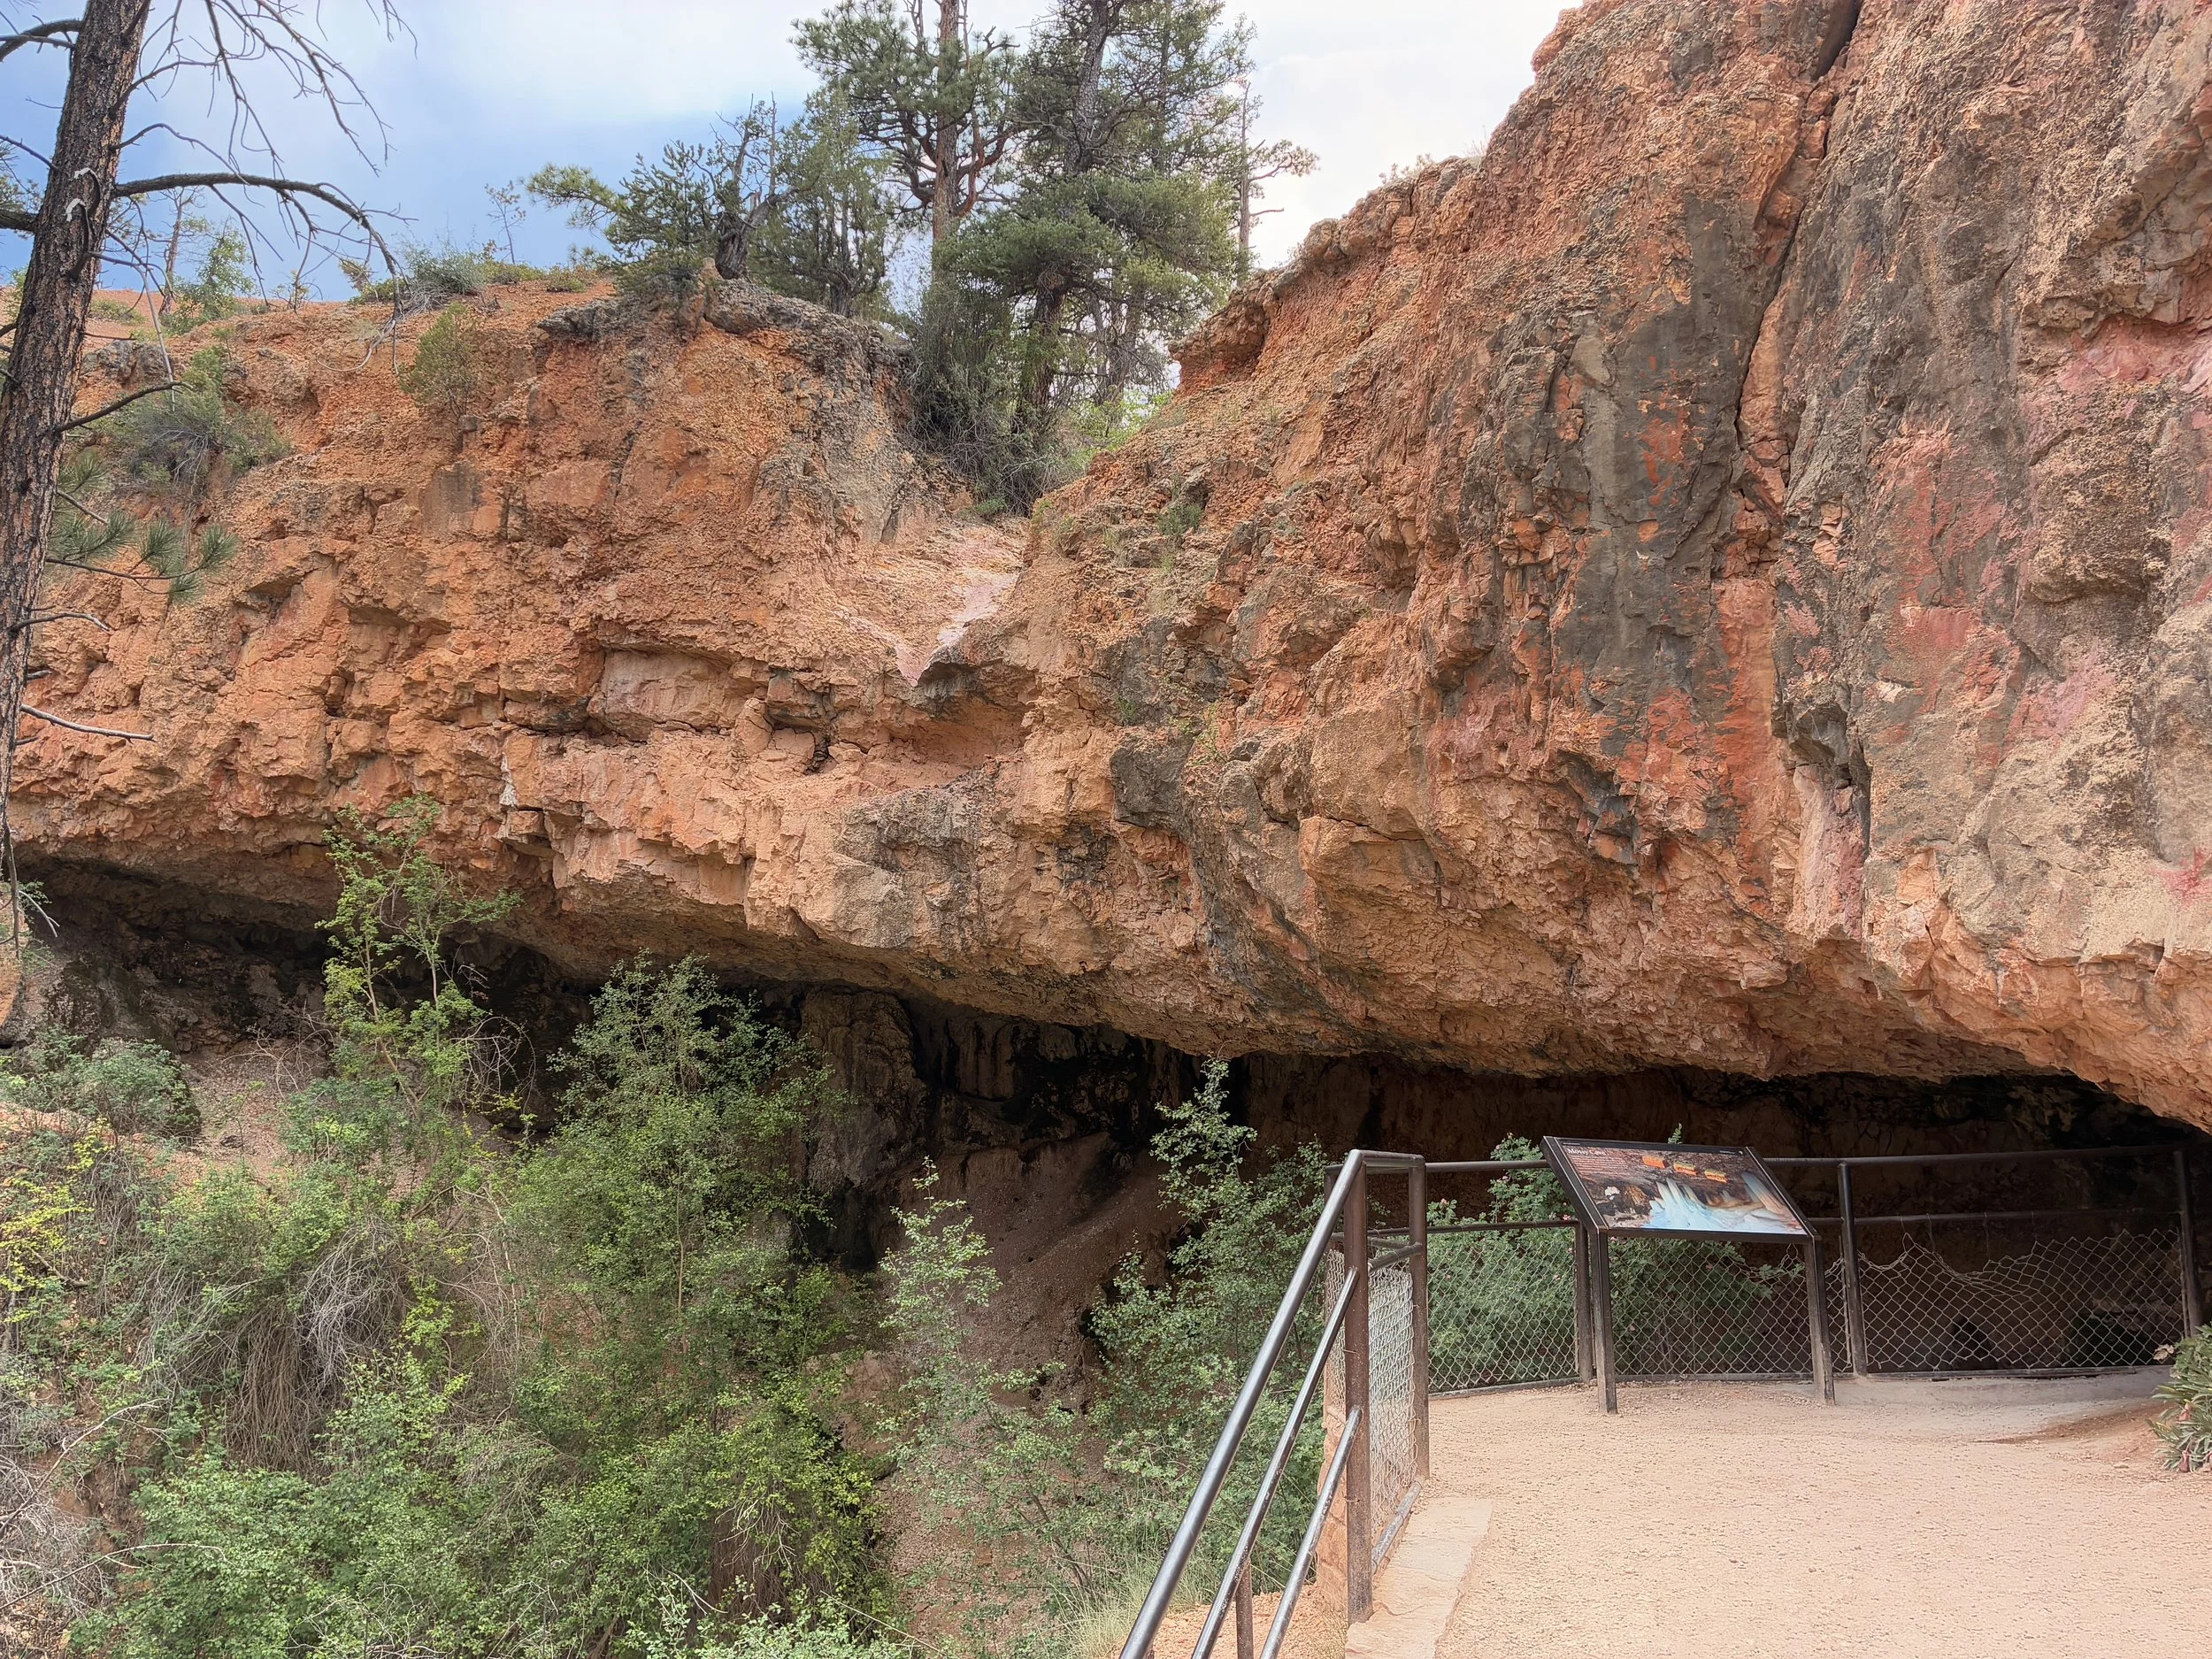
Bryce Canyon, Mossy Cave
There is one more thing to do on this trail, and that’s to go see the waterfall from above. Note that I wouldn’t recommend this part of the trail for anyone with small children. The ground is loose, and it’s easy to lose footings and slide. There are no railings despite the steep drop into the water. That being said, I think this was my favorite part of the trail.
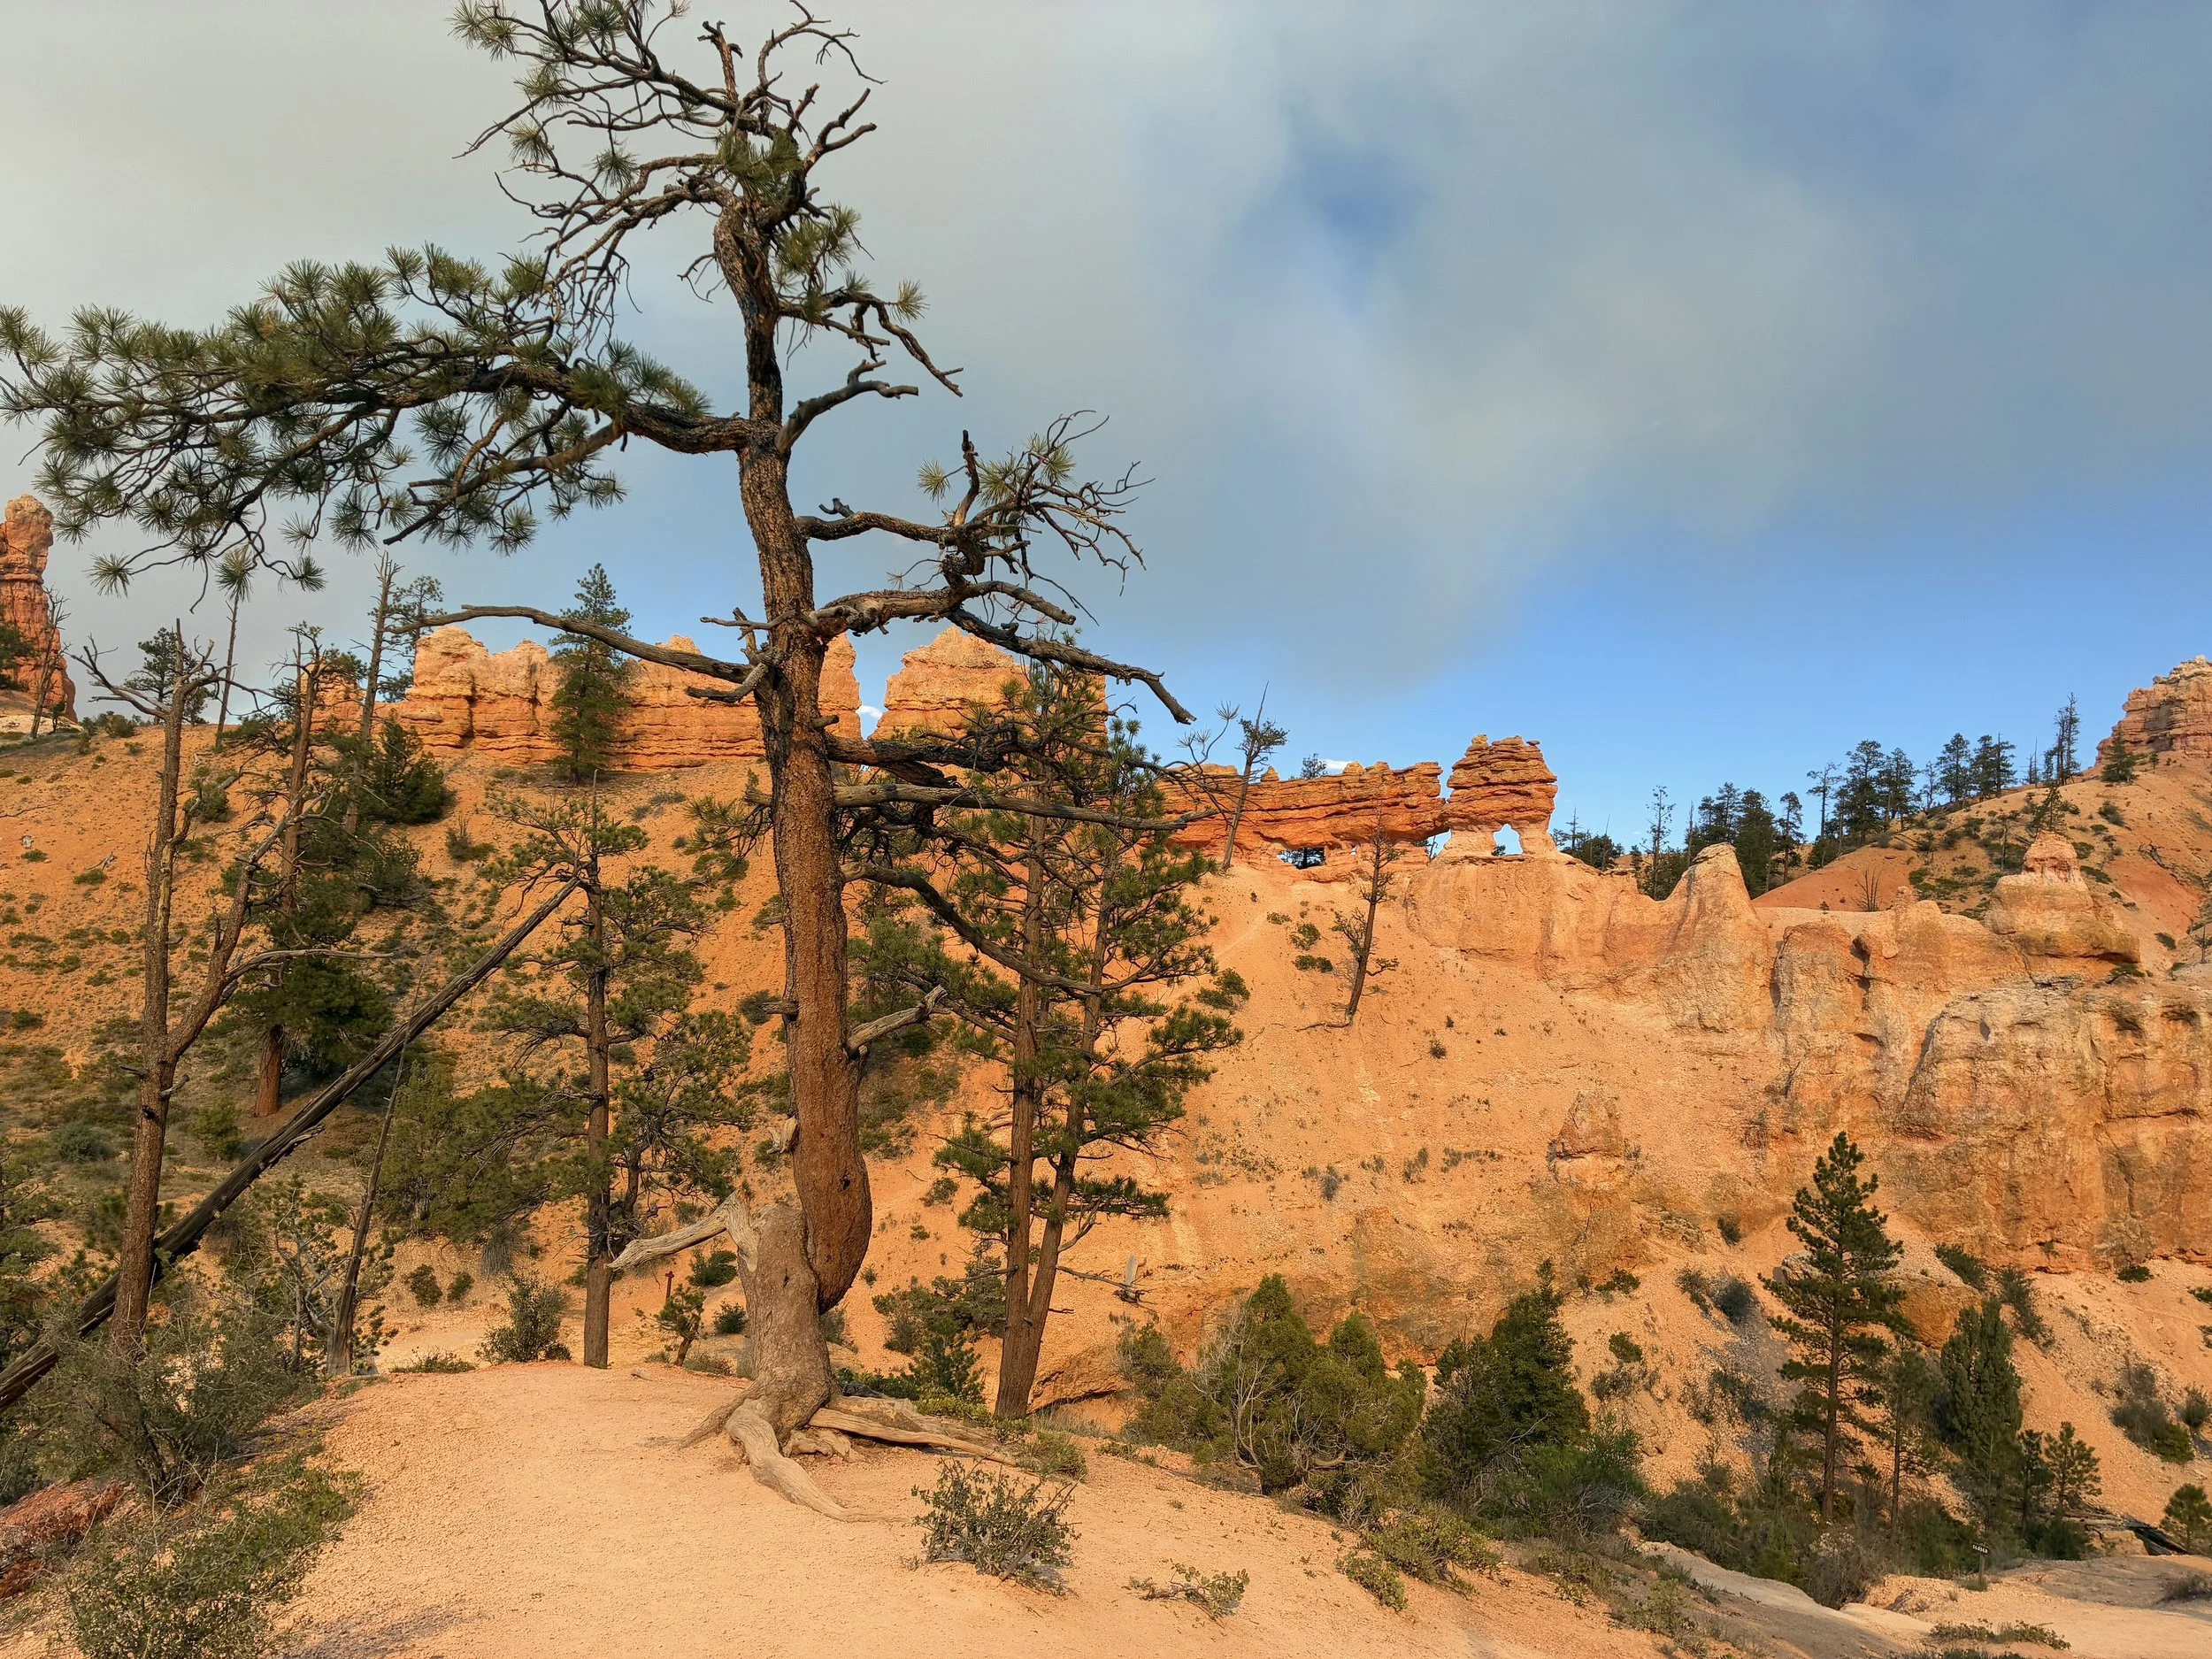
Bryce Canyon, Mossy Cave - Hoodoos on the way above the waterfall
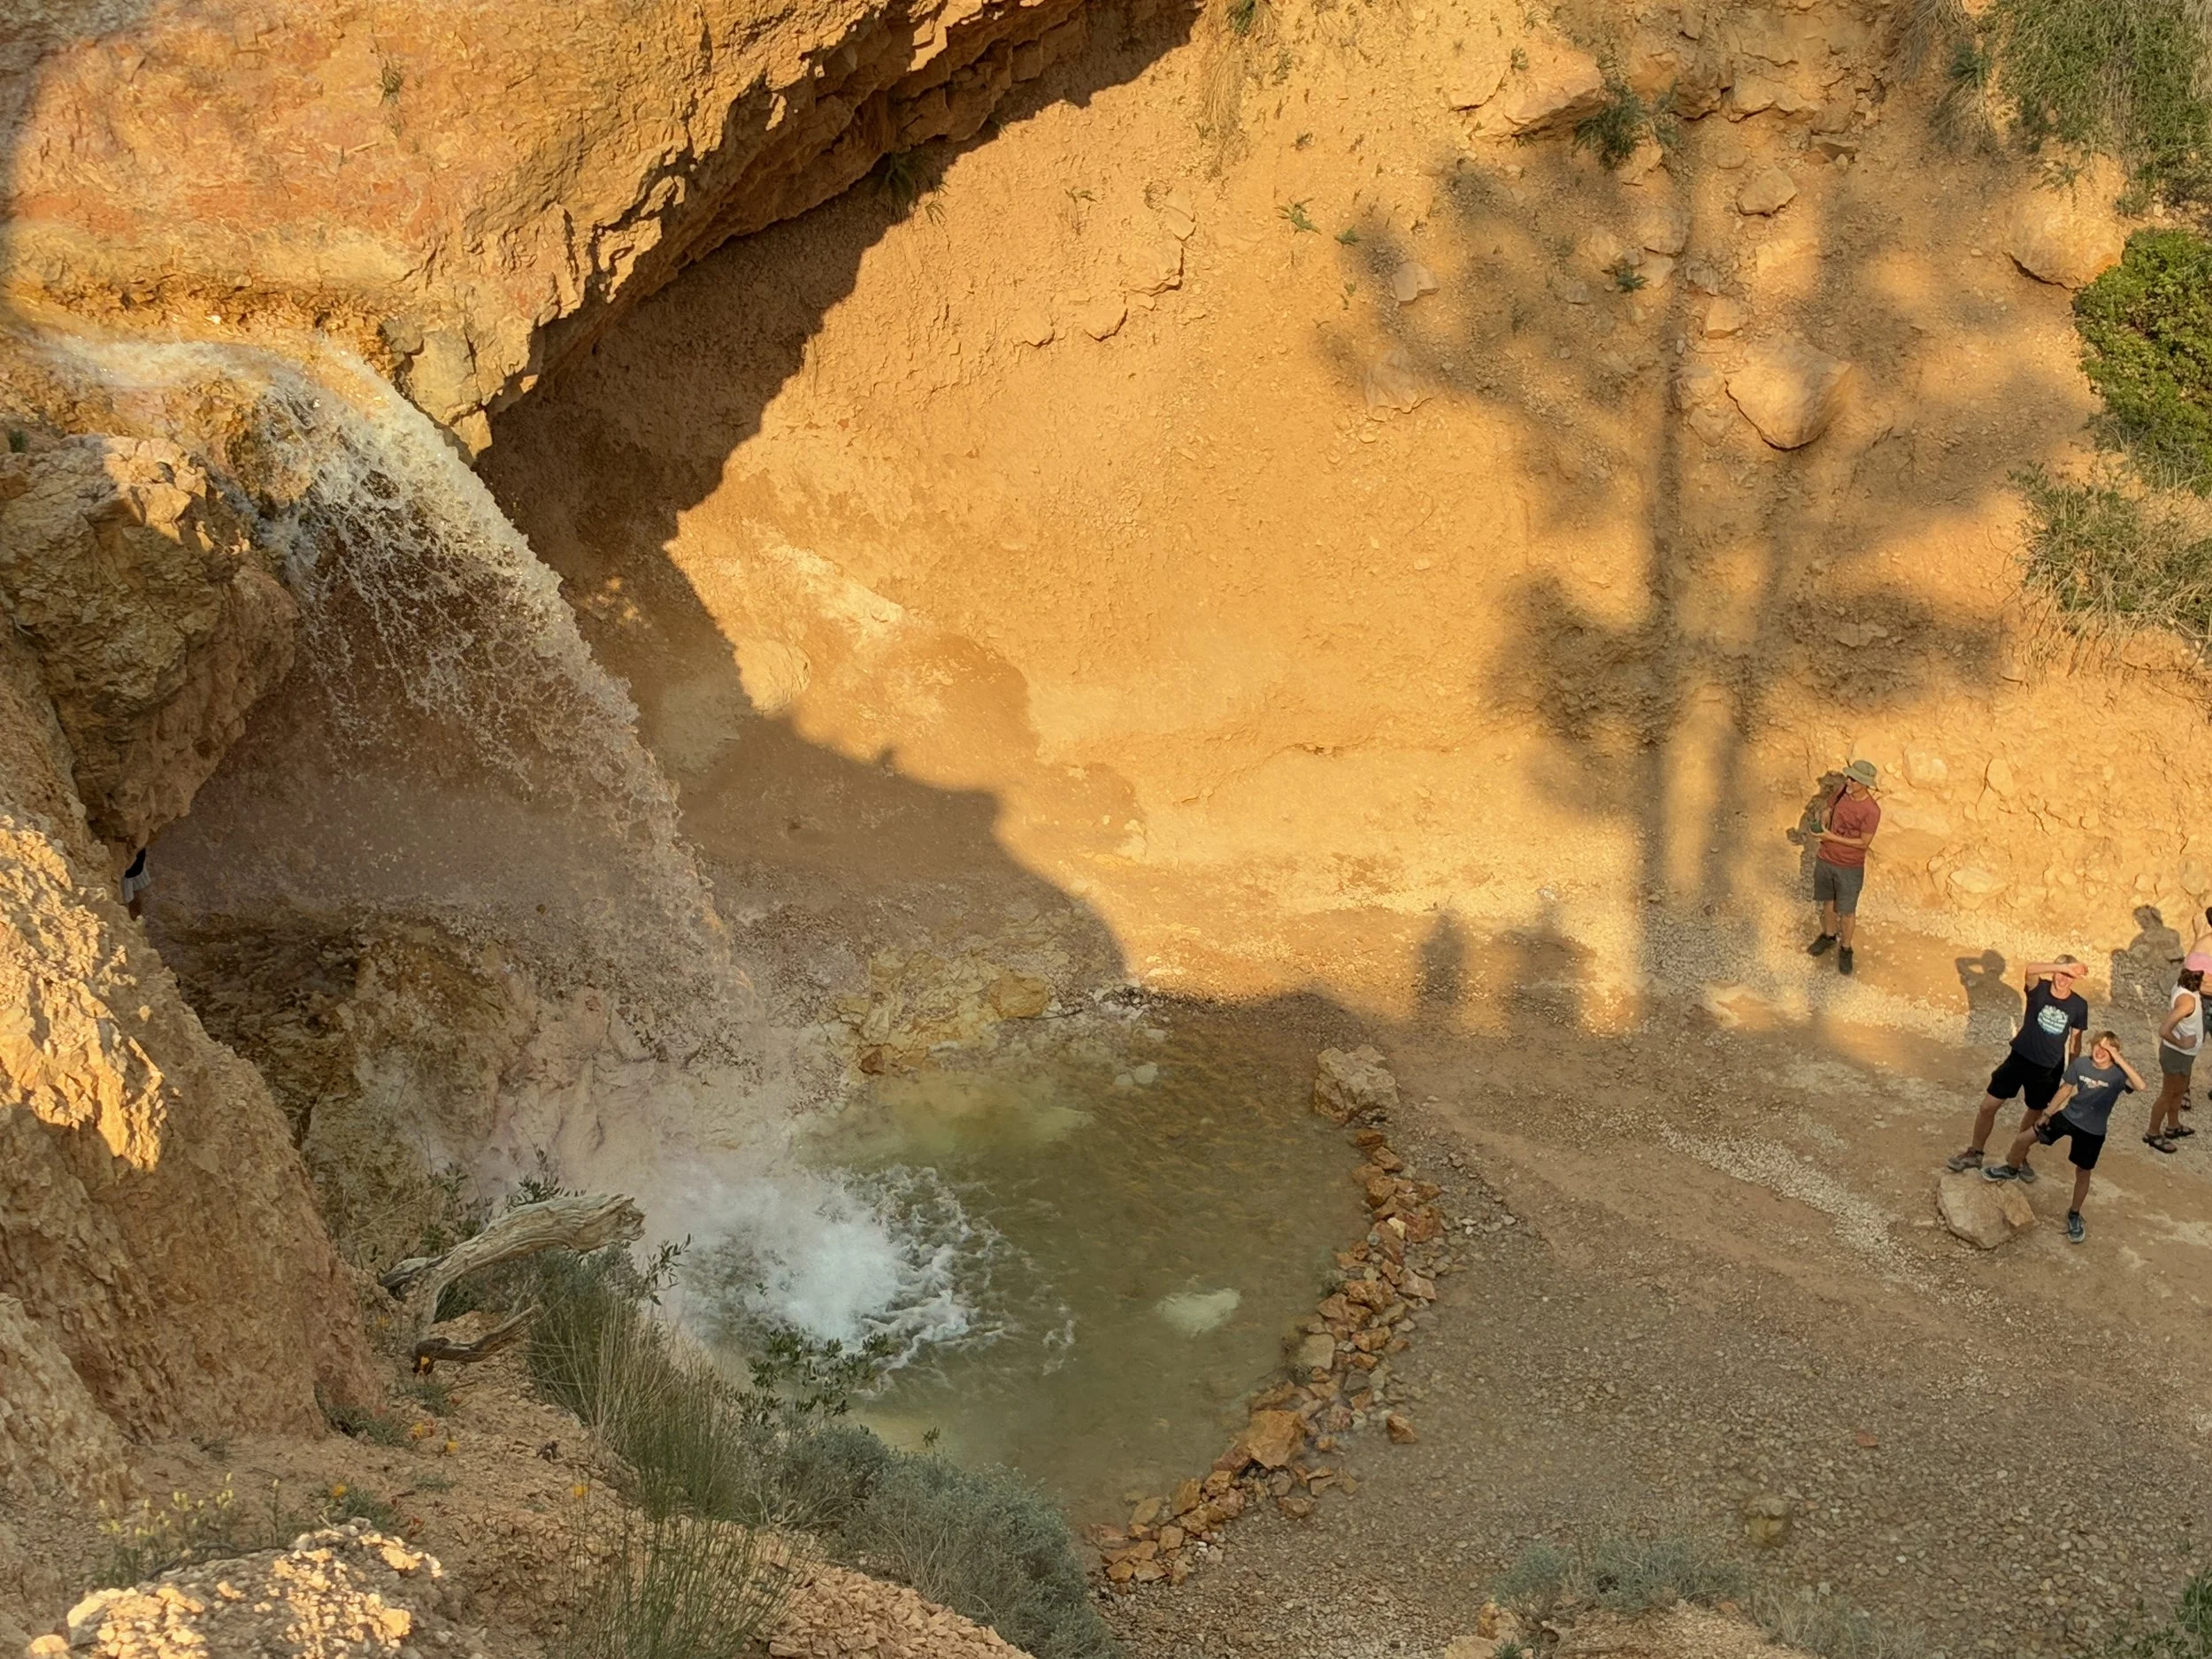
Bryce Canyon, Mossy Cave – View of the waterfall from above
A – Visitor Center
Make sure to stop at the Visitor Center at some point. There is a nice exhibit that explains how the region formed geographically over millions of years, and there is a large gift store. A second gift store can be found within Bryce Canyon Lodge.
A fun activity at Bryce Canyon is the Hike the Hoodoos Challenge. There are 9 medallions that can be found on park information signs throughout the park (we found 7). Take pictures of 3 of them (or hike 3 miles inside Bryce Canyon). After completing the Challenge, find a Park Ranger to receive a special surprise. If the Rangers aren’t out on the trails, stop back inside the Visitor Center.
Junior Ranger Activity Books can be requested for free at the Visitor Center as well. I think these books are fun to do even as an adult, as the activities usually push me to learn more about the park than I might otherwise.
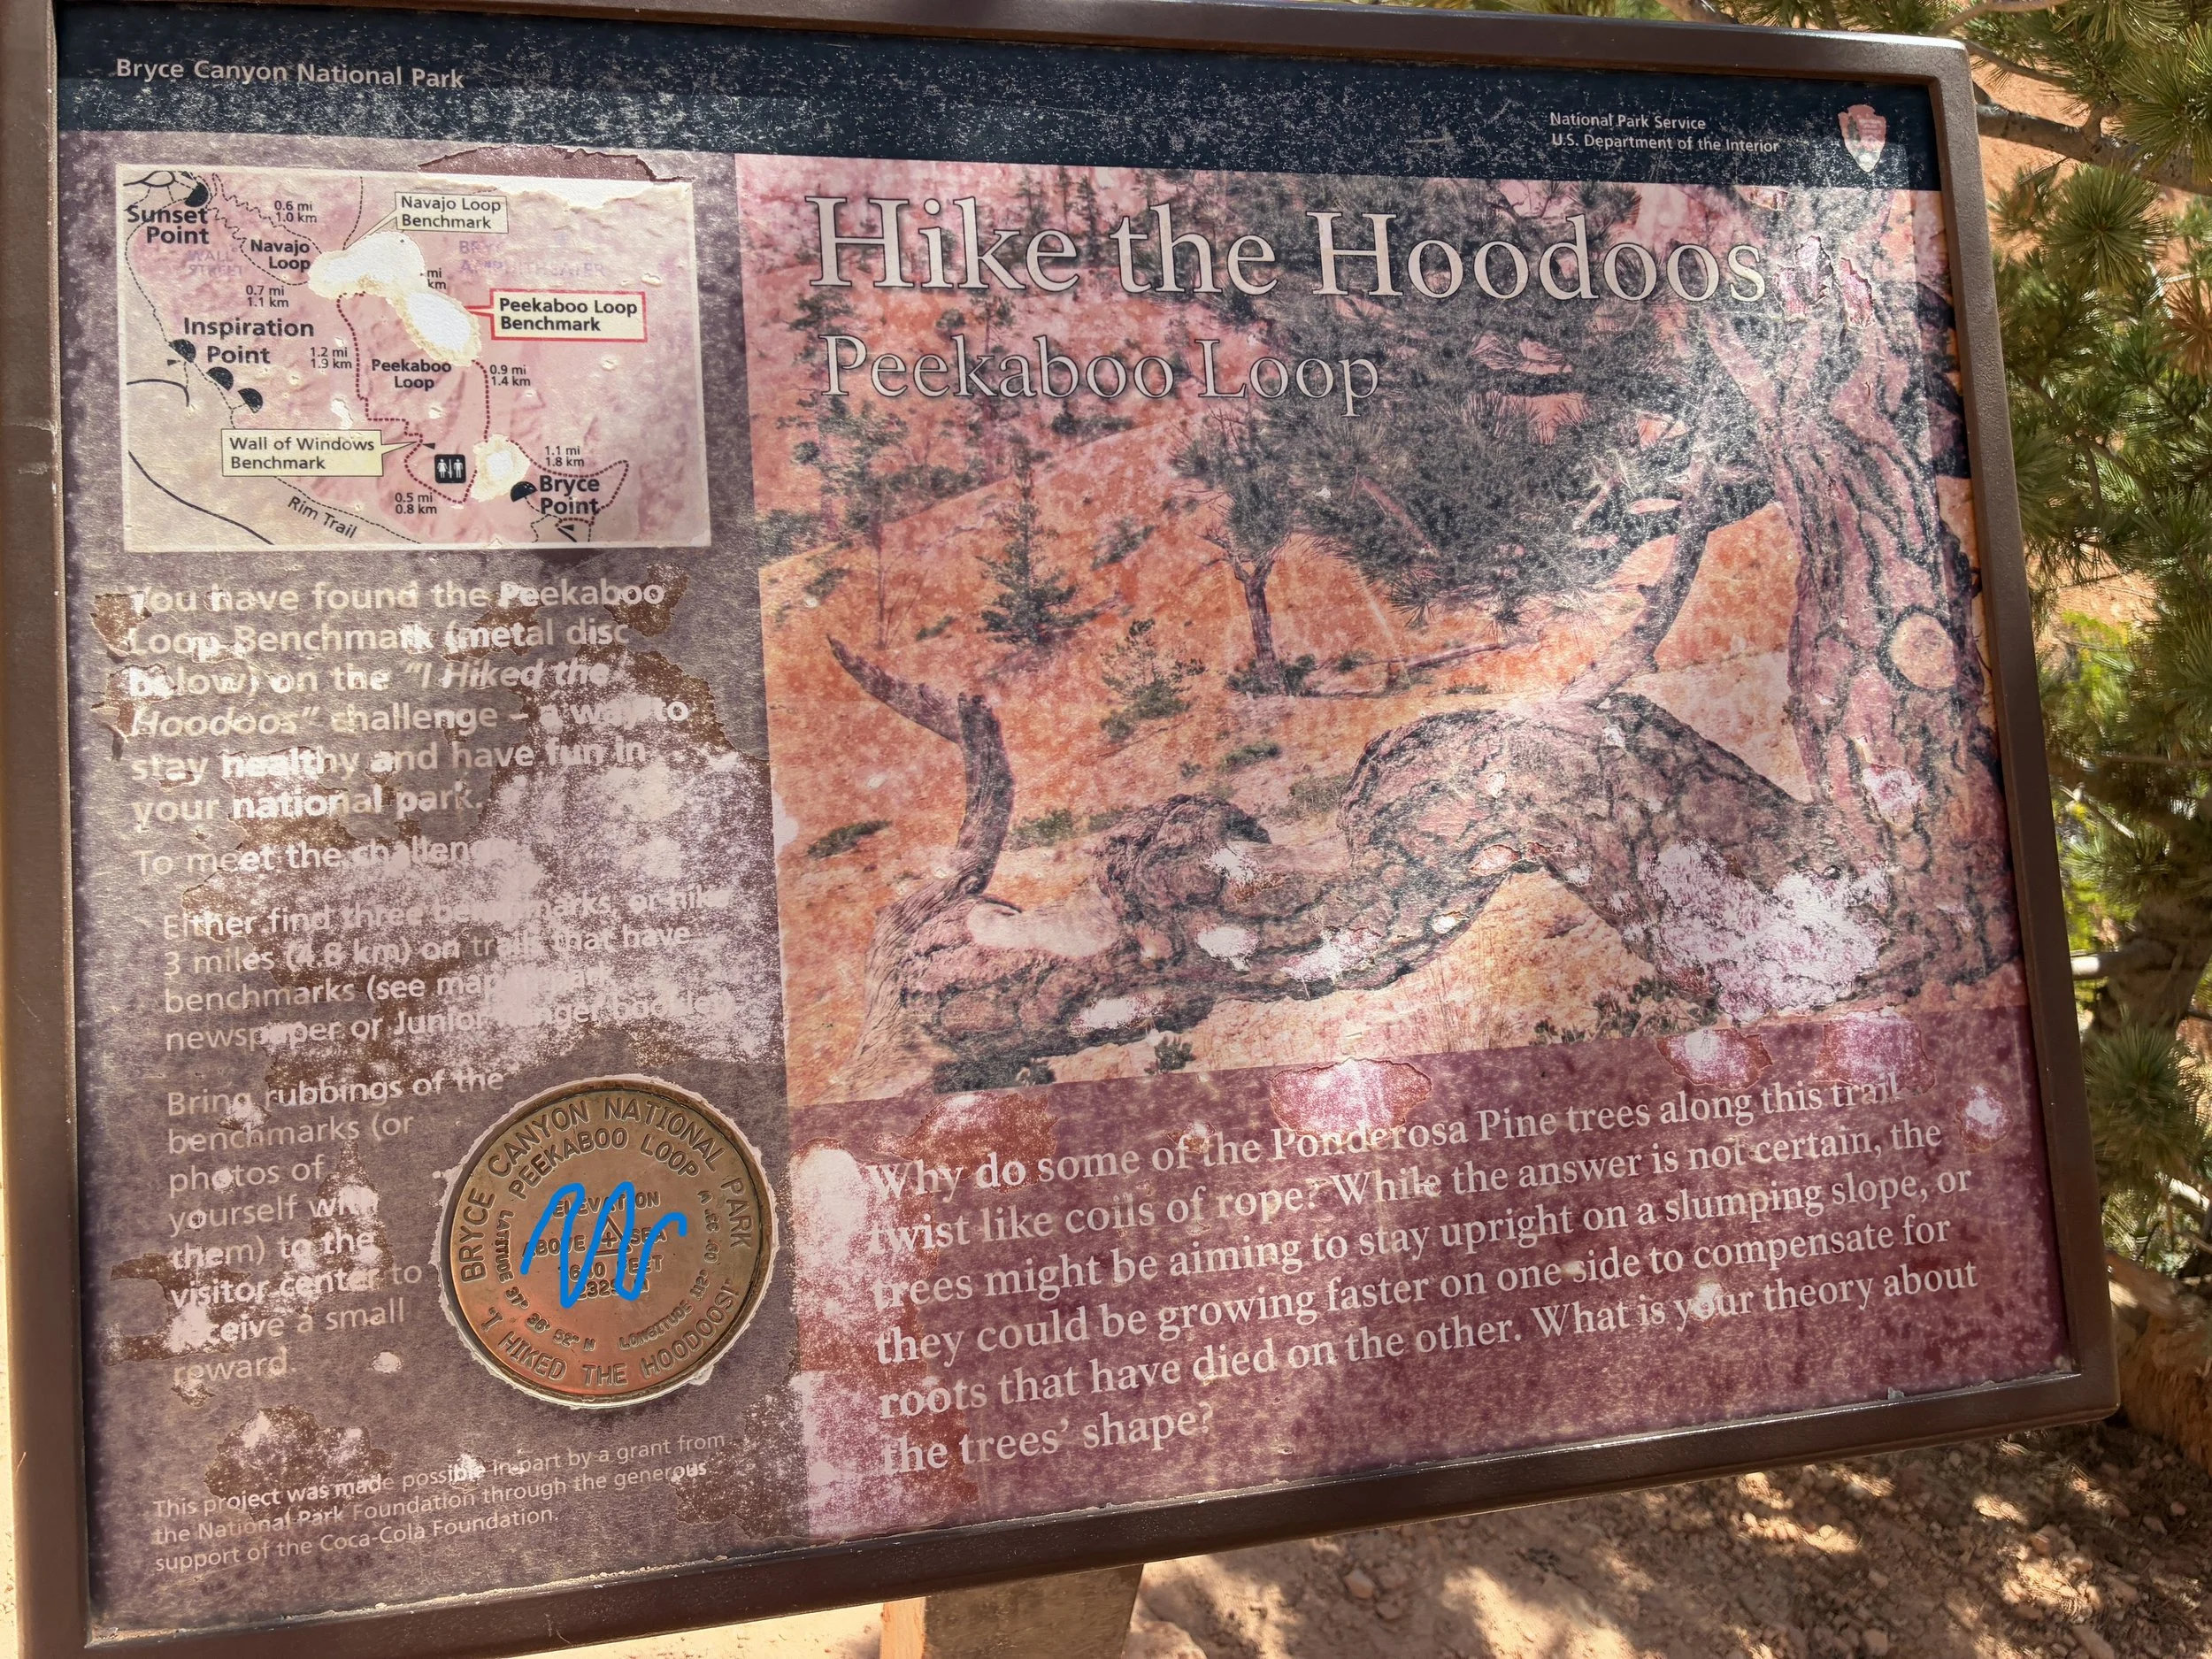
This is what to look for - but I’ve got mine marked so you can’t steal it. Finding the medallions is the fun part.
B & C – North and Sunset Campgrounds
Information about both campgrounds can be found on the main Bryce Canyon National Park website. There will be a link to the Recreation.gov system to reserve campsites. Reservations are required for North Campground. Sunset Campground has reservations as well, and there is an option for walk-ins, but they fill up quickly.
Both campgrounds have specific loops for RV campers and different loops for tents-only. Hammocks must be freestanding. Nothing can be tied around a tree.
Showers are available at the General Store near North Campground. Tokens need to be purchased at the General Store, and the showers have specific hours that they are available for use. Refer to the National Park website for information.
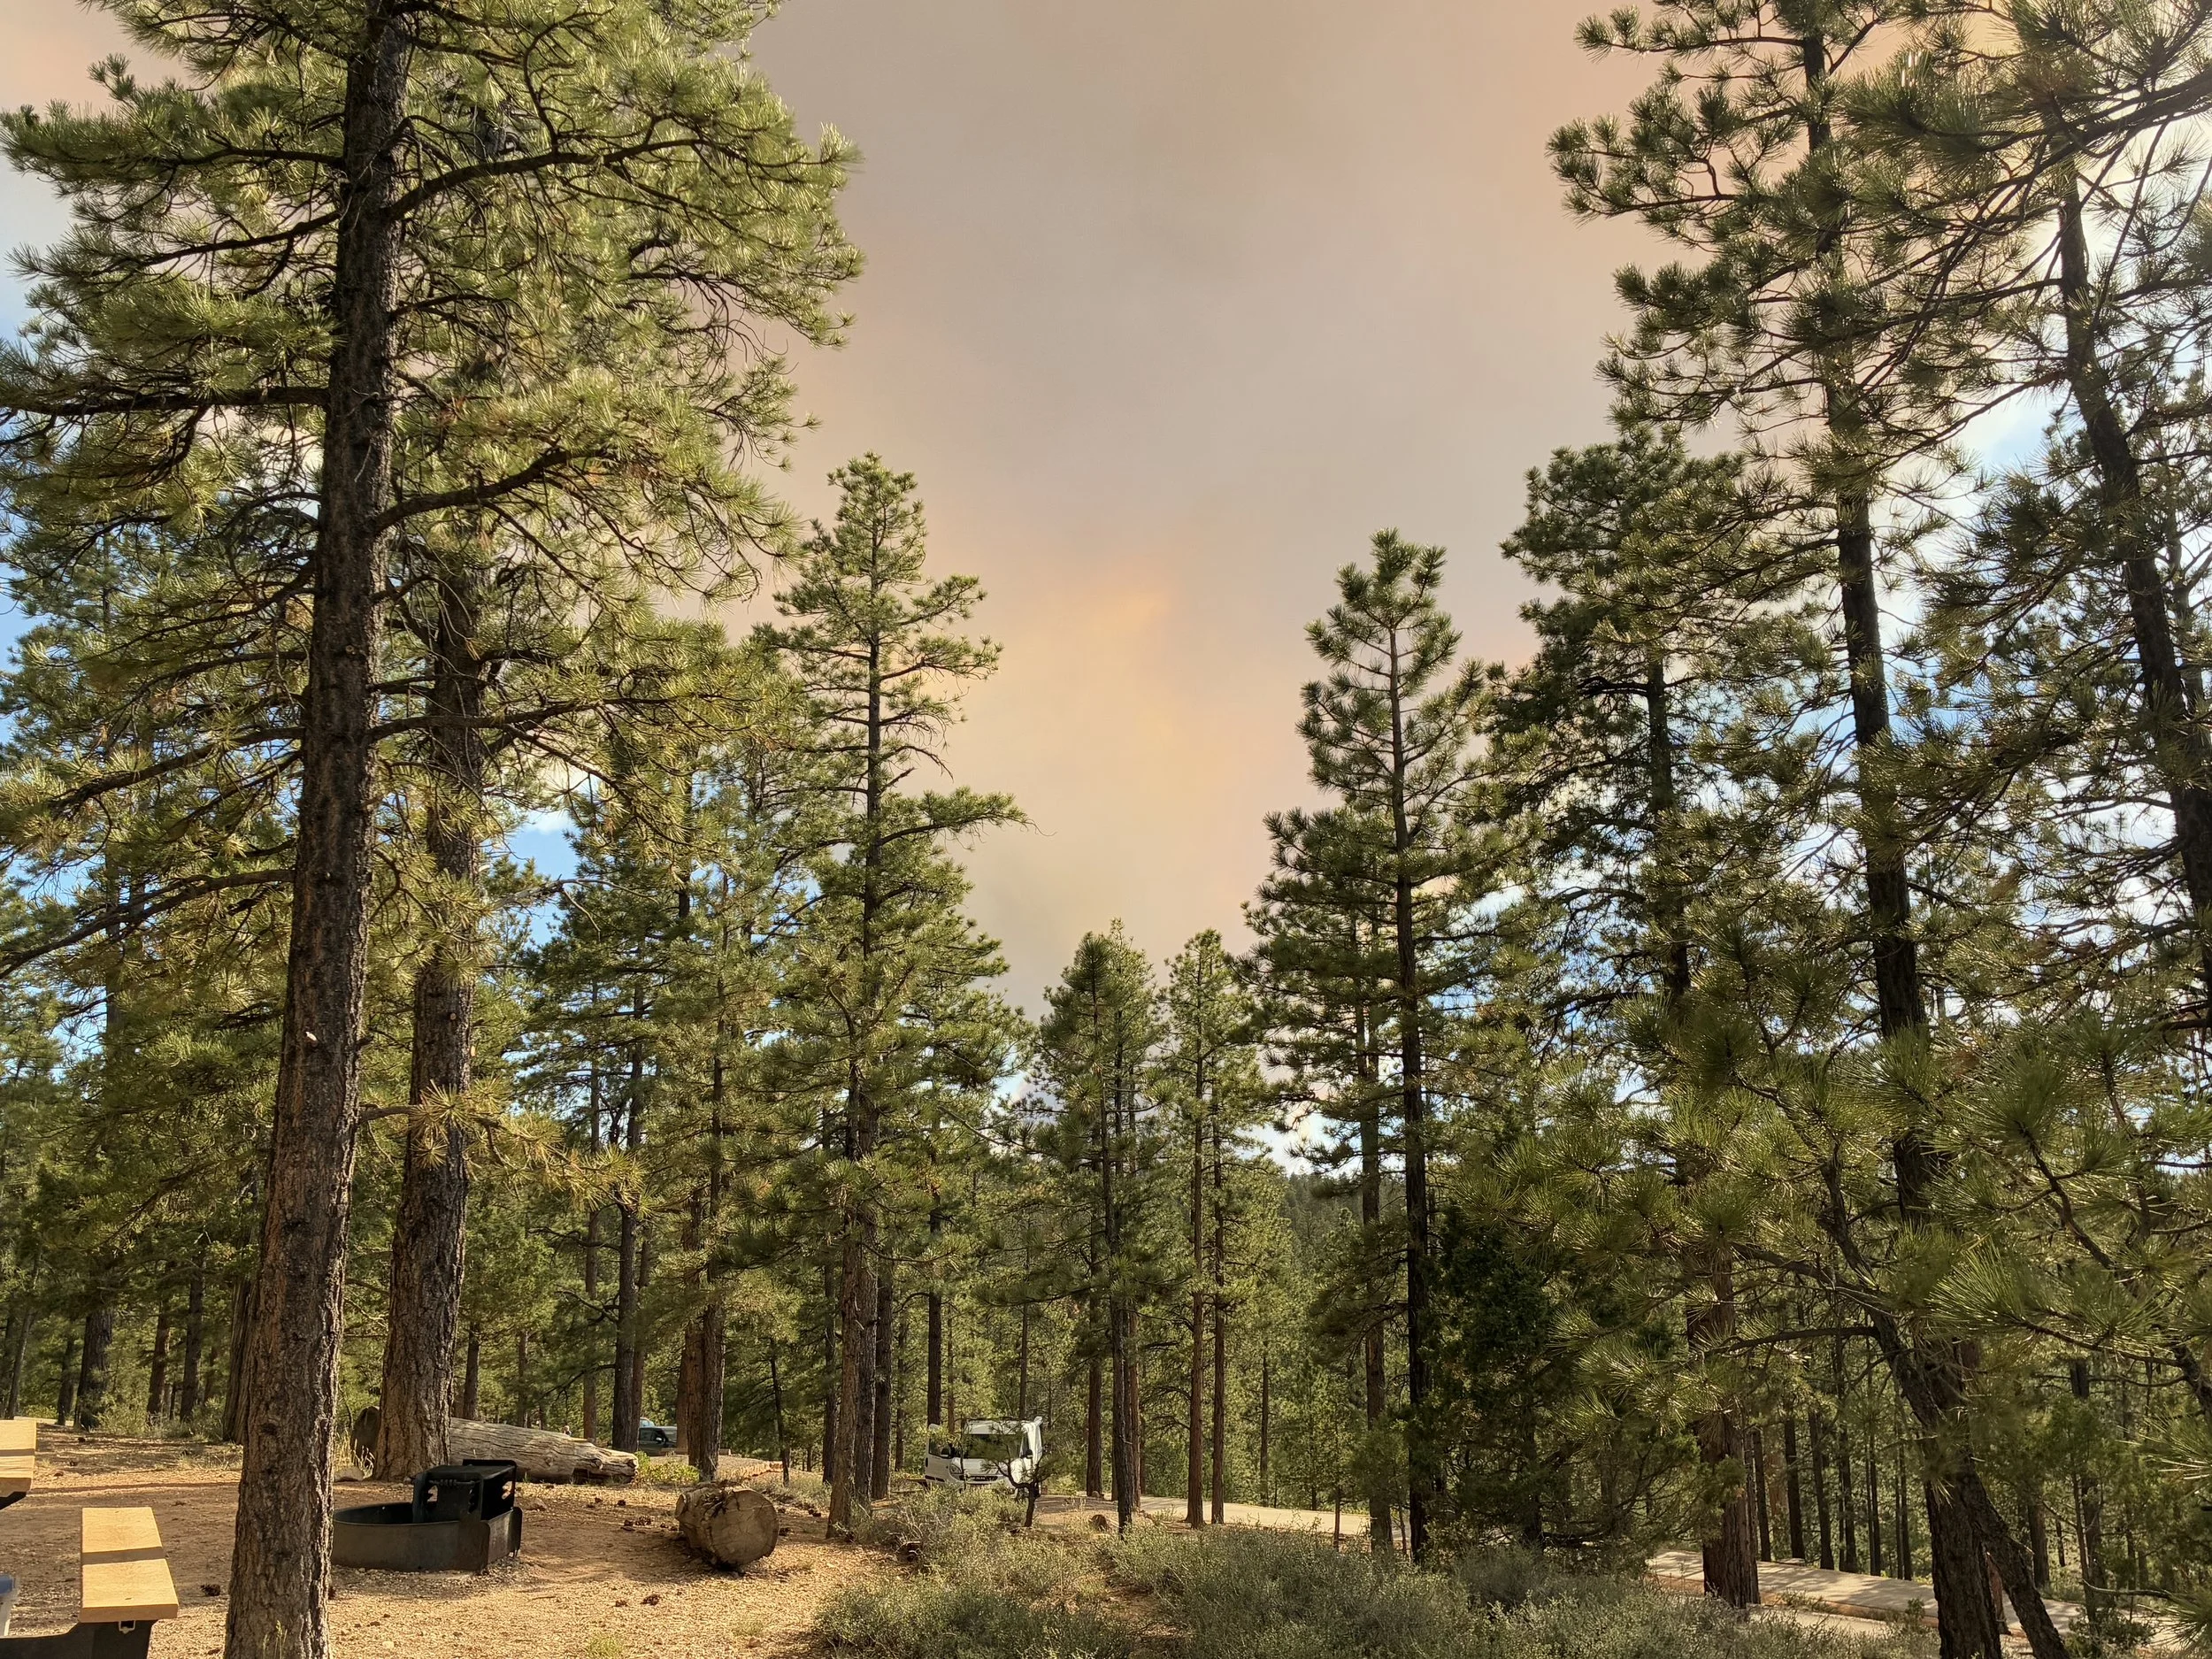
View from our campsite at North Campground. The smoke is from the France Dixie fire. This picture was taken 3 days after it started.
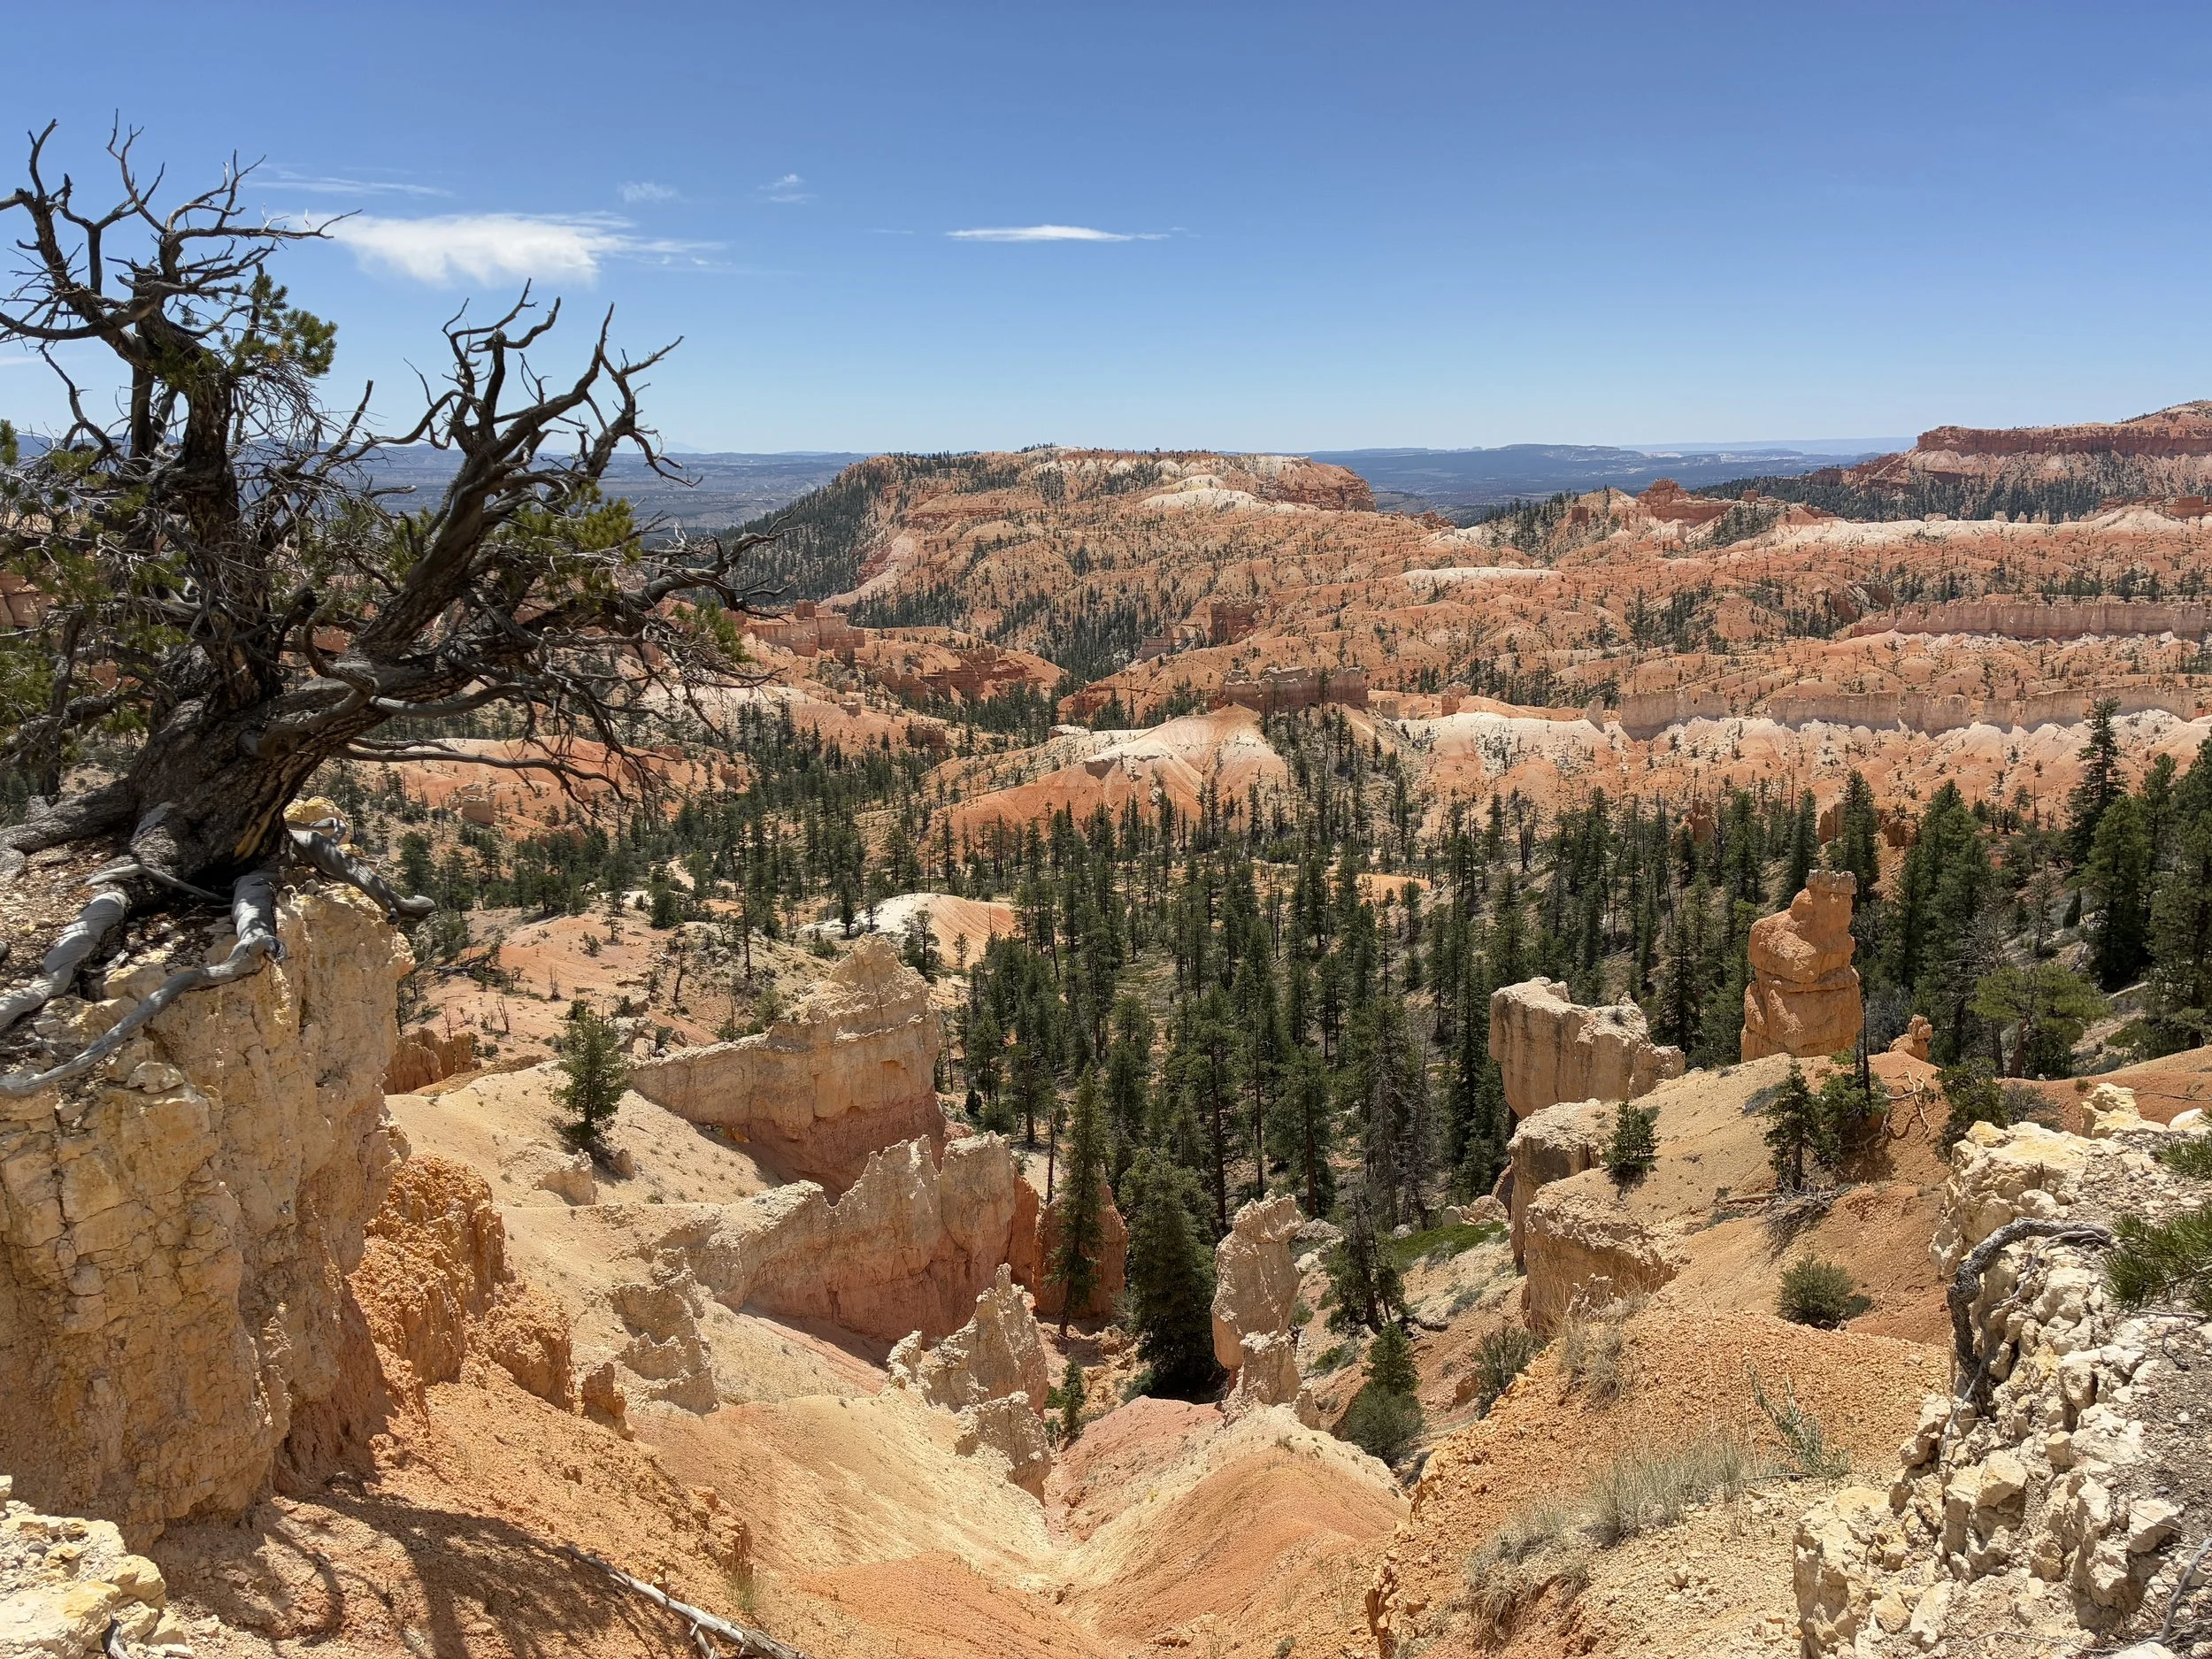
D) Fairyland Point
Viewpoint Location - There is a unique parking area for Fairyland Point, with a short and flat walk out to the viewpoint. There is no shuttle stop for this viewpoint.

Fairyland Point is not accessible by shuttle, but there is parking lot close by.
Bryce Canyon, Fairyland Point
Fairyland Point is beautiful, and for those not hiking along the rim trail or around Fairyland Loop, this viewpoint is easily accessible for those with a car inside the park. Even though it’s nearby the Visitor Center, because it is not a shuttle stop, this is a much quieter place to enjoy Bryce Canyon than from than Sunrise and Sunset Points.
We visited in June 2025 and the parking lot was pretty empty. We hiked around the entire Fairyland Loop, and there were not many hikers, even near the Fairyland Point trailhead.
Bryce Canyon, Fairyland Point
2) Sunrise Point
Distance - Approximately 0.3 miles
Elevation Gain - 70ft with a slow steady incline that is not apparent until the last portion of the trail - and the last section is worth the extra effort
Trailhead Location - There is parking along both the loop road at the trailhead or a bit further back there is a small parking lot. This trailhead is also a shuttle stop.
Helpful Information - The sunrise really is fantastic at this point. Go all the way up to the actual viewpoint to watch the sun light up the hoodoos.
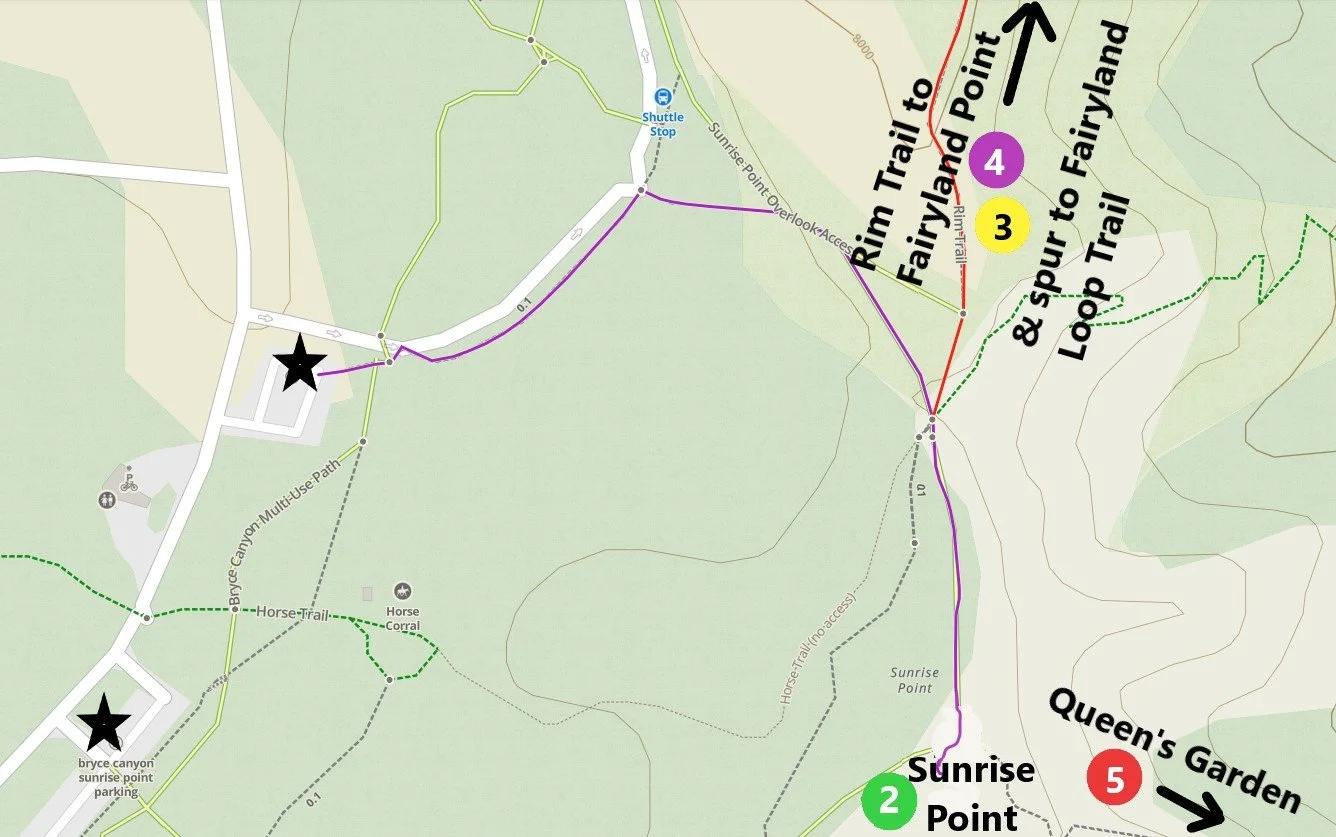
The trail to Sunrise Point is marked in purple.
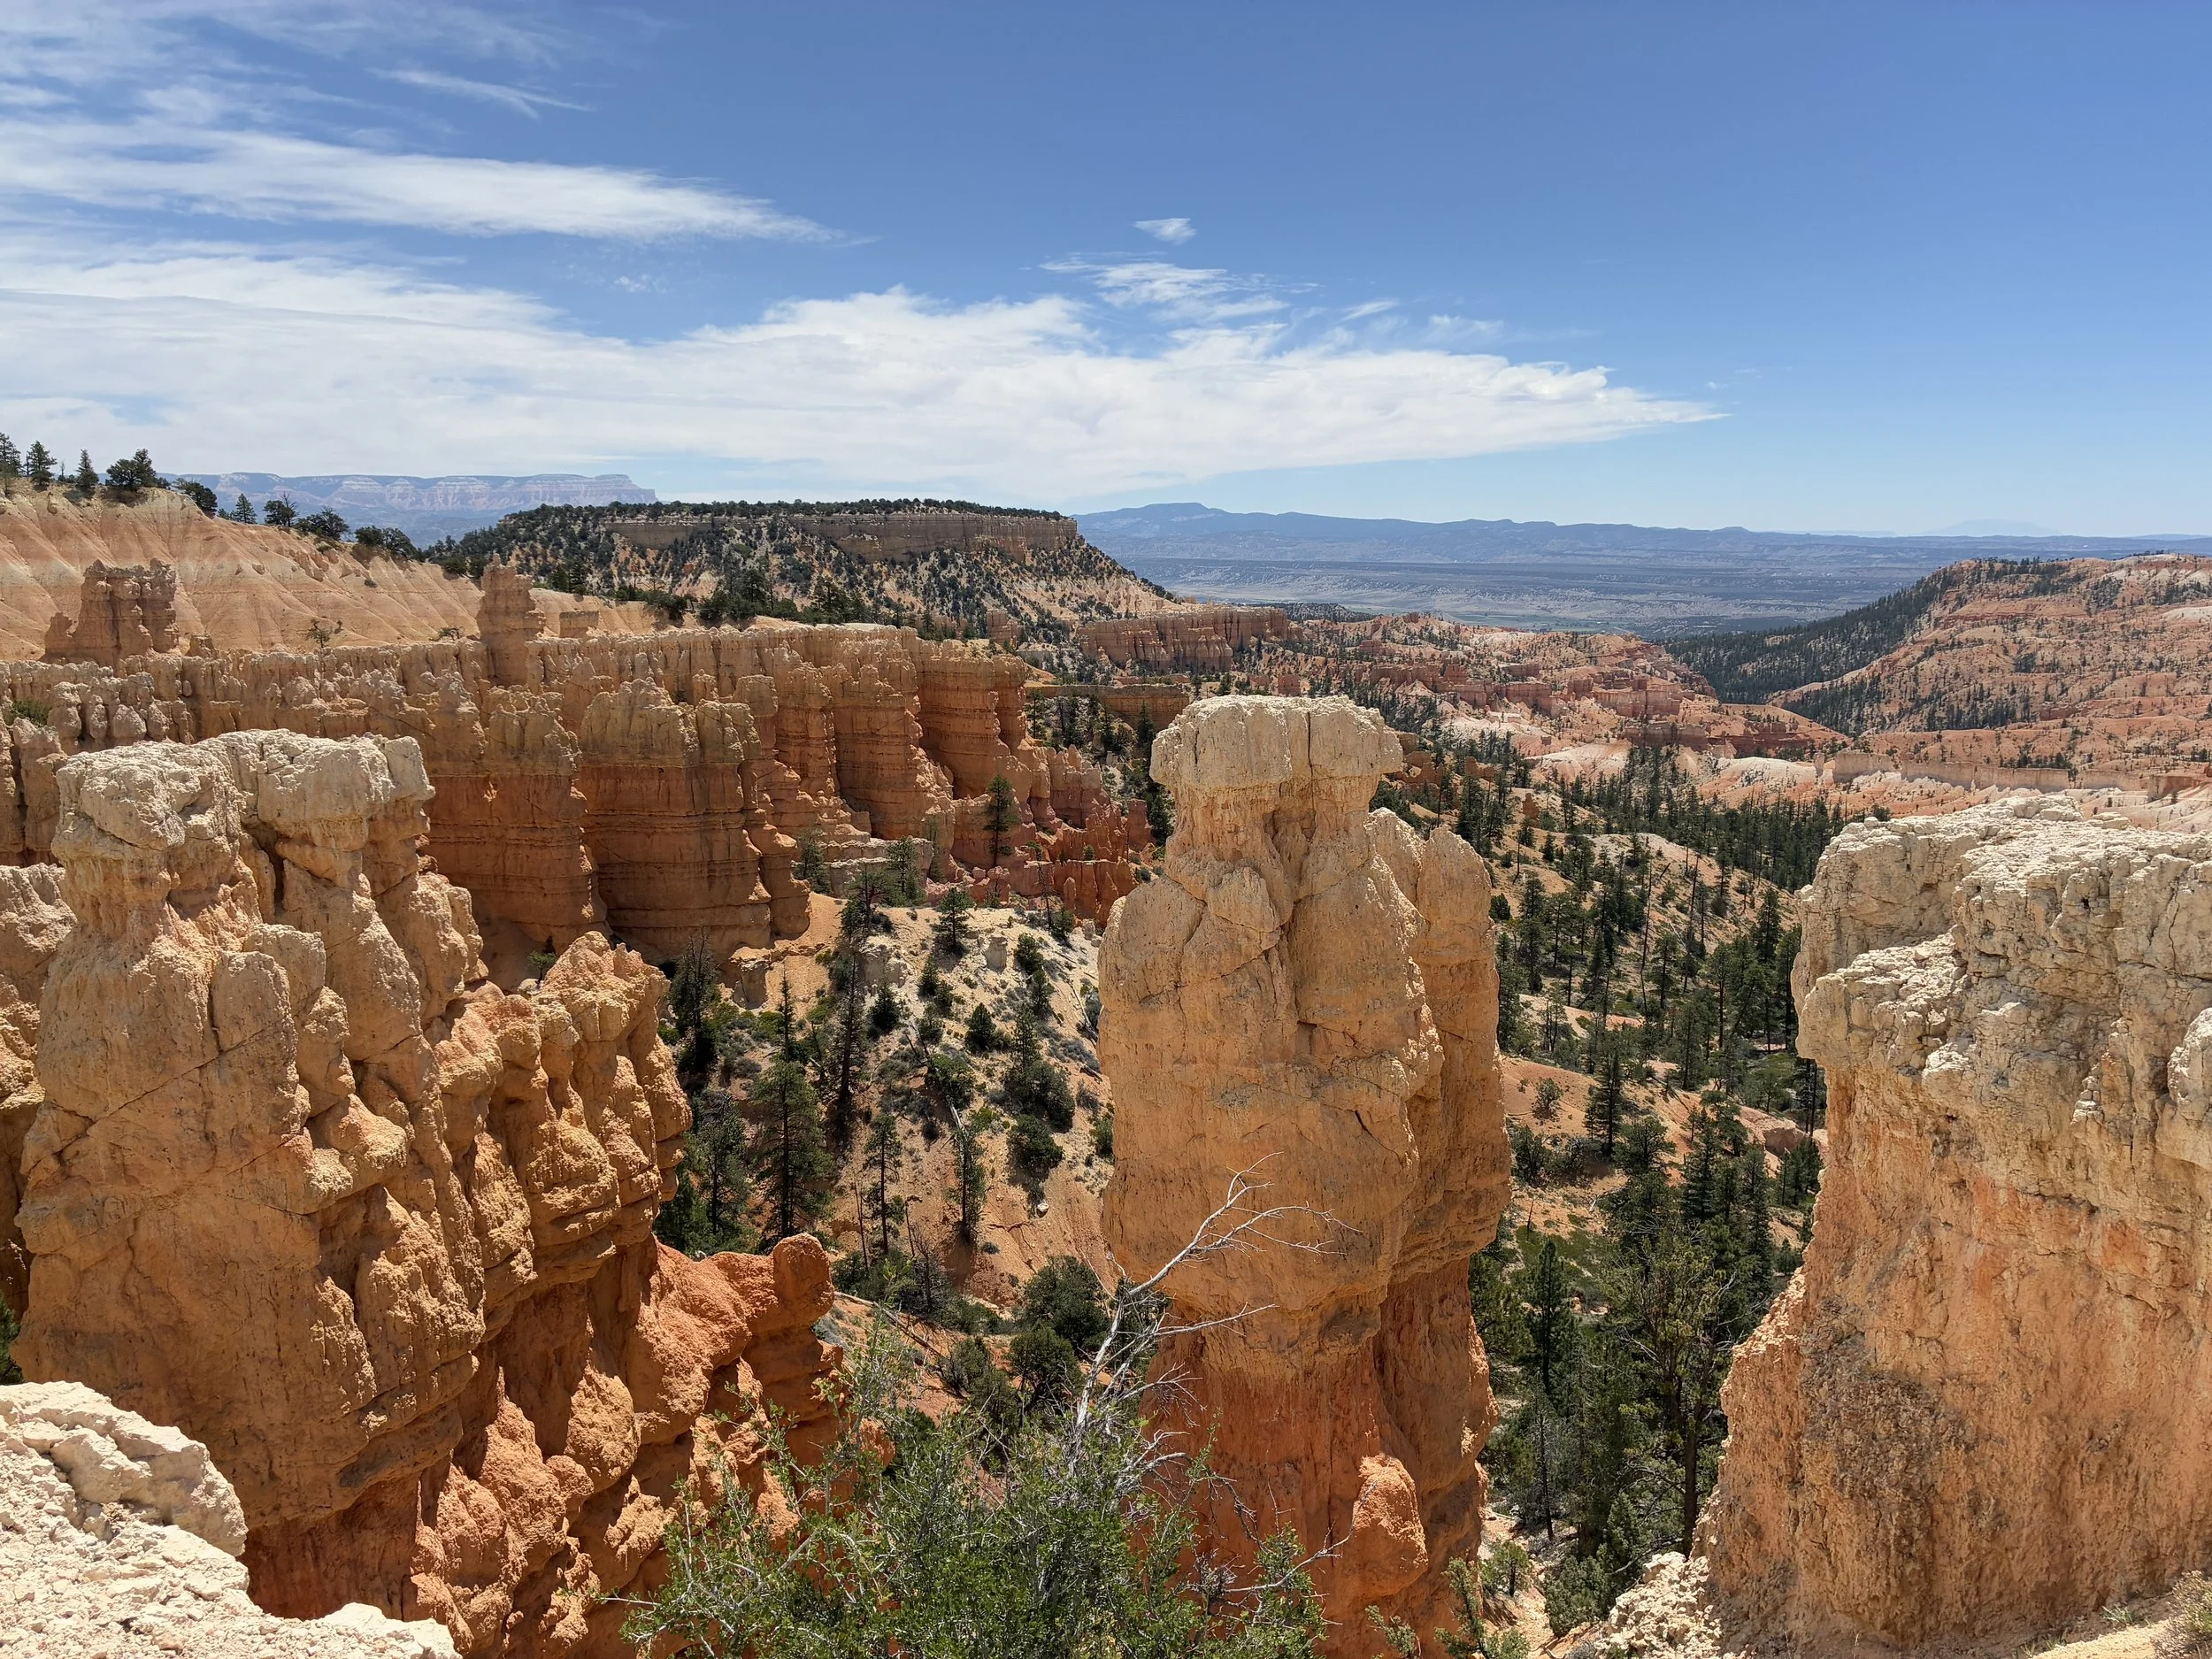
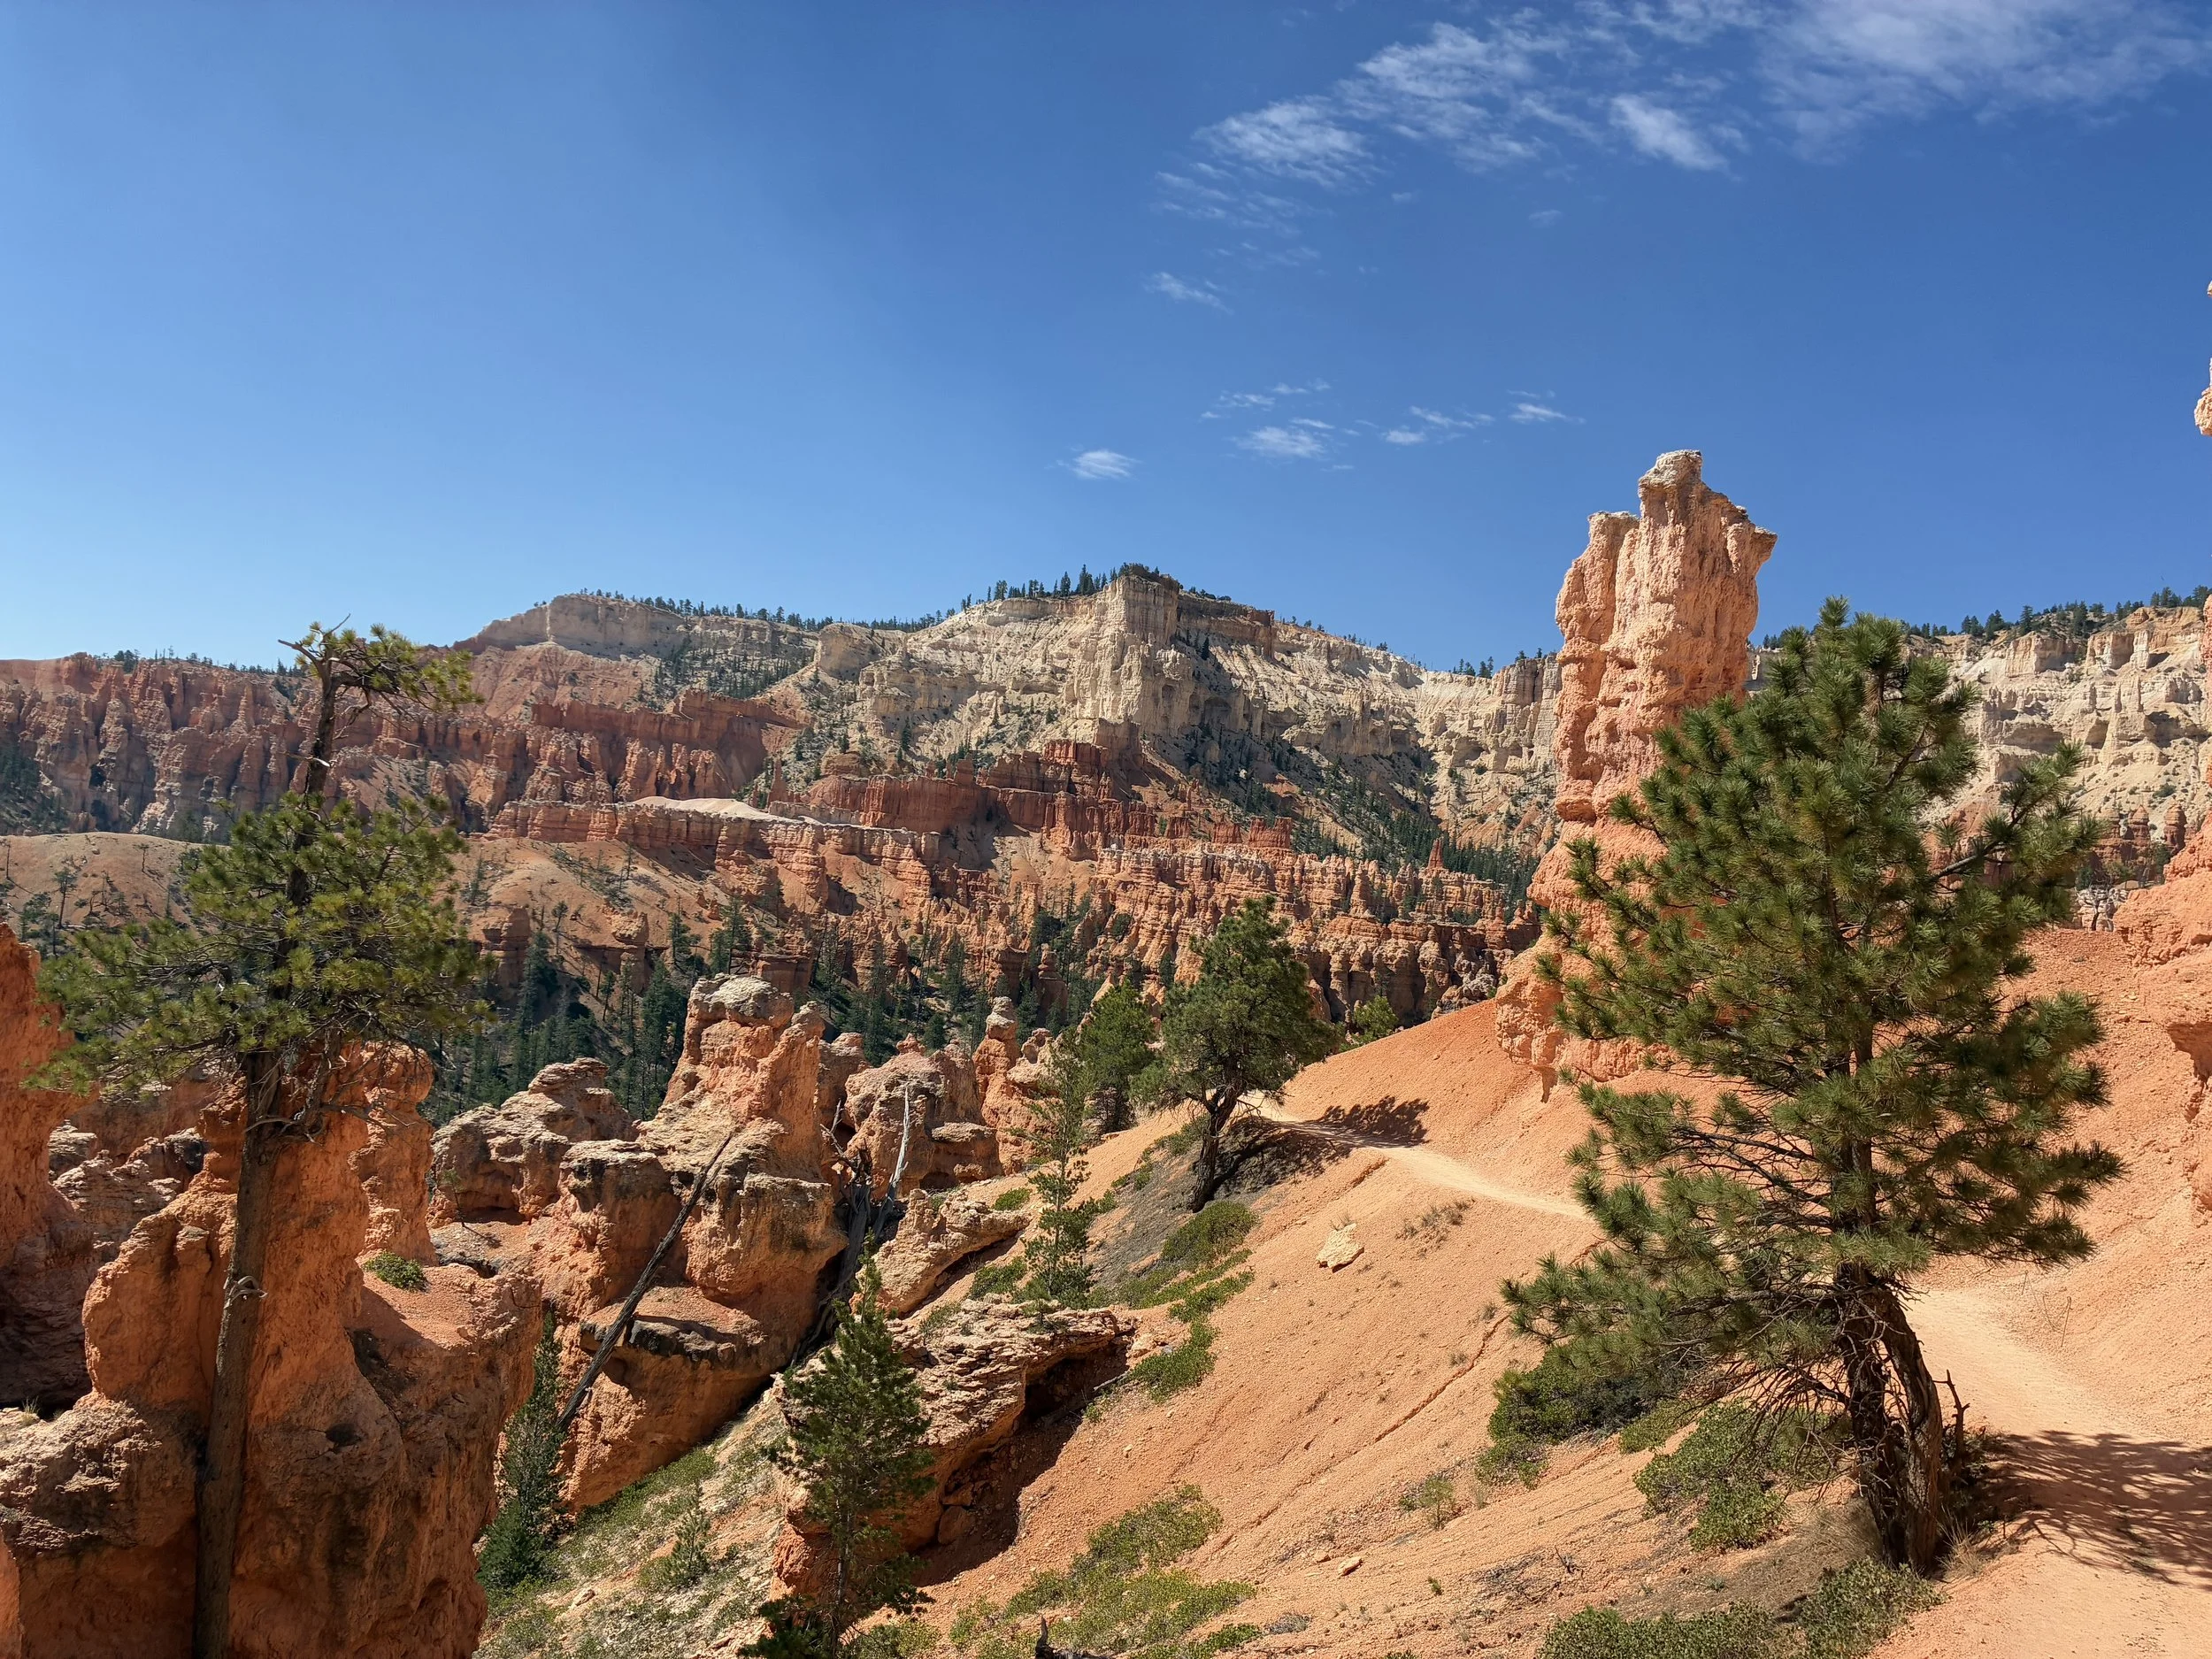
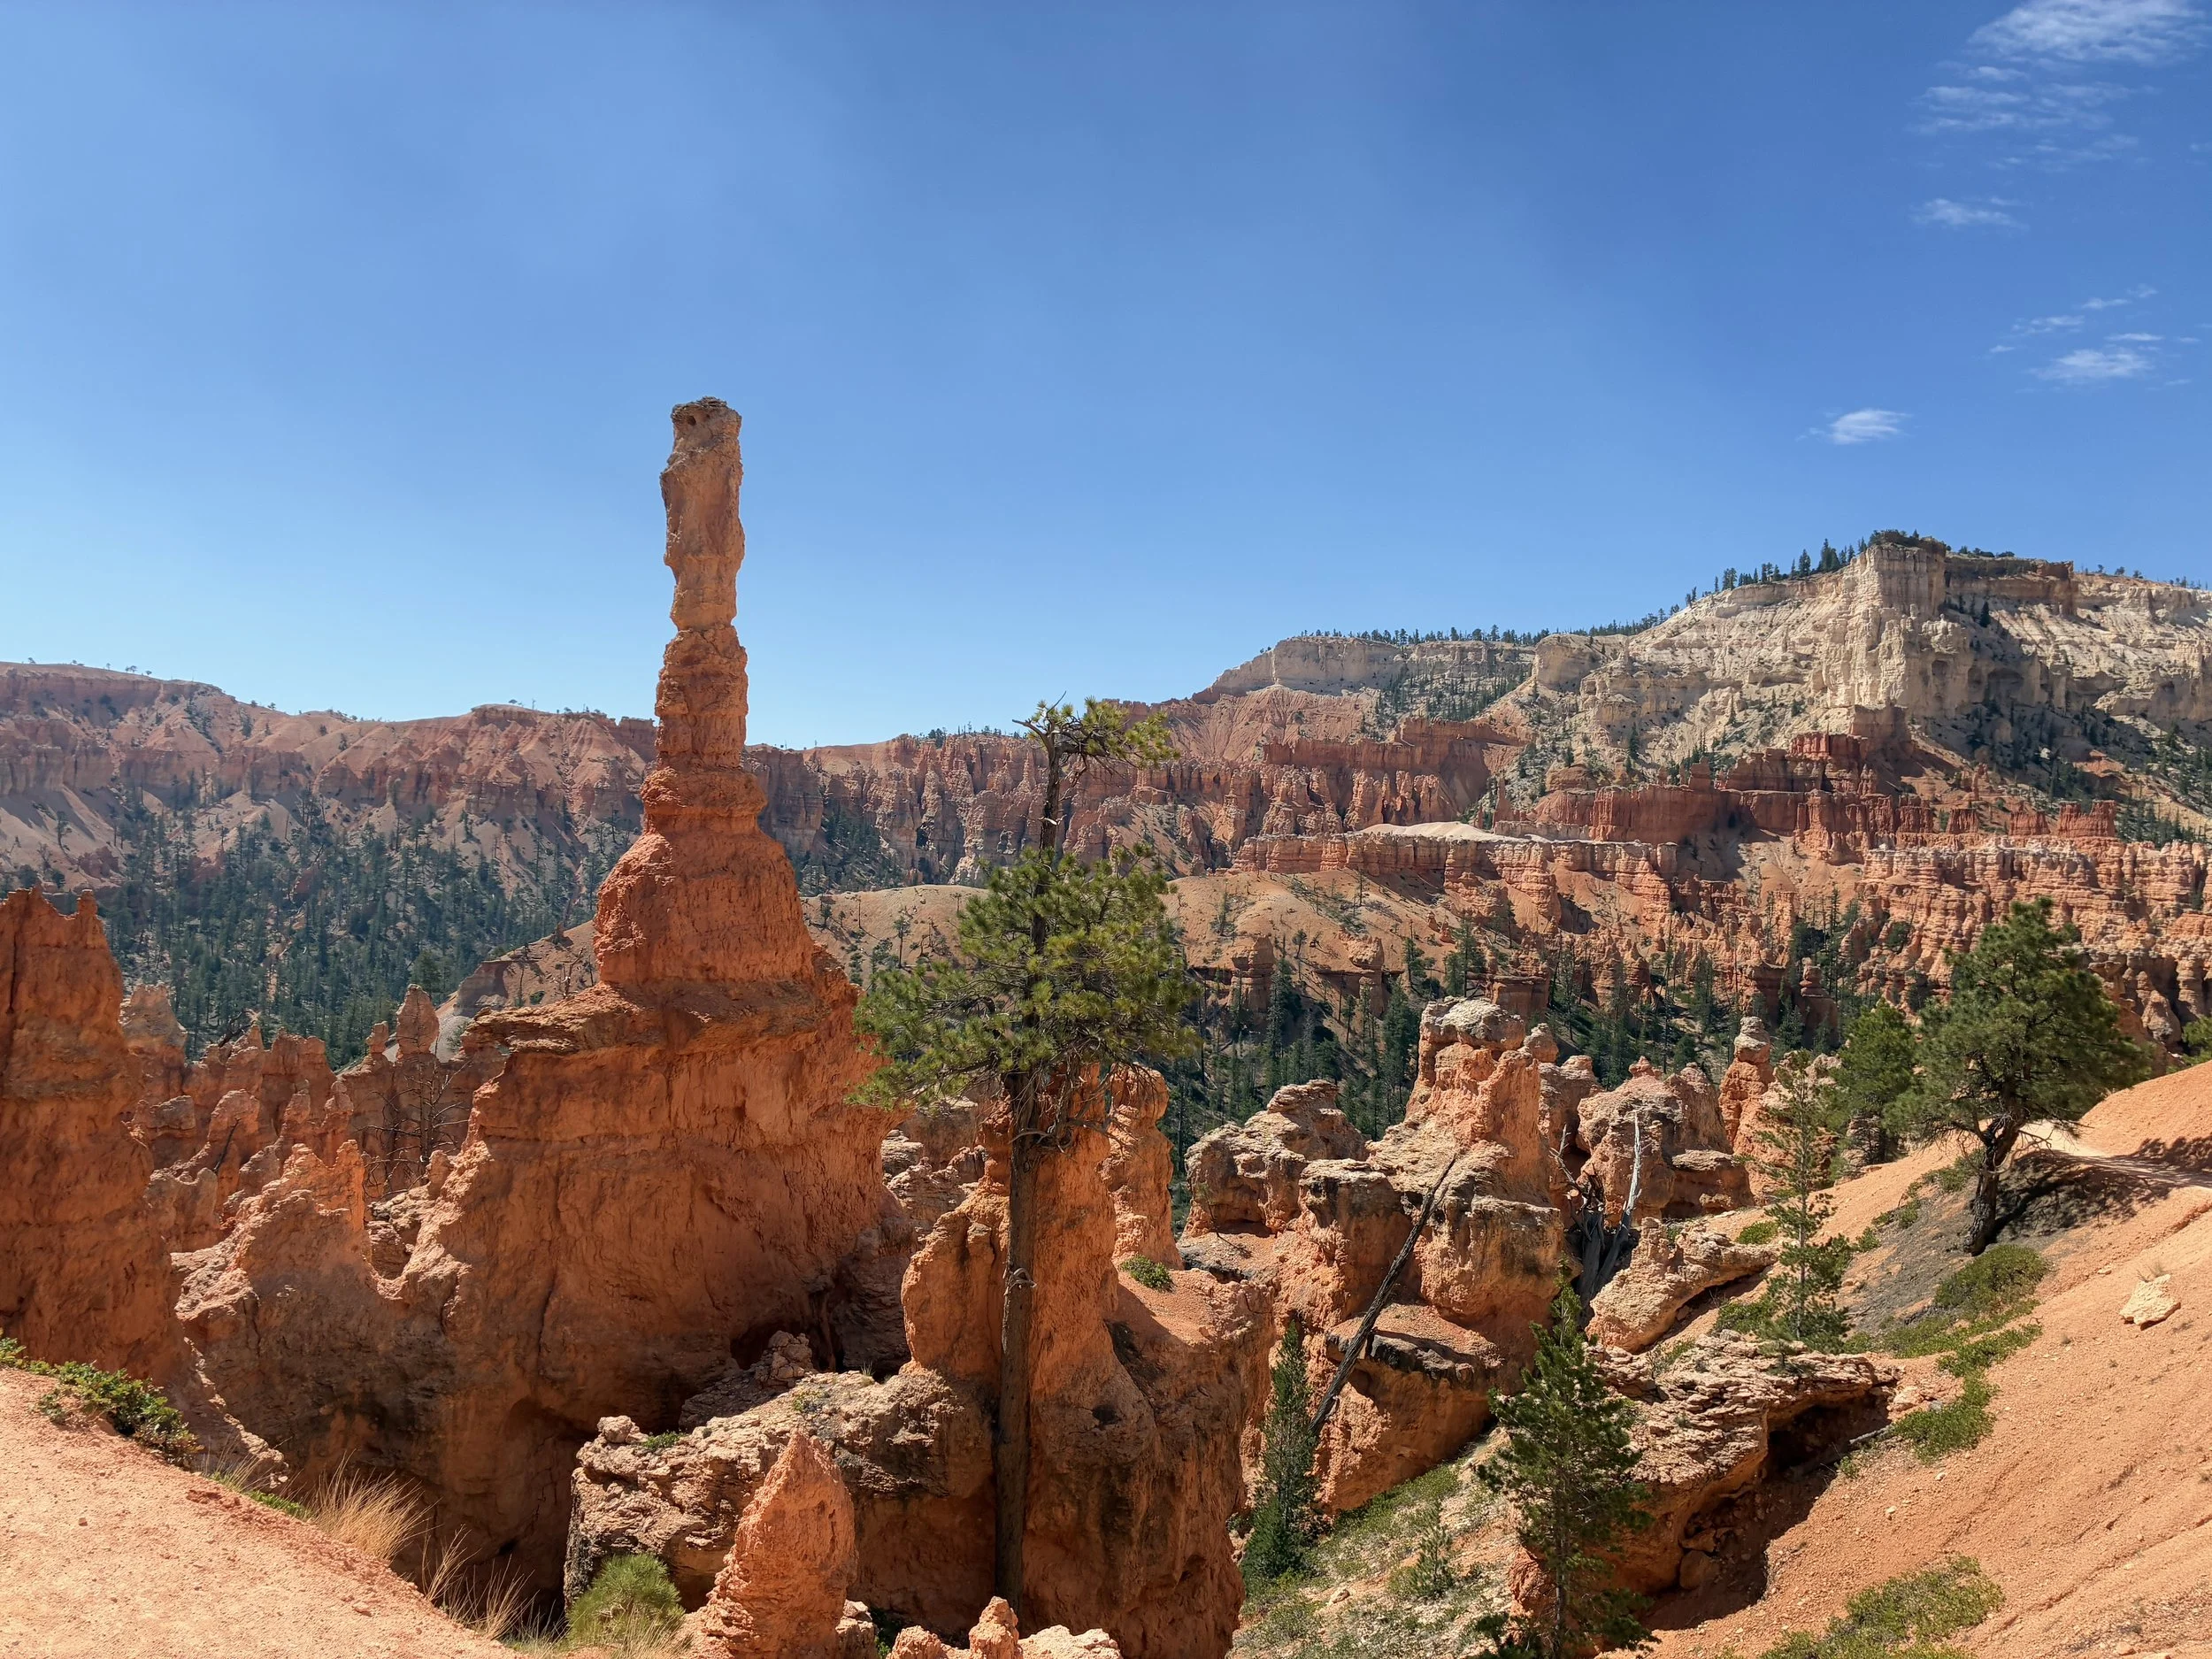
The trail to Sunrise Point is easy, paved, and accessible, with just a bit of elevation gain on the way up to the actual point. The first view of the canyon from the trail is quite impressive, but I would encourage everyone to walk all the way up to the actual viewpoint. At the top, there is a different view off on the right side that features rows and rows of hoodoos. For anyone watching the sunrise, it’s incredible watching each part of these hoodoos light up in reds and oranges.
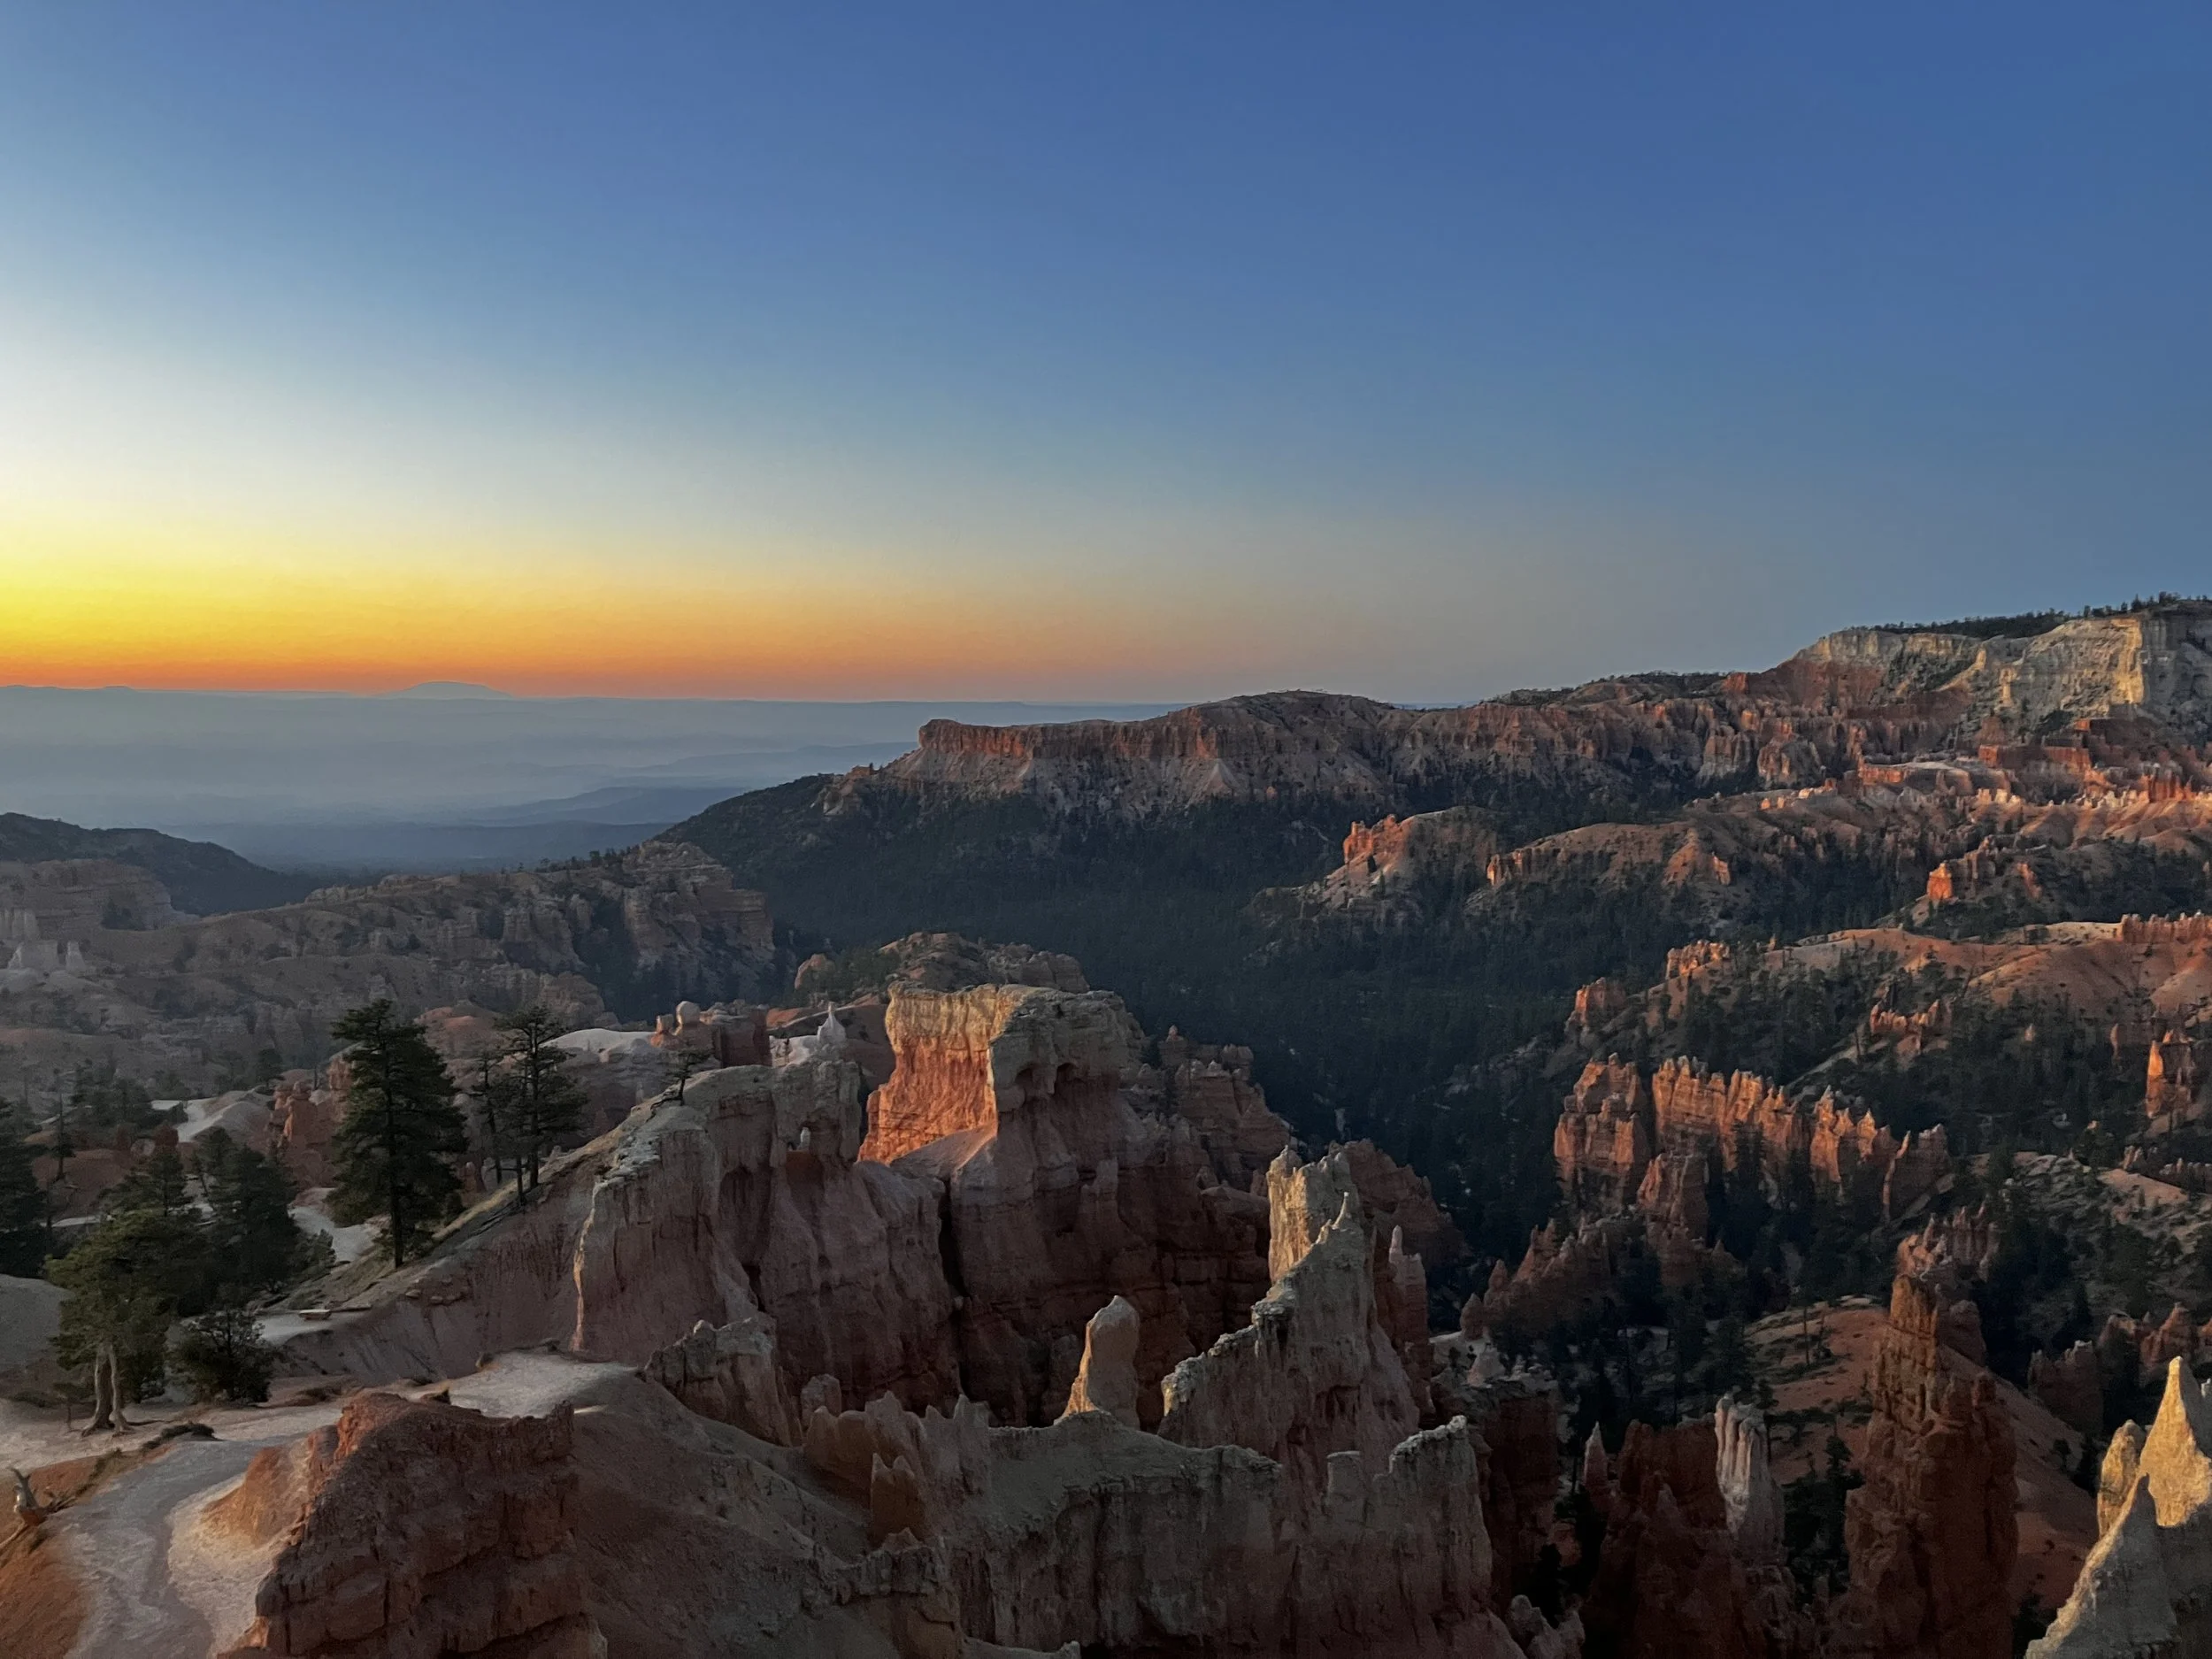
Bryce Canyon, Sunrise Point – looking down at Queen’s Garden Trail
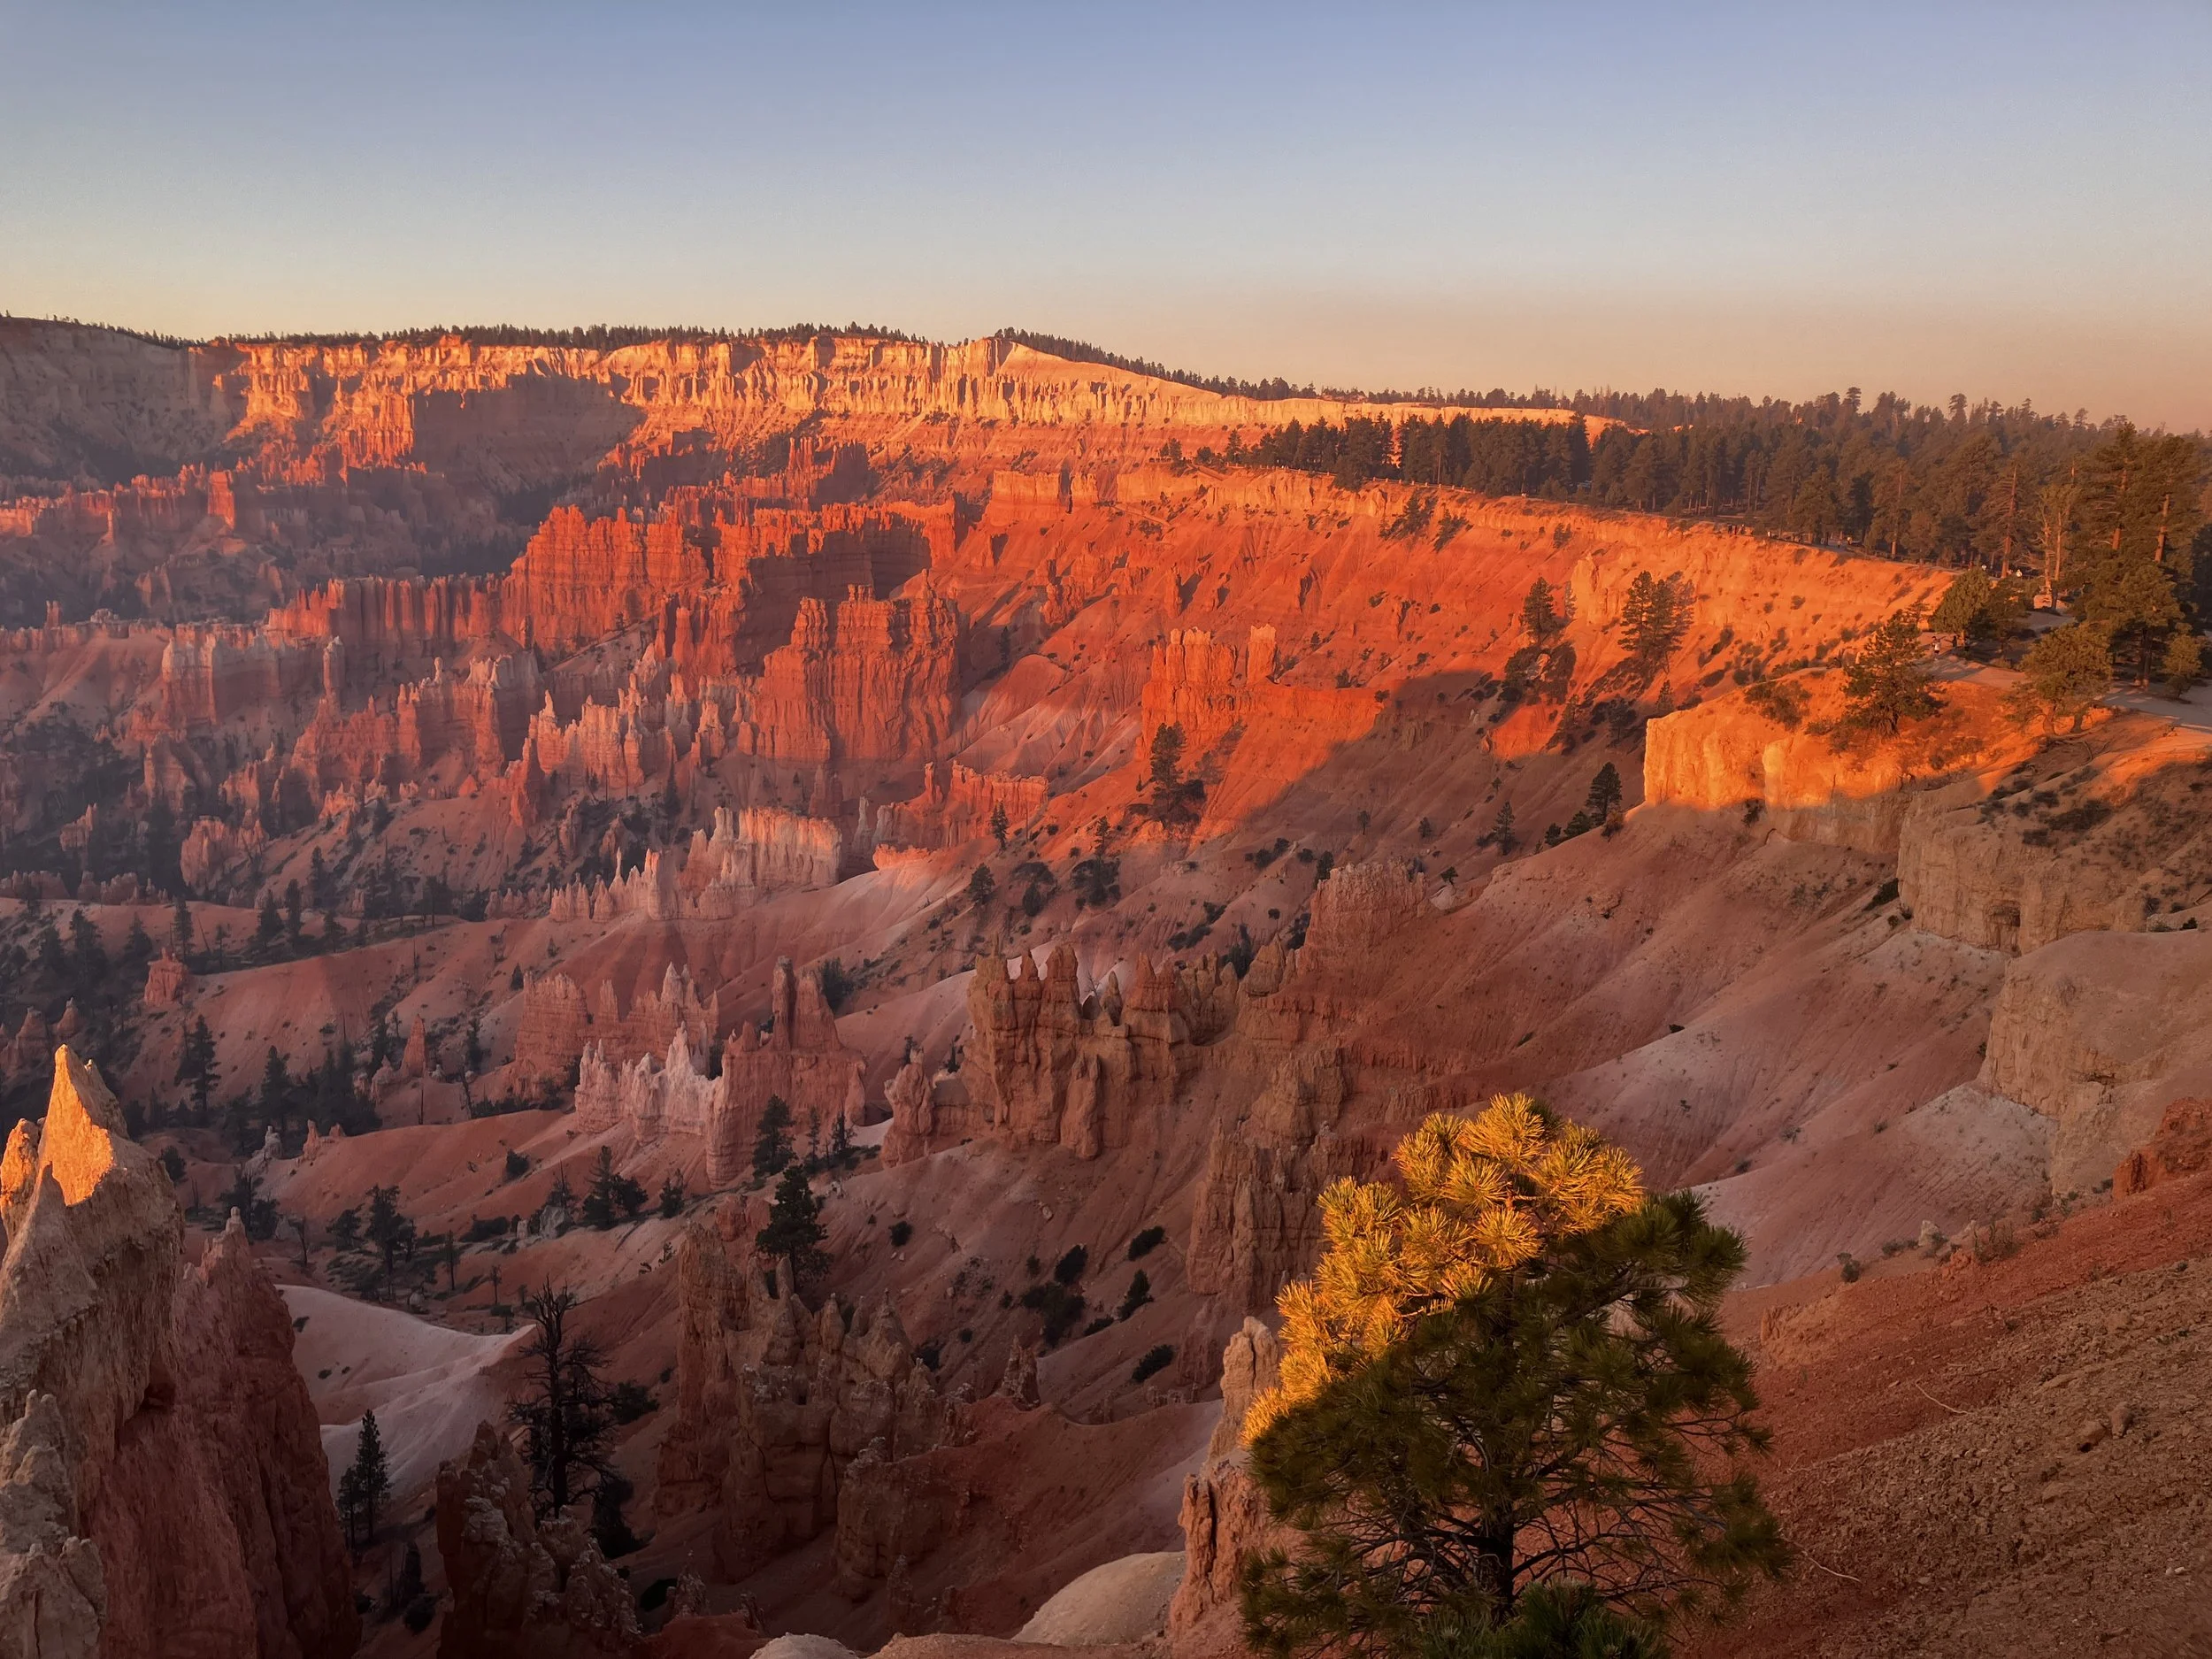
Bryce Canyon, Sunrise Point – Hoodoos off on the right (only visible from the Sunrise Point overlook) lighting up in the early morning sunlight
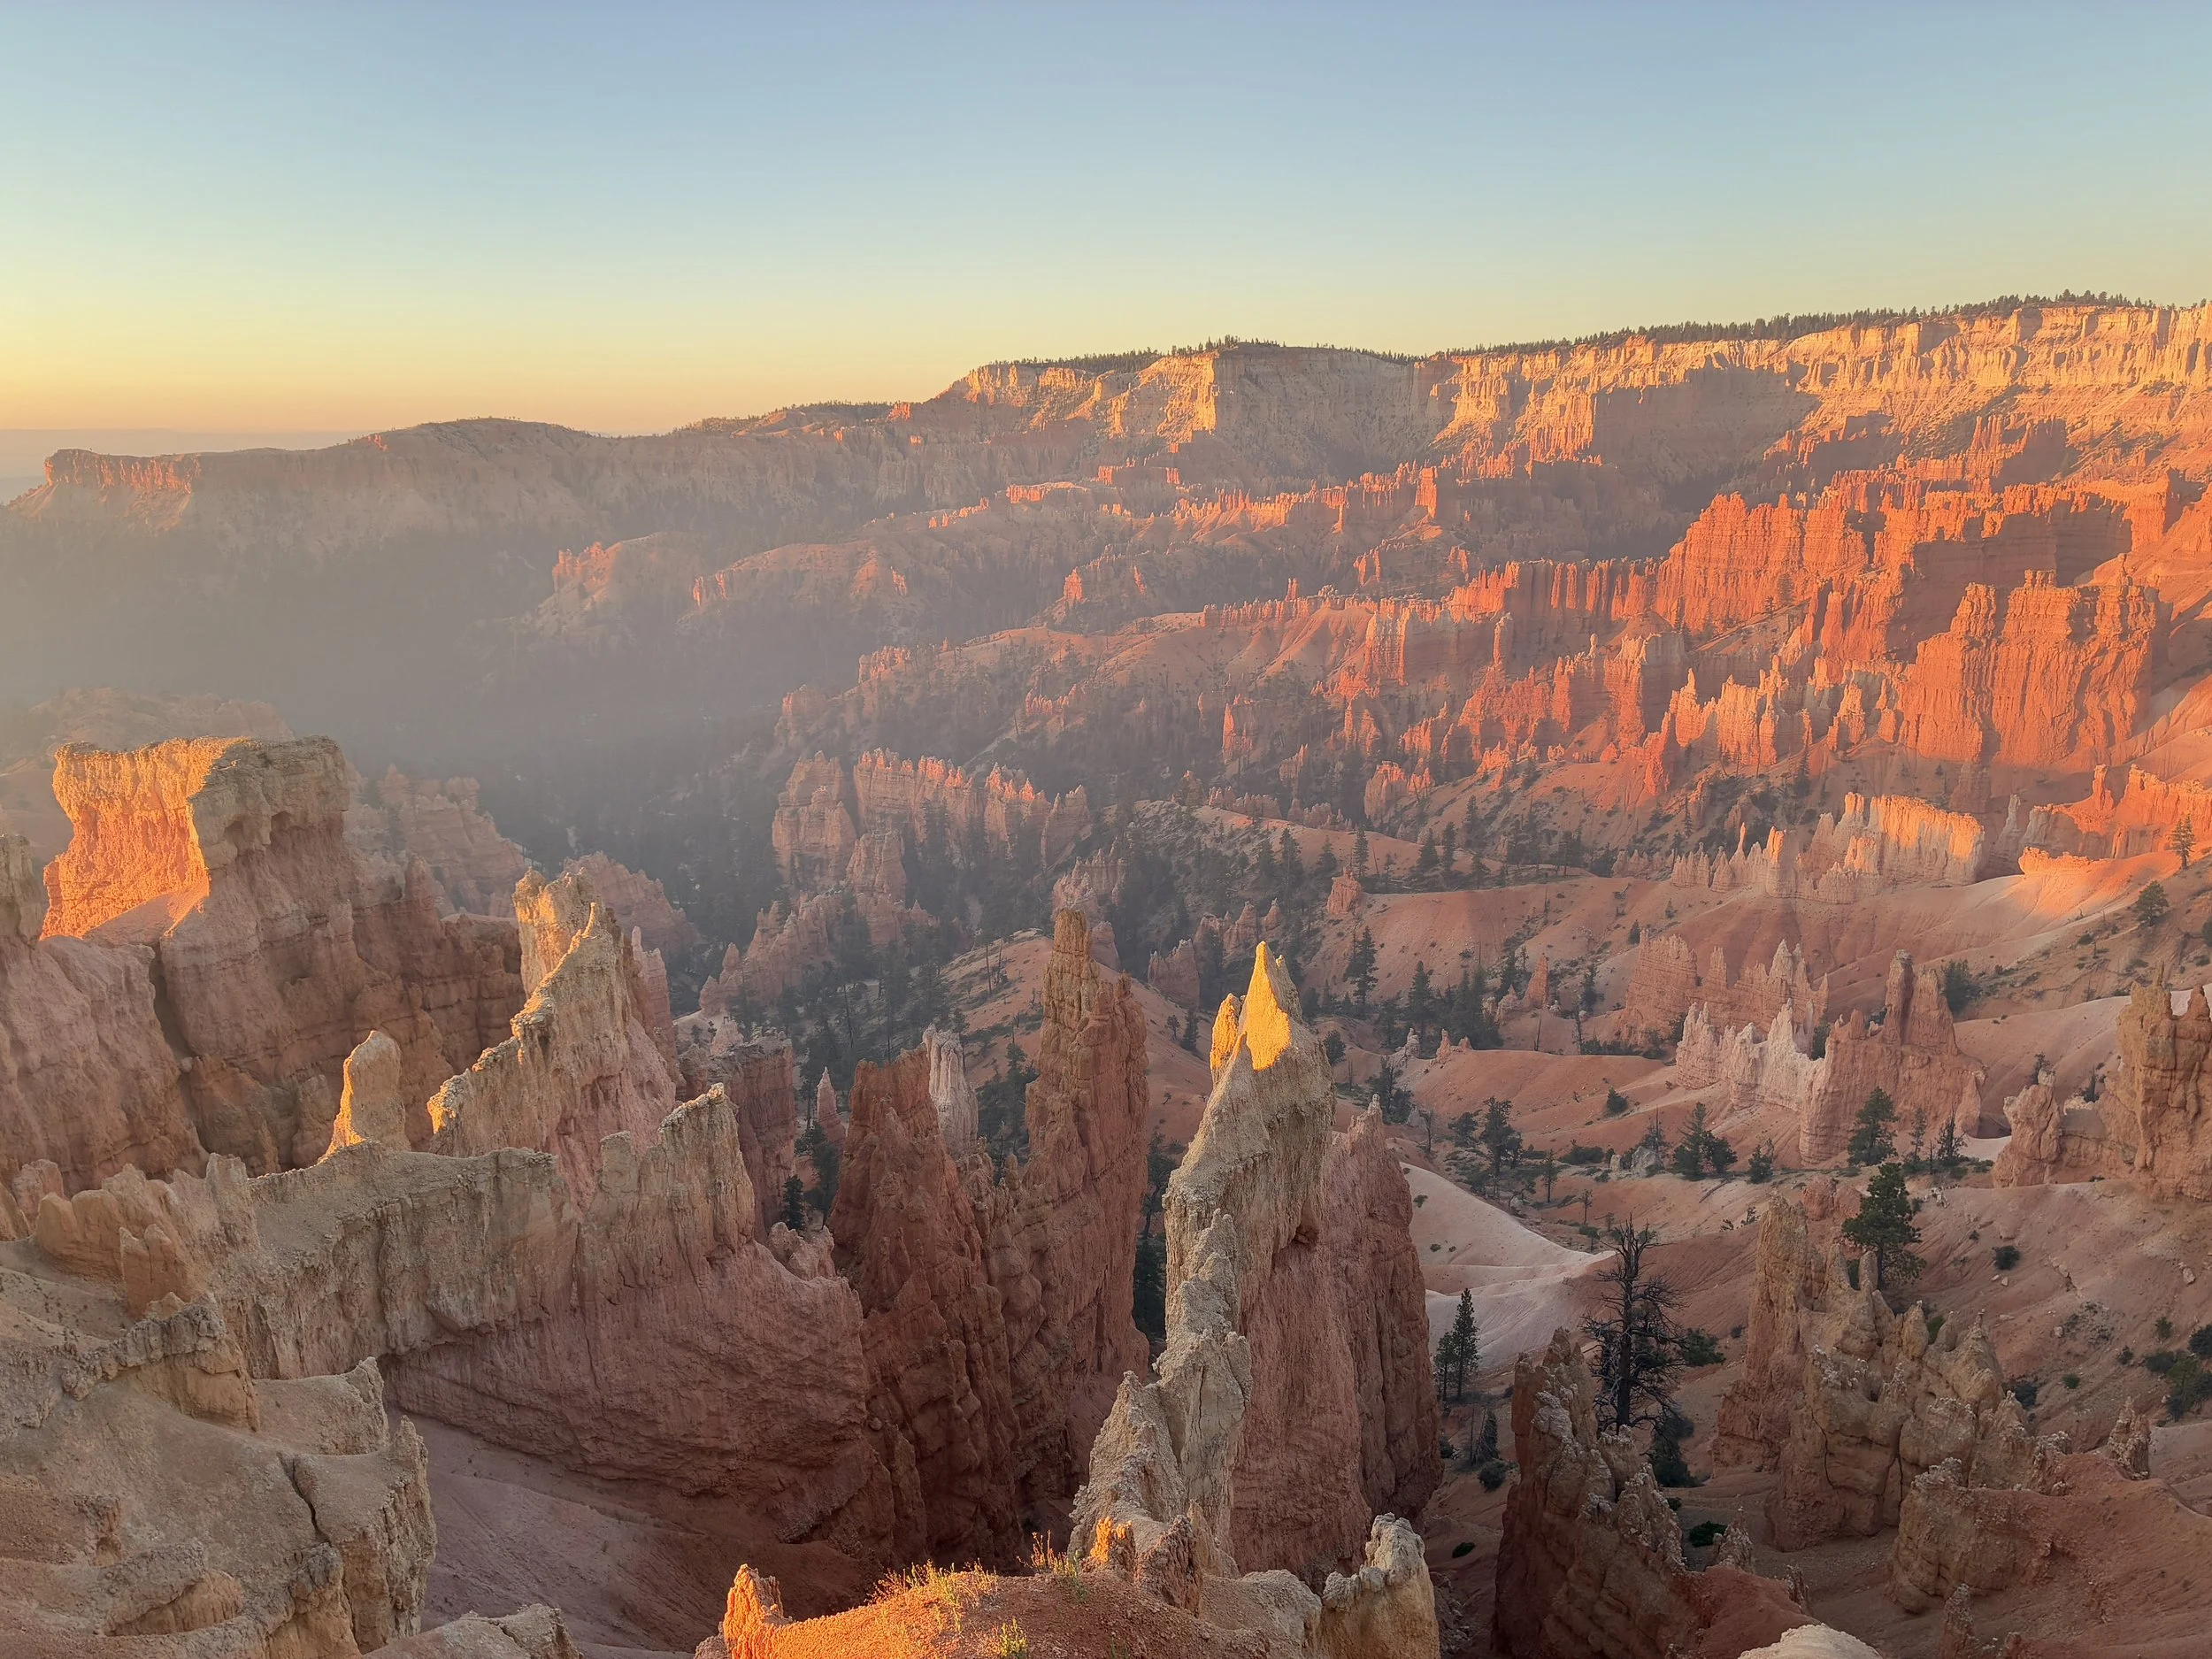
Bryce Canyon, Sunrise Point
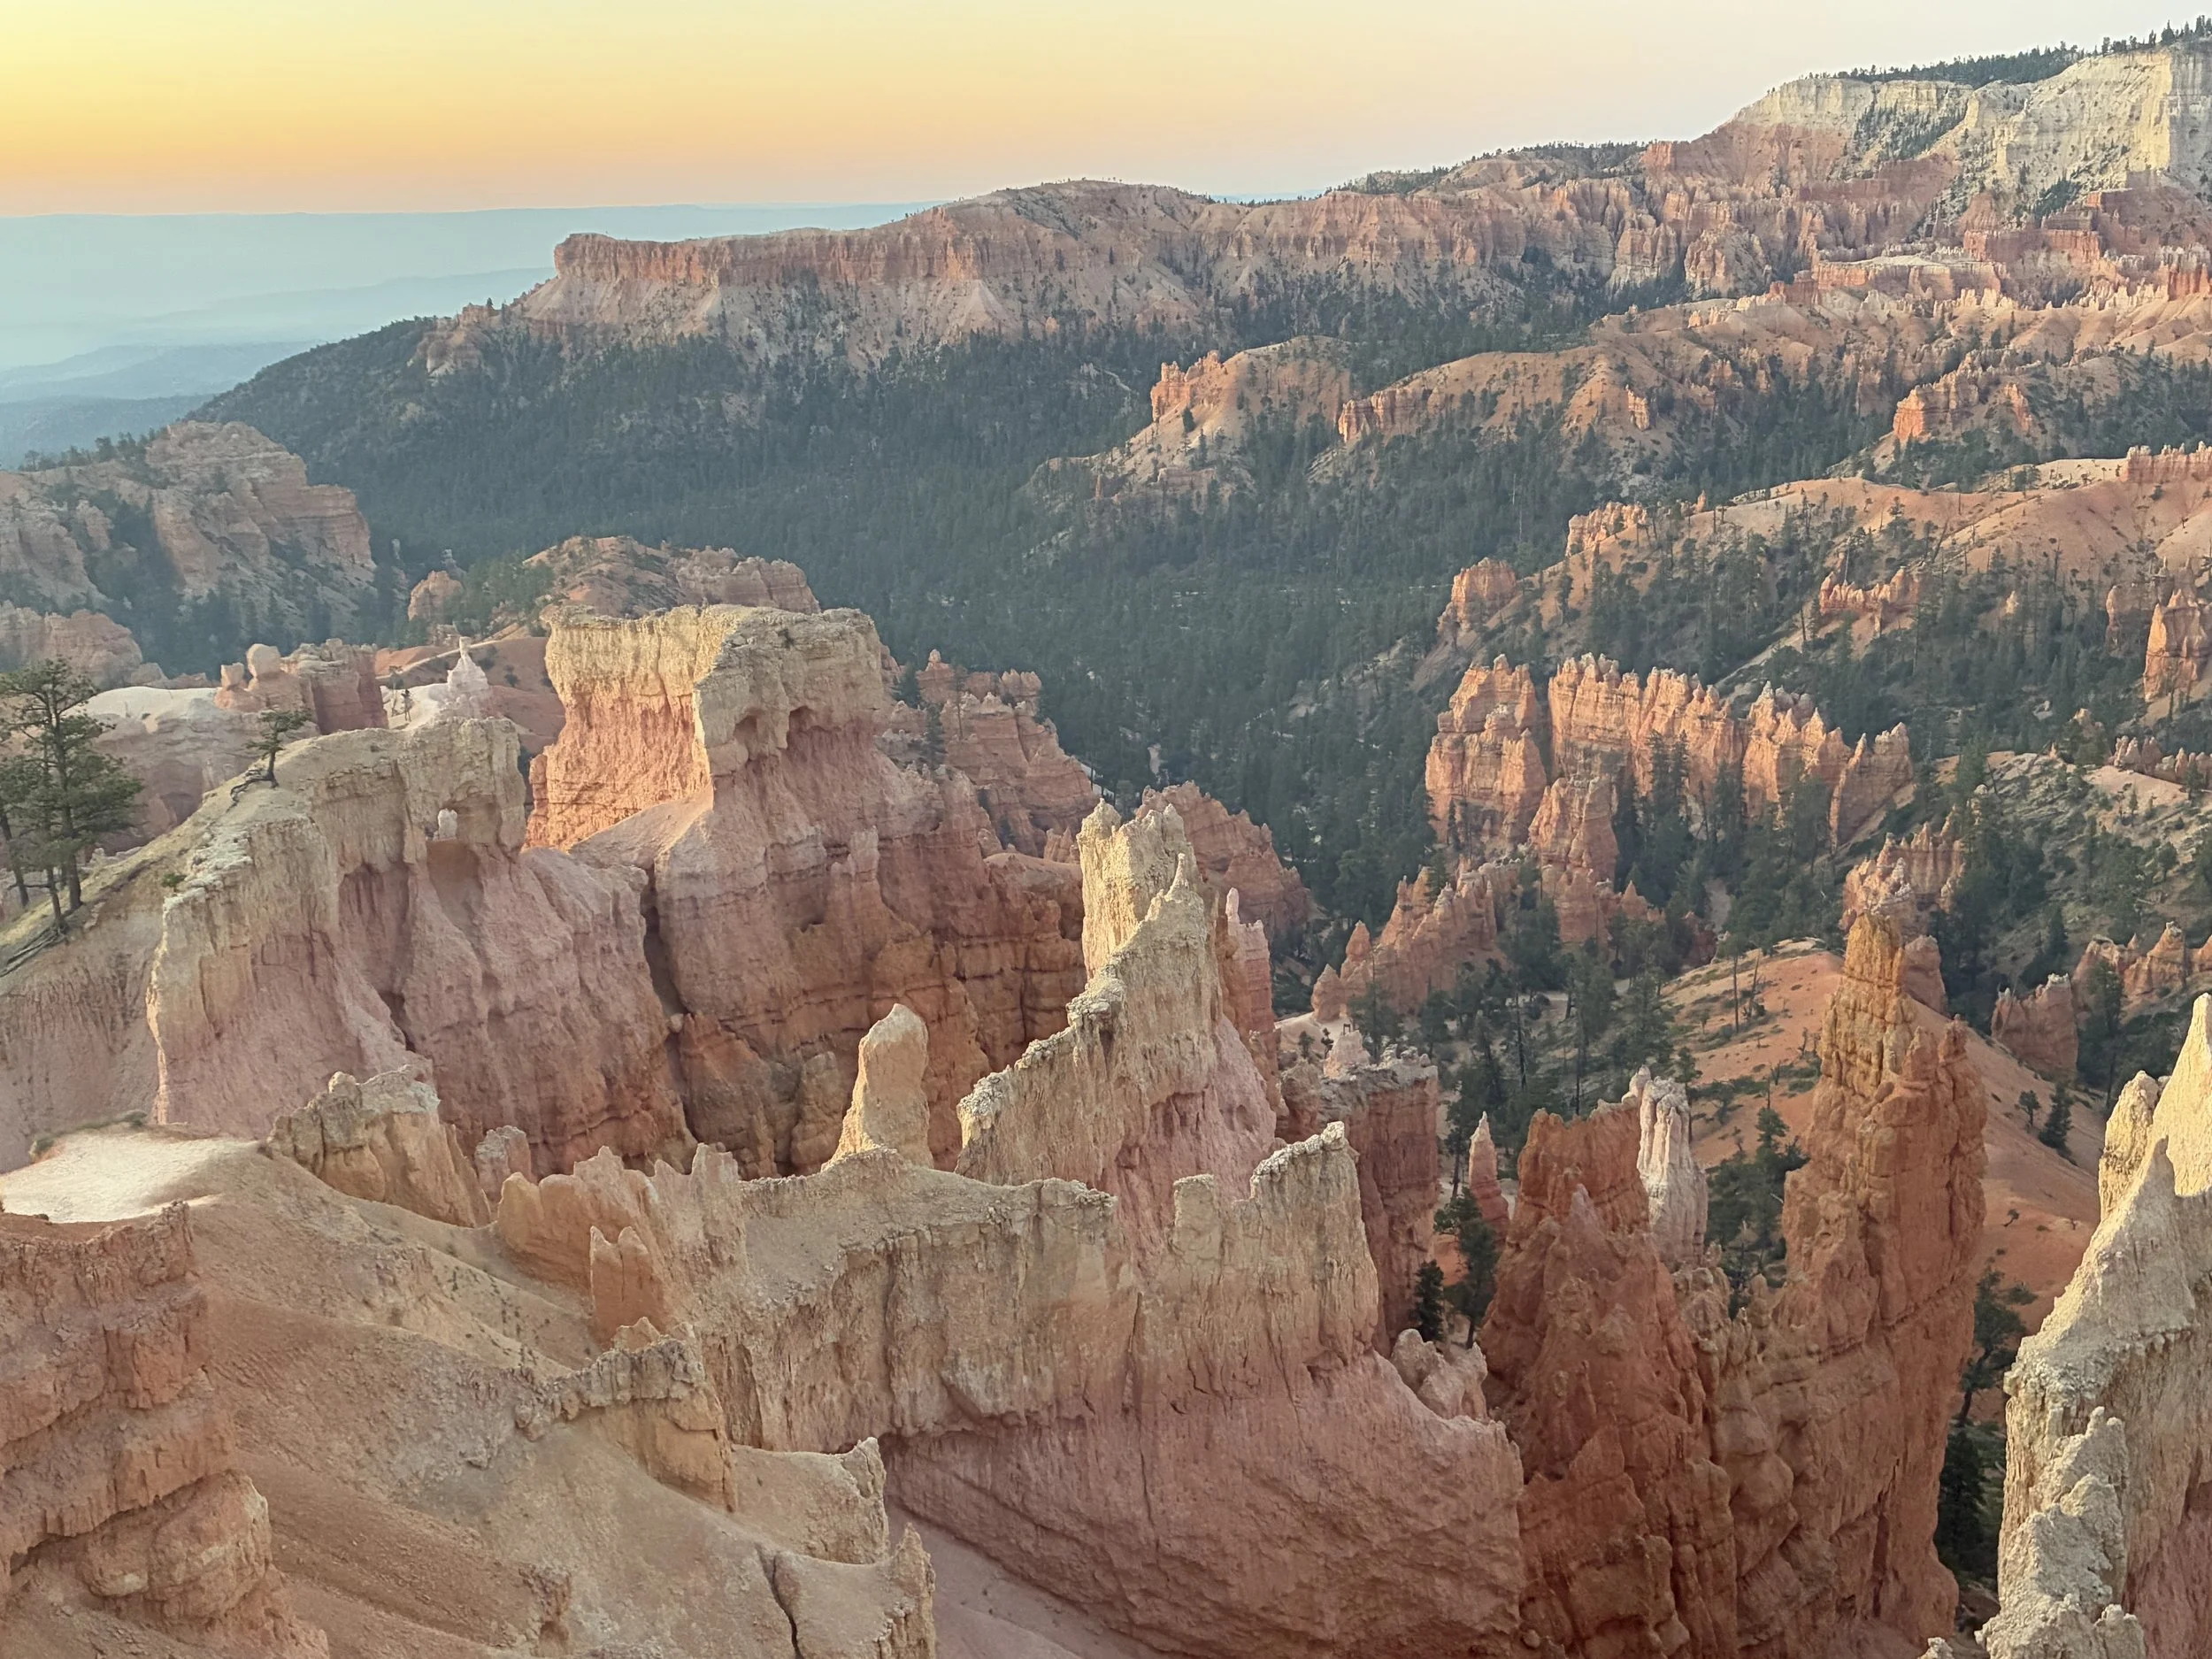
Bryce Canyon, Sunrise Point - It’s hard for me to pick pictures - it was such a beautiful morning
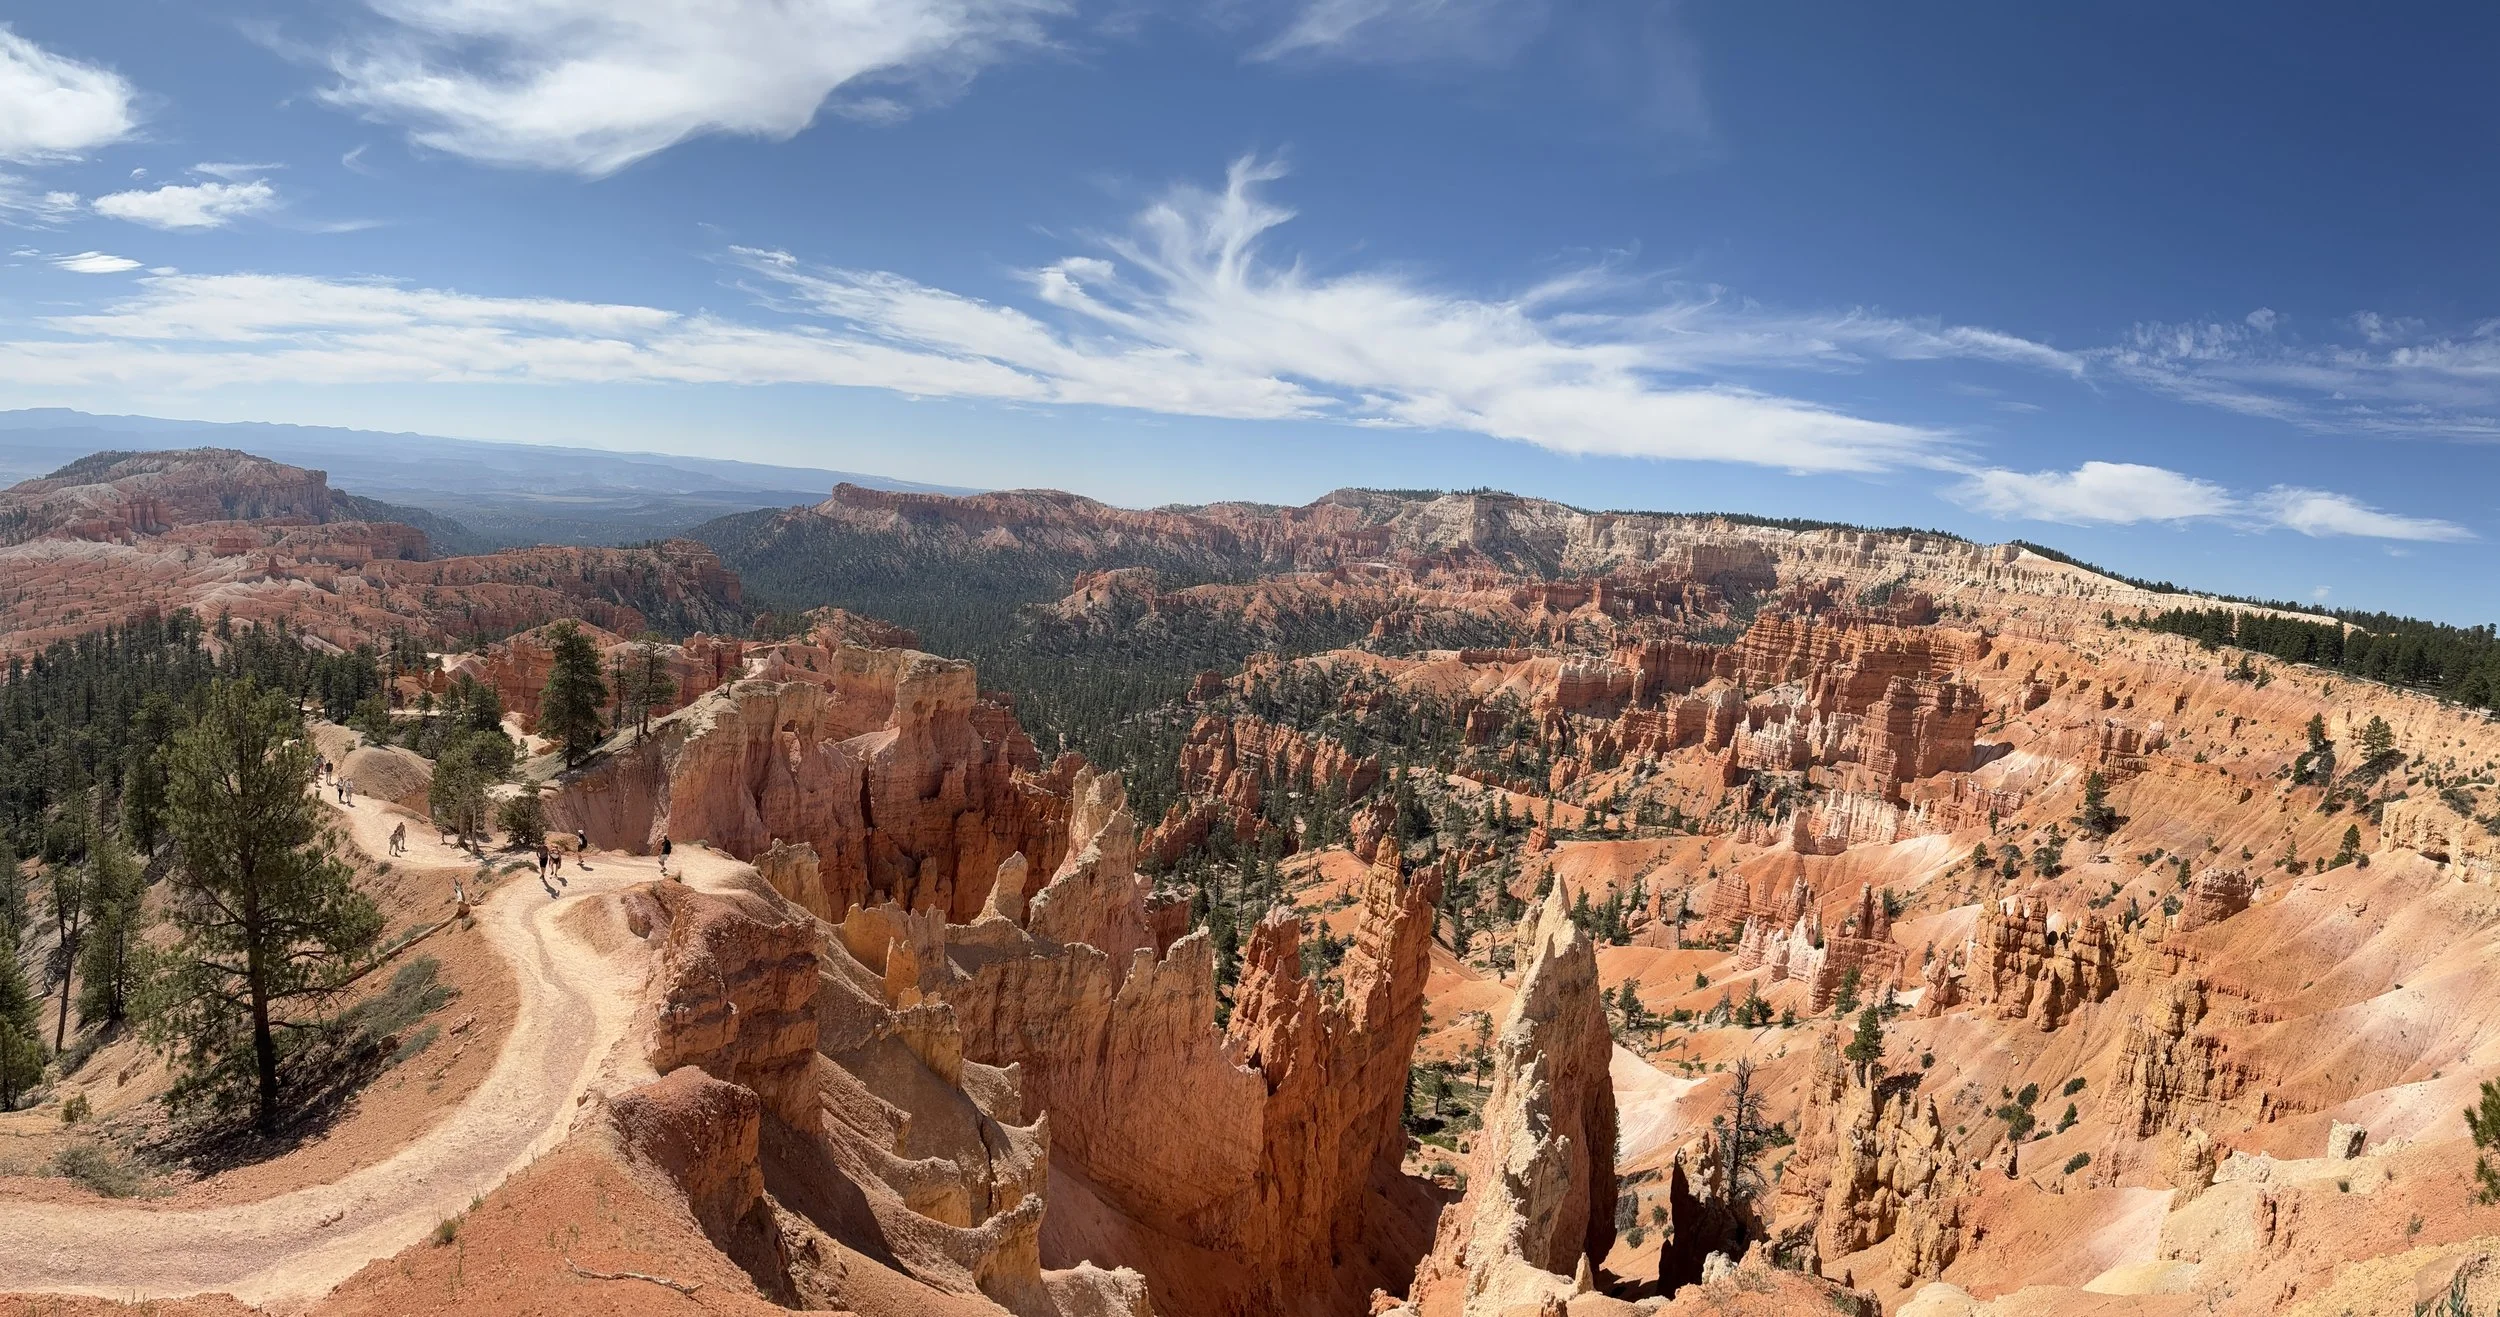
Bryce Canyon, Sunrise Point – during the day – Looking down at Queen’s Garden Trail
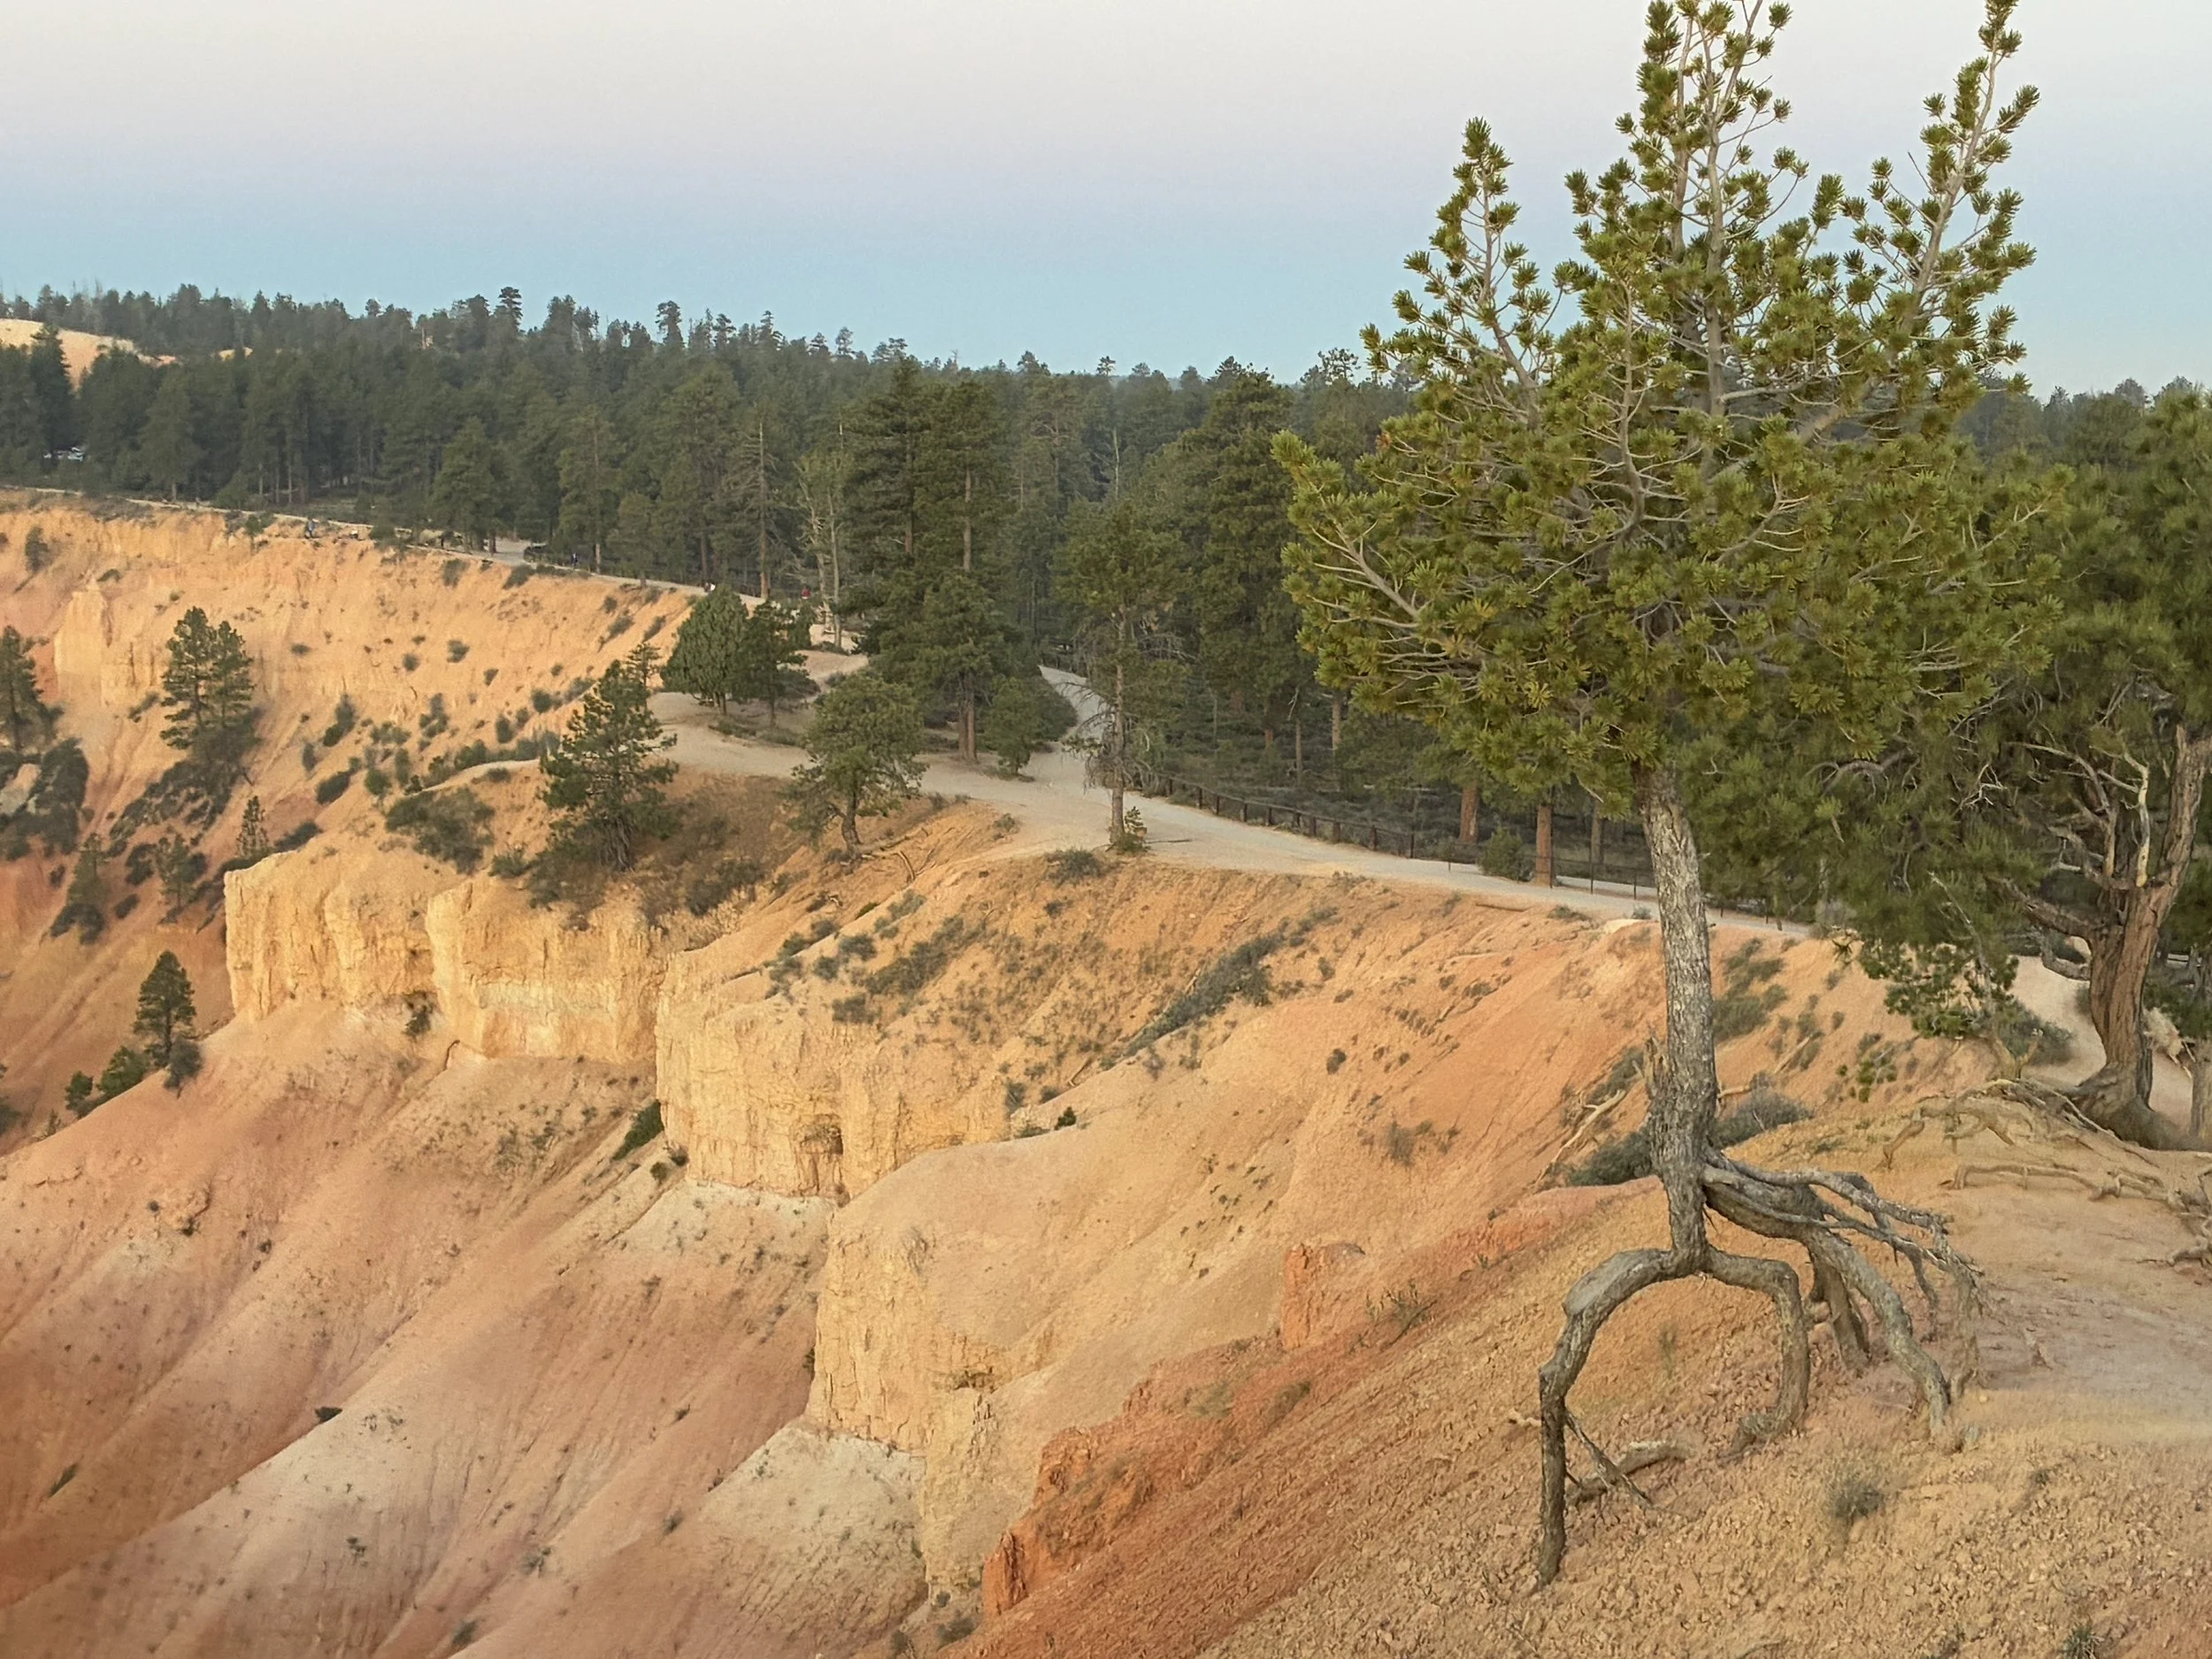
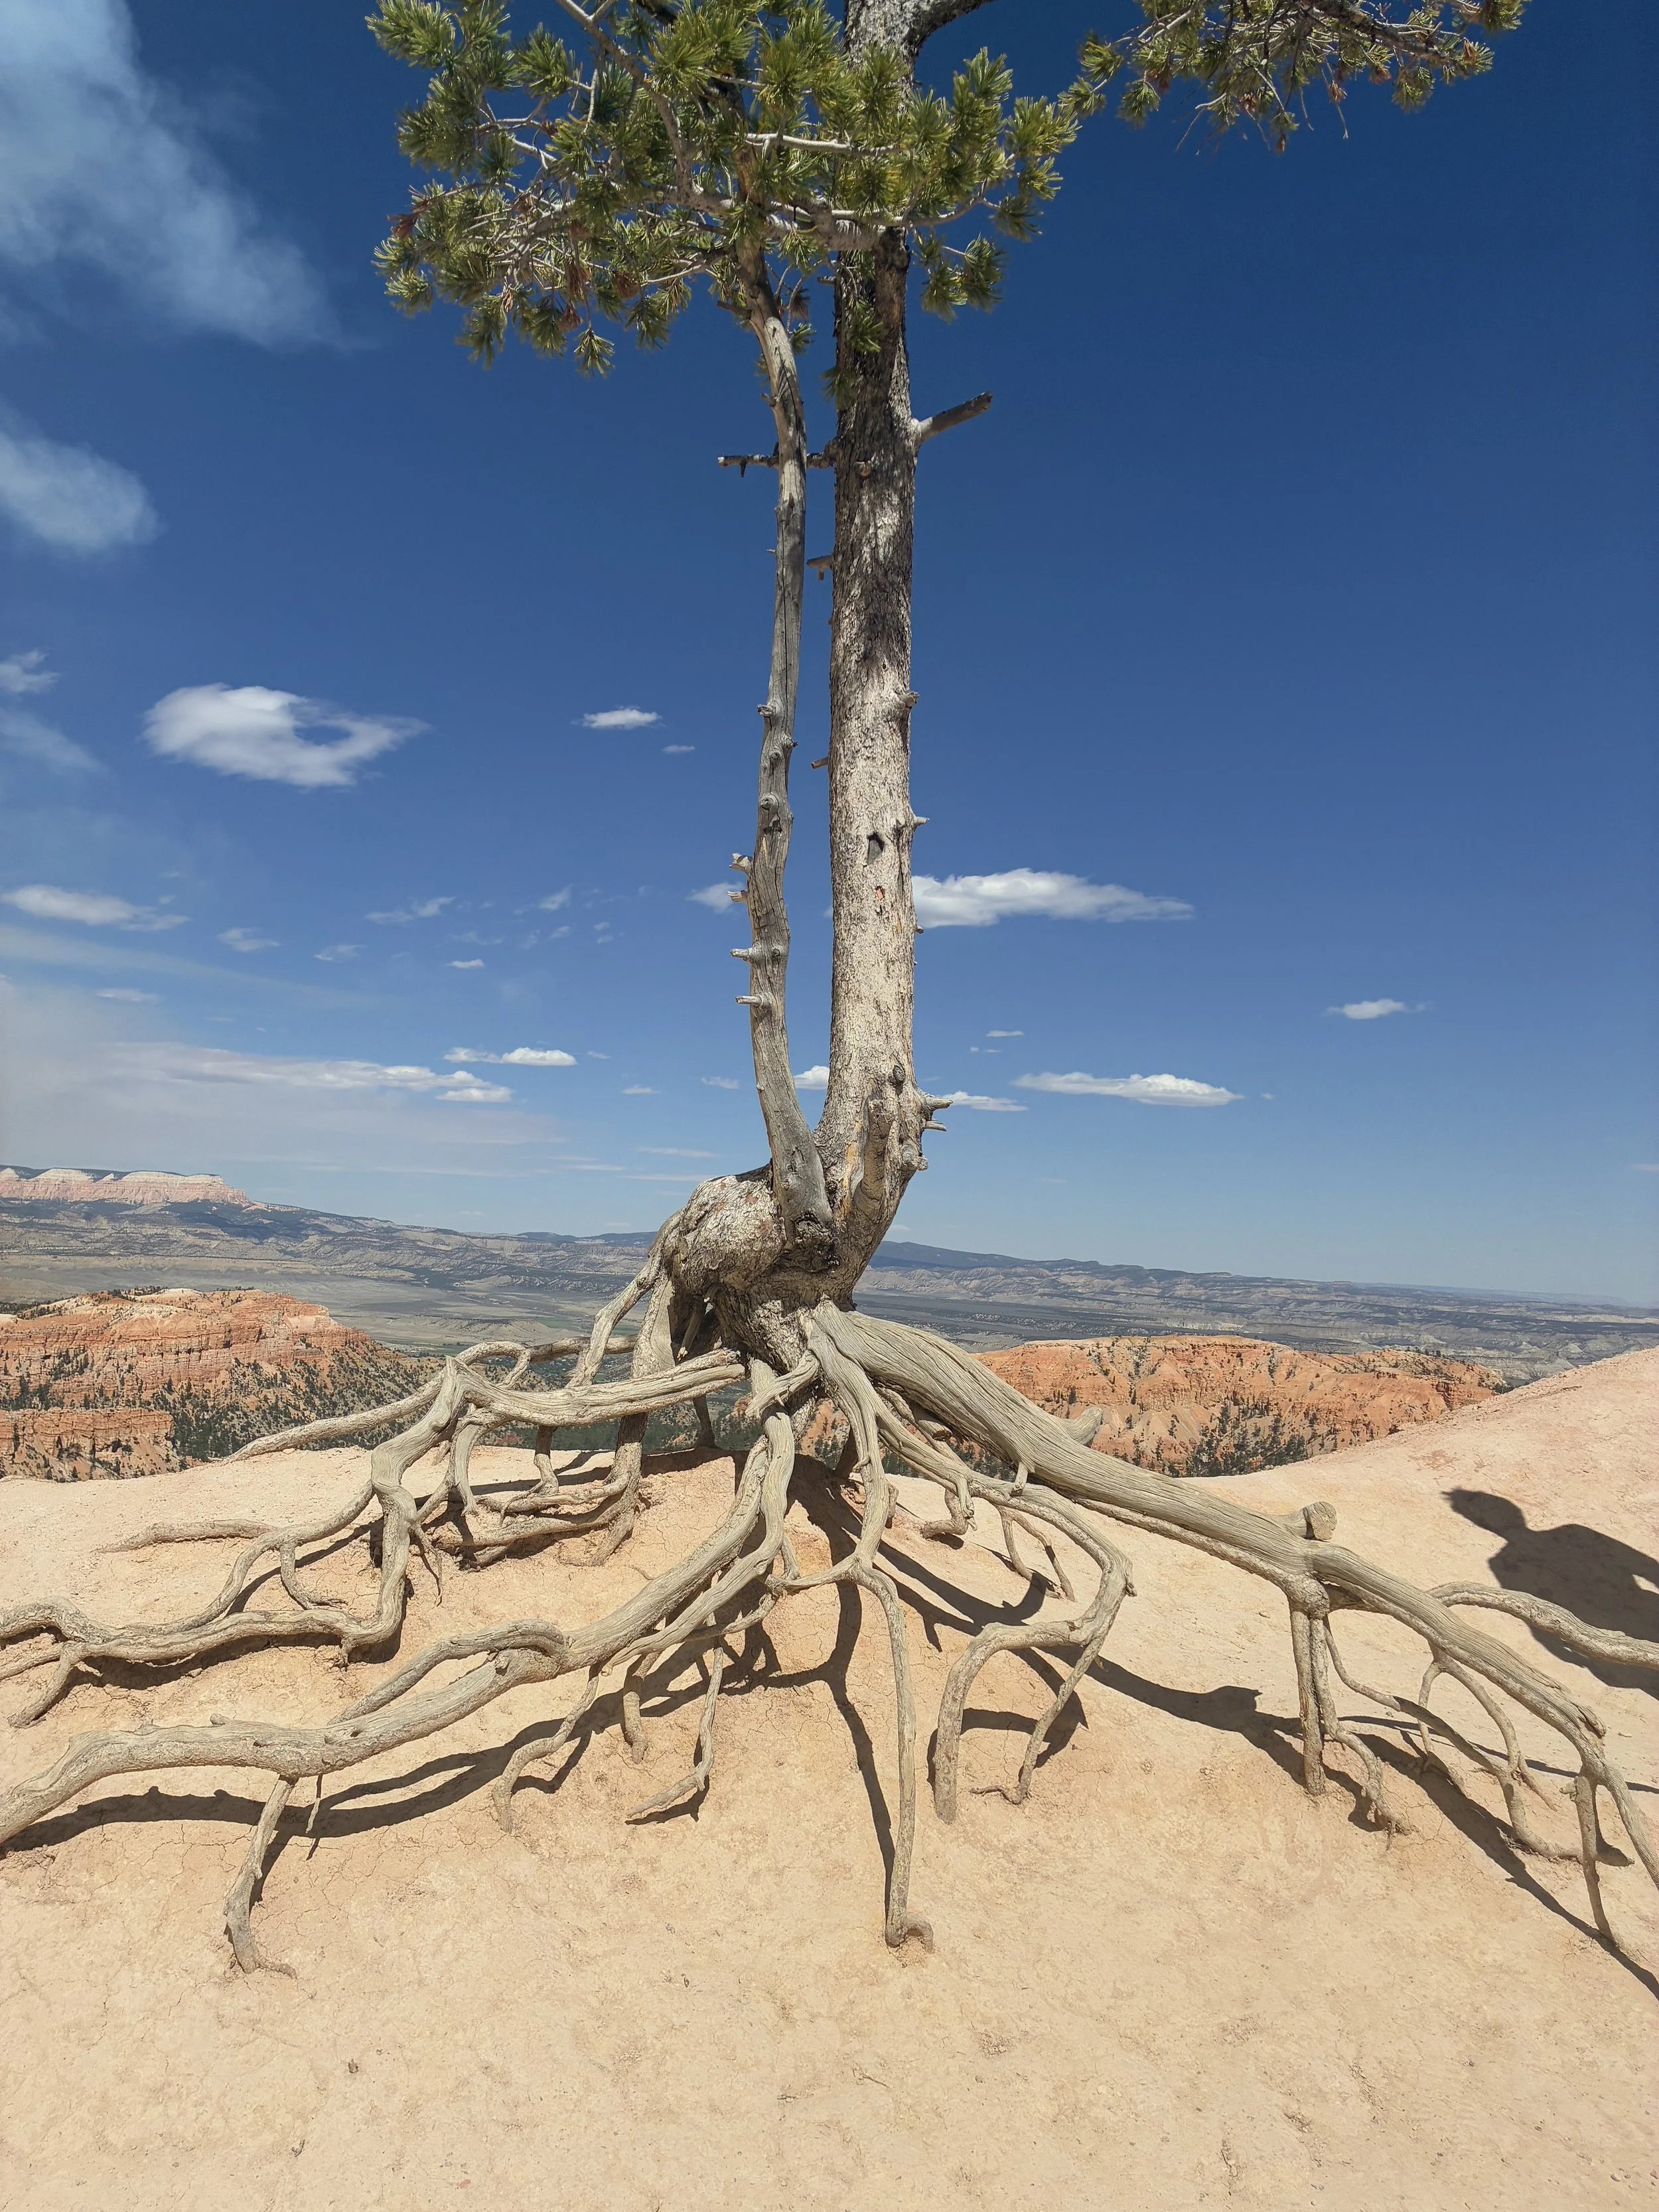
Bryce Canyon, Sunrise Point – Look at this tree’s roots. The reason they are exposed is erosion. The trees highlight how dramatically the rate of erosion occurs at this canyon. This tree isn’t very old, and there is more than a foot of exposed roots.
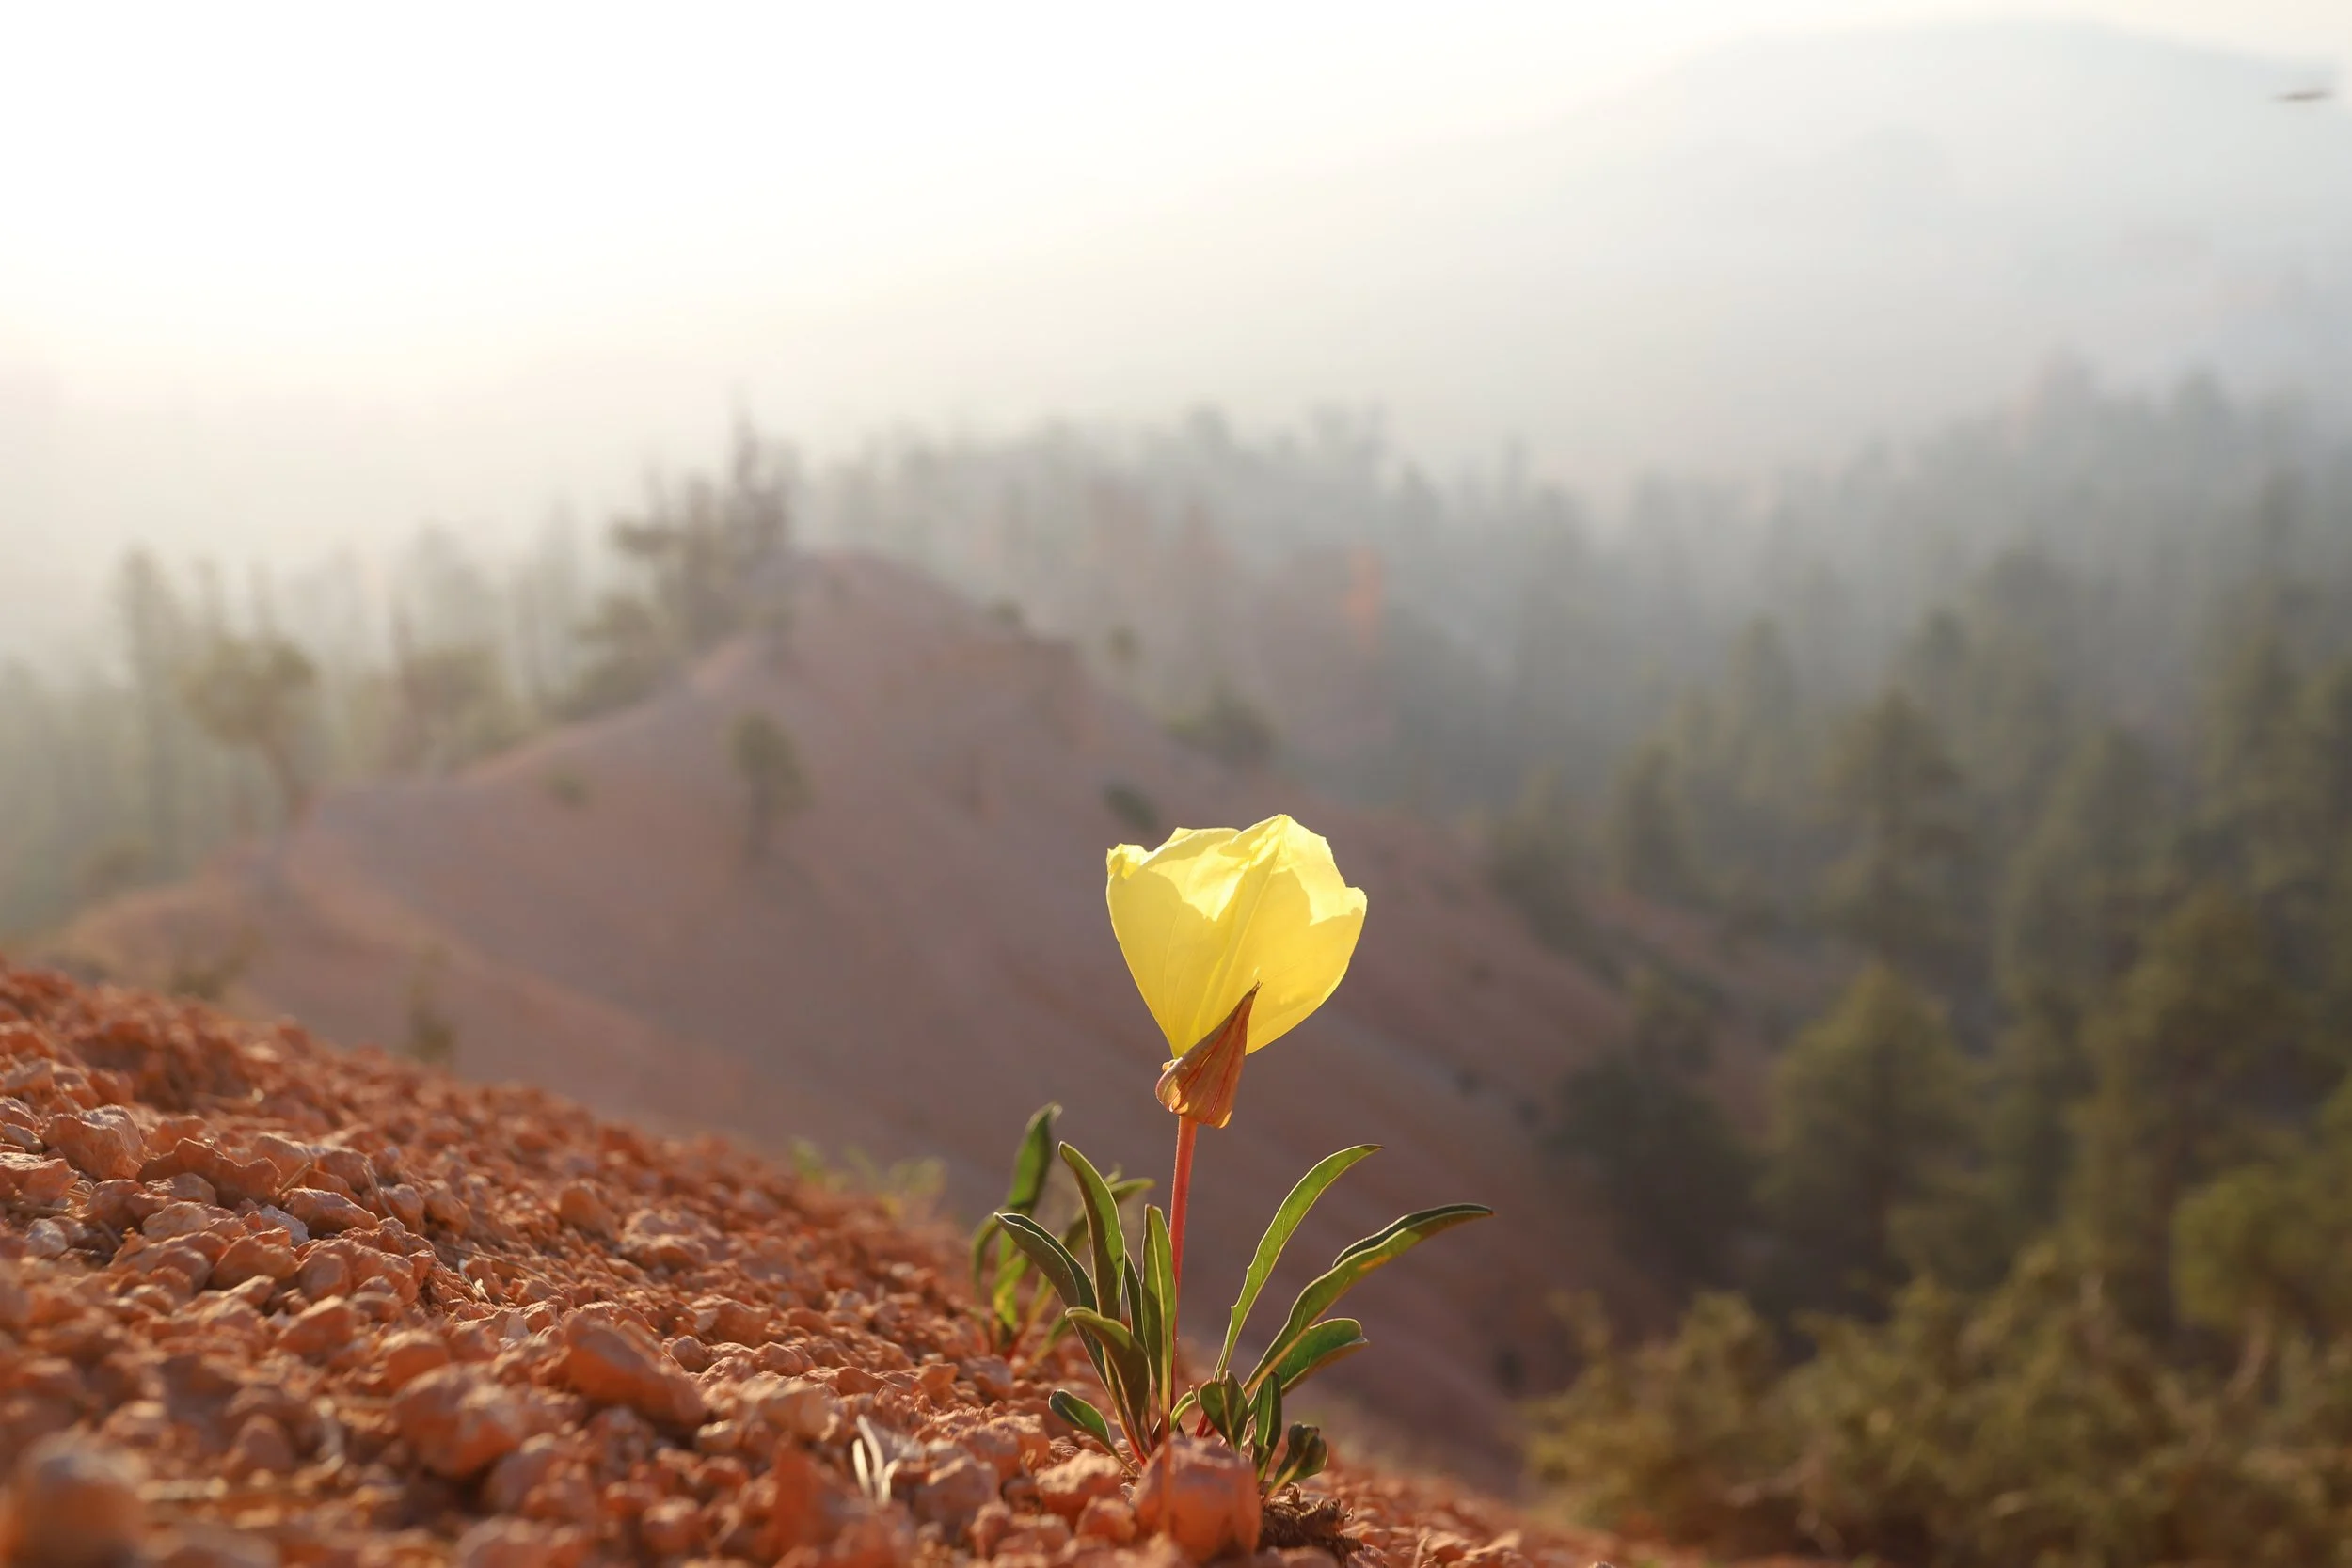
Bryce Canyon, Sunrise Point – Maybe someone else knows the name of this flower and can share it with me?
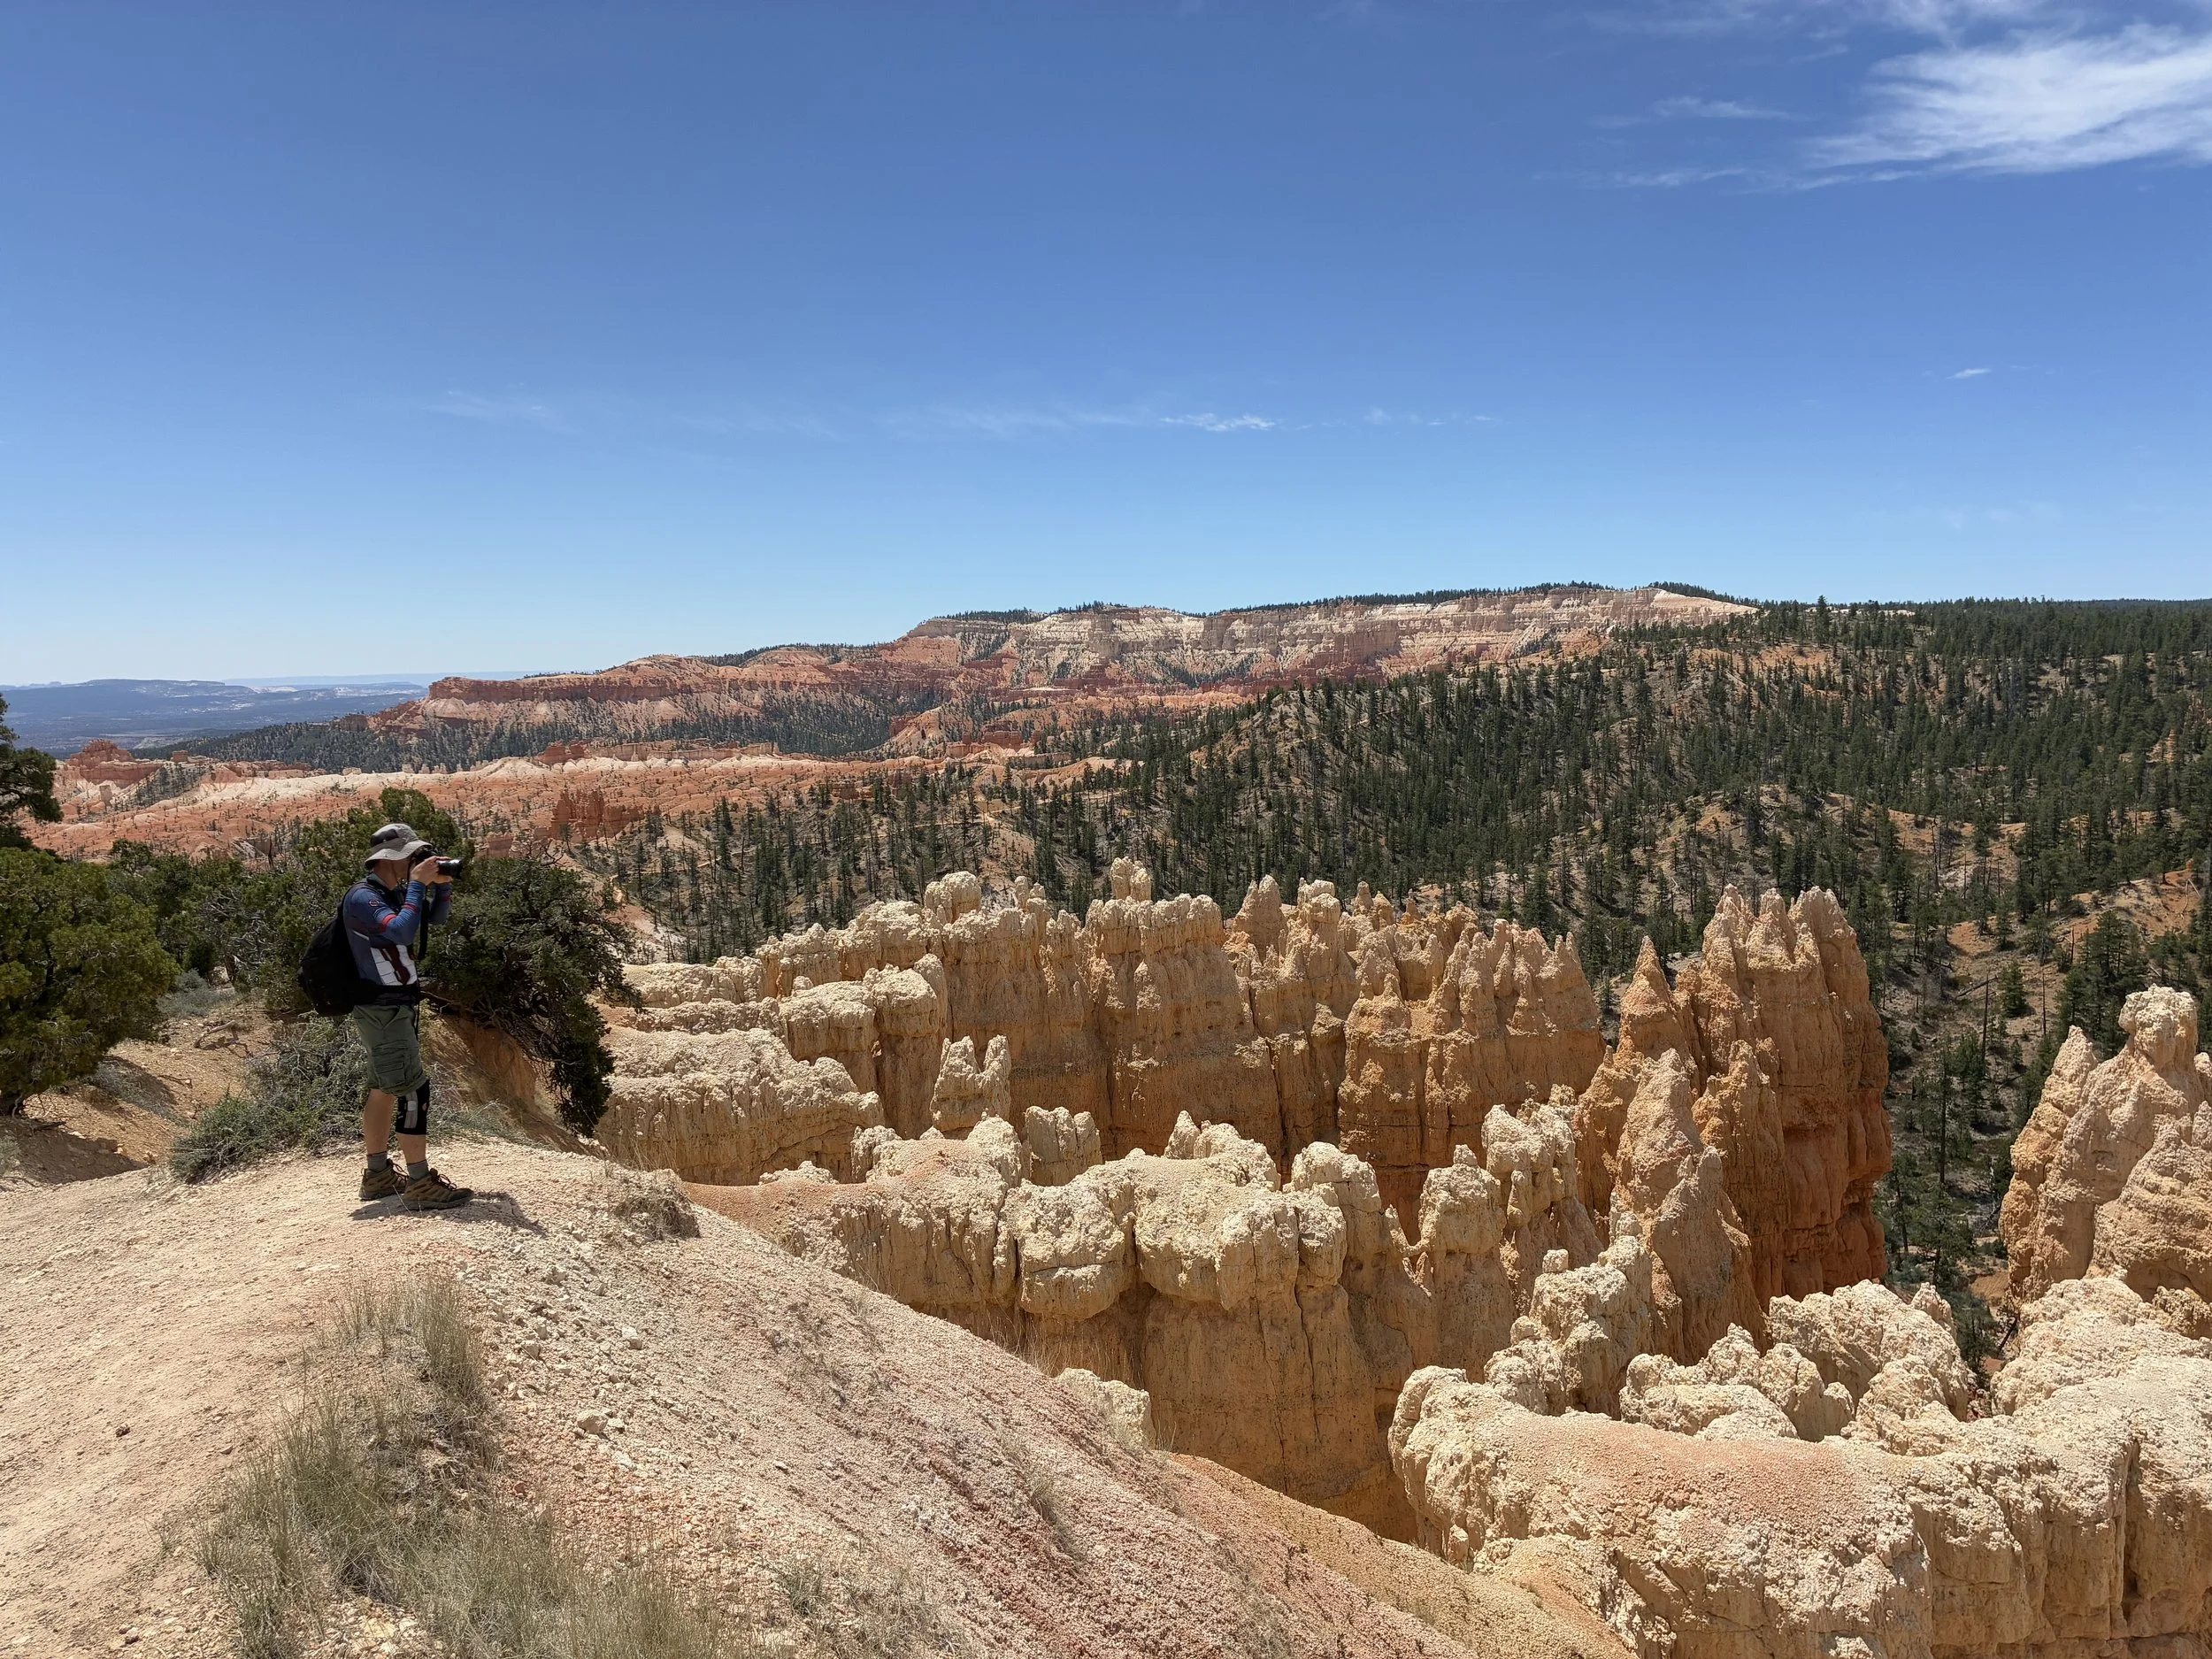
3) Rim Trail - Sunrise Point to Fairyland Point
Distance - Approximately 6 miles (out-and-back)
Elevation Gain - The trail goes up approximately 300ft and drops about 80ft (when walking from Sunrise to Fairyland).
Trailhead Location - There is parking available at both Sunrise and Fairyland Points. There is no shuttle stop at Fairyland Point, therefore this hike needs to be an out-and-back or part of the full Fairyland Loop.
Helpful Information - The easier direction to hike is Fairyland Point to Sunrise Point, so I would recommend starting at Sunrise Point, and doing the harder direction first.

The Rim Trail (Sunrise Point to Fairyland Point) is part of the Fairyland Loop. It is marked in red.
Bryce Canyon, Rim Trail – Sunrise Point to Fairyland Point
We hiked the Rim Trail between Sunrise Point and Fairyland Point as part of the 8-mile Fairyland Loop. We started at Sunrise Point and walked clockwise.
Bryce Canyon, Rim Trail – Sunrise Point to Fairyland Point
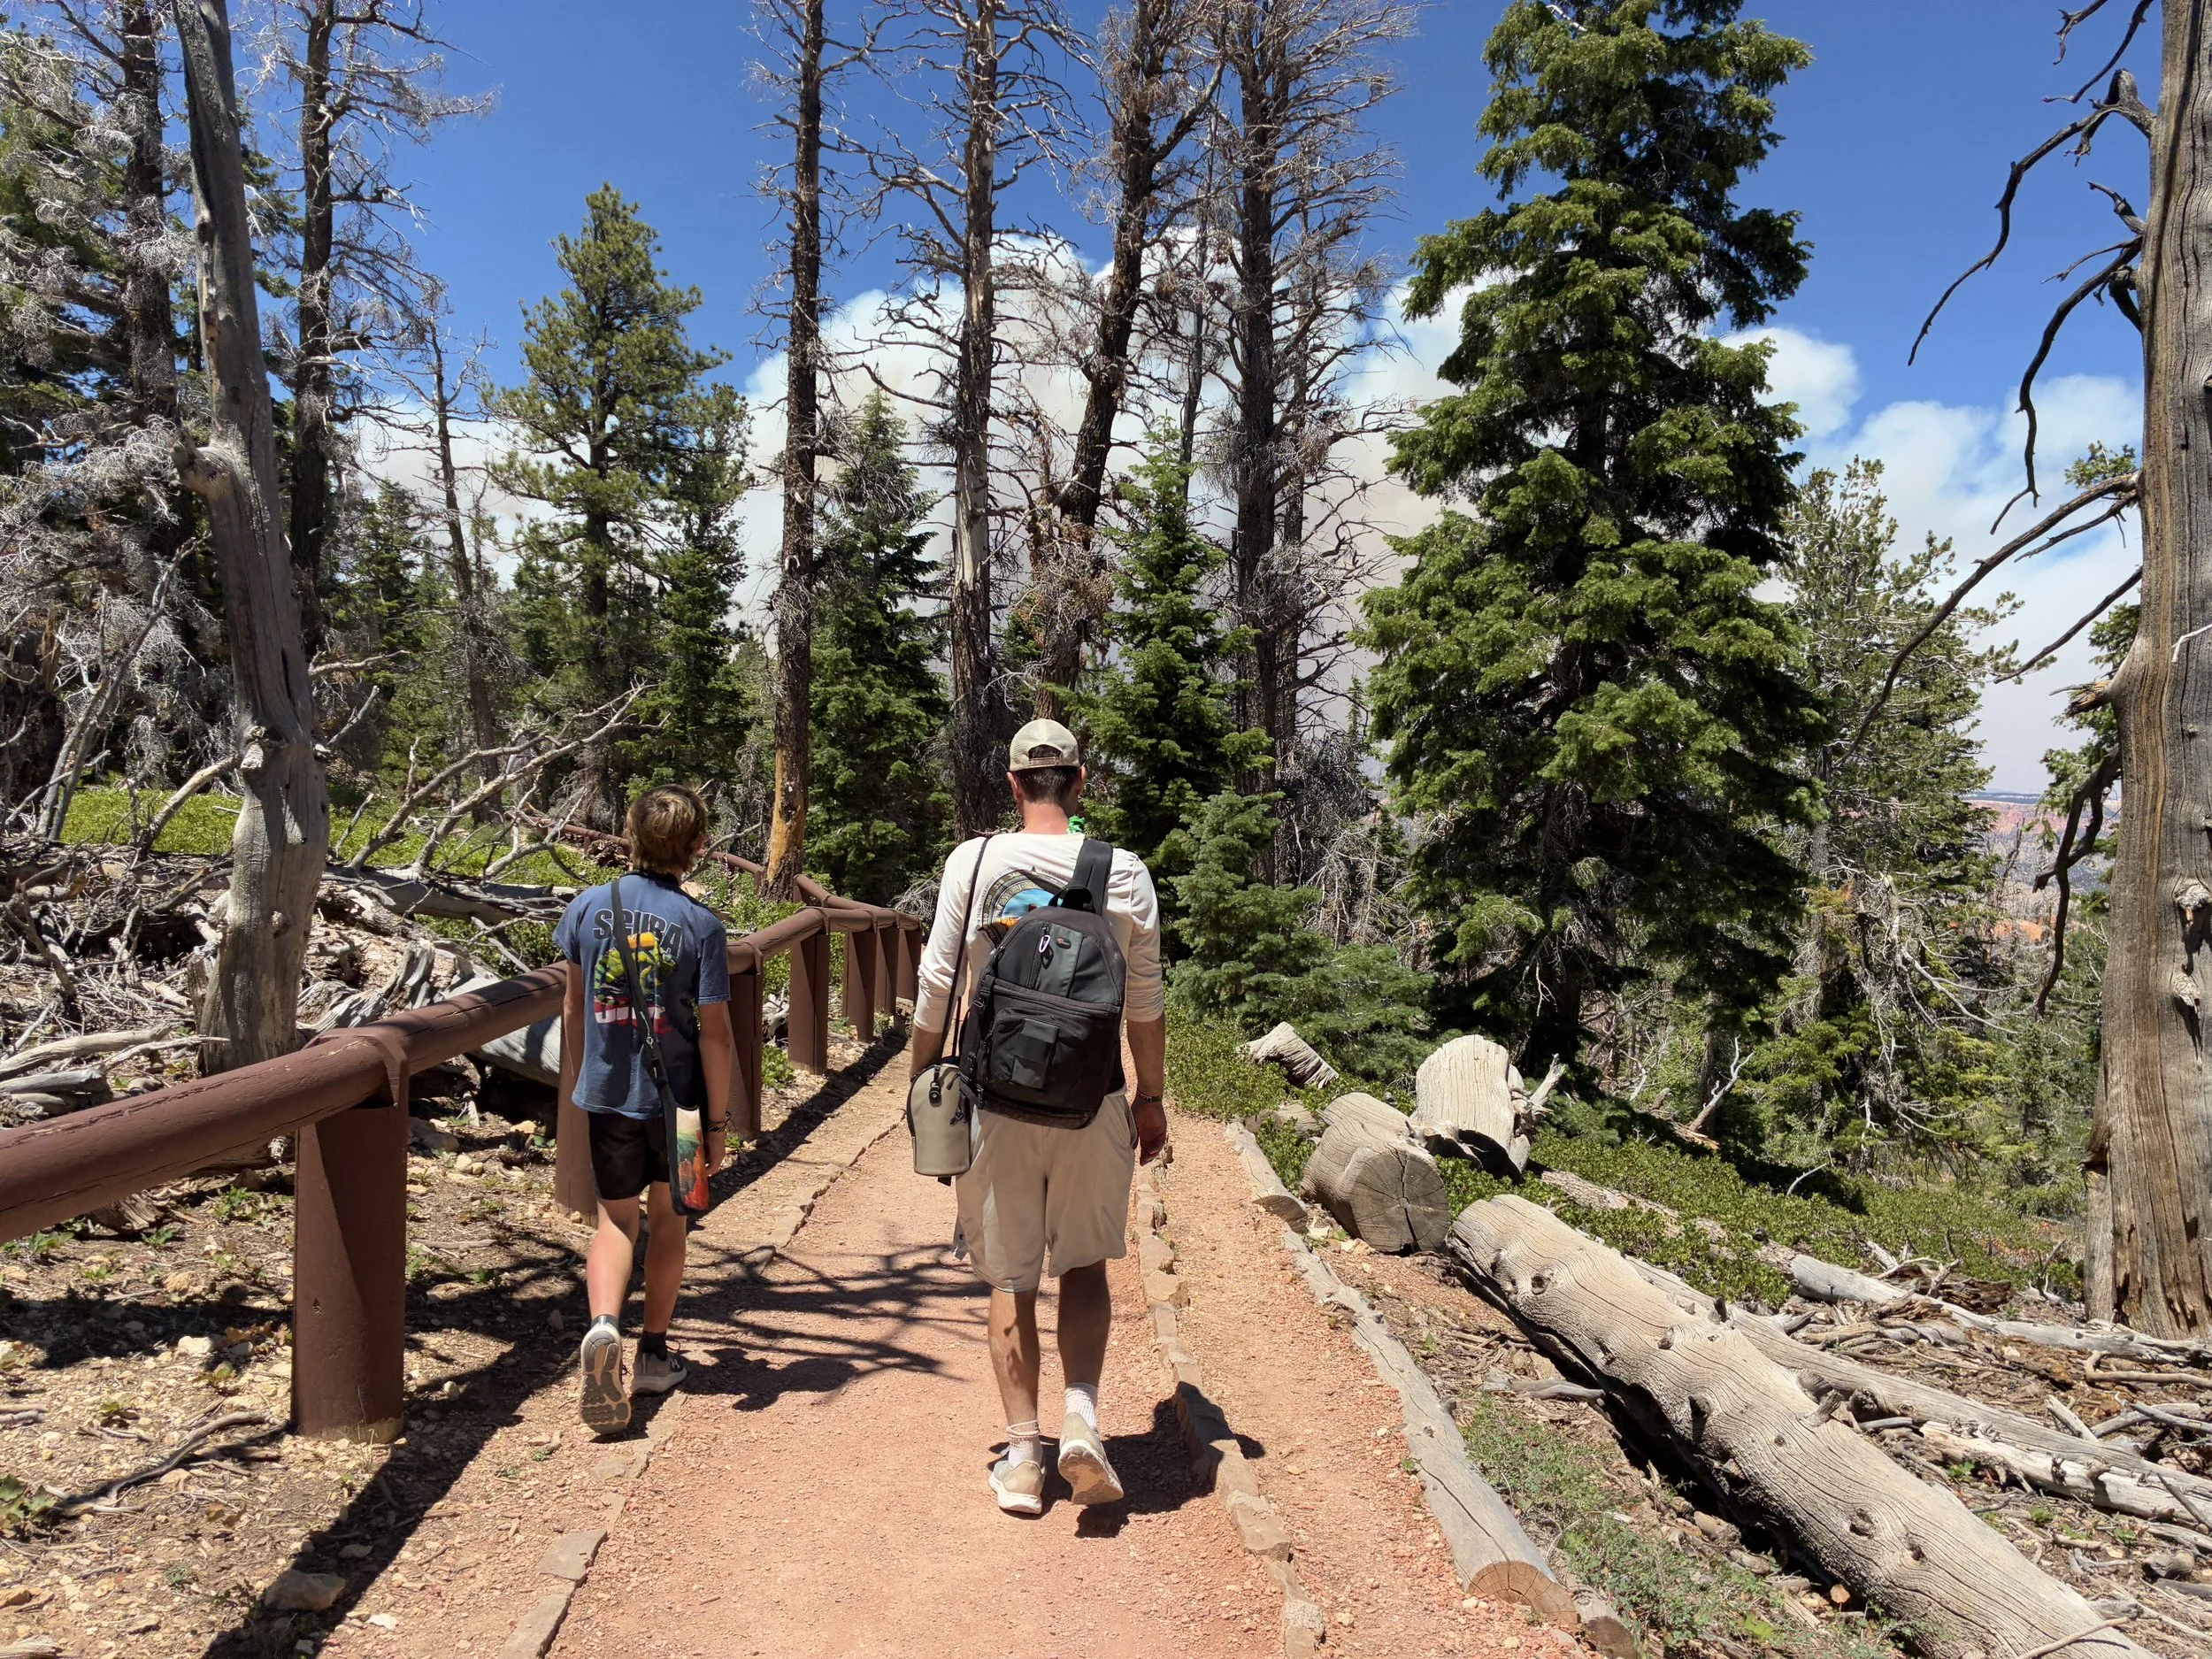
To earn the Boy Scout Hiking Merit Badge, one must complete four 10-mile hikes and one 20-mile hike. Earning this badge was one of our missions on our June 2025 trip to Utah. Fairyland Loop is only 8-miles, so to get up to 10 miles, we added on a spur hike down and back to Queen’s Garden (at the beginning) and then a spur to Tower Bridge (at the mid-point in the loop hike).
Bryce Canyon, Rim Trail – Sunrise Point to Fairyland Point
As I write about the Rim Trail between Sunrise and Fairyland Point, keep in mind that we have already hiked Queen’s Garden, and there is no “easy” hike in Bryce Canyon at over 8000ft in elevation. I was already tired before we started the Rim Trail.
Bryce Canyon, Rim Trail – Sunrise Point to Fairyland Point
For some reason, “Rim” as an adjective in a trail name translates into “easy” for me – but I don’t think I’ve ever actually been on an “easy” rim trail… This one included. It was up and down, mostly up, for 300ft along the trail. I felt beat before even heading down into the canyon on the Fairyland Loop.
Bryce Canyon, Rim Trail – Sunrise Point to Fairyland Point
That said, there are some incredible views along this rim trail. Compared to the business of Queen’s Garden, we only passed a mom with two kids on this rim trail. If someone is looking for an afternoon hike that is quiet and not terribly intense, this is a great option.
Bryce Canyon, Rim Trail – Sunrise Point to Fairyland Point
The only downside to this trail (in addition to the 300ft in elevation gain) is that it remains on the rim. Getting to view hoodoos from the same level or below (looking up) makes them even more impressive. On this trail, all hoodoos are visible from top-down.
Bryce Canyon, Rim Trail – Sunrise Point to Fairyland Point
This rim trail between Sunrise and Fairyland Point probably isn’t at the top of too many hiking wish lists, but for someone not wanting to hike the whole Fairyland Loop, an out-and-back hike on this section of the Rim Trail might be a perfect option.
Bryce Canyon, Rim Trail – Sunrise Point to Fairyland Point
4) Fairyland Loop
Distance - 8 miles
Elevation Gain - 1,555ft
Trailhead Location - The loop can be started at either Sunrise Point or Fairyland Point. There is parking available at both locations. The shuttle stops at Sunrise but not Fairyland.
Helpful Information - This is a tough trail - It’s not just the mileage and elevation gain. The rim elevation is over 8,000ft, which even a healthy athletic person is going to notice. The best part of this hike though is the solitude. Higher difficulty thins out the crowd significantly.
Where to start and which direction to go? The trail elevation gain is “W” shaped. The trail descends into the canyon from both Sunrise and Fairyland Points. In the middle third of the hike there is a descent, then a climb up and a walk back down. The trail is a bit steeper at Sunrise Point – a little harder maybe to climb out, but the up section is shorter. It probably doesn’t matter. Either direction is going to be really hard…
We started at Sunrise Point and hiked clockwise. My one recommendation for anyone hiking clockwise is to start at Sunrise Point. The Rim Trail between Sunrise and Fairyland goes up about 300ft on the way to Fairyland – knock that section of the trail out at beginning rather than the end.

The Fairyland Loop Trail is marked in blue.
As I’ve already included pictures and a trail review from Sunrise Point to Fairyland Point along the rim trail (in the trail above), I’ll start at Fairyland Point now and go clockwise back to Sunrise Point. We also stopped at the Tower Bridge spur trail, so I have those pictures included as well.
Bryce Canyon, Fairyland Loop – Descending into the canyon from Fairyland Point
There are no water sources along this trail. There is not much for shade, and it’s a desert, so extremely dry. We carried 4L of water a person, and we drank about 3L.
Bryce Canyon, Fairyland Loop – Walking into the first section of the canyon
This is an extremely tough trail due to the distance, elevation, sun exposure, and seemingly endless up and downs throughout the trail. But for anyone that is prepared and has the right endurance, this trail is my favorite in the park. It was so quiet. We passed less than 10 hikers along the entire loop, and there were so many different sections of the amphitheater within the canyon that we were able to see.
Bryce Canyon, Fairyland Loop – This is the first section of the canyon that trail goes through
Fairyland Loop descends all the way to the “floor” of the canyon, which isn’t really a traditional canyon, it’s more like steps that keep going down. There isn’t an opposite wall on the other side. There is no river at the bottom.
Bryce Canyon, Fairyland Loop – Walking through the first “floor” of the canyon
Although there are lots of sections of the trail that go up and down, there are also nice extended sections of flat easier trail. I thought the entire trail was pretty well packed down. None of us slid on loose rock when we visited.
Bryce Canyon, Fairyland Loop – Enjoying an easier section of the trail that was both flat and had a bit of shade in spots
The trail curves through this section of the canyon and then you turn into a totally different view.

Bryce Canyon, Fairyland Loop – The view keeps changing as the trail snakes around various sections of the rock walls
I’m not sure of the name of this next intricate rock structure which appears in the trail. To me, it looks like an elaborate castle wall. This is one of the prettiest structures along the trail.
Bryce Canyon, Fairyland Loop – “Castle Wall” – I’m making up rock names
Bryce Canyon, Fairyland Loop – Hard to pick just one favorite picture of “Castle Wall”
This middle section of the trail, from about here to Tower Bridge, was my favorite section of the trail. Although there was a decent ascent required, it was pretty gradual. There was a little bit of shade in some of the switchbacks, and the trail seemed to change so much with new hoodoos every few minutes.
Bryce Canyon, Fairyland Loop – The trail goes right in-between several tall hoodoos
In the very back of the picture below, there is a slanted rock. This rock structure is known as “Sinking Ship.”

Bryce Canyon, Fairyland Loop - Sinking Ship (in the background)
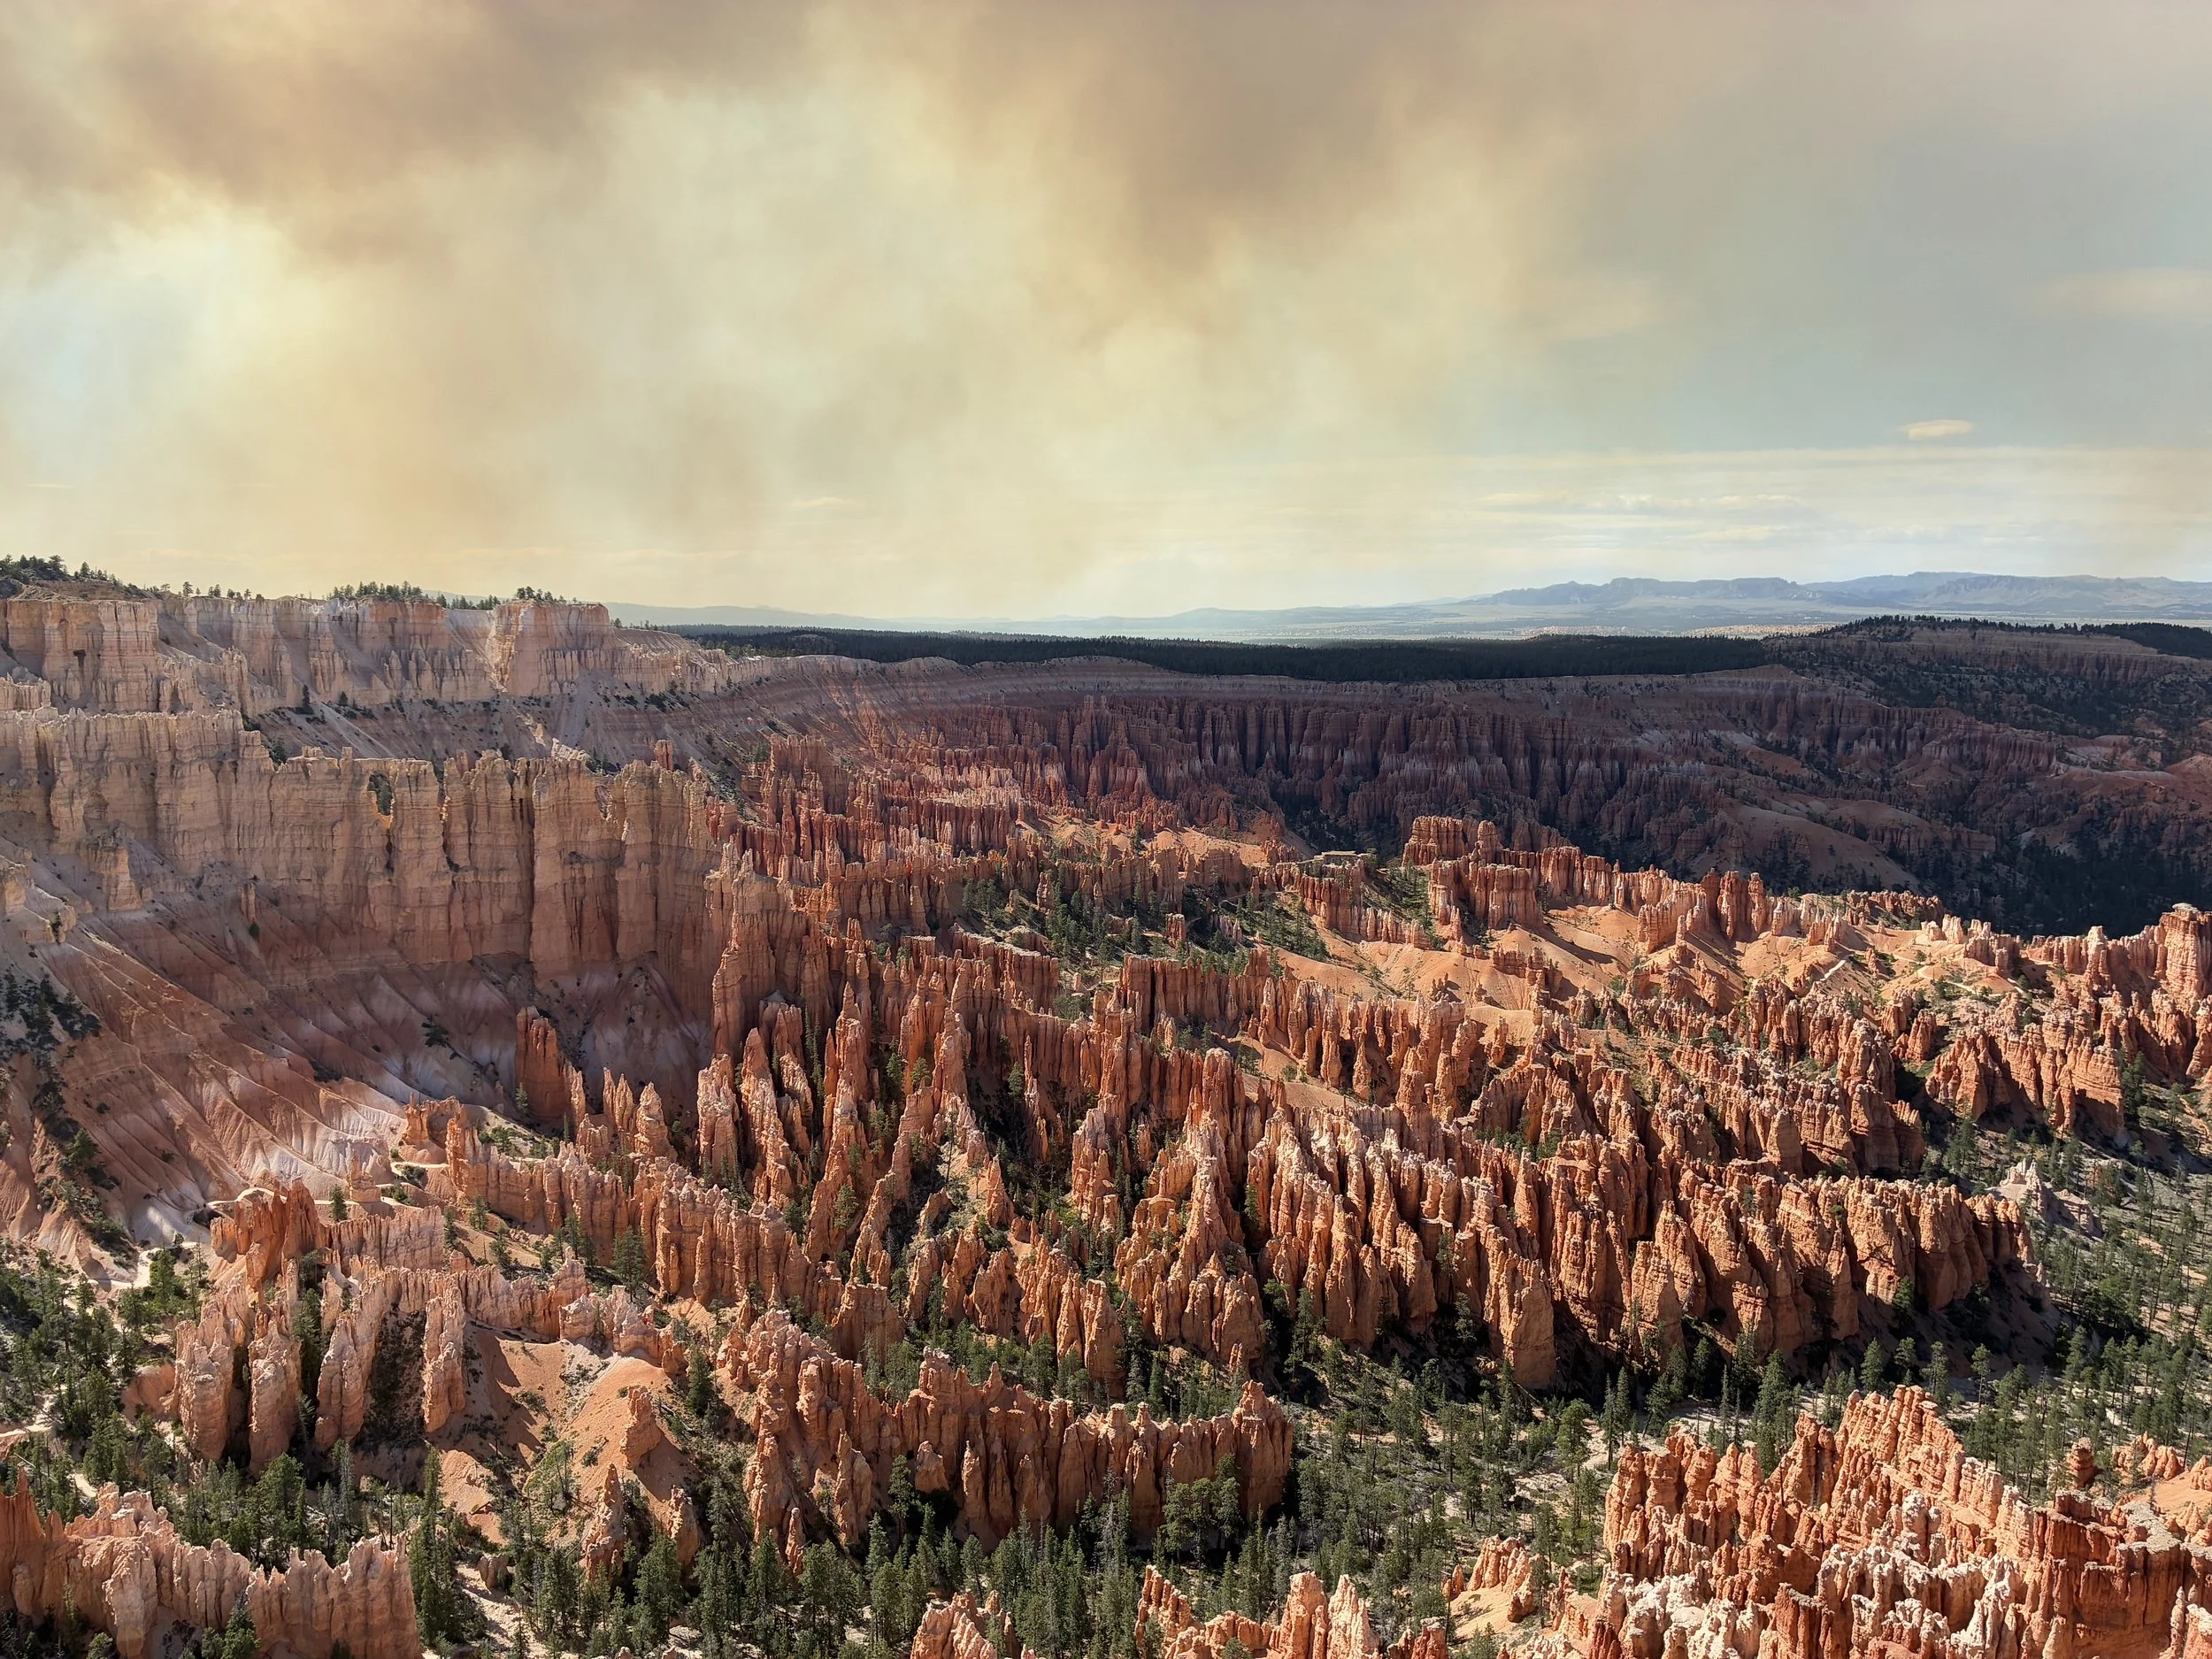
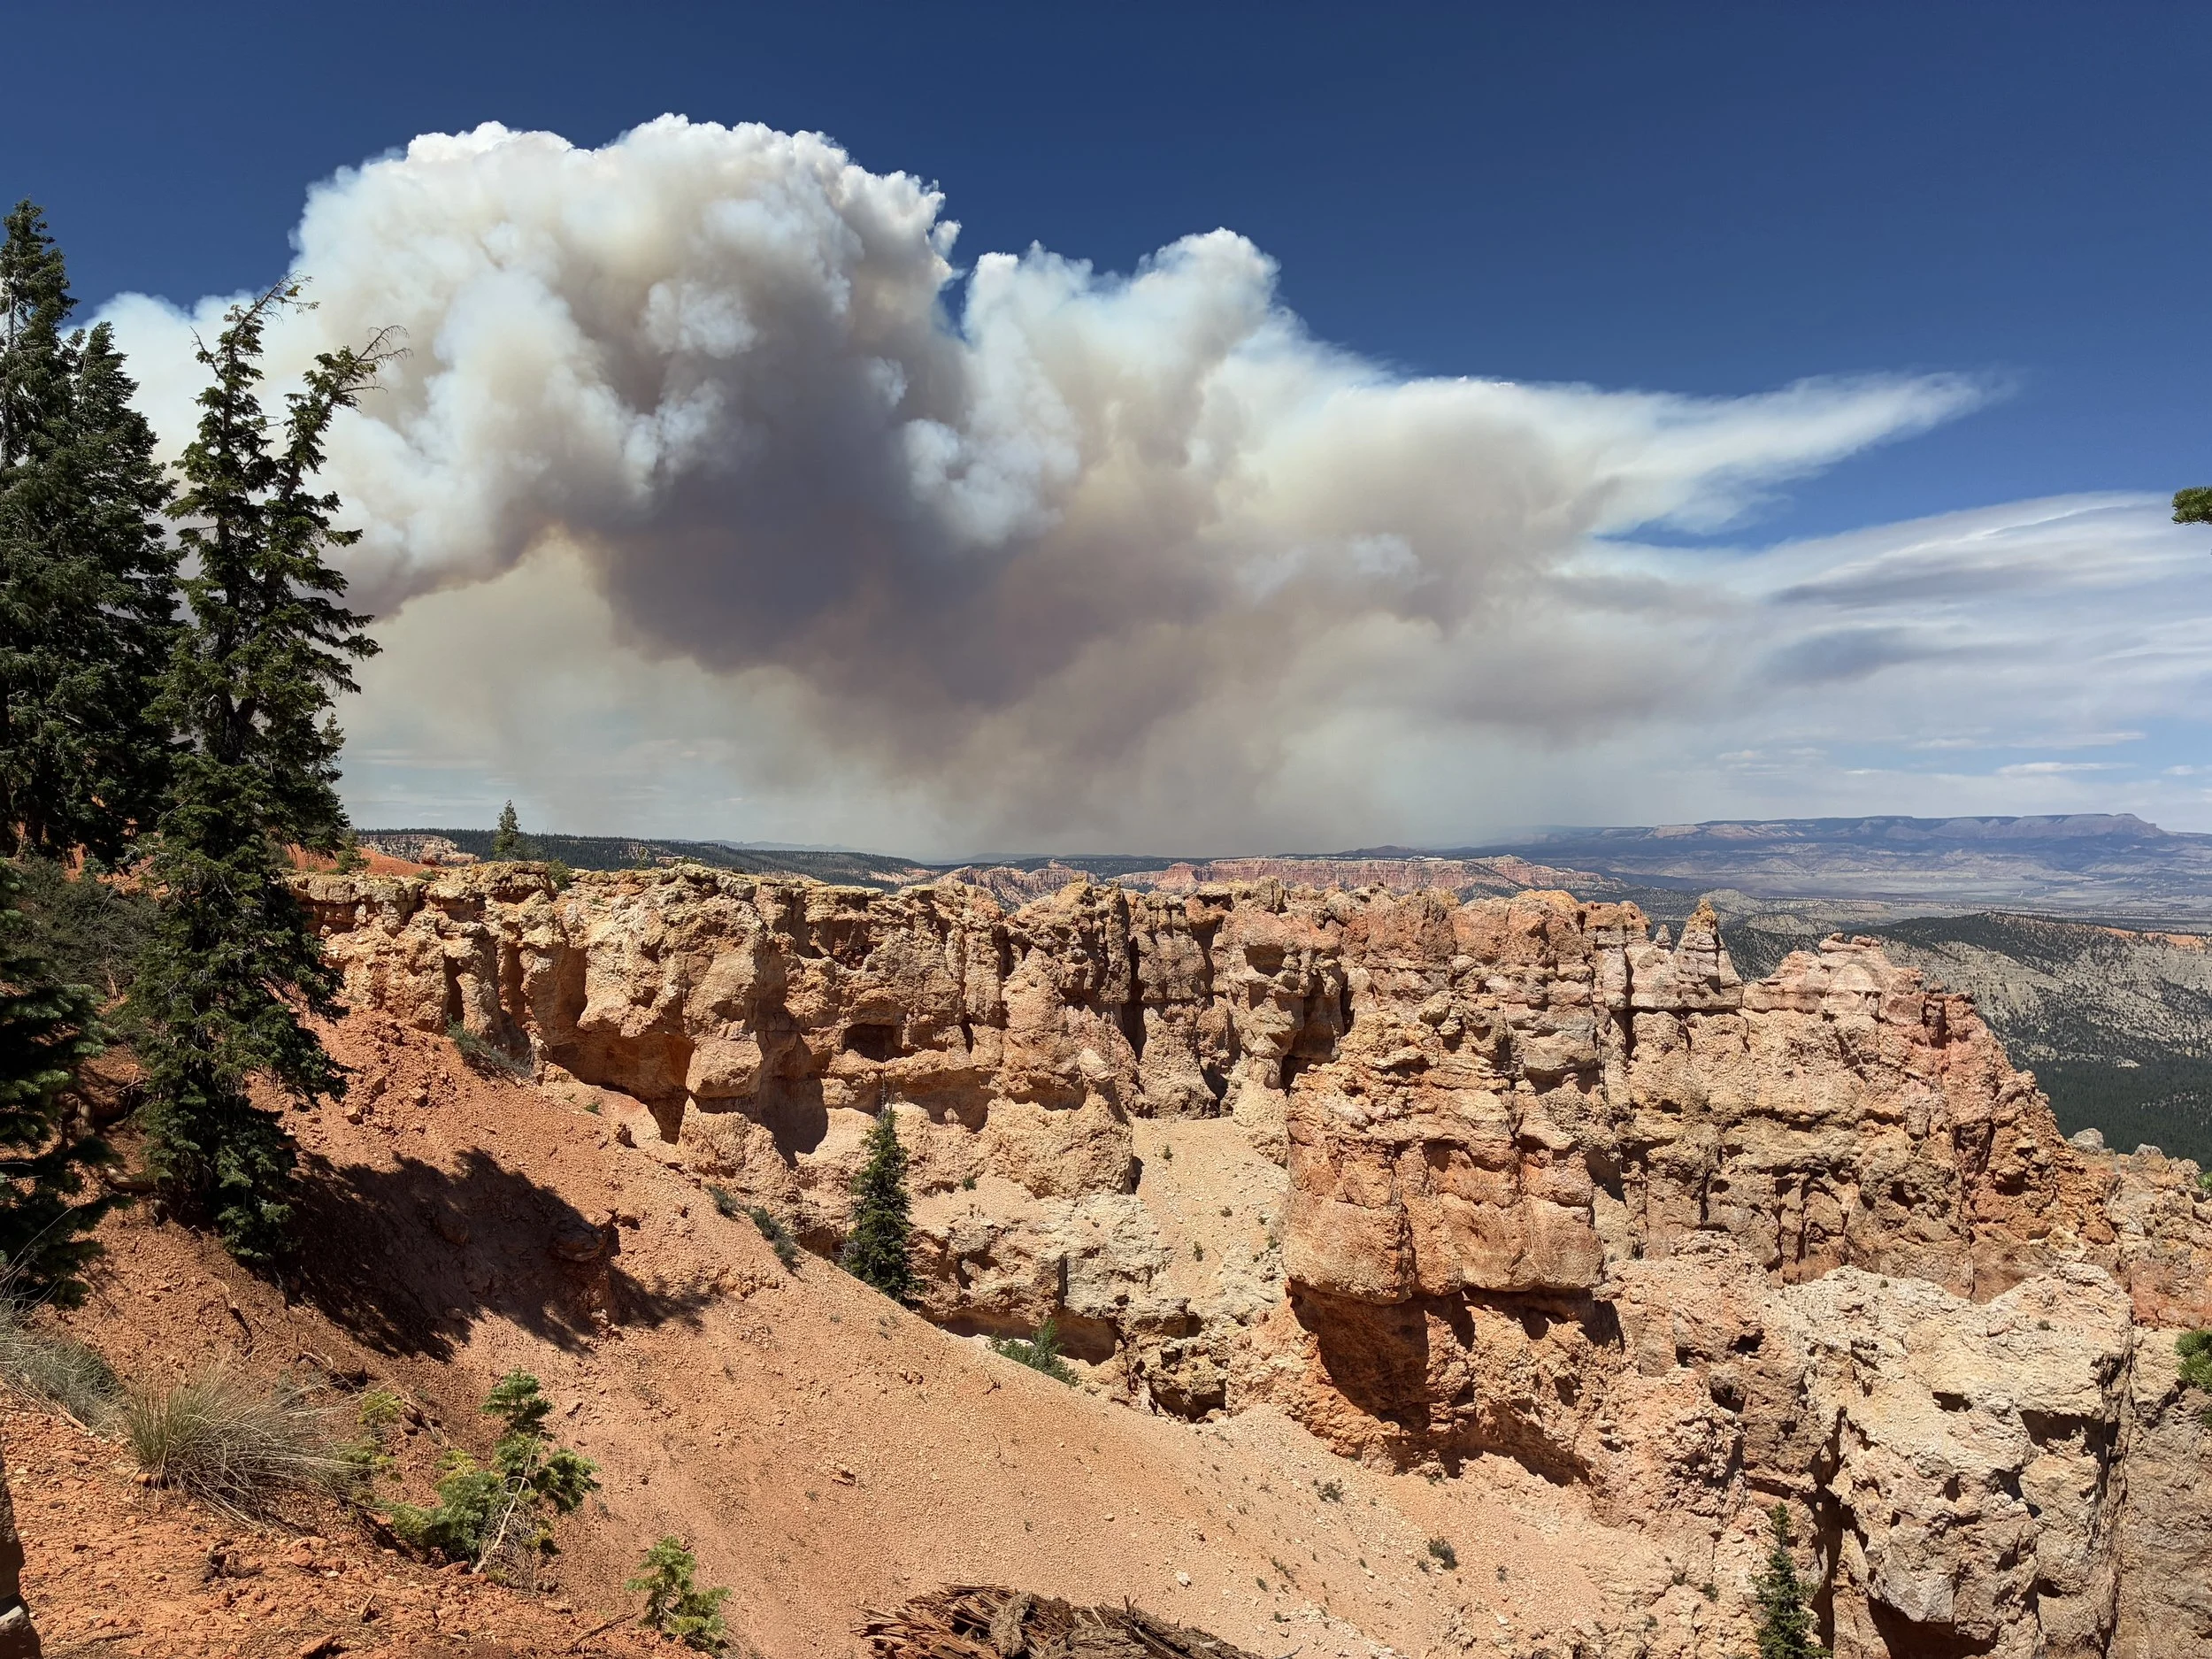
At this point in the loop, as we came around the corner, the color and air changed significantly. The rocks were more yellow and slightly hazy, and the sky was less blue. It took us a moment to realize what was going on. When we smelled the air, we realized it was full of wildfire smoke.
Bryce Canyon, Fairyland Loop – Our first indication that there was a nearby wildfire was the color change from the haze and the smell of smoke
We visited in June 2025, three days after a lightning strike started the France Dixie Fire. We hadn’t heard about it yet, even though it was only a few miles from the park, as it was still relatively small.

Bryce Canyon, Fairyland Loop
The rest of the hike was still amazing, but I have asthma with a smoke trigger, so that hike out of the canyon at 8000ft became a lot more difficult
The smoke brings out the colors of the canyon in a very different way - it was a unique time to be in the park
The trail now aims toward Boat Mesa, until it finally winds around it. Happily, the trail goes around and not over Boat Mesa.
Bryce Canyon, Fairyland Loop - Boat Mesa
This was a pretty amazing section of the trail. I don’t think we passed a single hiker between here and Tower Bridge, making it all the more special to have it all to ourselves for a moment in time.
Bryce Canyon, Fairyland Loop – The trail winds right past Boat Mesa
I don’t know the name of this next rock structure either, but I think it looks like a cat laying down, with its tail on the left and it’s looking right. Making up names of rocks is one of my favorite things to do with hoodoos.
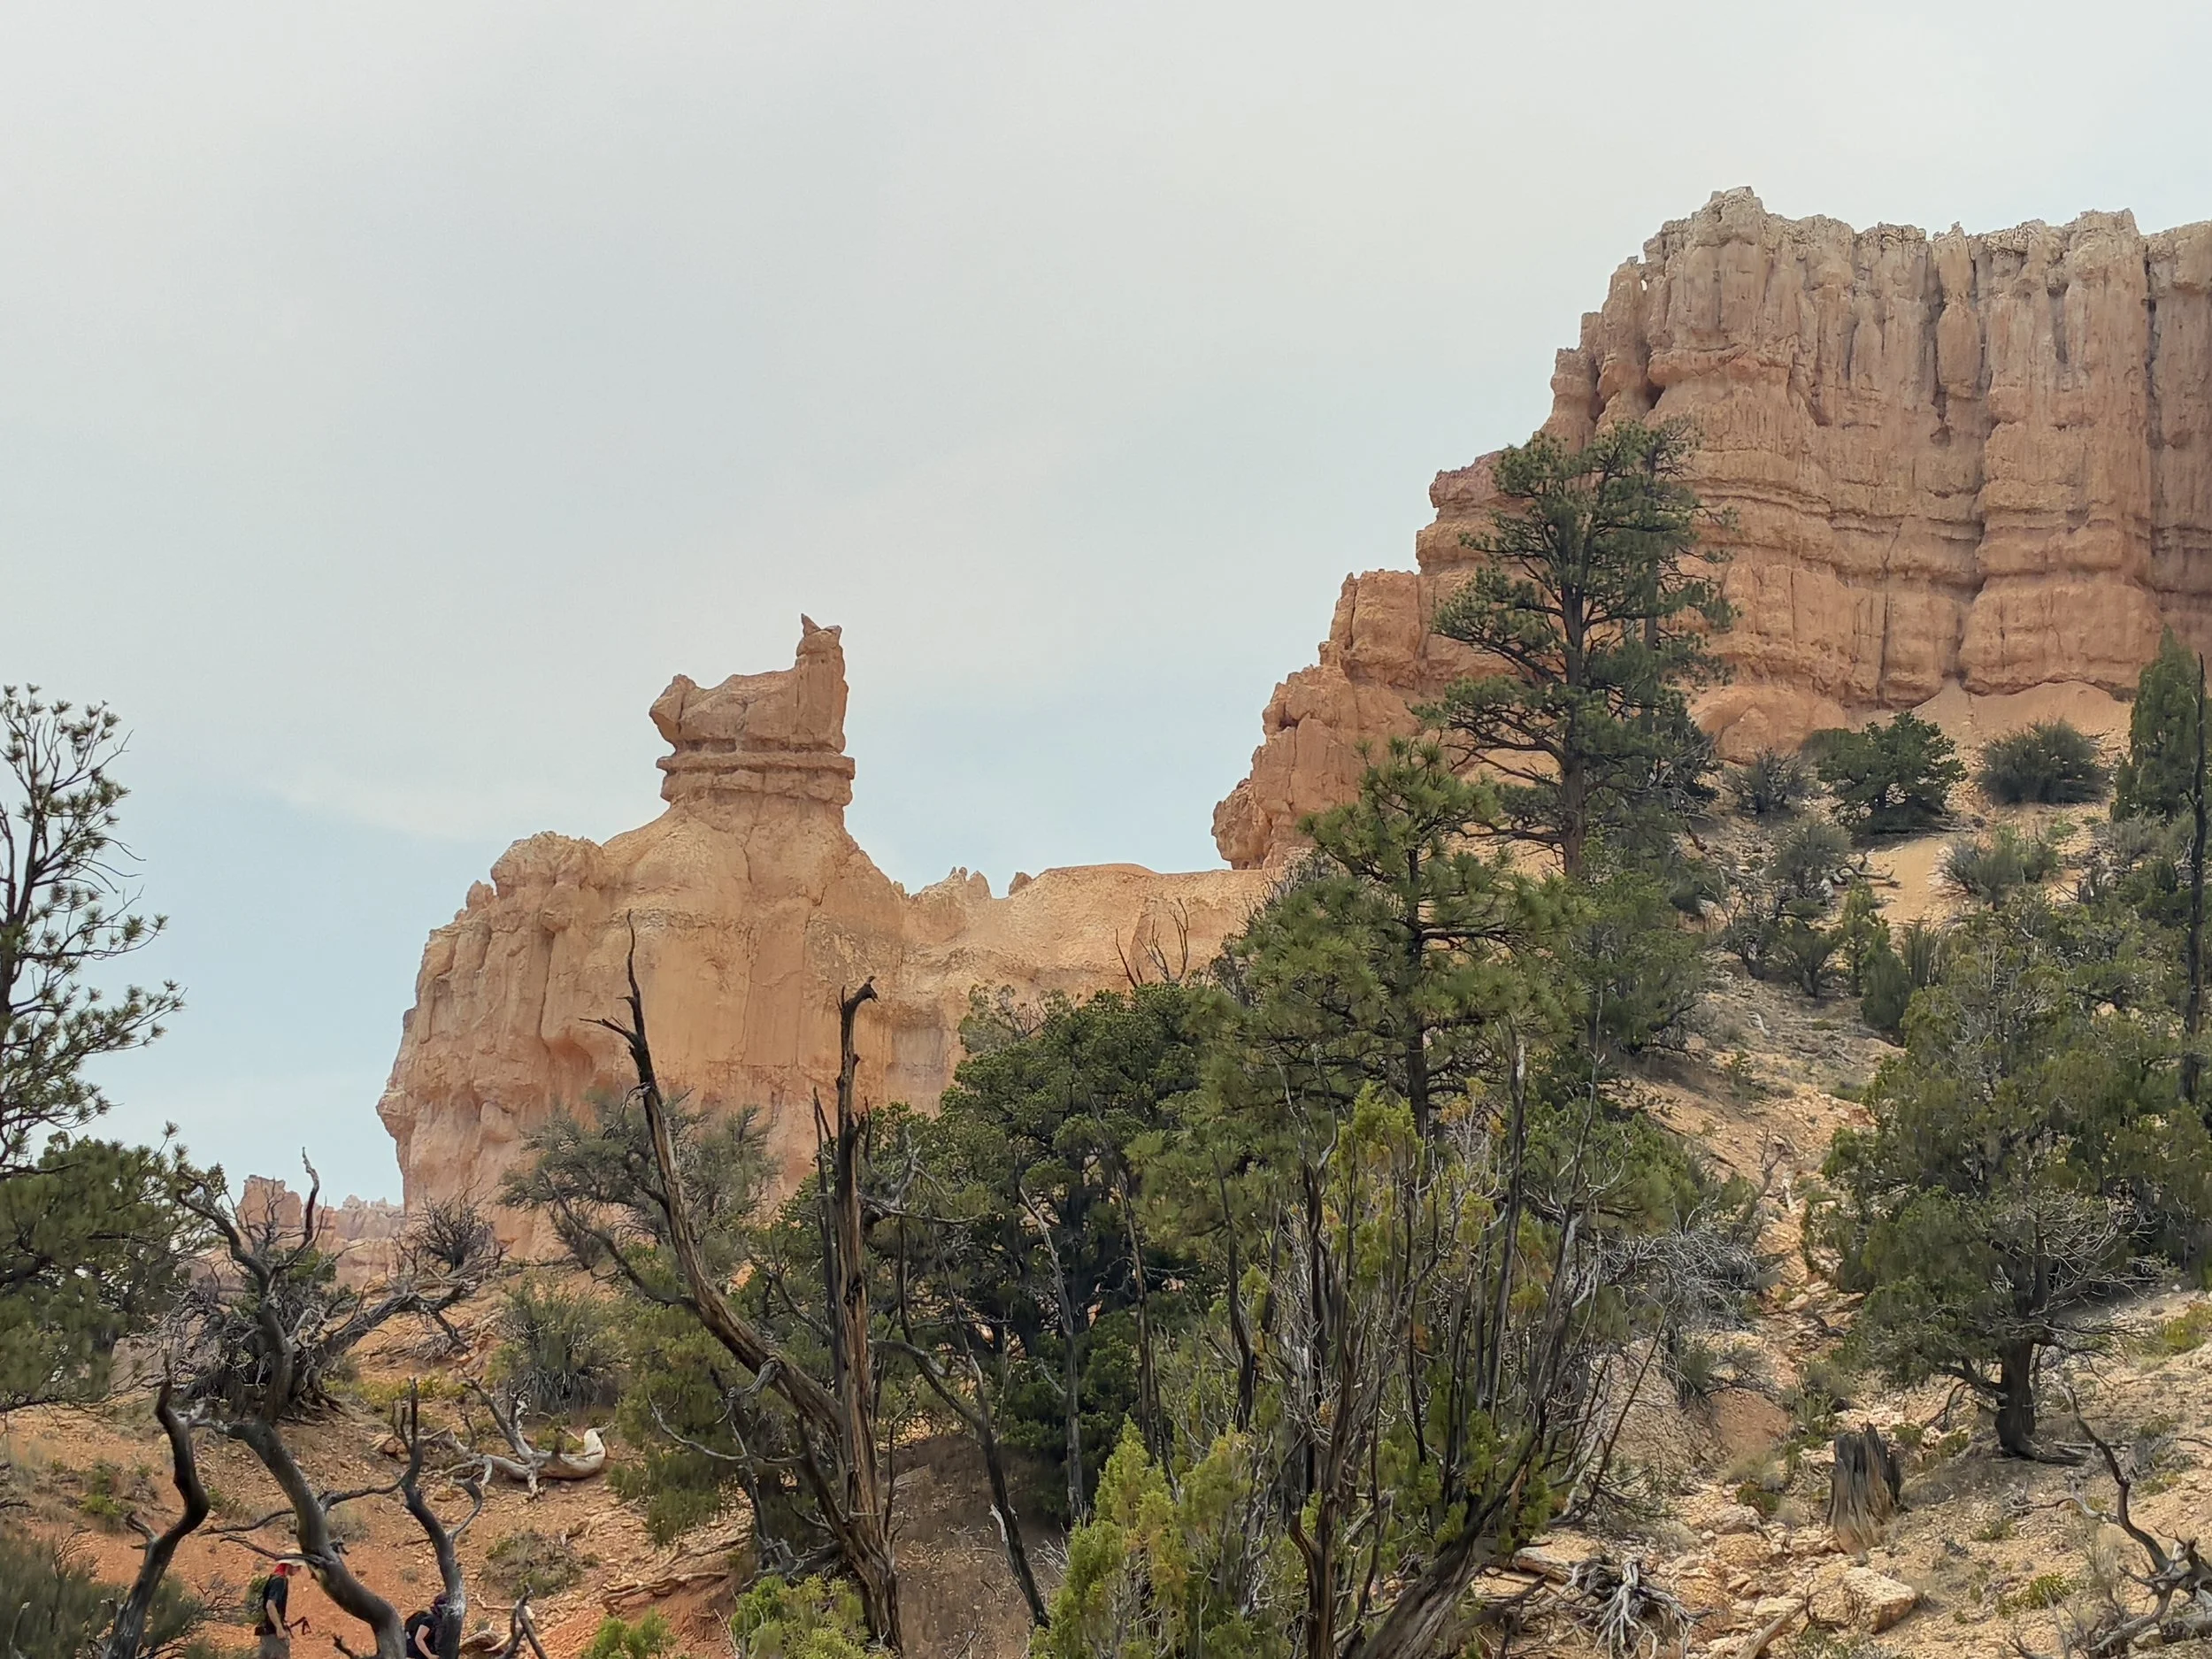
Bryce Canyon, Fairyland Loop – “Cat Mesa”
Past “Cat Mesa,” the trail descends consistently back to the canyon floor, where there is a spur to Tower Bride. The trail goes right past some spectacular hoodoos along the way.
Bryce Canyon, Fairyland Loop – Between Boat Mesa and Tower Bridge

Bryce Canyon, Fairyland Loop – Between Boat Mesa and Tower Bridge
At this point in the trail, start looking left, not too far. Eventually Tower Bridge is going to be visible up on the cliffs.
Bryce Canyon, Fairyland Loop – Between Boat Mesa and Tower Bridge
The name “Tower Bridge” makes a lot of sense – It looks a lot like London Bridge. Note that we are using a telephoto lens to magnify Tower Bridge.
Bryce Canyon, Fairyland Loop – Tower Bridge
Below is an image further zoomed in from the same spot in the trail. This is from the main part of the trail (not the spur)
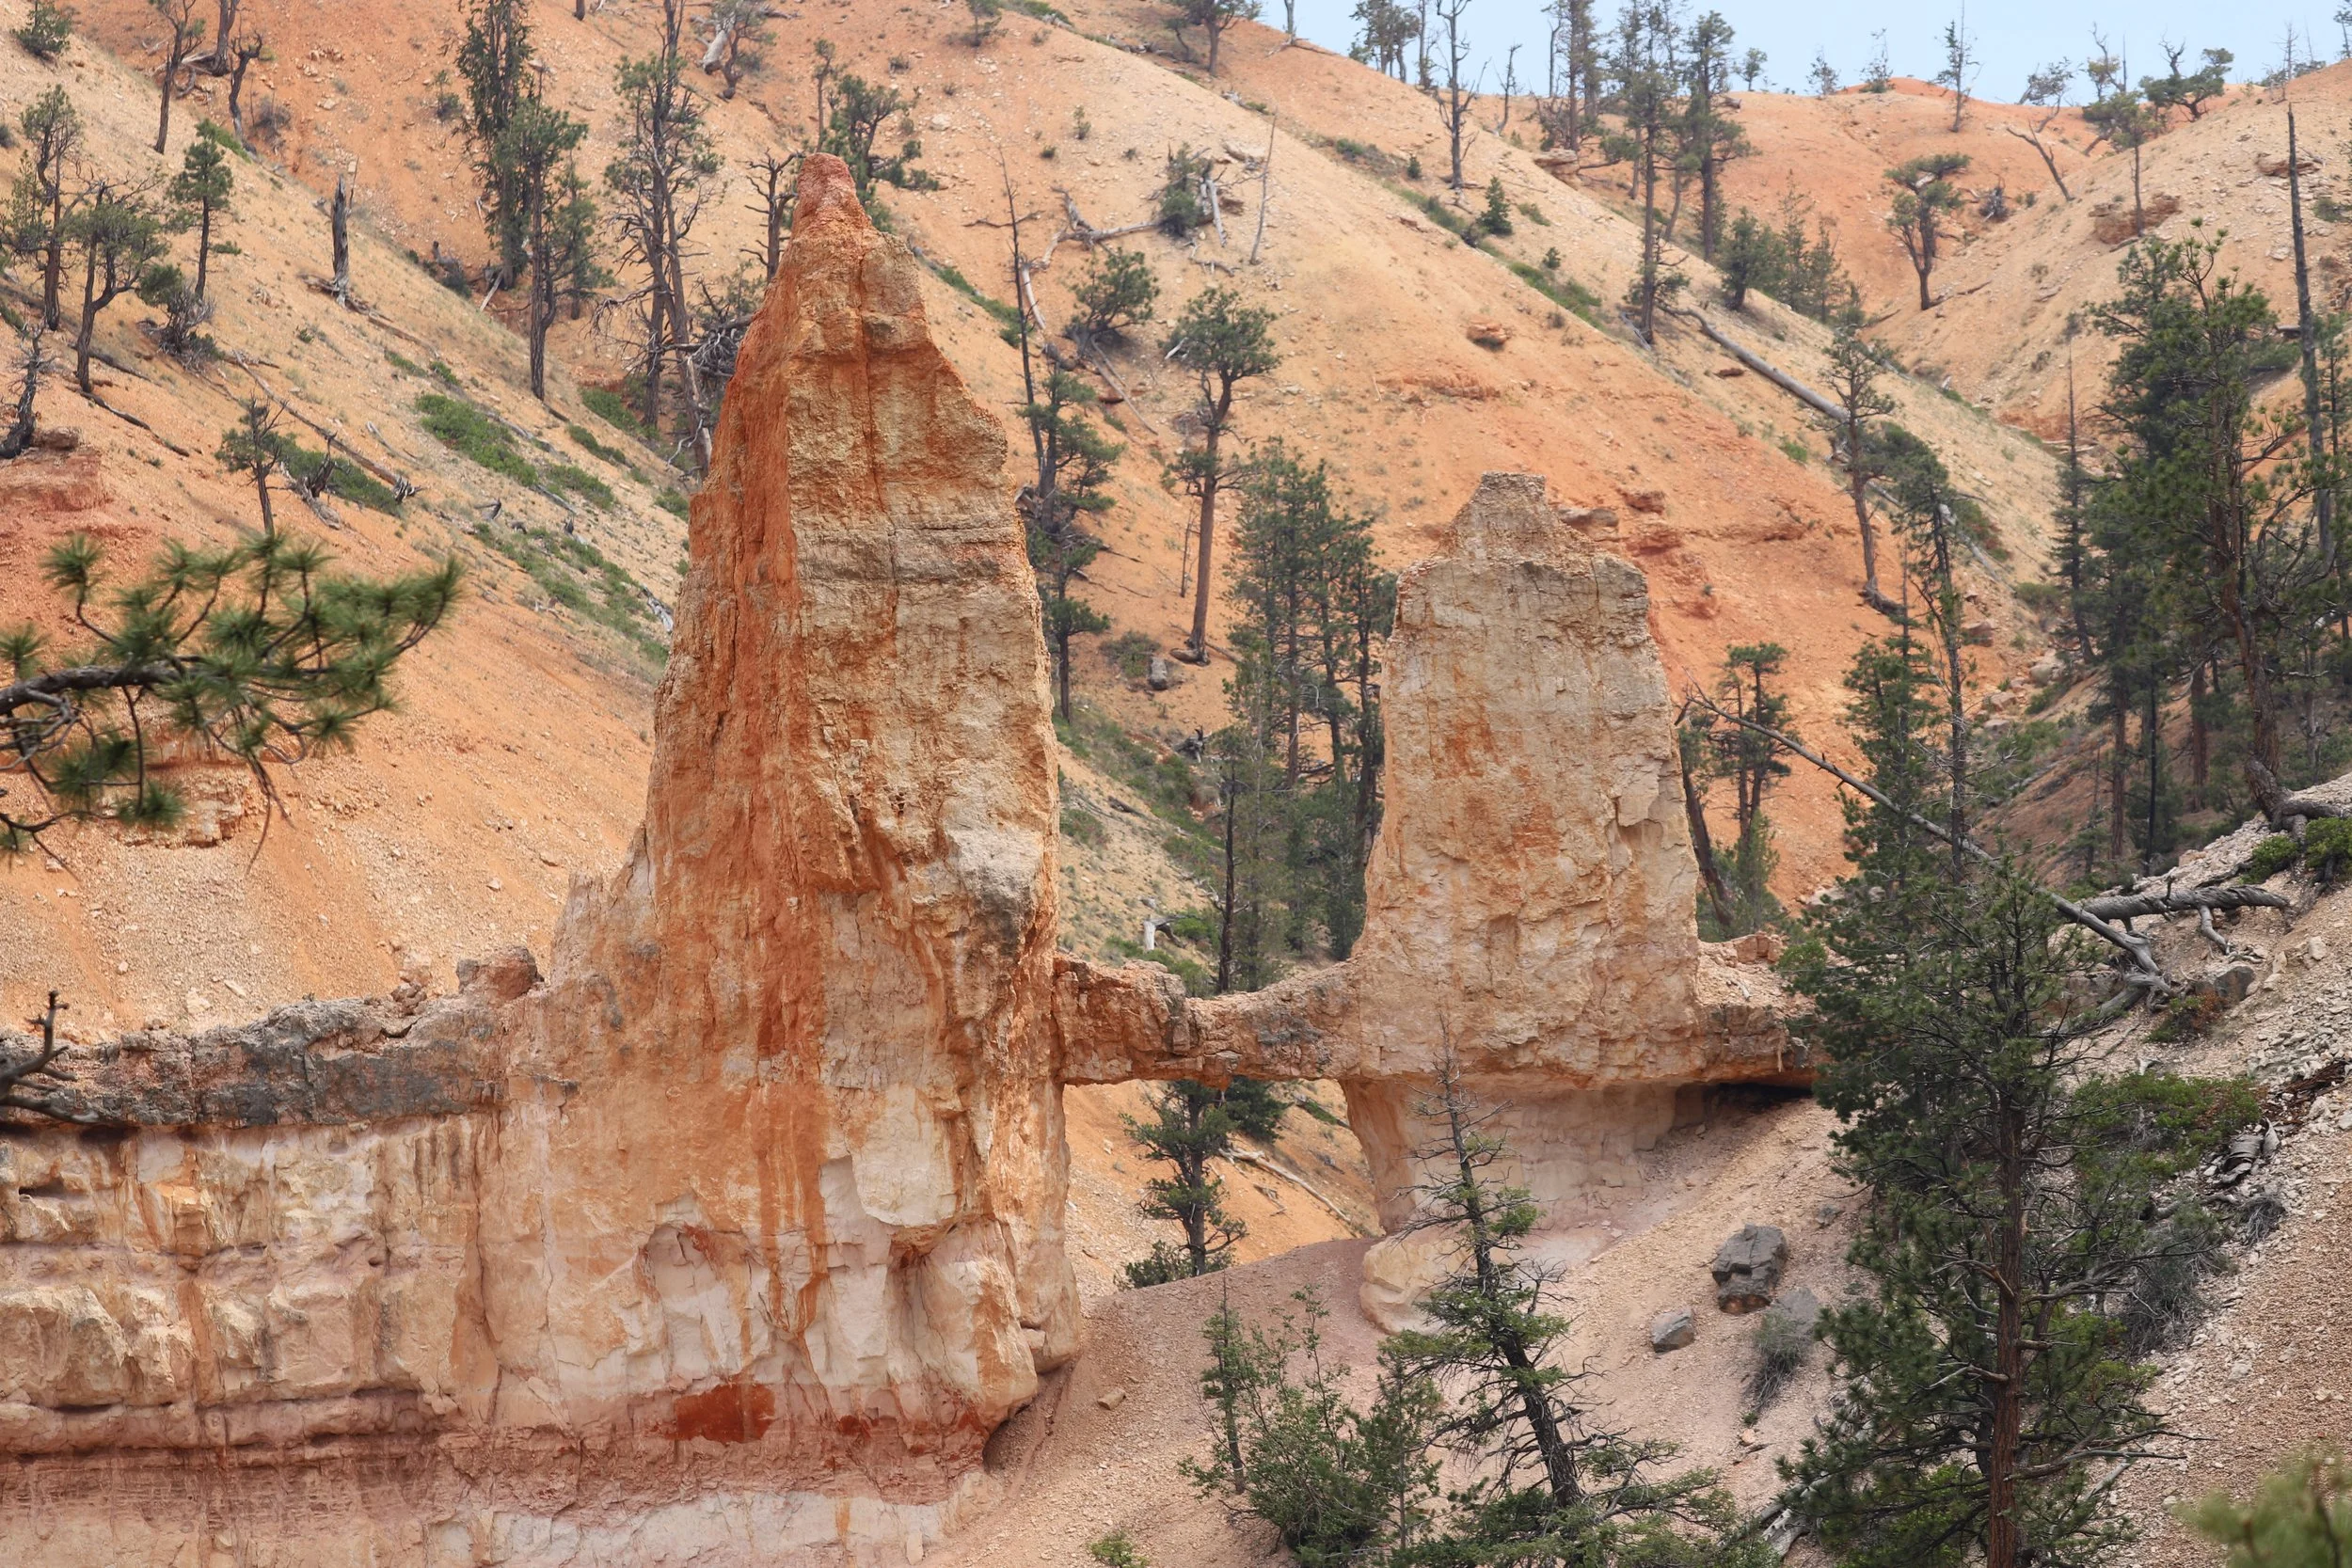
Bryce Canyon, Fairyland Loop – Tower Bridge
The spur to Tower Bridge is short, but it does not take you out to Tower Bridge, rather you see it in a clearing from quite a bit below. The spur is nice though as there is a lot of shade, and downed logs to sit on and have a snack and relax for a bit.

Bryce Canyon, Fairyland Loop – Tower Bridge view from the spur trail
From Tower Bridge, it’s 1.7 miles back to Sunrise Point, and it’s all uphill. The trail is gradual however, and switchbacks are not required.
Bryce Canyon, Fairyland Loop - Chinese Wall
Once the trail gets above the trees and back into the hoodoos, it’s quite pretty. One of the amazing rock formations is formally referred to as Chinese Wall.
Bryce Canyon, Fairyland Loop - Chinese Wall
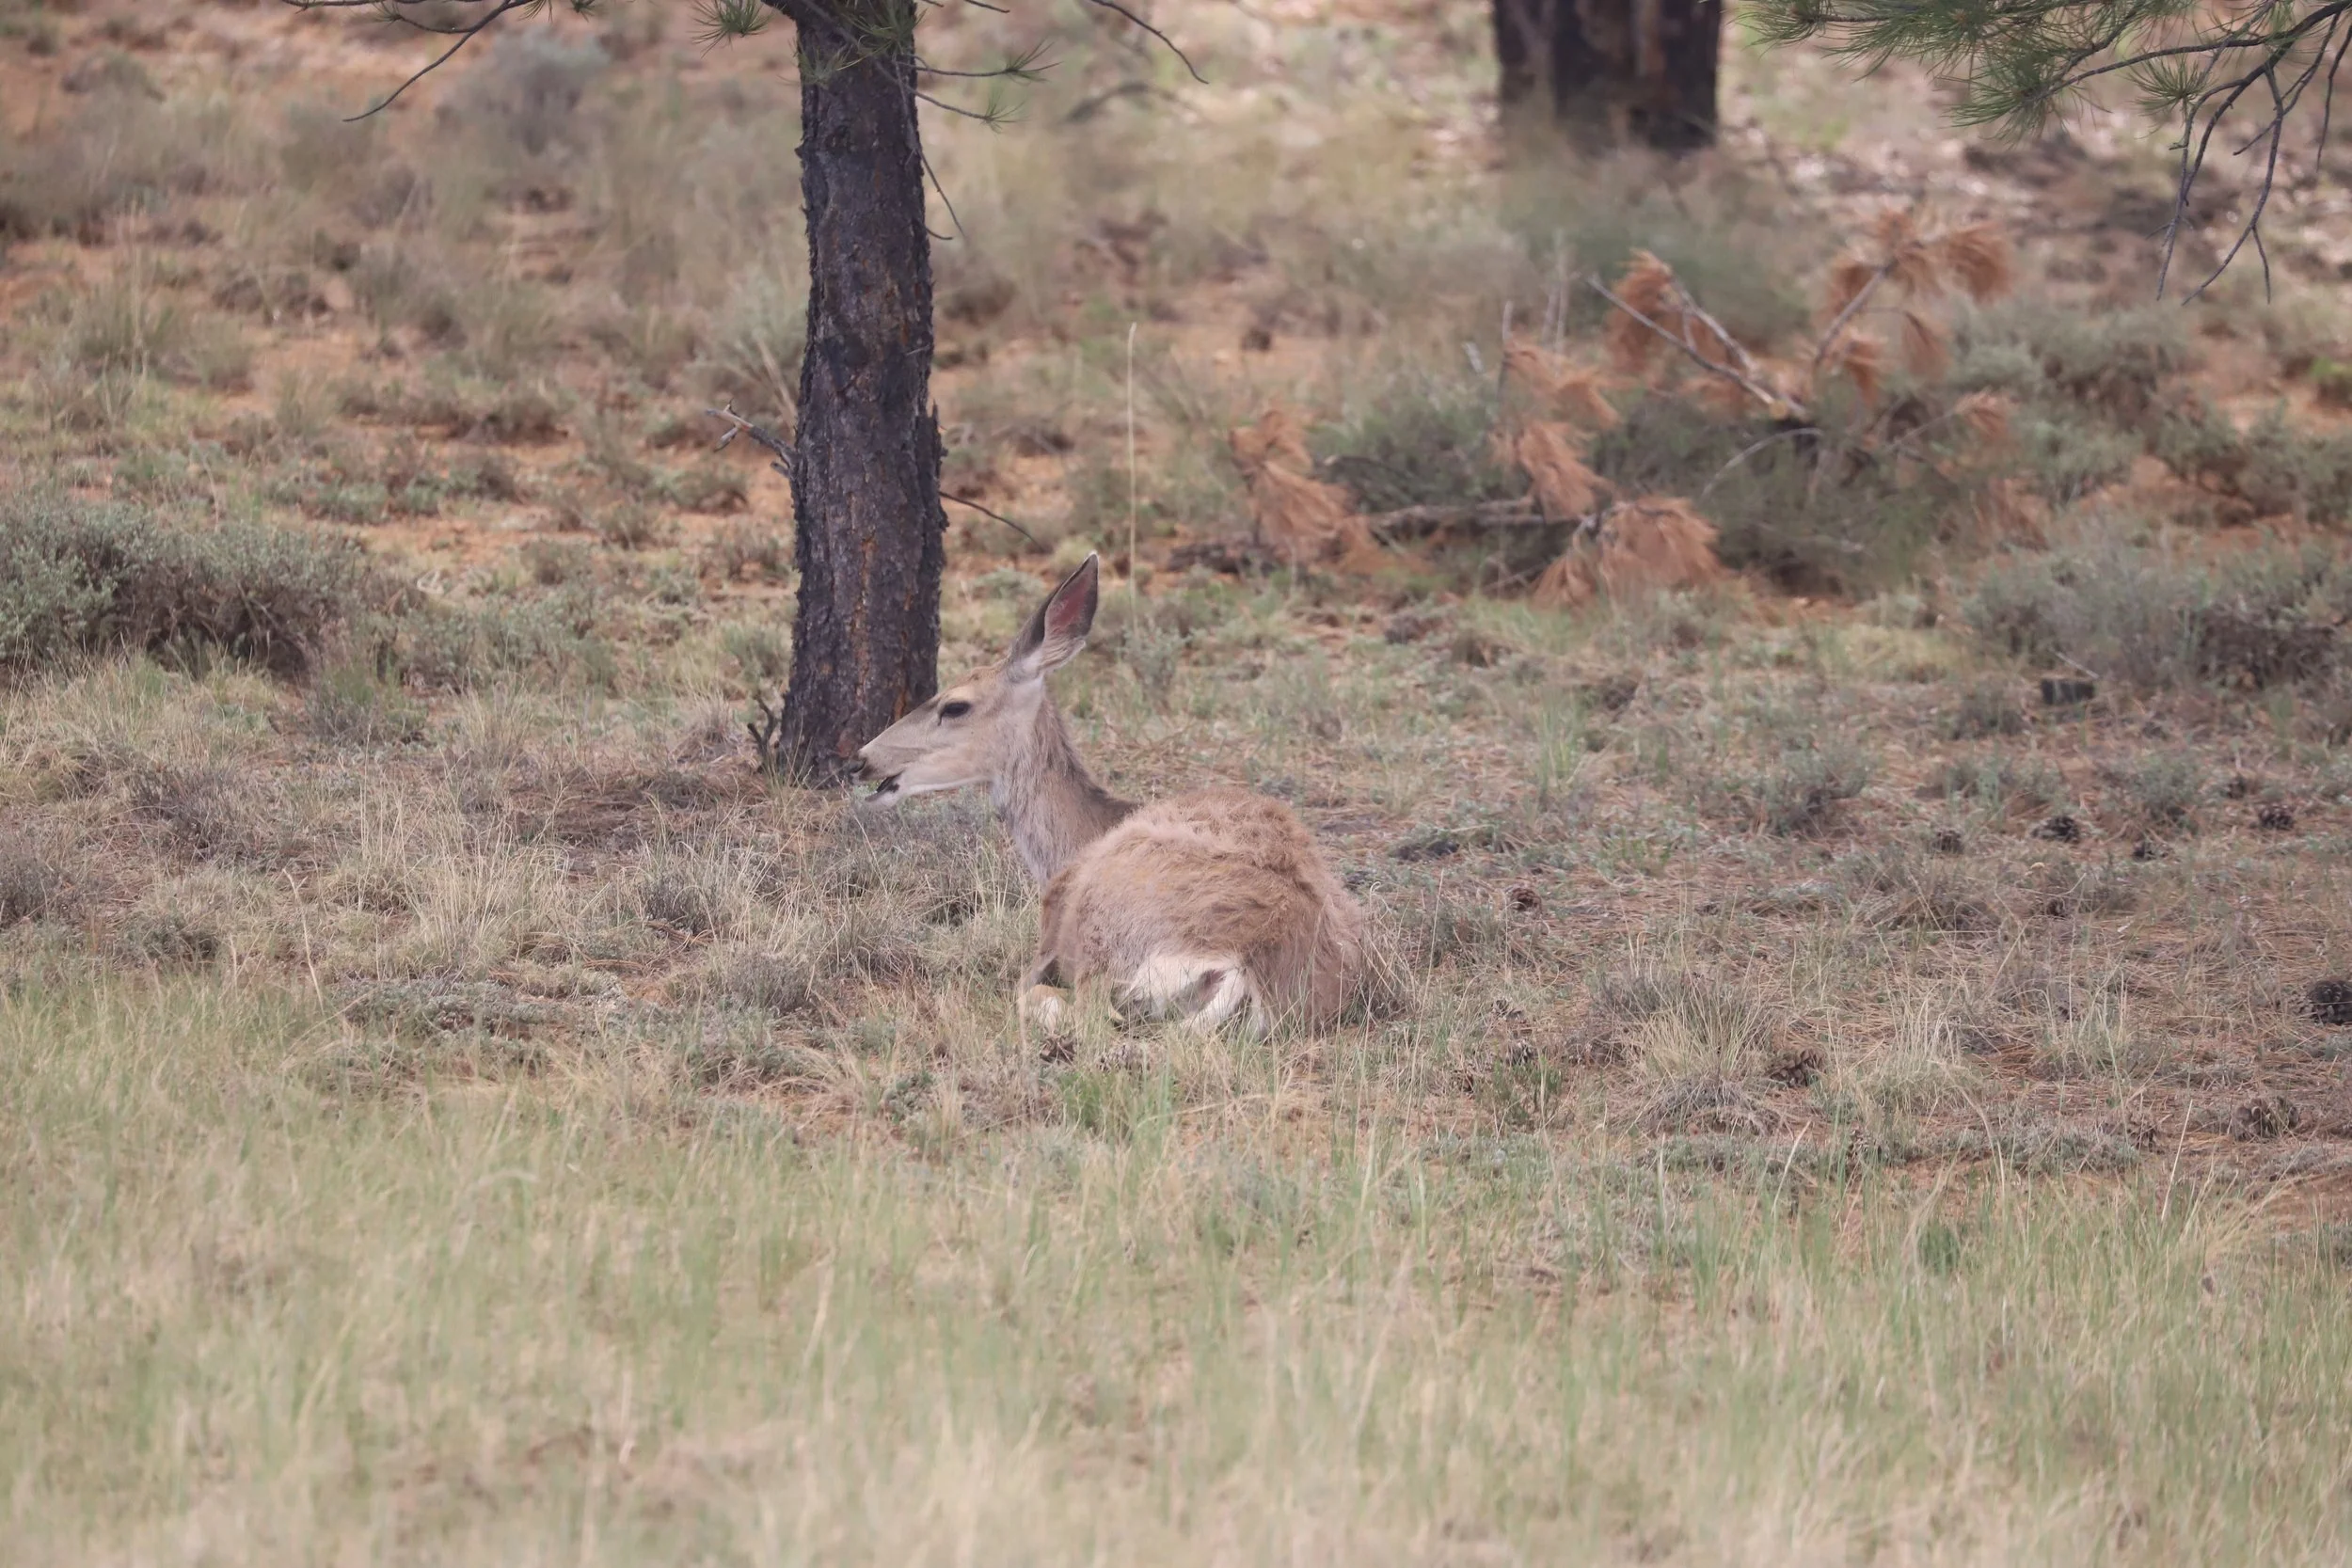
There wasn’t much wildlife along the trail, but we did find one mule deer near Tower Bridge.
5) Queen’s Garden
Distance - Approximately 1.8 miles (out-and-back)
Elevation Gain - The trail goes down about 450ft, which will then need to be ascended on the way back.
Trailhead Location - The trailhead for Queen’s Garden is Sunrise Point.
Helpful Information - Queen’s Garden can be made into a loop with either Wall Street or Navajo. We hiked Queen’s Garden as an out-and-back and then combined it with Fairyland Loop. Our youngest son was working on his hiking merit badge so we needed a 10-mile hike. On a separate day, we did the Wall Street and Navajo Loop, combined with Peekaboo Loop.
For anyone making a loop with Wall Street or Navajo and Queen’s Garden, start at Sunset Point and go down Wall Street or Navajo and return up Queen’s Garden. The elevation at Sunrise Point is lower than Sunset Point. That elevation will be gained if completing the loop on the Rim Trail, but this trail is less steep.
The Wall Street / Queen’s Garden loop is 3.2 miles or the Navajo / Queen’s Garden loop is 2.9 miles. I preferred the Wall Street hike due to the Douglas Fir trees, but Navajo has Thor’s Hammer, and that’s pretty cool too. Tough choice.
The trail to Queen’s Garden is marked in orange.
We’ve been on Queen’s Garden Trail a couple of times. On a Spring Break trip in March, unsurprisingly (at over 8000ft in elevation) we encountered snow. We walked a fair ways into the canyon, but the snow and ice made the trail pretty slick and eventually we stopped and hiked back out. The park is beautiful in the snow, but hiking is a bit more precarious.
Bryce Canyon, Queen’s Garden Trail – March 2015
Bryce Canyon, Queen’s Garden - Hiking through the snow and hoodoos - We had a lot of snowball fights along this hike
My husband told this story of carrying both boys out of this canyon so many times to random hikers that we met when we returned in June 2025 that I have to include a picture of it.
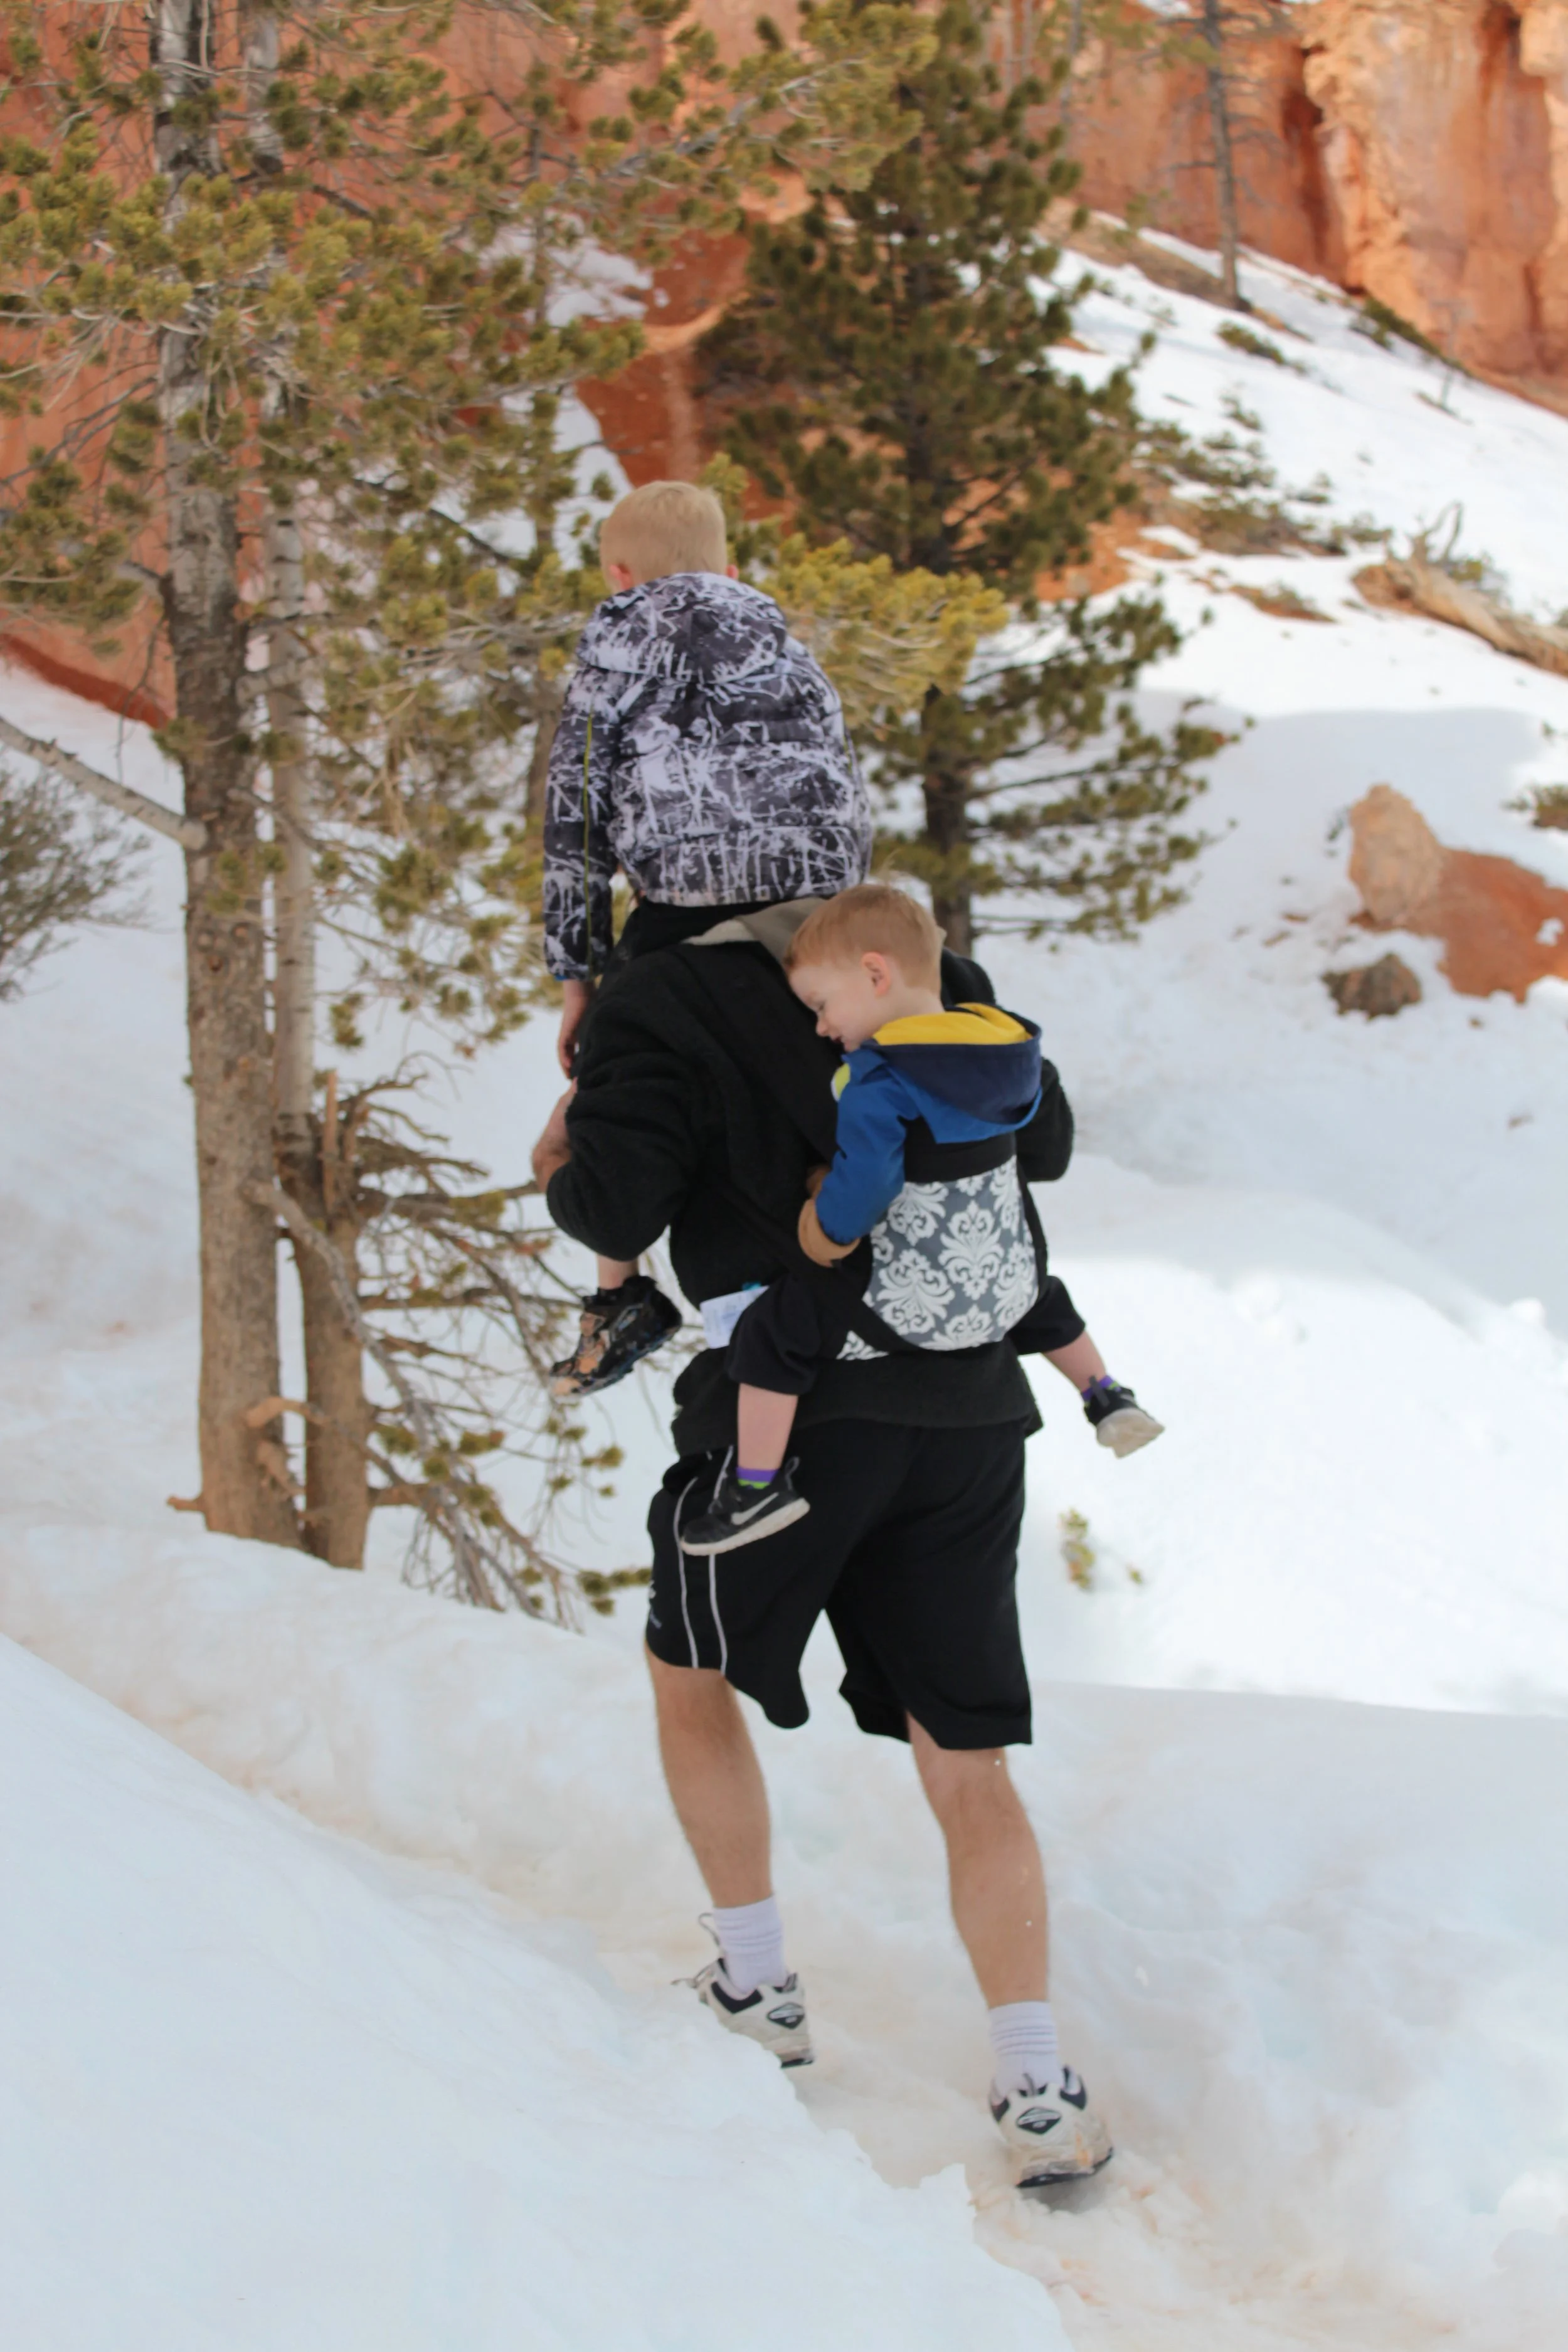
Bryce Canyon, Queen’s Garden - Super Dad on a mission to make it back to the car
The remainder of the pictures are from our most recent trip in June 2025.

Bryce Canyon – Queen’s Garden
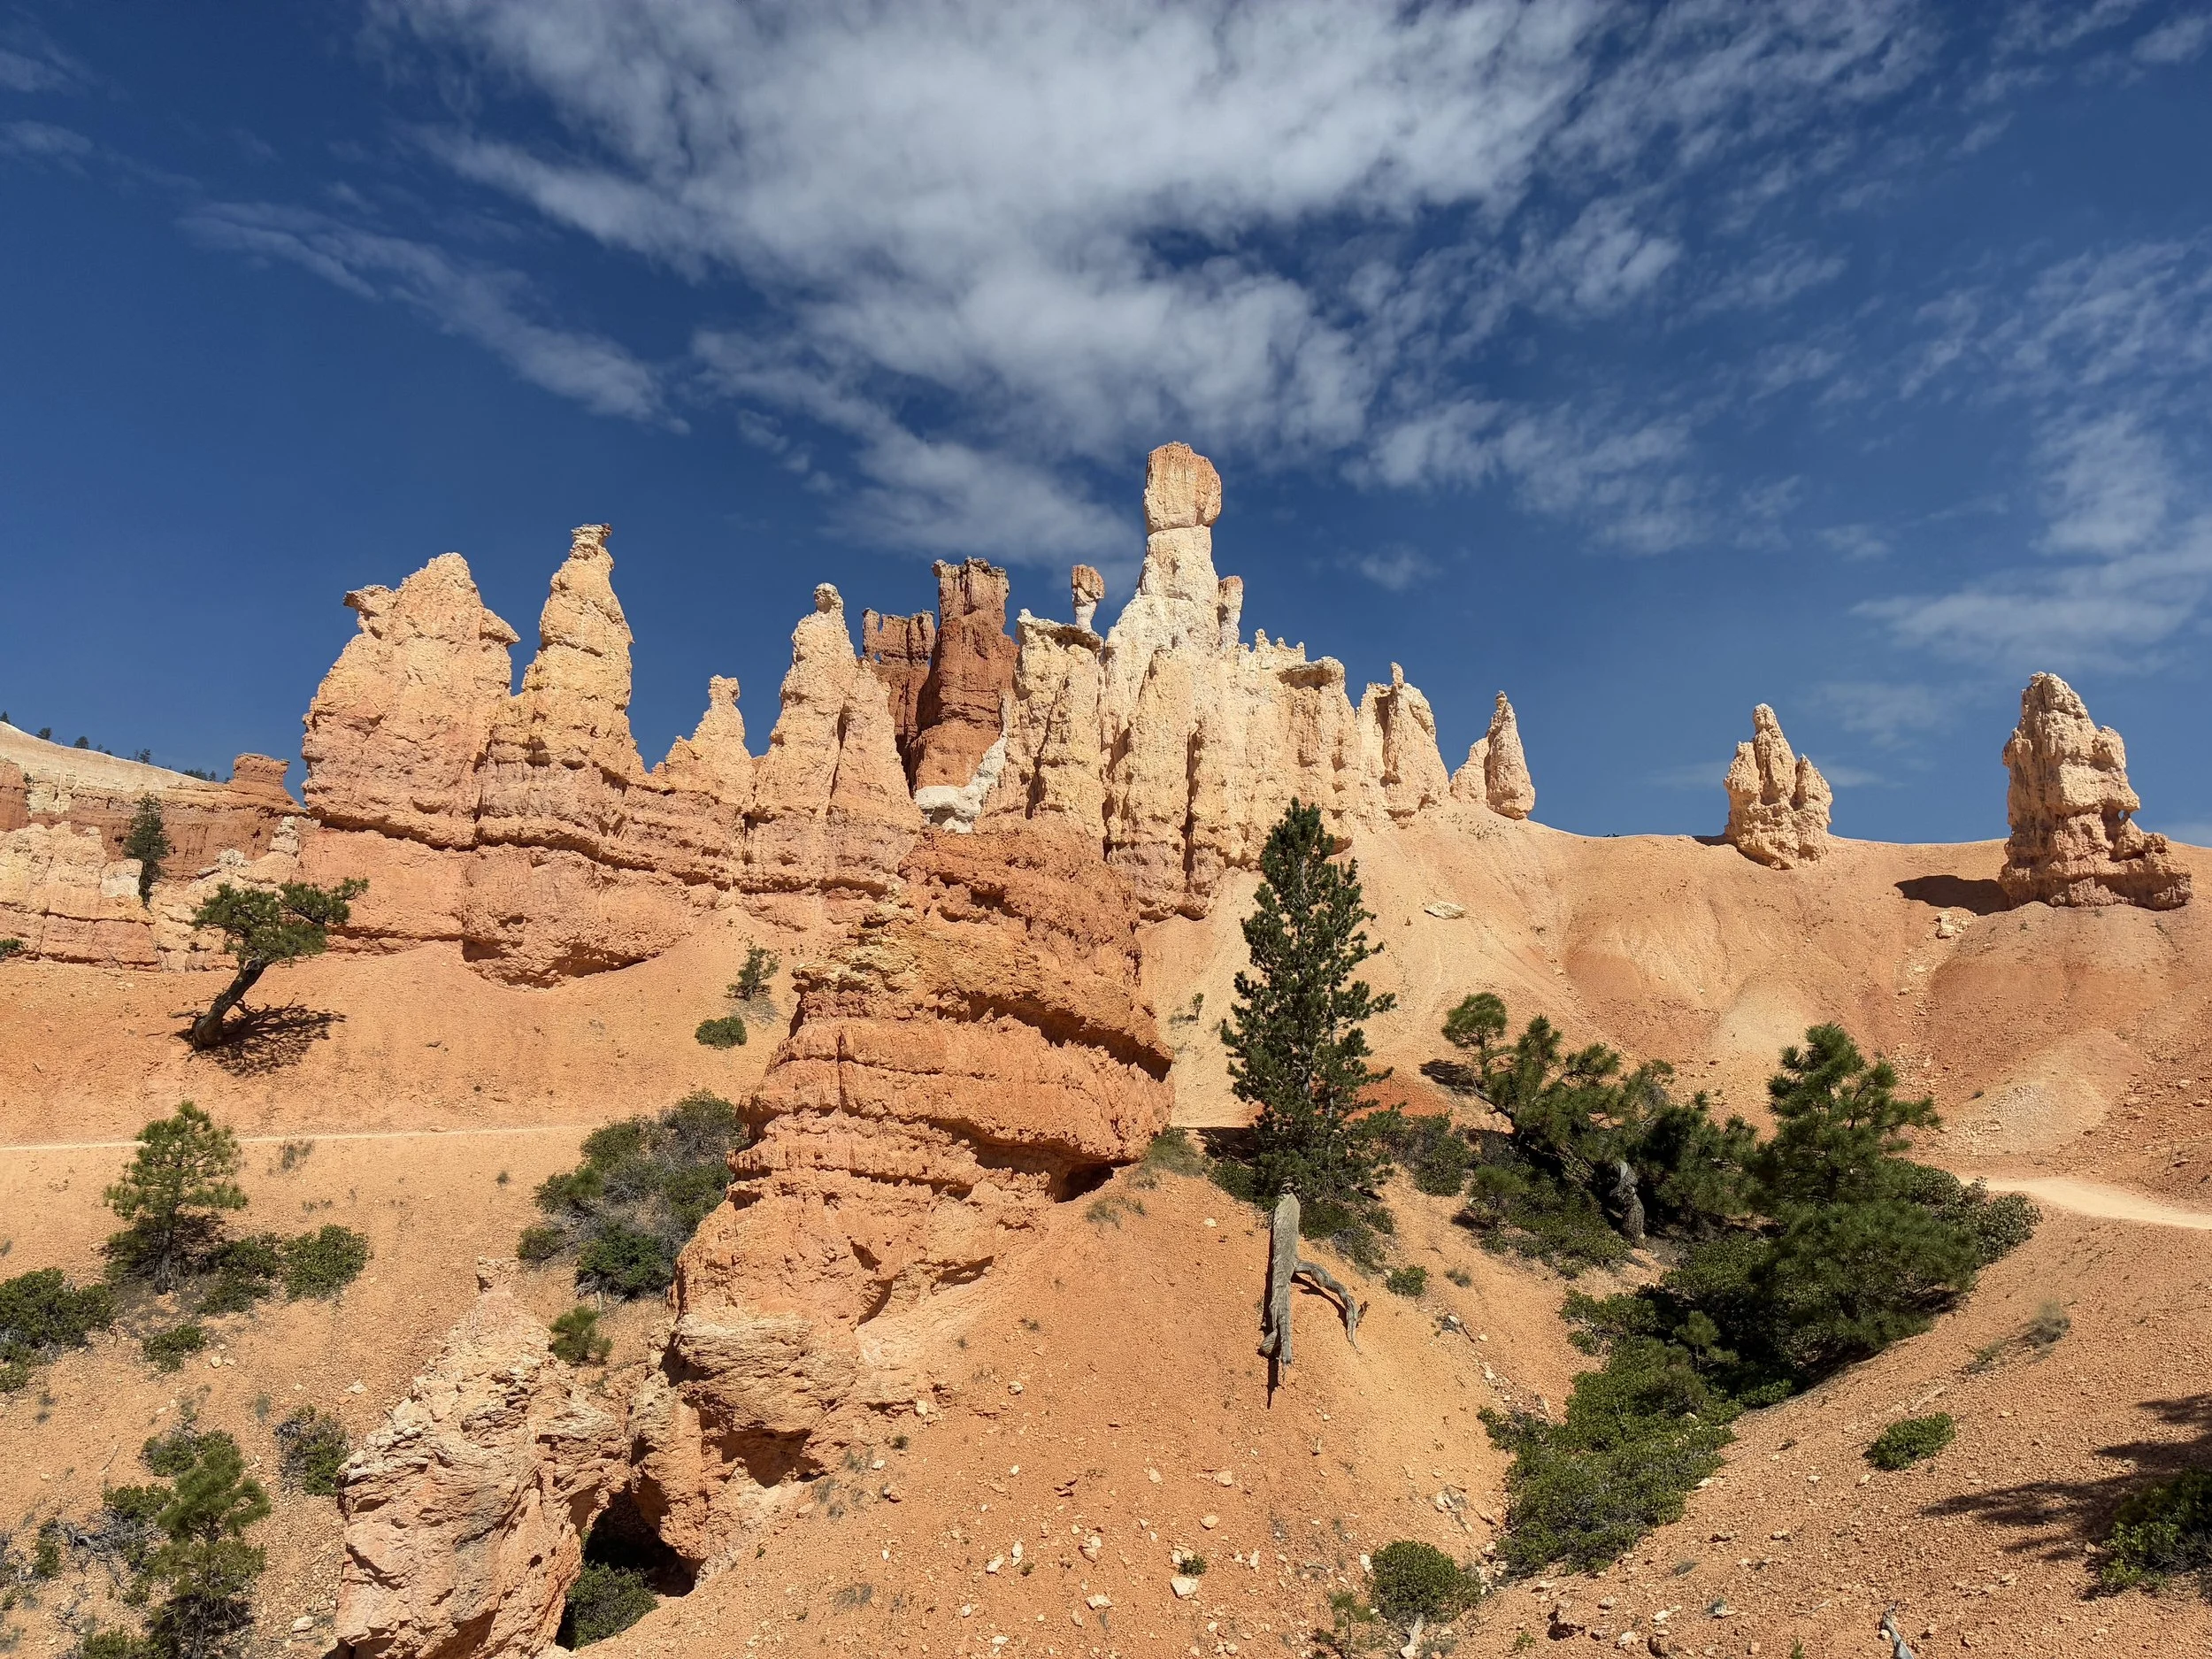
Out of all of the trails at Bryce Canyon, Queen’s Garden is probably the best one. A 450ft elevation gain on the way out with a rim at over 8000ft isn’t ever “easy”, but the relative shortness of the trail and smoothness of the hard packed dirt trail should make this trail reasonable for most hikers, including younger children. This trail goes straight down into the hoodoos, and the views make it worth the effort of the hike back out. This is a much easier trail to walk up than Wall Street or Navajo, which both have serious switchbacks.
Bryce Canyon – Queen’s Garden
Bryce Canyon – Queen’s Garden
There is a huge downside to this trail (and Wall Street and Navajo) – there are going to be other hikers everywhere! For anyone looking for solitude, there won’t be a moment on these trails without other hikers in view (if visiting in the summer months).
Bryce Canyon – Queen’s Garden
A plus side to other hikers though are lots of people that can photograph your family!

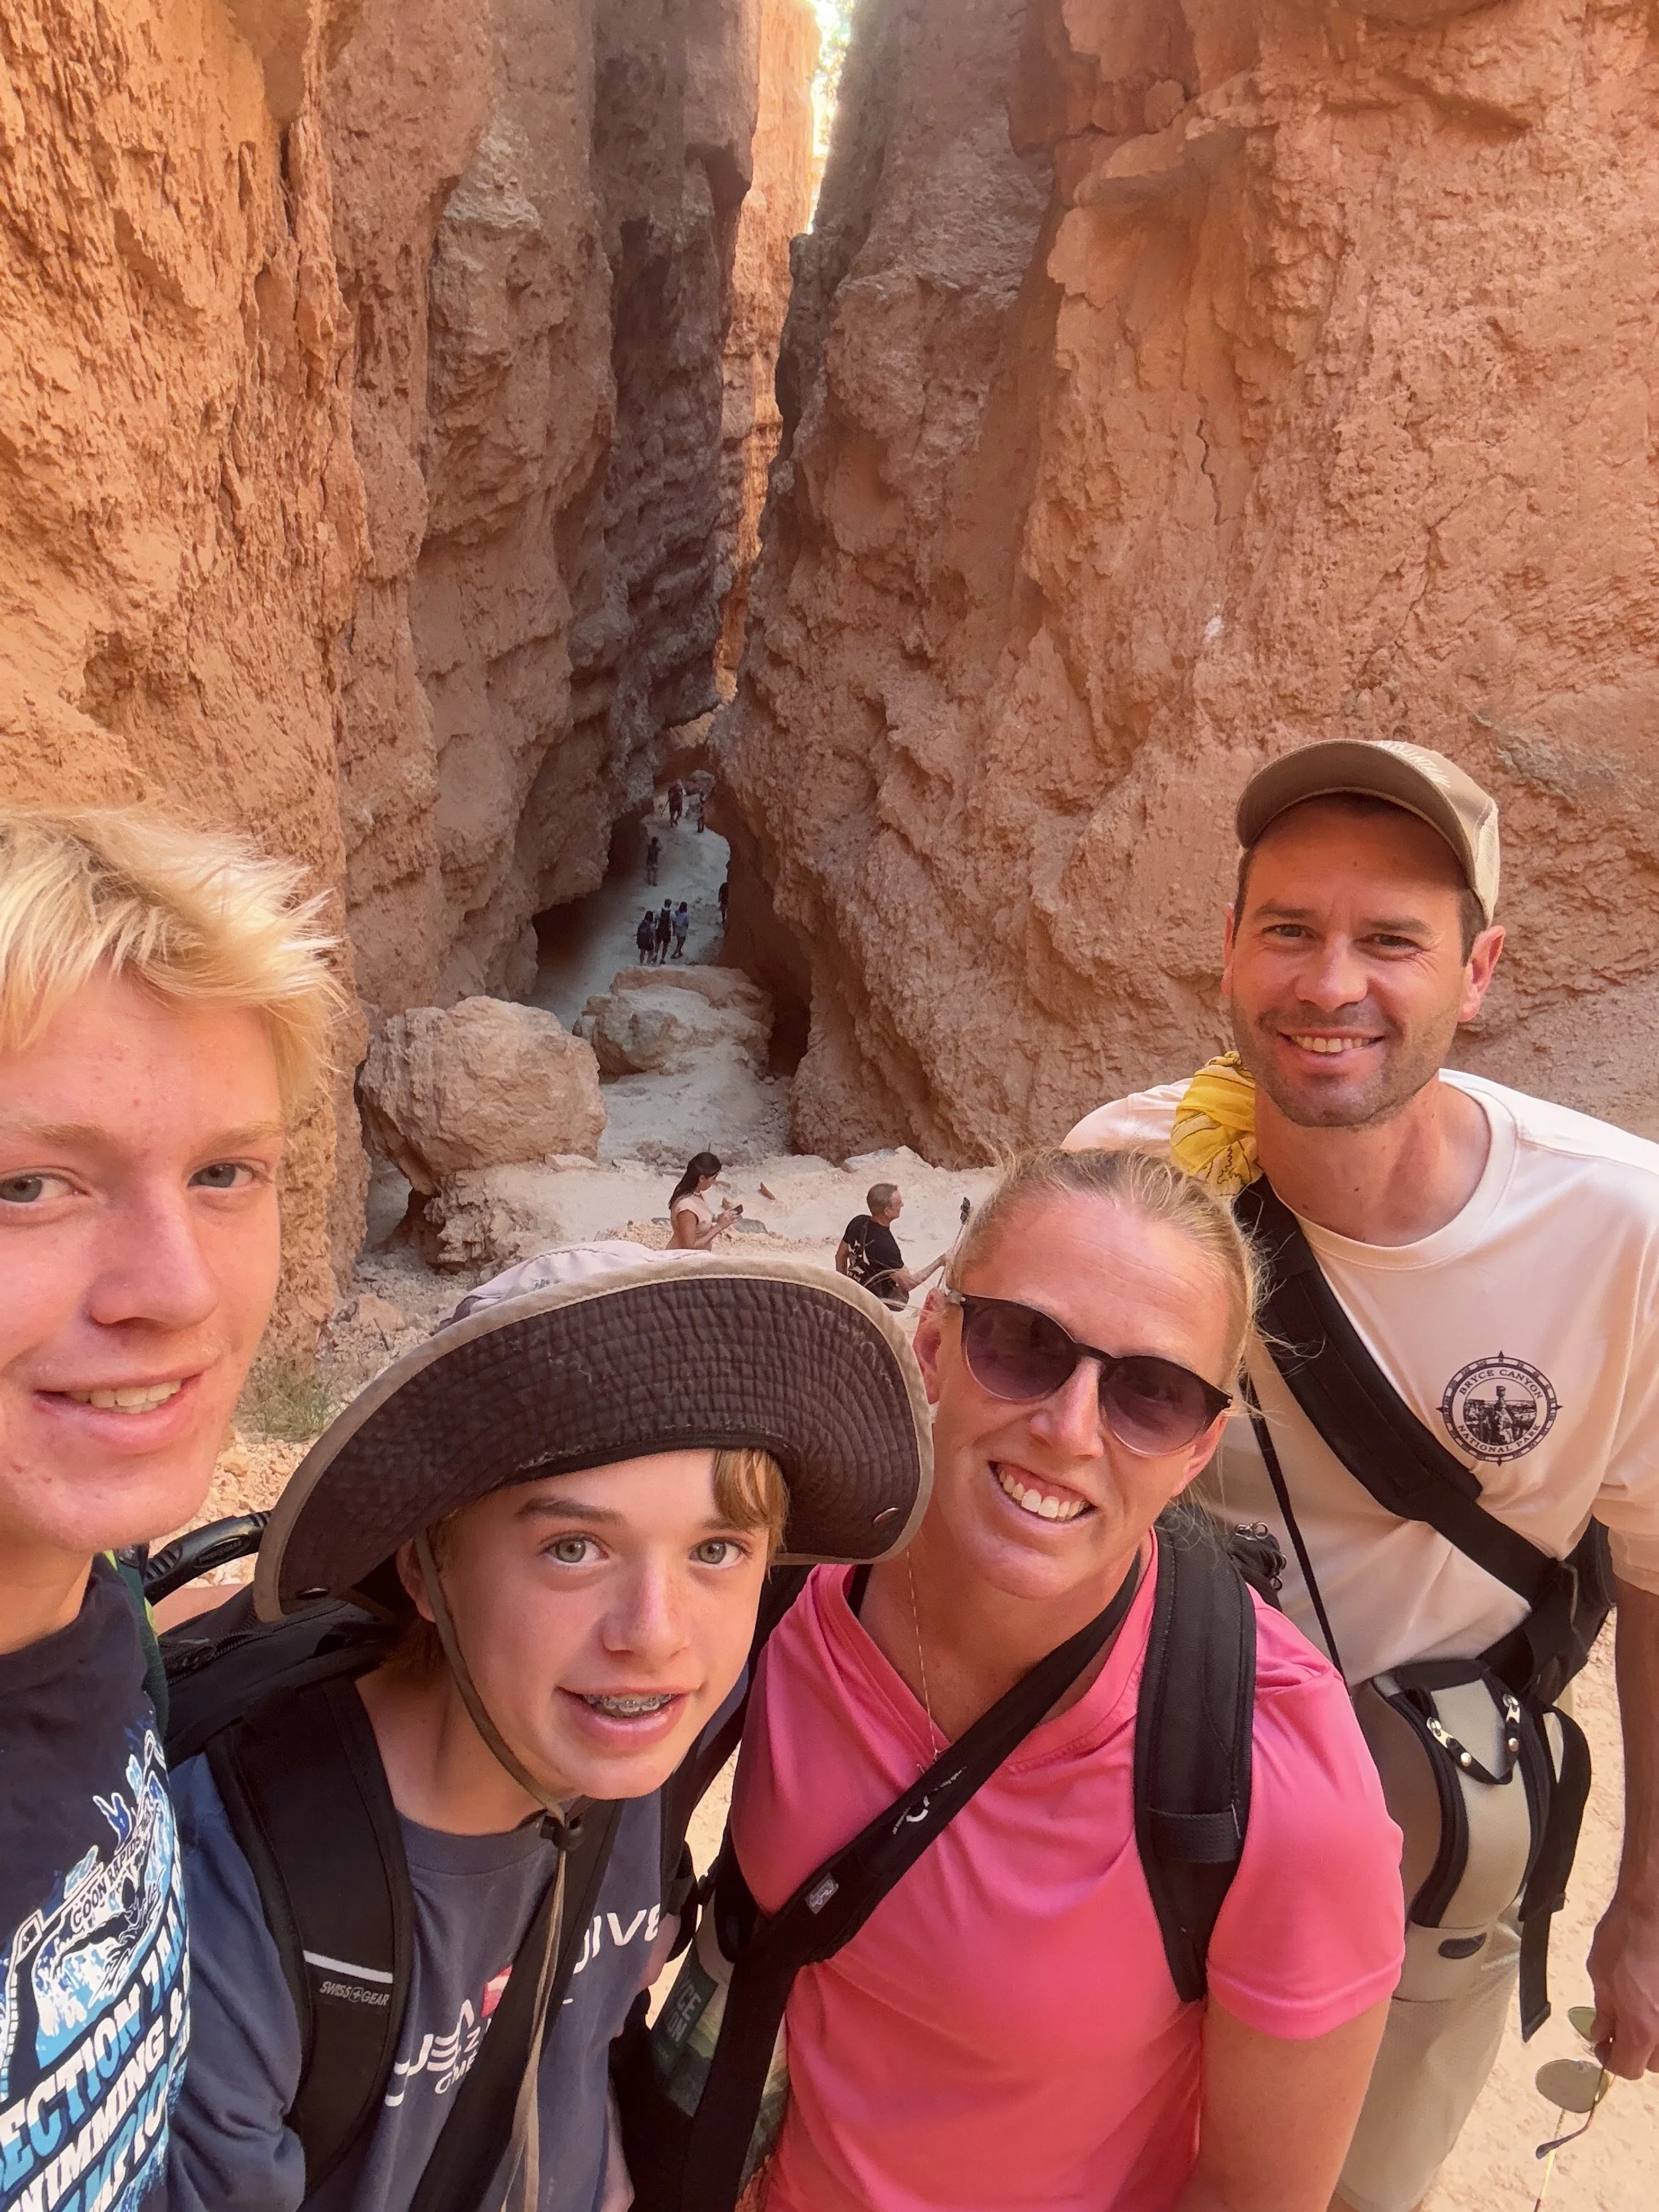
Family Photo on Queen’s Garden Trail - June 2025
There aren’t people in the pictures, but they are there, these were just well-timed shots that took a bit of patience.
Bryce Canyon – Descending into Queen’s Garden
Despite the crowd, Queen’s Garden should be at the top of your list of hikes to do while in Bryce Canyon.
Bryce Canyon - Queen’s Garden - Does anyone know the name of this flower?
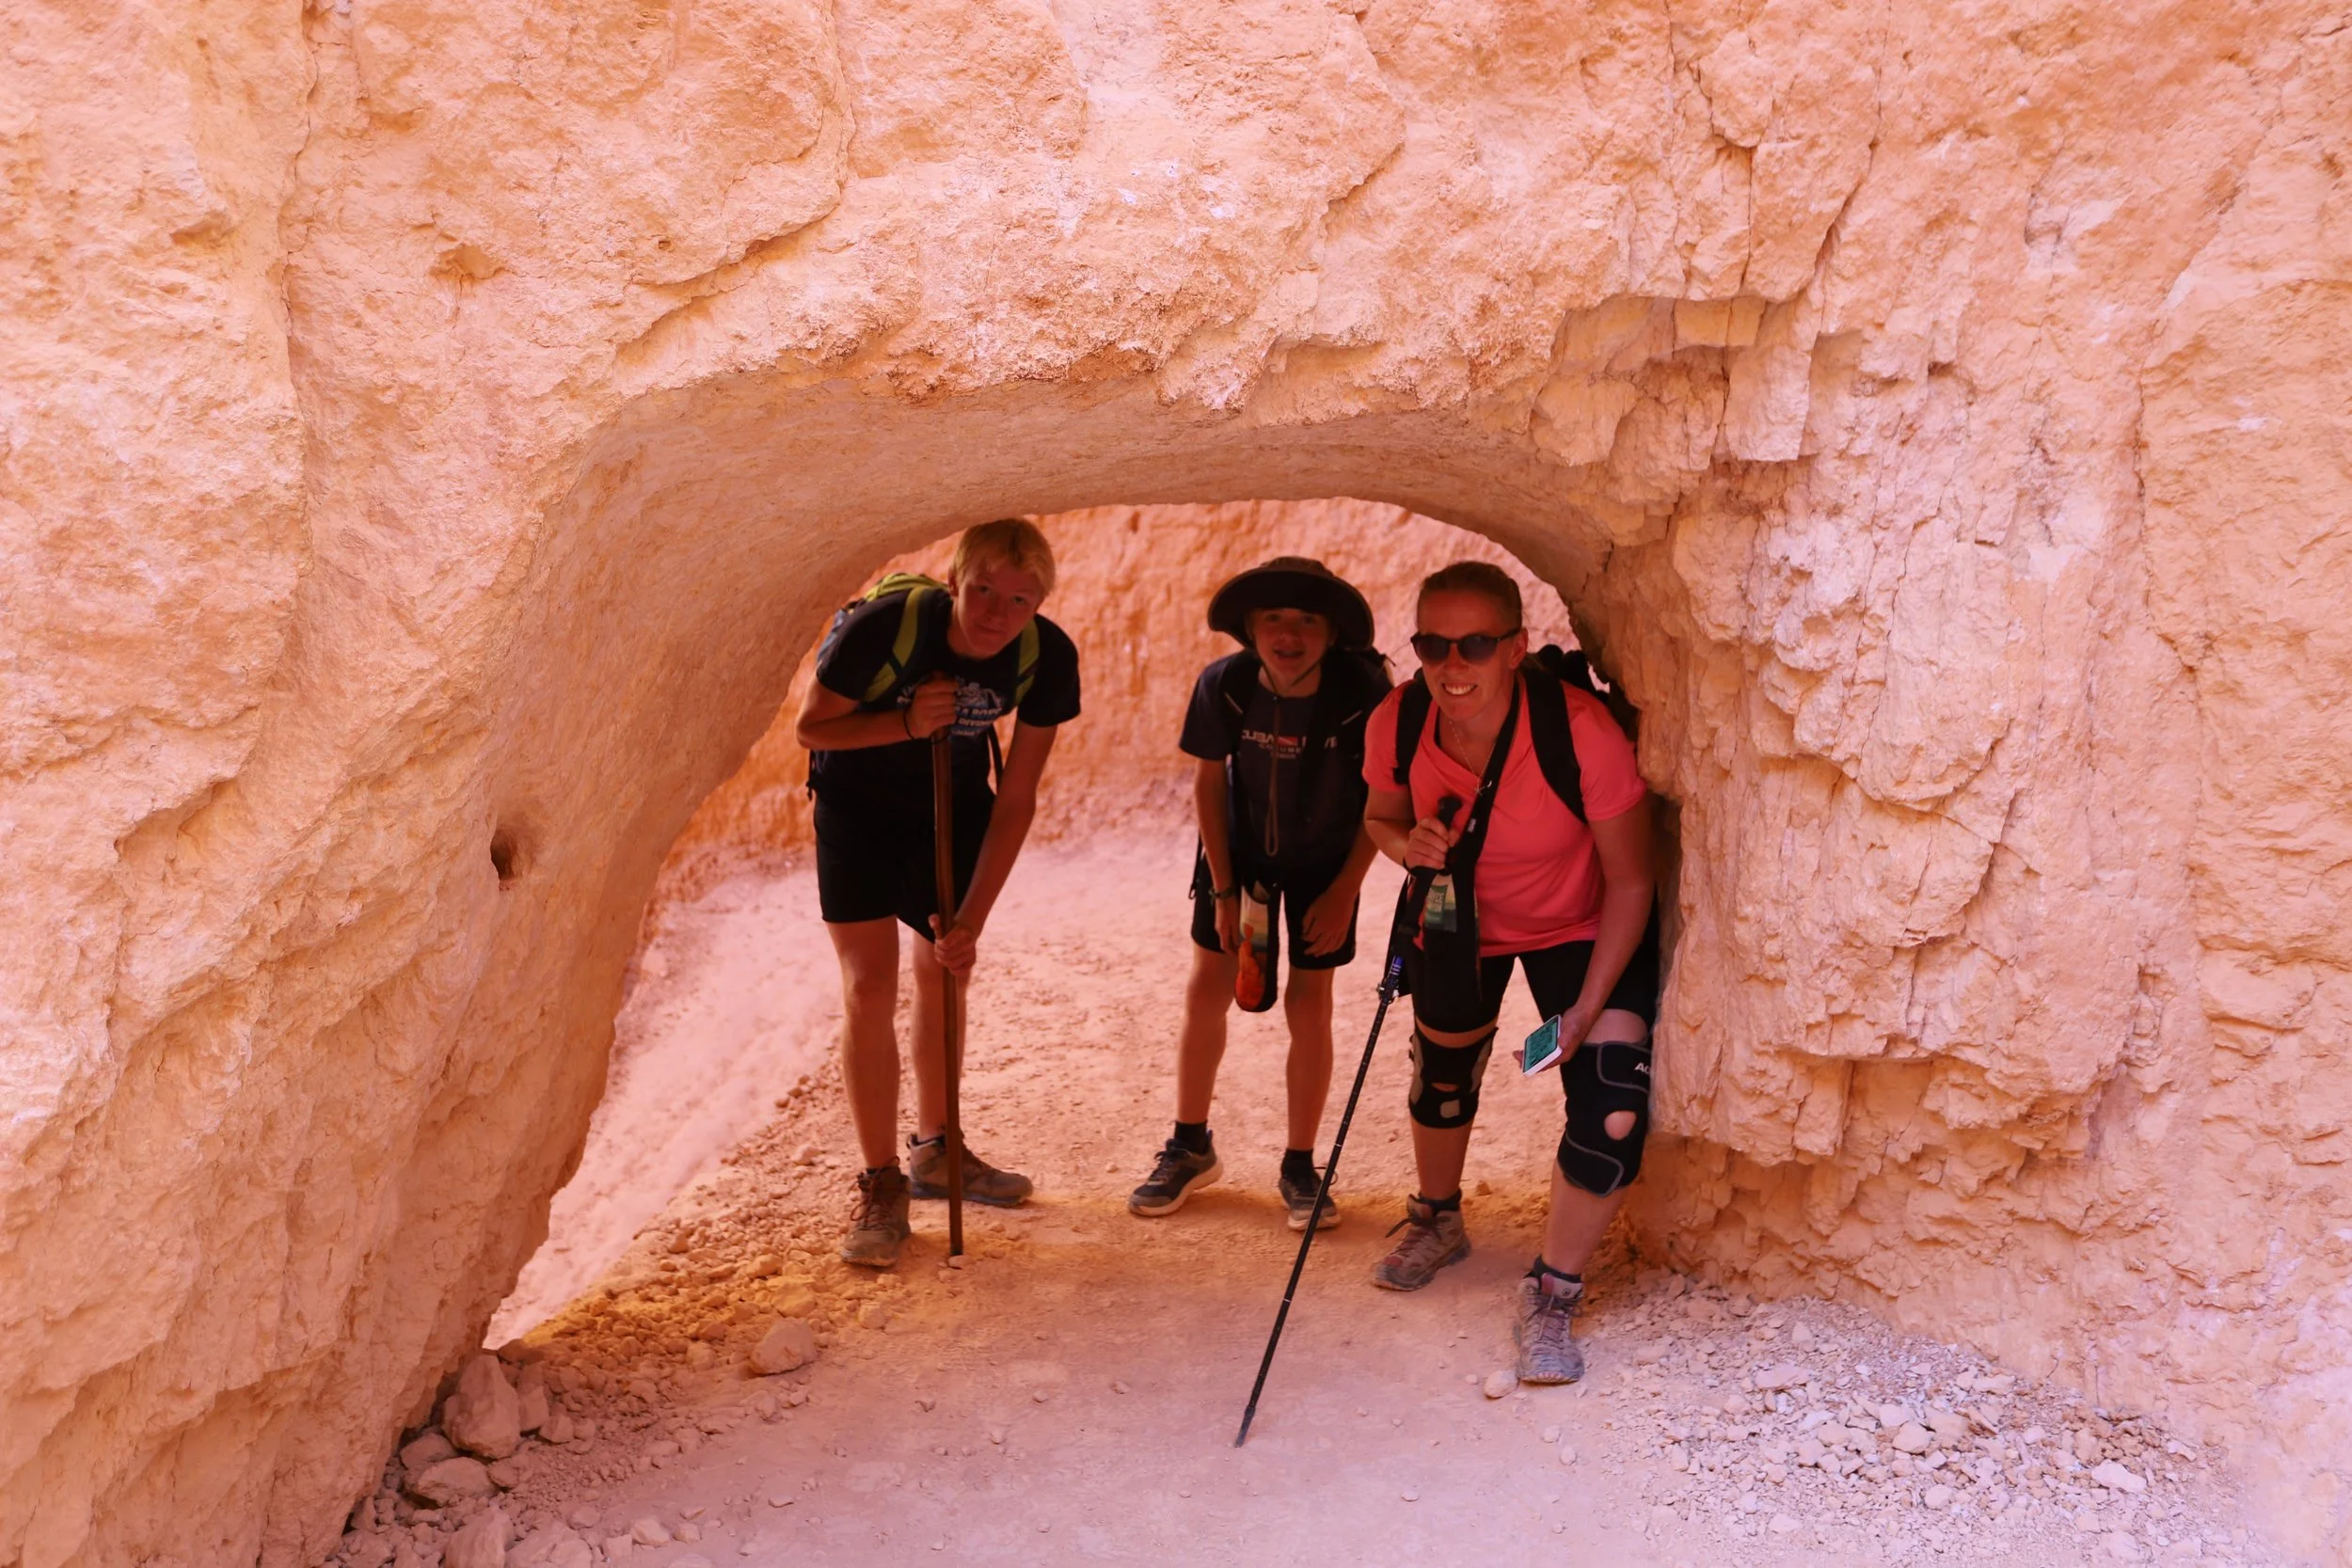
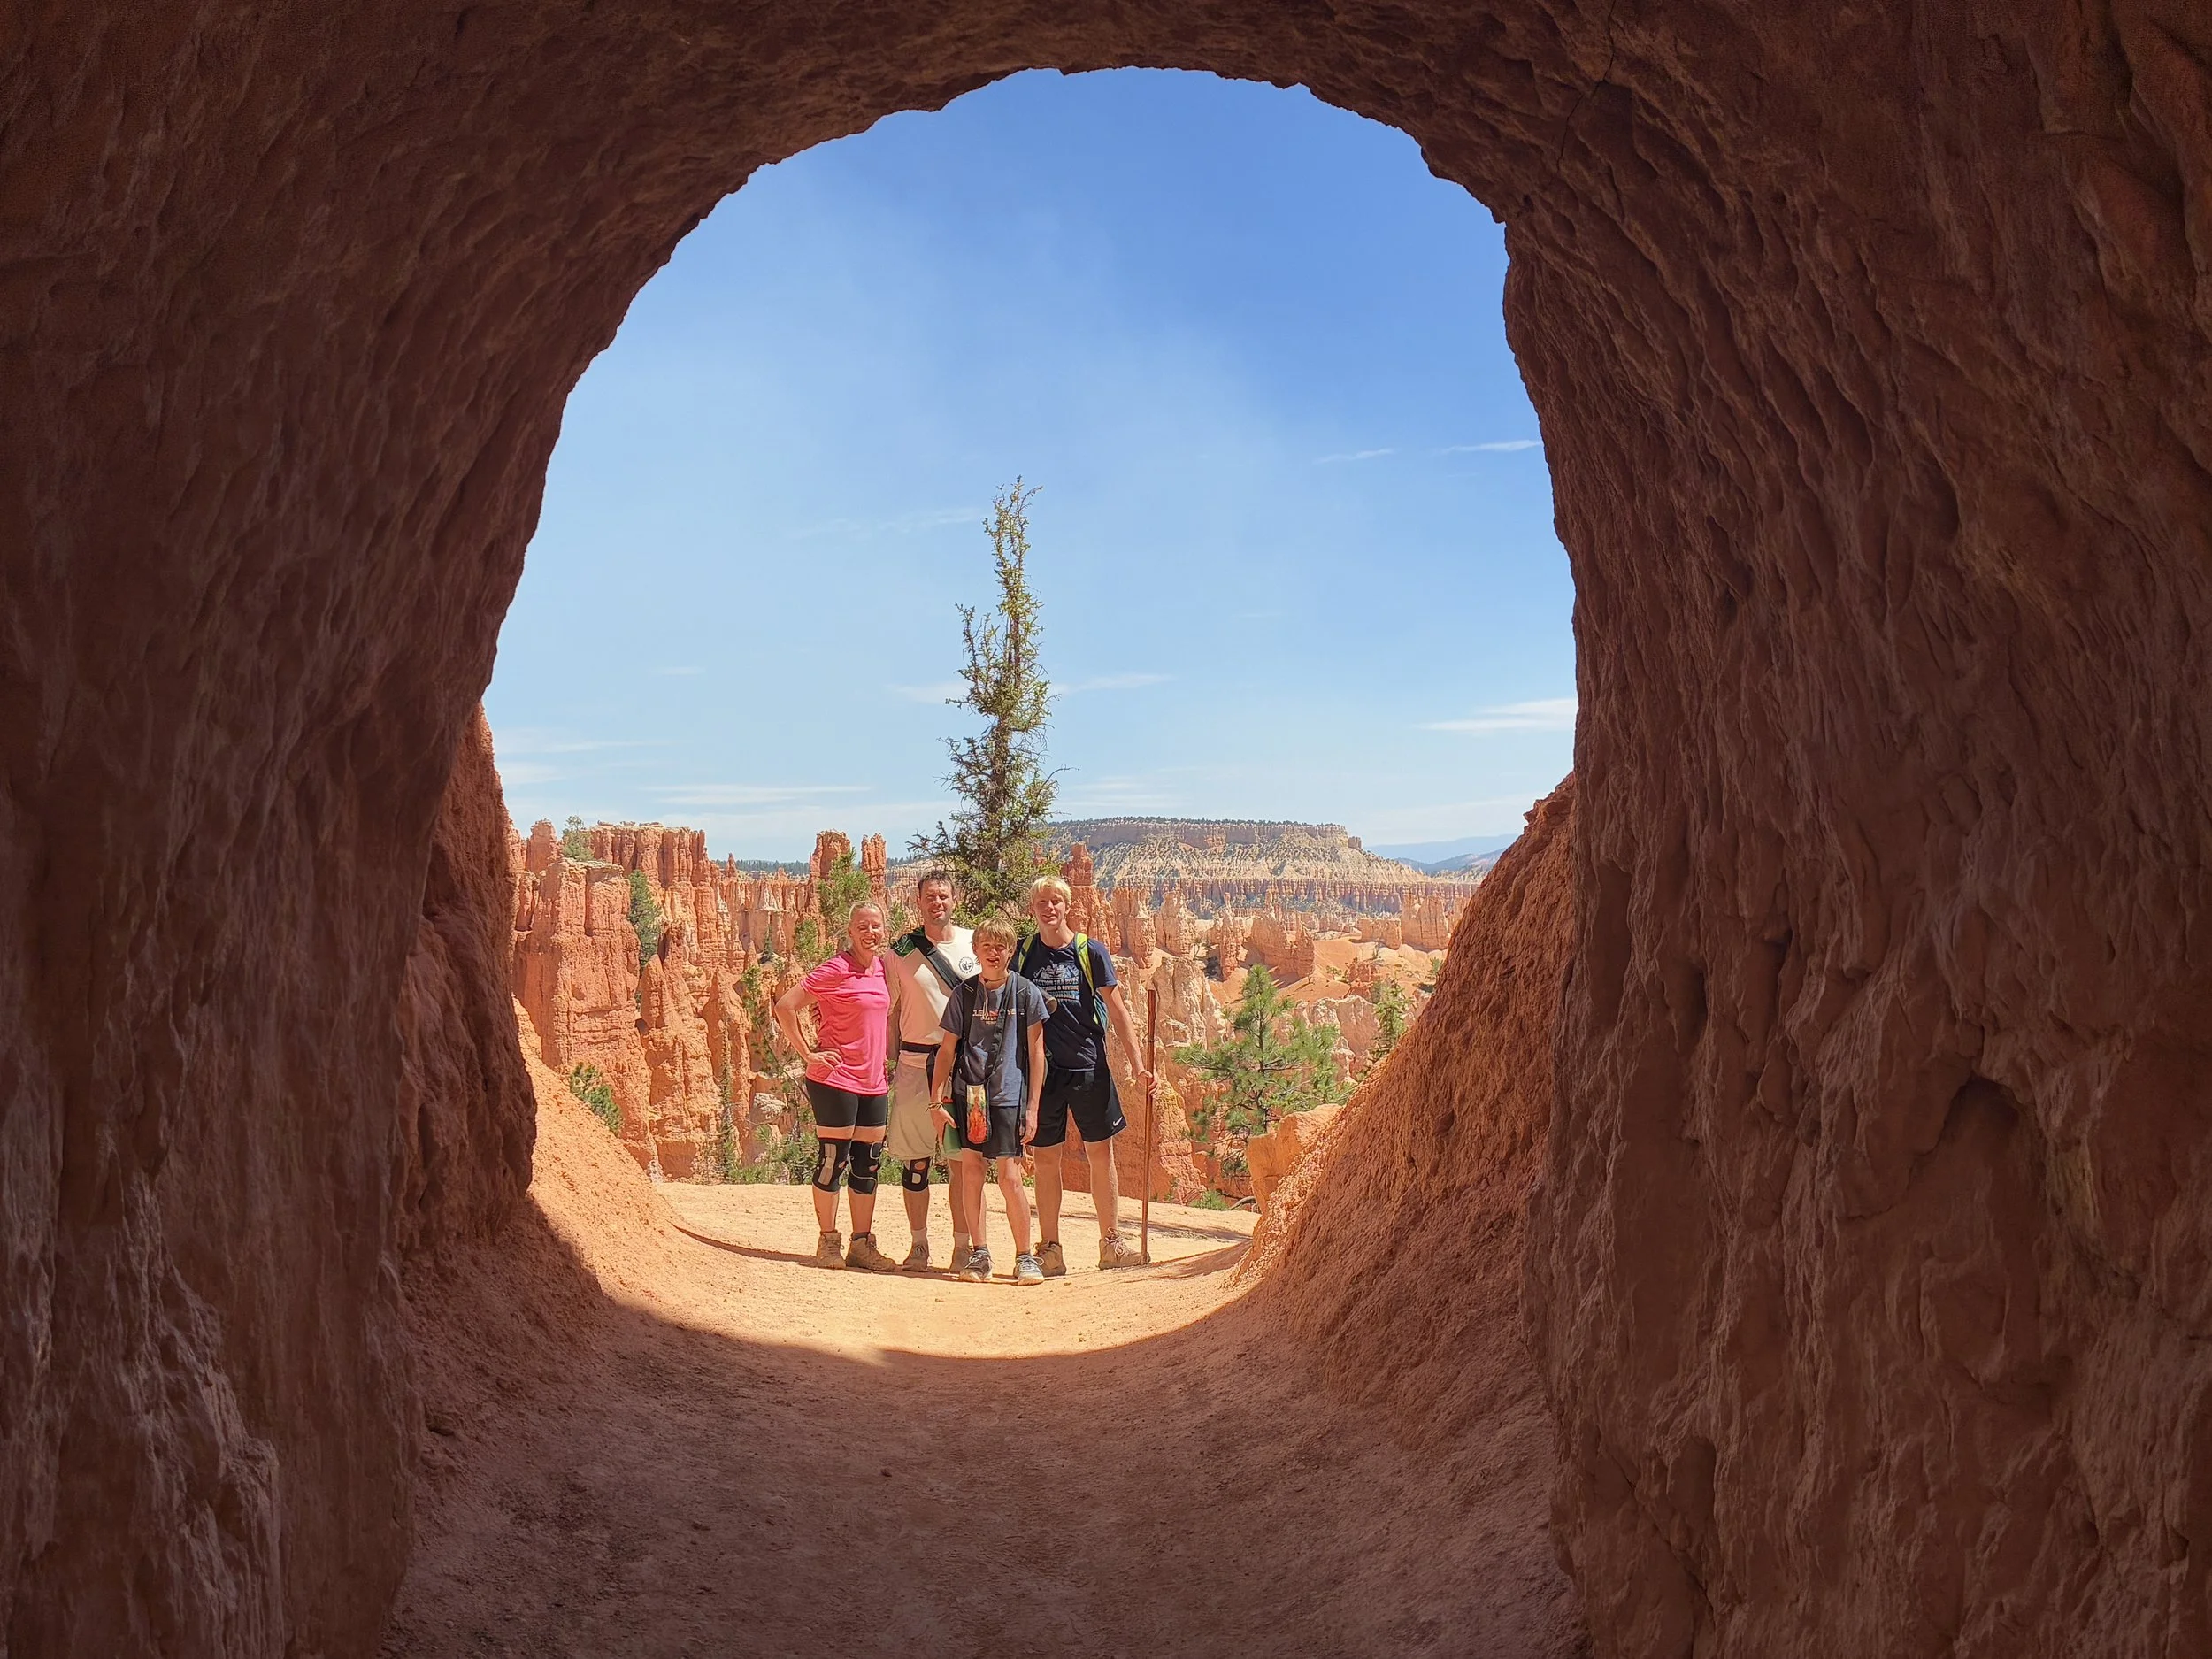
Bryce Canyon - Queen’s Garden - one of many tunnels through the hoodoos that can be found in Bryce Canyon
Bryce Canyon – Queen’s Garden
Bryce Canyon – Queen’s Garden – This is where we turned around.
6) Sunset Point
Distance - 0.2 miles
Elevation Gain - Essentially flat
Trailhead Location - There is parking on the loop road next to the trailhead. Additionally, Sunset Point is also a shuttle stop.
Helpful Information - We hiked so hard every day that we were at Bryce, that even though we were camping in the park, just a few minutes away from Sunset Point, none us had any energy left after showers and supper to get back in the car. I’m not even sad that I missed it… I was so tired each day, I couldn’t do anything more… The park ranger I talked with did say though that this is the best place to watch the sun set.
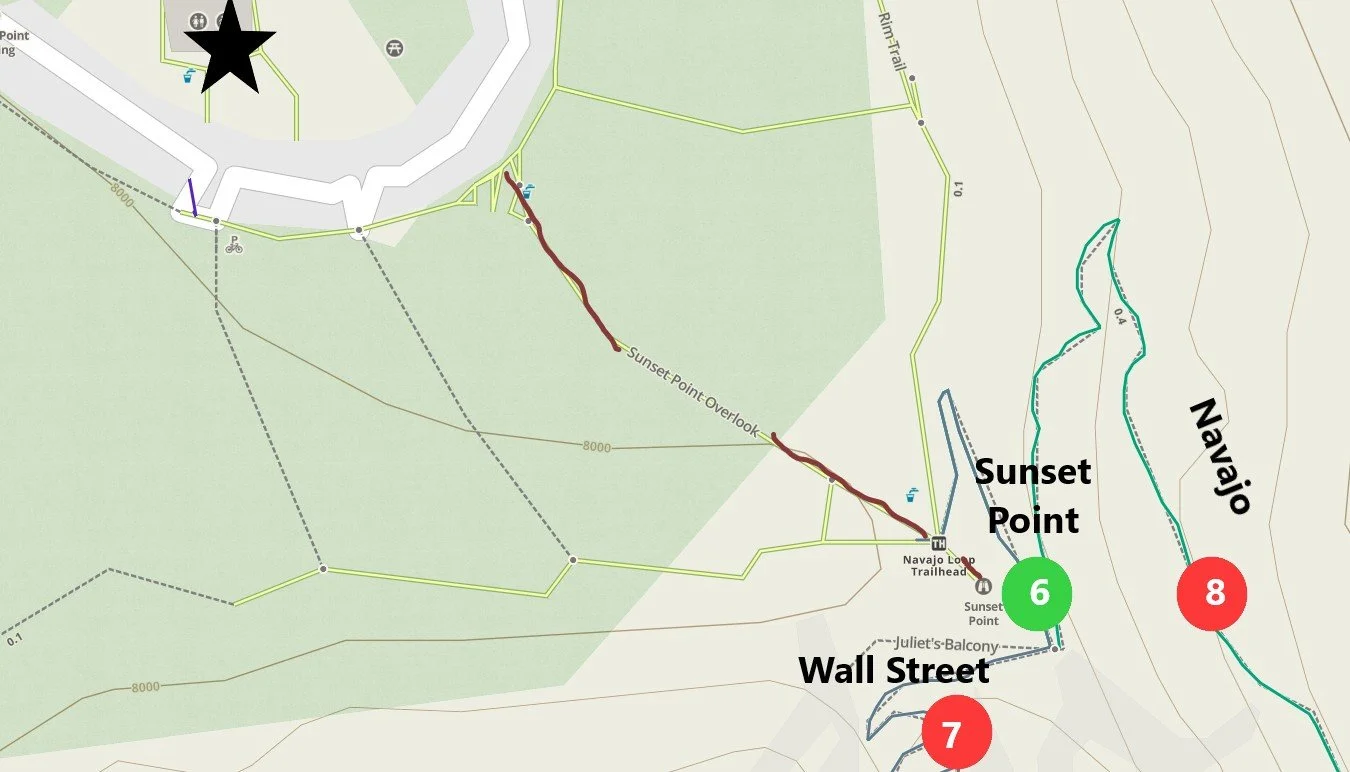
The trail to Sunset Point is marked in brown.
I’m not sure which was busier when we visited, Sunrise Point or Sunset Point, but regardless, this is another spot where there are going to be crowds of people. With one of the best views in the park though, it’s worth the extra patience needed.
Bryce Canyon, Sunset Point
Bryce Canyon, Sunset Point
Bryce Canyon, Sunset Point
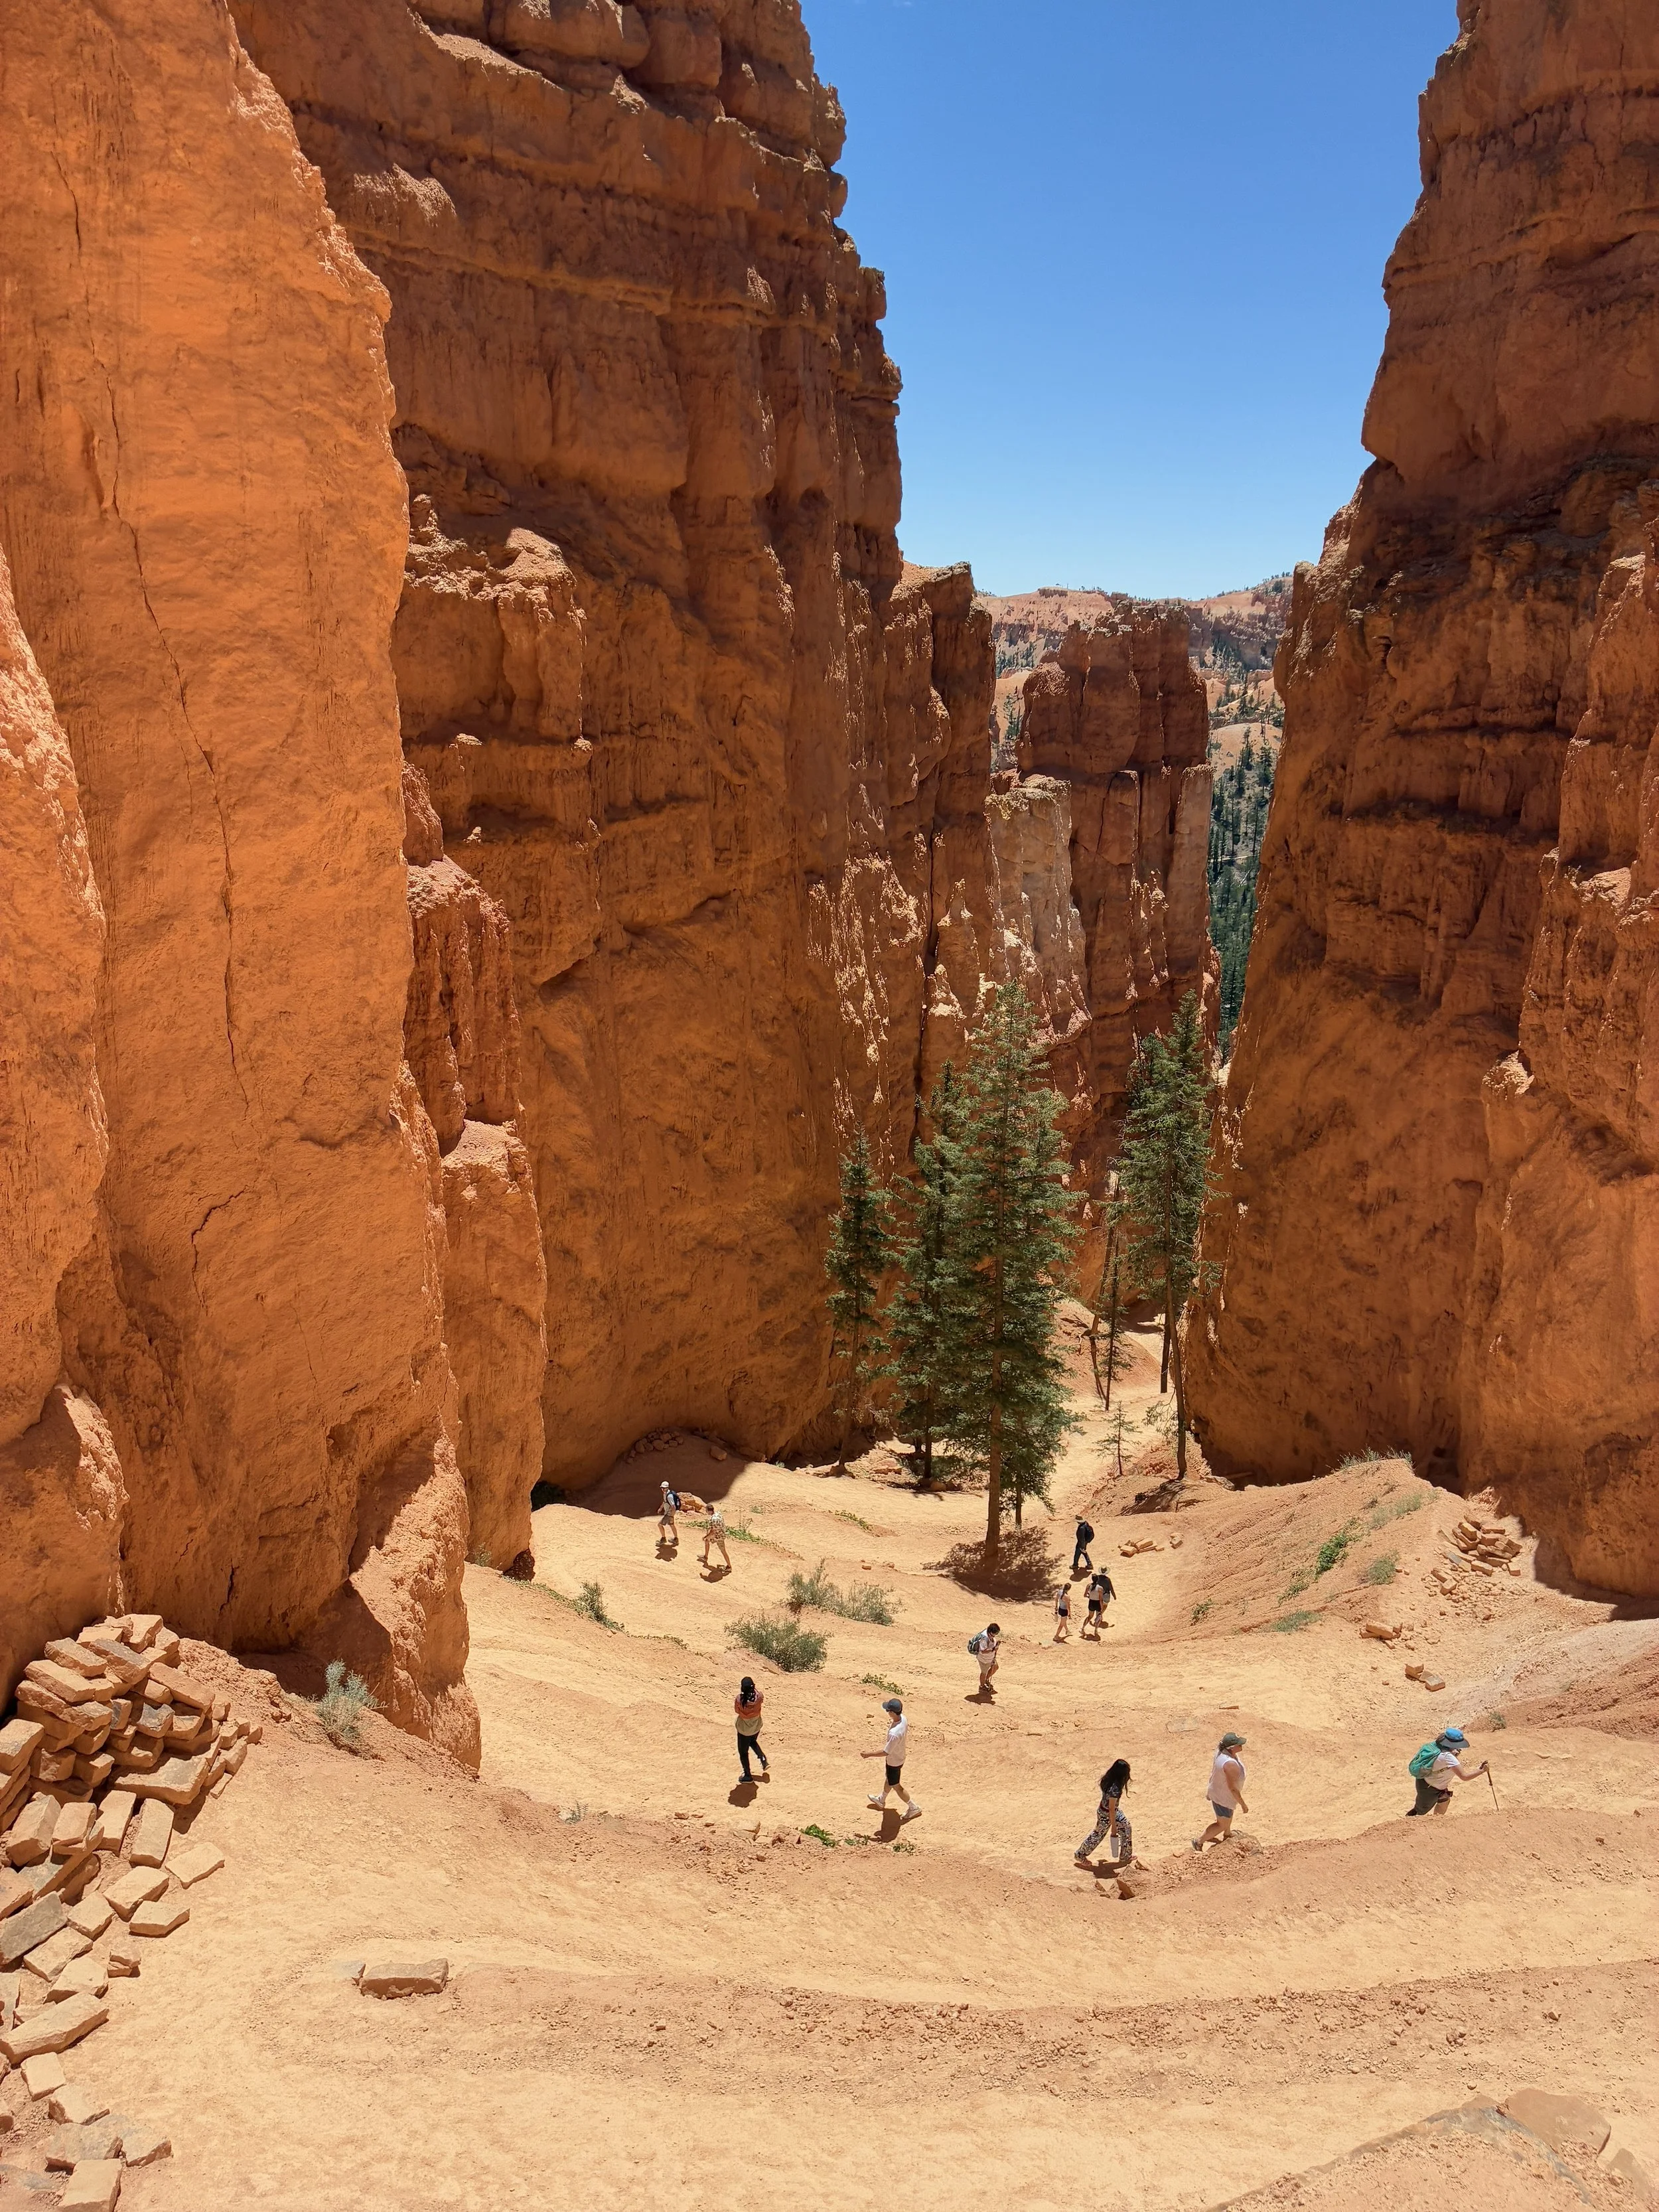
7) Wall Street
Distance - 0.7 miles (one-way)
Elevation Gain - From Sunset Point down to the bottom of Wall Street, the trail loses 700ft (climbing into the canyon) or gains 700ft (climbing out)
Trailhead Location - There is parking on the loop road next to the trailhead for Sunset Point. Sunset Point is also a shuttle stop.
Helpful Information – The Navajo Loop – Wall Street and Navajo – is listed as a “moderate” hike in the park brochure. This loop is the most popular trail in Bryce Canyon National Park. Although this loop is short (1.3 miles), there isn’t an easy way back up the parking lot. Both trails have steep switchbacks that are mostly exposed to the sun in the summer afternoons. This may be one of the easier trails in Bryce Canyon, but that doesn’t make this trail “easy.” Most of the hikes in this park are extremely difficult. Kids will be able to do this hike, but I would rank it as “hard.”
Bring water along this hike!
There is a second loop option for anyone looking for a longer hike – Hike down Wall Street and up Queen’s Garden (3.2 mile hike with the rim trail to create the loop). A third option, which is what we did, is to add the Peekaboo Loop to make a figure-8 hiking trail.

The Wall Street trail is marked in light grey.
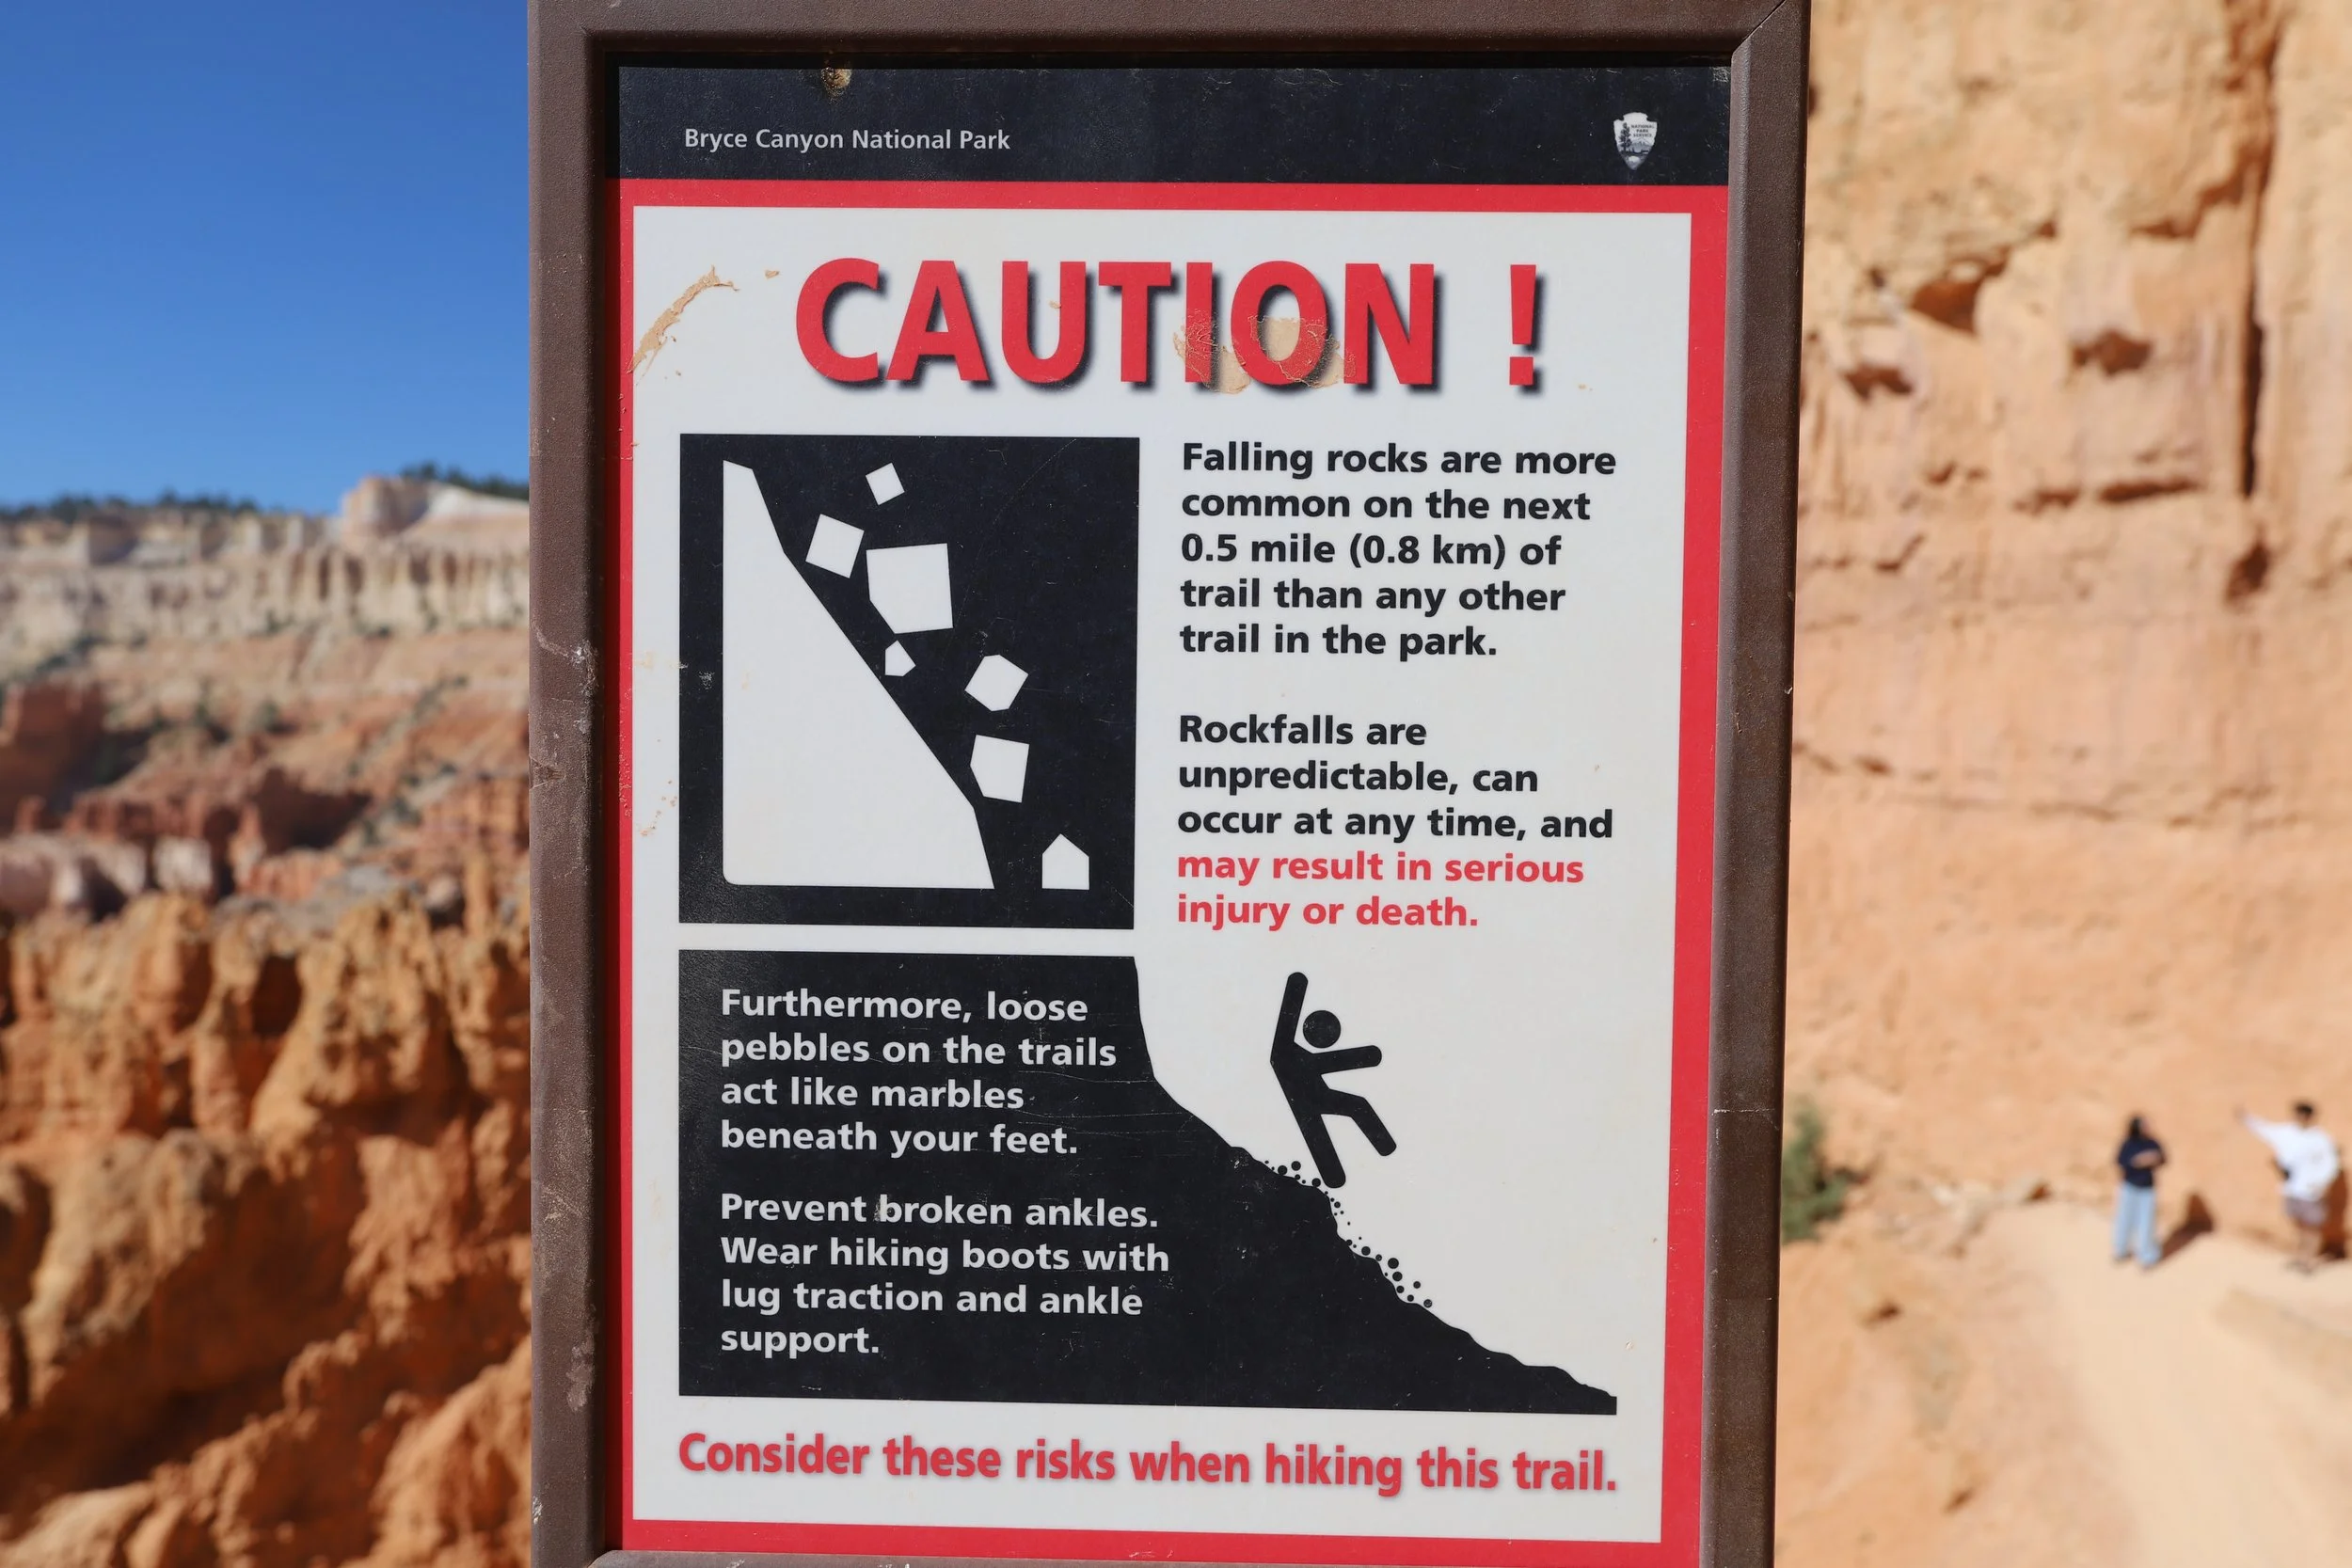
Bryce Canyon, Sunset Point Trailhead - This was the only falling rock sign that we saw while hiking at Bryce Canyon. No rocks fell on us, but it seems worth sharing the warning. I very much agree with the recommendation to wear hiking boots with ankle supports. The trail is steep, and the sand / gravel along the trail can move a little bit under boots. We all slid a few times.
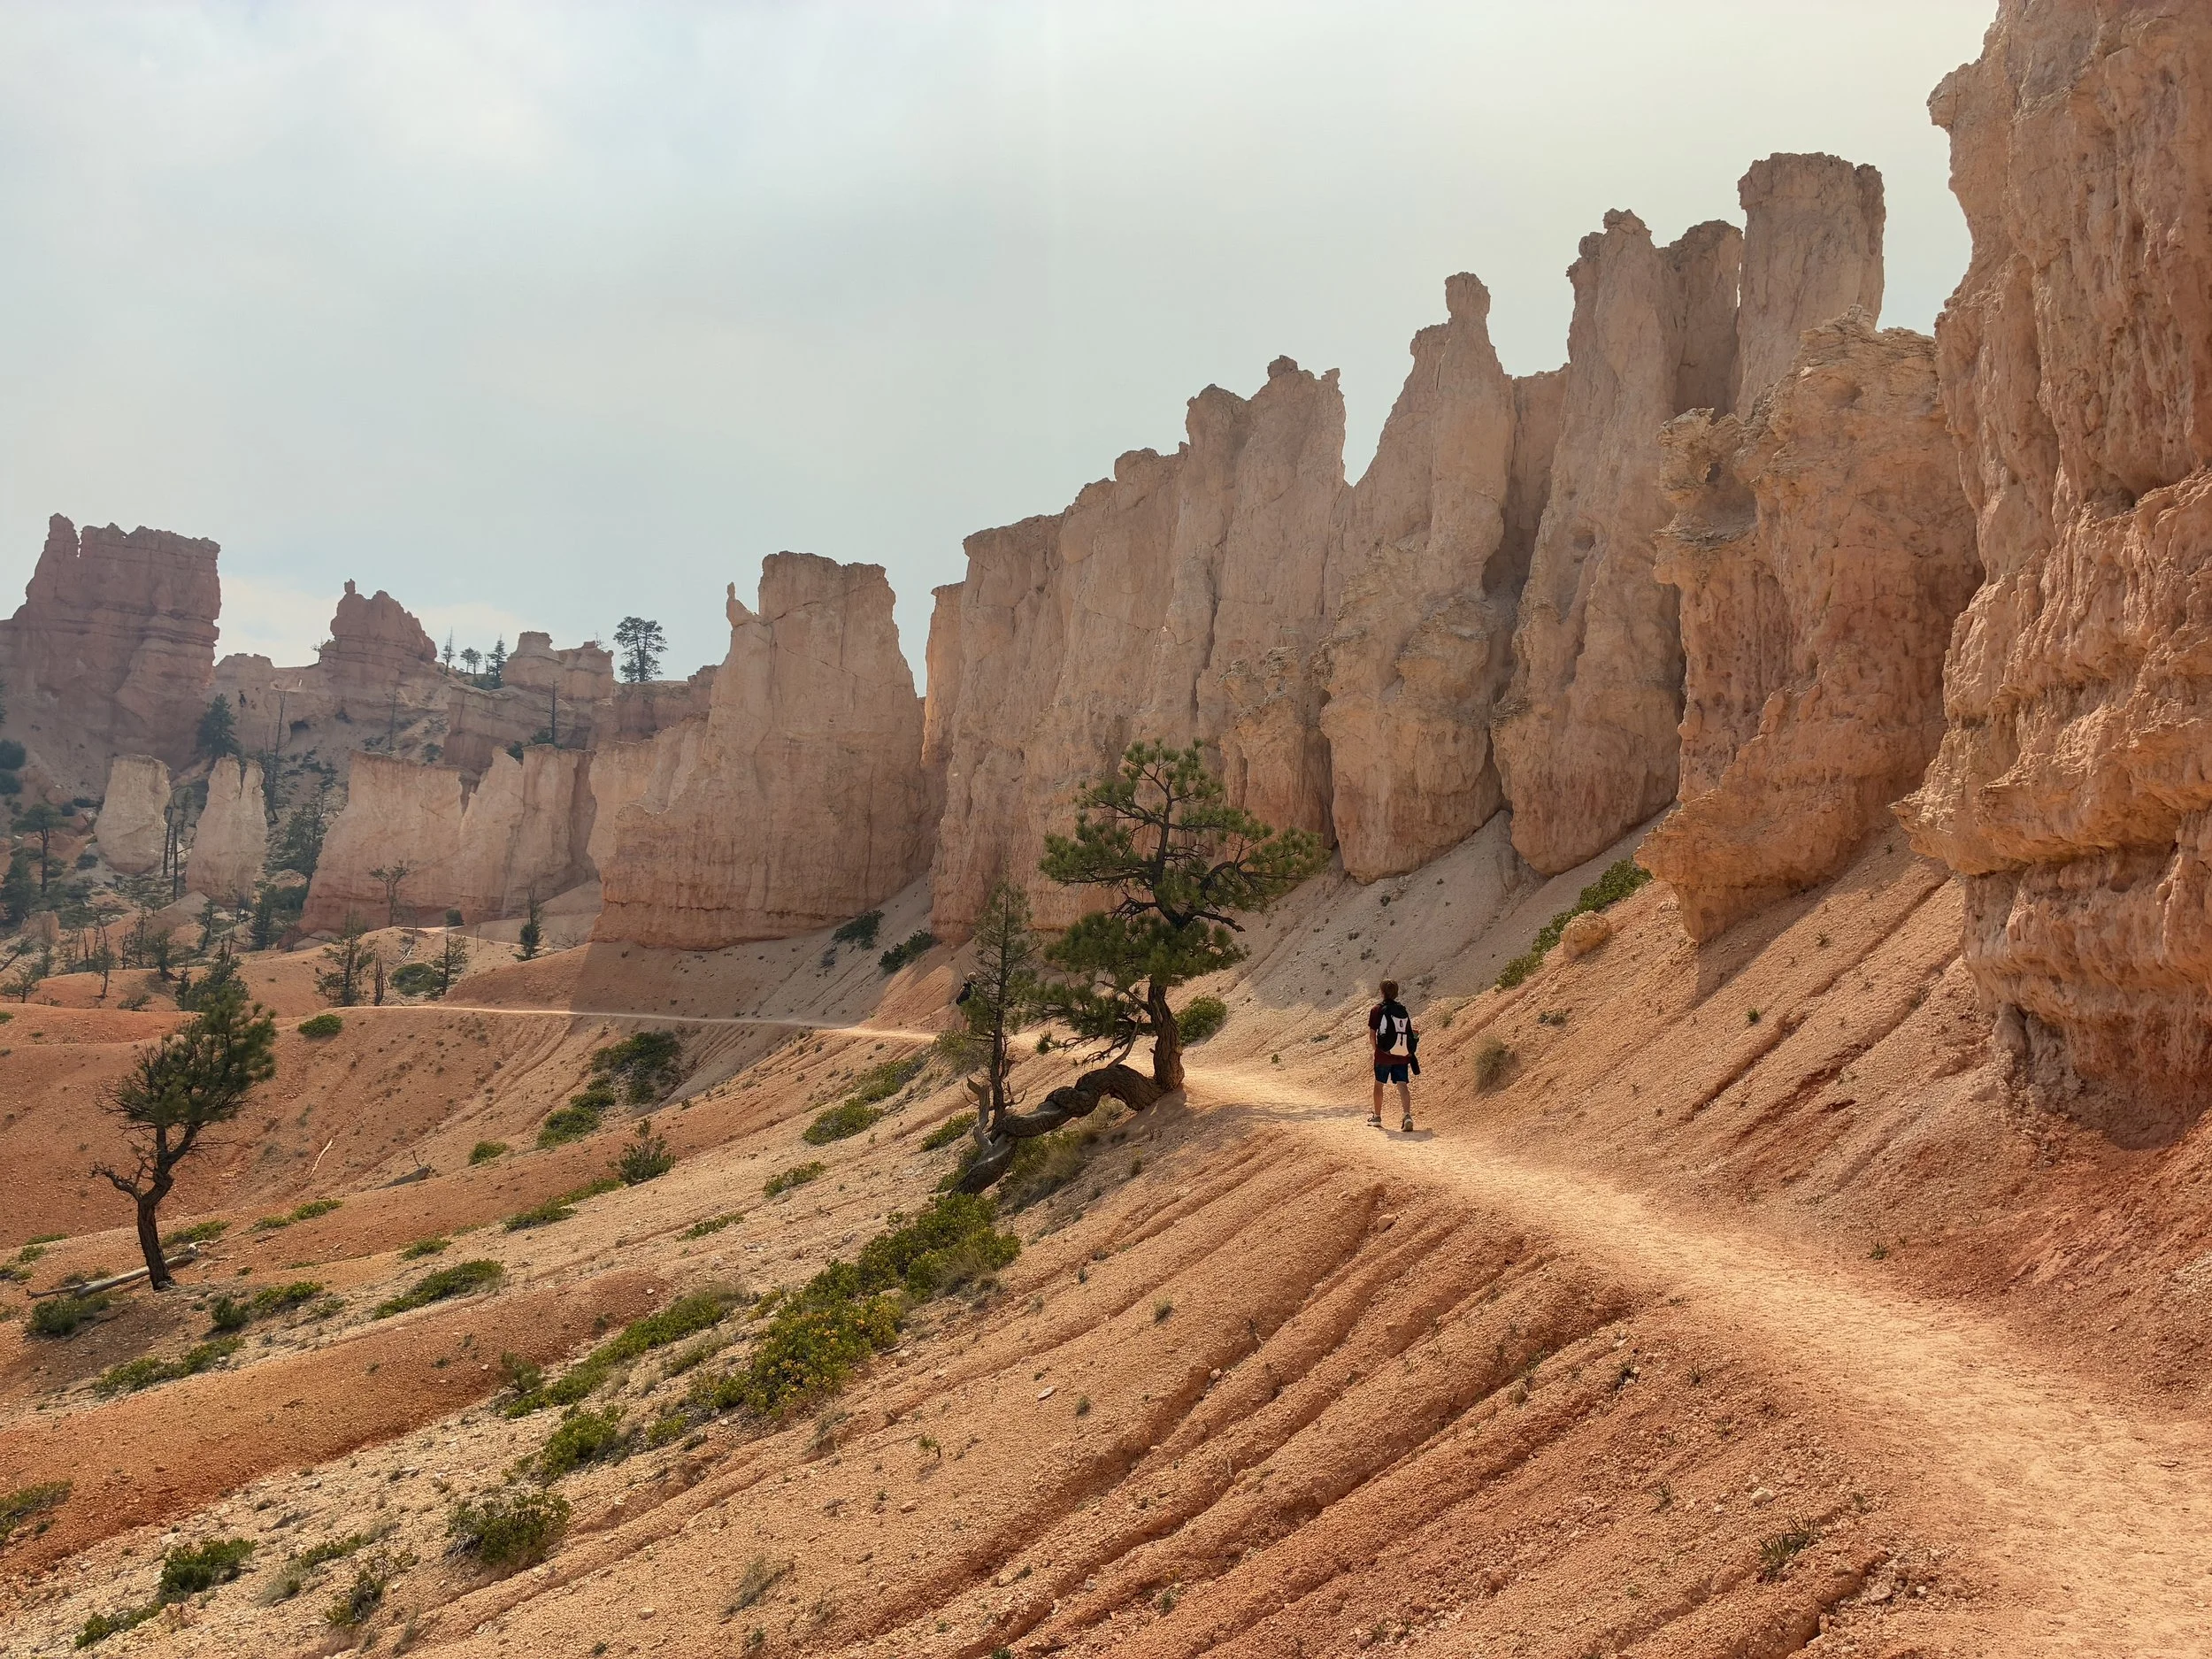
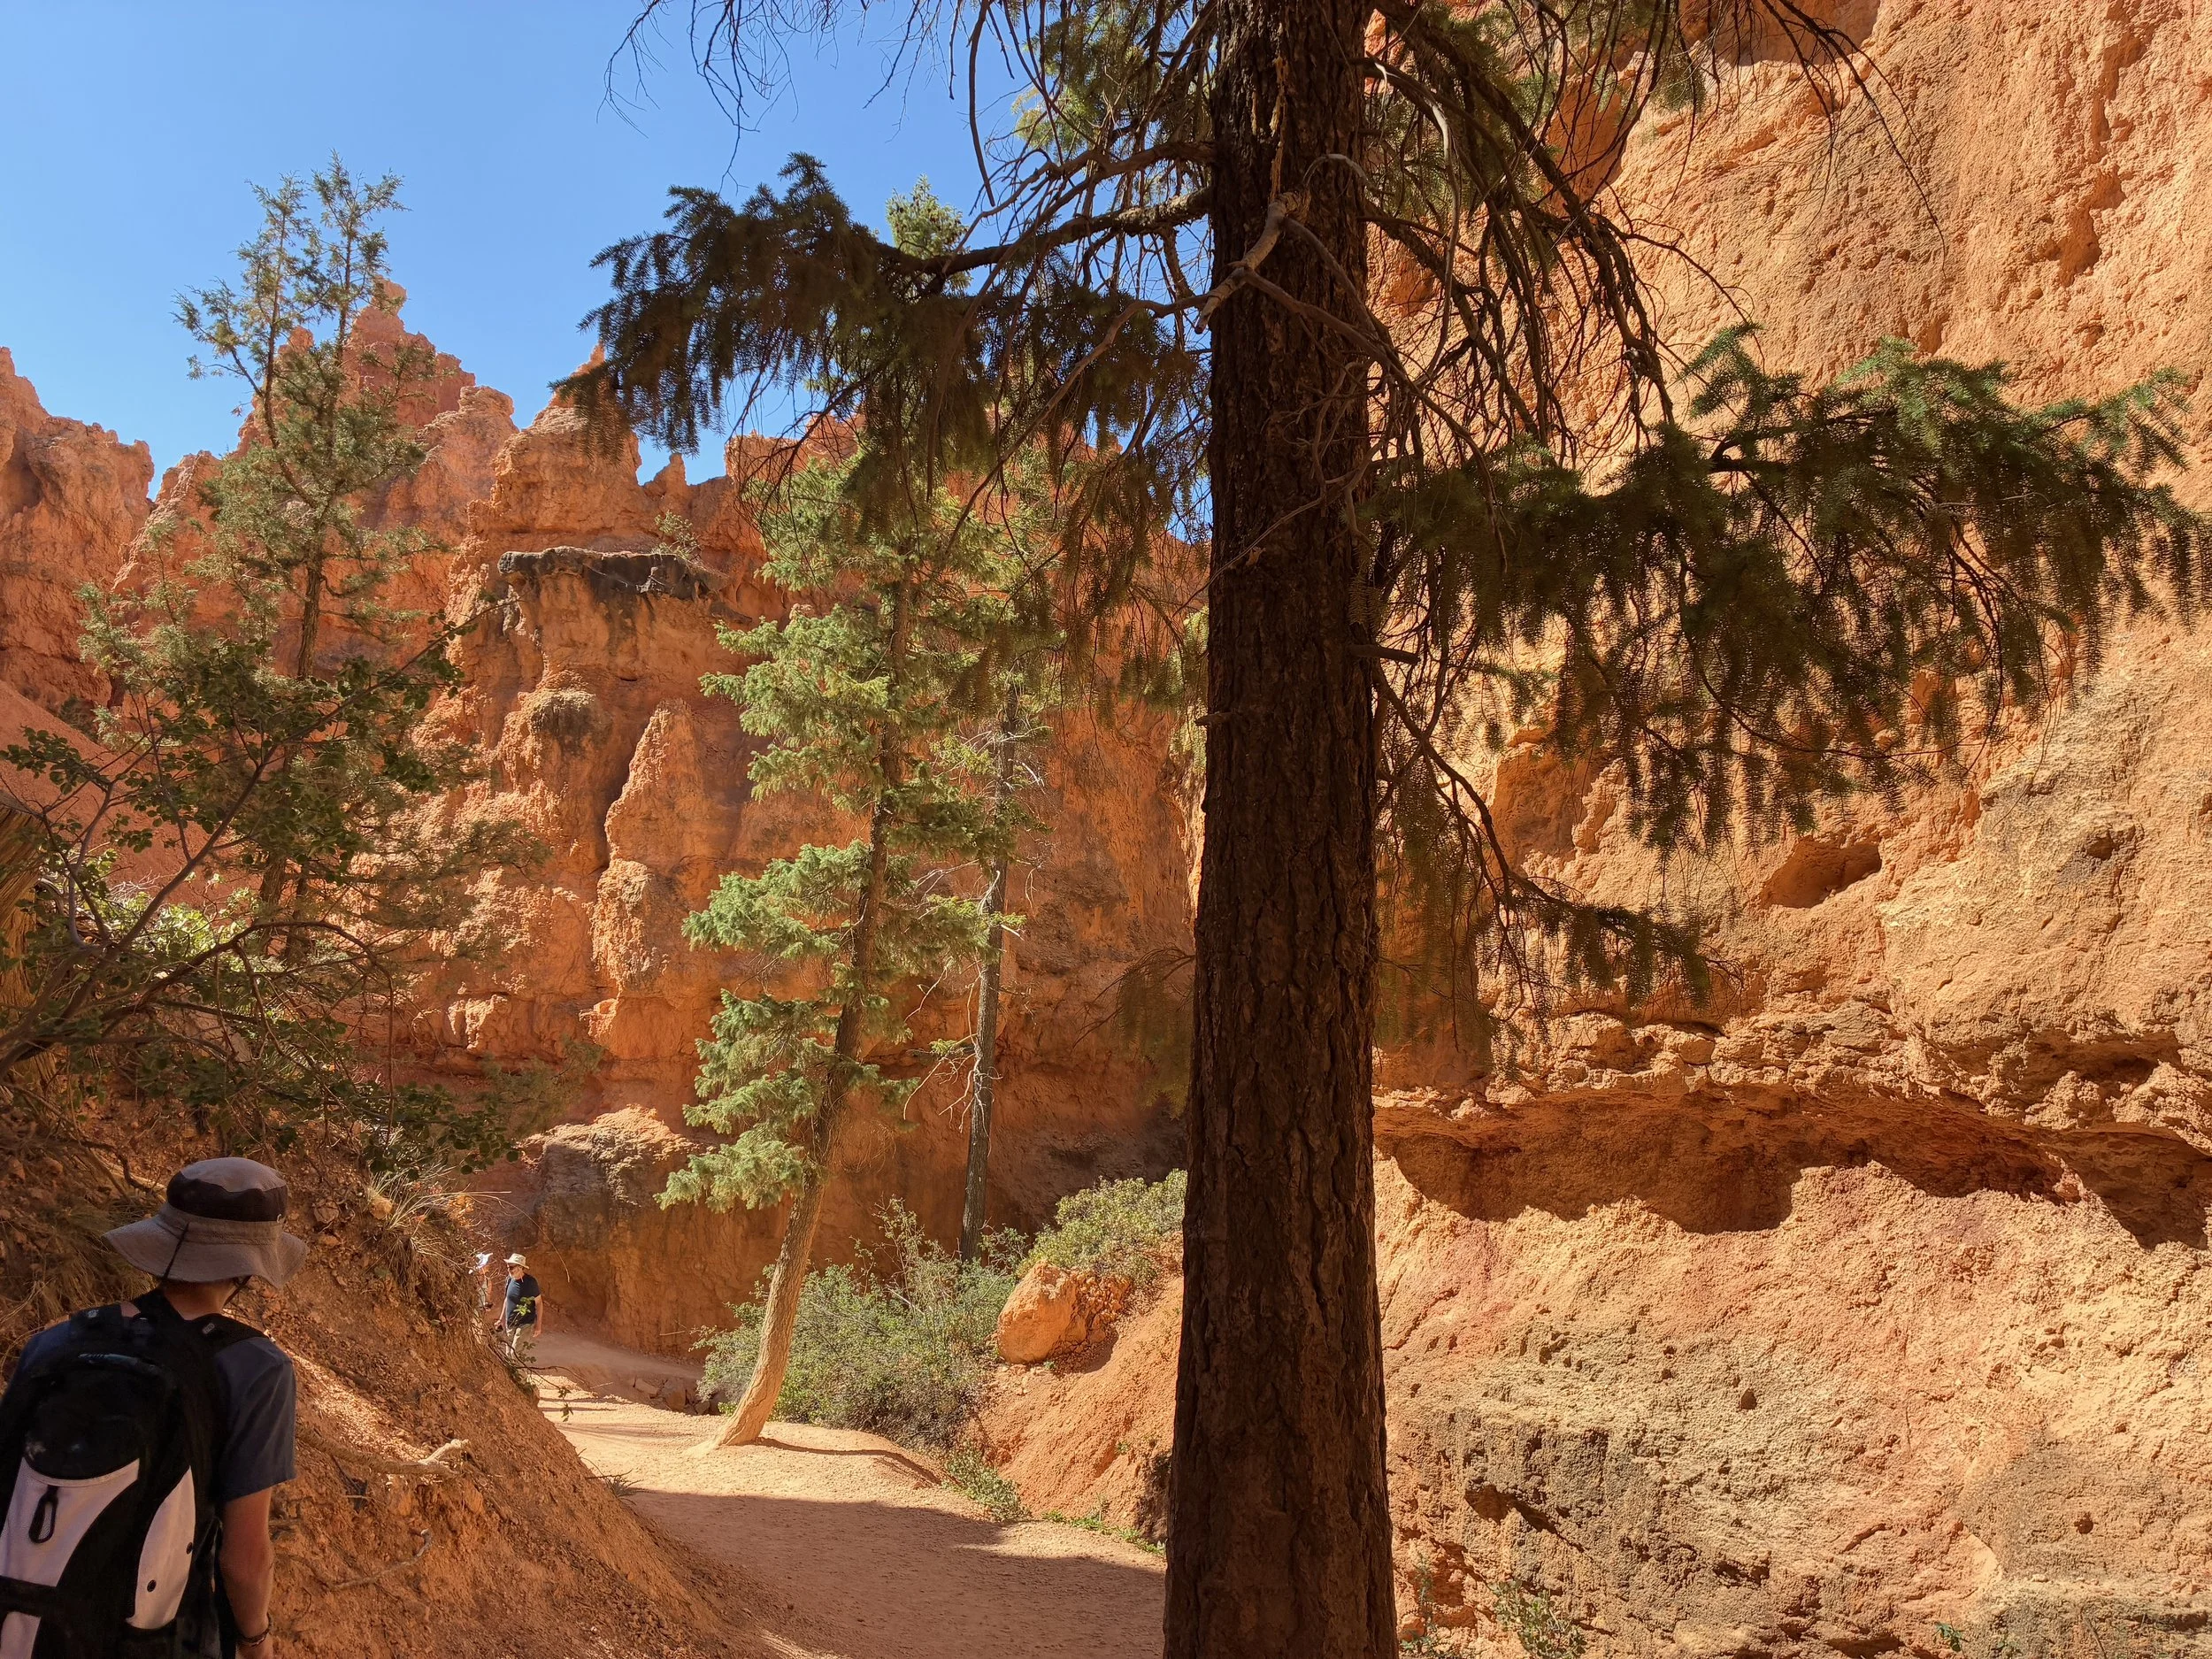
From Sunset Point, all trails start on a short, shared descent before it splits into Wall Street and Navajo. We chose to go down Wall Street (the trail to the right). I wanted to see the Douglas Fir trees from this direction – where they are hidden behind the walls until you are right next to them, and they are such a stunning but curious sight. I don’t think one direction is easier than the other, and there were people going both ways, although most people chose to go the same direction as us.
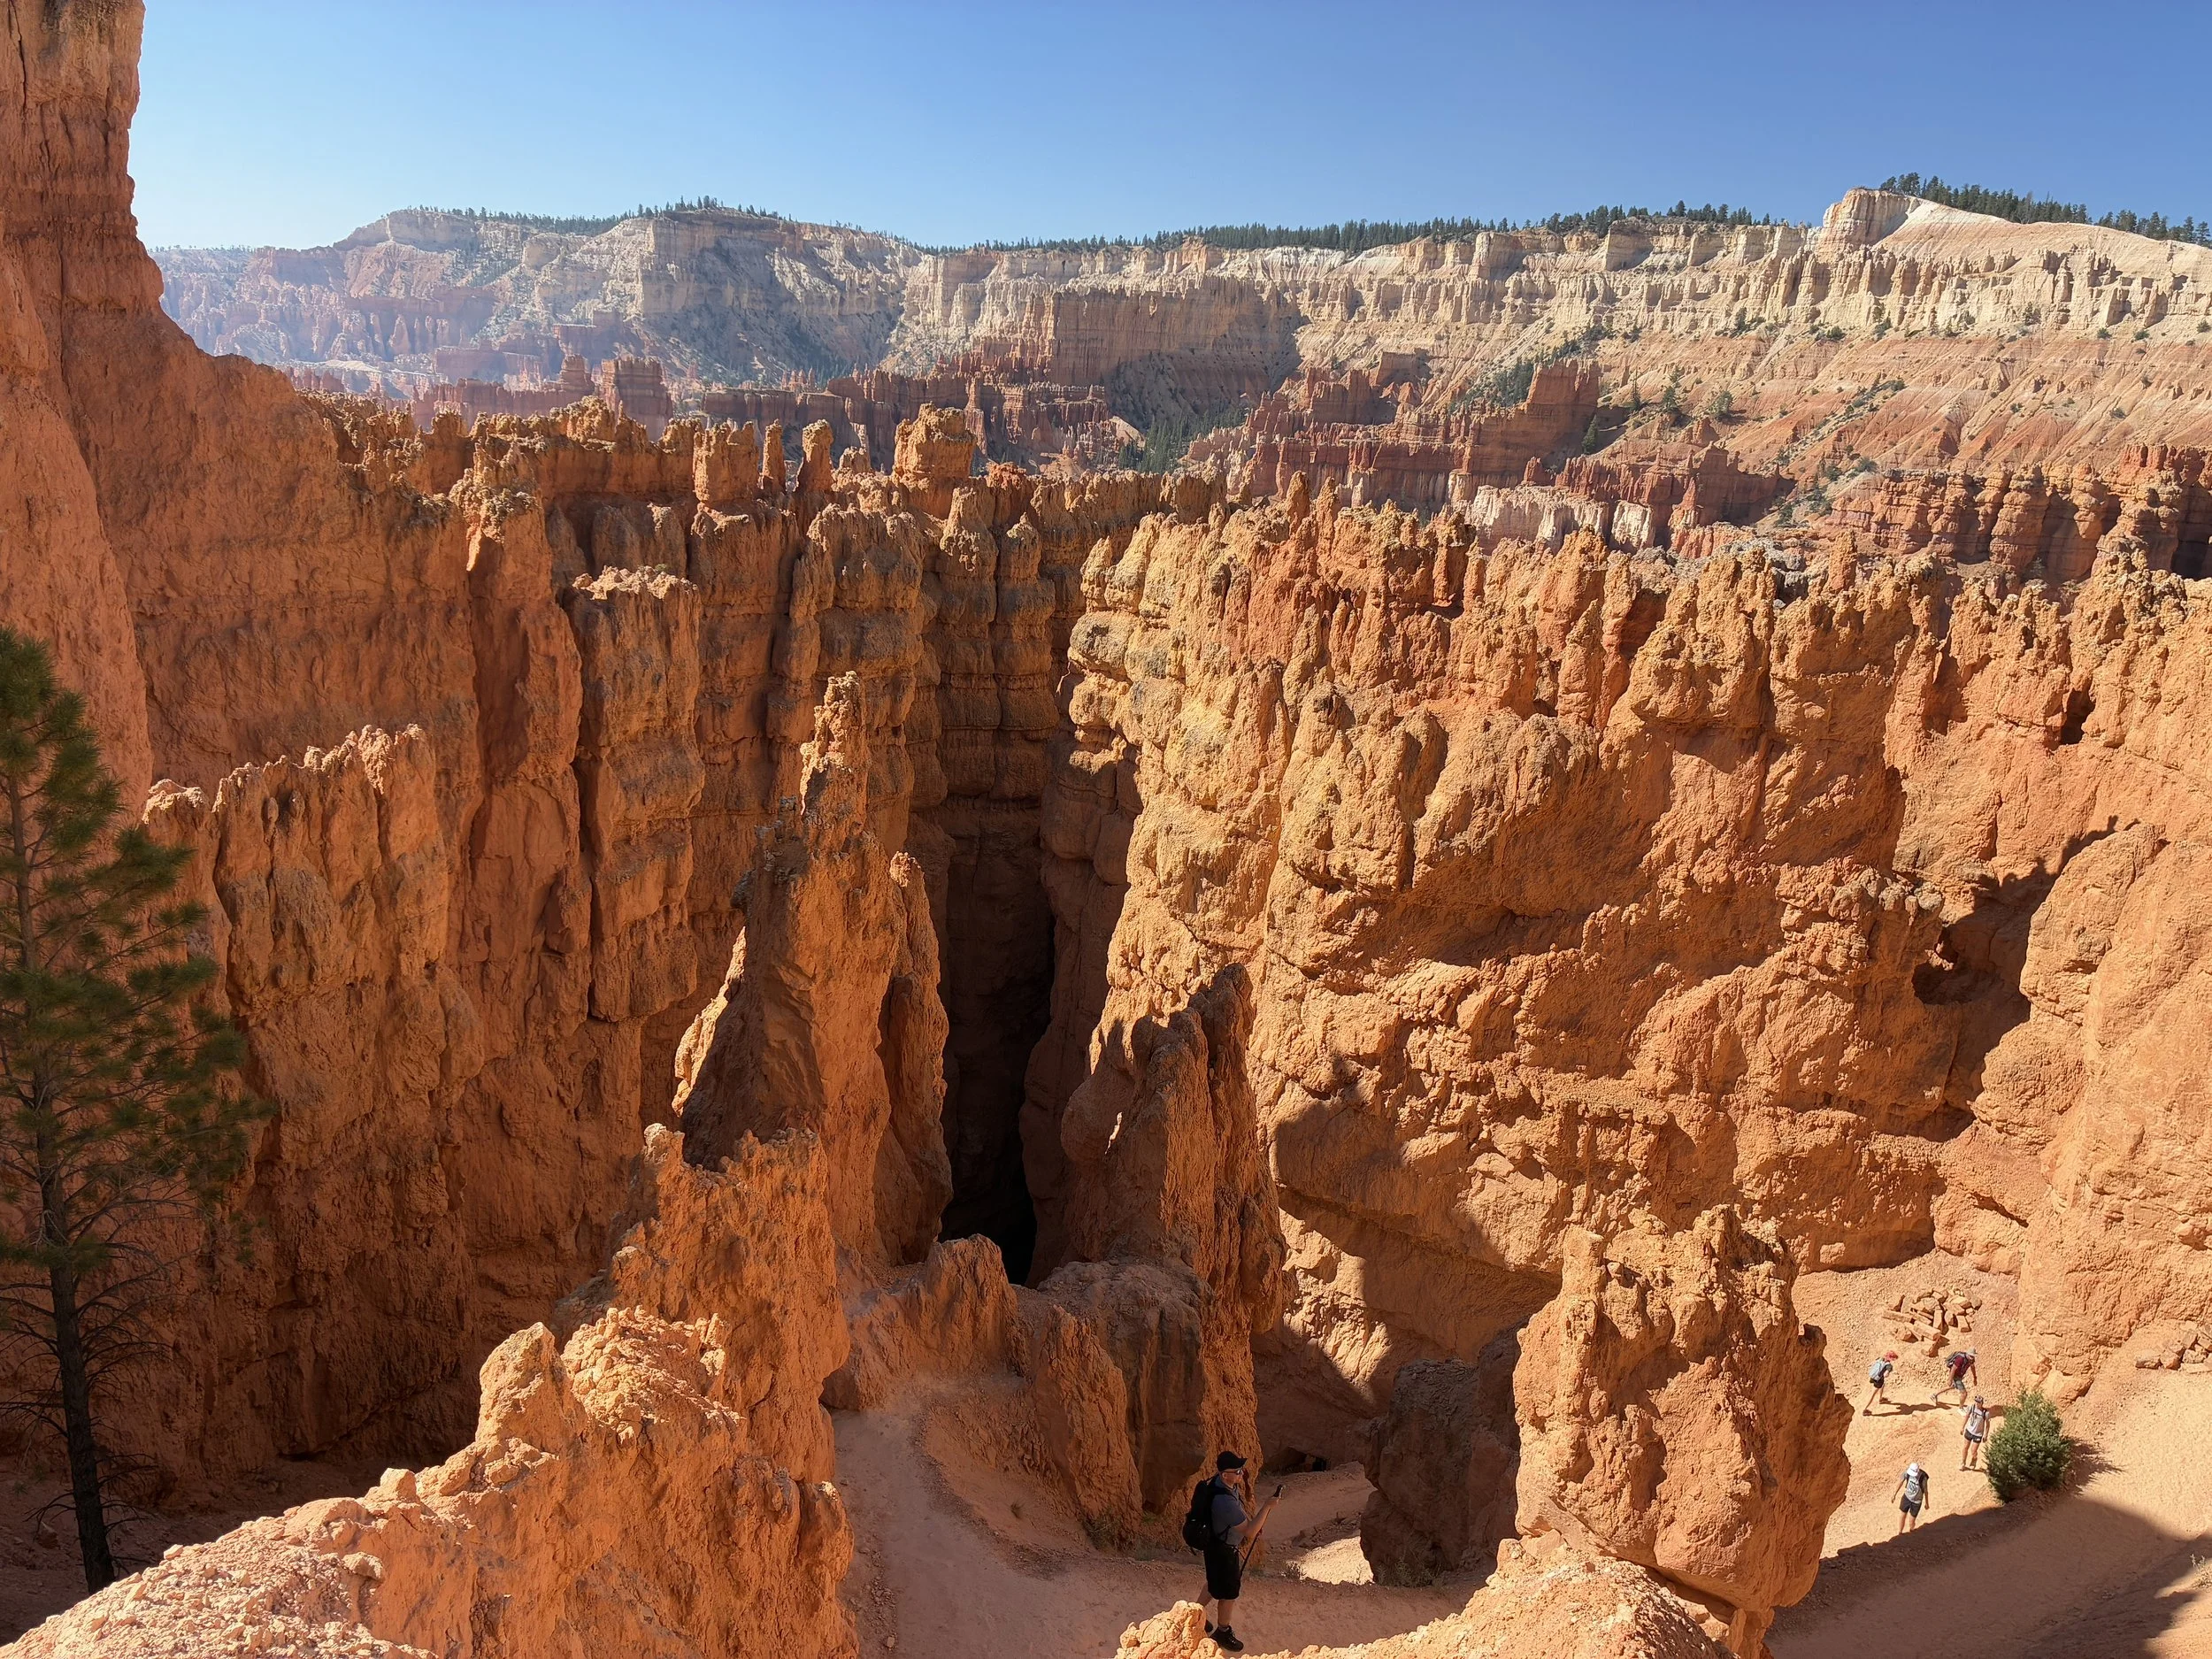
Bryce Canyon, Wall Street – From the trailhead, the Wall Street trail descends into the heart of hoodoos rapidly
In the summer, the best time of day to hike this loop is in the morning. We hiked the Peekaboo Loop before climbing back up Navajo, and by that point in the day (midafternoon), the majority of the trail was in full sun, except the very corners of each switchback.
Bryce Canyon, Wall Street – There are a lot of switchbacks – this keeps going for almost the full 0.7 mile trail. Going down isn’t too bad, but it’s a beast to walk back up.
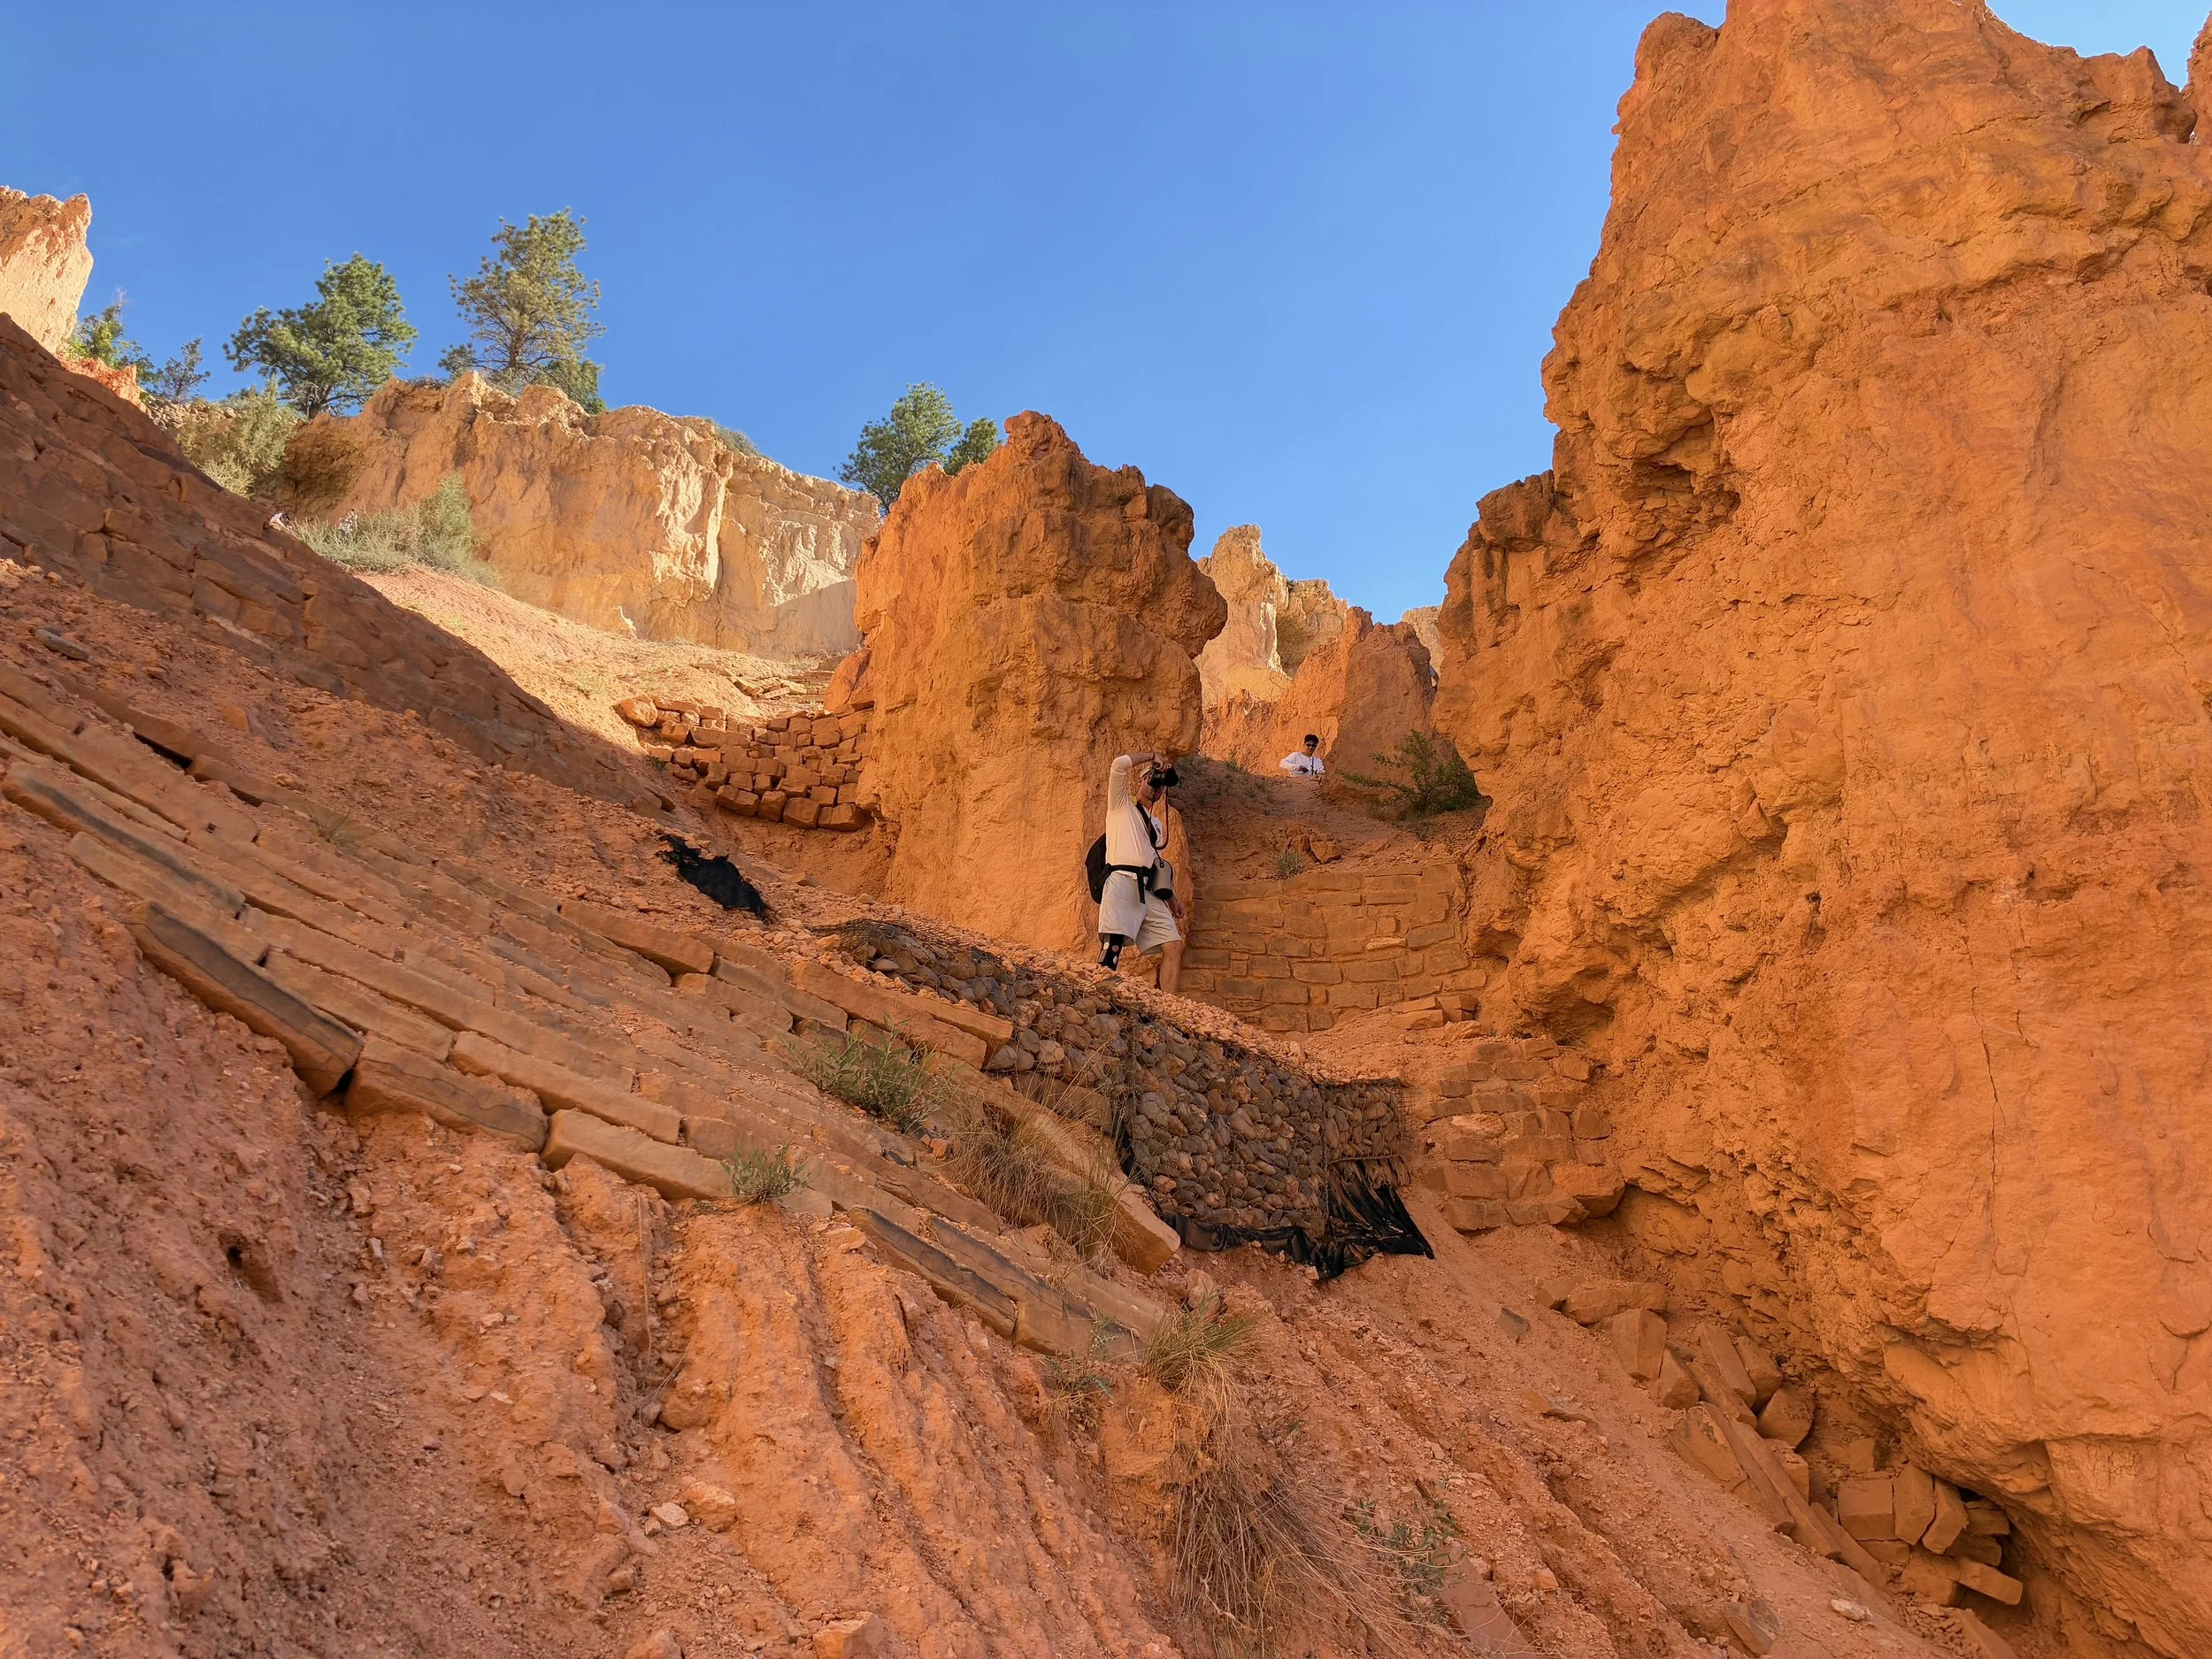
Bryce Canyon, Wall Street – This is my picture of Chris taking the picture above of us. We are only two switchbacks below him - these switchbacks are steep.
There is a small, short tunnel through the hoodoos that leads to more…. Switchbacks. Yep, like I said, most of this trail is made of switchbacks.
Bryce Canyon, Wall Street – This tunnel is easy to get through but likely requires ducking.
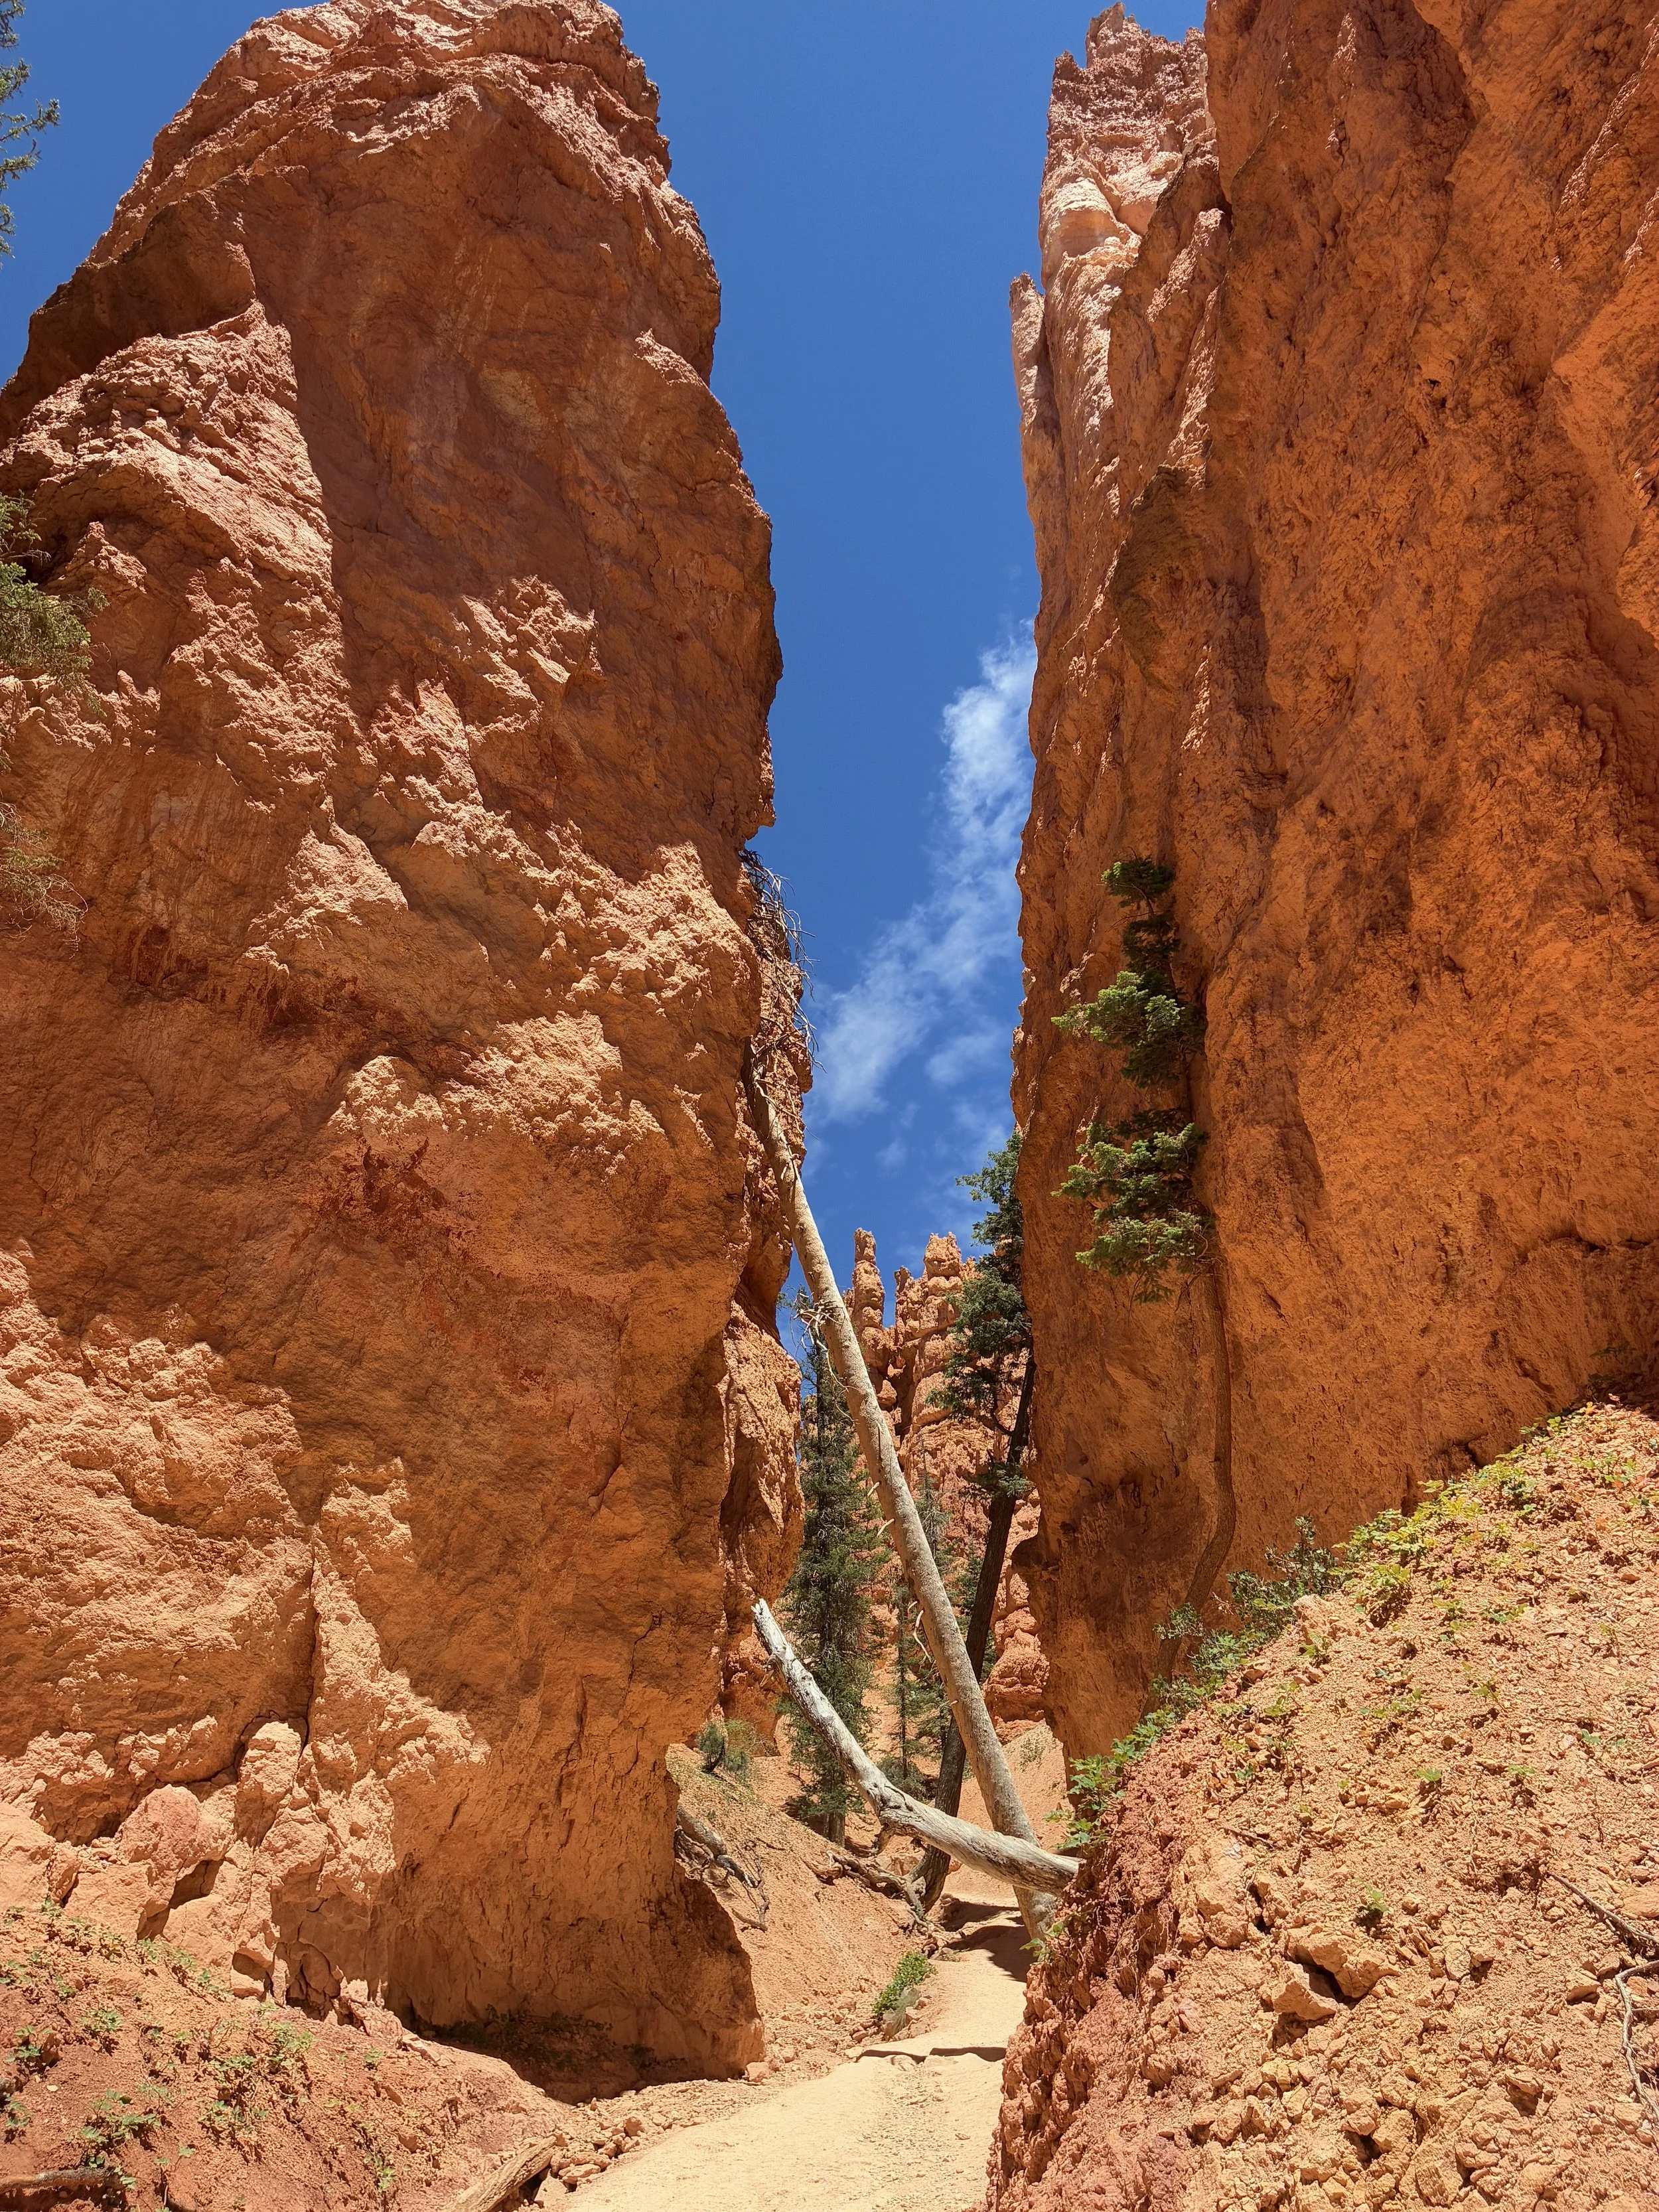
The trail continues down more switchbacks, all the way to the slot canyon – “wall street” formed between two huge hoodoos.
Bryce Canyon, Wall Street – Selfie time – We laughed here as the trail name suddenly made sense to us, just like how “Tower Bridge” made sense once we saw it. These rock features are well-named.
There is a short section through the hoodoos. The passageway between the rock walls is wide enough that it shouldn’t be too bad for anyone that gets claustrophobic, but it’s tight enough that it’s hard not to feel small in this world when hiking through it.
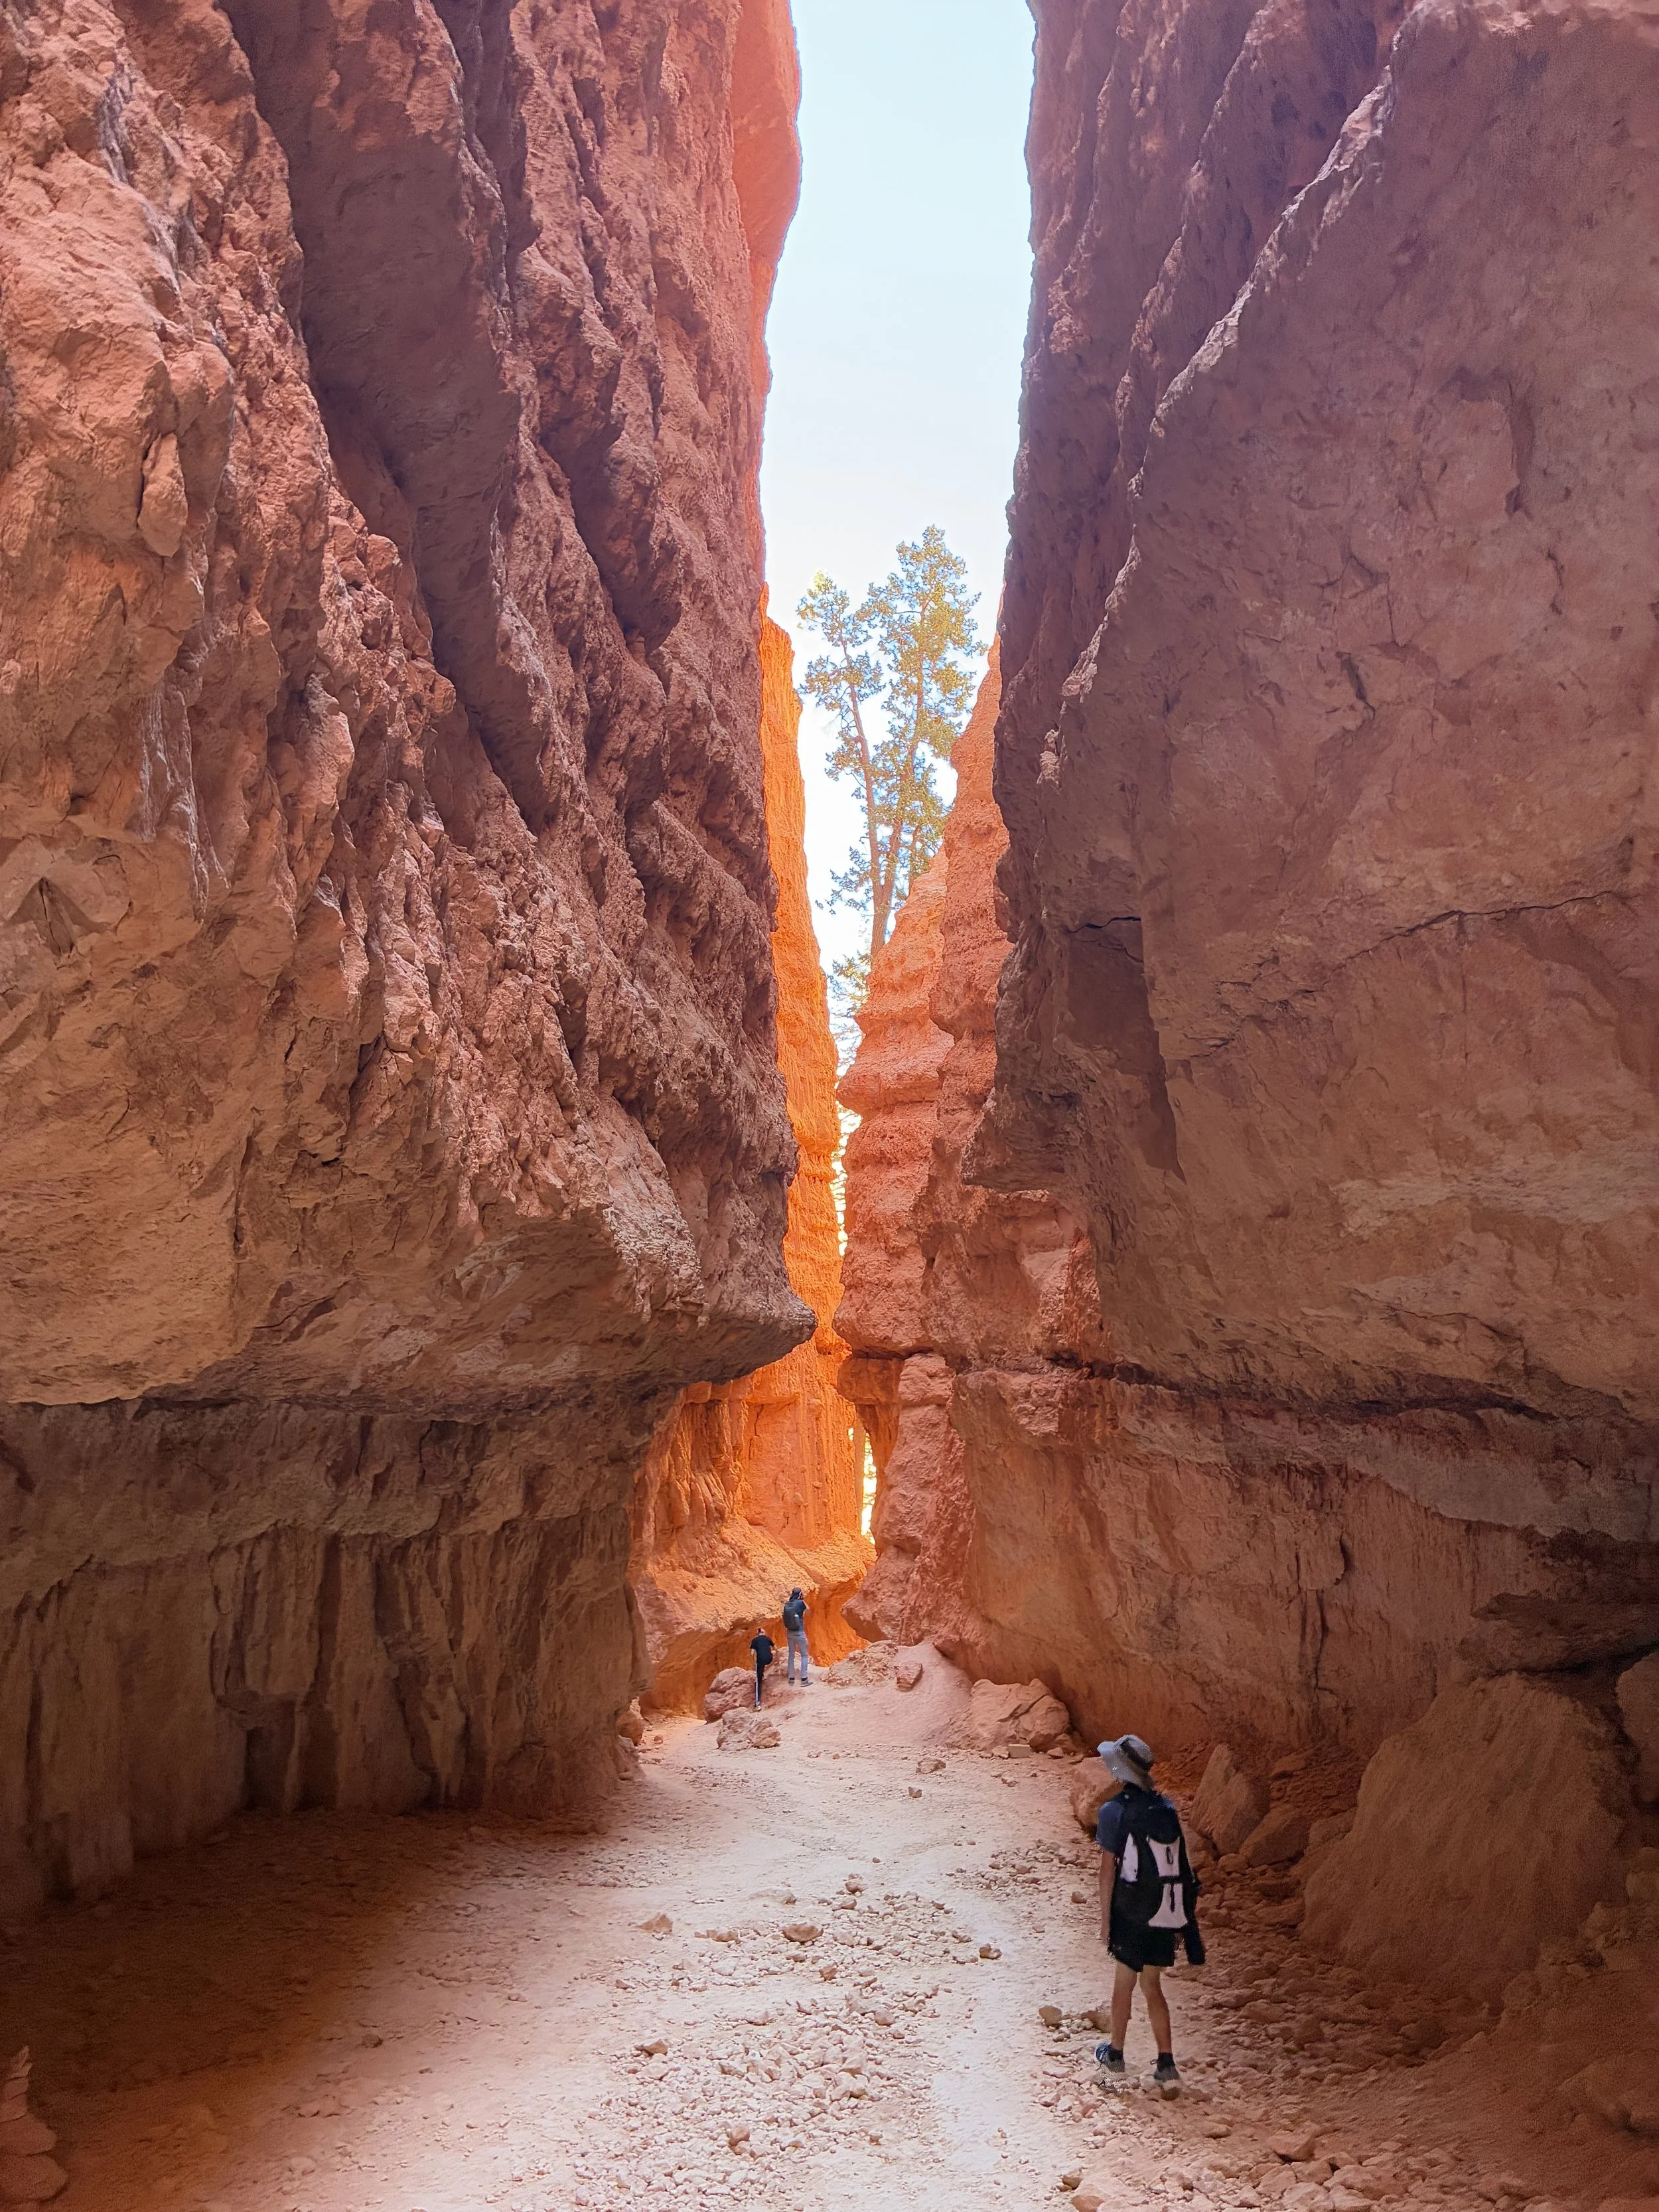
Bryce Canyon, Wall Street – Passing through “Wall Street.” The first Douglas Fir is visible here, but you probably won’t notice it yet, due to being distracted by these huge rock walls on both sides.
The switchbacks are done at this point in the Wall Street trail. At the end of Wall Street, a huge Douglas Fir becomes the center of attention. All we could think about as we walked towards this tree was pondering how it could have possibly grown here with such little sunlight.
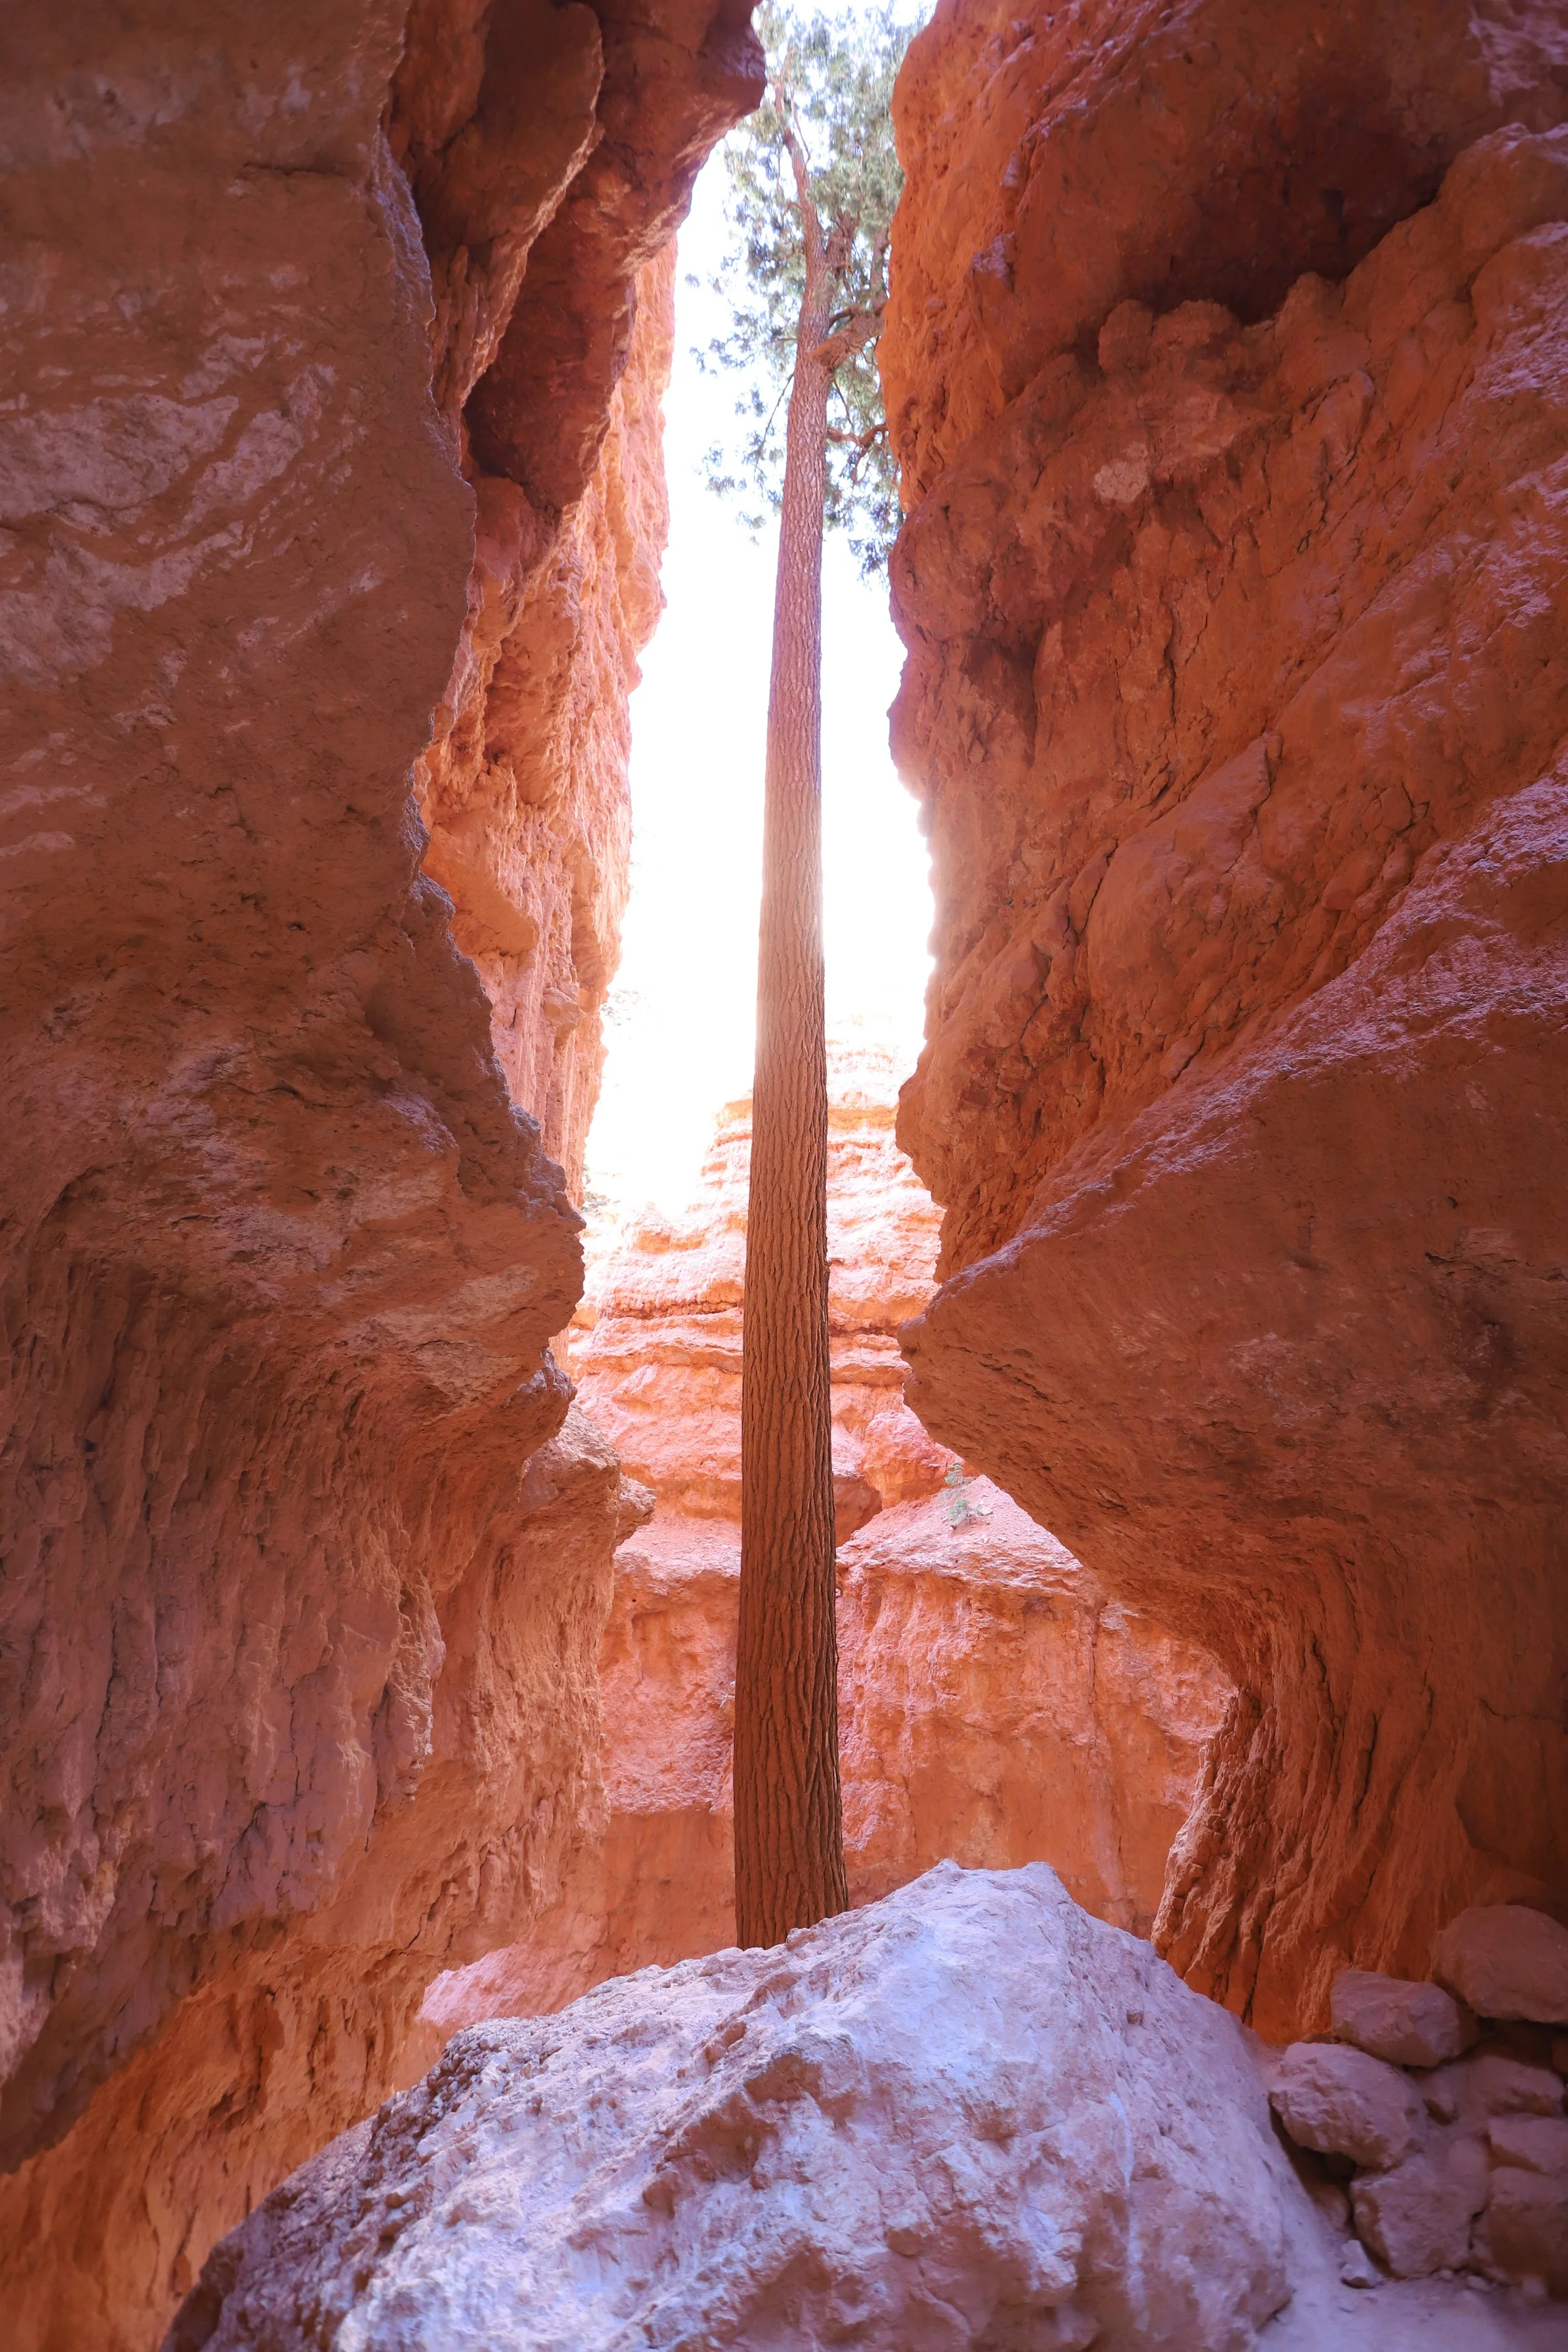
Bryce Canyon’s Most Famous Douglas Firs along the Wall Street trail.
After passing around the first tree, a second tree comes into vision. This section of Wall Street, under the Douglas Firs, is one of my favorite spots inside of Bryce Canyon.
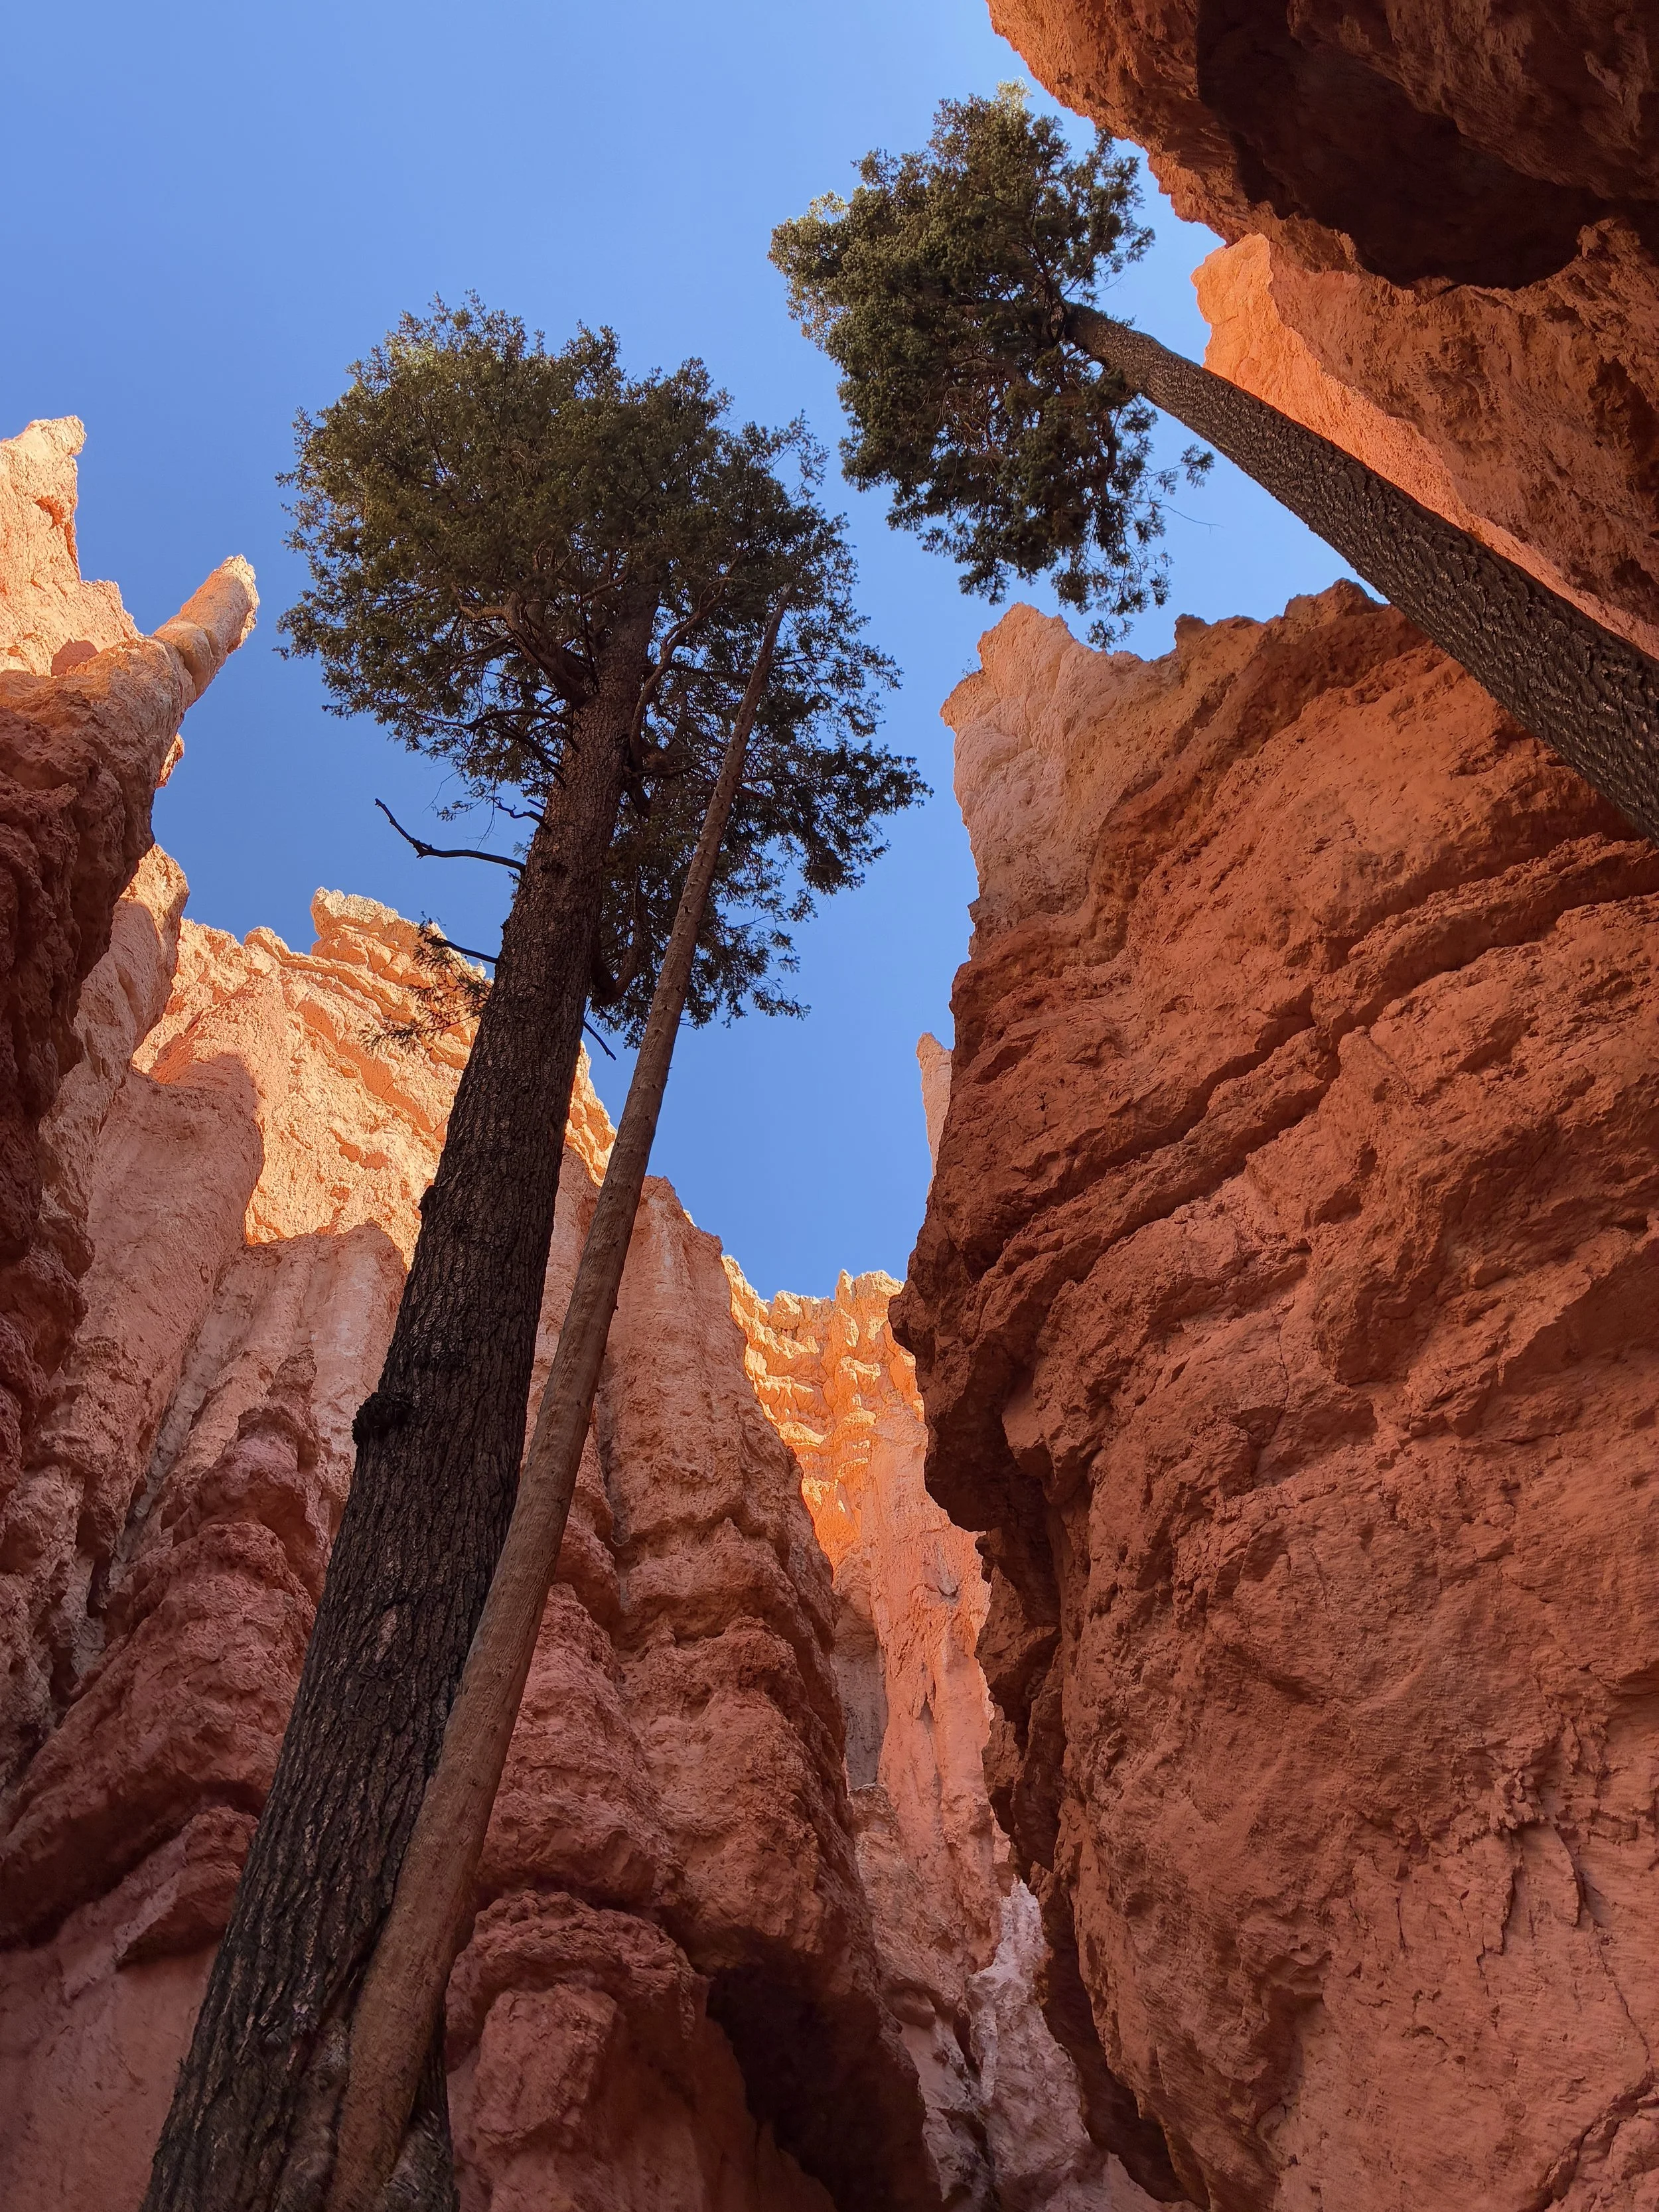
Bryce Canyon – Wall Street’s Douglas Firs
The trail widens out into first a valley with more trees, and then it widens out significantly further. Stay to the left if hiking the loop back to Navajo. We went to the right when the trail split and walked along a short spur to the Peekaboo Trail.
I’m going to continue to the Navajo Trail, as that’s the loop most people will do. My review of Peekaboo Loop will follow, even though we hiked Wall Street, then Peekaboo Loop, then Navajo.
Last section of the Wall Street trail, before it widens out and splits with Peekaboo Loop.
8) Navajo
Distance - 0.6 miles (one-way)
Elevation Gain - From Sunset Point down to the bottom of Navajo, the trail loses 800ft (climbing into the canyon) or gains 800ft (climbing out)
Trailhead Location – There is parking on the loop road next to the trailhead for Sunset Point. Sunset Point is also a shuttle stop.
Helpful Information - The Navajo Loop – Wall Street and Navajo – is listed as a “moderate” hike in the park brochure. This loop is the most popular trail in Bryce Canyon National Park. Although this loop is short (1.3 miles), there isn’t an easy way back up the parking lot. Both trails have steep switchbacks and are mostly exposed to the sun in the summer afternoons. The parking lot is also at over 8,000ft in elevation. This may be one of the easier trails in Bryce Canyon, but that doesn’t make this trail “easy.” Most of the hikes in this park are extremely difficult. Kids will be able to do this hike, but I would rank it as “hard.”
Bring water along this hike!
There is a second loop option for anyone looking for a longer hike – Hike down Navajo and up Queen’s Garden (2.9 mile hike with the rim trail to create the loop)

The Navajo Trail is marked in dark green.
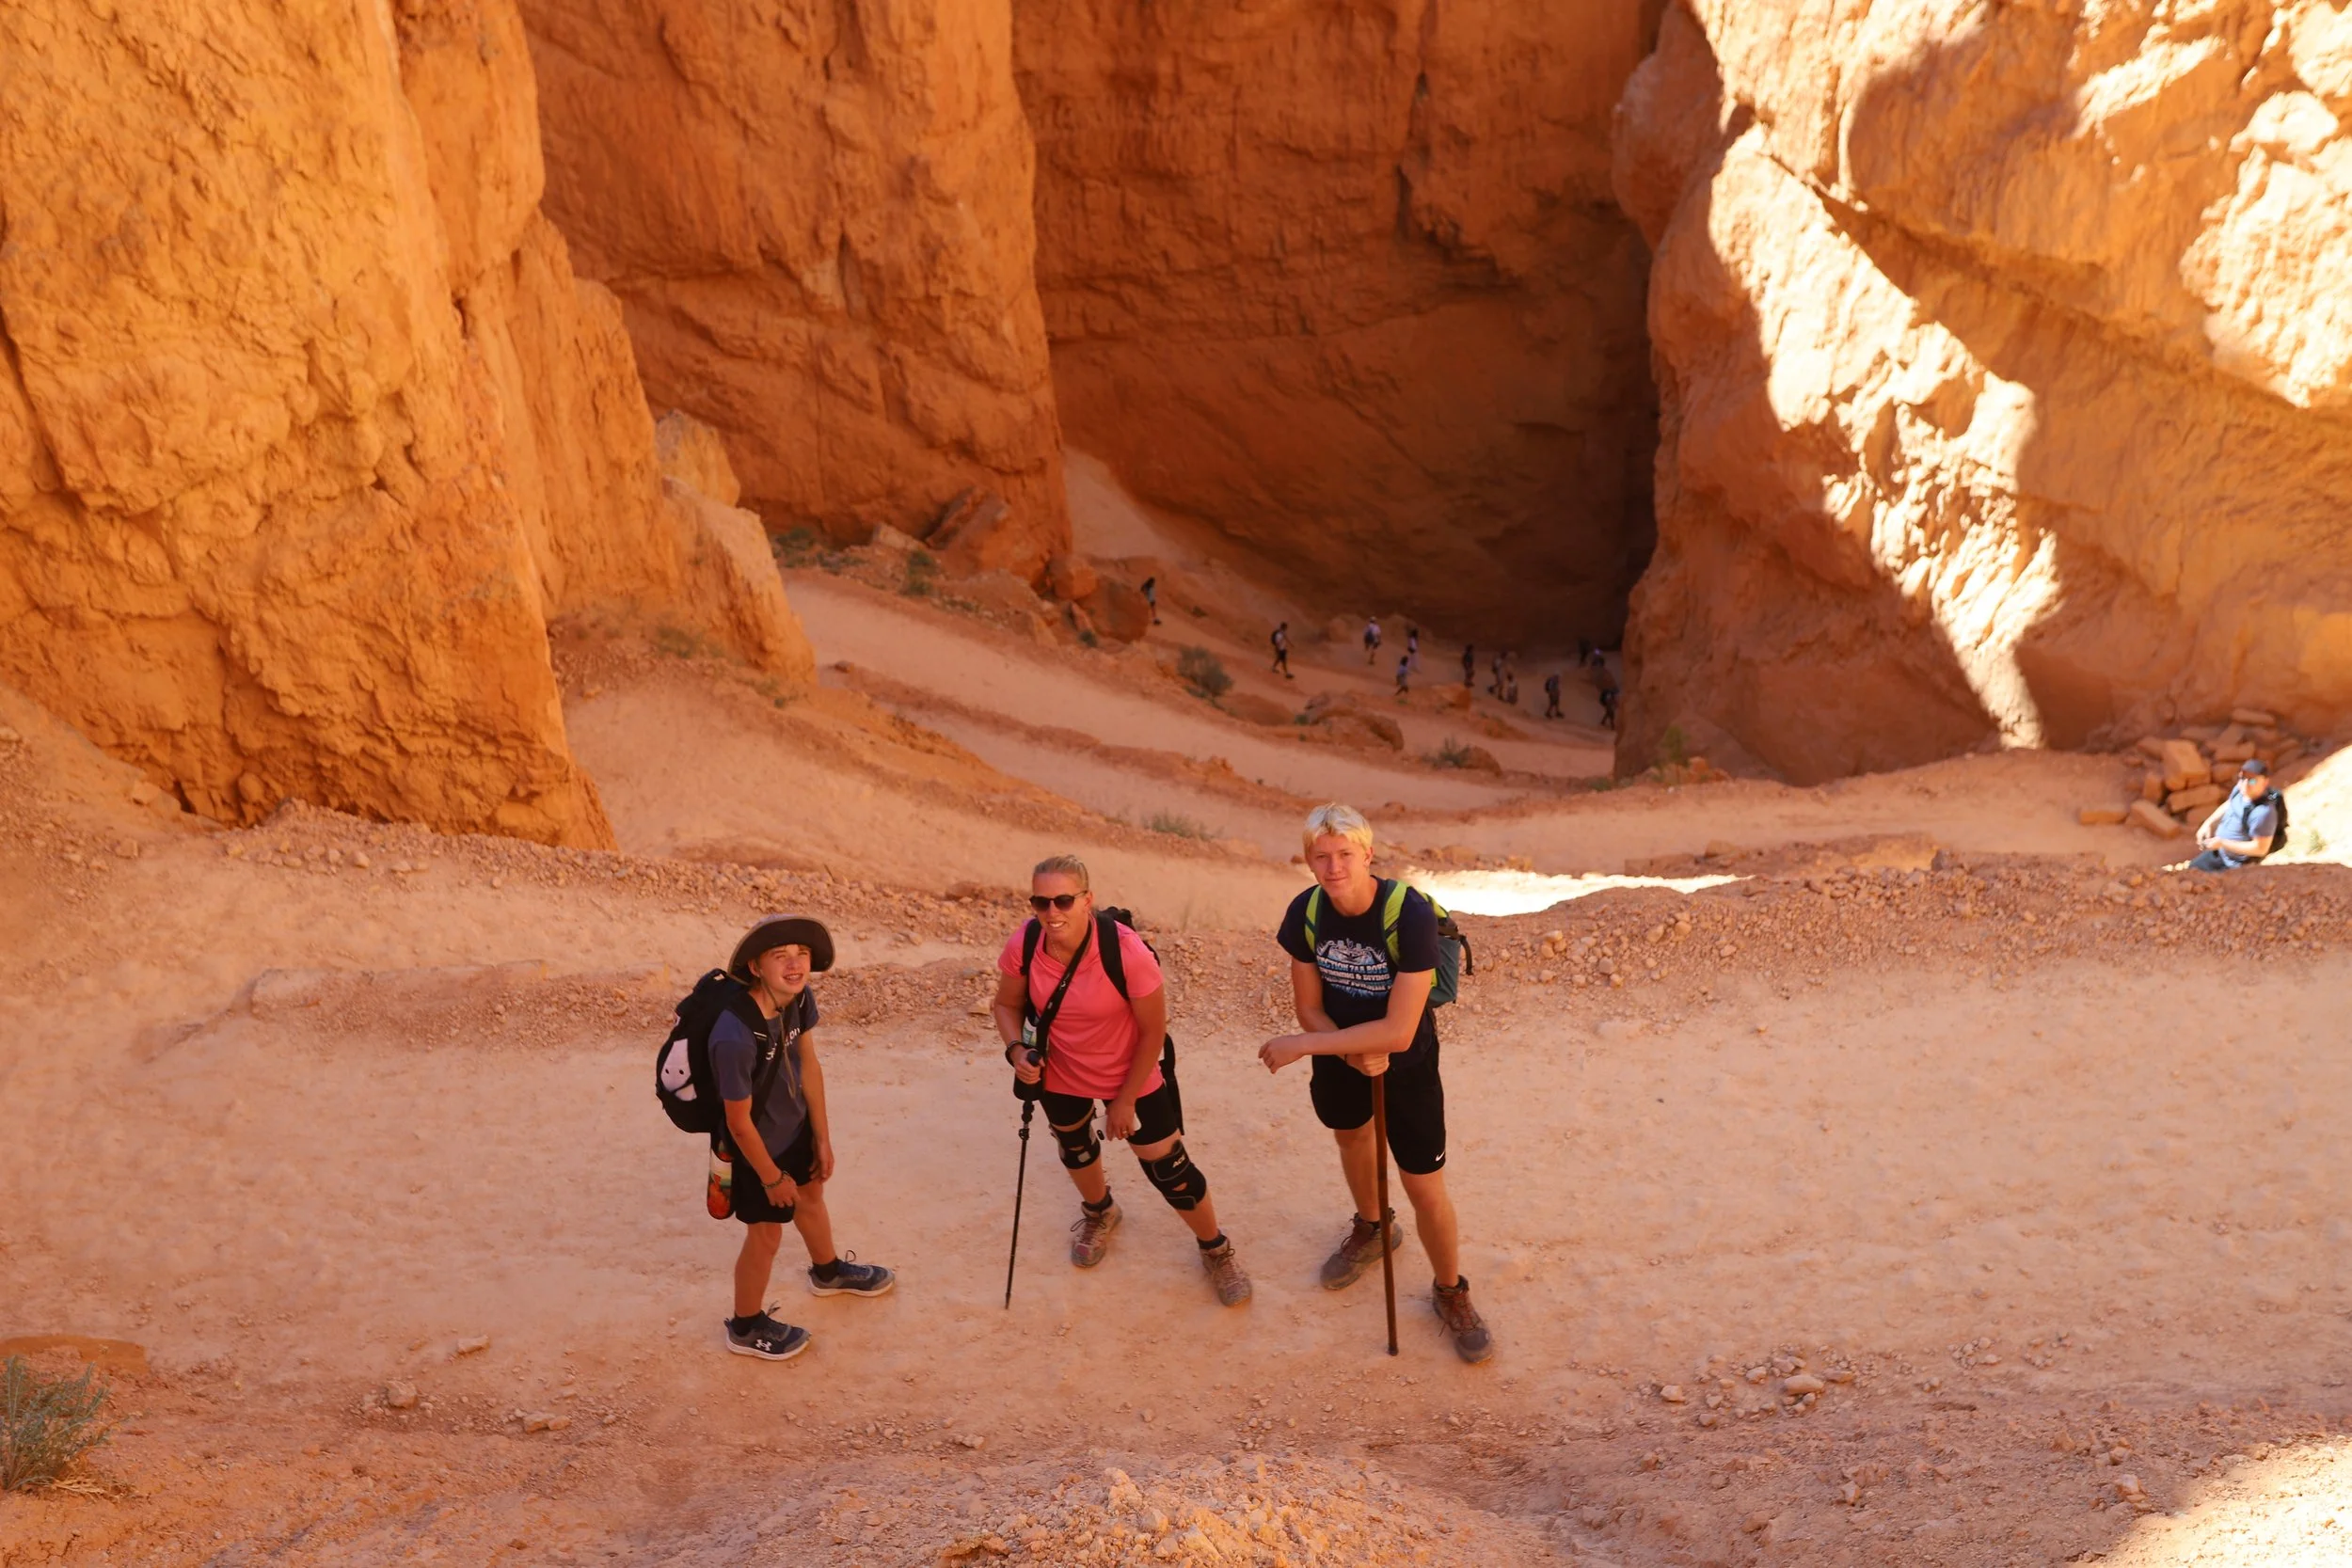
We hiked down Wall Street, and then completed the Peekaboo Loop before walking back up Navajo. It was mid-afternoon by the time we climbed back out of the canyon, and most of the trail was in the sun by this time.
Bryce Canyon, Navajo – Beginning the journey back up and out of the canyon
Navajo isn’t quite as pretty as Wall Street at the bottom because there is no dramatic slot canyon, but there are several pine trees, and being at the base of the hoodoos is still quite incredible.
Bryce Canyon – The trail starts to climb gently at first
From where the switchbacks start, the rest of Navajo is a tough incline back up to the trailhead. There was a little bit of shade at the corners of each switchback to pause and take a few breaths out of the sun. This took us awhile to climb out.
Bryce Canyon – Navajo – Switchbacks looking down
Towards the top of Navajo, Thor’s Hammer comes into view. This is the best part of the Navajo Trail. This structure is visible from the top, but it’s much more obvious why it was named Thor’s hammer seeing it from a head on view.
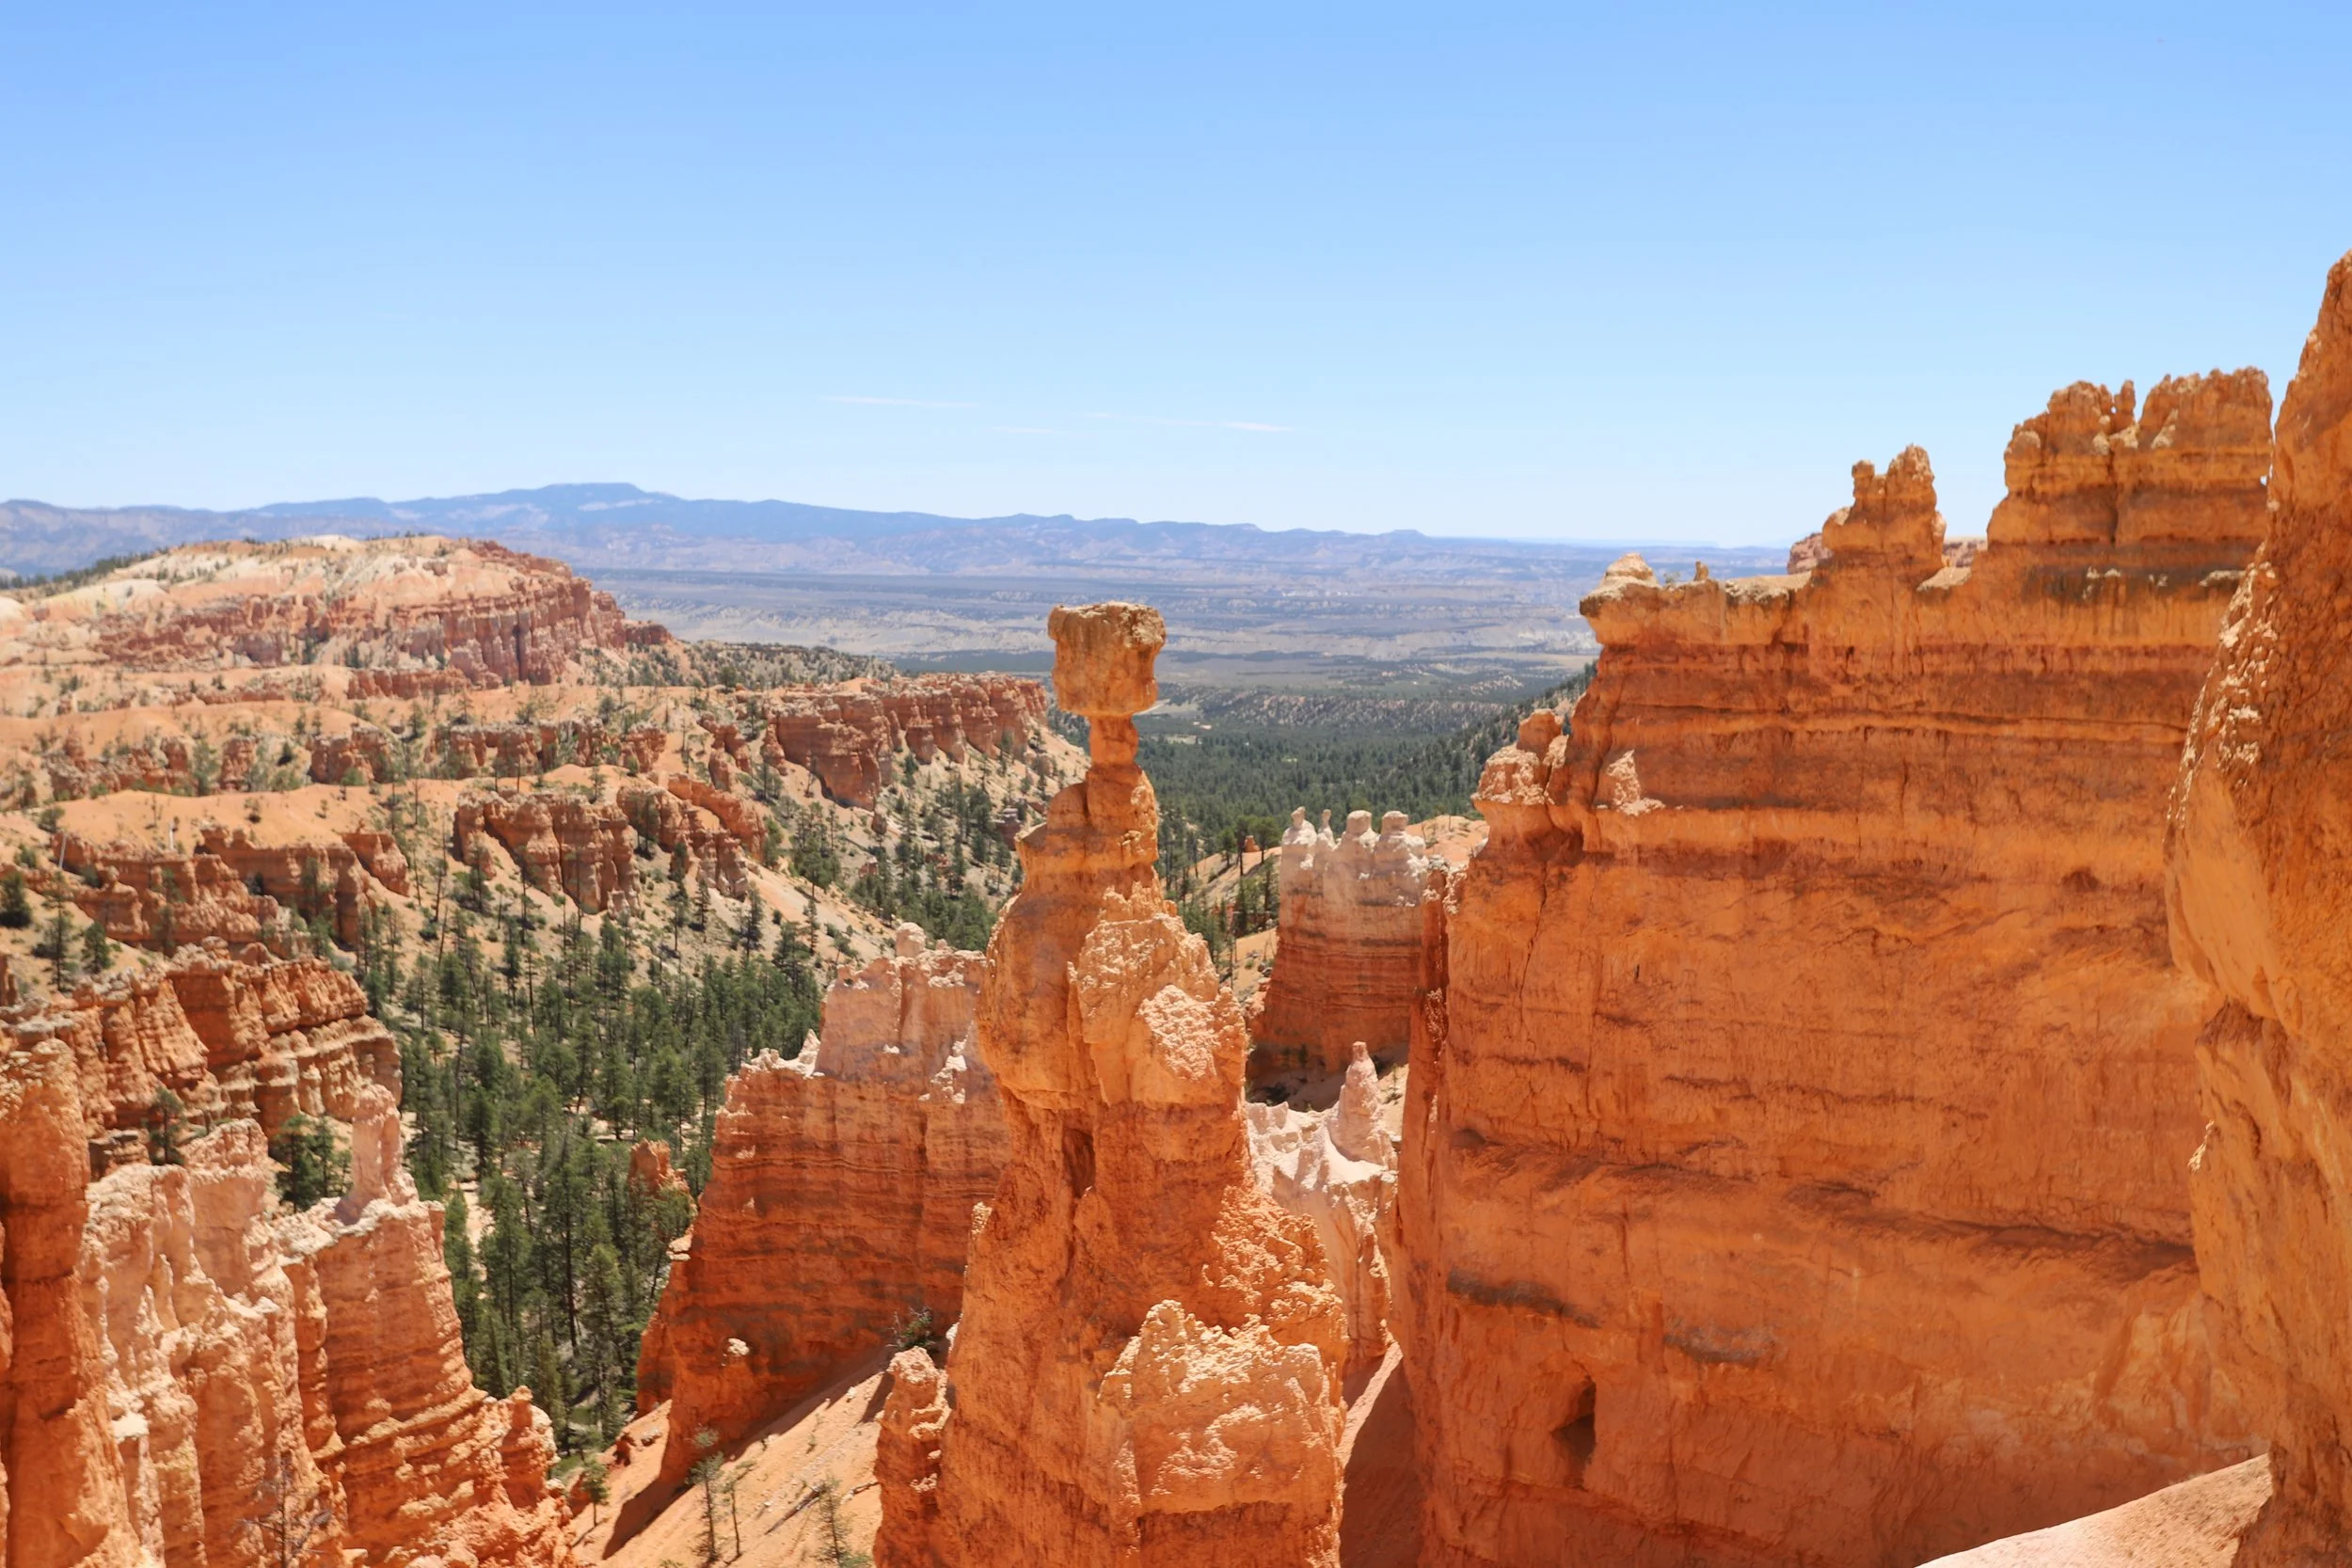
Bryce Canyon, Navajo - Thor’s Hammer
Bryce Canyon, Navajo – View from the top
As we were getting near the trailhead, we happened across a larger group of international tourists. An older couple was standing at the below viewpoint, and Chris is shouting “kiss, kiss,” but they didn’t understand. To translate, Chris handed them our phone and demonstrated. There was a lot of whooping and laughter when they understood what we wanted them to do.
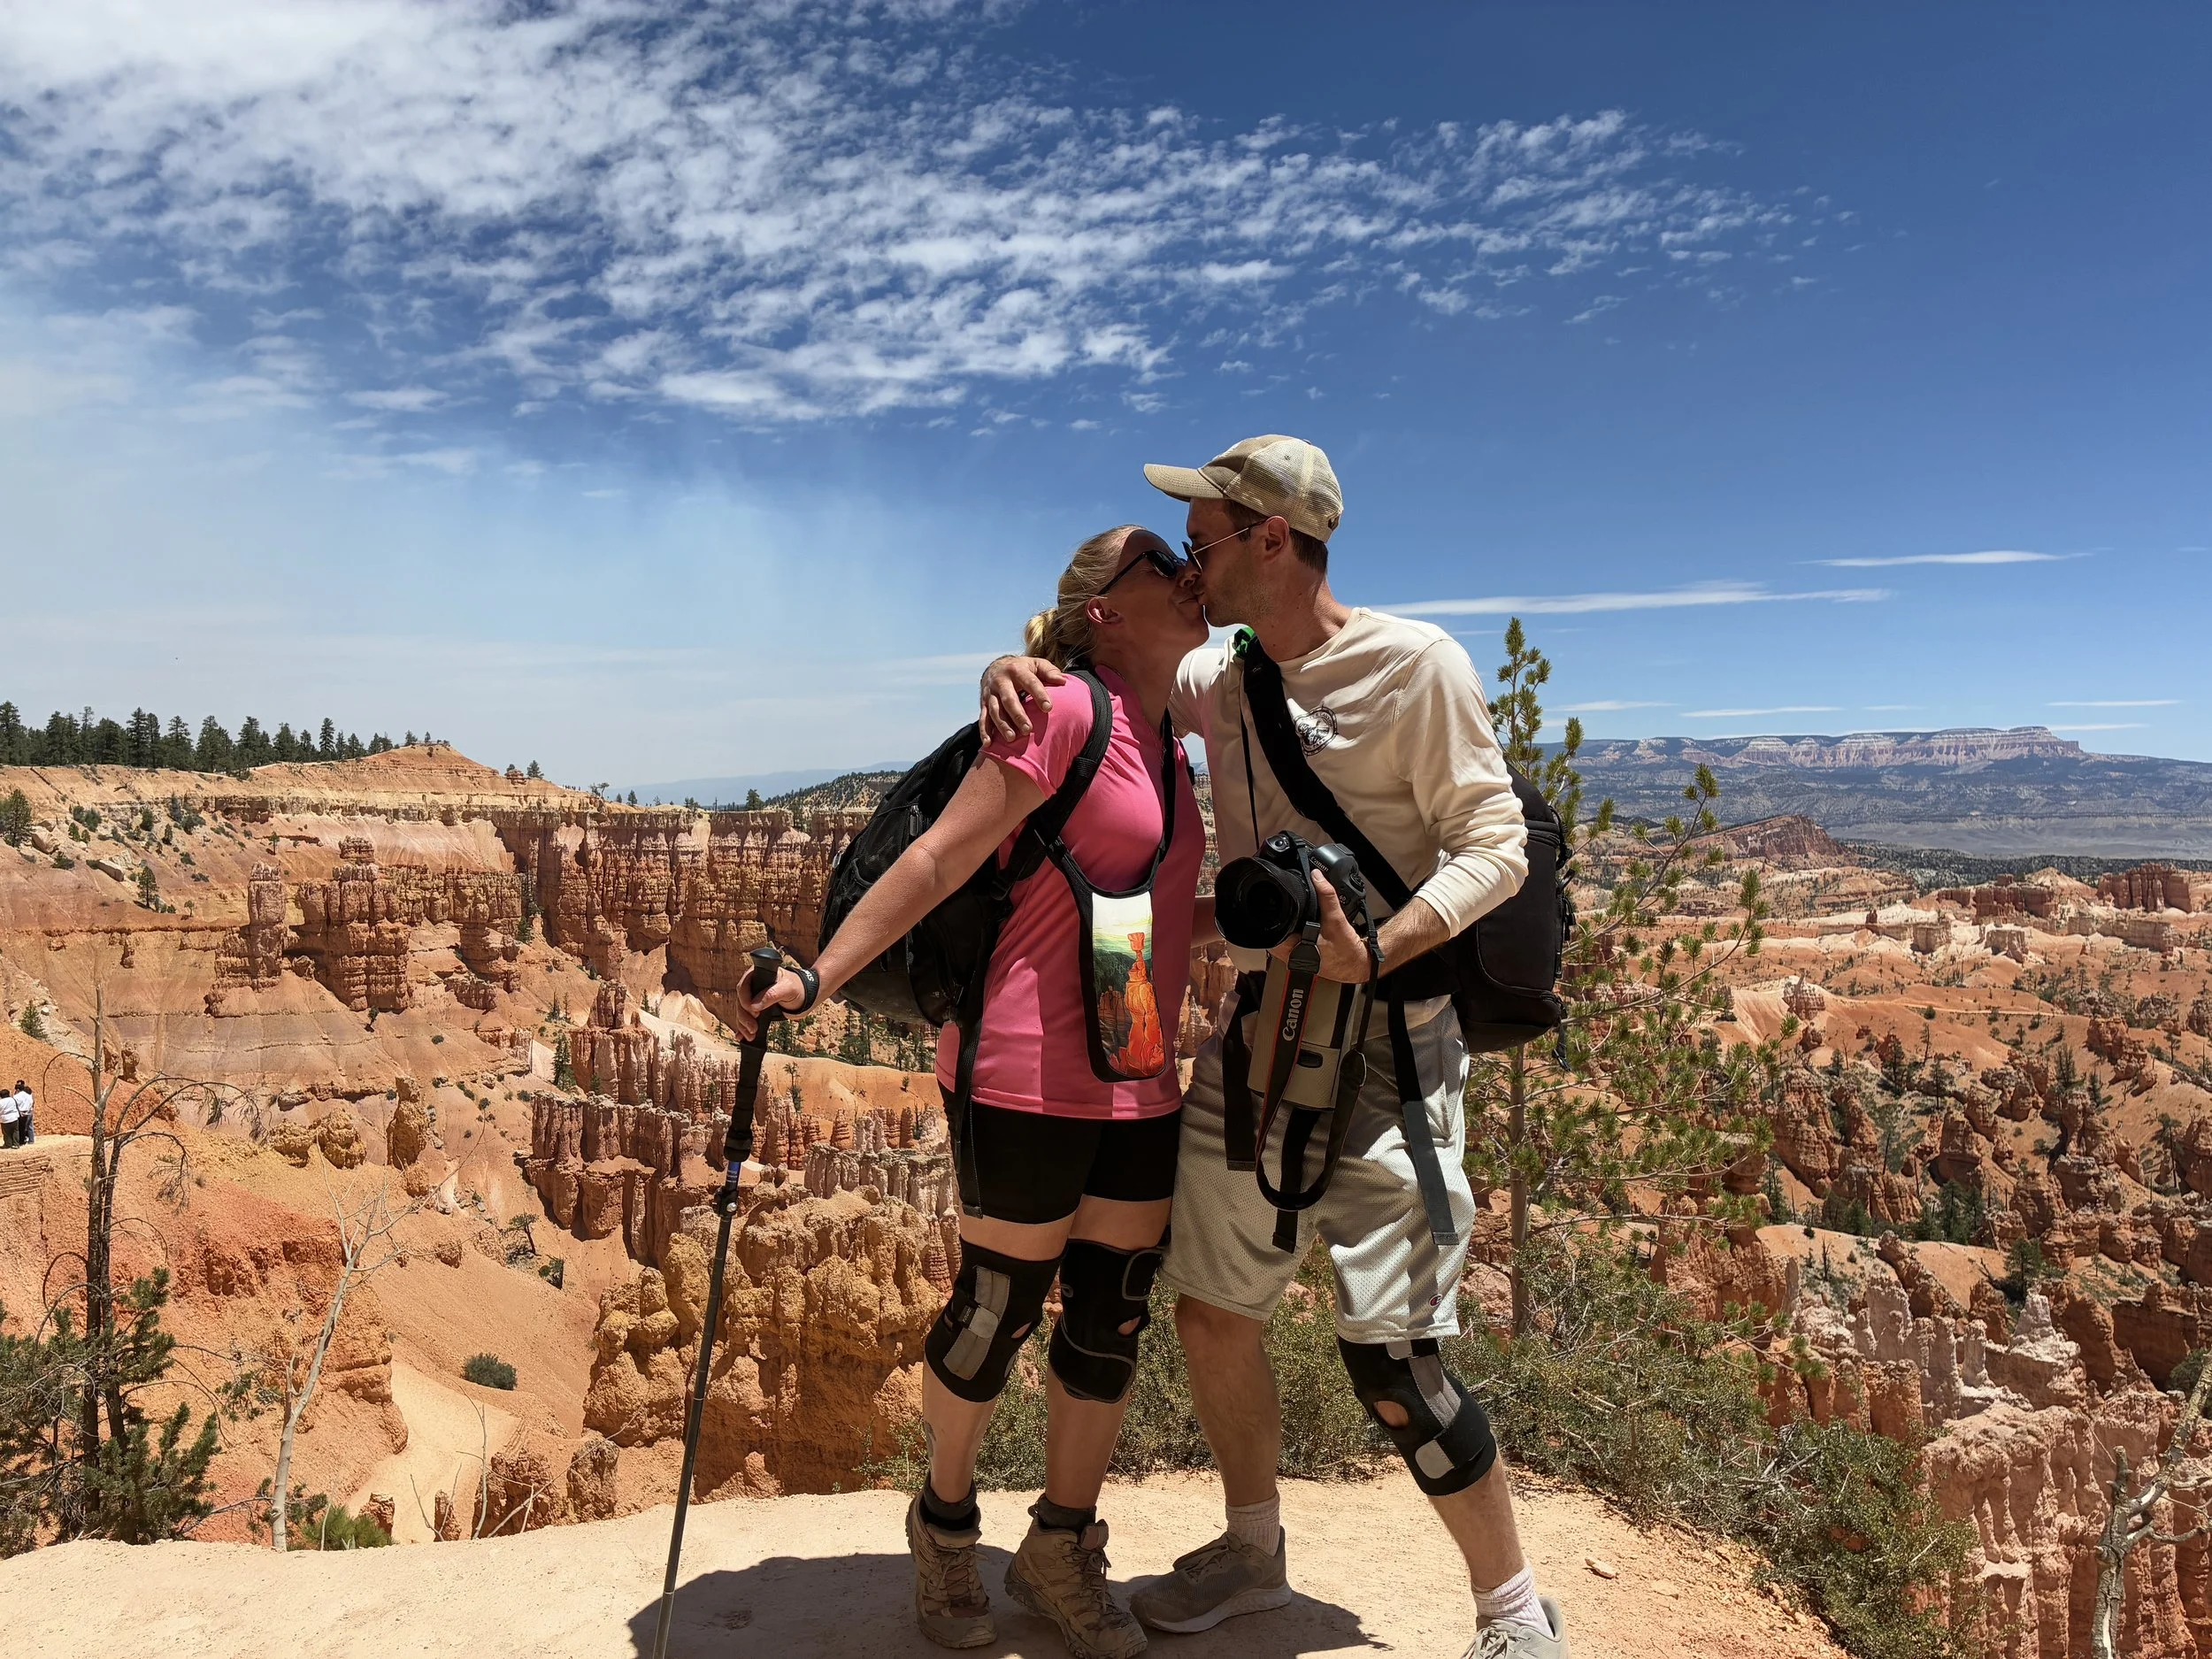
Bryce Canyon, Navajo
9) Peekaboo Loop Trail
Distance - 5.2 miles (Peekaboo Loop + Wall Street and Navajo) or 5.5 miles (Peekaboo Loop + out-and-back from Bryce Point)
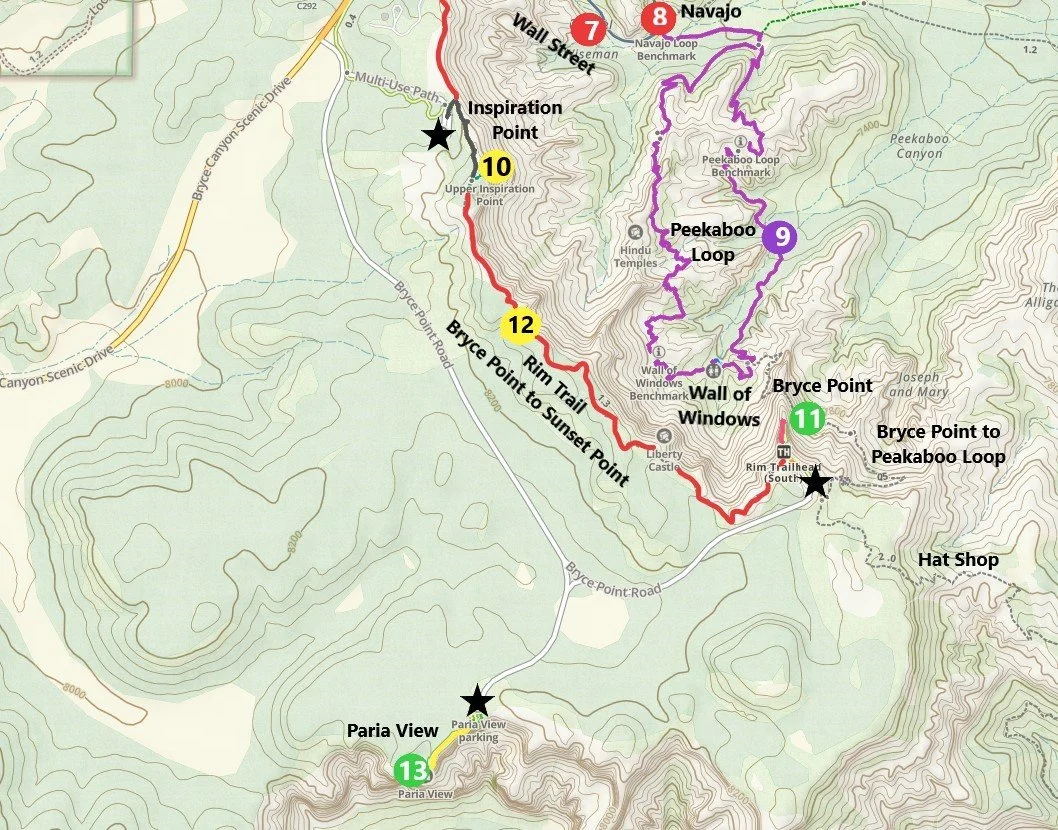
The third option is to leave a car at Sunset Point, and hike down Wall Street and half of Peekaboo Loop (go along the side of the loop with Wall of Windows). Exit the loop and hike out at Bryce Point. Take the shuttle back to Sunset Point (don’t forget to also stop at Inspiration Point). This option is 4.0 miles.
Elevation Gain - 1,530ft (Peekaboo Loop + Wall Street and Navajo) or 1,560ft (Peekaboo Loop + out-and-back from Bryce Point).
The third, one-way, option with the shuttle has an elevation gain of 1576ft (if travelling from Sunset Point to Bryce Point) or 1468ft if going from Bryce Point to Sunset Point. The one advantage to starting at Sunset Point is that the shuttle stops first at Bryce Point, then Inspiration, and then you’d be back at your car at Sunset. The other way would be easier, but the shuttle ride will go past several more stops before arriving back at Bryce Point.
Trailhead Location - There is parking on the loop road next to the Sunset Point trailhead. Additionally, Sunset Point is also a shuttle stop. There is also parking and a shuttle stop at Bryce Point.
There is parking on the loop road next to the trailhead for Sunset Point. Sunset Point is also a shuttle stop. For anyone starting at Bryce Point, there is a parking lot here as well, and it is also a shuttle stop.
Helpful Information - We saw several parents with young children on this hike, and I honestly don’t think they had any idea how hard this hike was going to be. Although the distance of either hiking option isn’t too terribly long for a full-day hike, the elevation gain is extremely tough. Peekaboo Loop isn’t up one part and down another. The entire trail is full of ups and downs. And the starting elevation at the rim is over 8,000ft. My family and I are decently in shape, and we honestly thought this hike was as hard as Fairyland Loop, although it didn’t take us as long.
The other thing to realize is that Peekaboo Loop Trail is shared with horses. There are sections of this trail that smell, a lot…
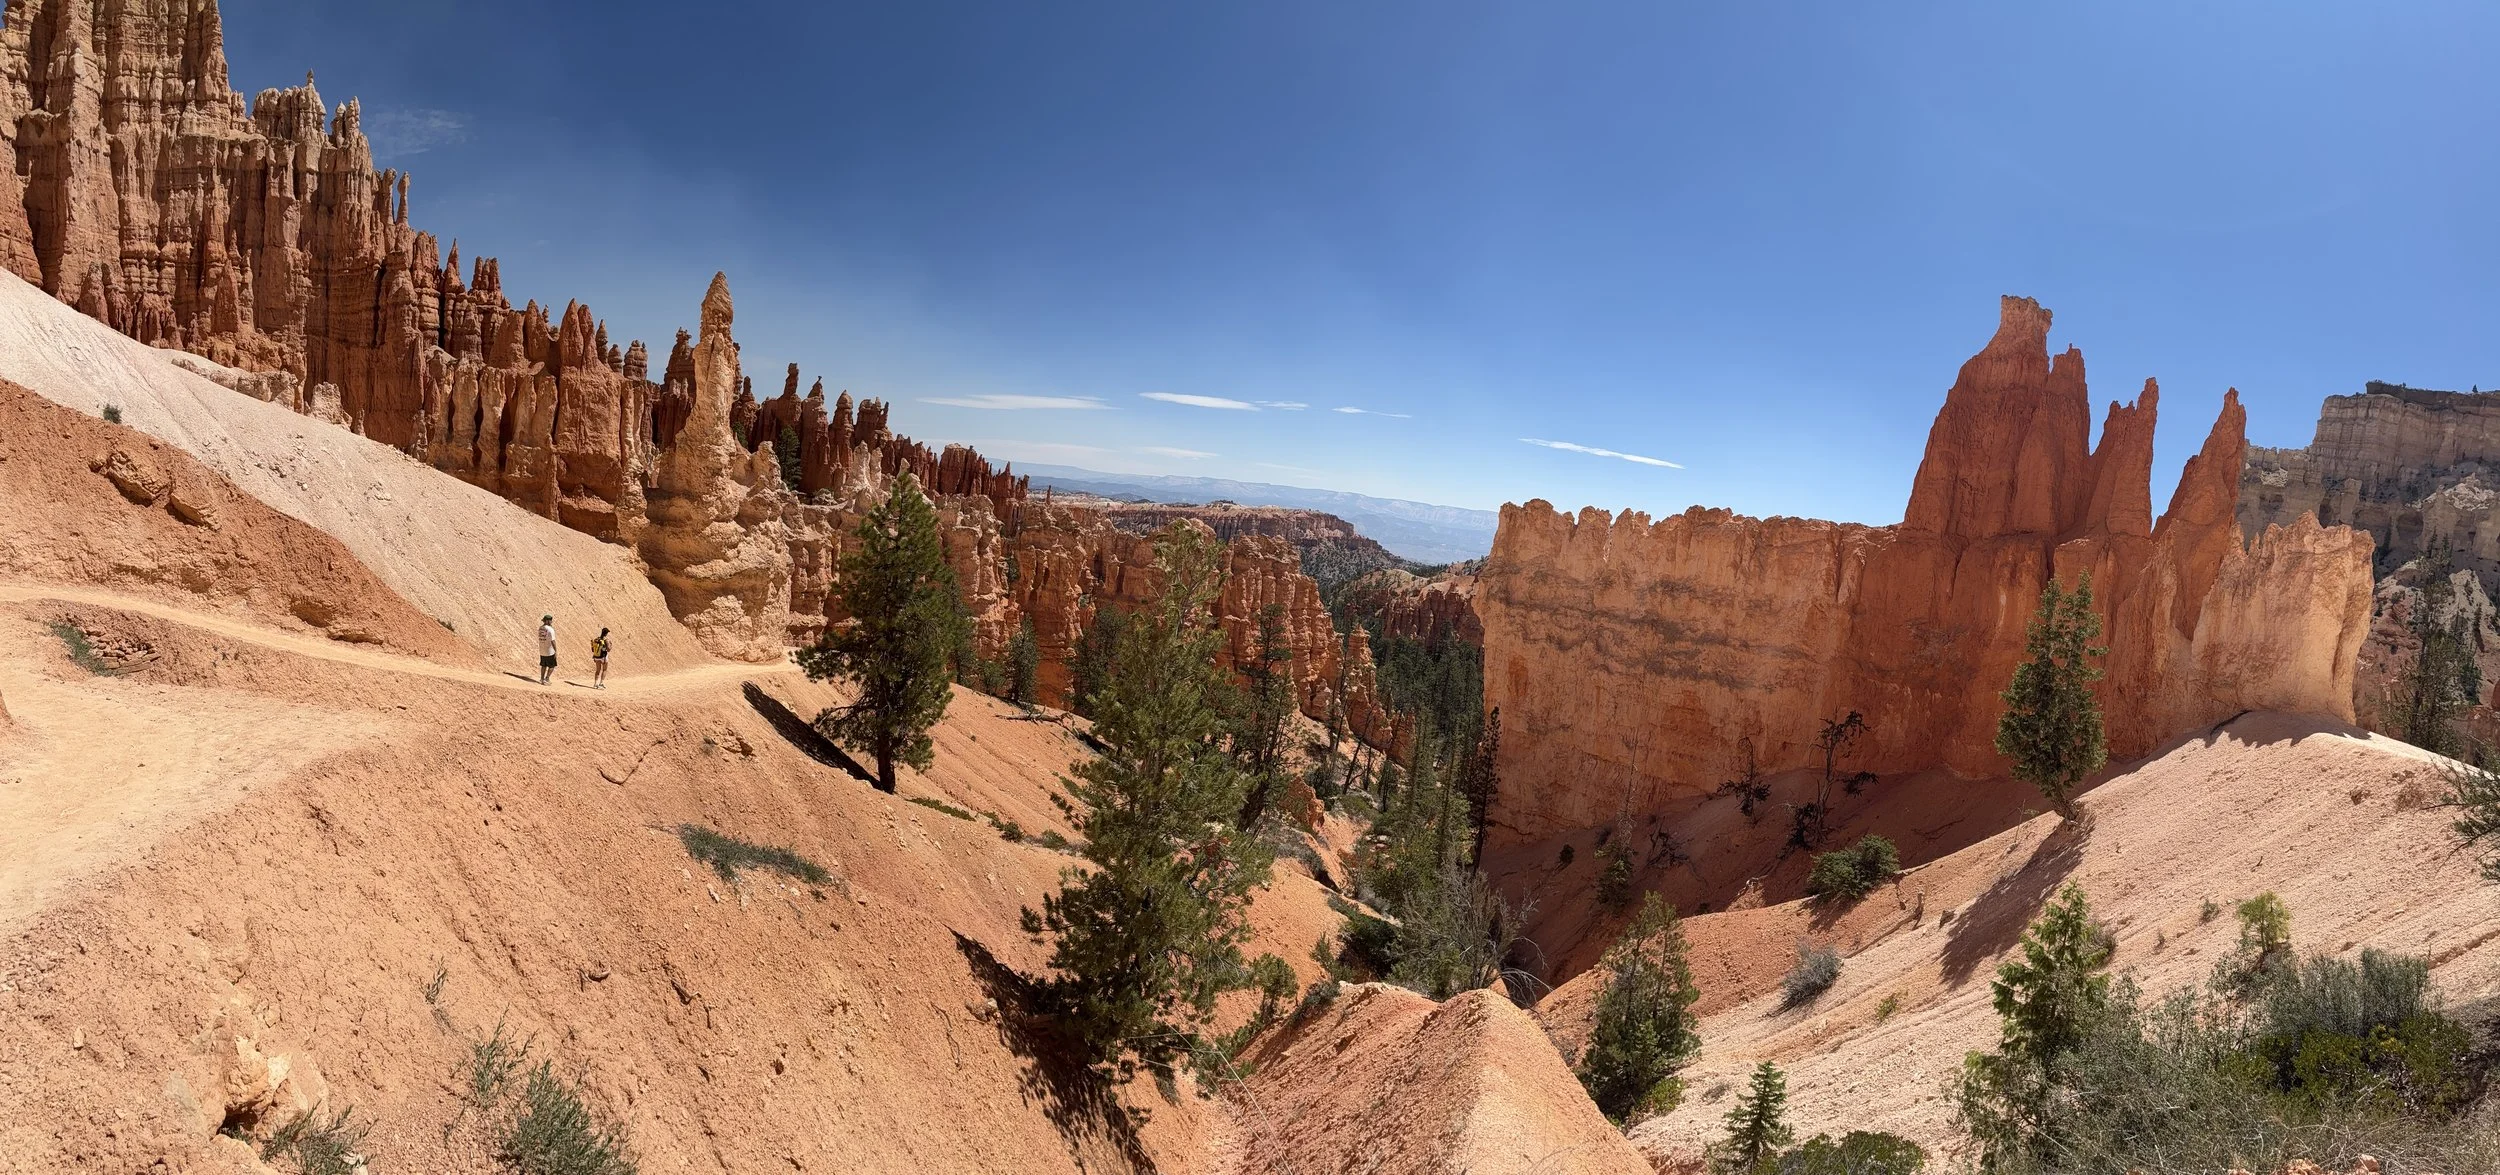
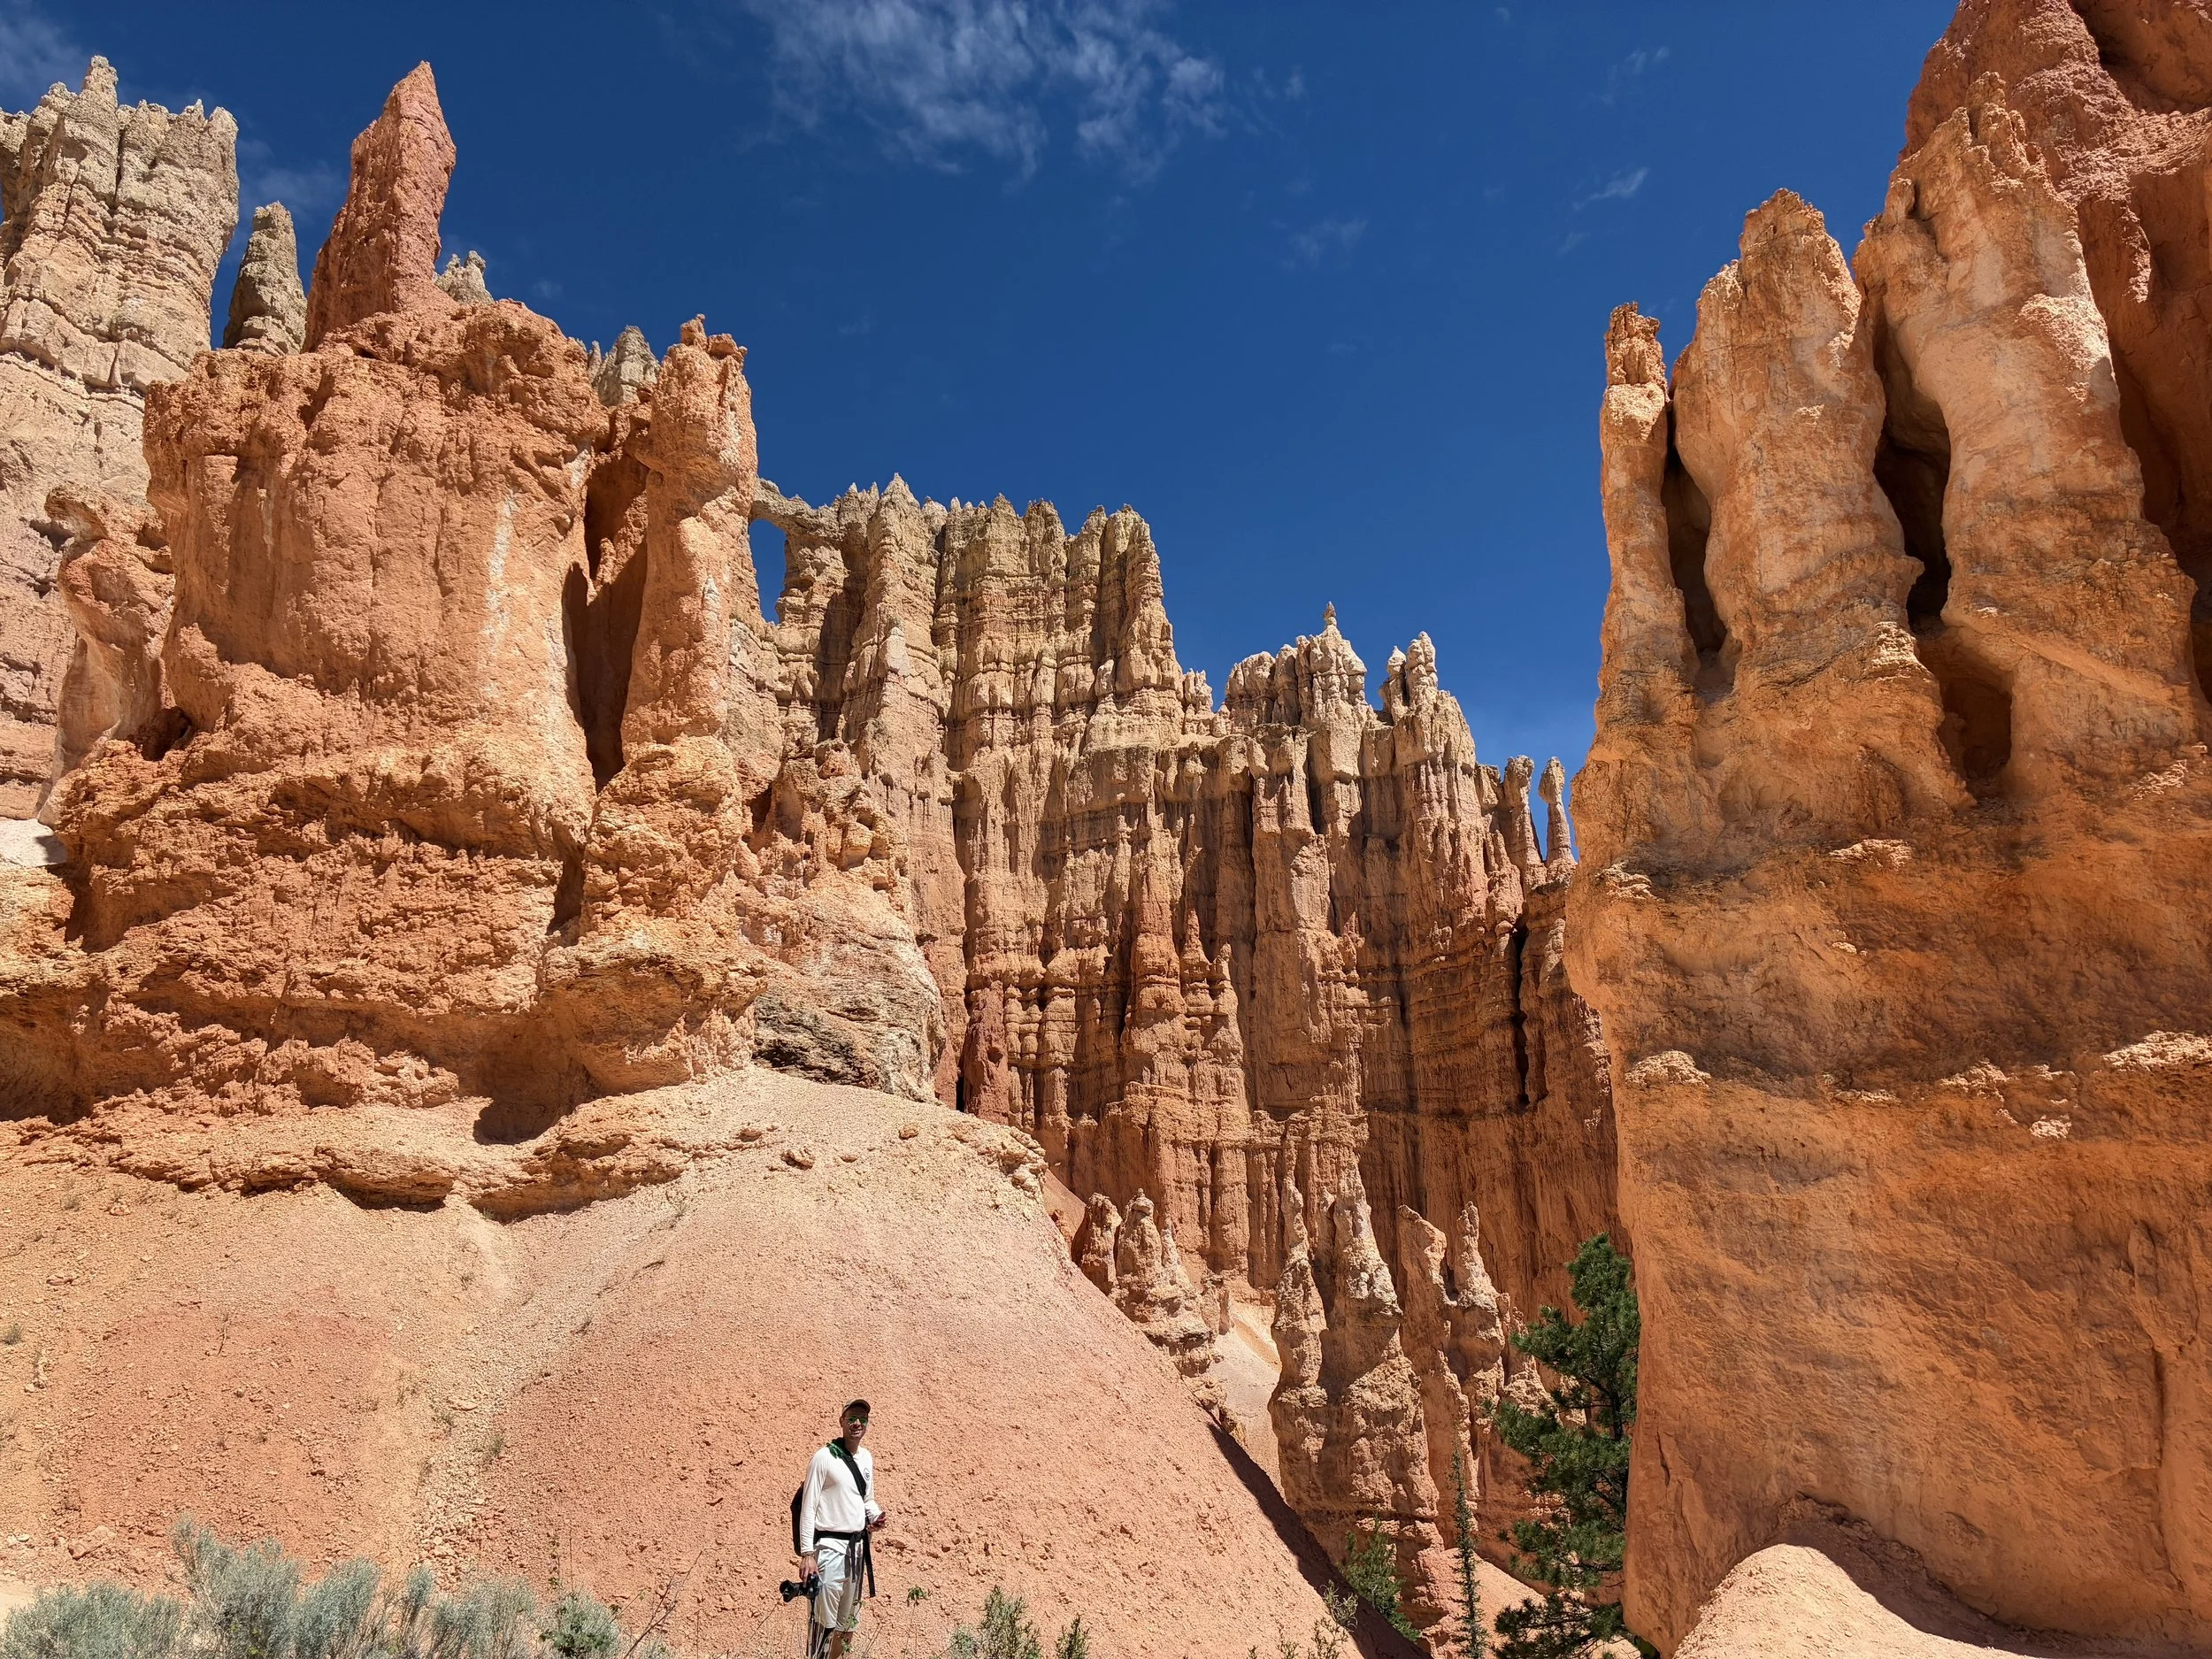
This review may seem a bit negative but keep reading. I think Wall of Windows is actually the best view in the entire park. I didn’t know about it beforehand, and we were more than halfway around the loop when we stumbled into this section of the trail. I very much questioned why I had picked this trail until that moment, and then I walked in stunned amazement for the rest of the loop. My review shares my thought process along the journey.
The Peekaboo Loop is marked in purple. It is not a hike that can be tackled on its own. To get to Peekaboo Loop, a hiker either needs to add an out-and-back from Bryce Point or the Wall Street / Navajo Loop. We chose the Wall Street / Navajo Loop option.
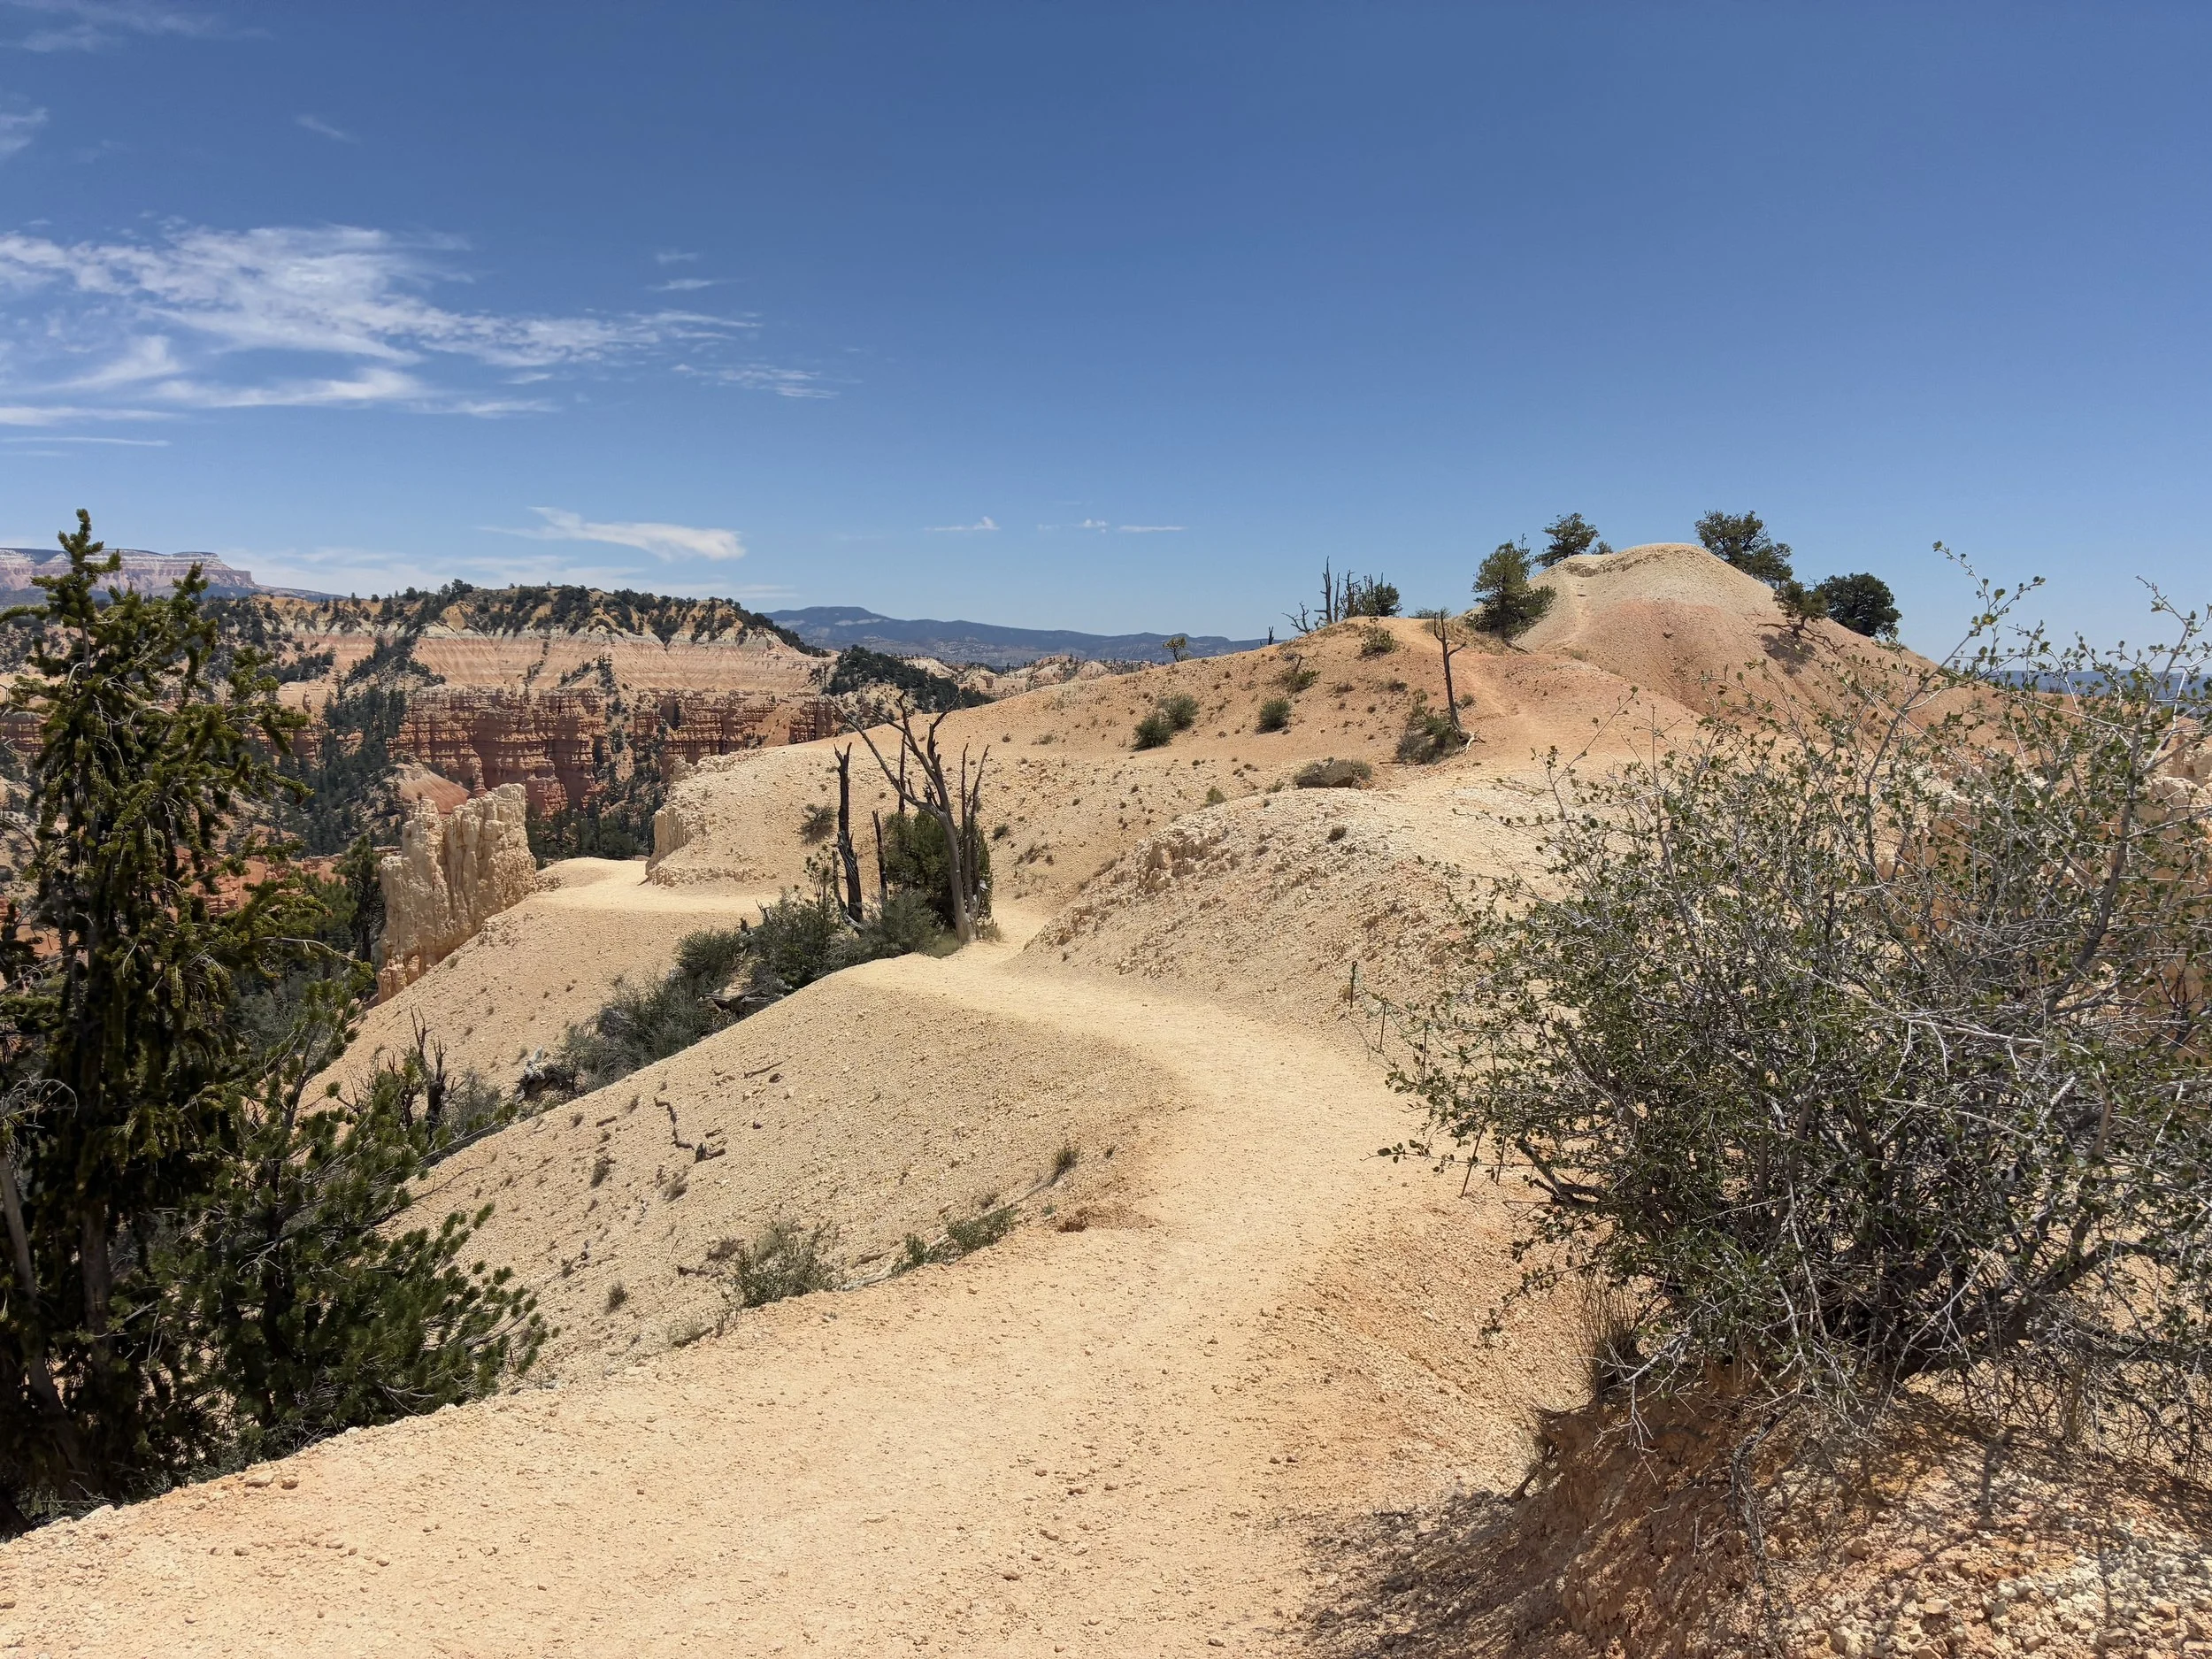
There is a short (0.2 miles) connecting trail between the Navajo Loop and Peekaboo Trails. The trails are well marked with signed. This short section of trail was just about the only flat section of the hike. There aren’t many spots along trails in Bryce Canyon when you at the bottom of the canyon, and it’s a different perspective to look up rather than down.
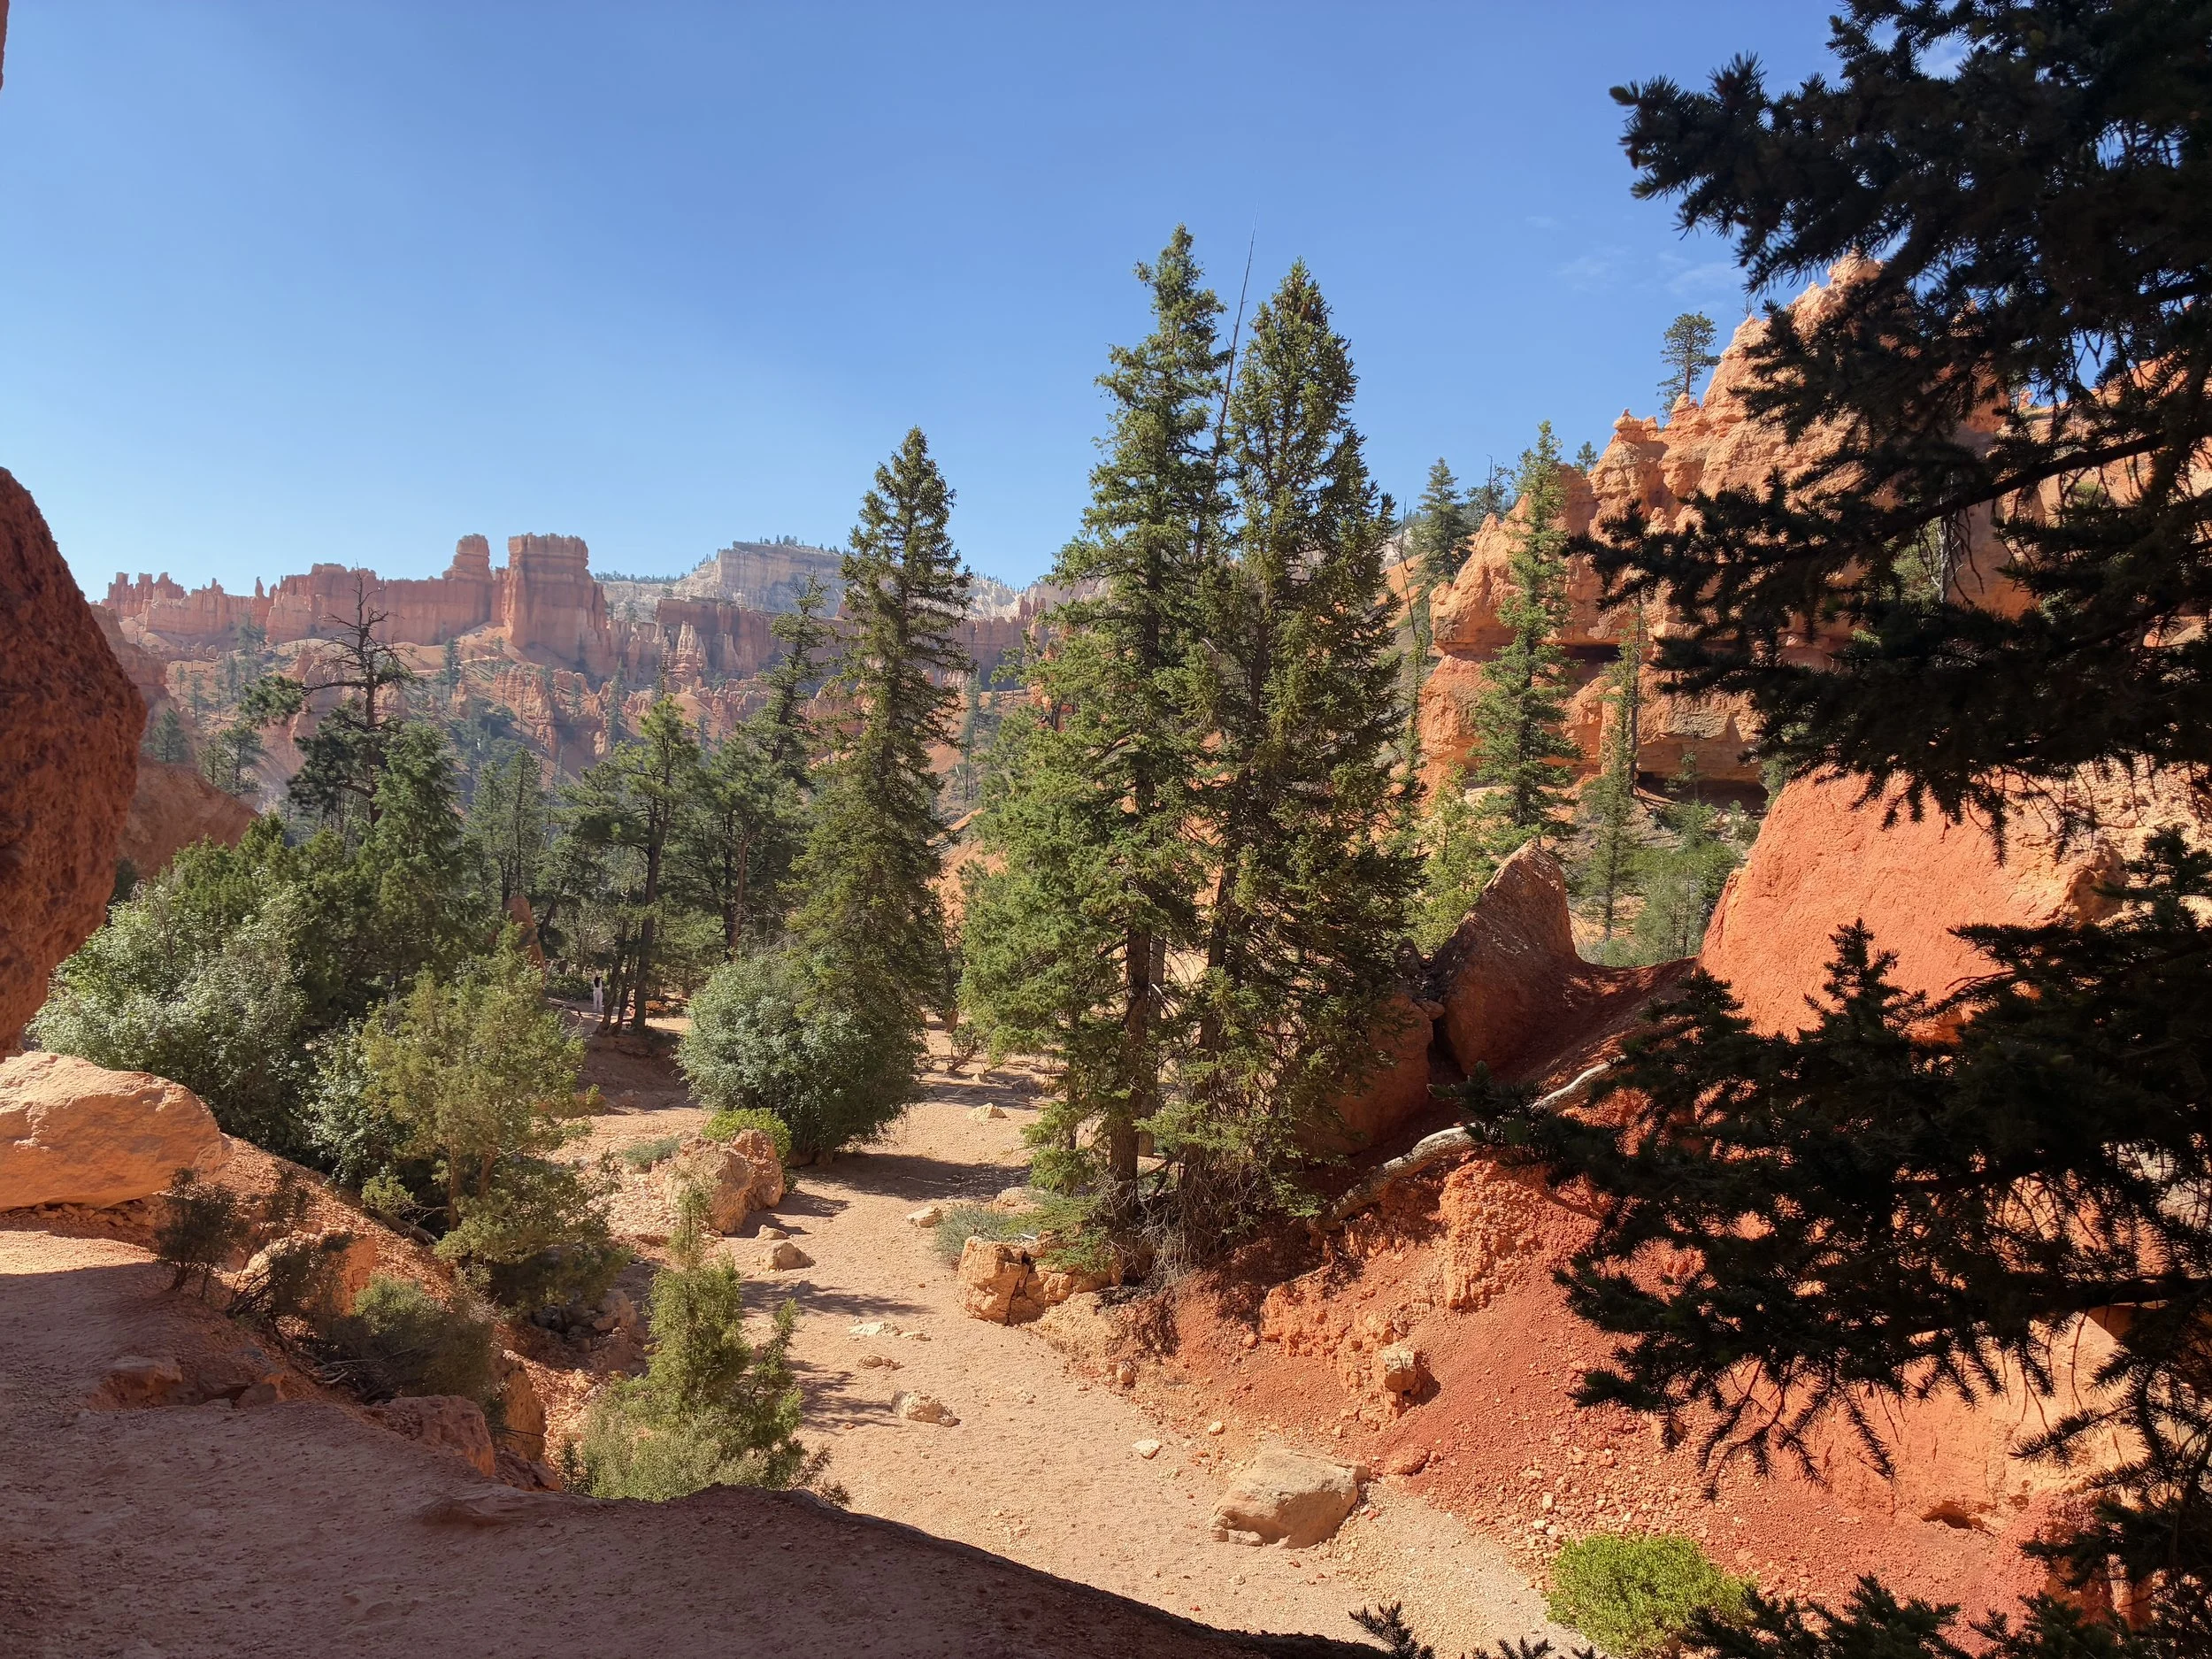
Bryce Canyon, Connecting trail between Navajo Loop and Peekaboo Loop
The next intersection is also clearly marked. Go to the right to get to Peekaboo Loop. For some reason, this sign and the map had confused me. I thought there was a unique trail for horses called “Horse Trail.” I missed that there was also an arrow to the right for horses…. I don’t mind horses themselves, but what they leave behind, especially at the bottom of a canyon, can be quite smelly. This was something we dealt with along the whole trail.
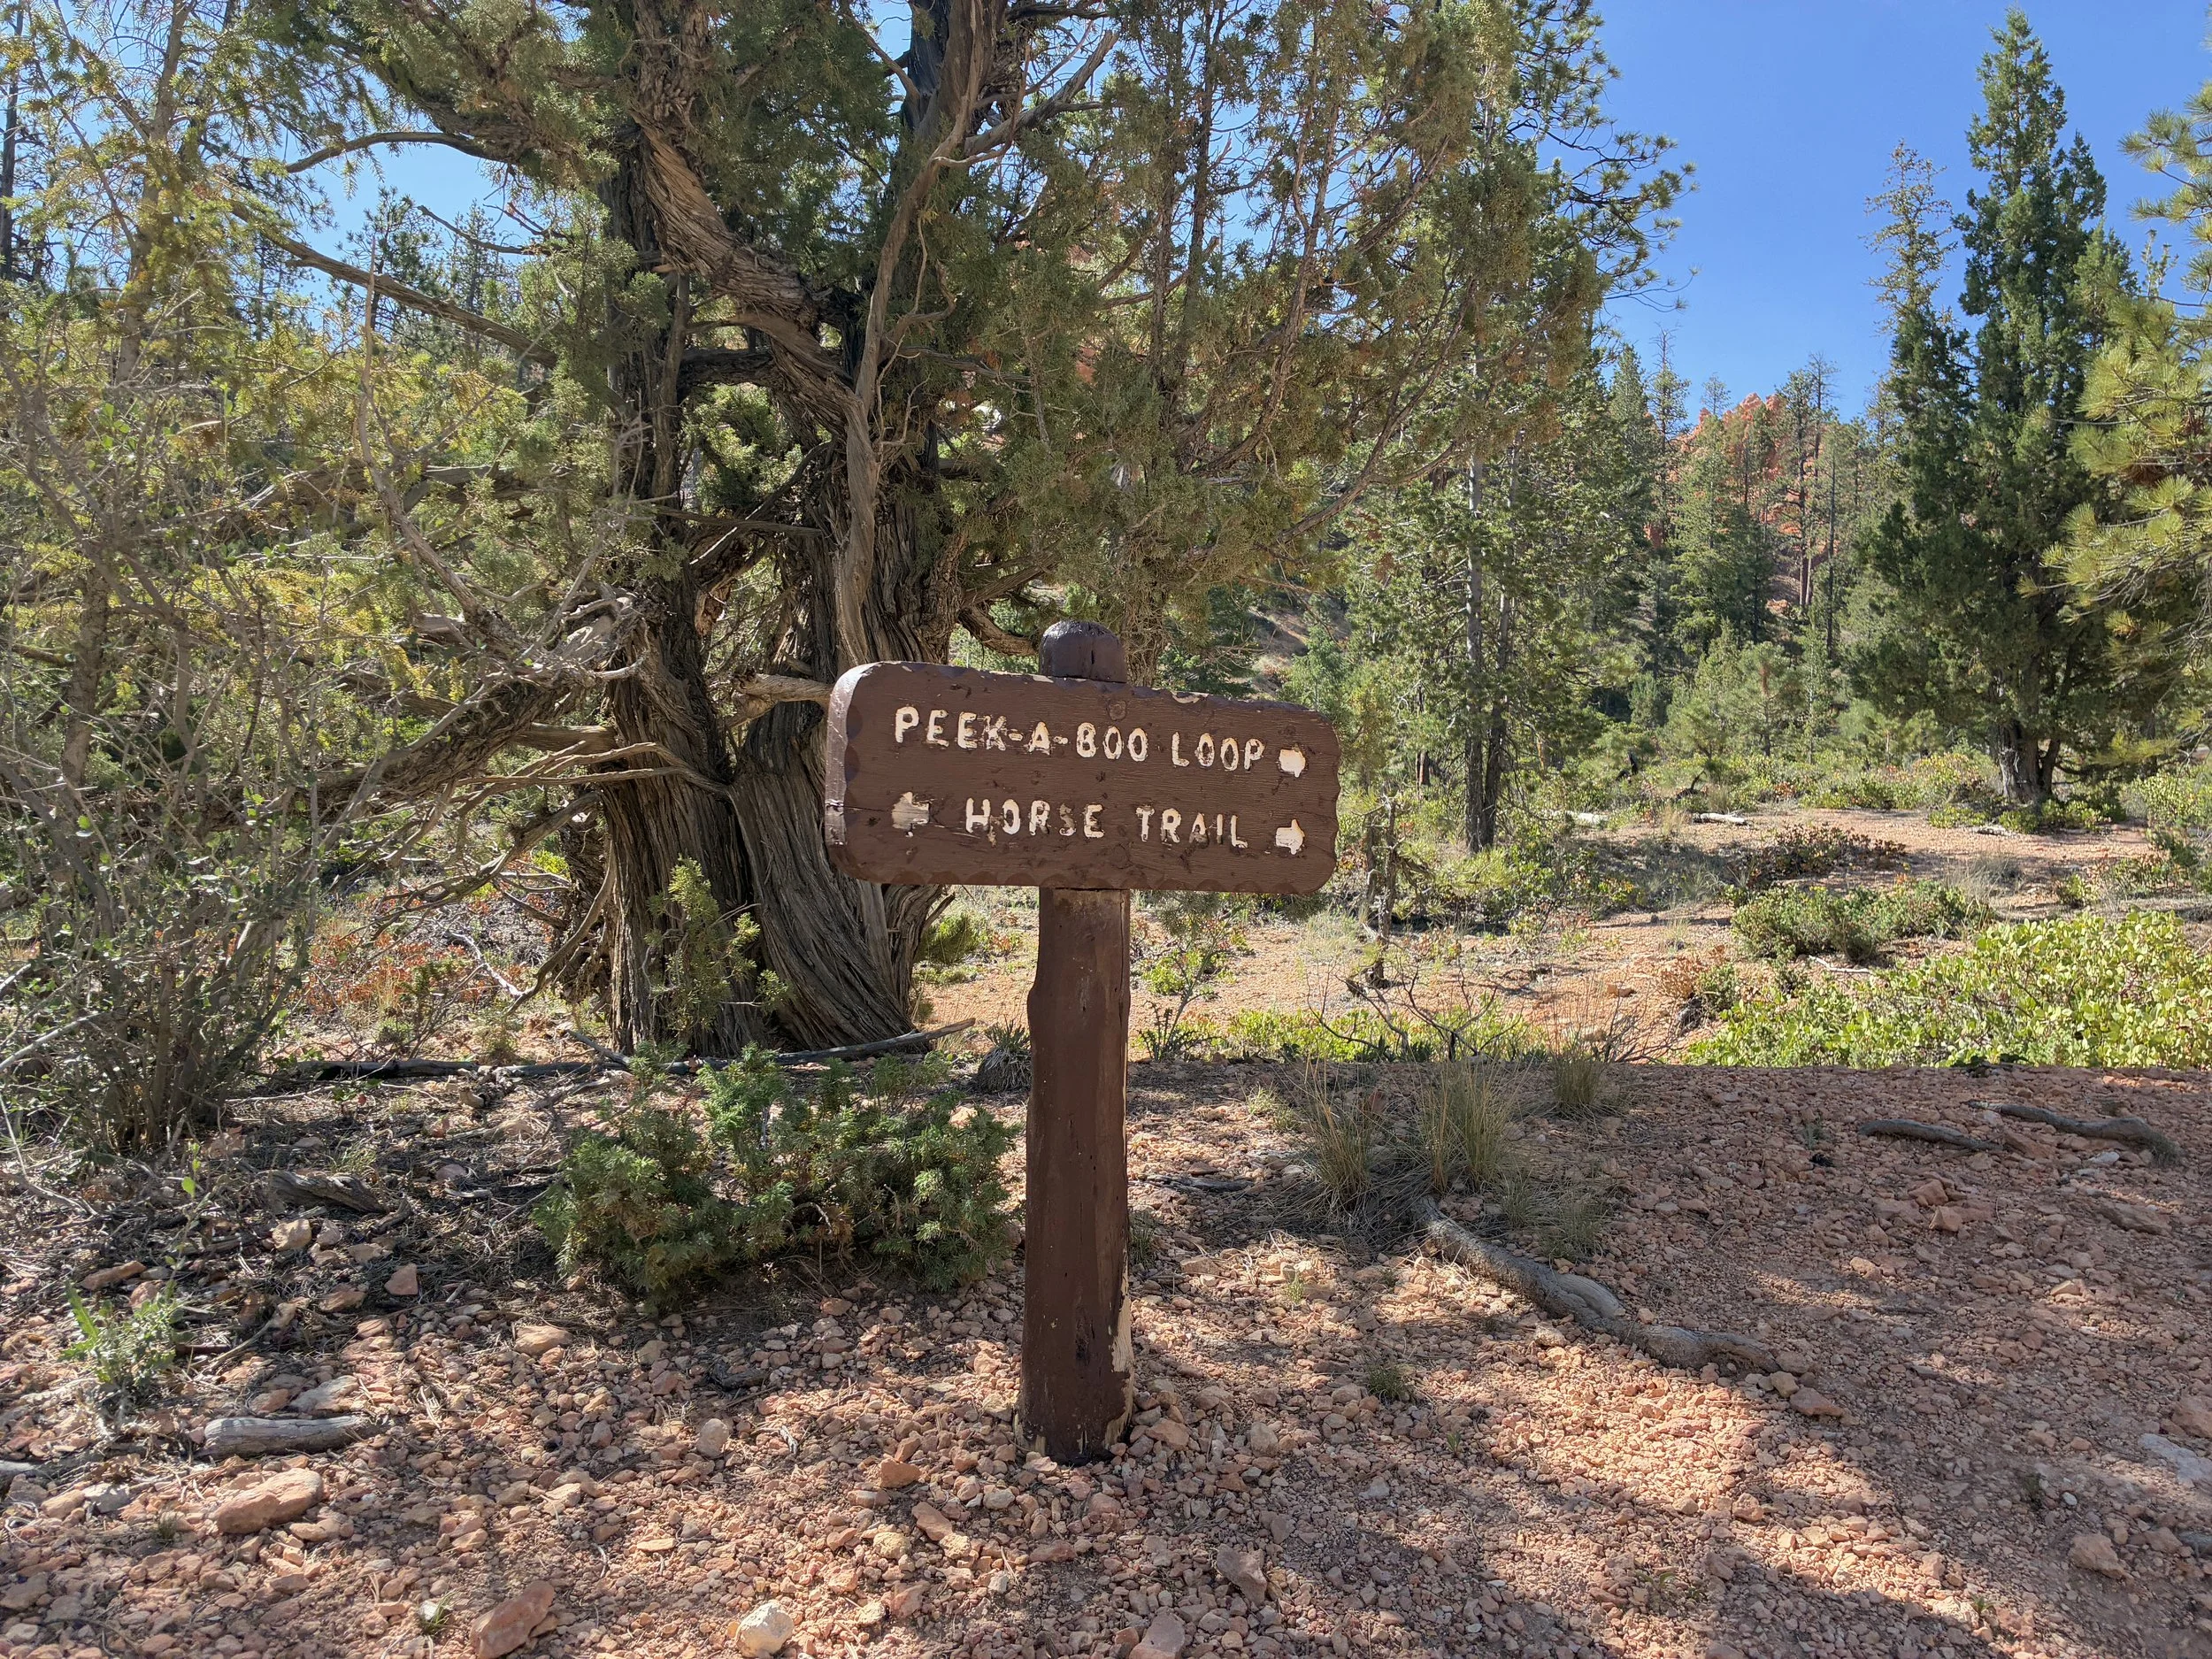
Bryce Canyon, Peekaboo Loop Trailhead
In a few short steps, there is another junction and sign. This is the loop section of Peekaboo, so either direction is the right trail. We went left and hiked clockwise. I think the Wall of Windows is by far the best part of this trail, and I thought it was better to do the boring section of the trail first and then be dazzled by the second half. But we saw a lot of people going the other way as well.
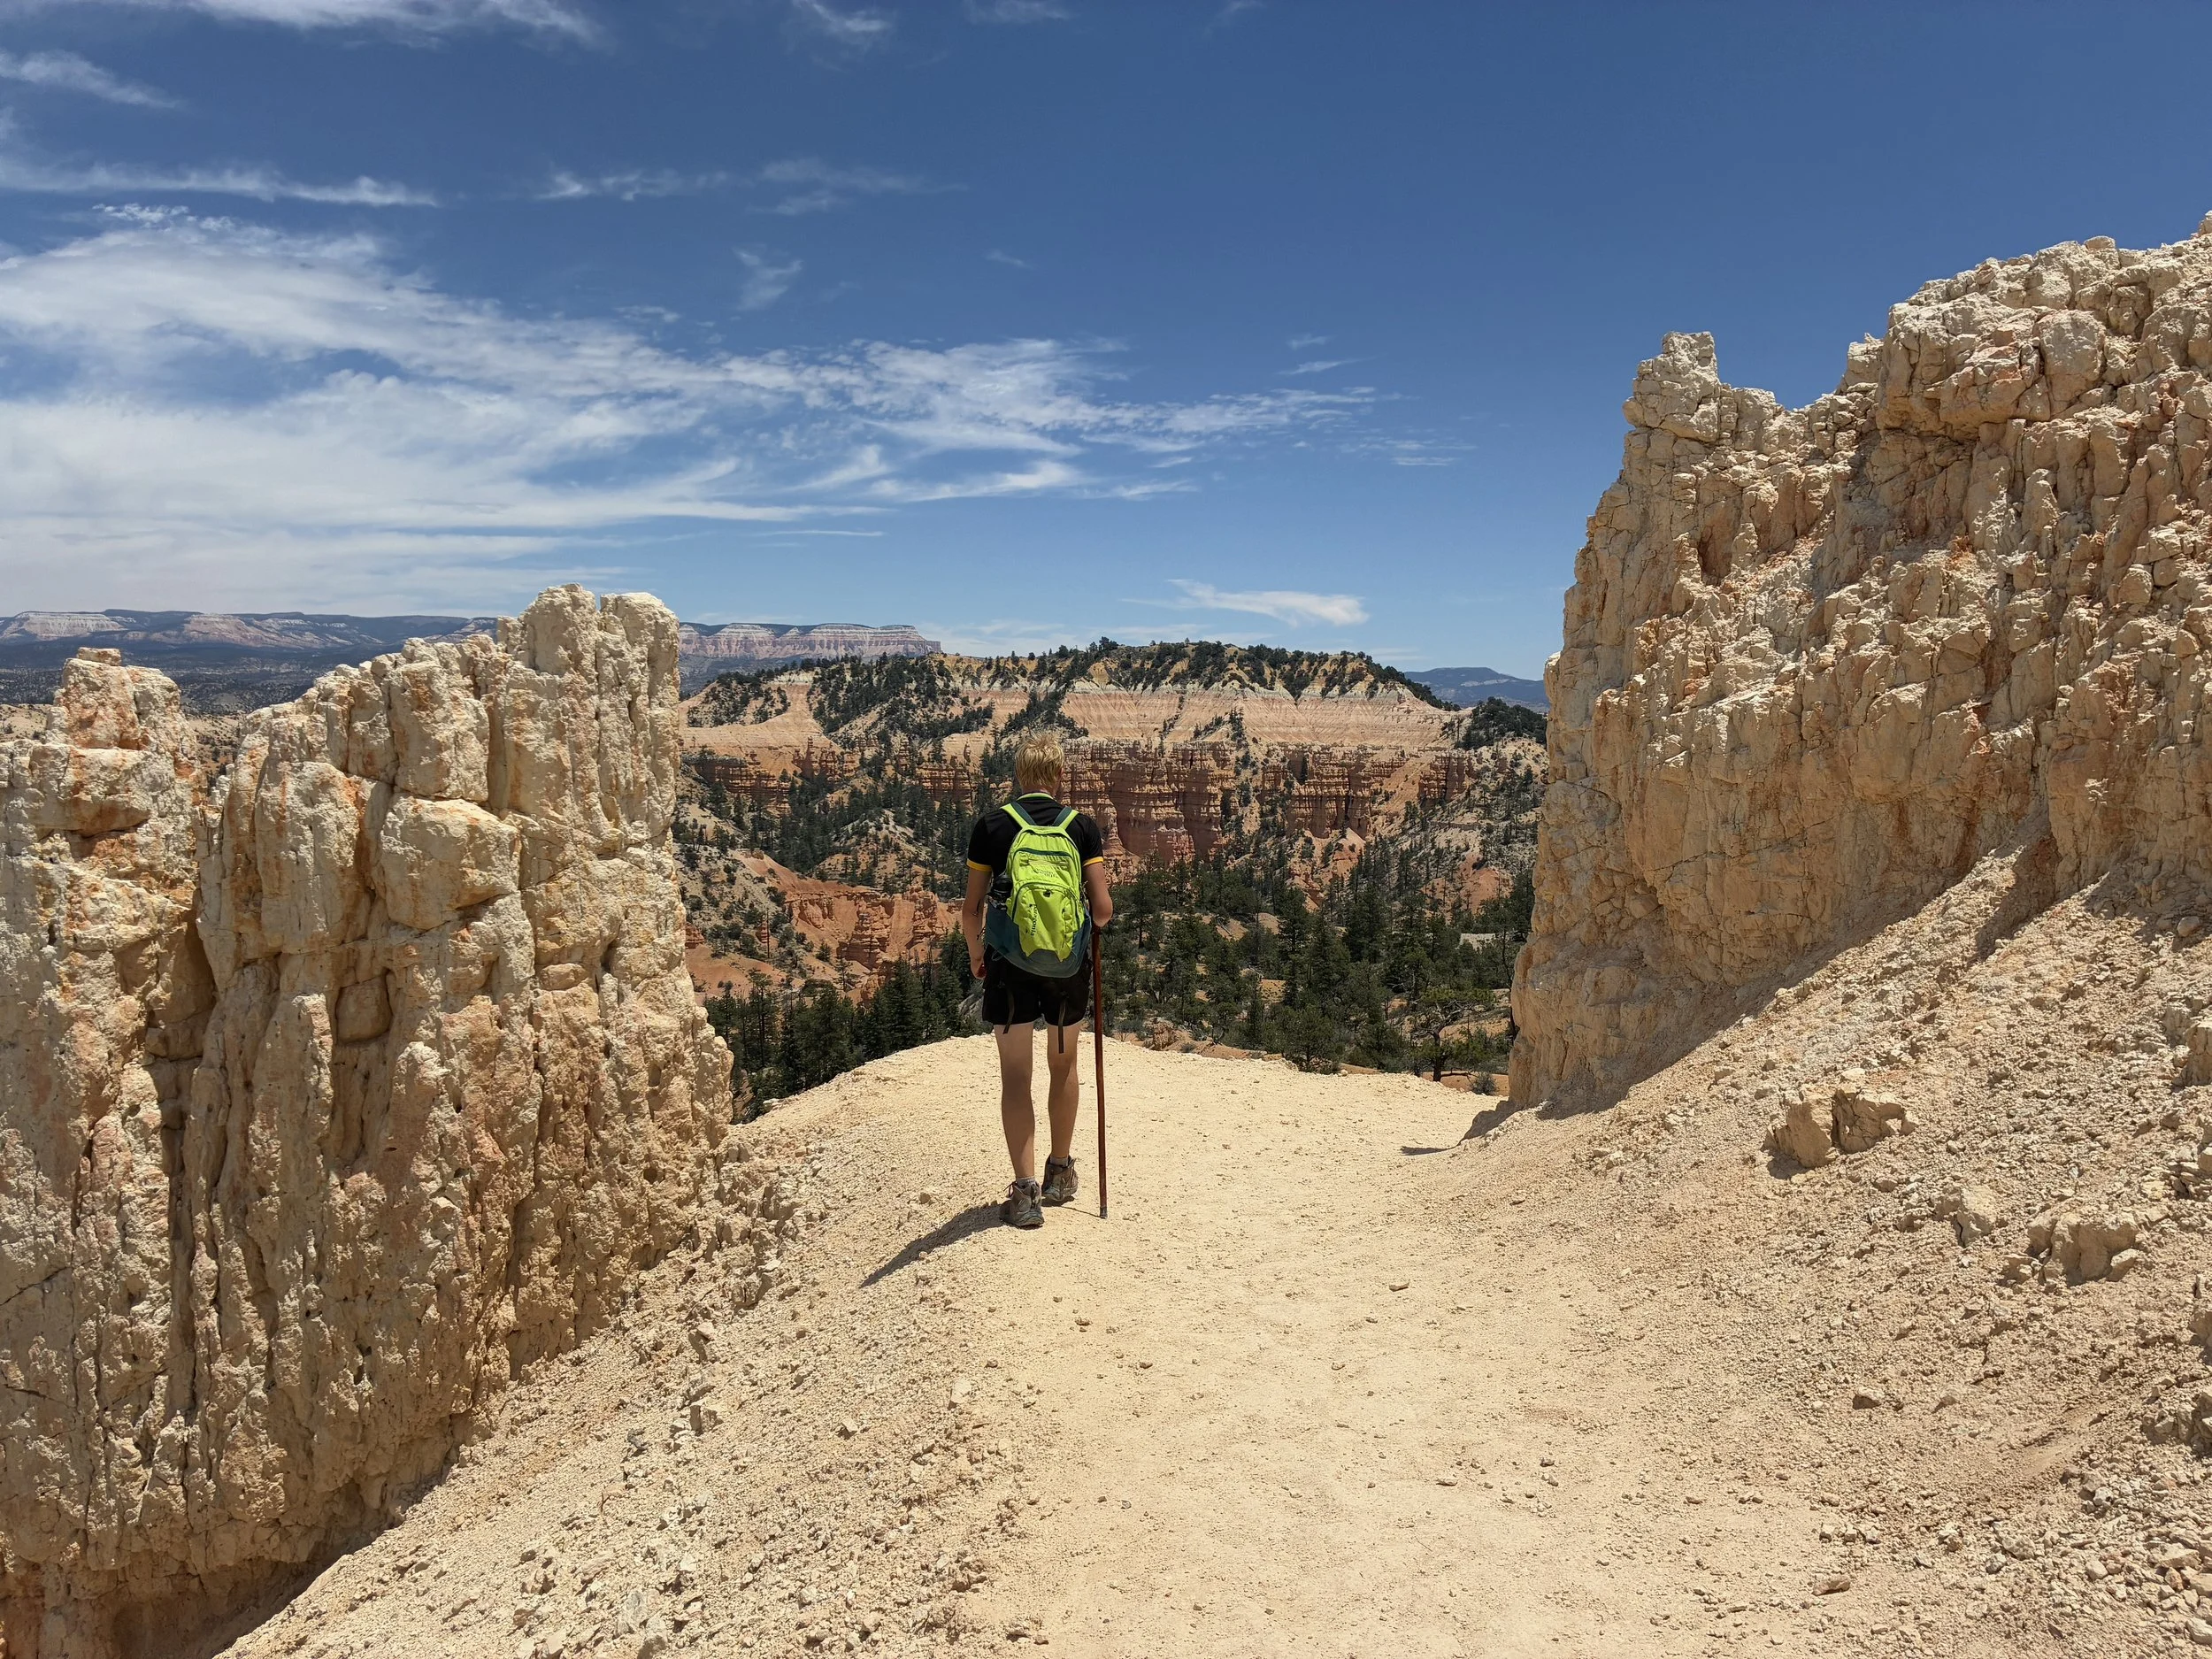
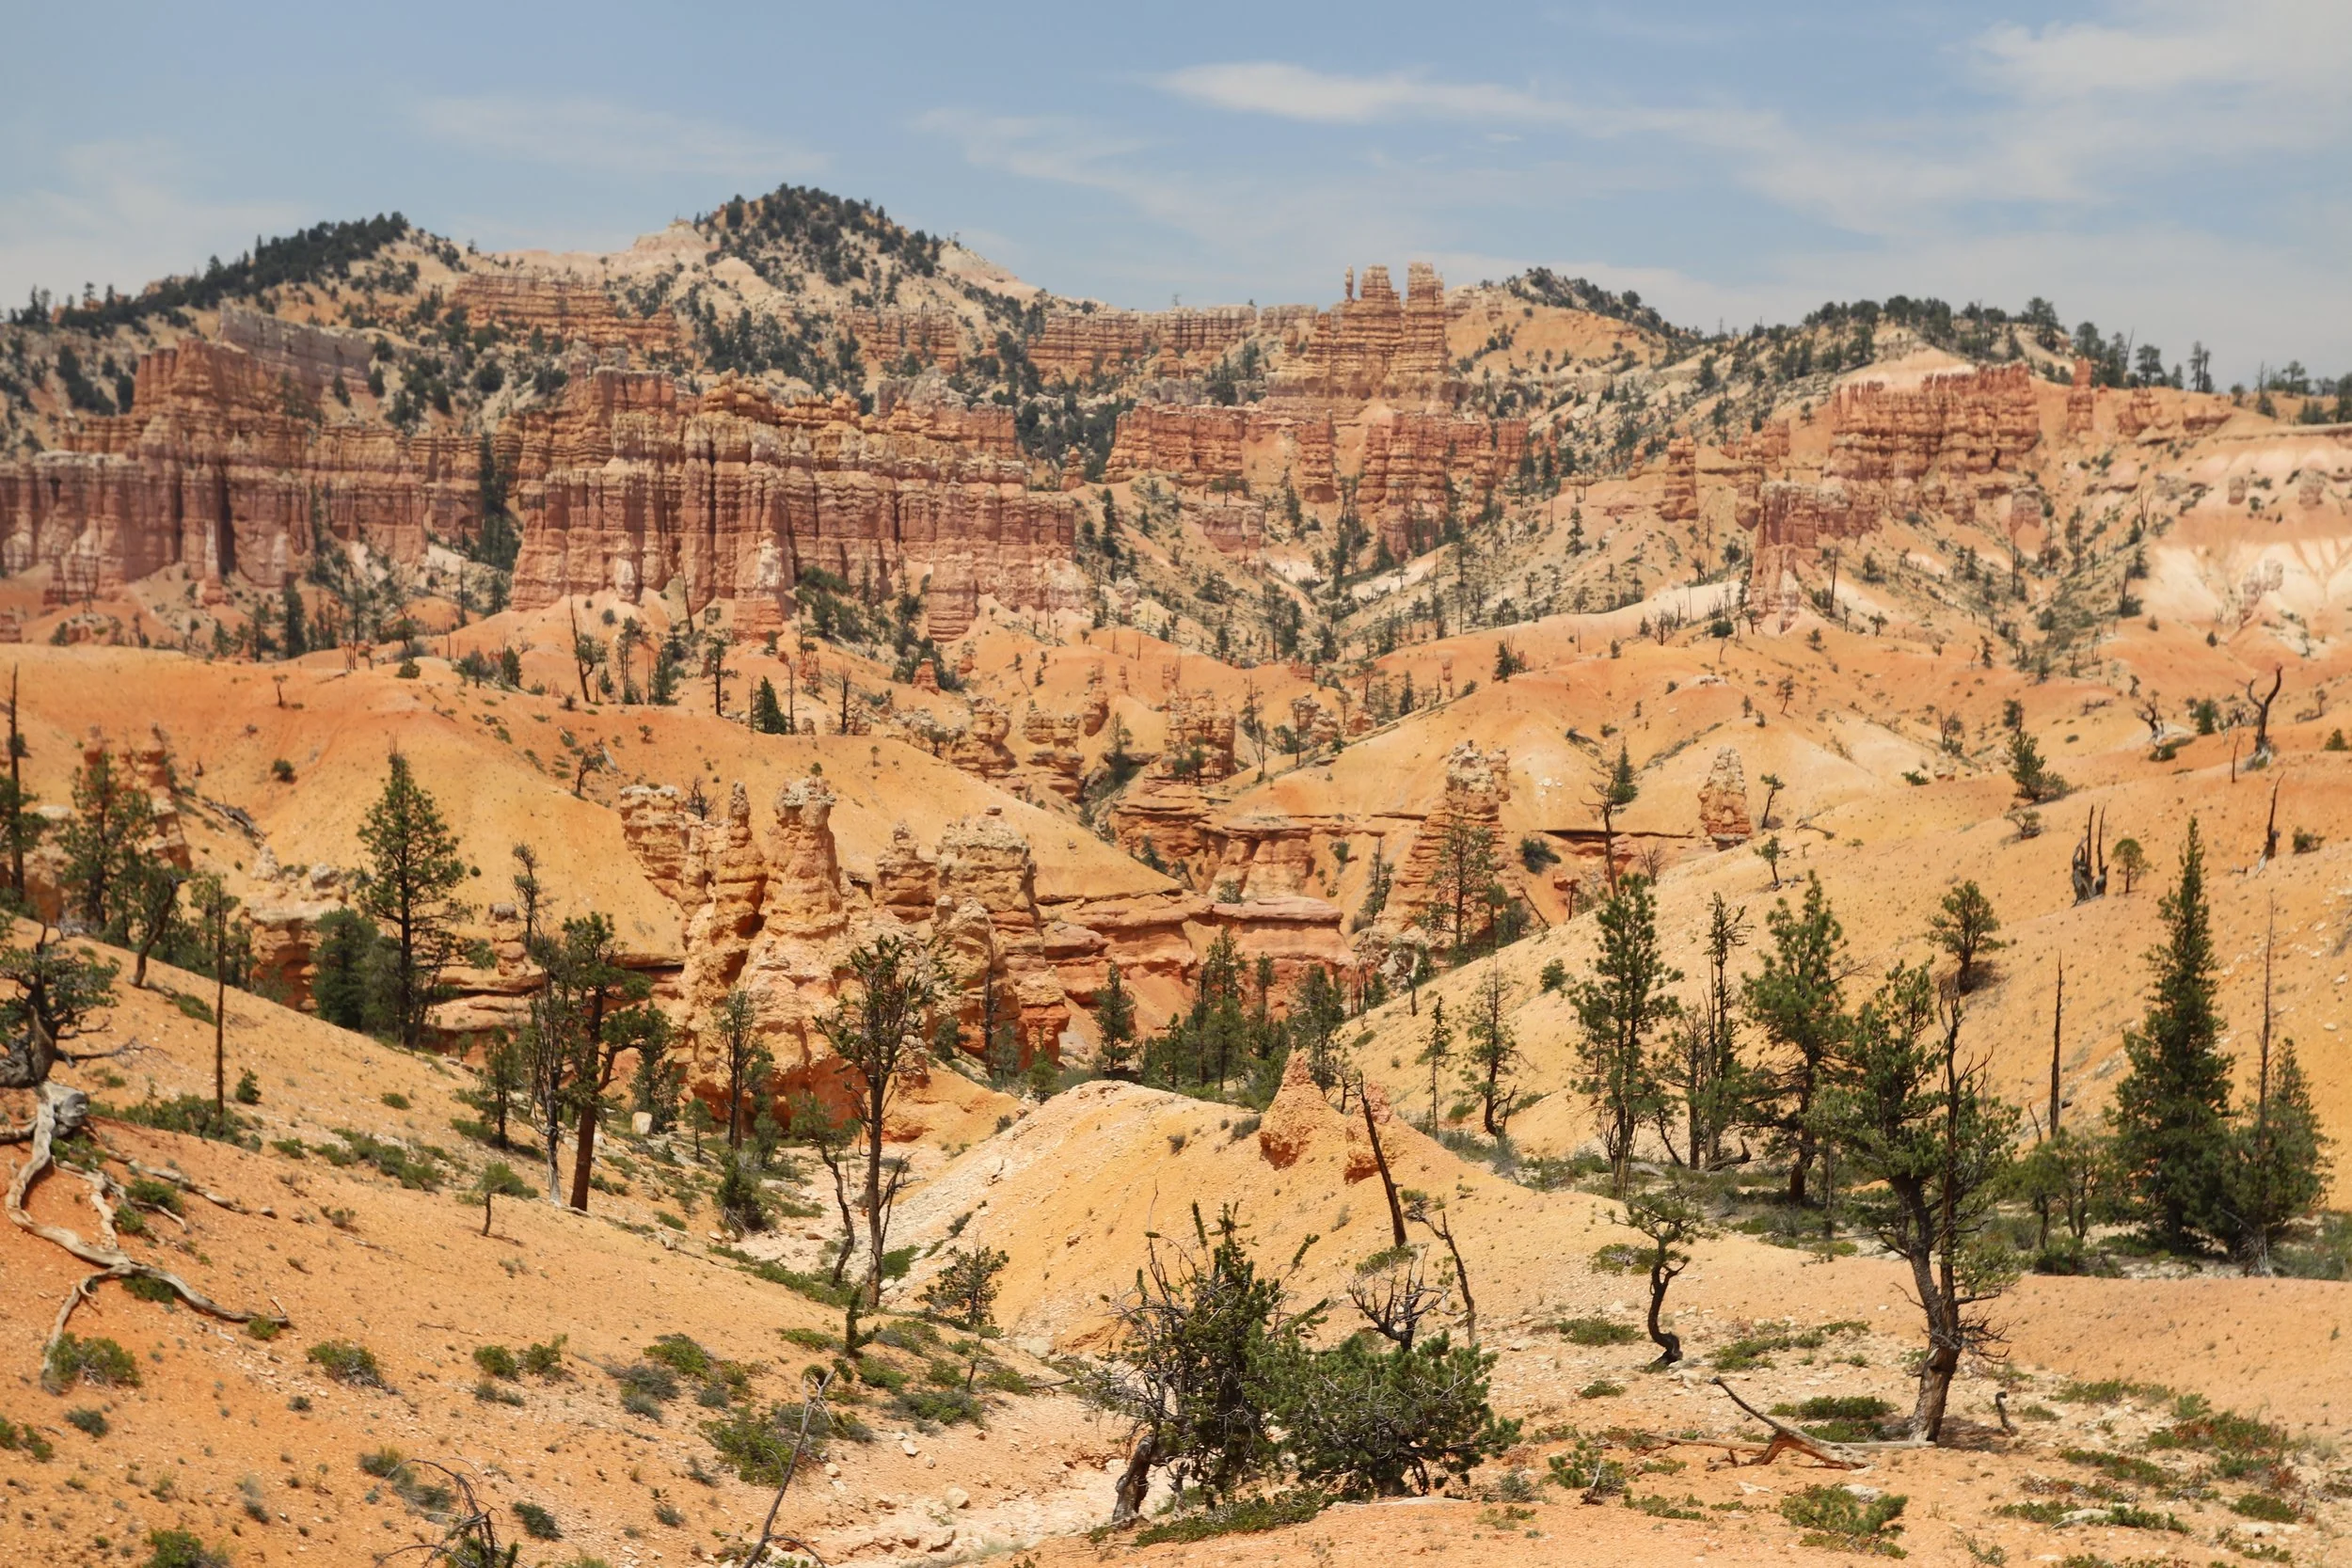
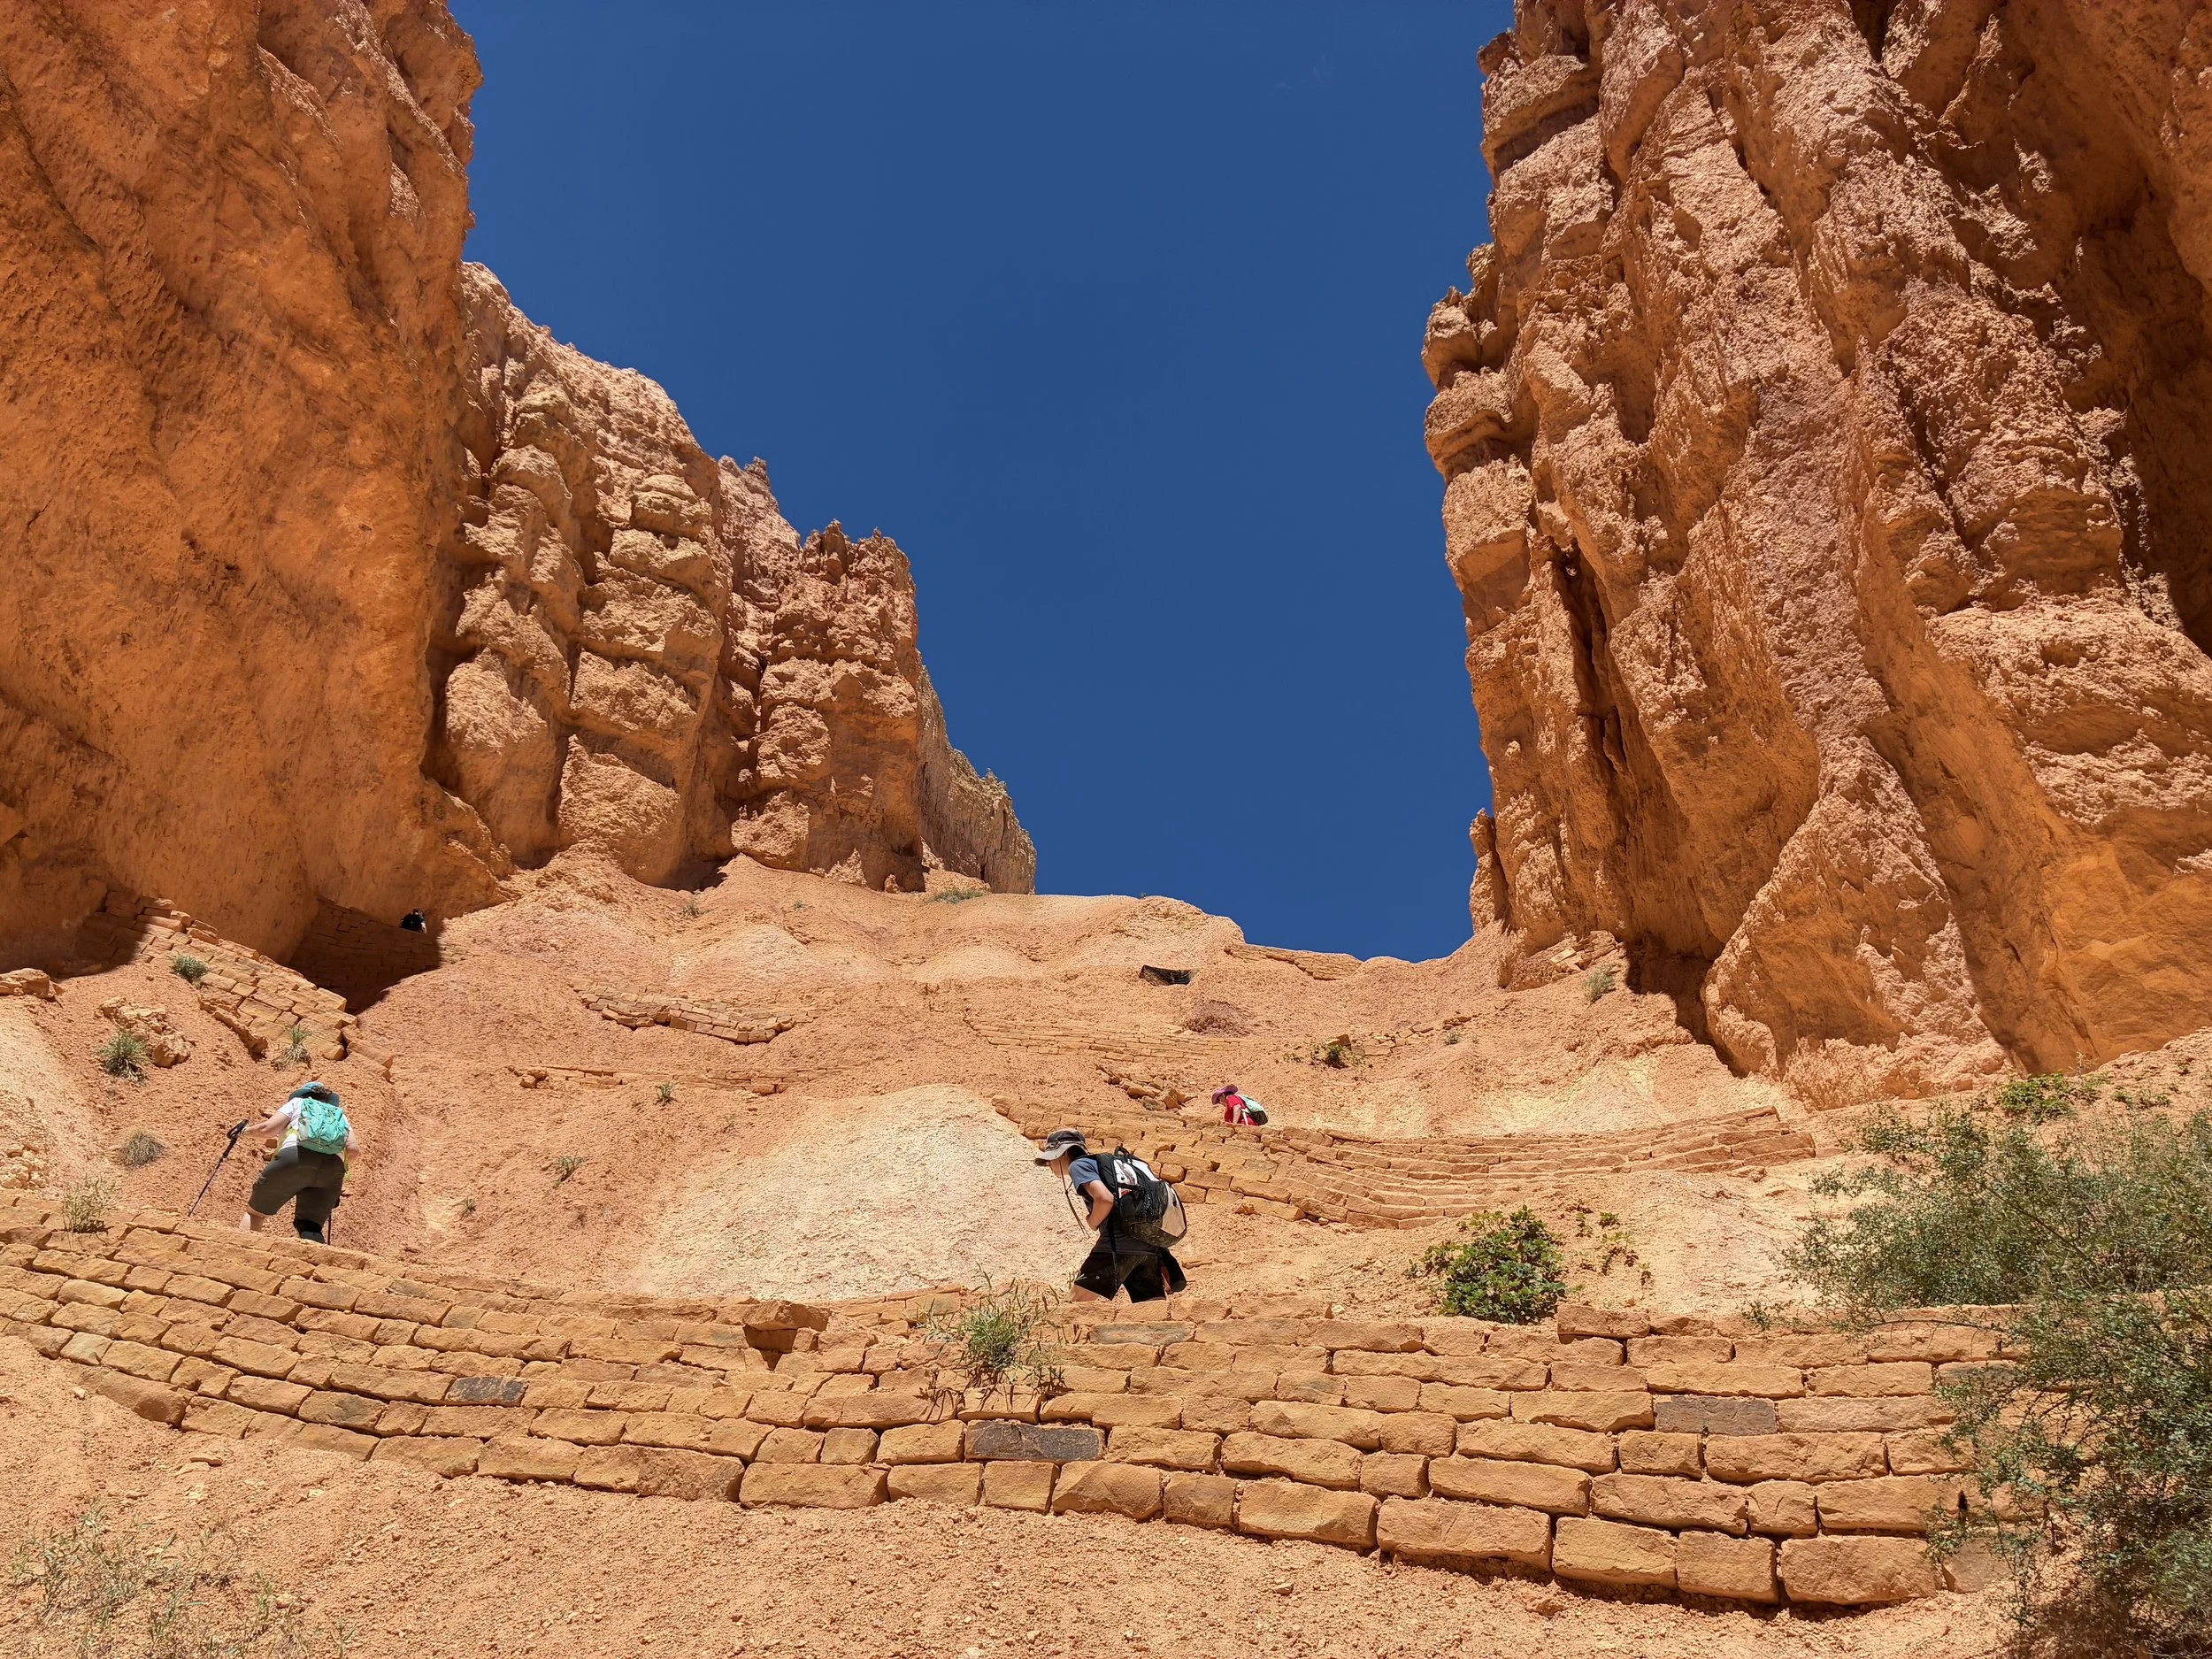
Bryce Canyon, Peekaboo Loop – Walking up one of at five fairly significant inclines
Peekaboo Loop is not a flat trail, and it’s not an “ascend up one side of the canyon and walk back down along the other” type of trail either. When I checked my trail recording, I see five large hills we climbed up and down throughout this loop. It felt like more than that… This is a hard trail.
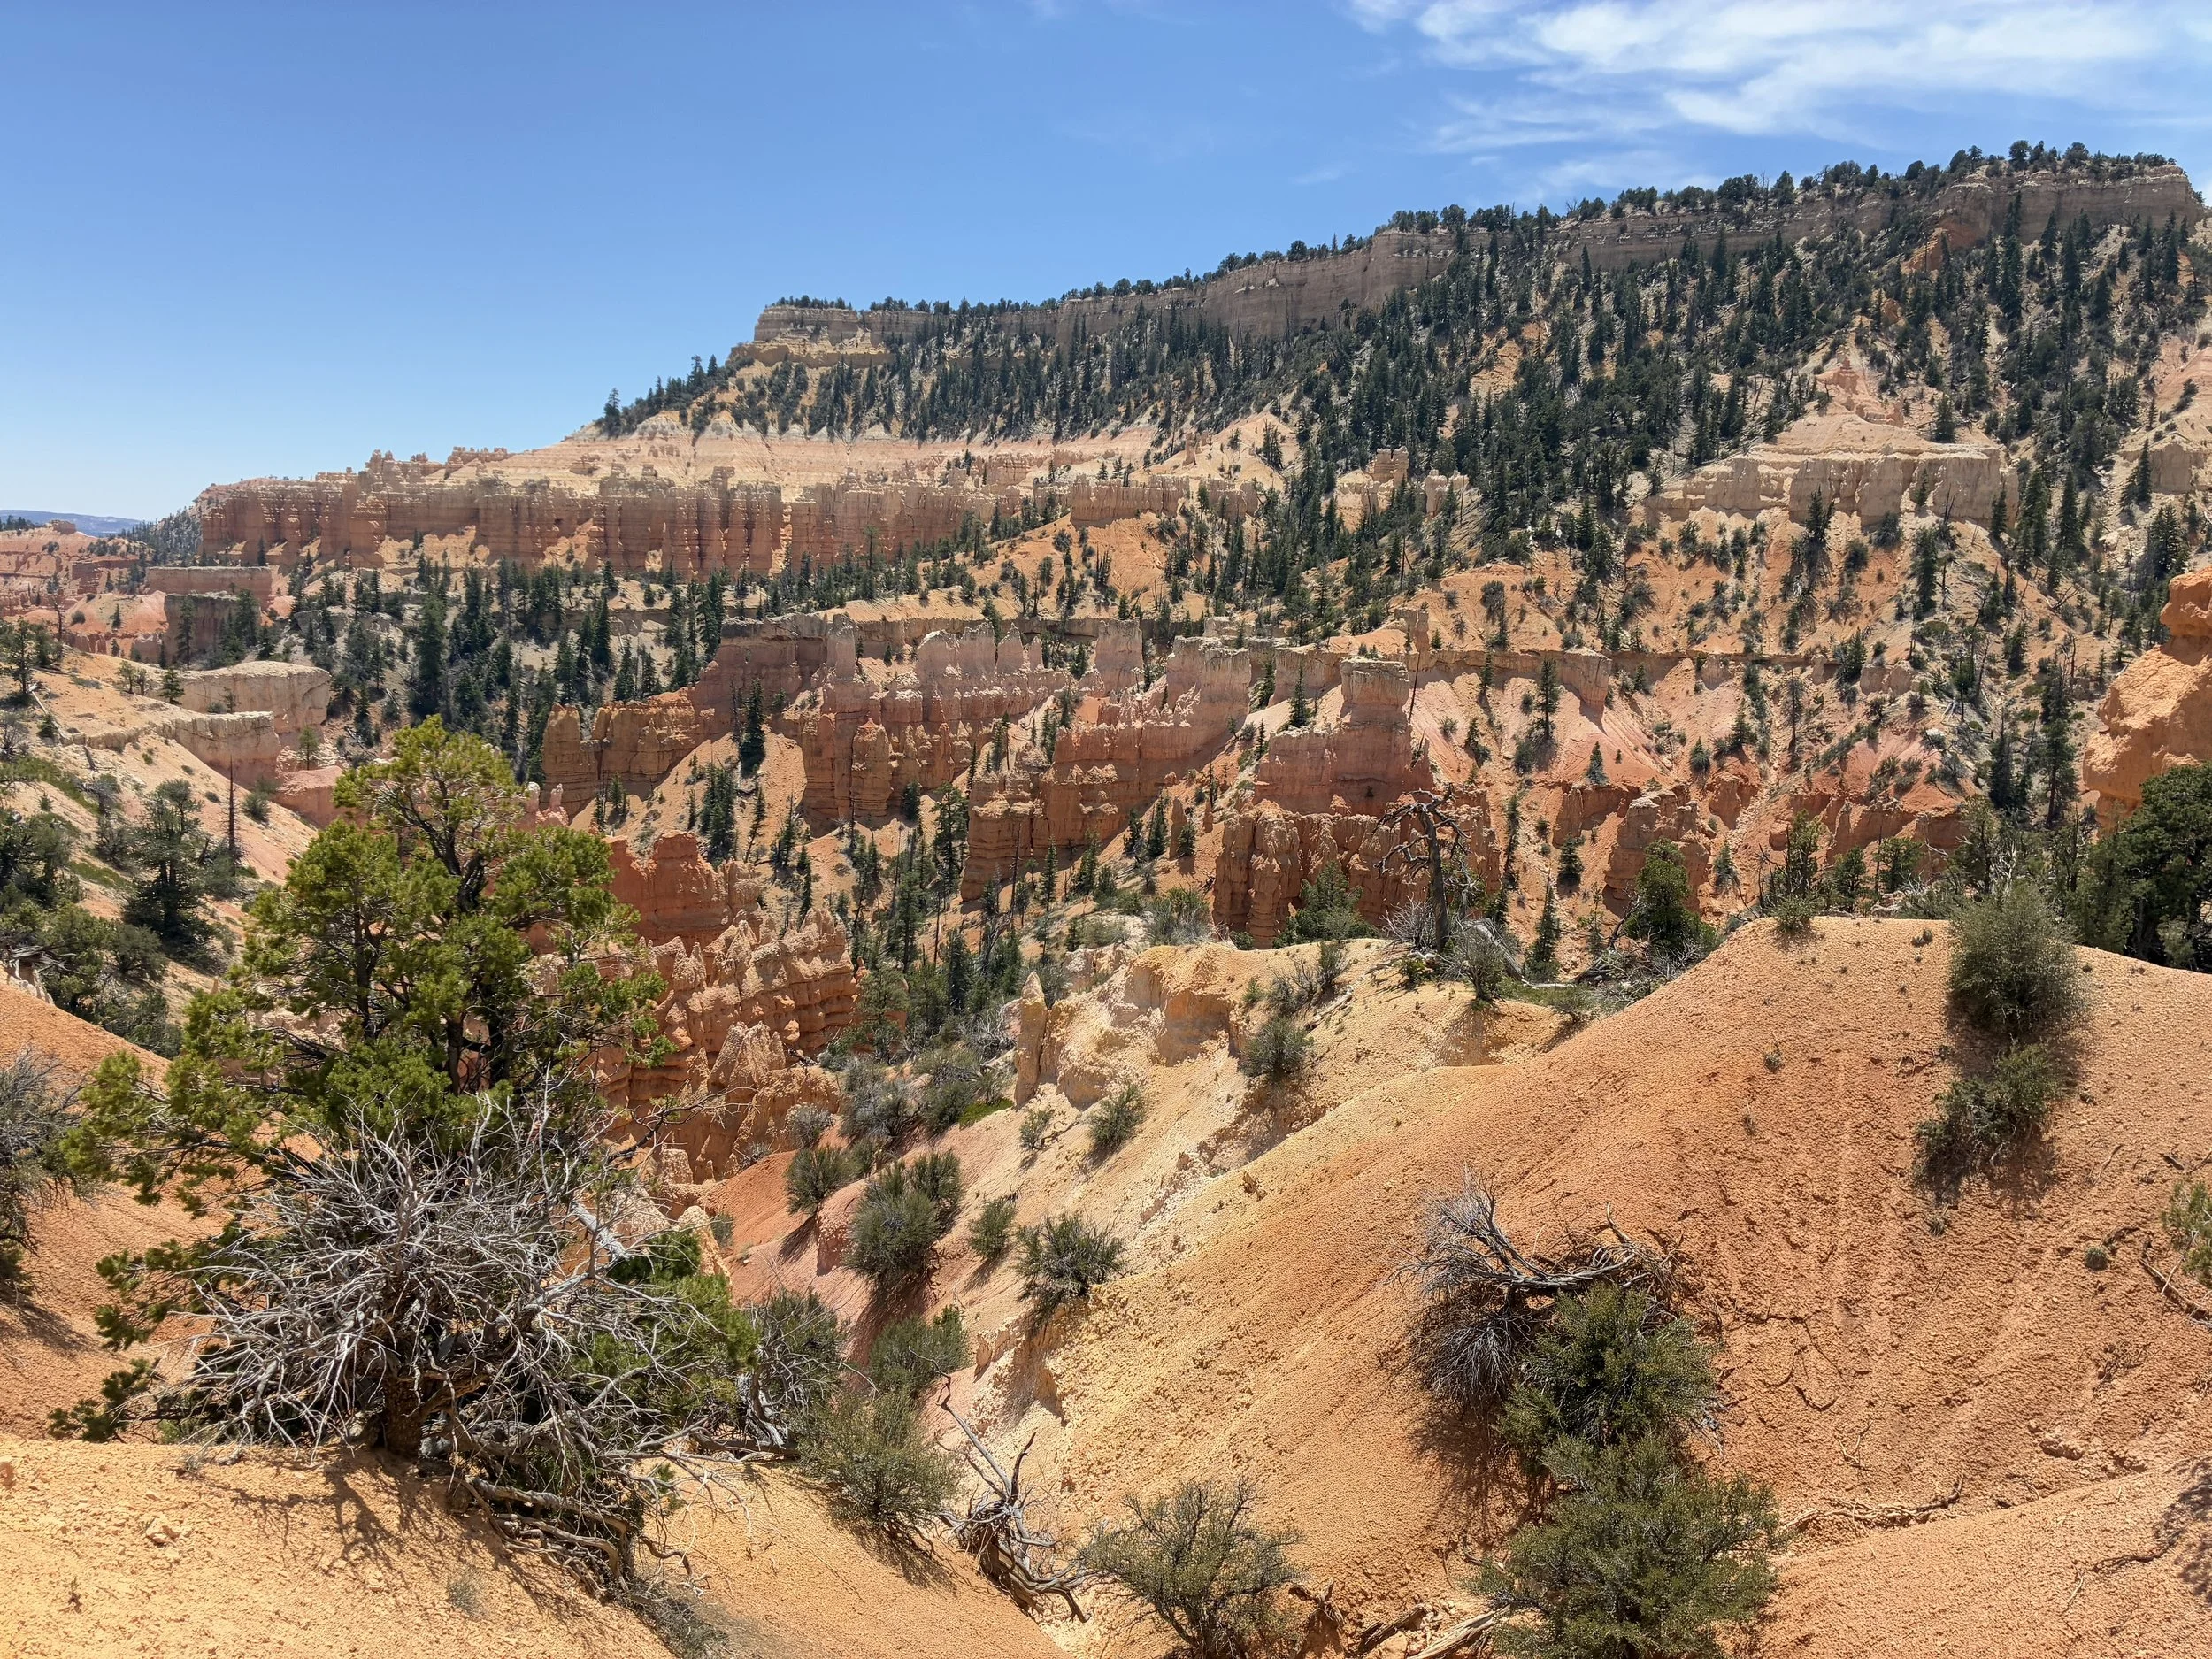
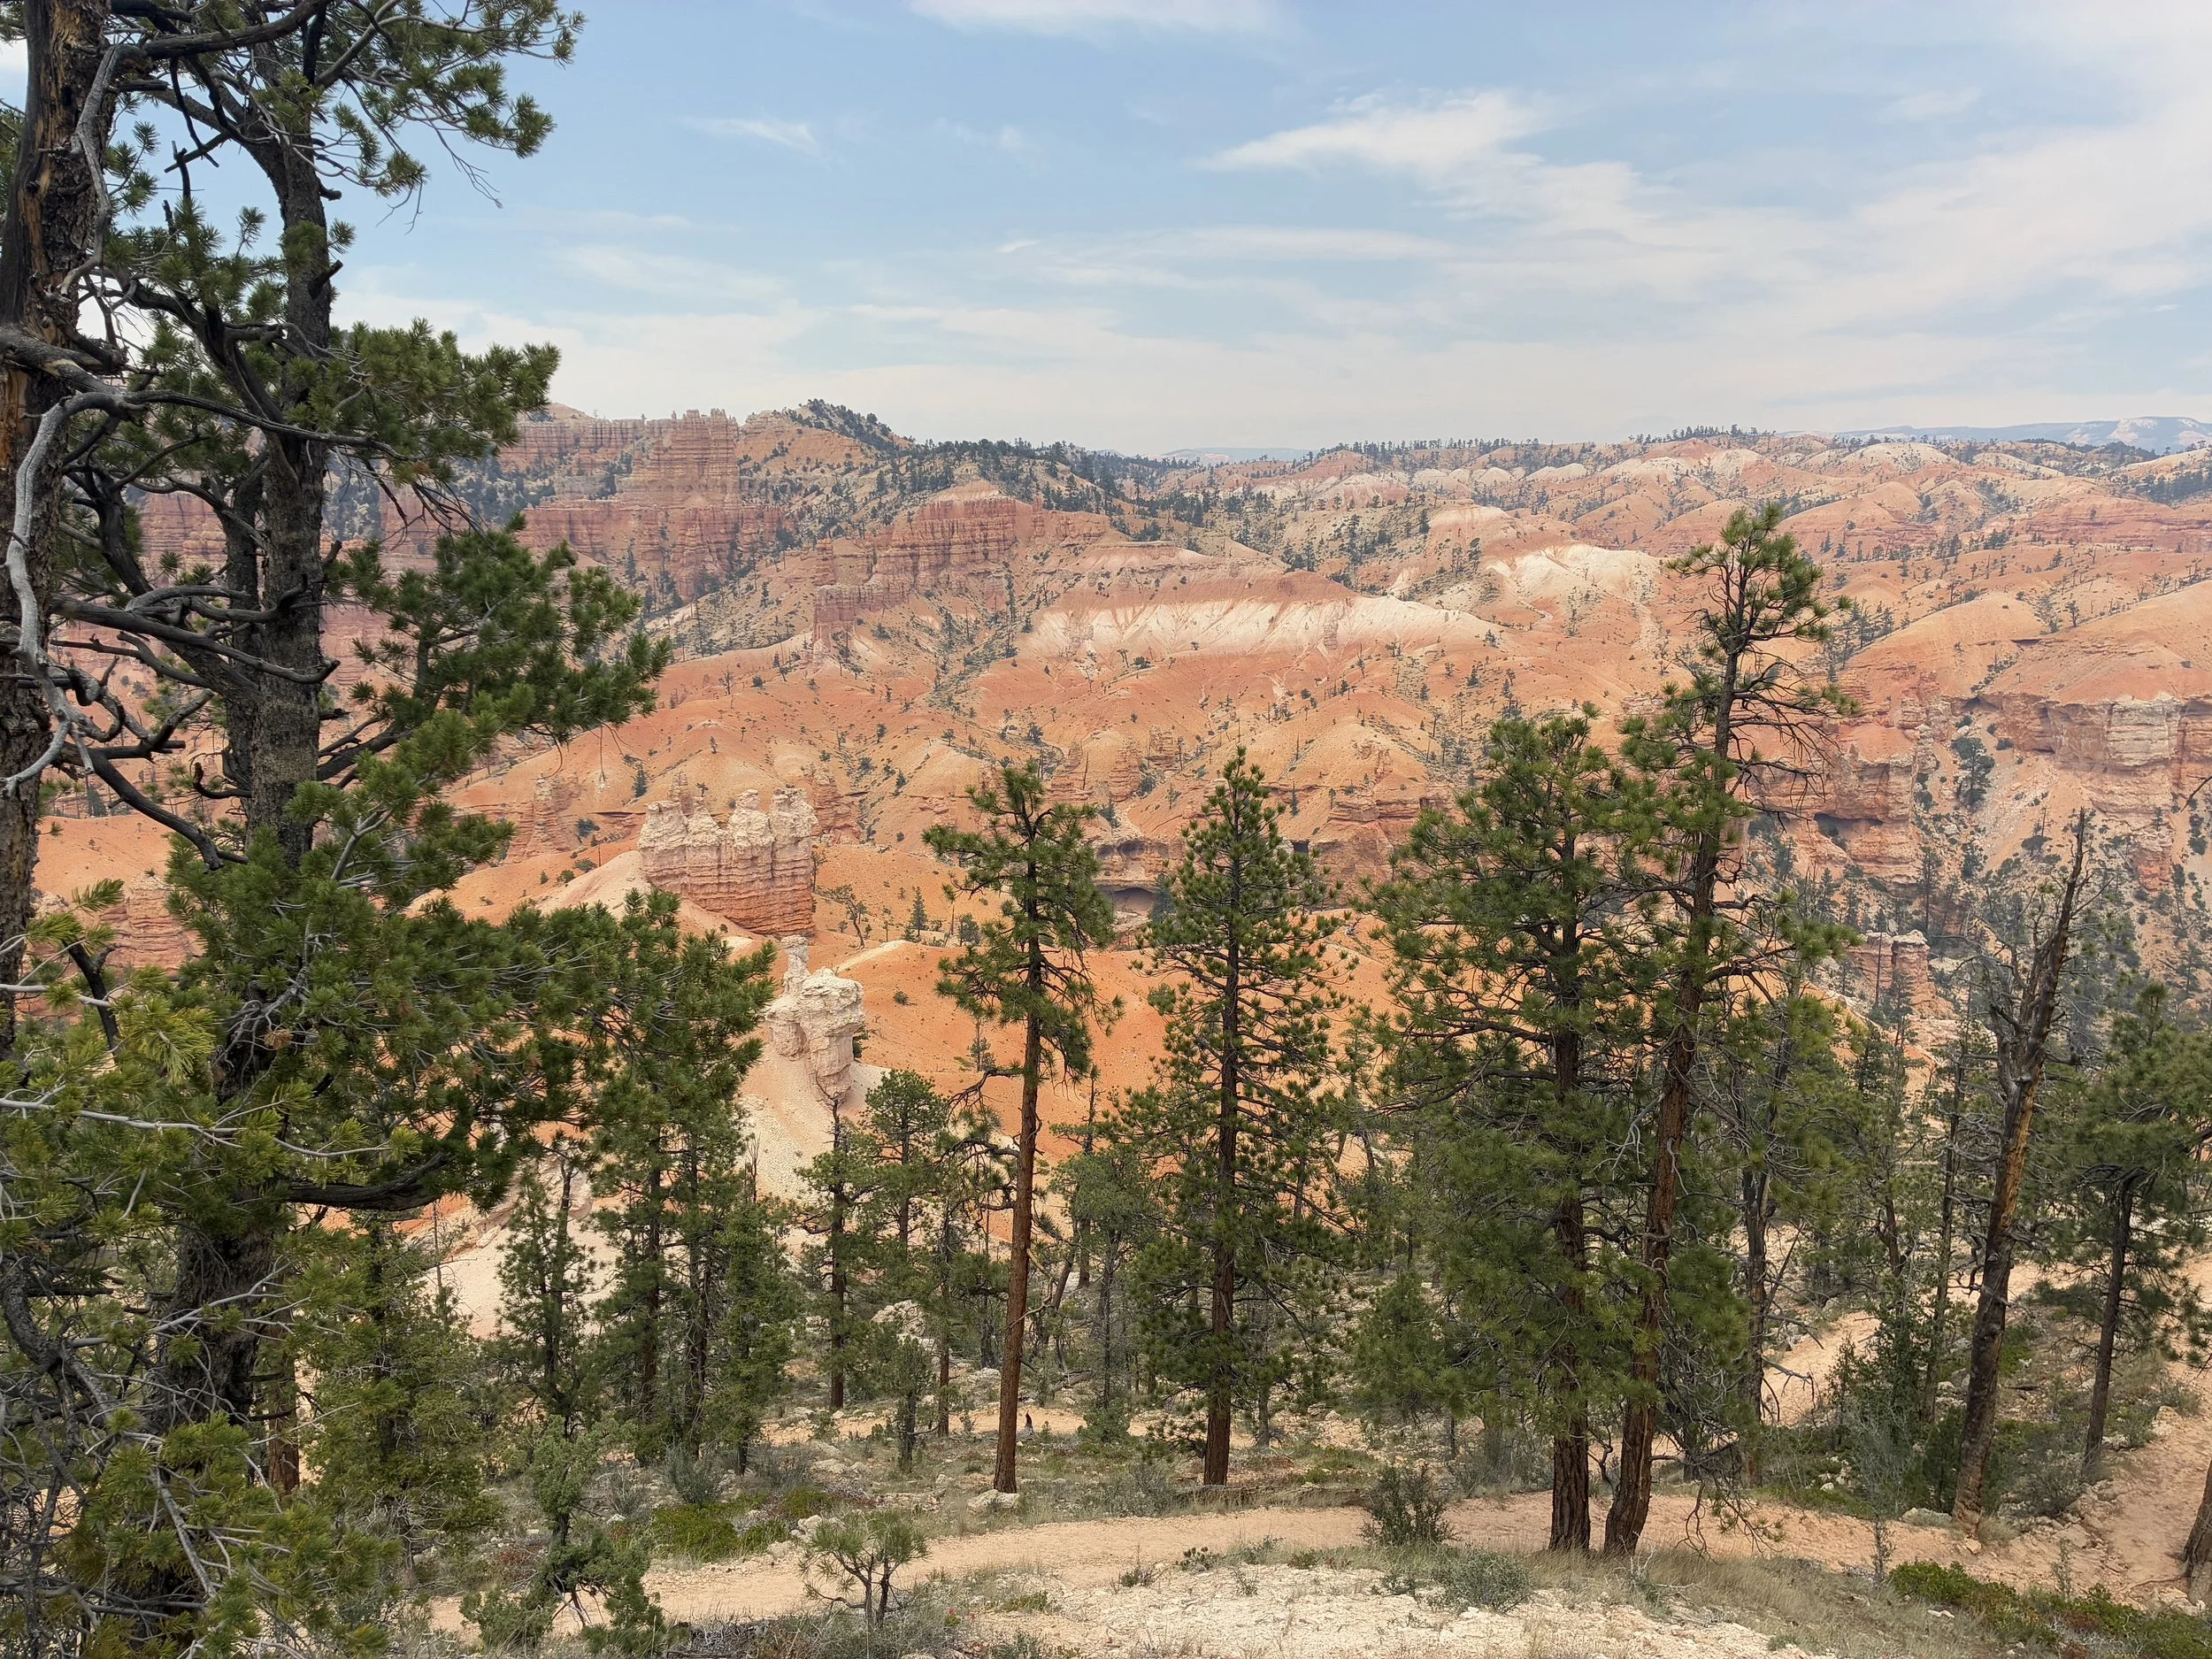
There are many pretty views along Peekaboo Trail going in the clockwise direction, but as I’m hiking up and down and up and down at 8,000ft in elevation, I’m thinking to myself that there are lots of pretty spots in Bryce Canyon which can be seen from short walks along the rim, and I’m not sure why I picked this trail to hike along on uring our summer vacation.
Bryce Canyon, Peekaboo Loop
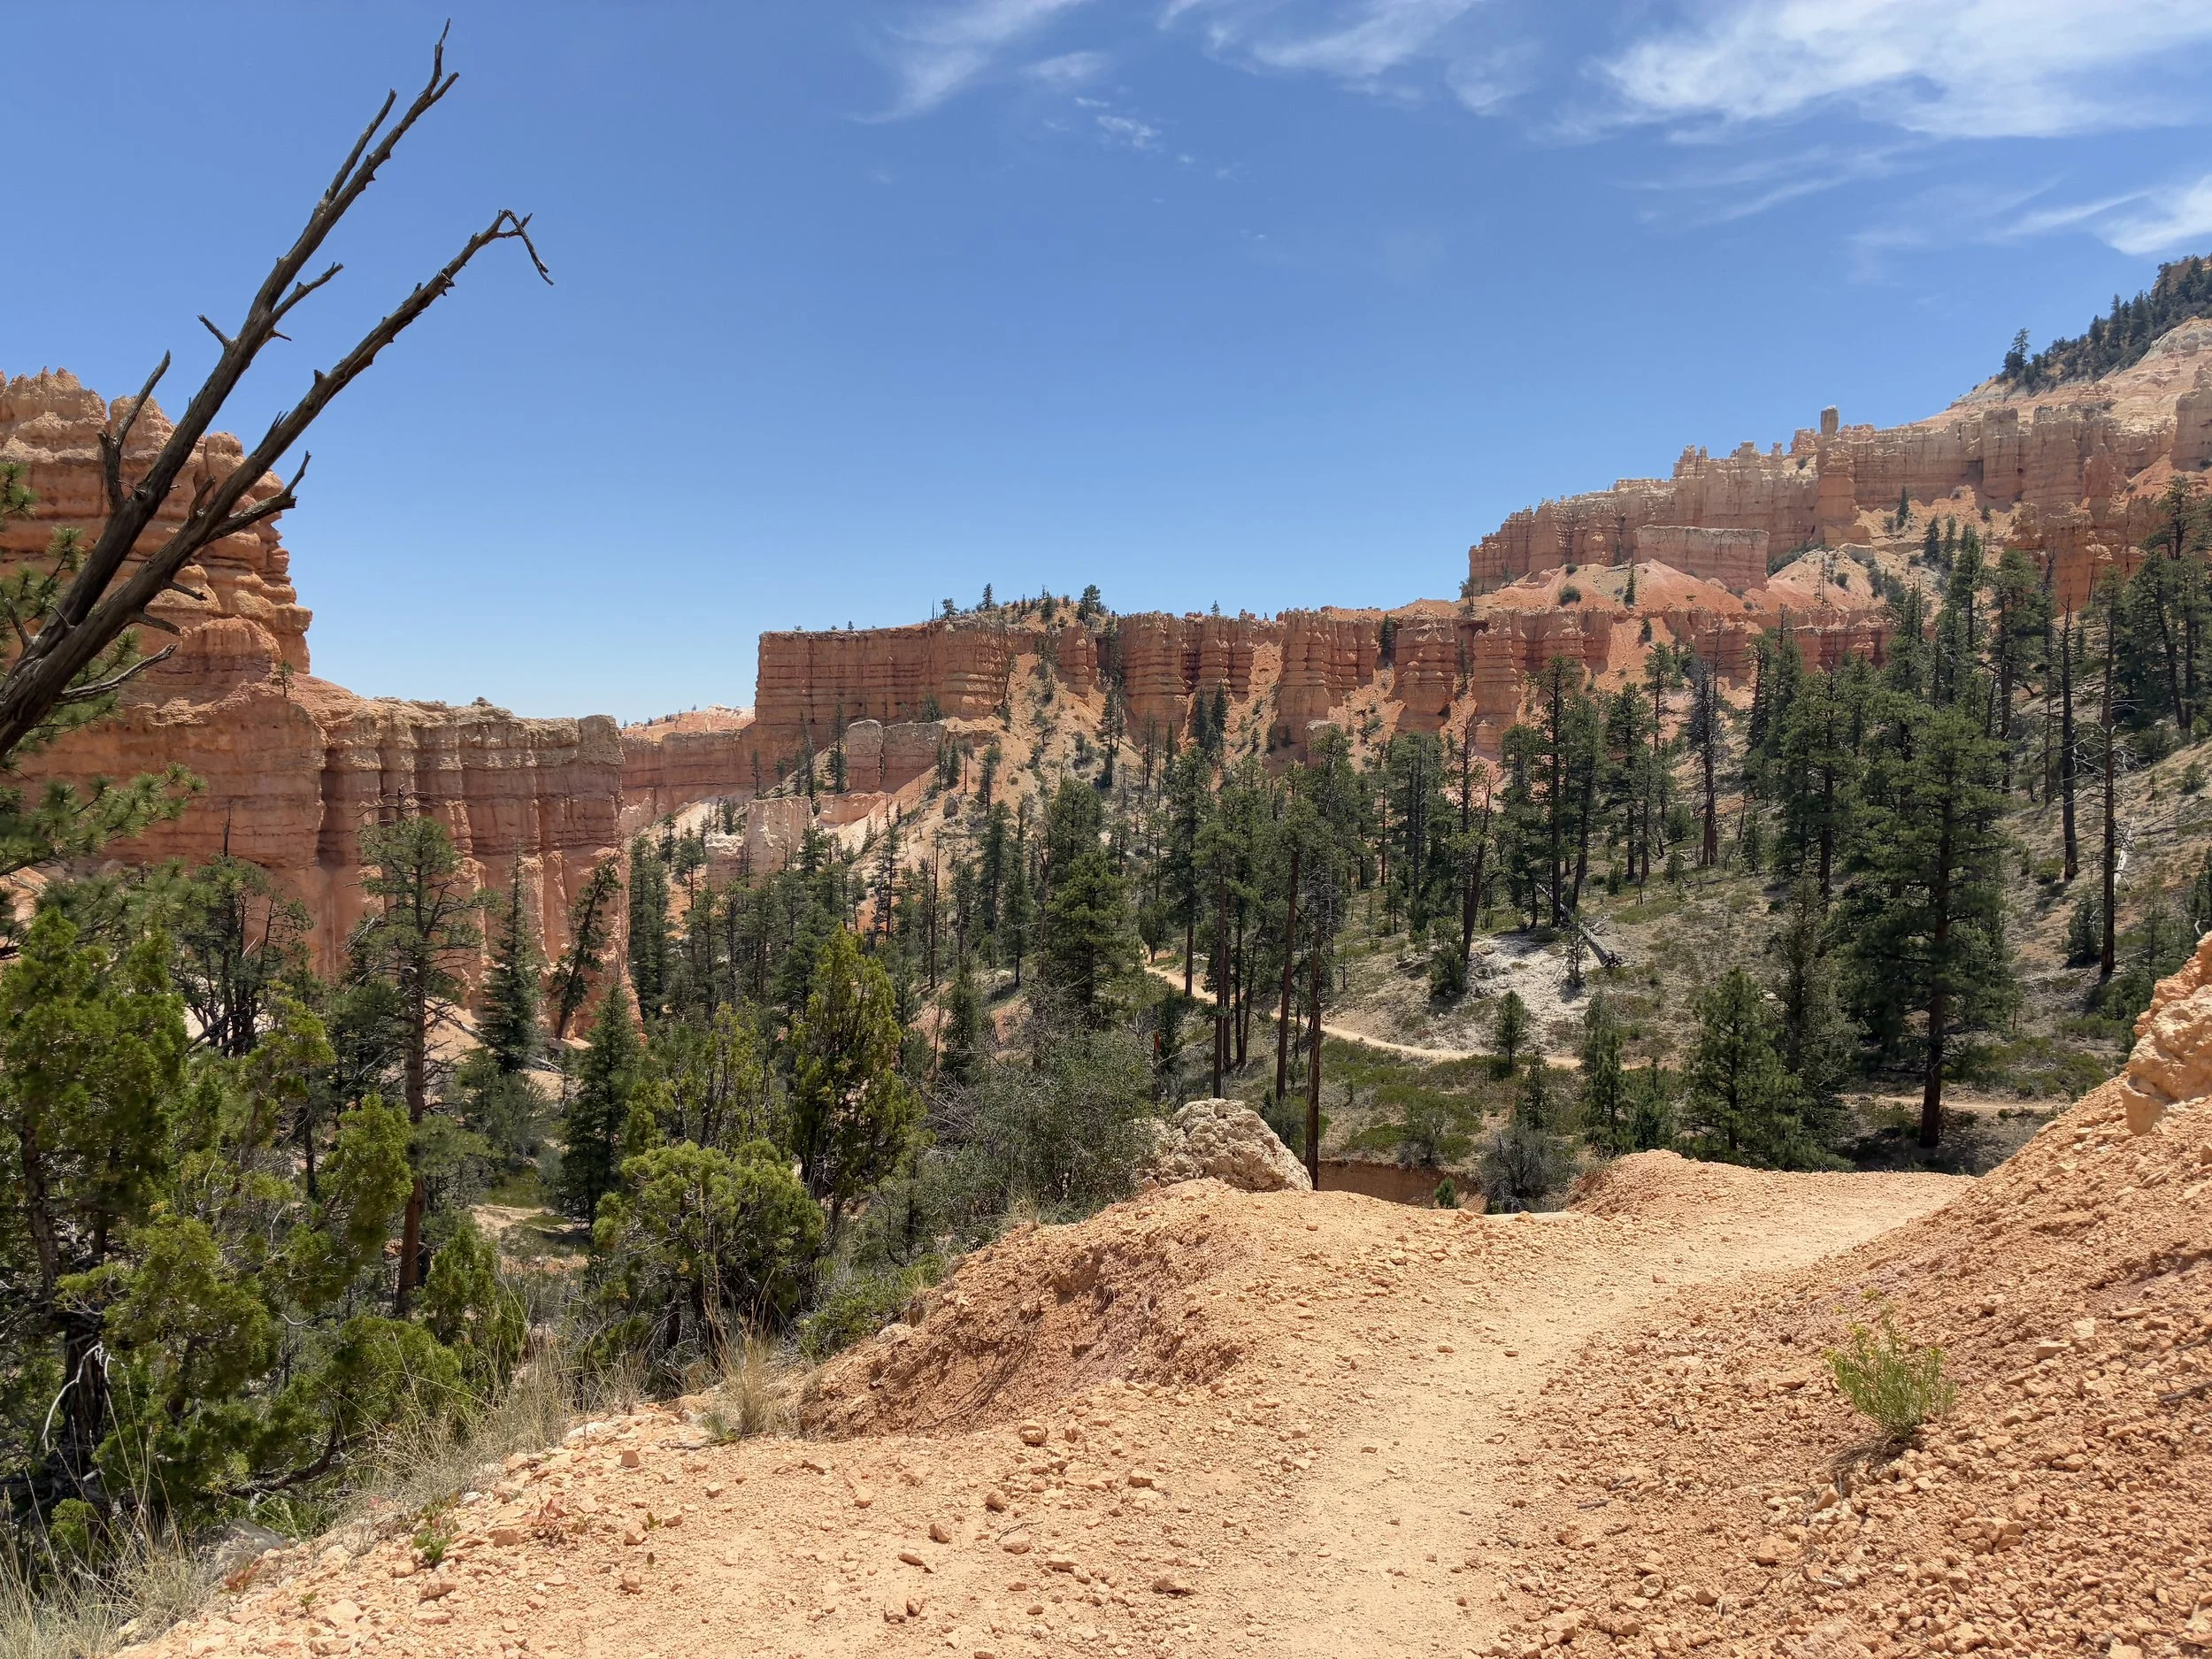
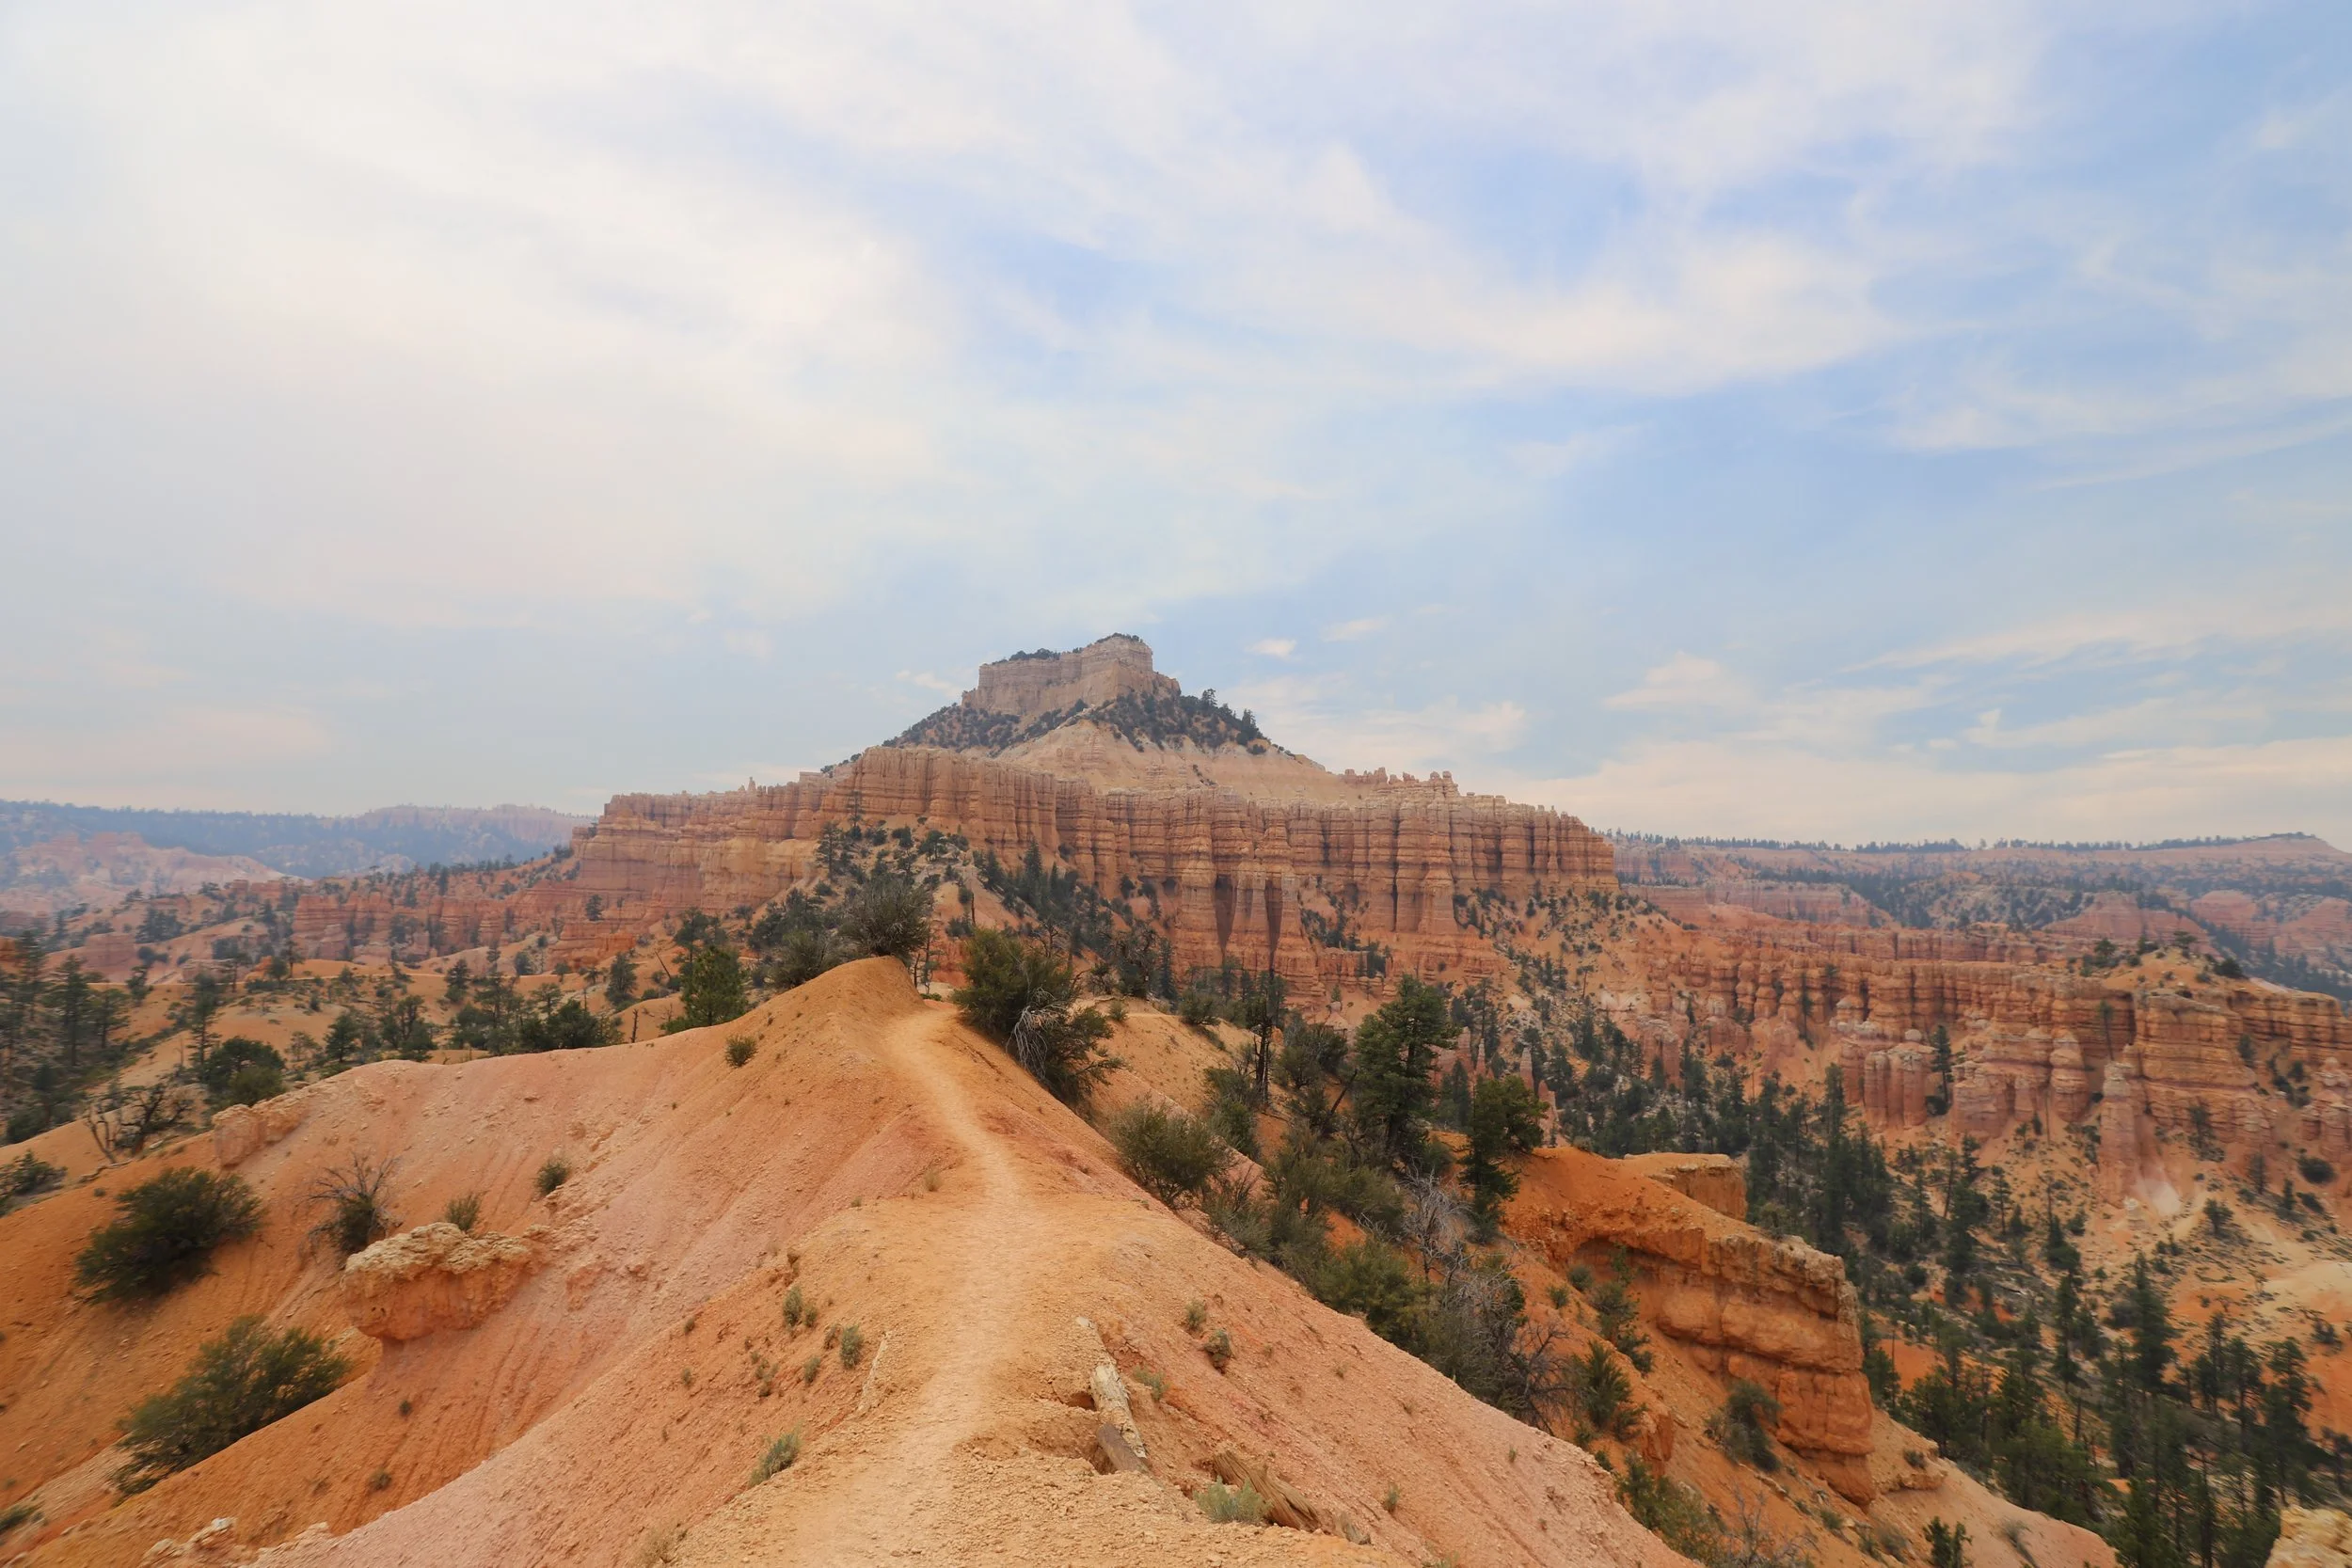
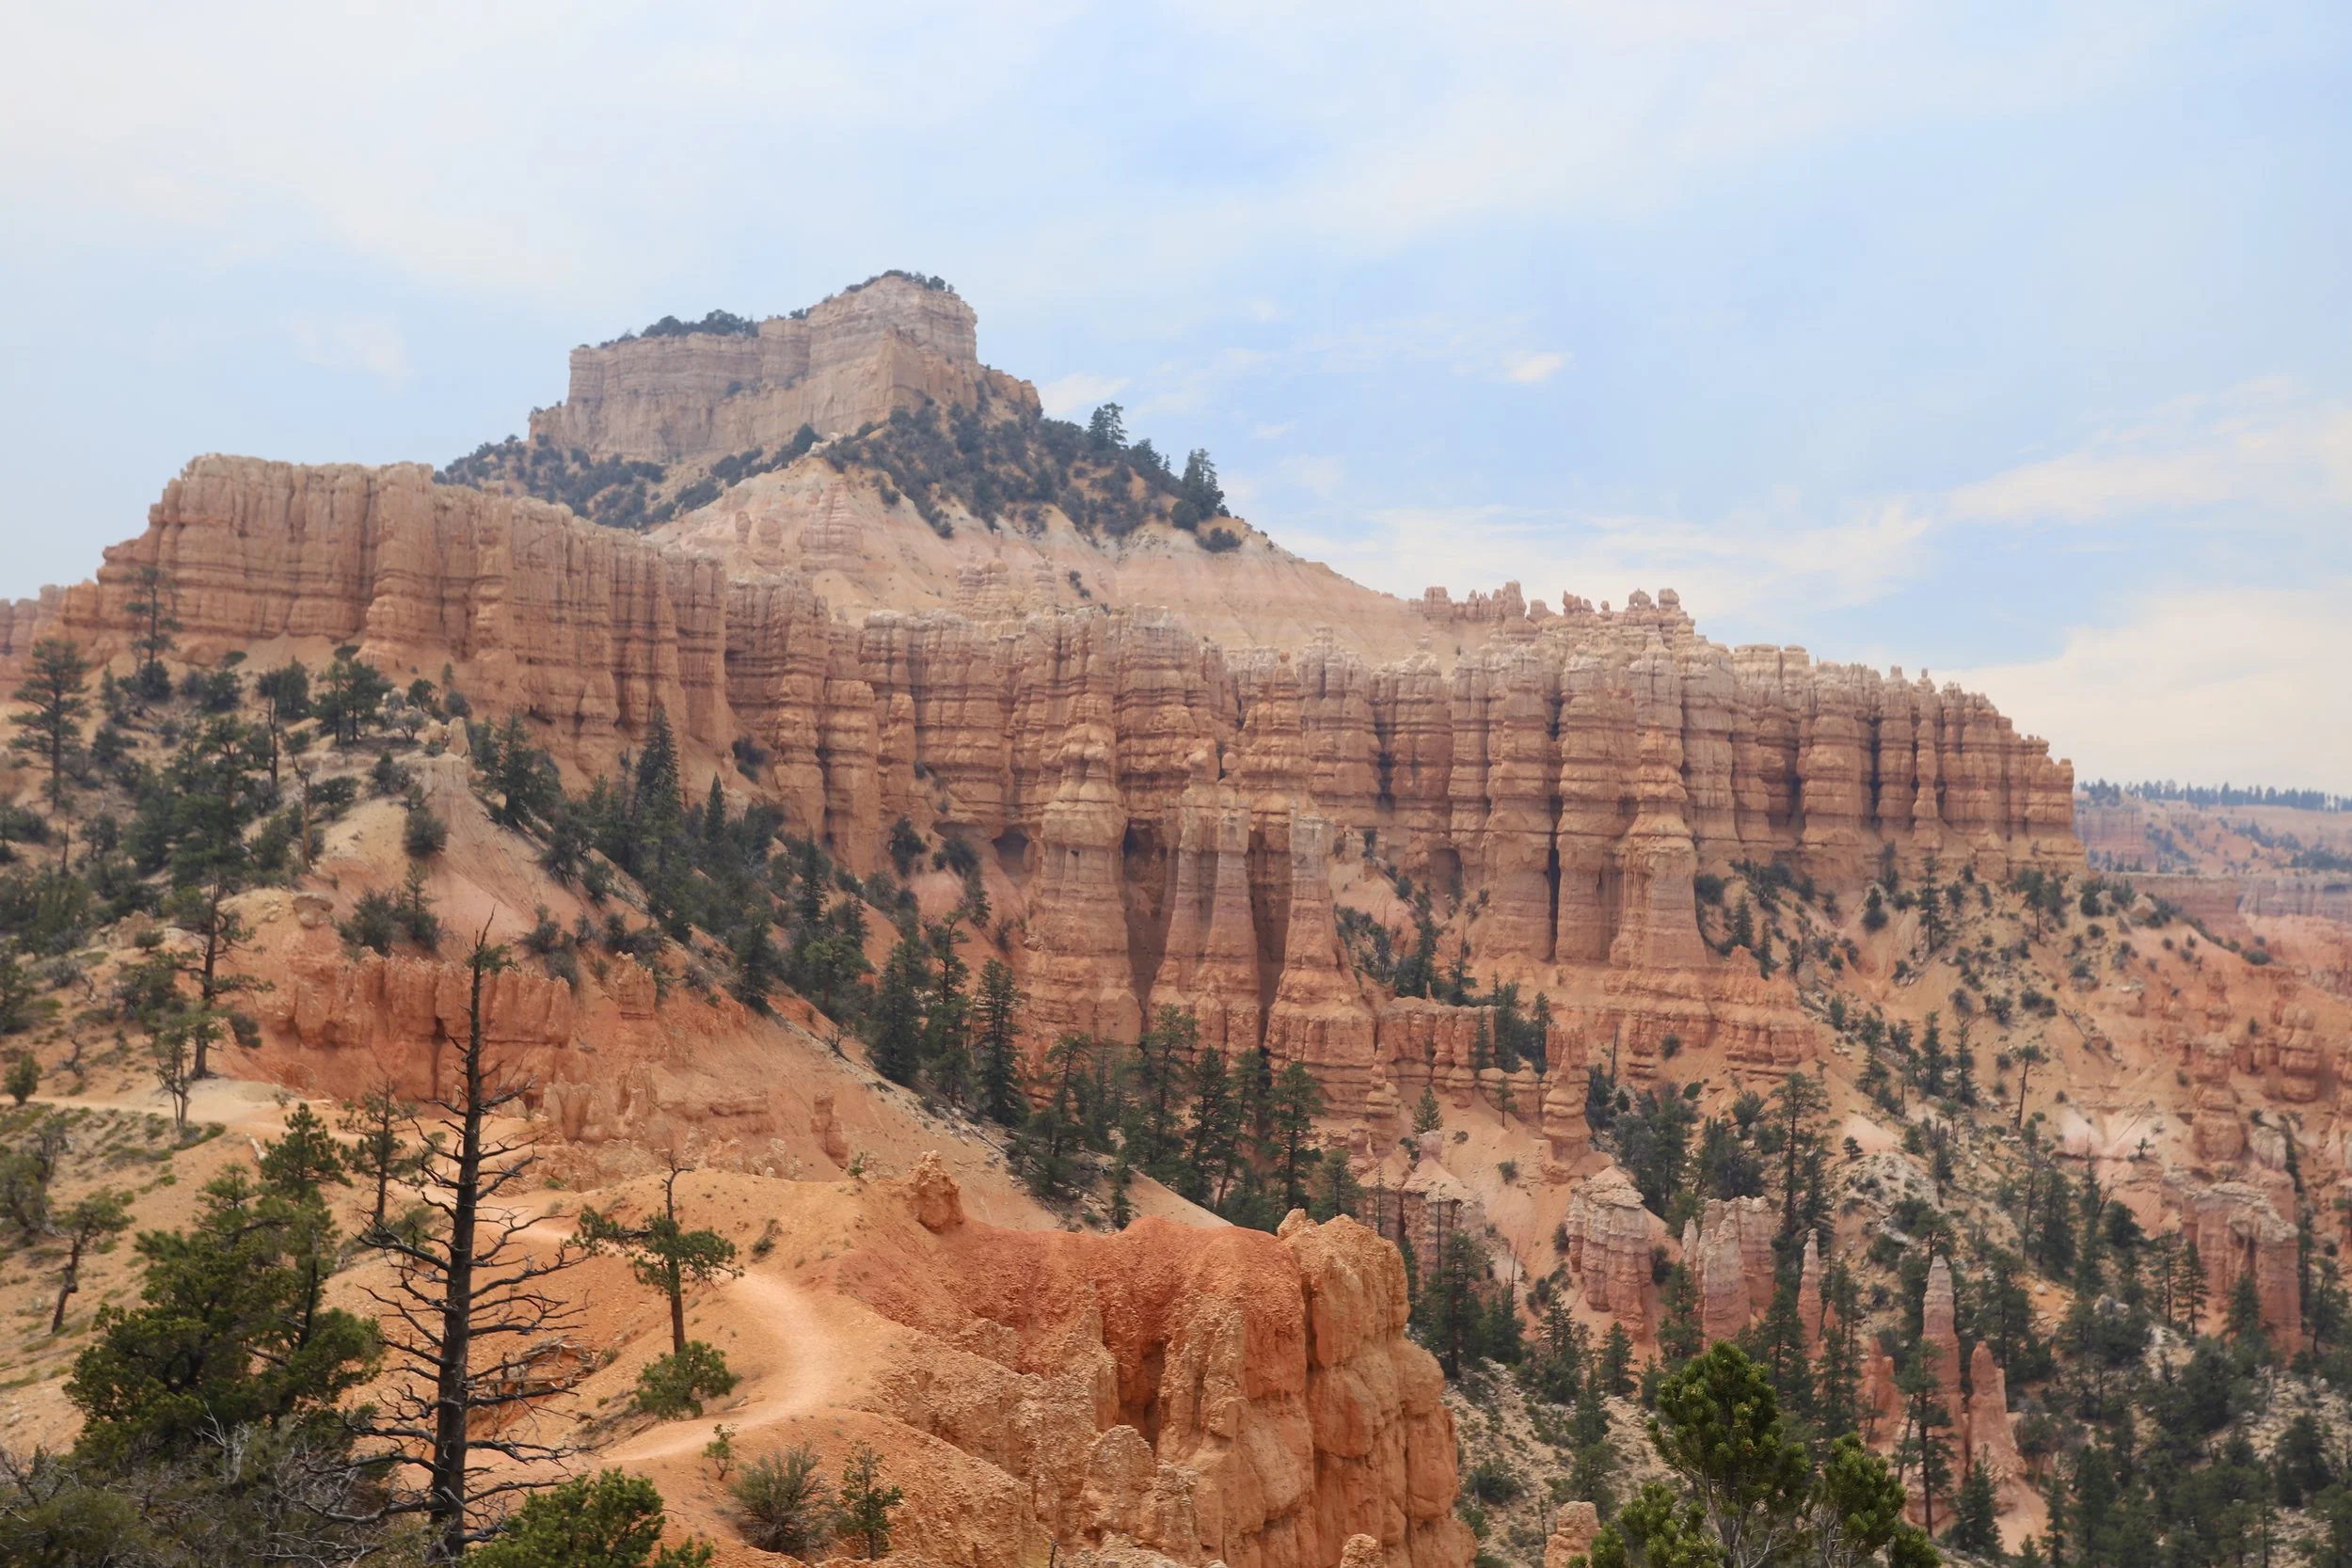
Towards the top of the first really big hill, there are some impressive hoodoos. And I’m still kind of “meh…” about this trail so far, being honest.
Bryce Canyon, Peekaboo Loop
At this point in the trail, it starts going back down, and again being honest, I’m quite a bit happier, but I still feel like I’m missing something. At this point in the trail, I would have recommended Fairyland Loop much more enthusiastically.
Bryce Canyon, Peekaboo Loop
There’s a nice big rock overhang with a bench on the way down that was nice to rest on in the shade and eat some lunch. Not sure why I forgot to take a picture of it. And then we hiked some more – more ups, more downs, more hoodoos.

Bryce Canyon, Peekaboo Loop
About midway through Peekaboo Loop, there was a sign for restrooms. I was surprised since this trail is so much shorter than Fairyland Loop, which does not have bathrooms. Peekaboo Loop is multiple-fold busier, so I guess it makes sense. And there were a lot of families along this trail.
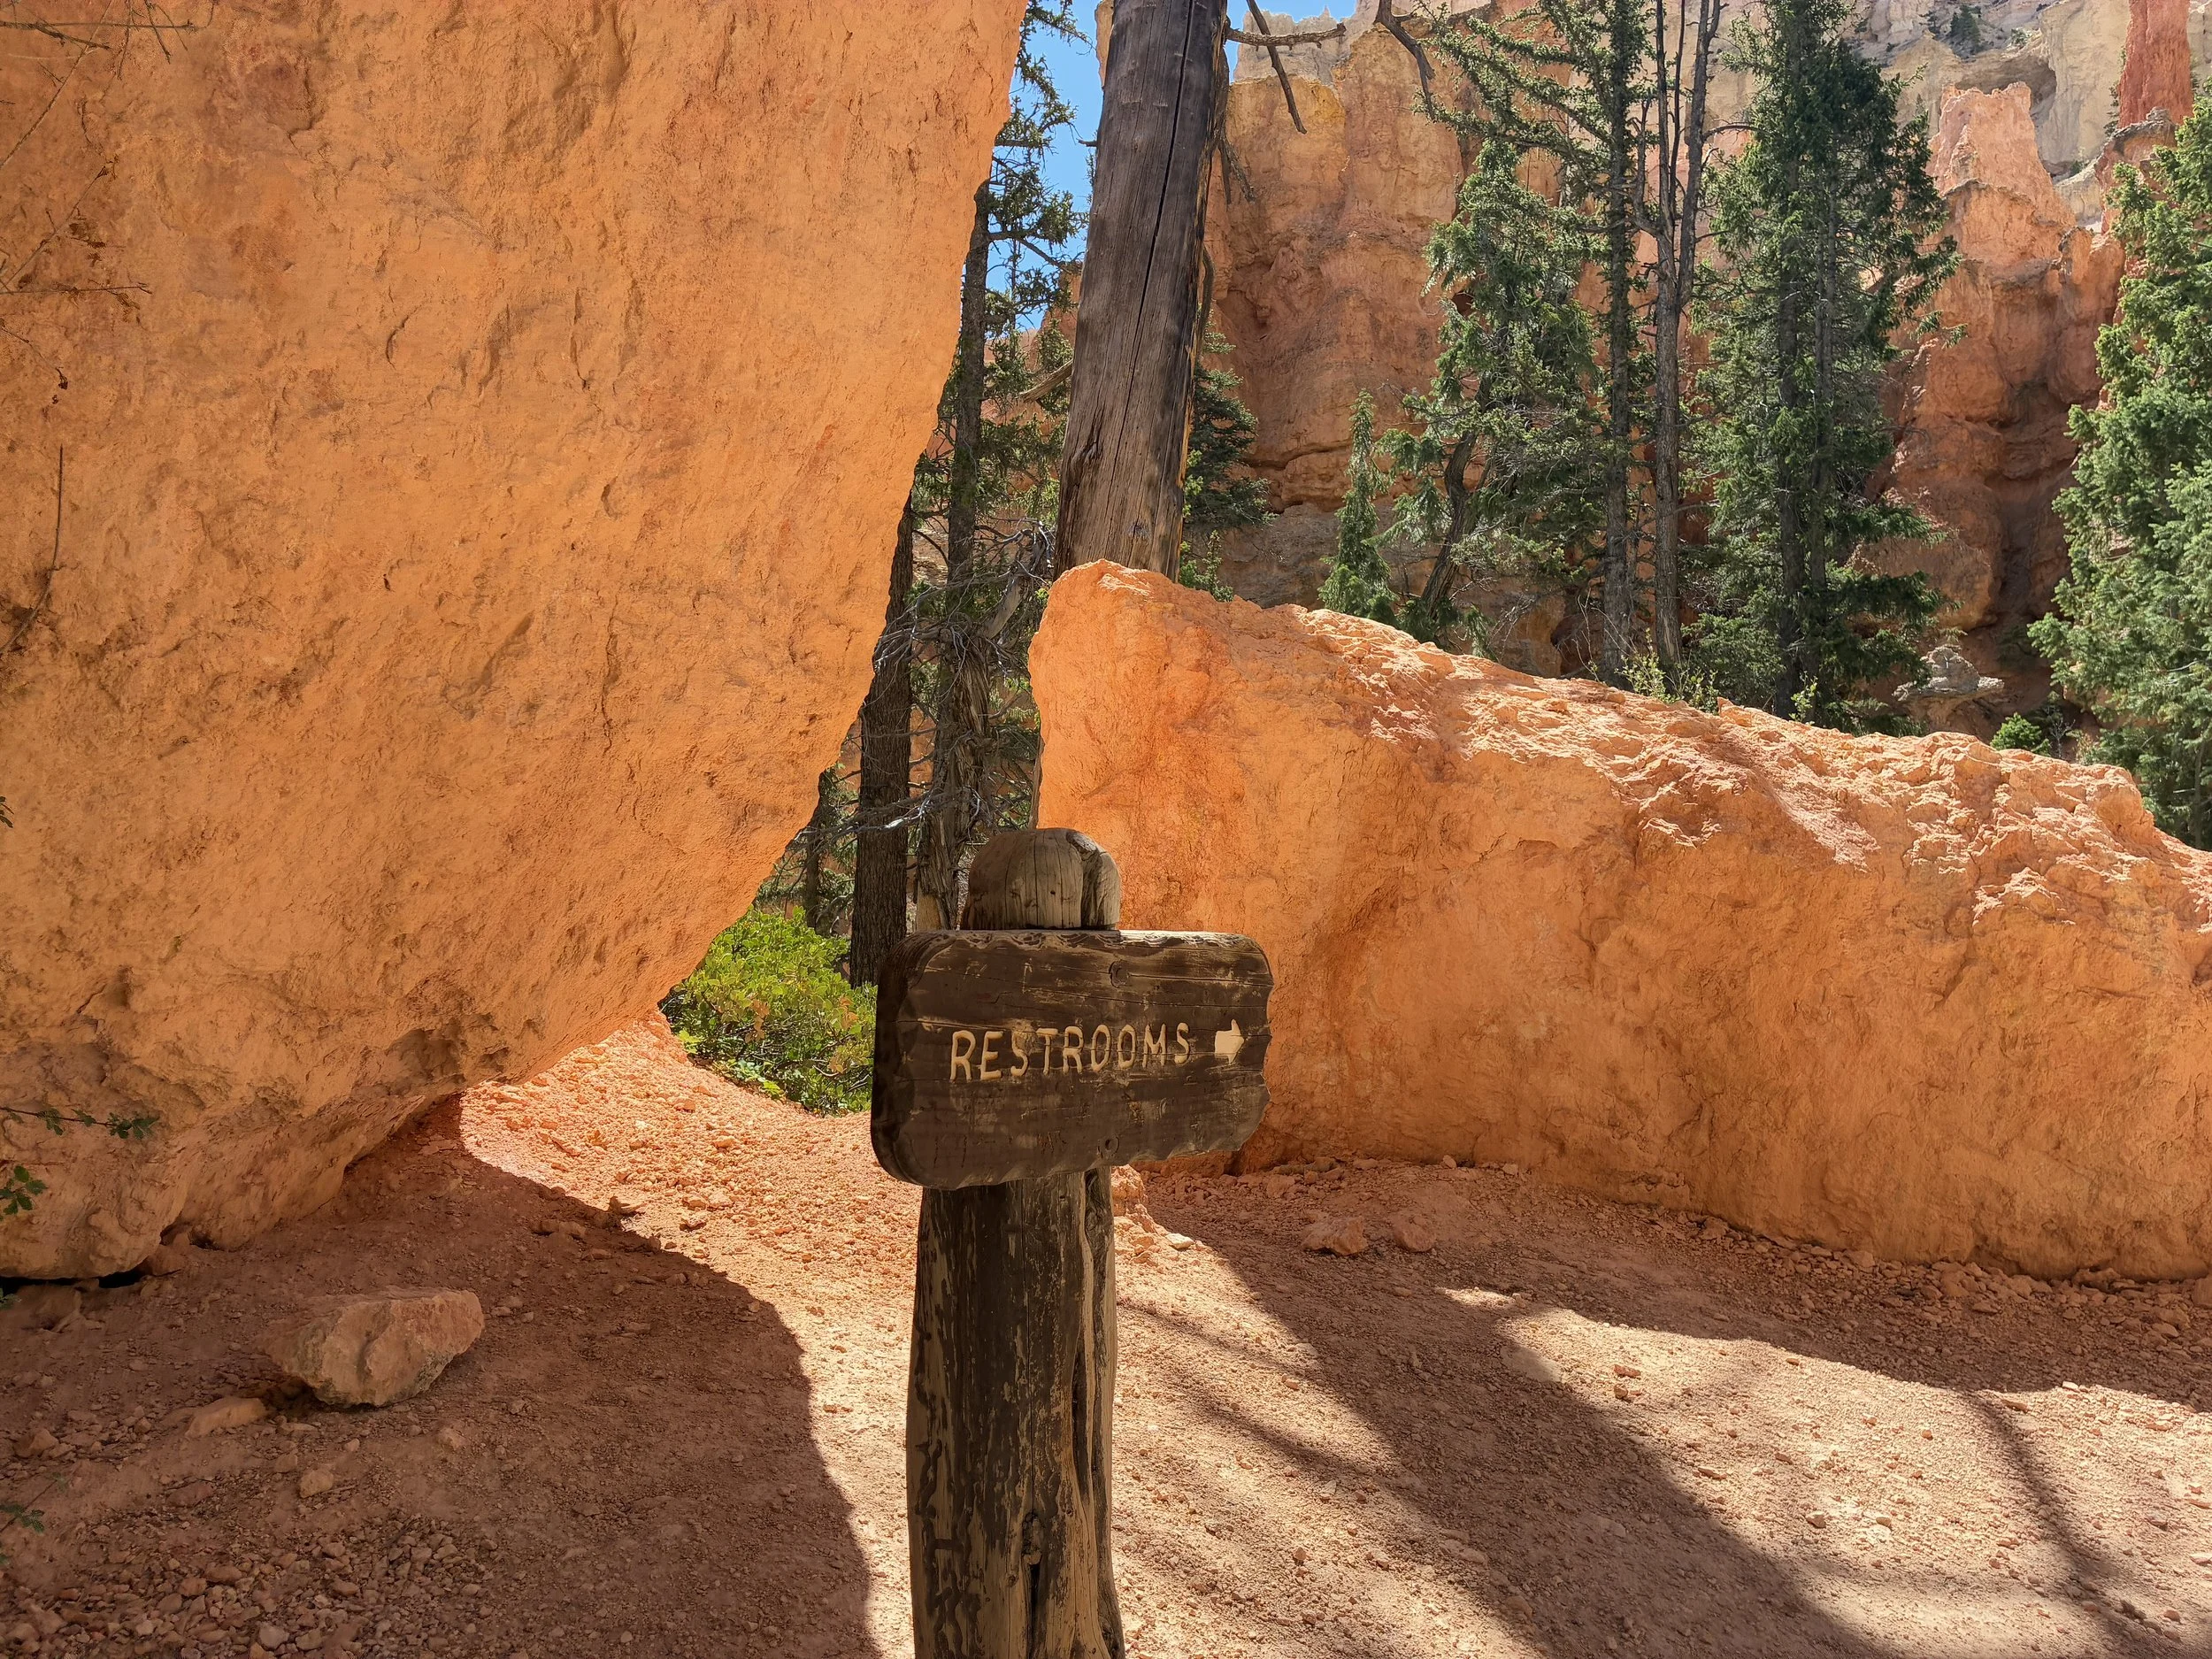
Bryce Canyon, Restrooms are available along the Peekaboo Loop Trail, about halfway into the loop
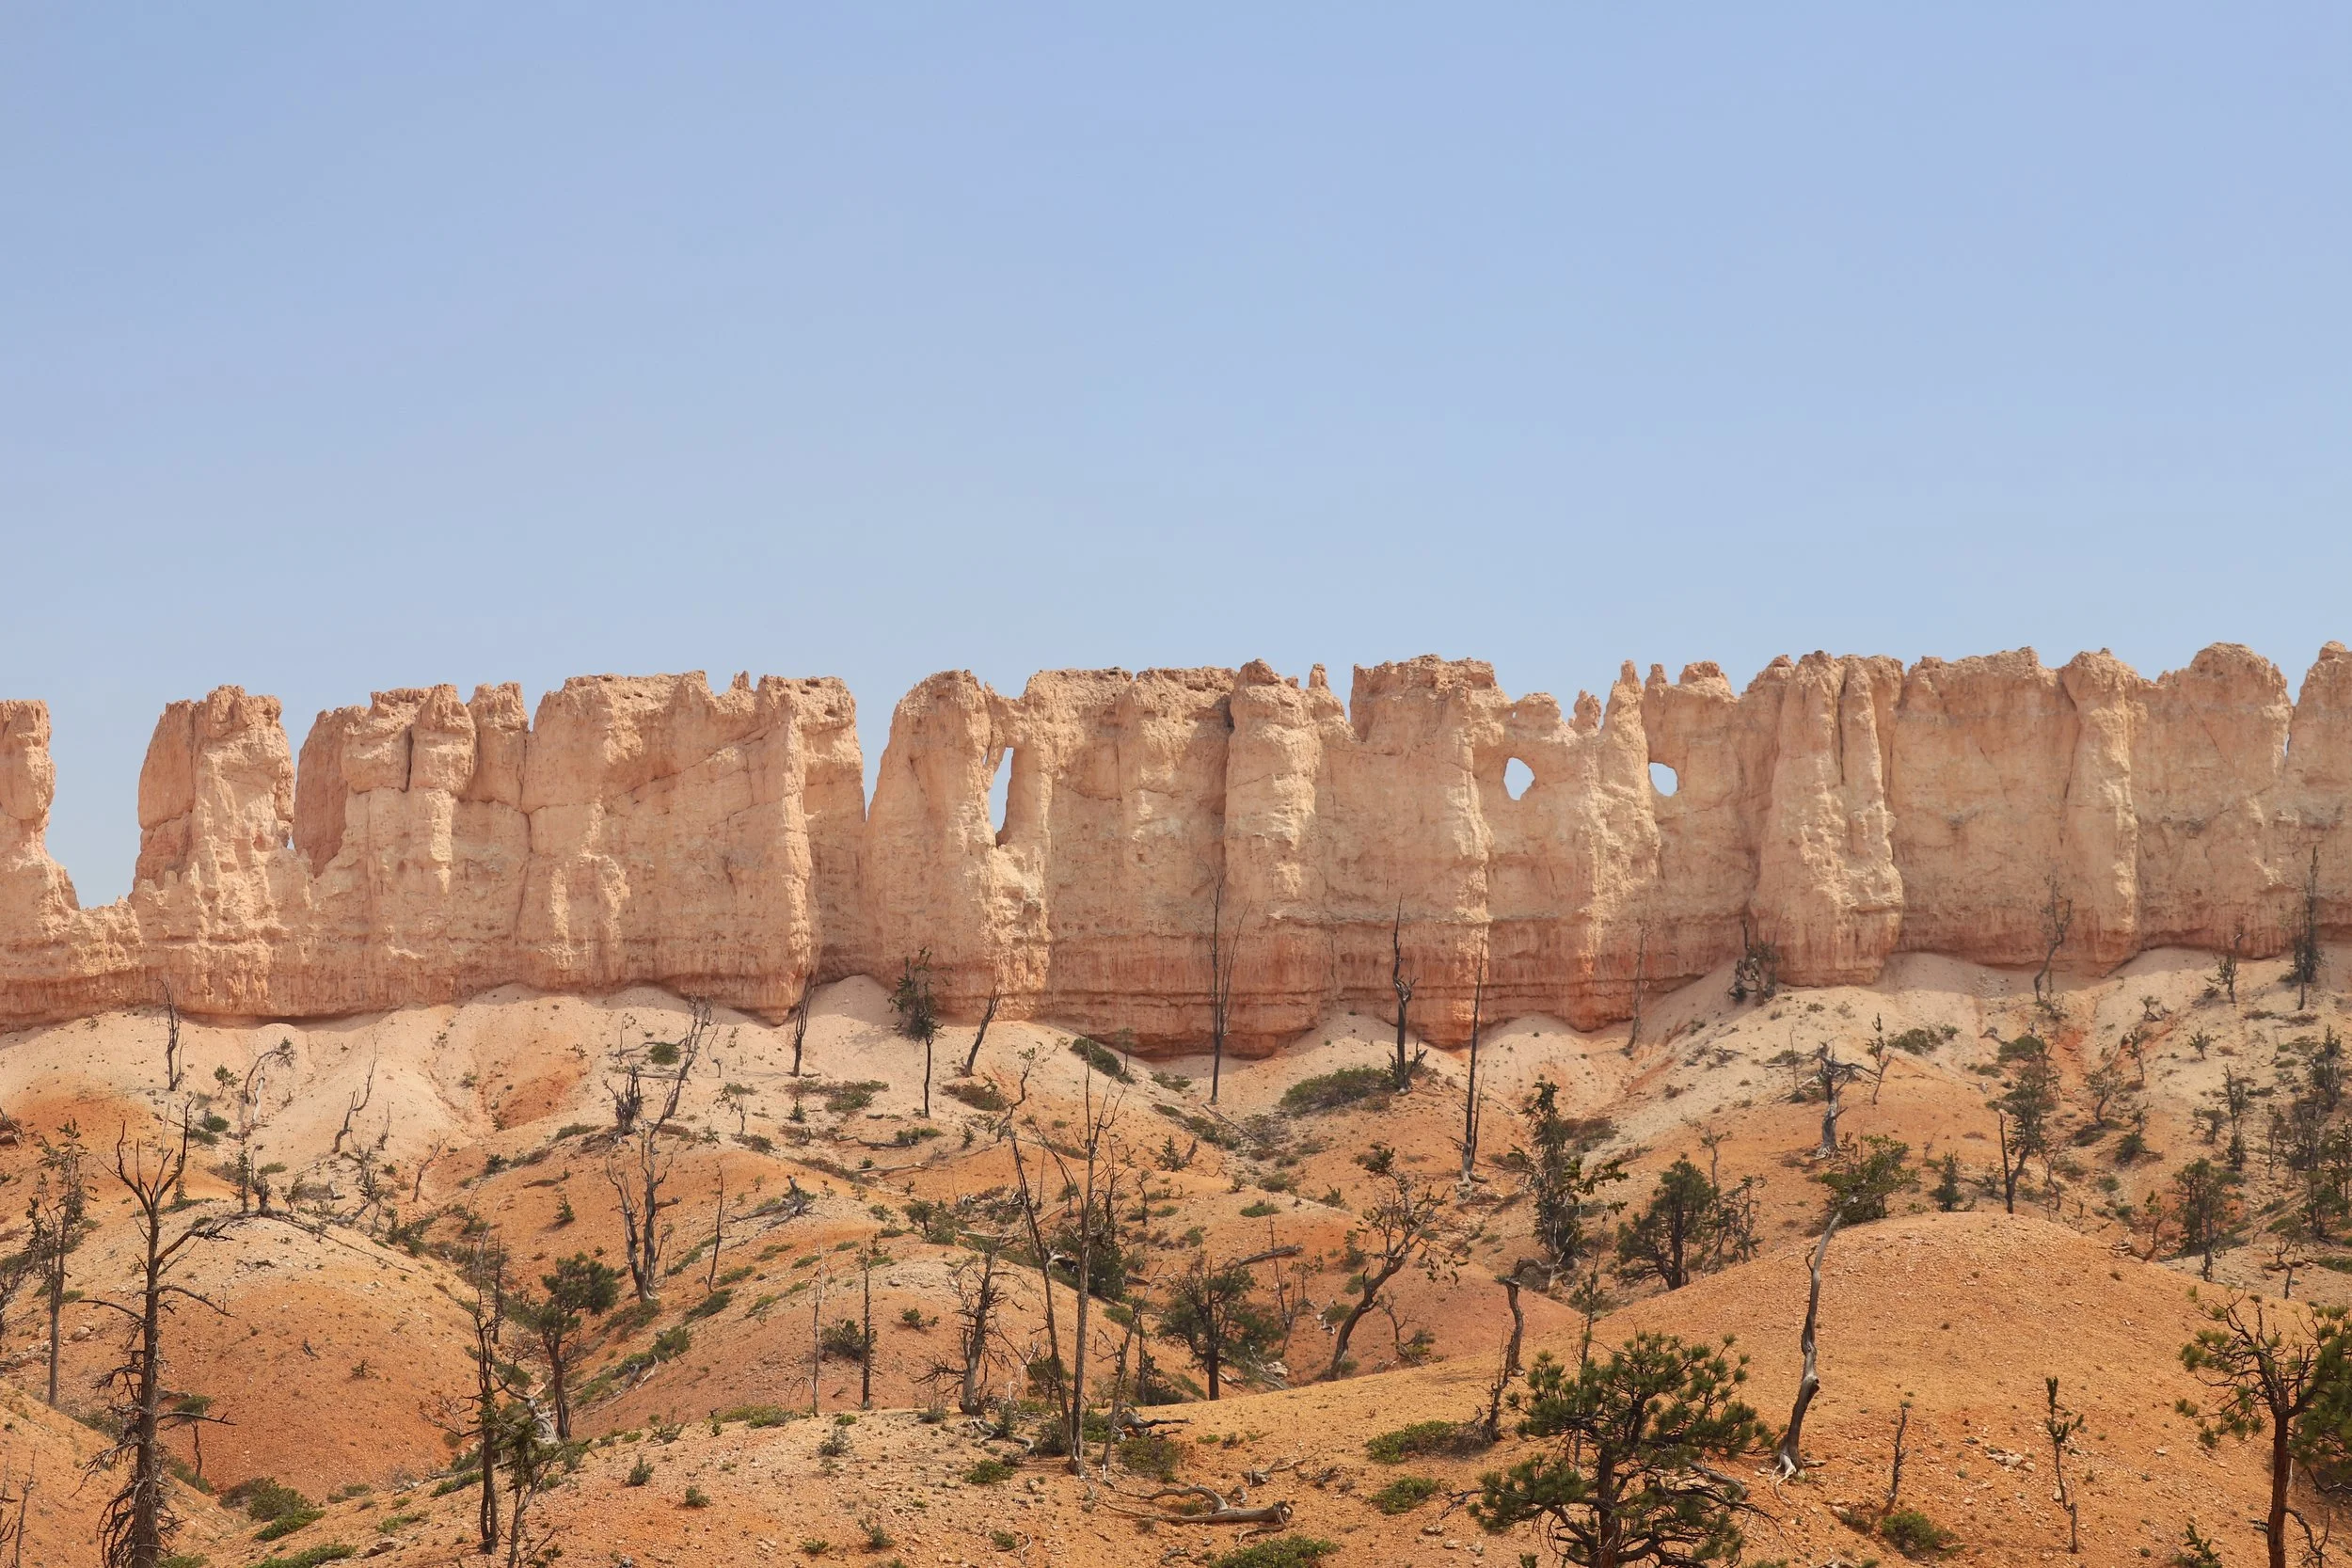
Hiking clockwise, after the restrooms, we head back up along the trail. If I remember right, I think this second to last ascent. All of a sudden, Wall of Windows comes into view, and it is jaw-dropping, stop moving, “stare at it in wonder” sort of beautiful. In an instant, my feelings have changed 180 degrees about this trail. For anyone that can handle a harder trail, this is the one to hike in Bryce Canyon.
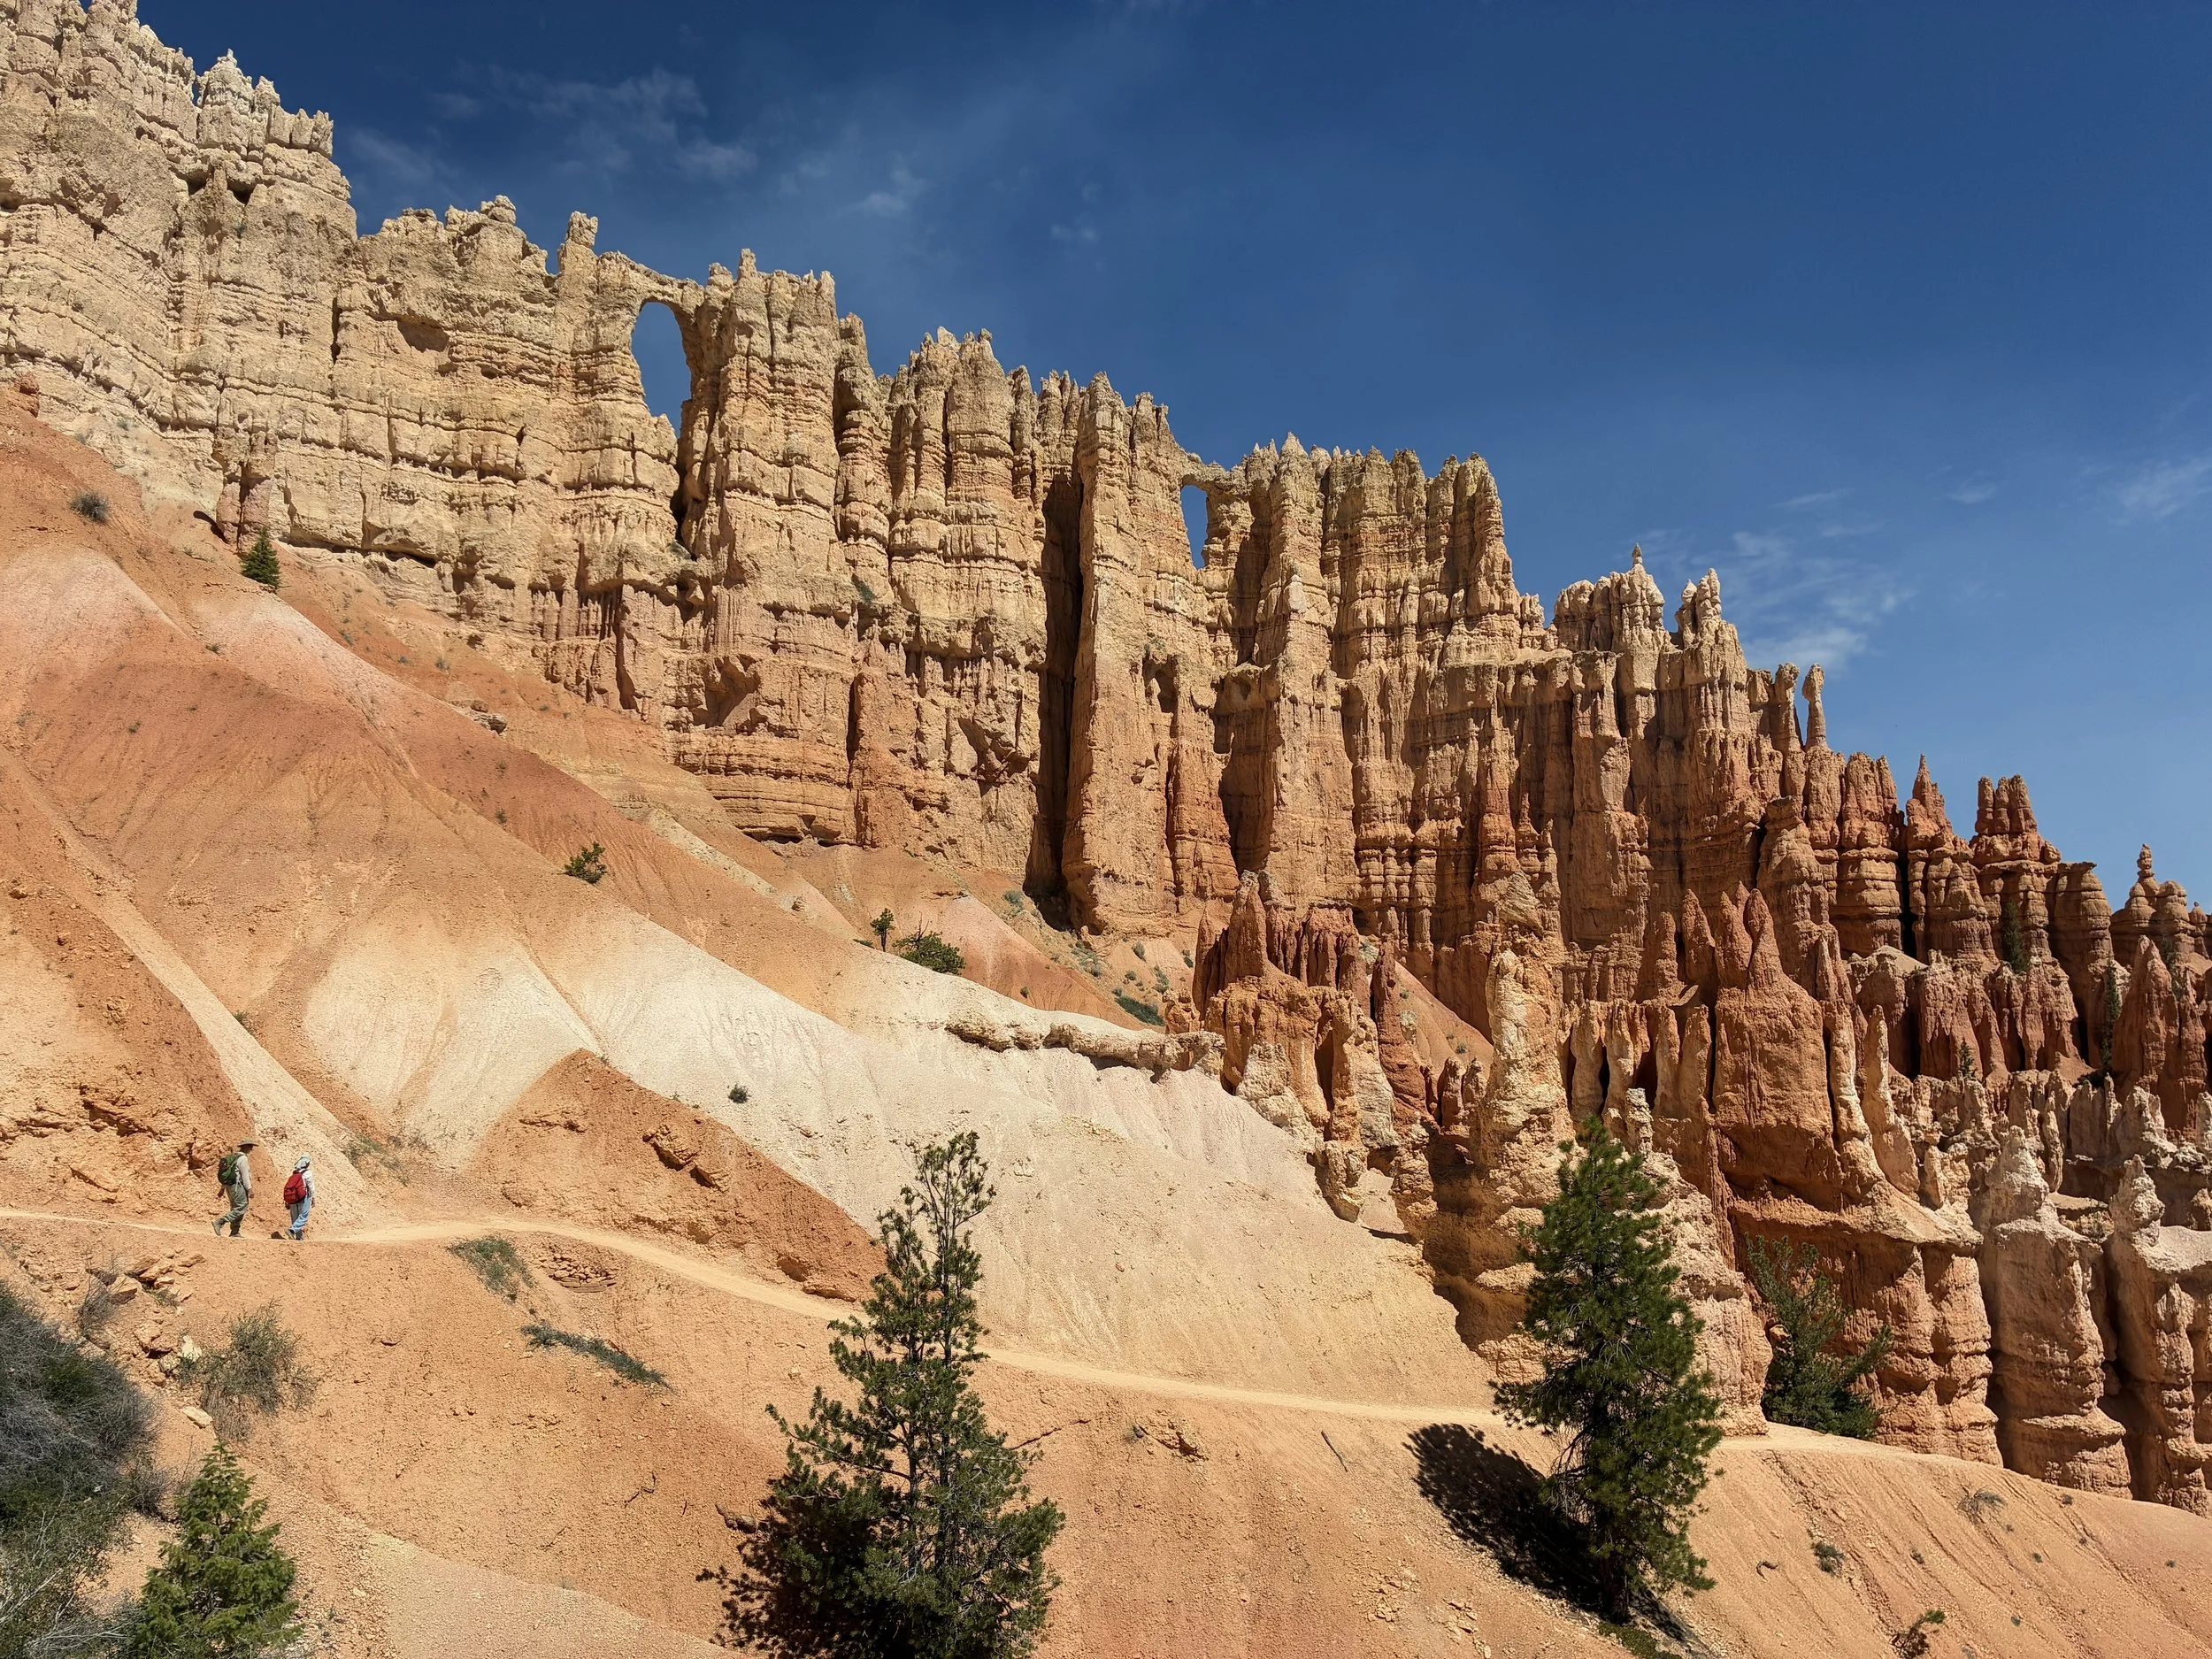
Bryce Canyon, Peekaboo Loop – Wall of Windows
This view goes on and on and on. It’s on all sides of the trail. I could not believe that we stumbled into an area of our planet that was so incredible.
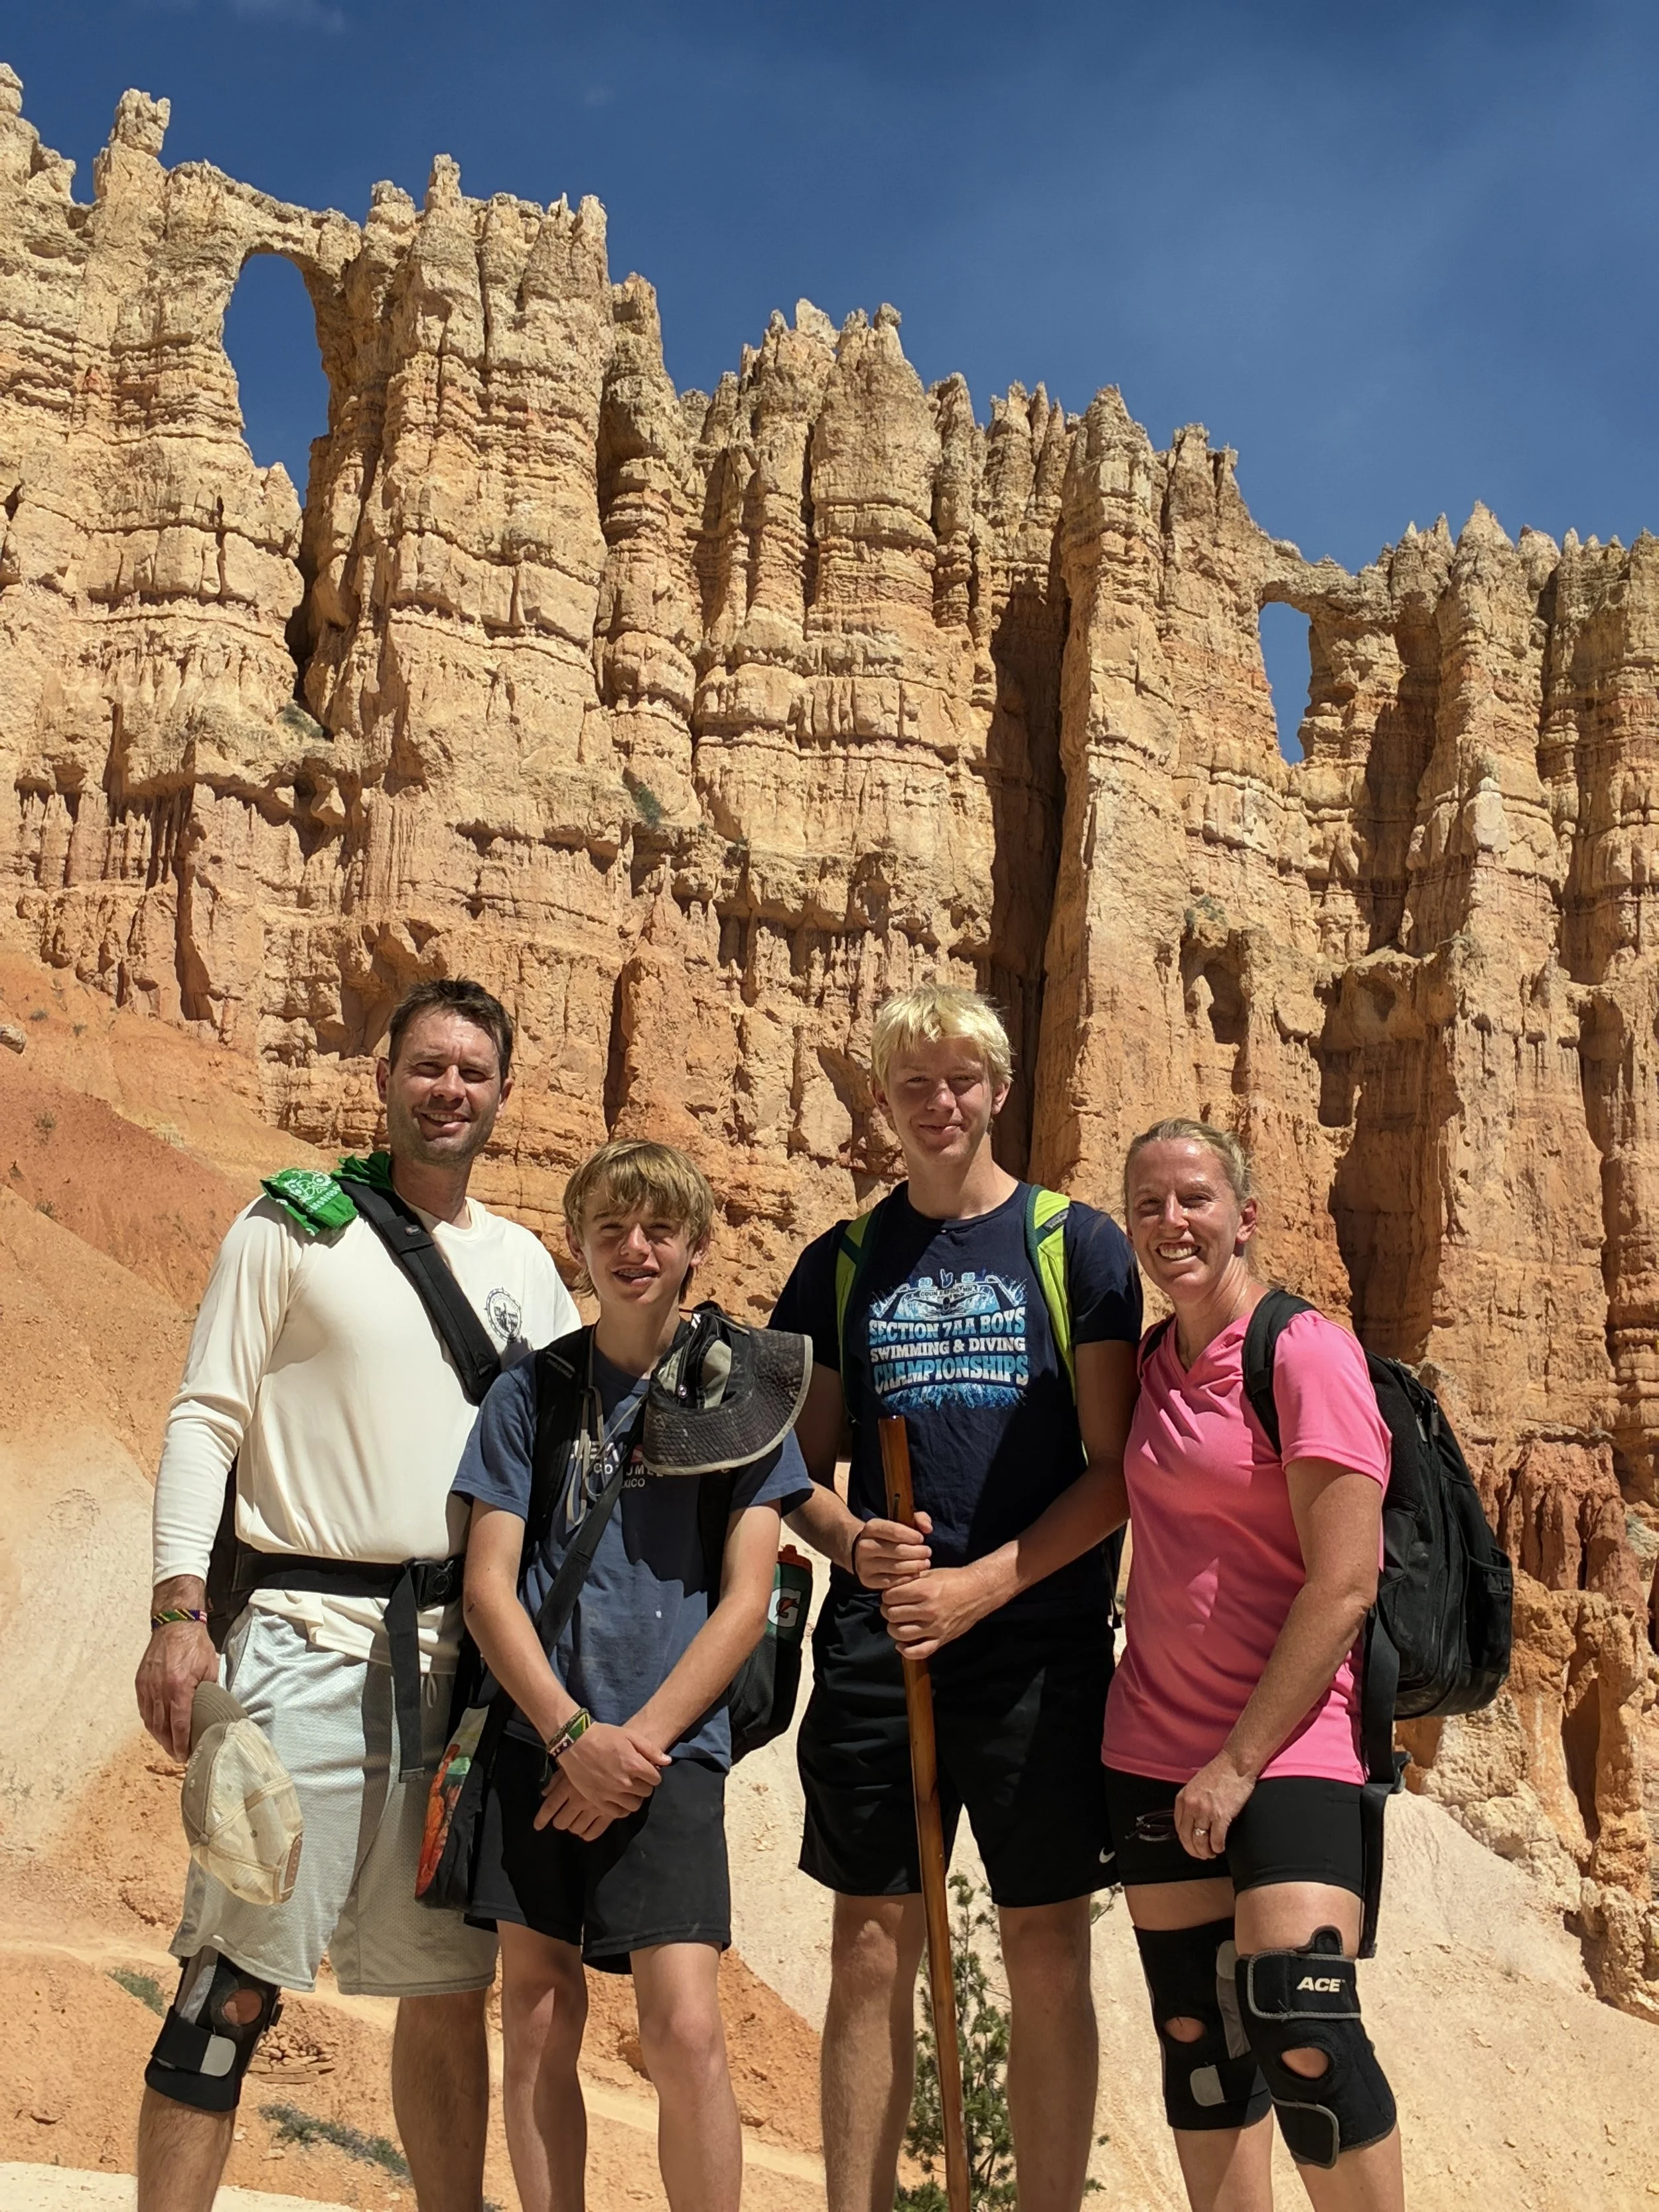
Bryce Canyon, Peekaboo Loop – Wall of Windows – Best spot in Bryce Canyon for a Family Picture
The amazing hoodoos continue for the rest of the loop.
Bryce Canyon, Peekaboo Loop
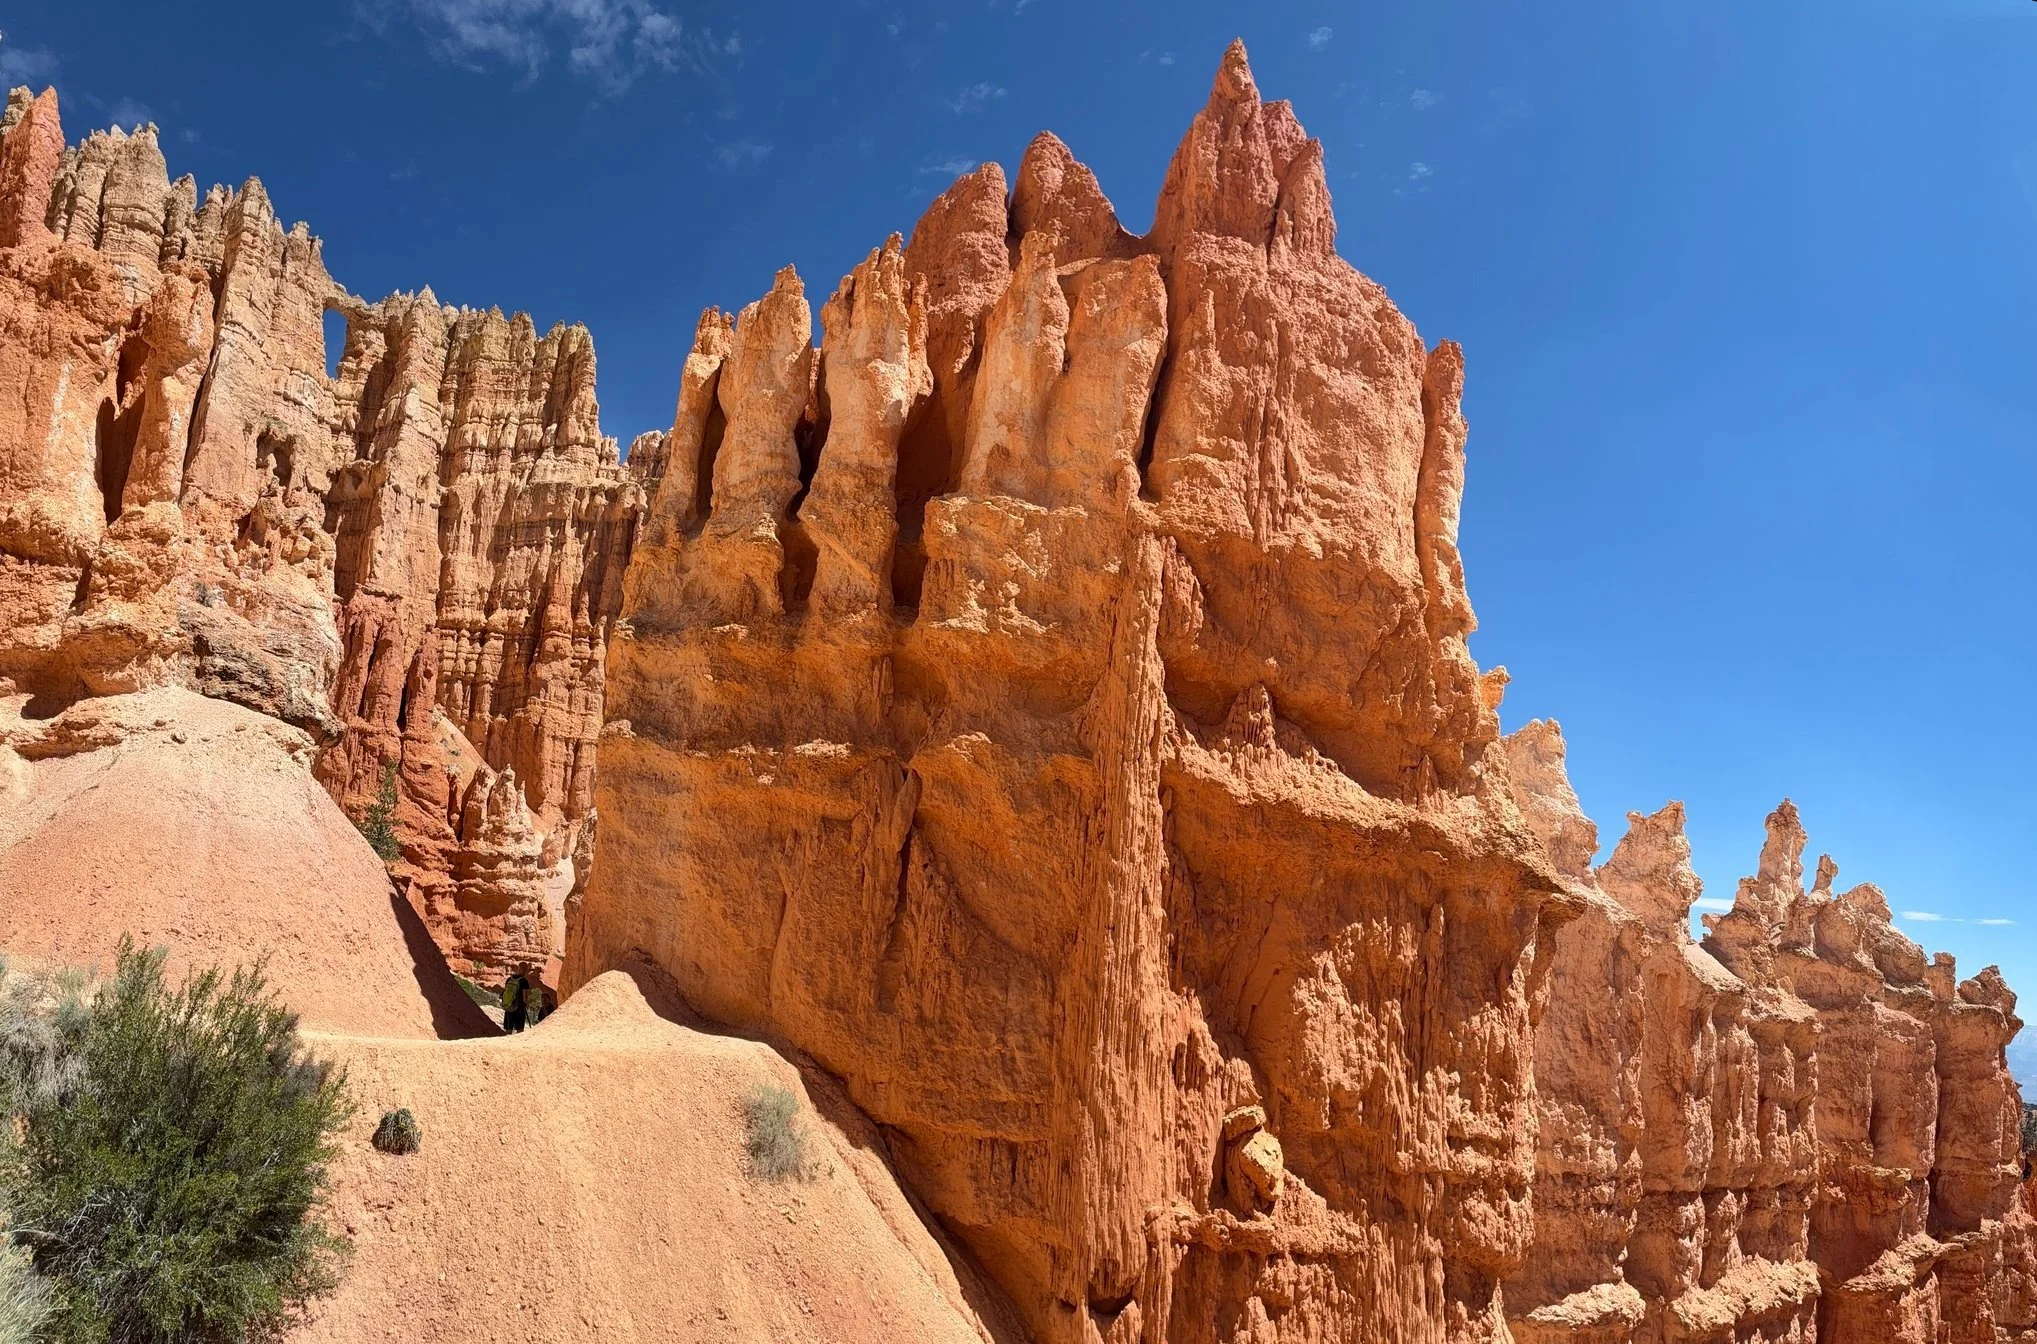
Bryce Canyon, Peekaboo Loop
Bryce Canyon, Peekaboo Loop
I think it’s the last ascent in the trail (until needing to hike back up to the trailhead) that has a huge tunnel in it. The incredible views continue on the other side of the tunnel.
Bryce Canyon, Peekaboo Loop – second best spot for a family photo)
The trail now winds down into the valley, and pretty soon it’s possible to see the Wall Street trail on the other side of the valley.
Bryce Canyon, Peekaboo Loop
Bryce Canyon, Peekaboo Loop
Bryce Canyon, Peekaboo Loop

Bryce Canyon, Peekaboo Loop – Final descent back to Navajo Loop
10) Inspiration Point (Lower and Upper Viewpoints)
Distance - 0.6 miles (out-and-back)
Elevation Gain - 150ft (this is a short and steep trail)
Trailhead Location - There is a parking lot at Inspiration Point and this is also a shuttle stop.
Helpful Information - Of all of the viewpoints, this is the hardest one to hike due to the steepness of the trail. There are two Inspiration Point viewpoints (Lower and Upper). I wish I could say it was worth just stopping at the lower (easier) viewpoint, but for anyone that’s all the way here…. put in that extra effort and walk up to the upper viewpoint too.
Inspiration Point is marked in dark grey.
There’s a reason the shuttle stops at Inspiration Point. The view is from higher up (further away) than Sunrise and Sunset, and as a result there are an amazing amount of hoodoos that can be seen in the canyon below.
Bryce Canyon, Lower Inspiration Point
Bryce Canyon, Lower Inspiration Point - The hoodoos look like armies of marching soldiers.
Bryce Canyon, Inspiration Point - The trees roots are displayed as a result of dramatic soil erosion.
Keep walking up the Rim Trail - It’s hard, but not too hard. You can do it!
Bryce Canyon, Upper Inspiration Point

Bryce Canyon, Upper Inspiration Point - the cloud is a smoke cloud from the 2025 France Dixie Fire
11) Bryce Point
Distance - 0.2 miles (out-and-back)
Elevation Gain - Flat trail
Trailhead Location - There is both parking lot at Bryce Point and a shuttle stop.
Helpful Information - Of all of the viewpoints in the park, we though Bryce Point was the best one. Makes sense, as it is named after the park. This is both a short and an easy walk. It should be on everyone’s list to stop at.
The short walk to Bryce Point is marked in pink.
The hike out to Bryce Point is quick, short, and easy. This viewpoint is also not busy –we had this view all to ourselves.
Off on the left side are pre-hoodoos – arches and windows. Eventually the top part of the rock will erode, leaving a hoodoo.
Bryce Canyon, Bryce Point – Beginning life of a hoodoo
The viewpoint is incredible. Peekaboo loop is in the valley below, and this was the best section of the trail. Seeing it from above was almost as amazing.
Bryce Canyon, Bryce Point – Looking out towards Peekaboo Loop
12) Rim Trail: Bryce Point to Sunset Point (one-way)
Distance - 2.3 miles (one-way)
Elevation Gain - In the direction Bryce Point to Sunset Point, the trail mostly descends, with an approximate rise of 150ft.
Trailhead Location - Use the shuttle option at Bryce Point and Sunset Point and just hike in one direction, starting at Bryce Point. Parking is available at both sides of the trailhead. The shuttle goes in the direction from Bryce Point to Sunset Point, so leave a car at Sunset Point for a quick departure.
Helpful Information -This rim trail isn’t flat, and I wouldn’t refer to it as “easy”, but it’s one of the “easier” options to see multiple views of the hoodoos from above.

The Rim Trail is shown in red.
This is the one trail recommendation in this post that I haven’t yet tried. With over 19-miles hiked inside of Bryce Canyon in 2025, we just didn’t have an extra 2.3 miles in us. But I think this trail is still worth mentioning as an option for anyone looking for an option to see incredible views without needing to hike into the canyon.
Note that even though this trail is along the rim, the hike is not flat.

Bryce Canyon, Rim Trail – about 200ft along the Rim Trail past Upper Inspiration Point
13) Paria Point
Distance - 0.4 miles
Elevation Gain - Flat
Trailhead Location - Paria Point has its own parking lot.
Helpful Information - This is an easy, paved trail, but I didn’t think the view was worth the stop.

The trail to Paria Point is marked in yellow
Paria Point is a very easy paved trail, near Bryce Point. There are a lot of beautiful places within Bryce Canyon, and while it’s pretty at Paria Point, I wasn’t wowed. I would instead recommend stopping at Fairyland Point, Sunrise Point, Sunset Point, Natural Bridge, and Rainbow Point.
Bryce Canyon, Paria Point
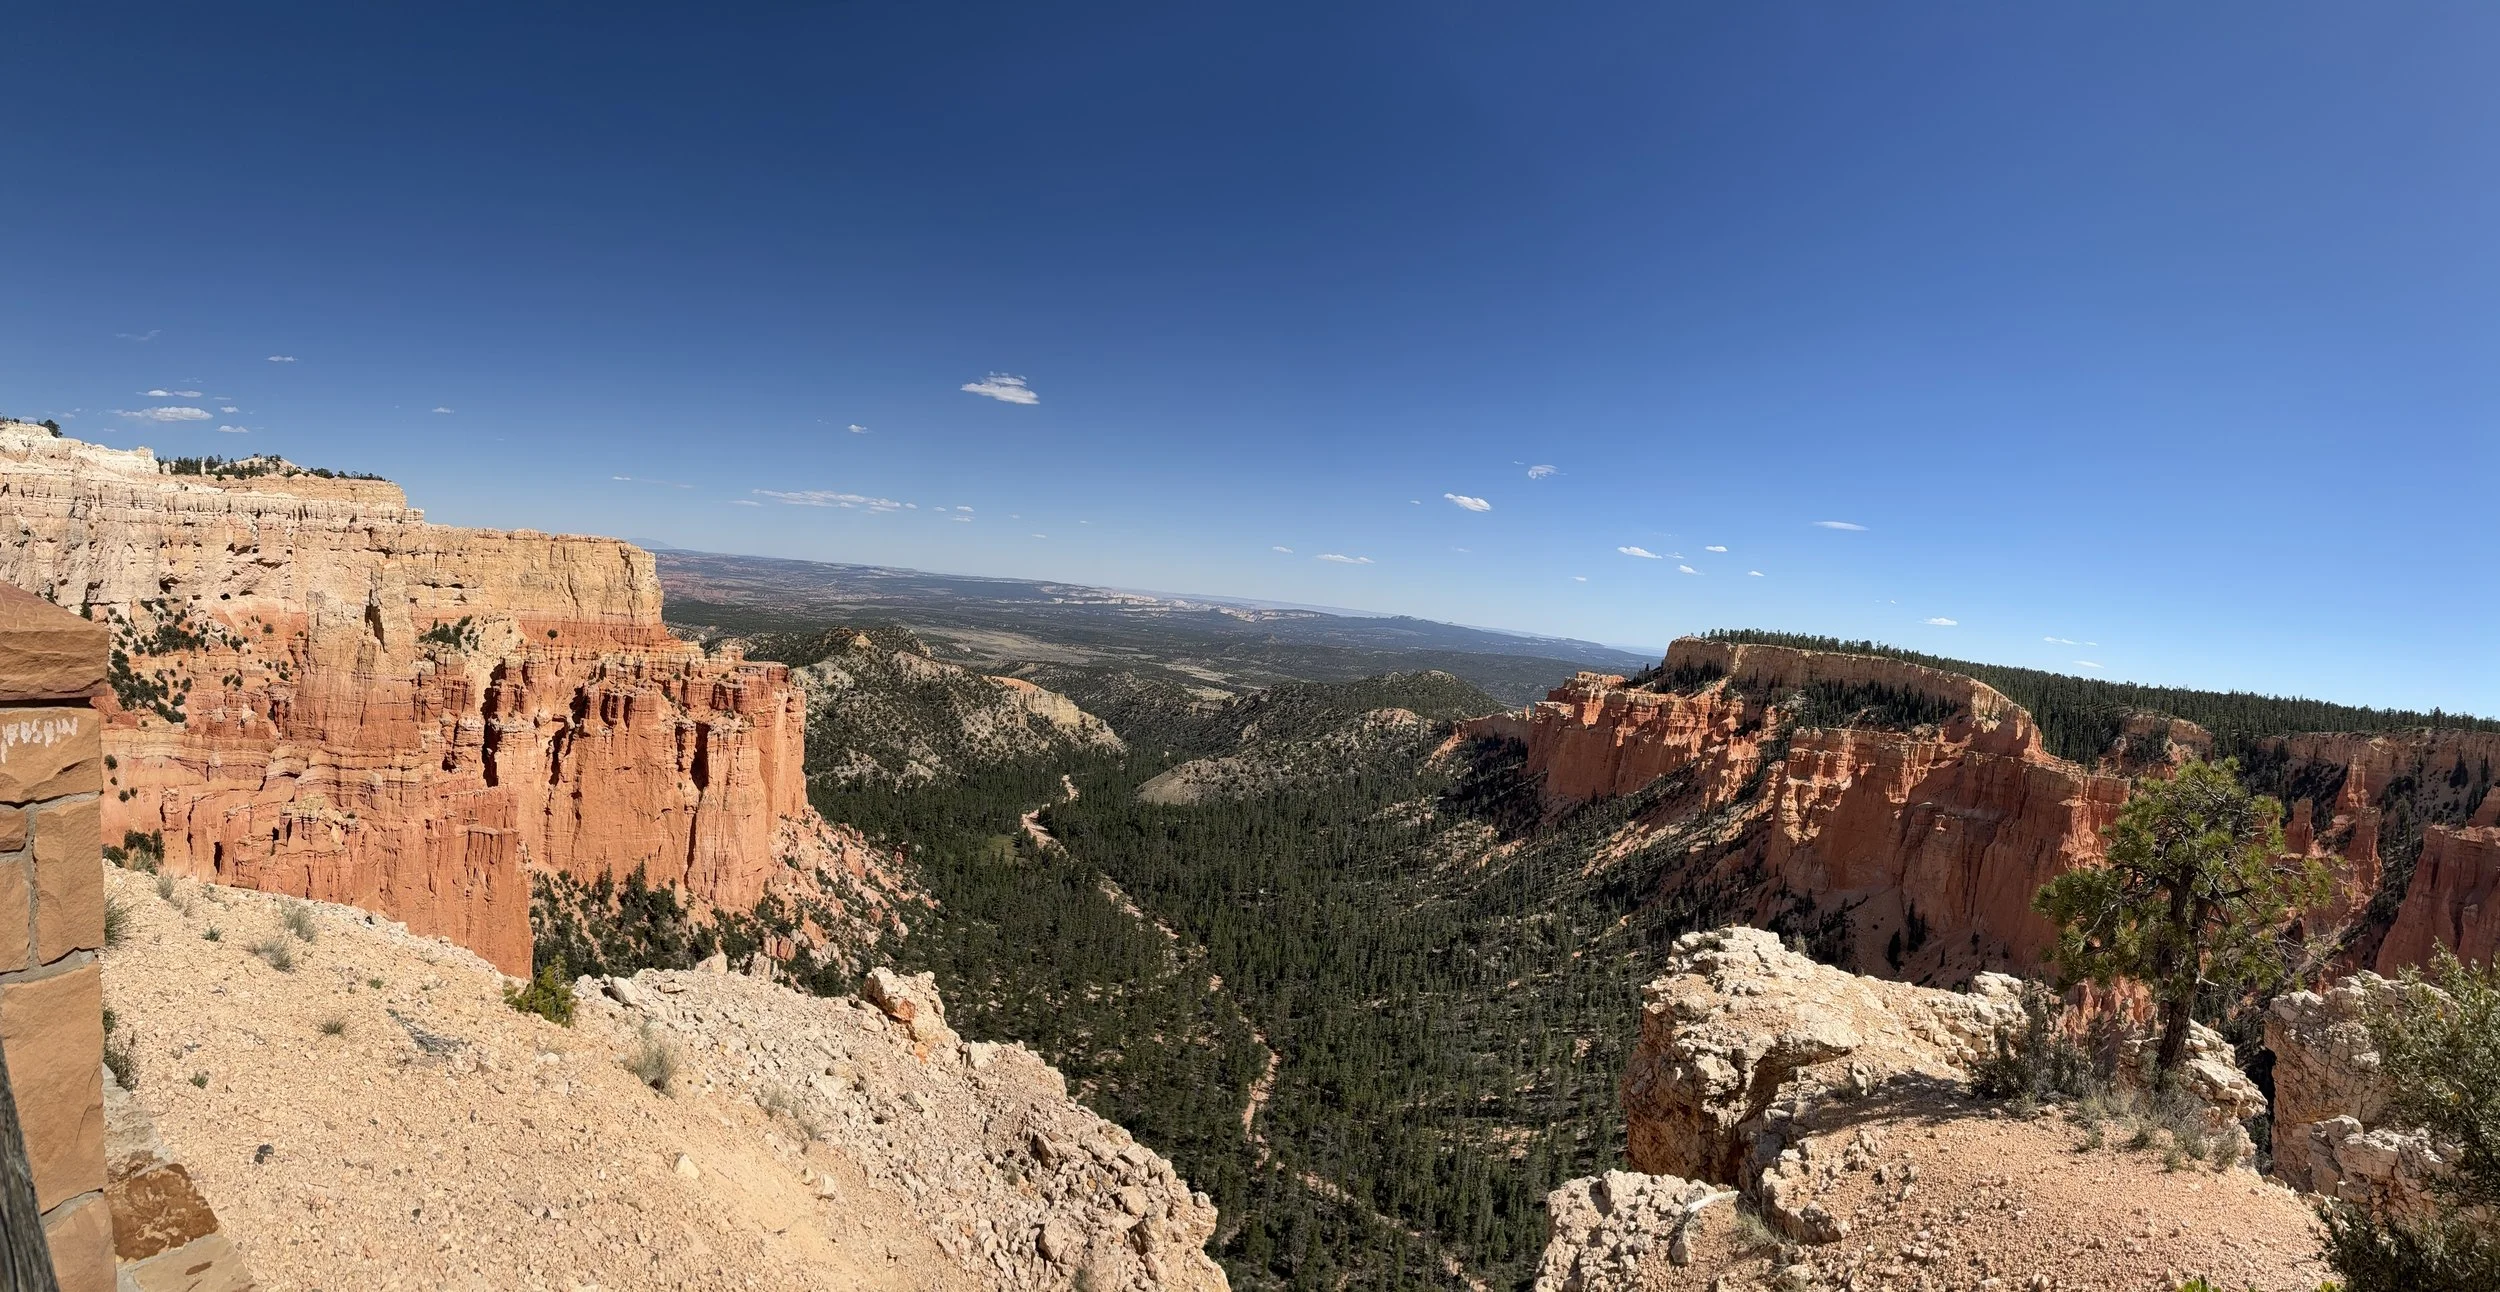
E) Swamp Canyon
Viewpoint Location - Swamp Canyon has its own parking lot. No hiking is required to see the viewpoint. This is also a trailhead location for a more rugged, forested hike than the trails at Sunrise and Sunset Point.

Swamp Canyon is between Whiteman and Bryce Points
We did not stop to hike here, rather we just looked from the viewpoint. A much smaller section of Bryce Canyon is visible from Swamp Canyon, so it isn’t as impressive. I think you could skip this stop and still feel like you’ve seen most of Bryce Canyon. I would guess this trailhead is pretty quiet, for anyone looking for a trail to have to yourself.
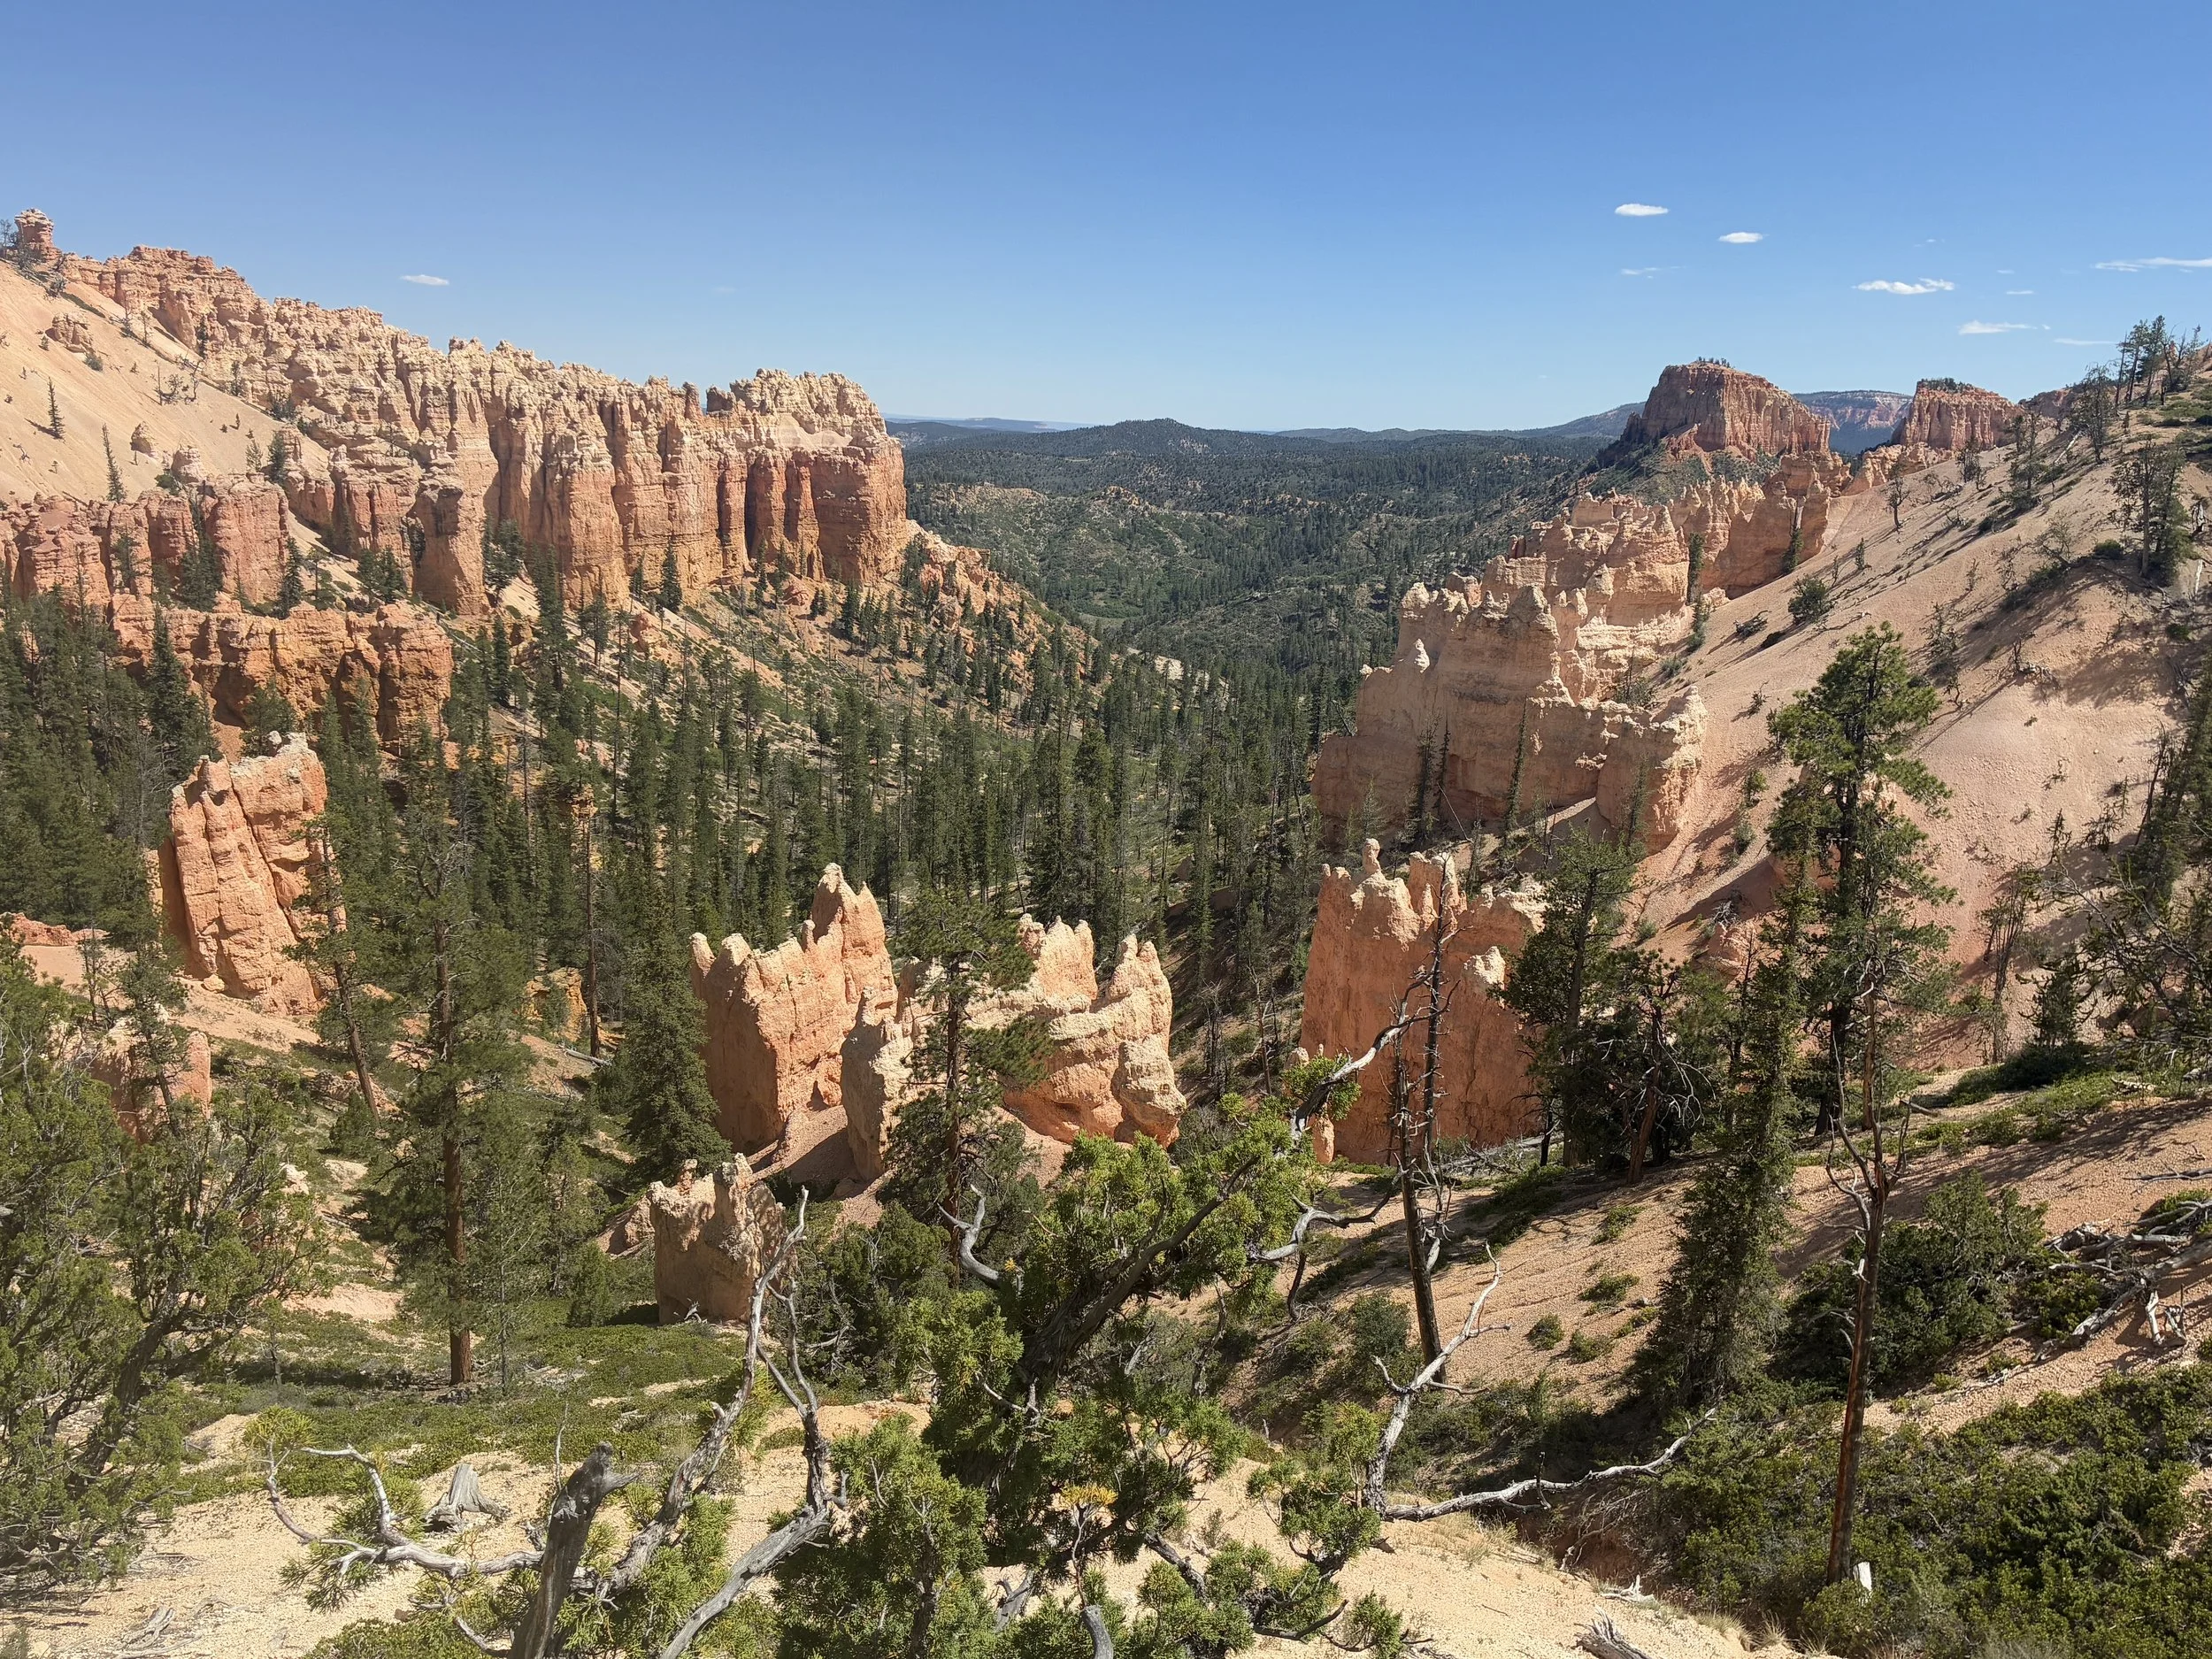
Bryce Canyon, Swamp Canyon Viewpoint
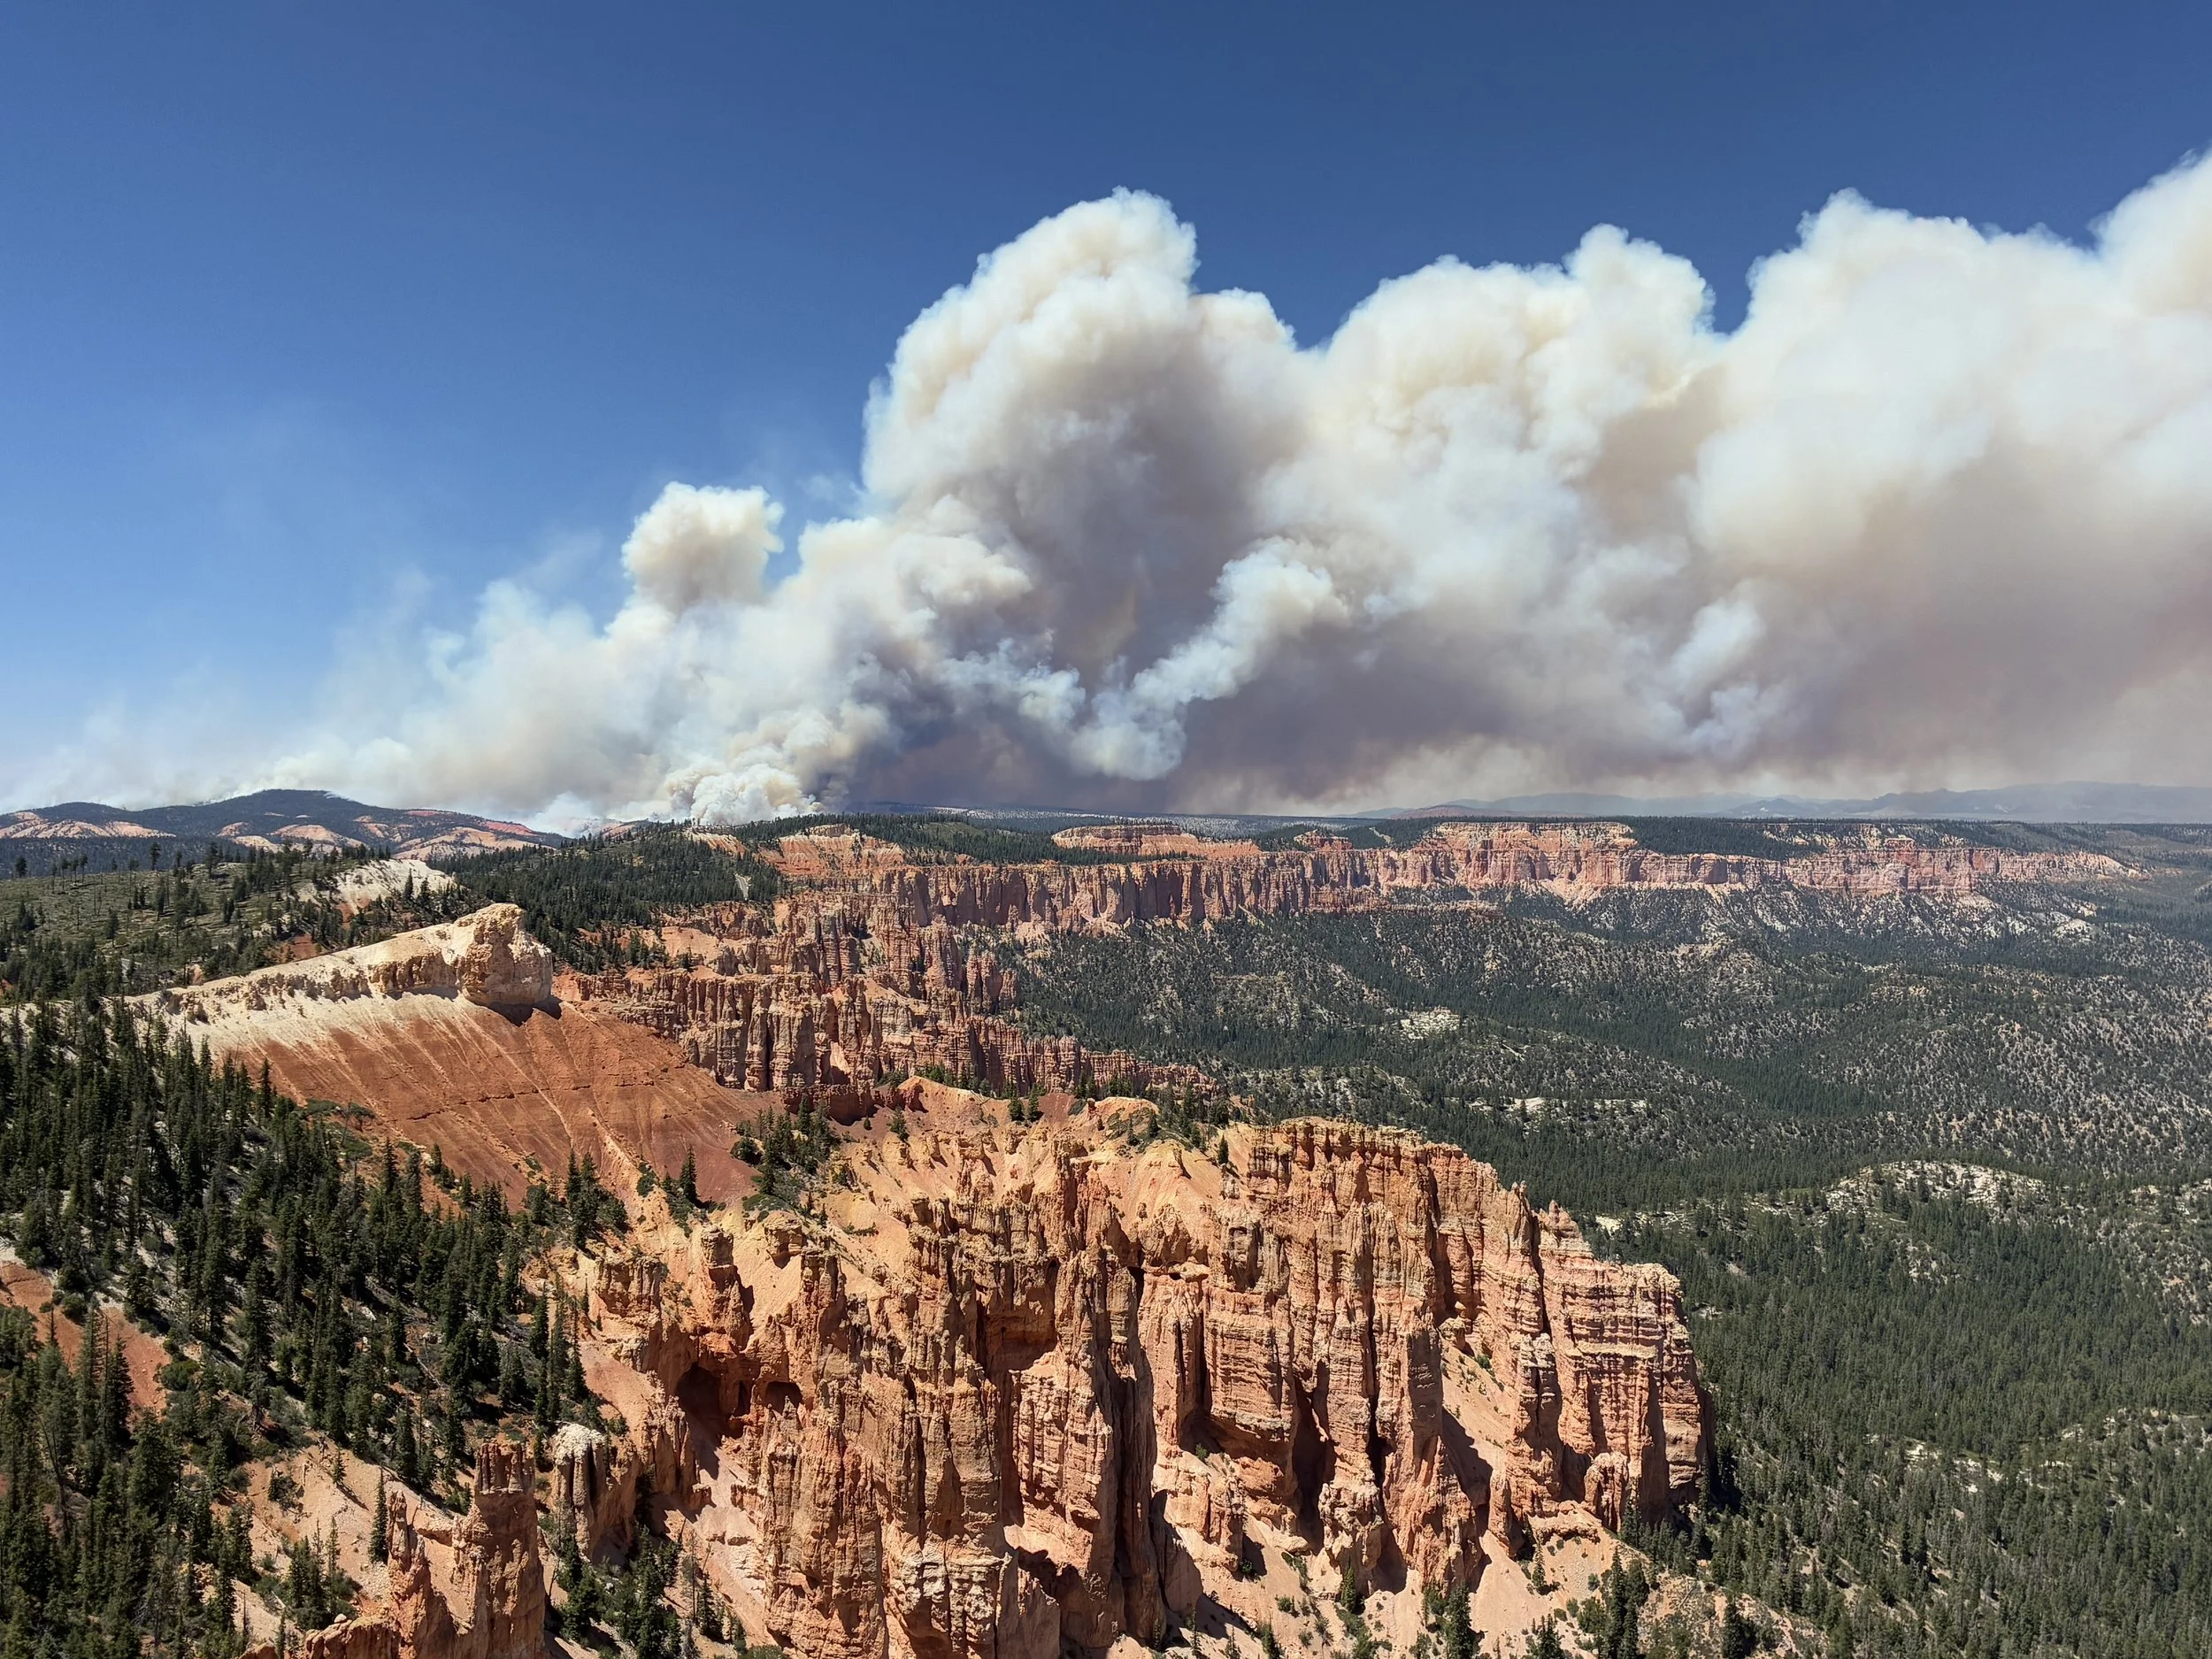
F) Whiteman
Viewpoint Location - Whiteman is a trailhead location and not a viewpoint.
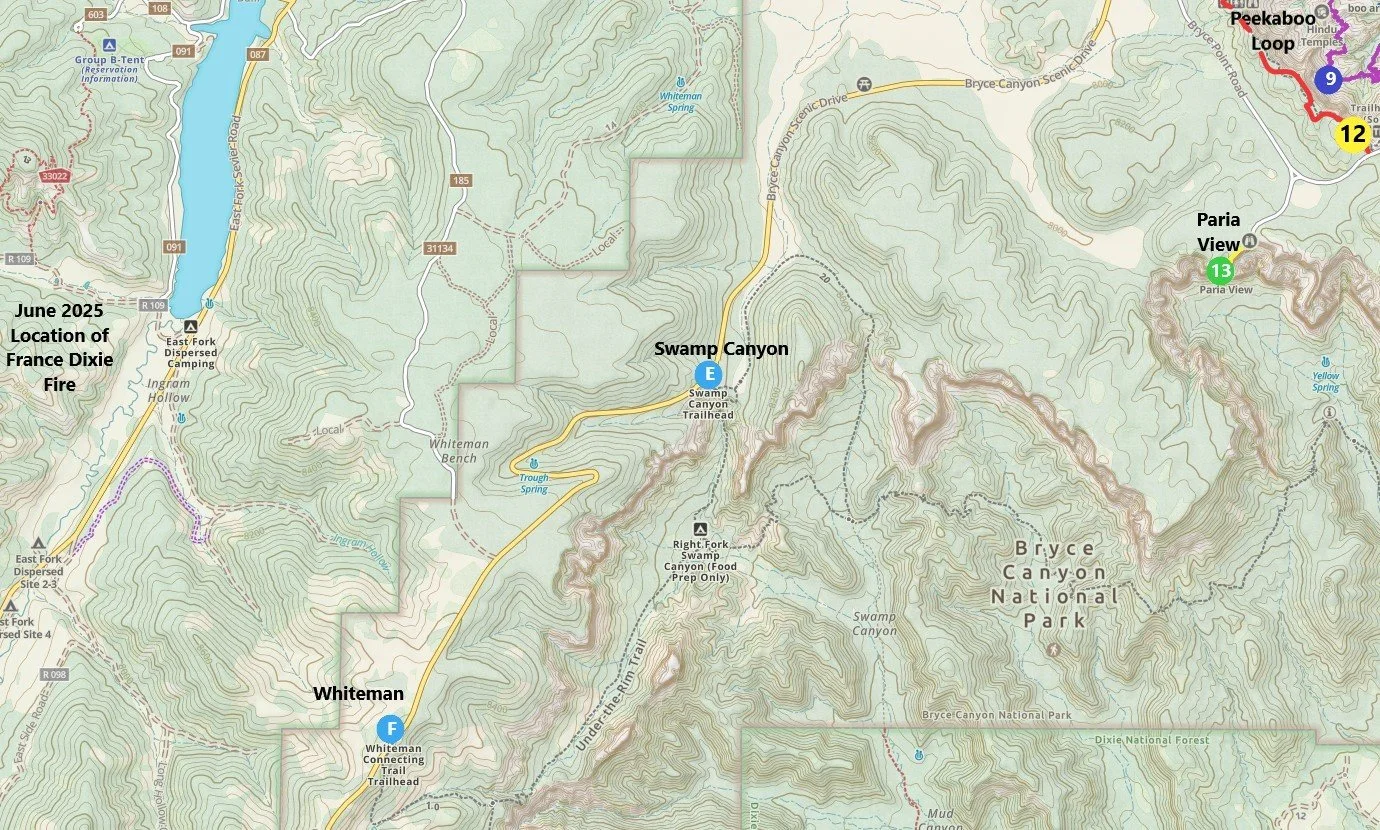
Whiteman is located between Fairview Point and Swamp Canyon
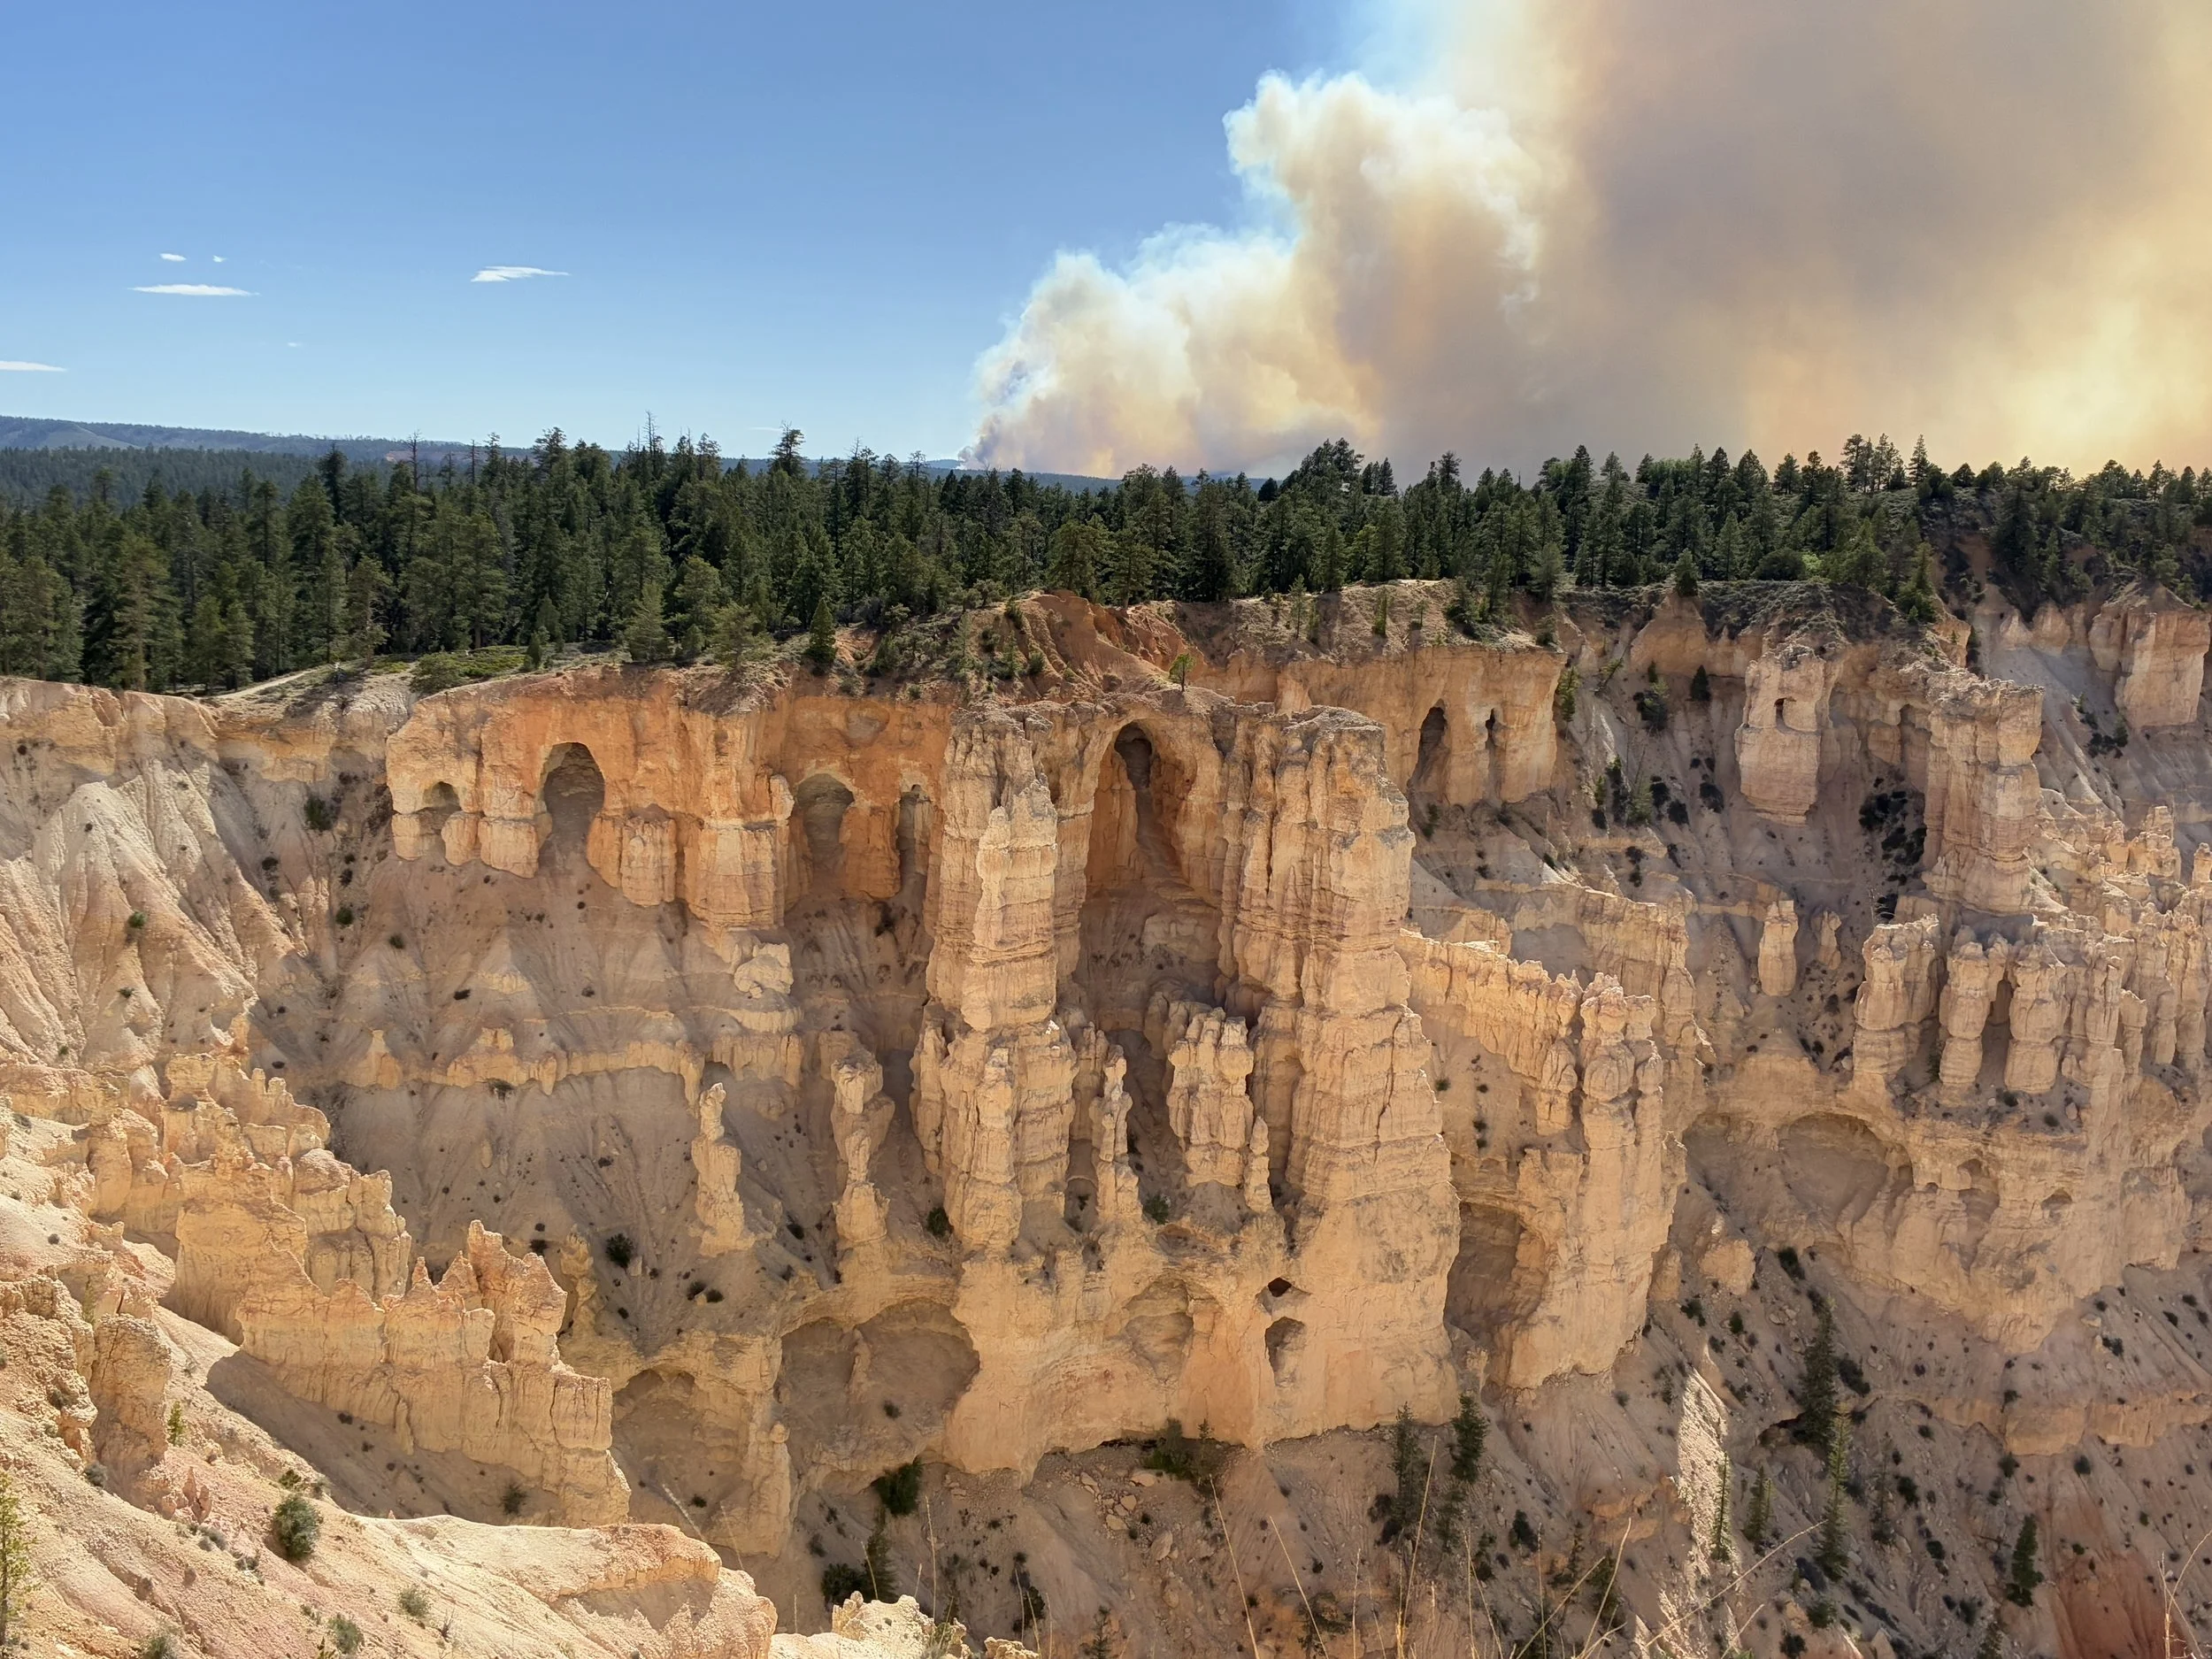
The reason we stopped at Whiteman had nothing to do with the Bryce Canyon views. We were here in June 2025, just a couple of days after the France Dixie Fire started. Whiteman was about 3 miles from the edge of the wildfire. We had not yet seen an actual wildfire, so we stopped here and watched the ever changing smoke clouds for a long time, while we talked to Park Rangers that were sitting at a picnic table, also memorized by the fire. Every once in awhile, the wind direction would change, and the orange flames would just barely come into view between the trees. It was humbling to watch the shear force of nature beyond our control - devastating to watch it destroy a landscape, but not unbeautiful at the same time. It was a unique moment in time to be at Bryce Canyon, and we are grateful to the firefighters that ultimately kept this National Park safe.
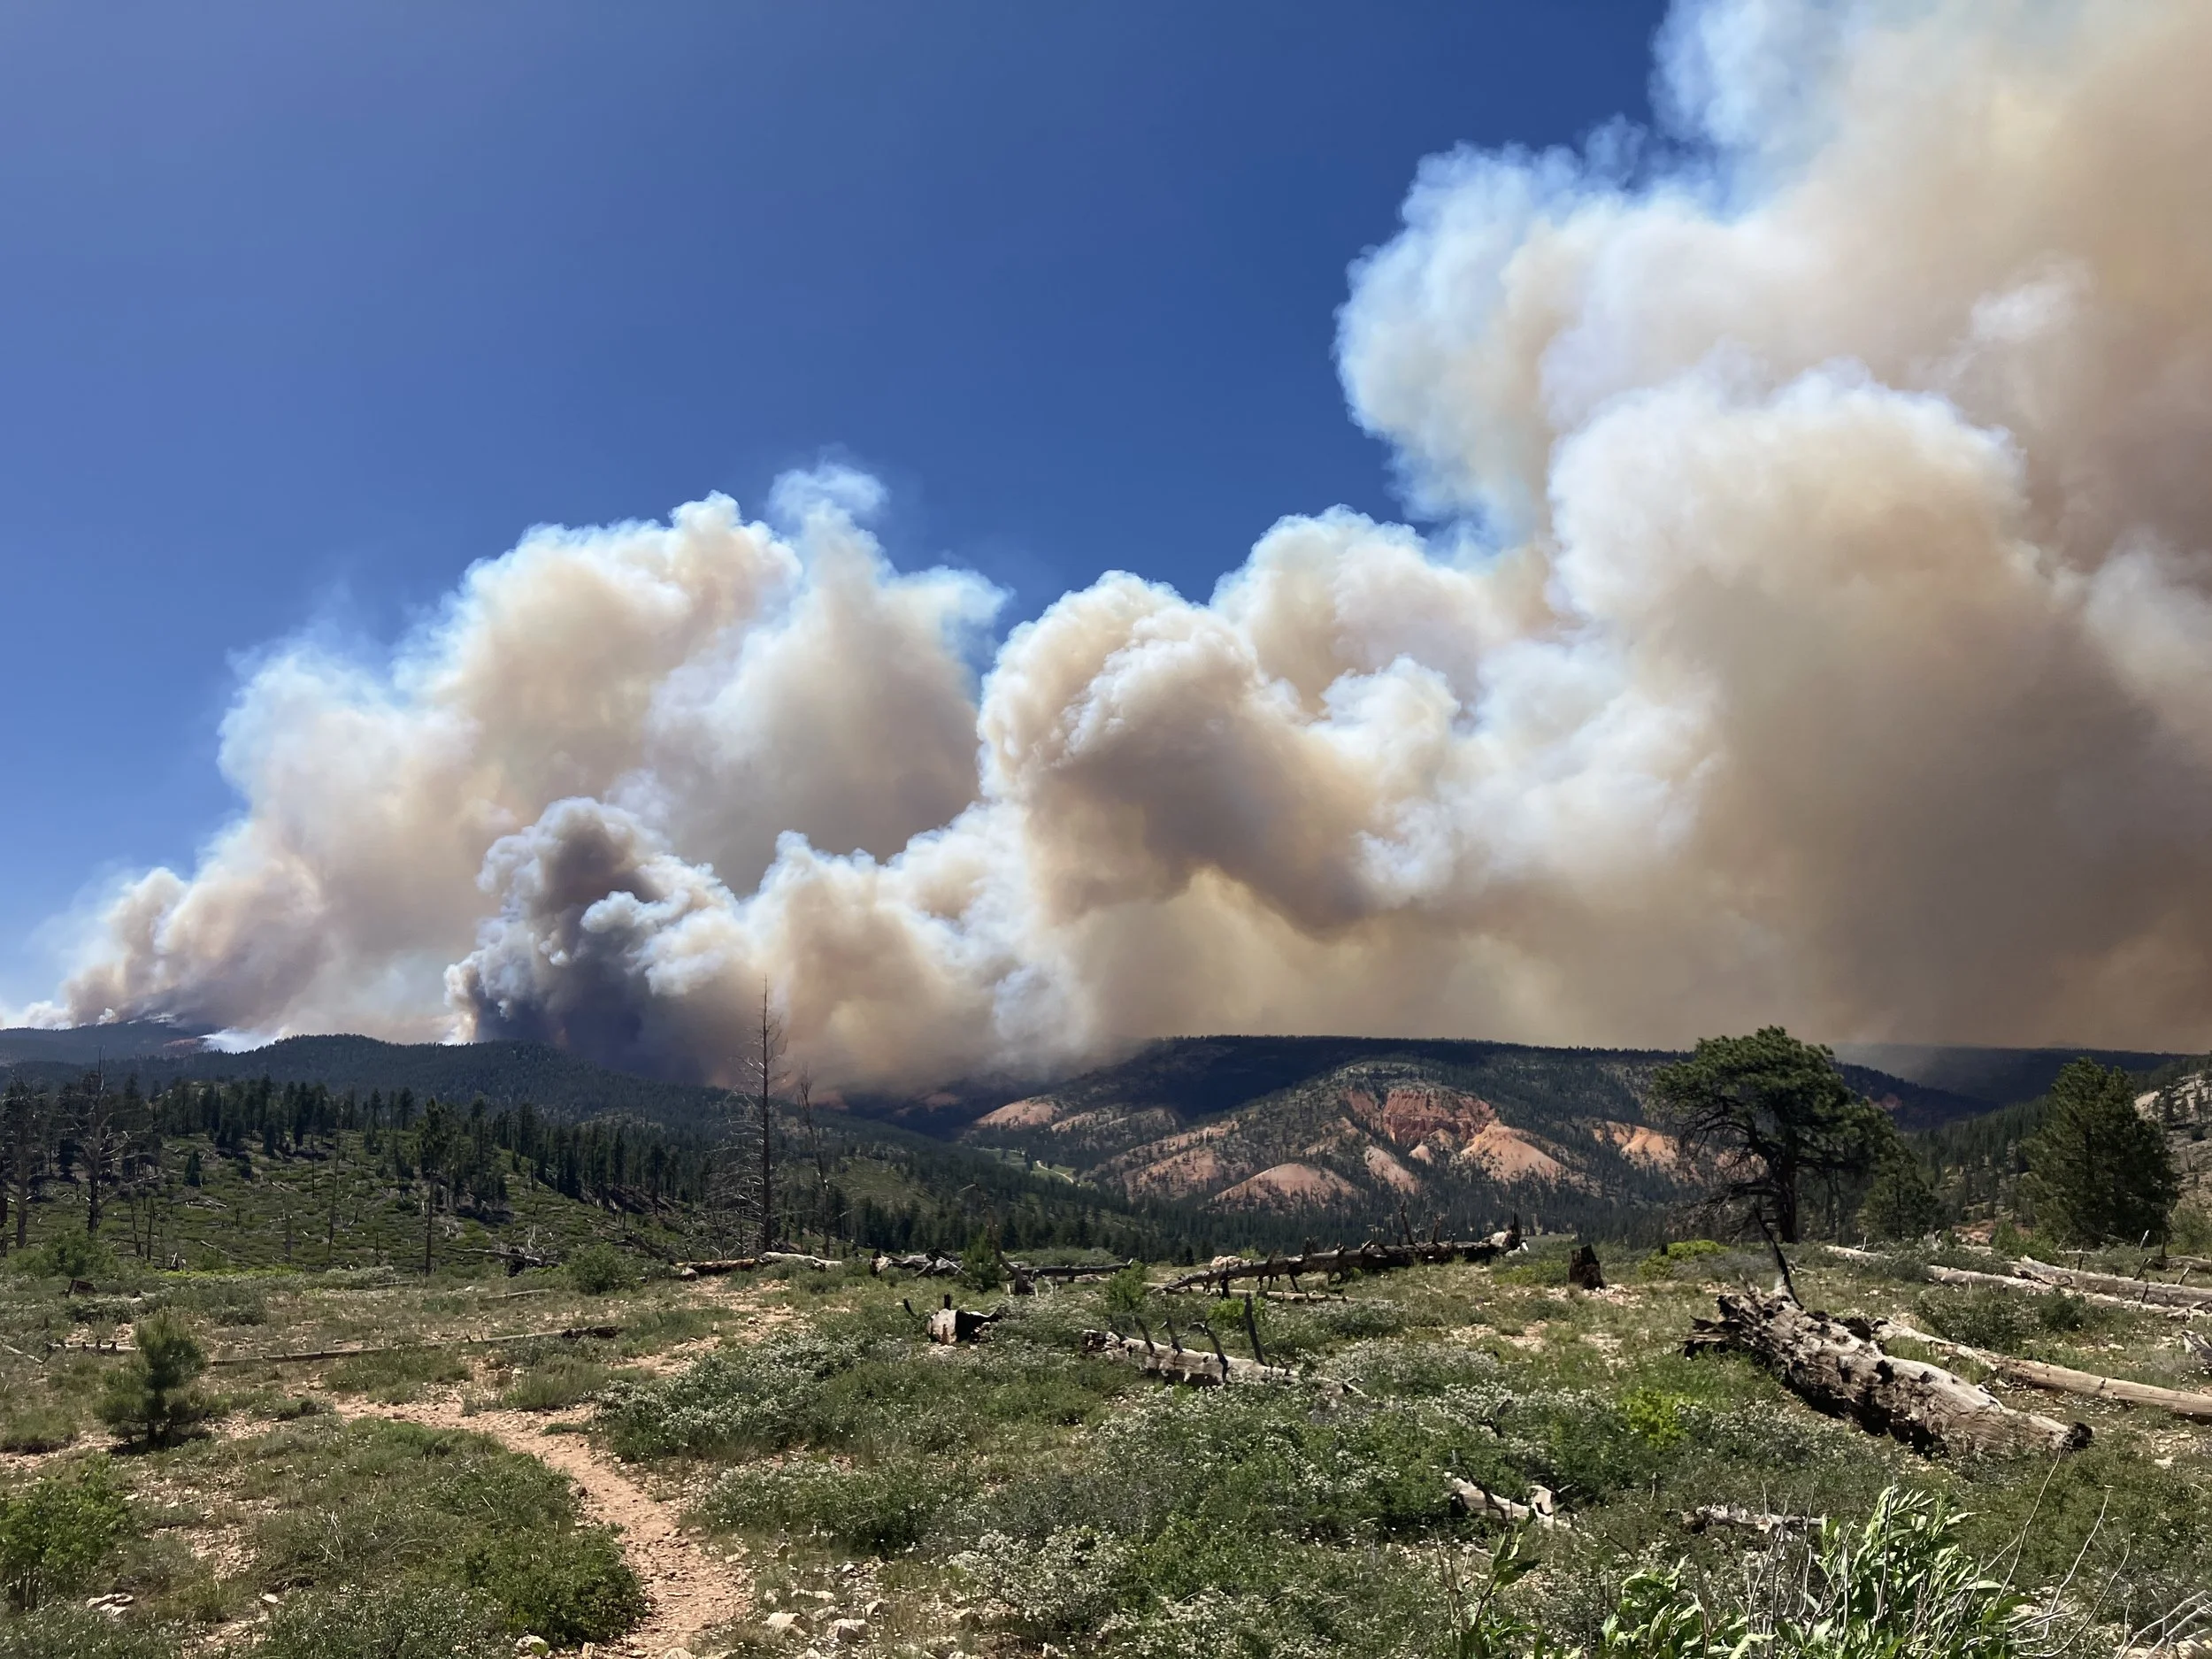
Bryce Canyon - Watching the 2025 France Dixie Fire near Whiteman
G) Fairview Point & 14) Piracy Point
Distance - 0.4 miles
Elevation Gain - Flat
Trailhead Location - The trailhead for Piracy Point is at Fairview Point.
Helpful Information - This is a flat and easy trail, but the entire time I was walking along it, I was trying to figure out why they built a trail here. The best viewpoint was at the beginning, at Fairview. I wouldn’t recommend this short hike.
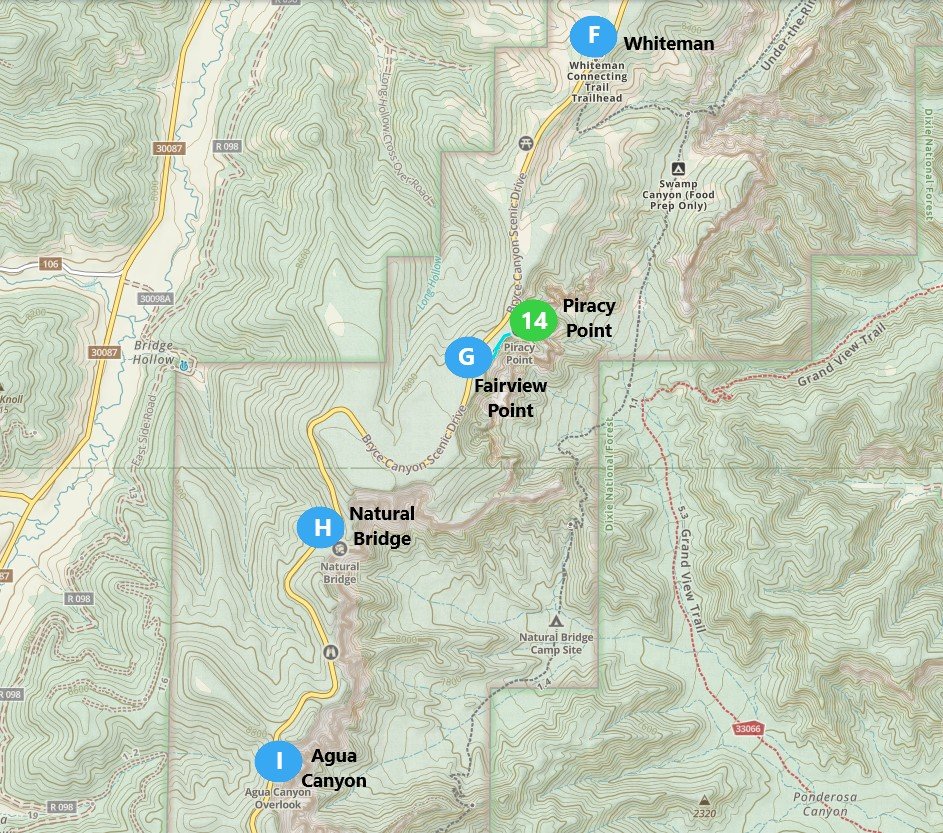
The trail from Fairview Point to Piracy Point is marked in blue.
Piracy Point is an easy hike that I wouldn’t recommend. Fairview Point wouldn’t be on my list of top viewpoints either. I liked Fairyland Point, Sunrise Point, Sunset Point, Bryce Point, National Bridge, and Rainbow Point all better than Fairview and Piracy Points.
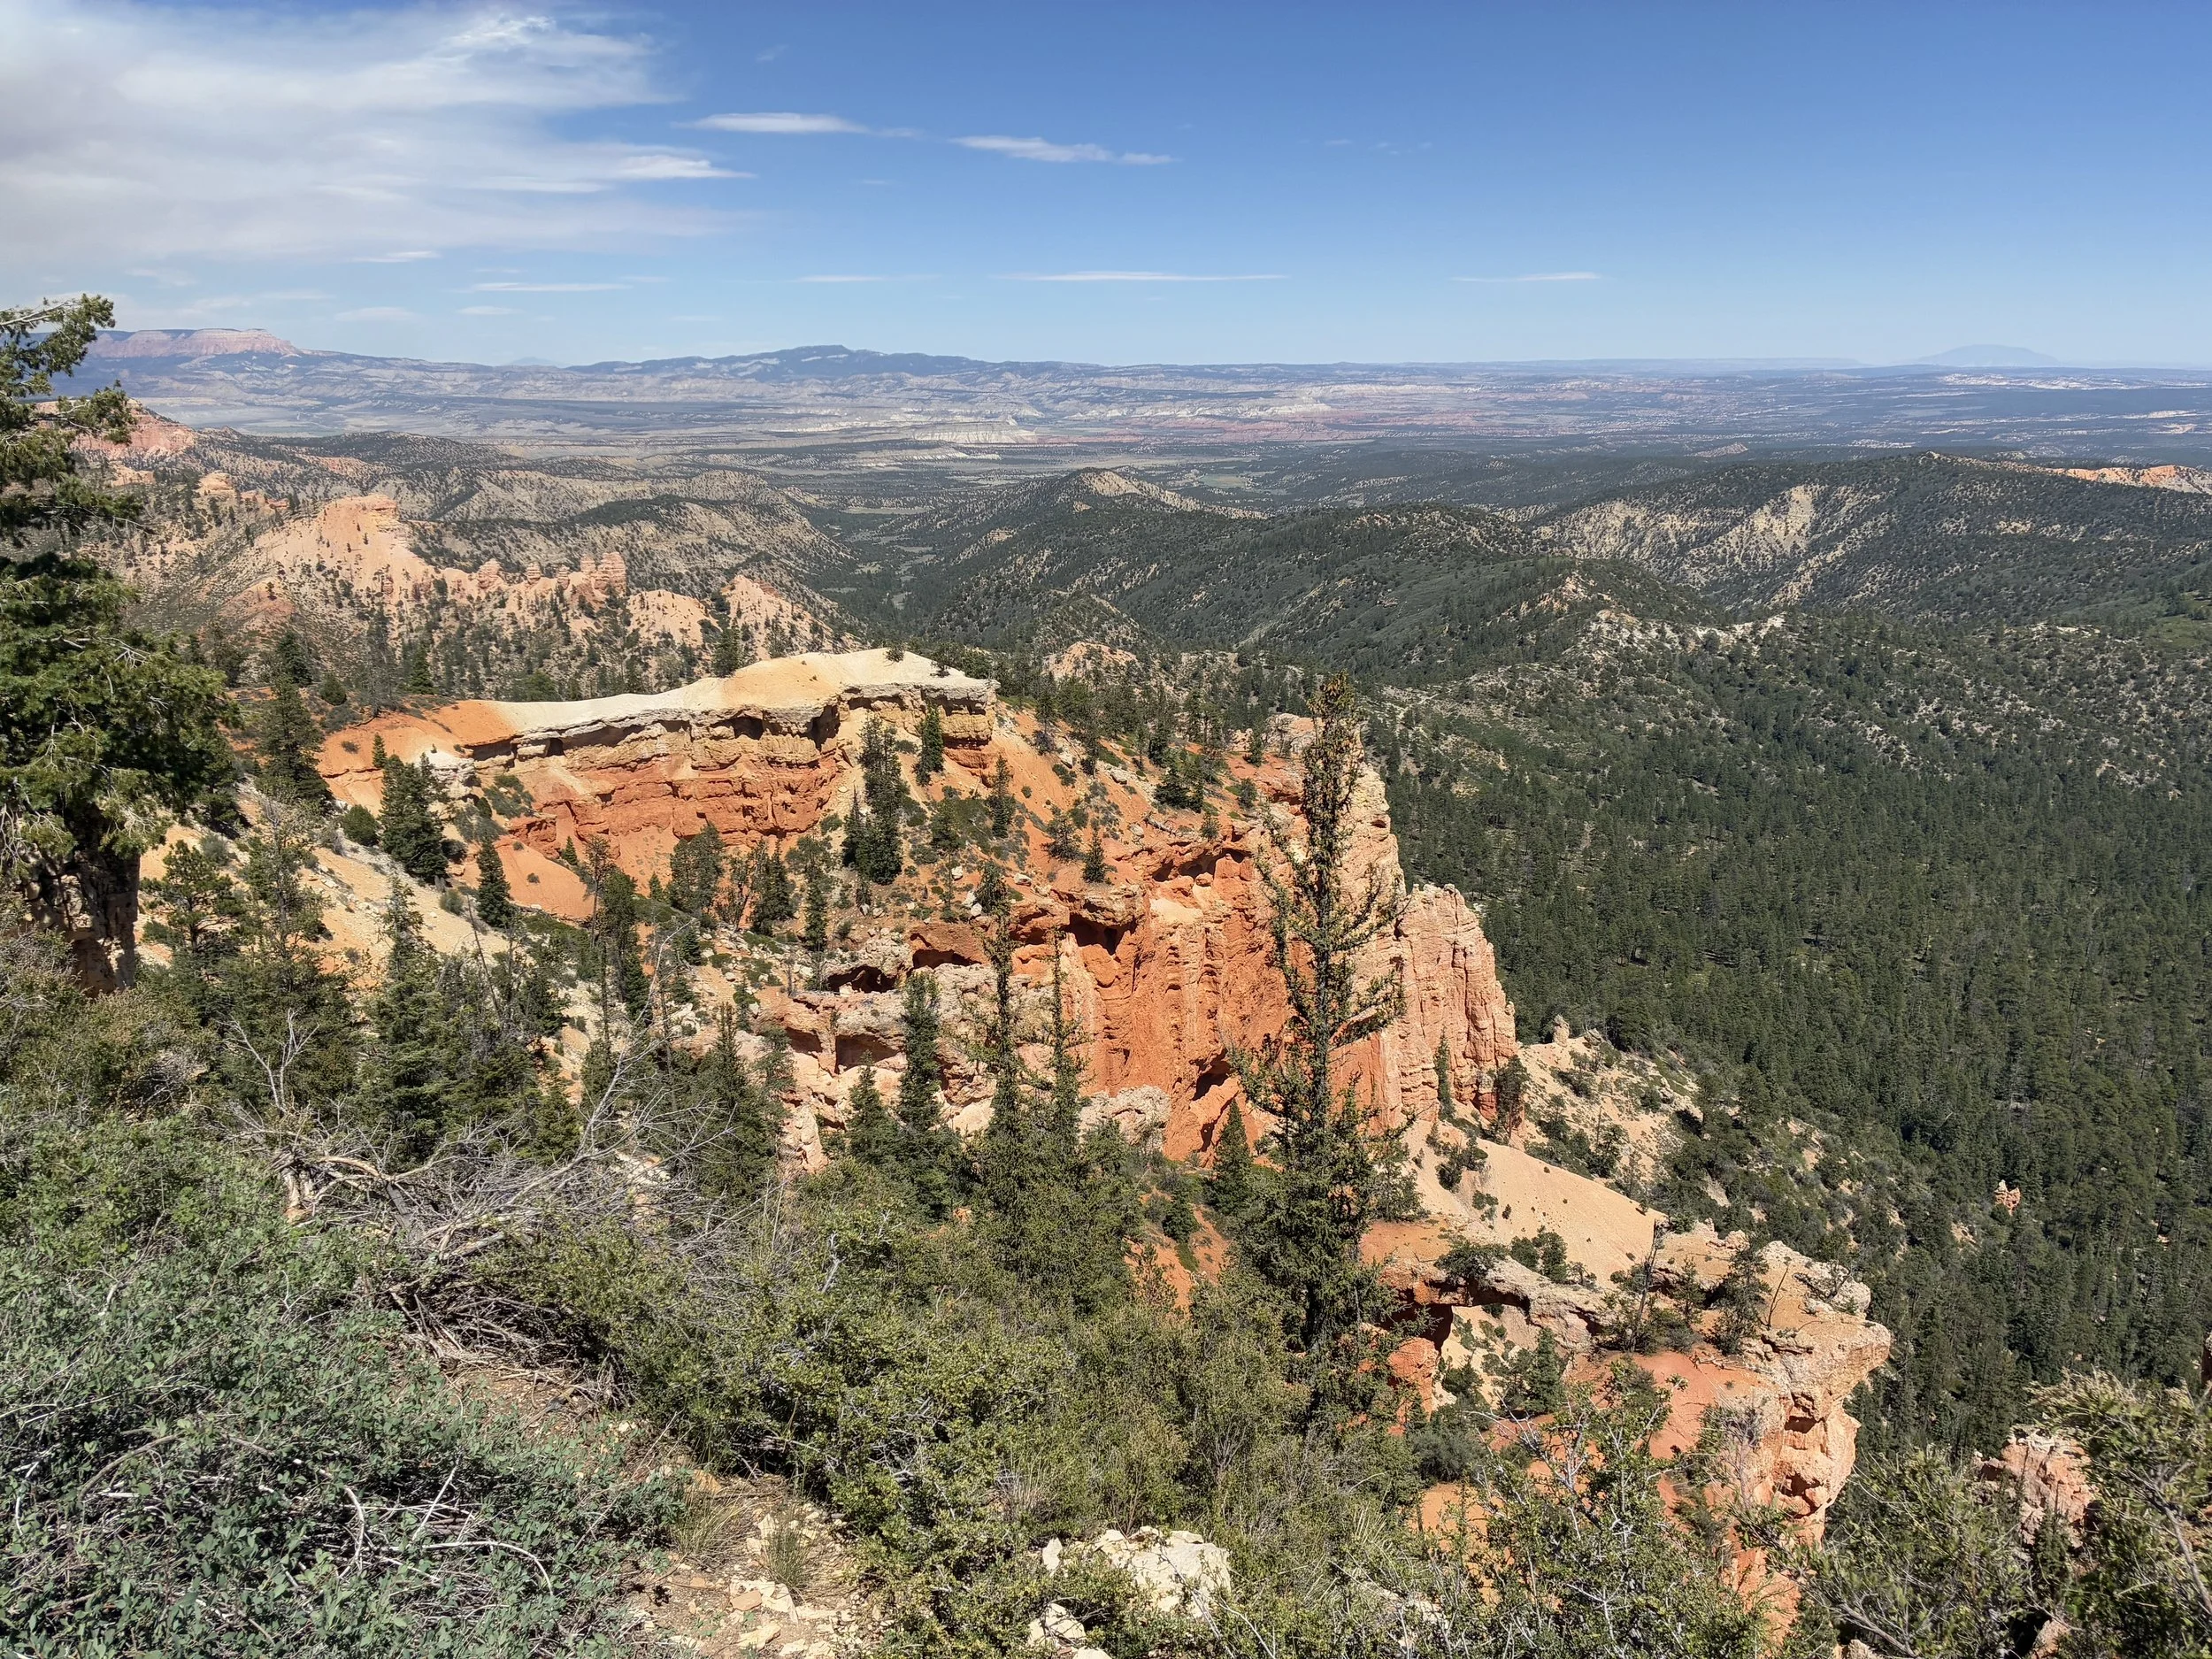
Bryce Canyon, Fairview Point
Bryce Canyon, Fairview Point
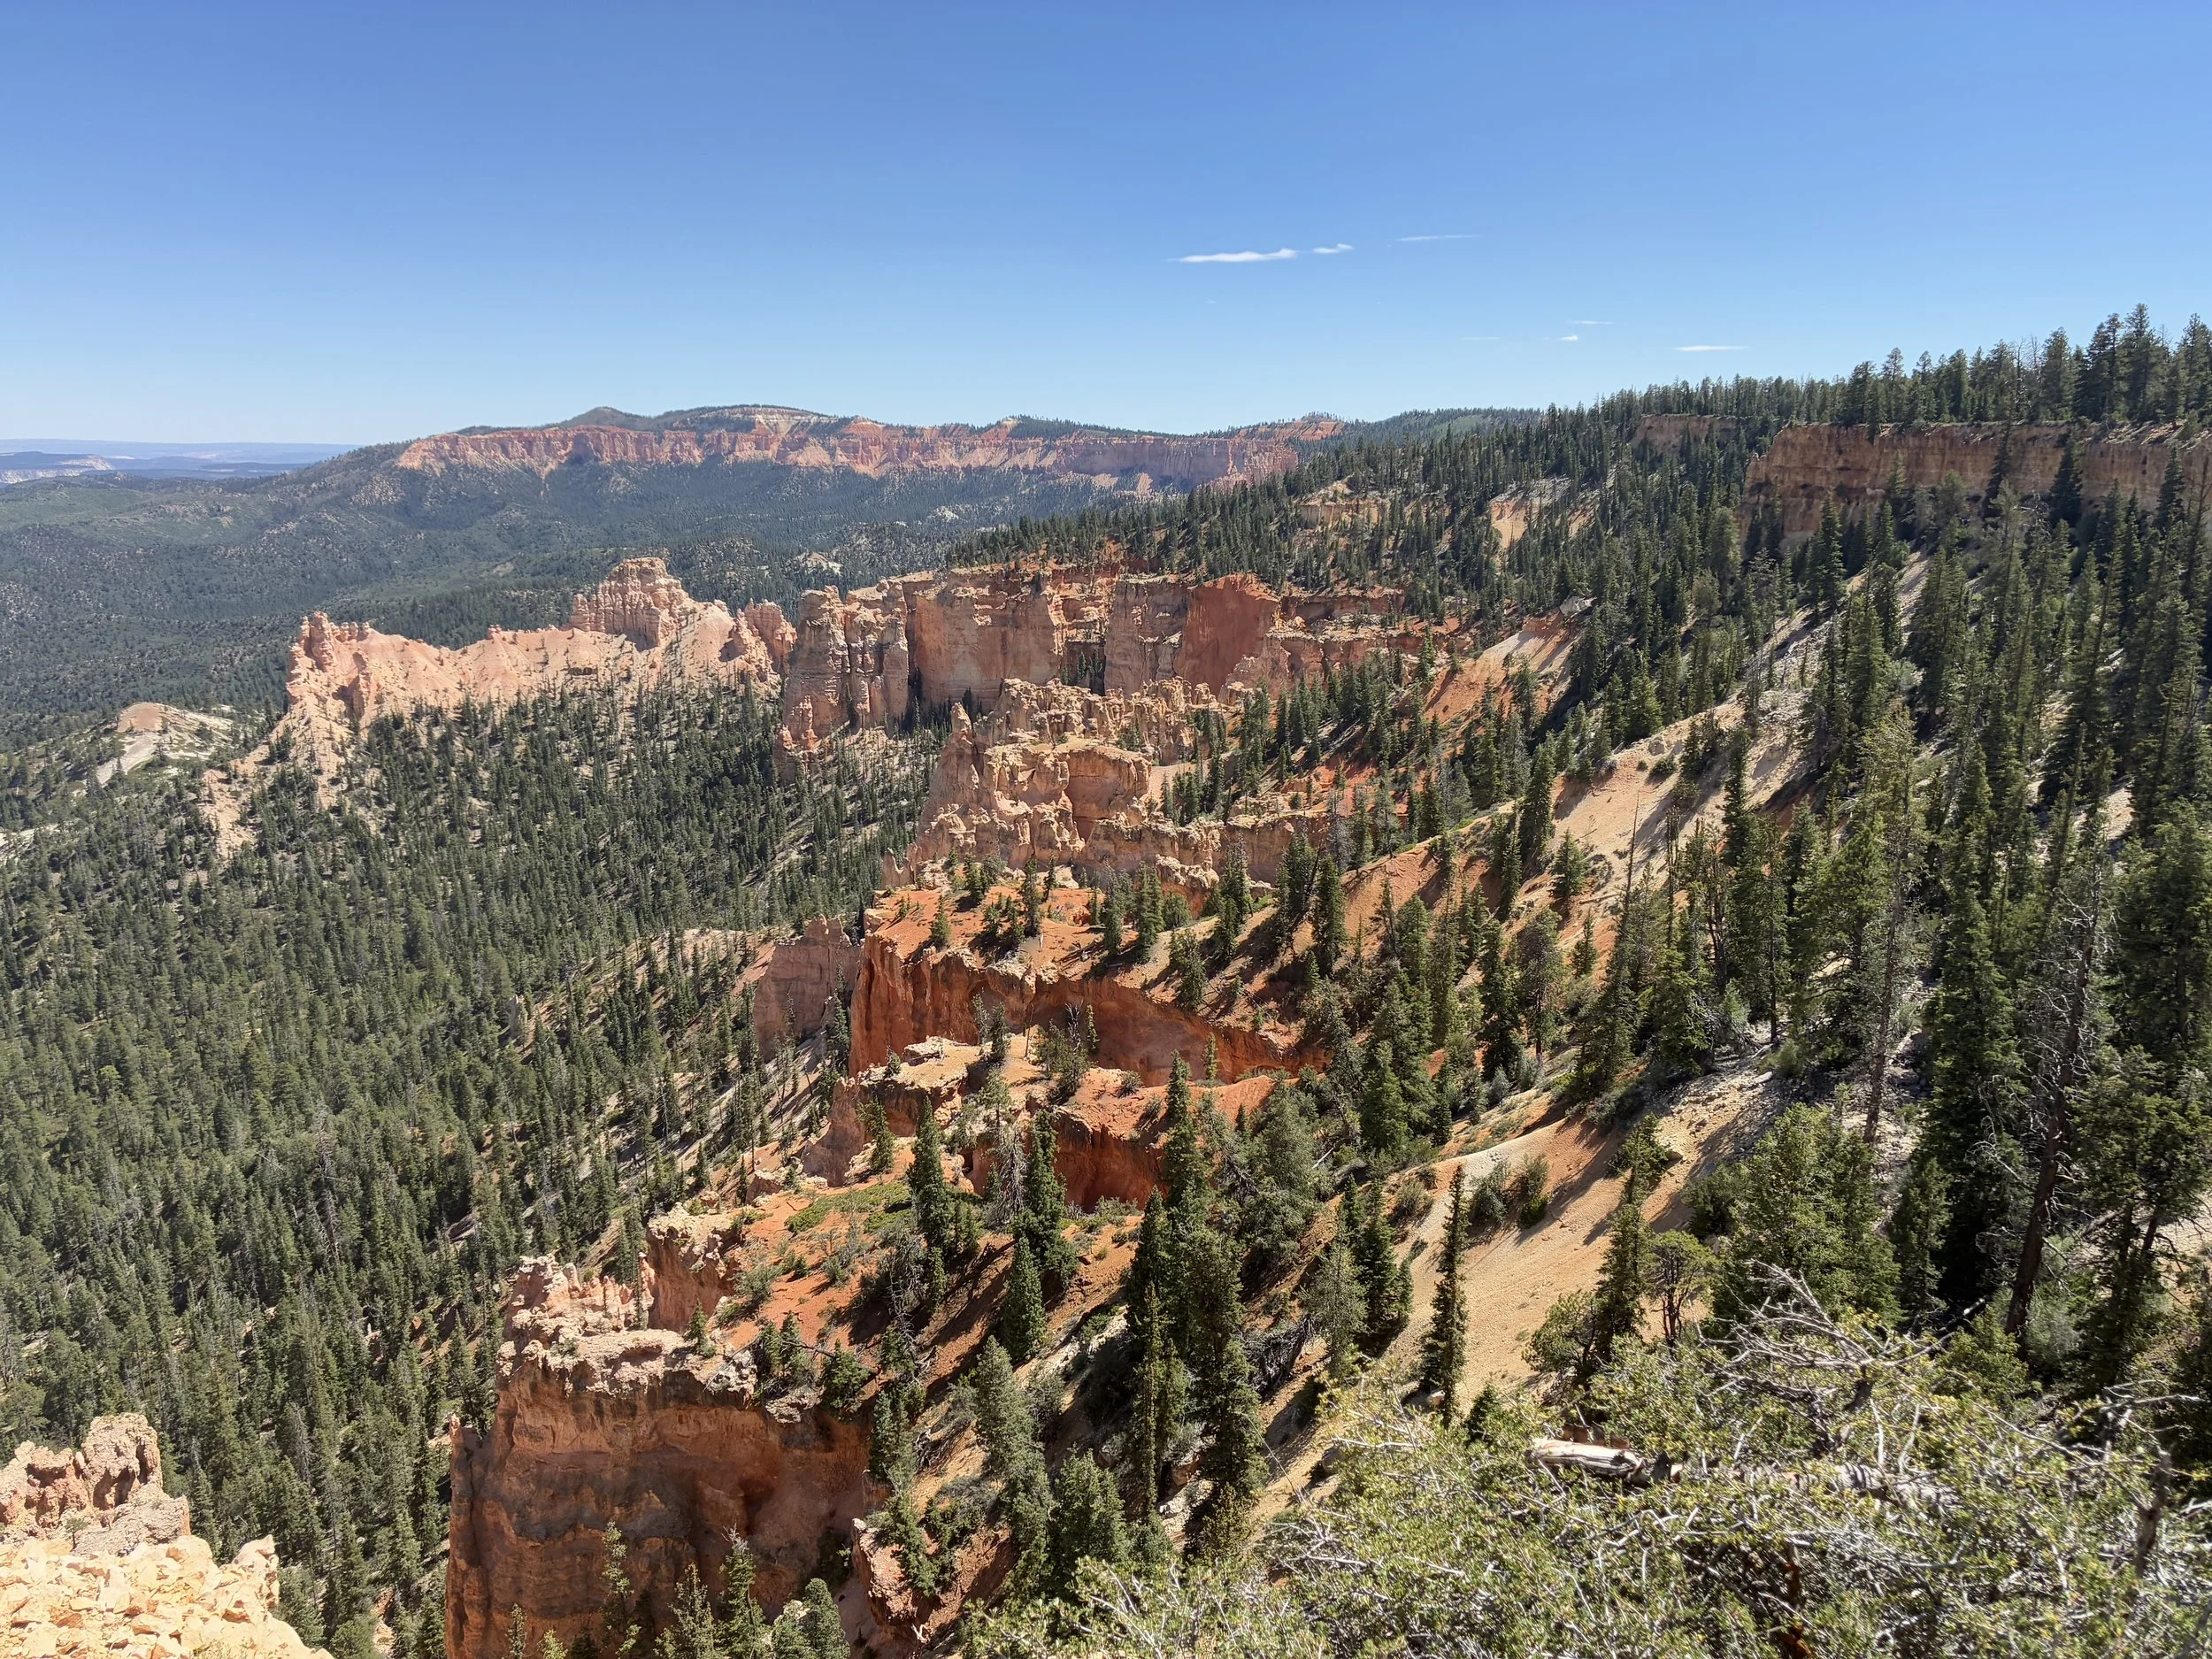
The one cool thing though about Piracy Point is the view of the capstone on top of the hoodoos. This is harder rock to erode, and this rock is ultimately why the hoodoo formations can be formed. Once the capstone ultimately erodes off, the hoodoo underneath also erodes until it is a simple rounded rock mound.
Bryce Canyon, Piracy Point - View of the capstone rock on top of the hoodoo formations
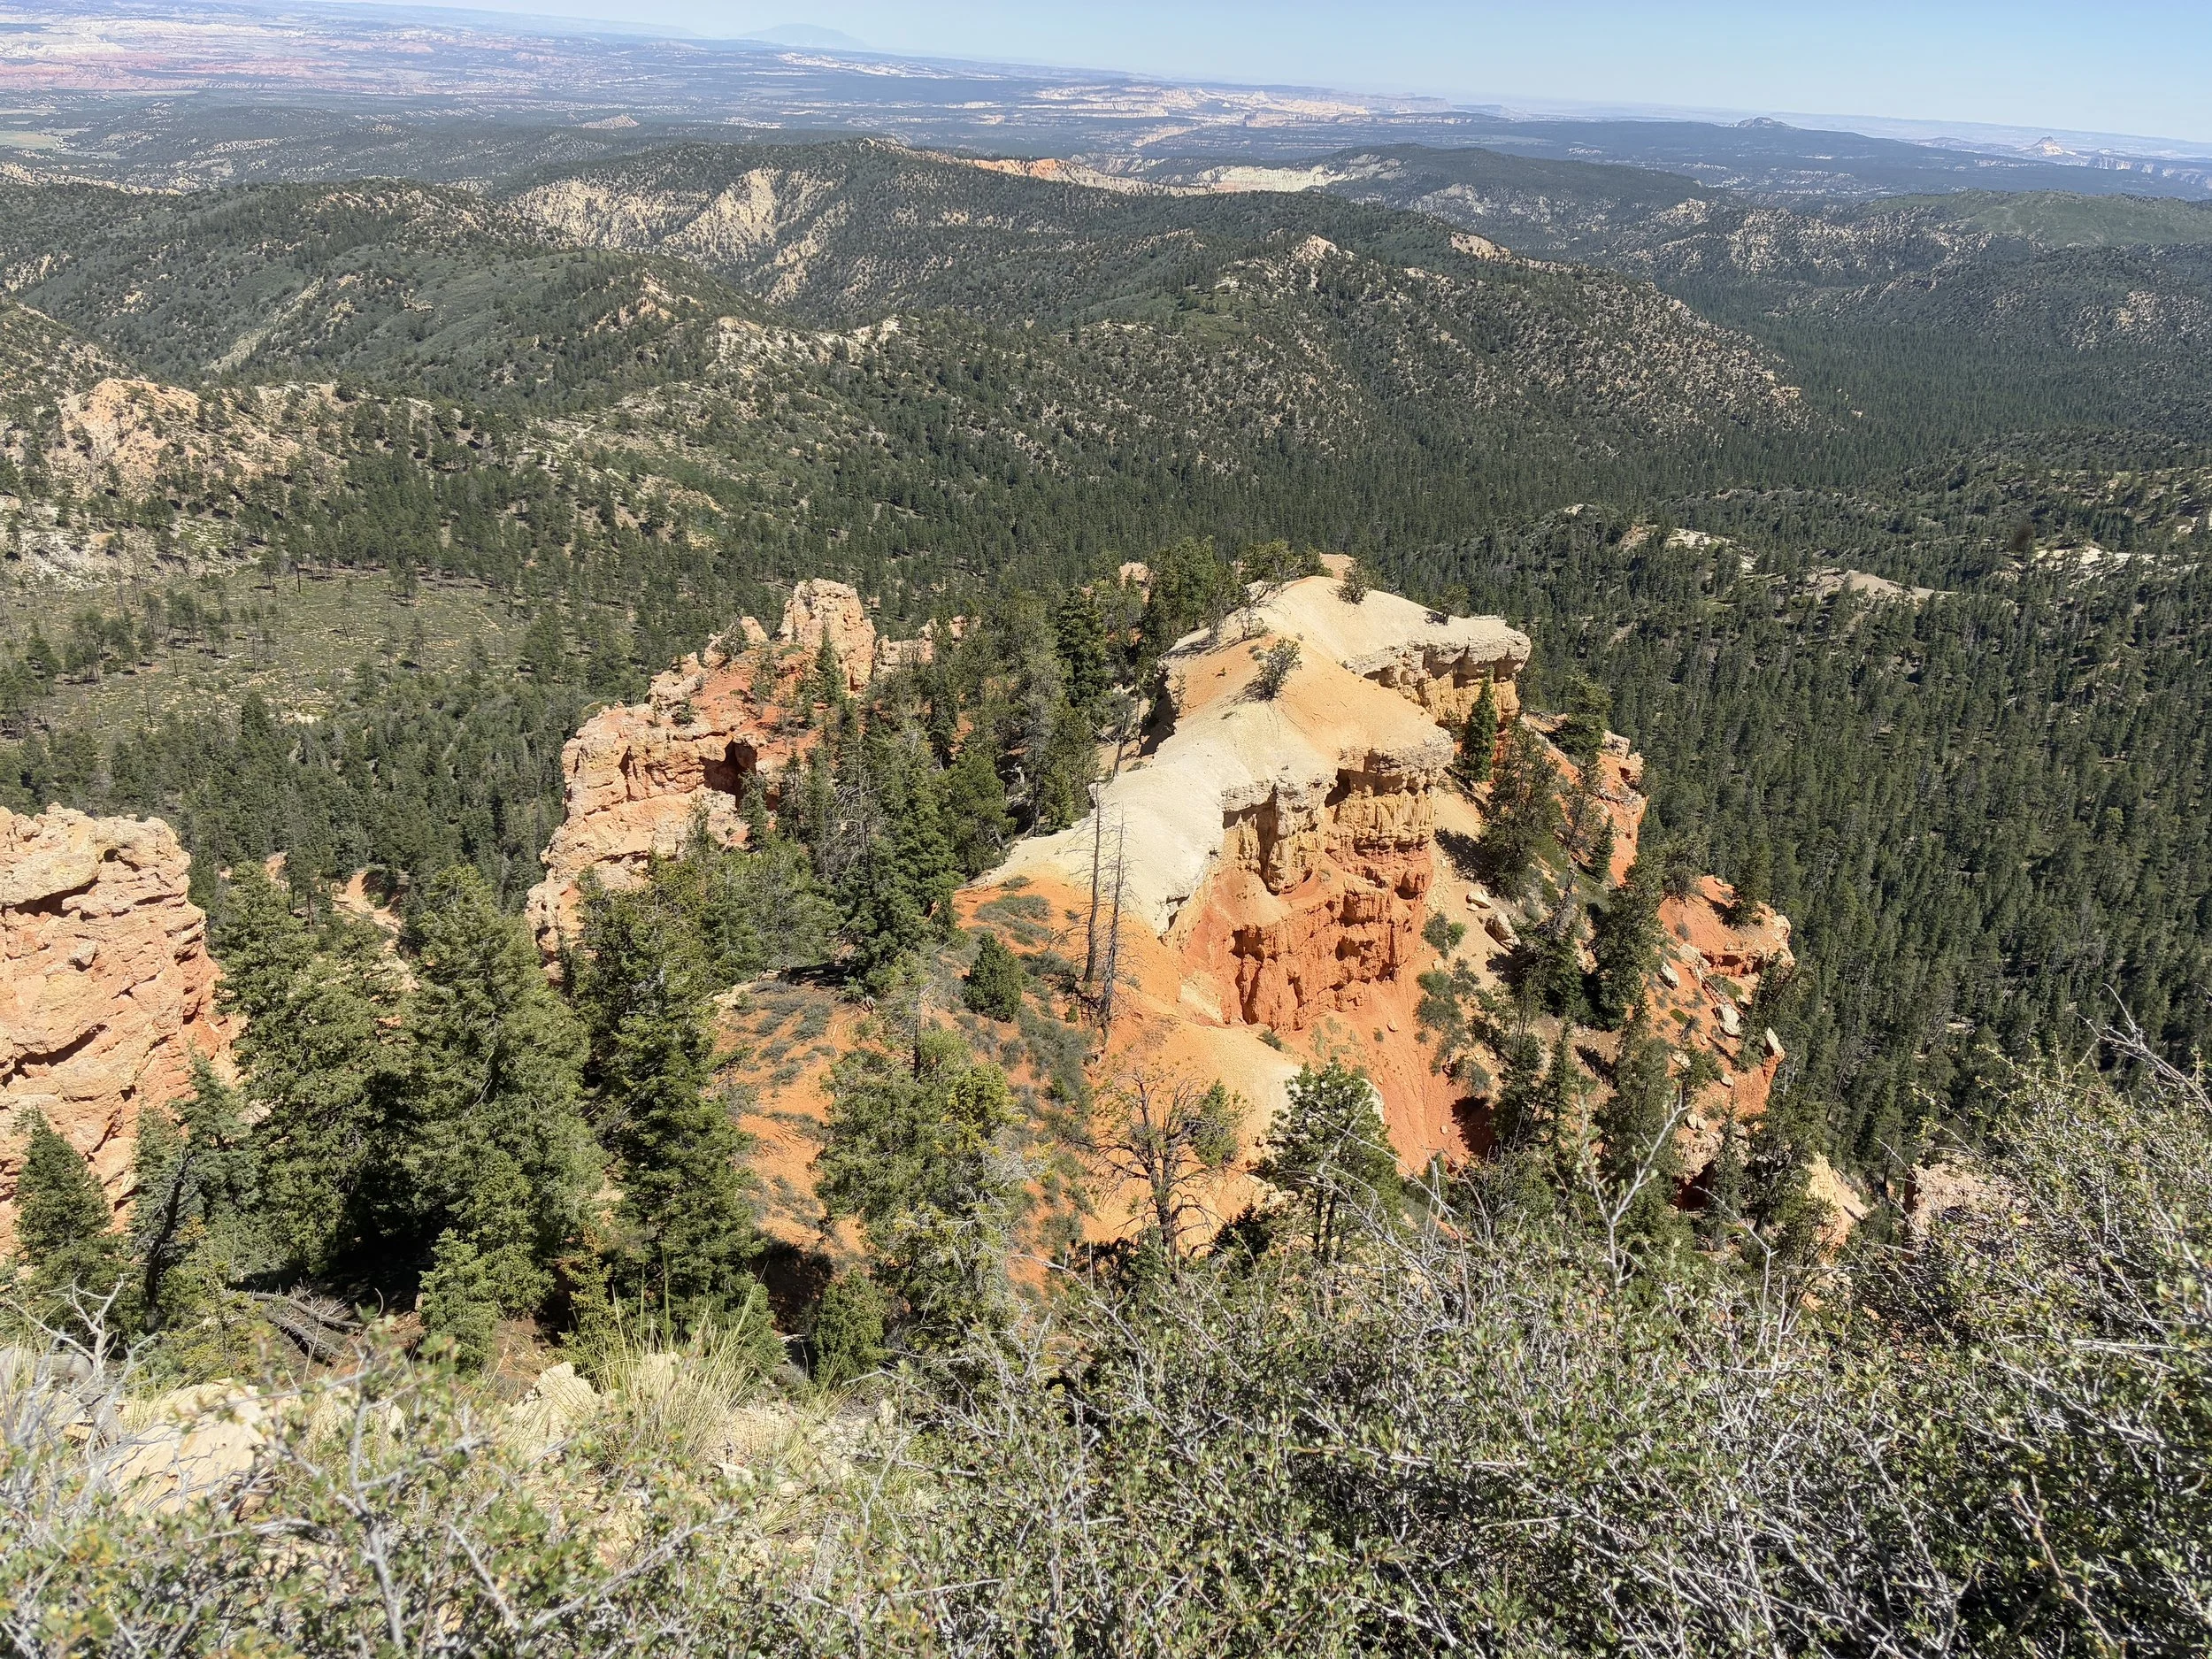
H) Natural Bridge
Viewpoint Location - Natural Bridge has its own parking lot, between Agua Canyon and Fairview Point. There are no hiking options at Natural Bridge.

Natural Bridge is found between Agua Canyon and Fairview Point
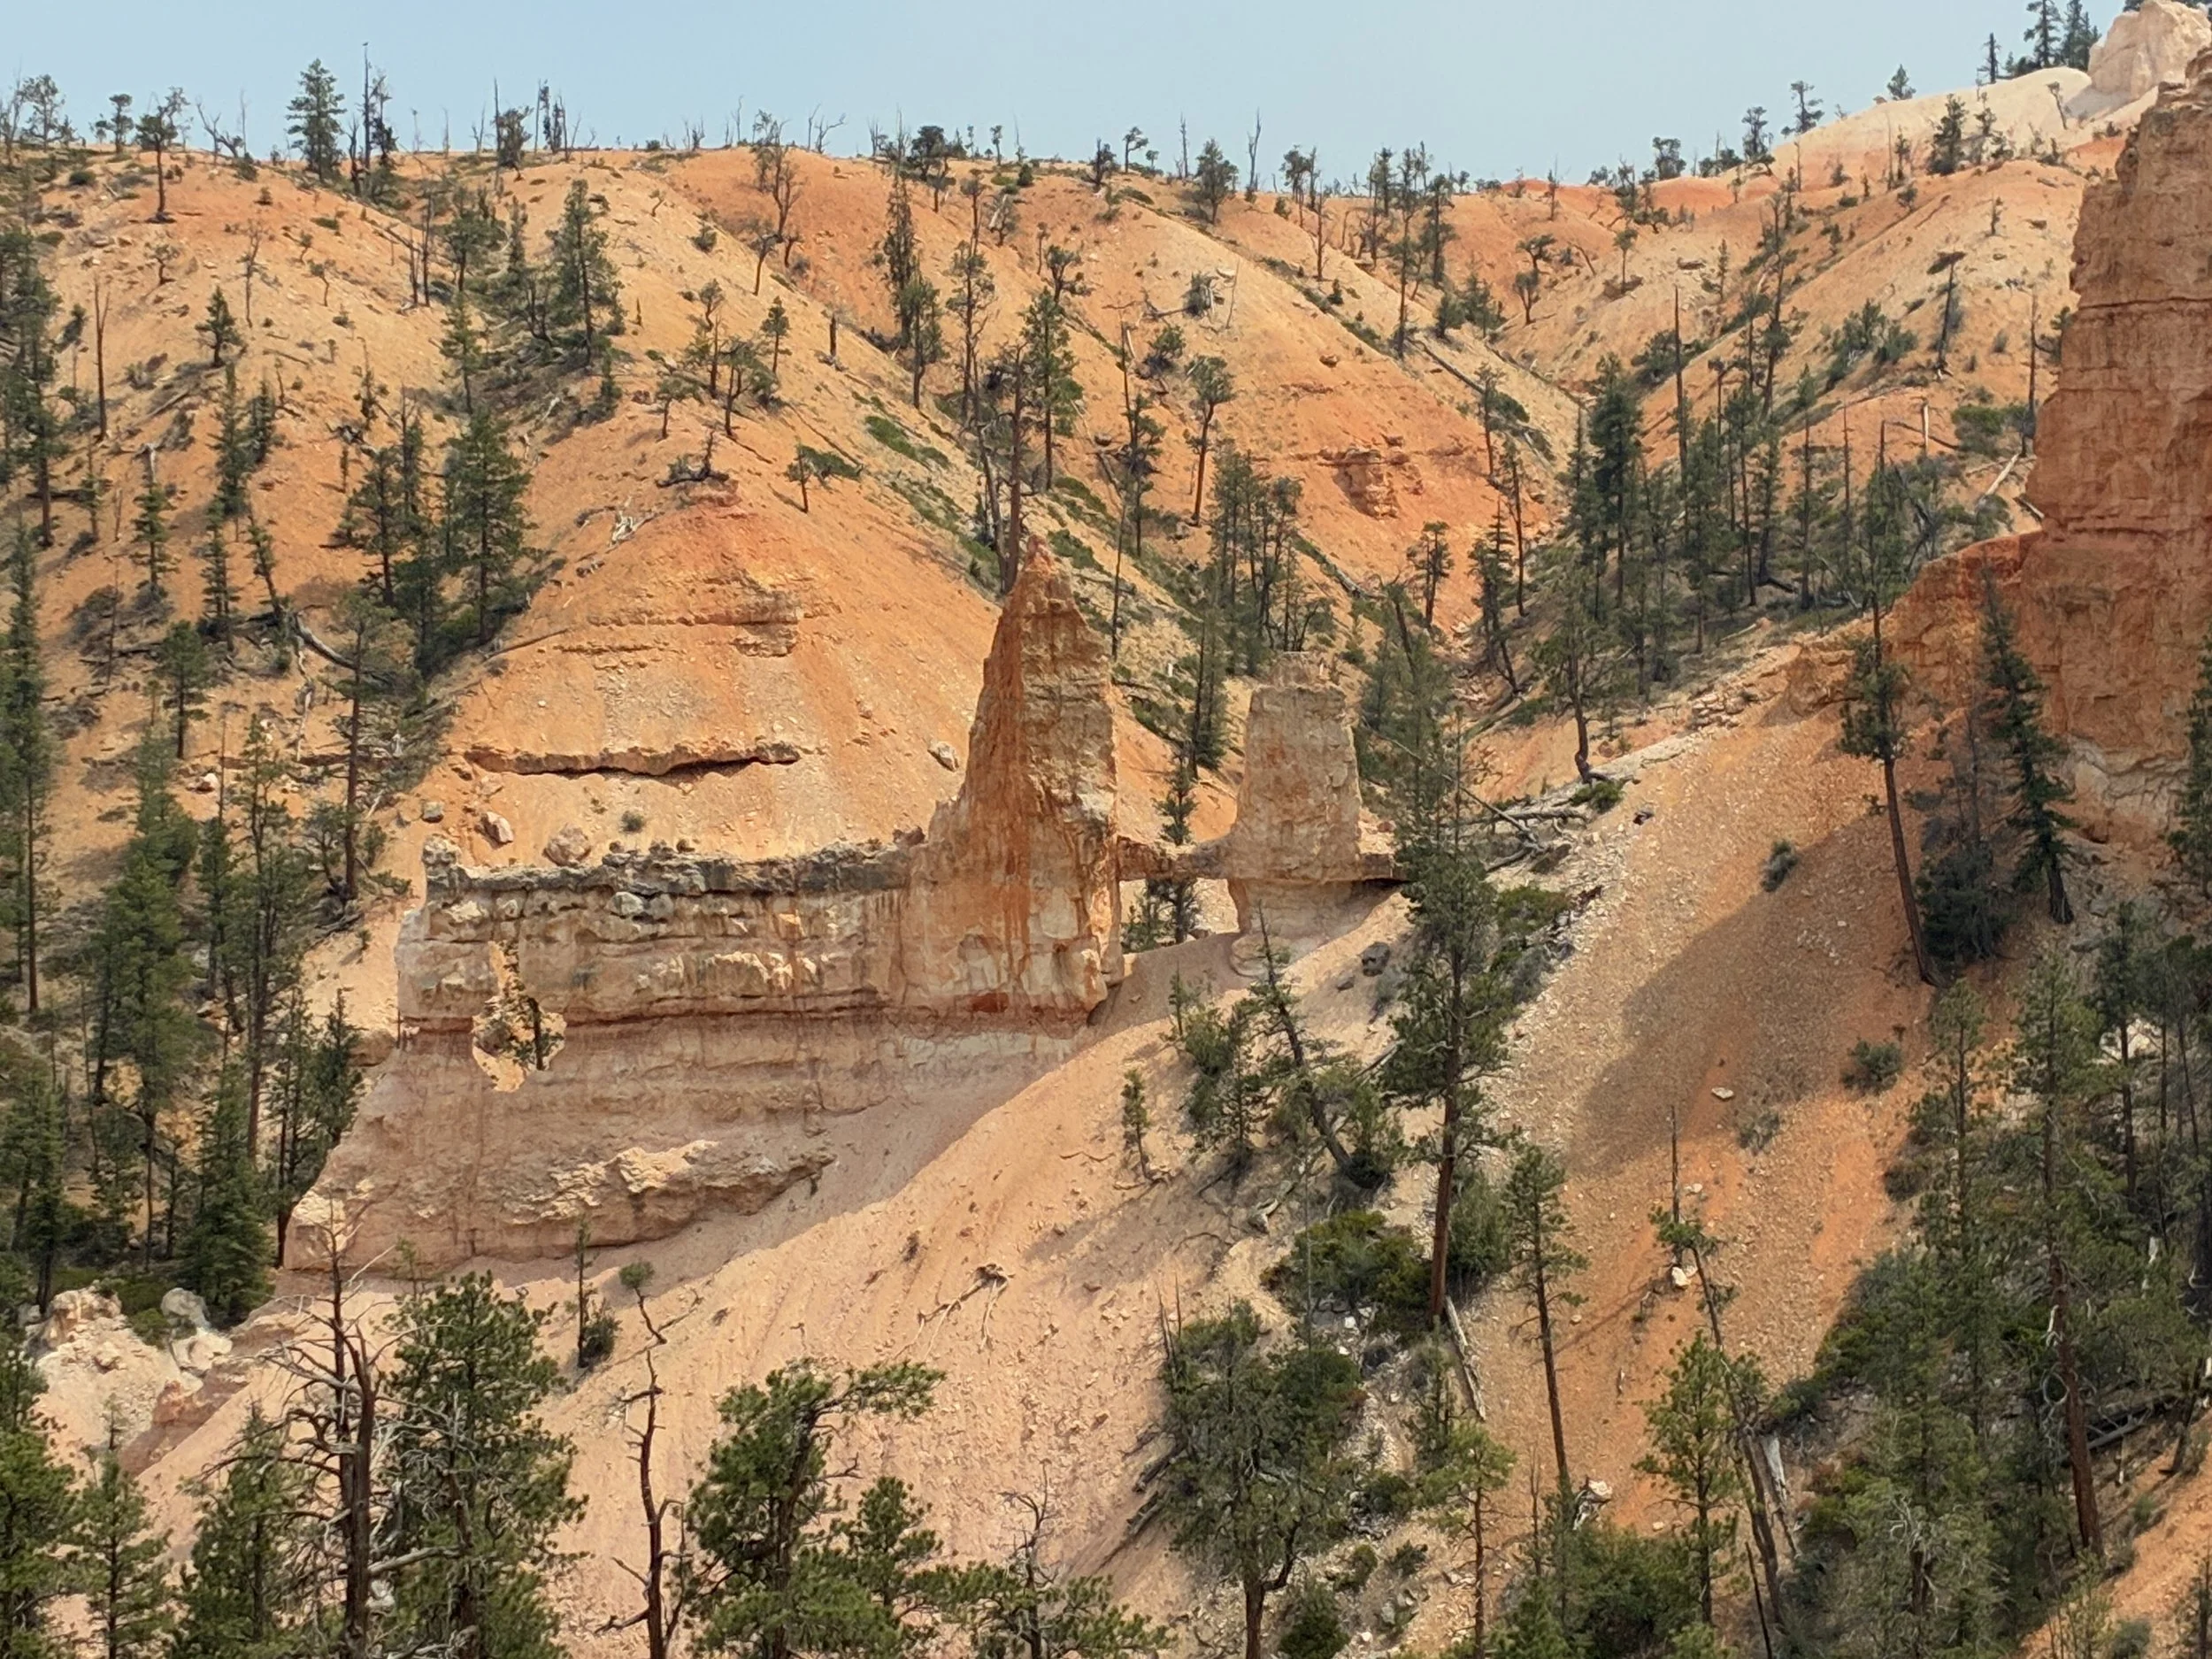
Natural Bridge is a quick place to stop for anyone driving in the park. A beautiful, huge arch has formed under the hoodoo formations.
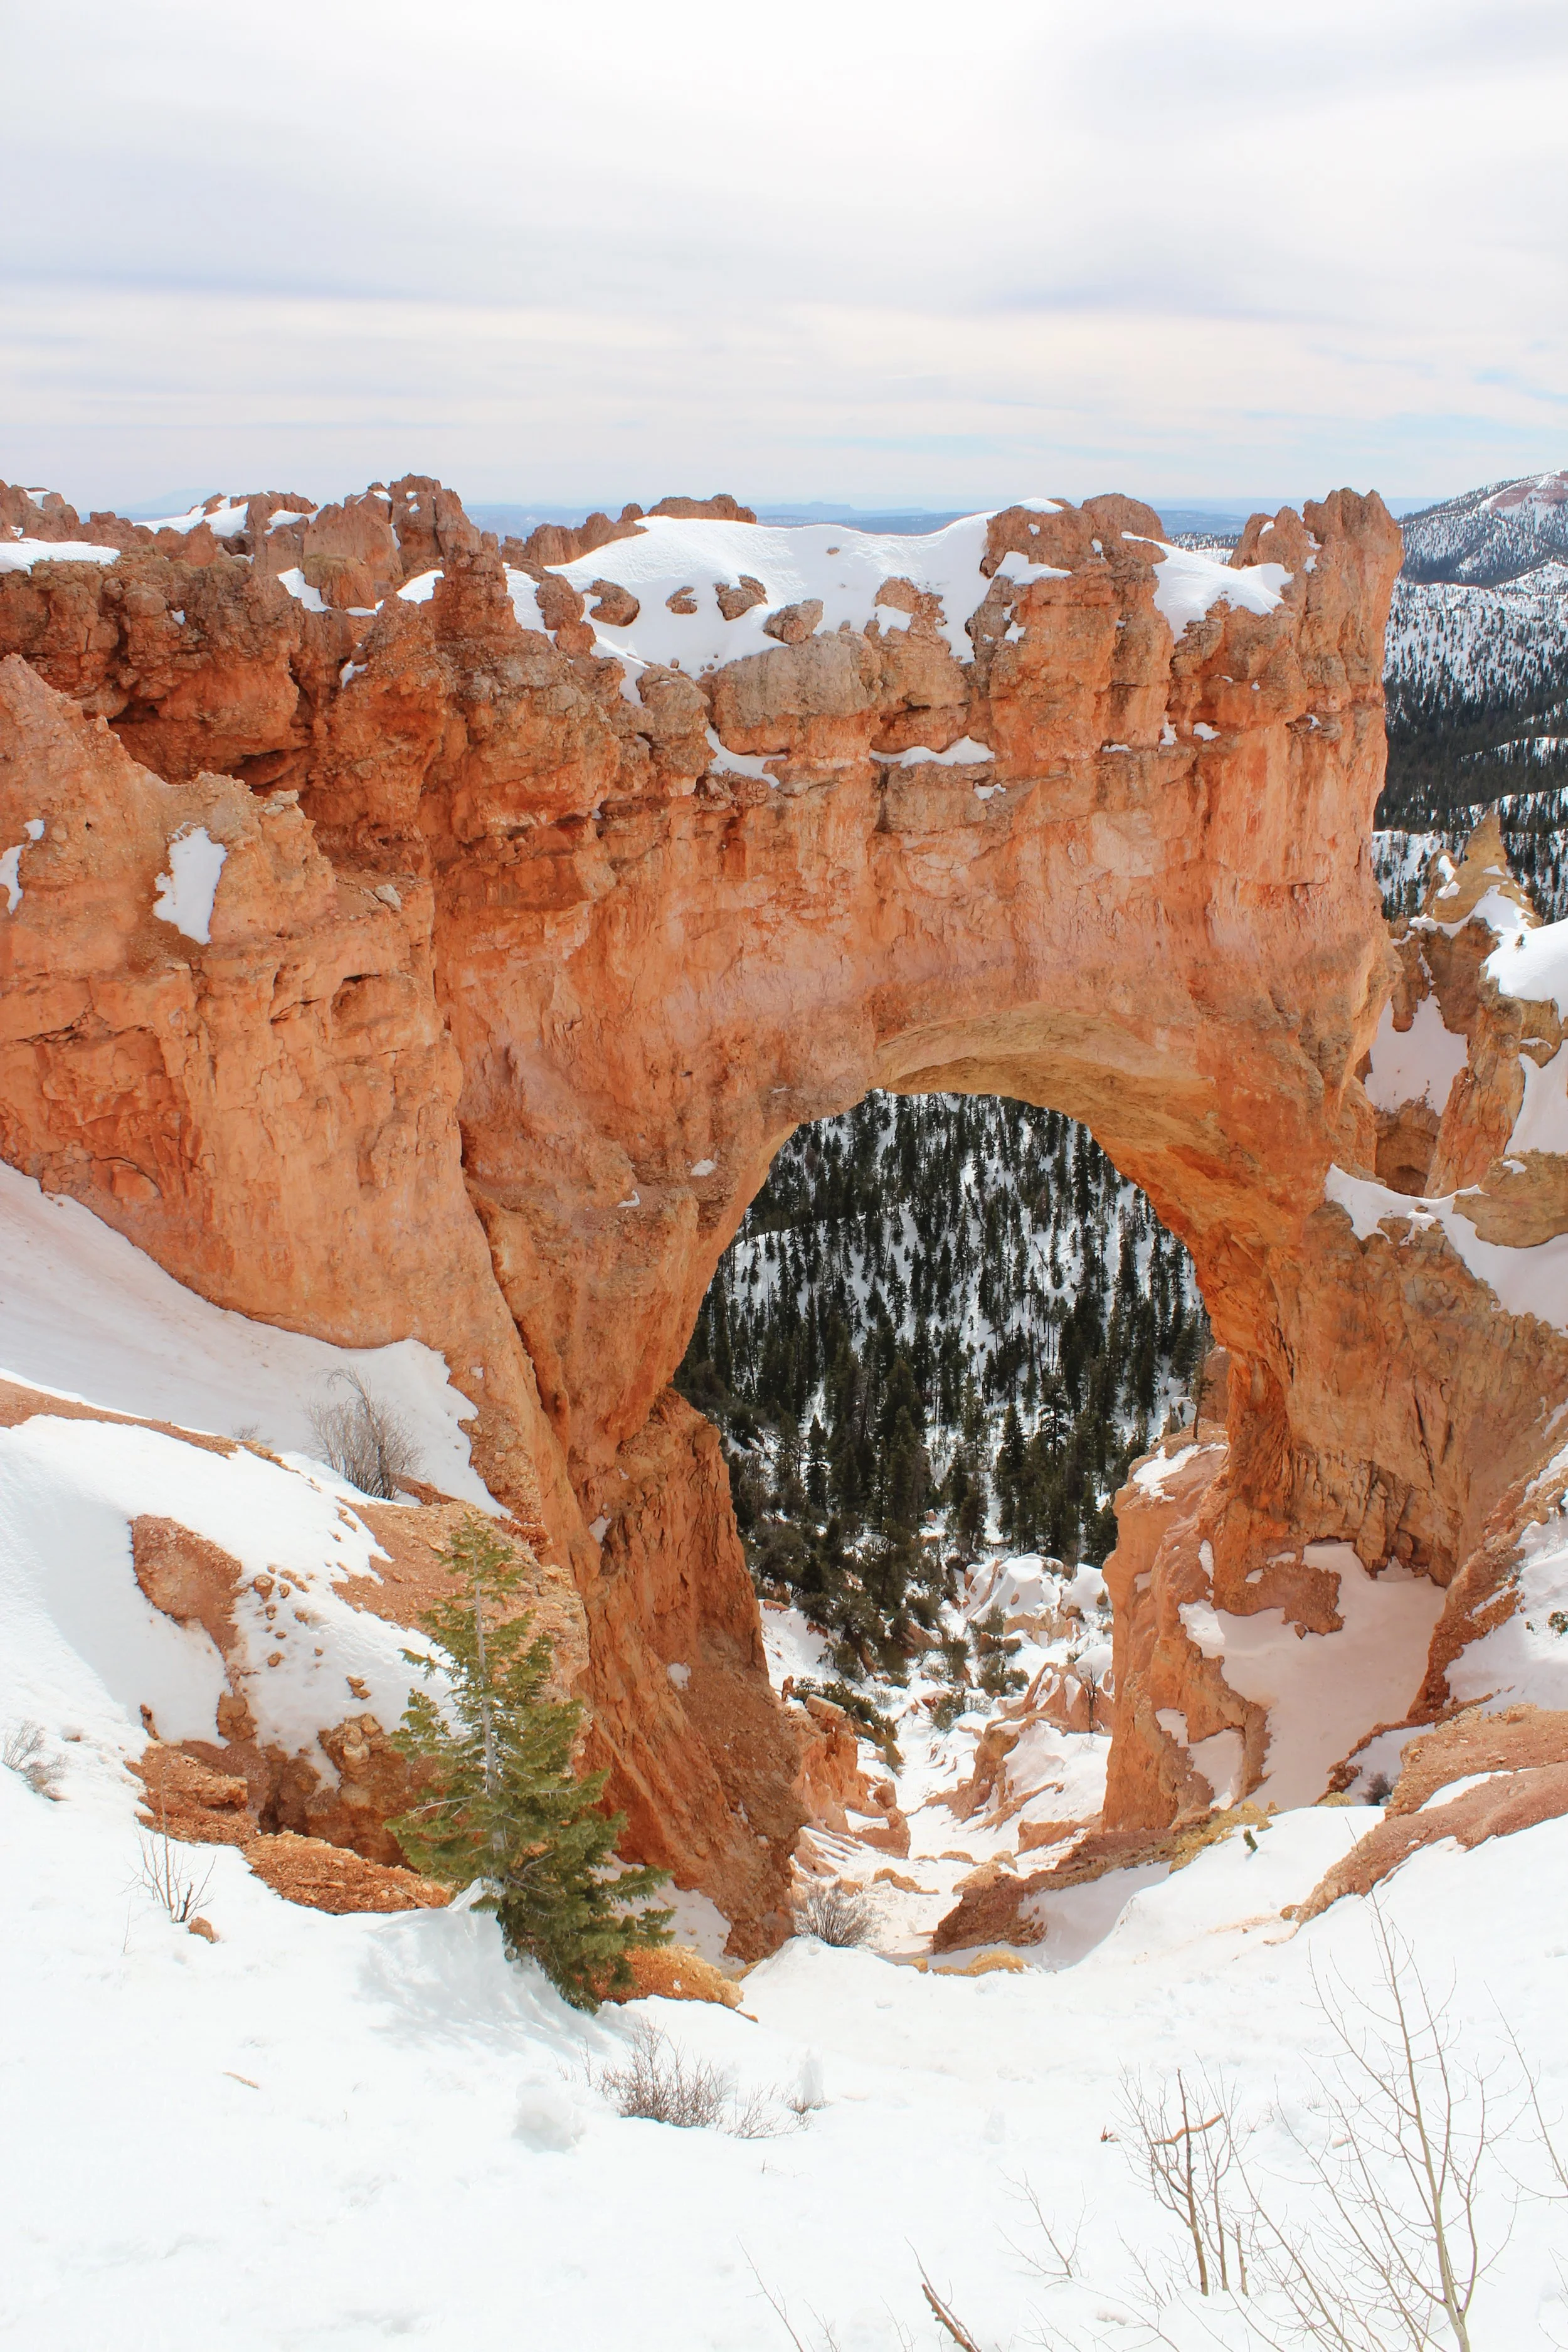
Bryce Canyon, Natural Bridge - March 2015
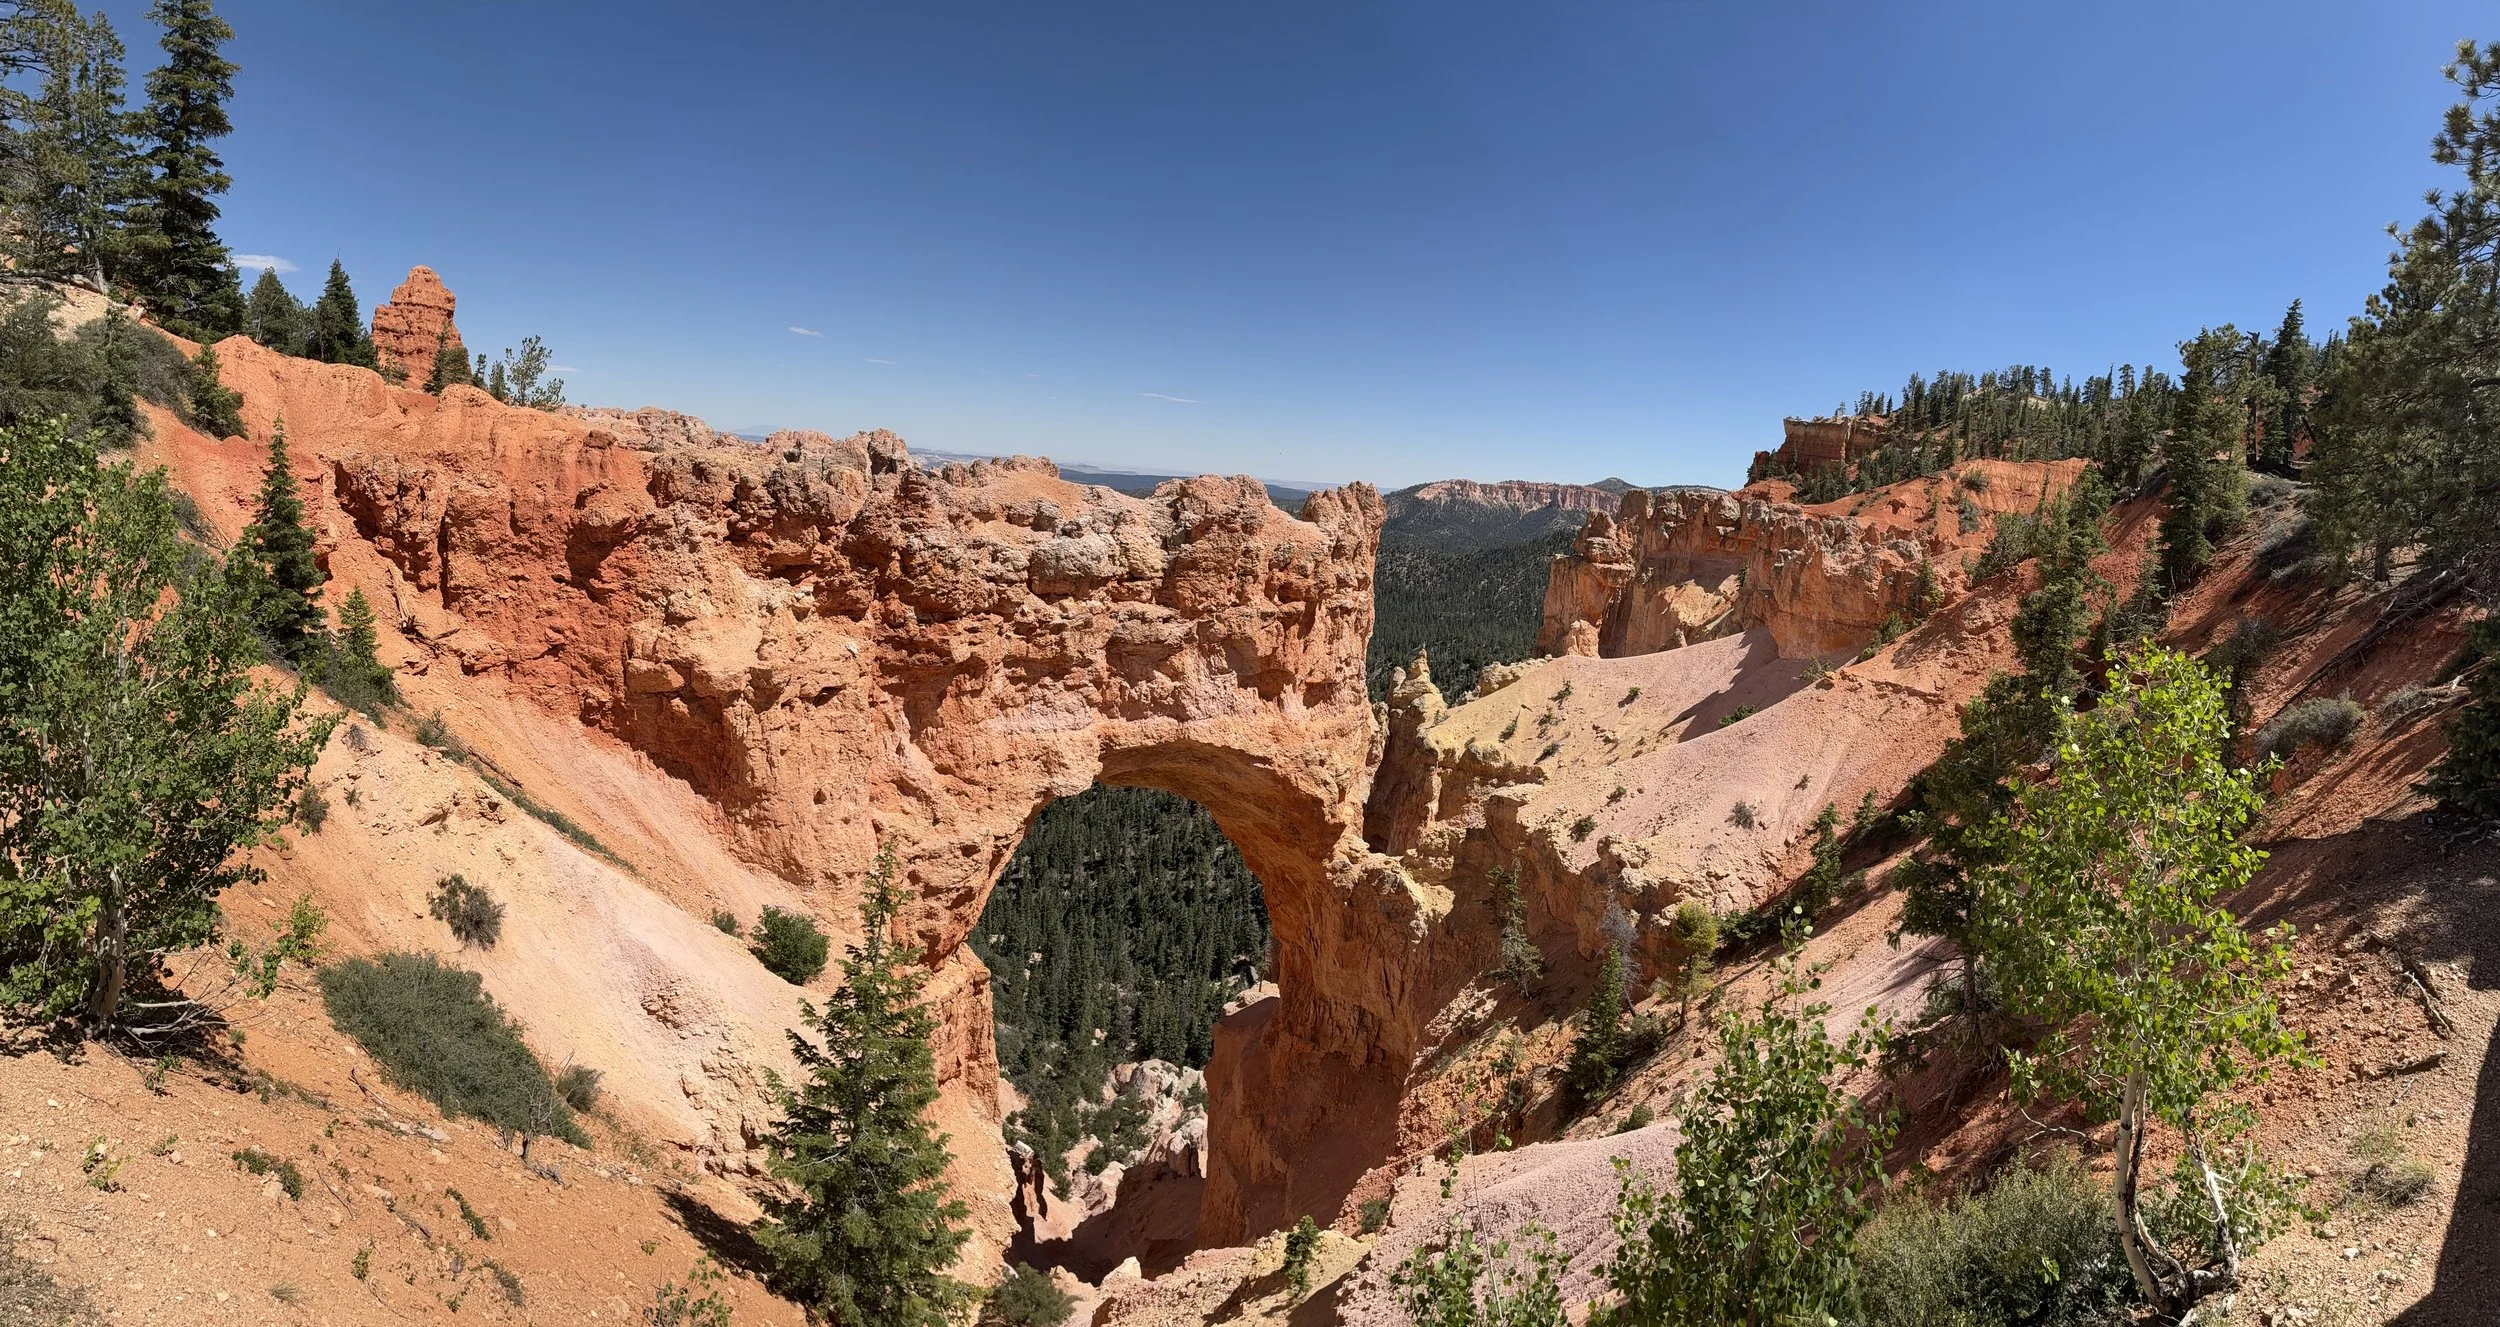
Bryce Canyon, Natural Bridge - June 2025
I) Agua Canyon
Viewpoint Location - Agua Canyon has its own parking lot, between Natural Bridge and Ponderosa Canyon. There are no hiking options at Agua Canyon.

Agua Canyon is found between Natural Bridge and Ponderosa Canyon
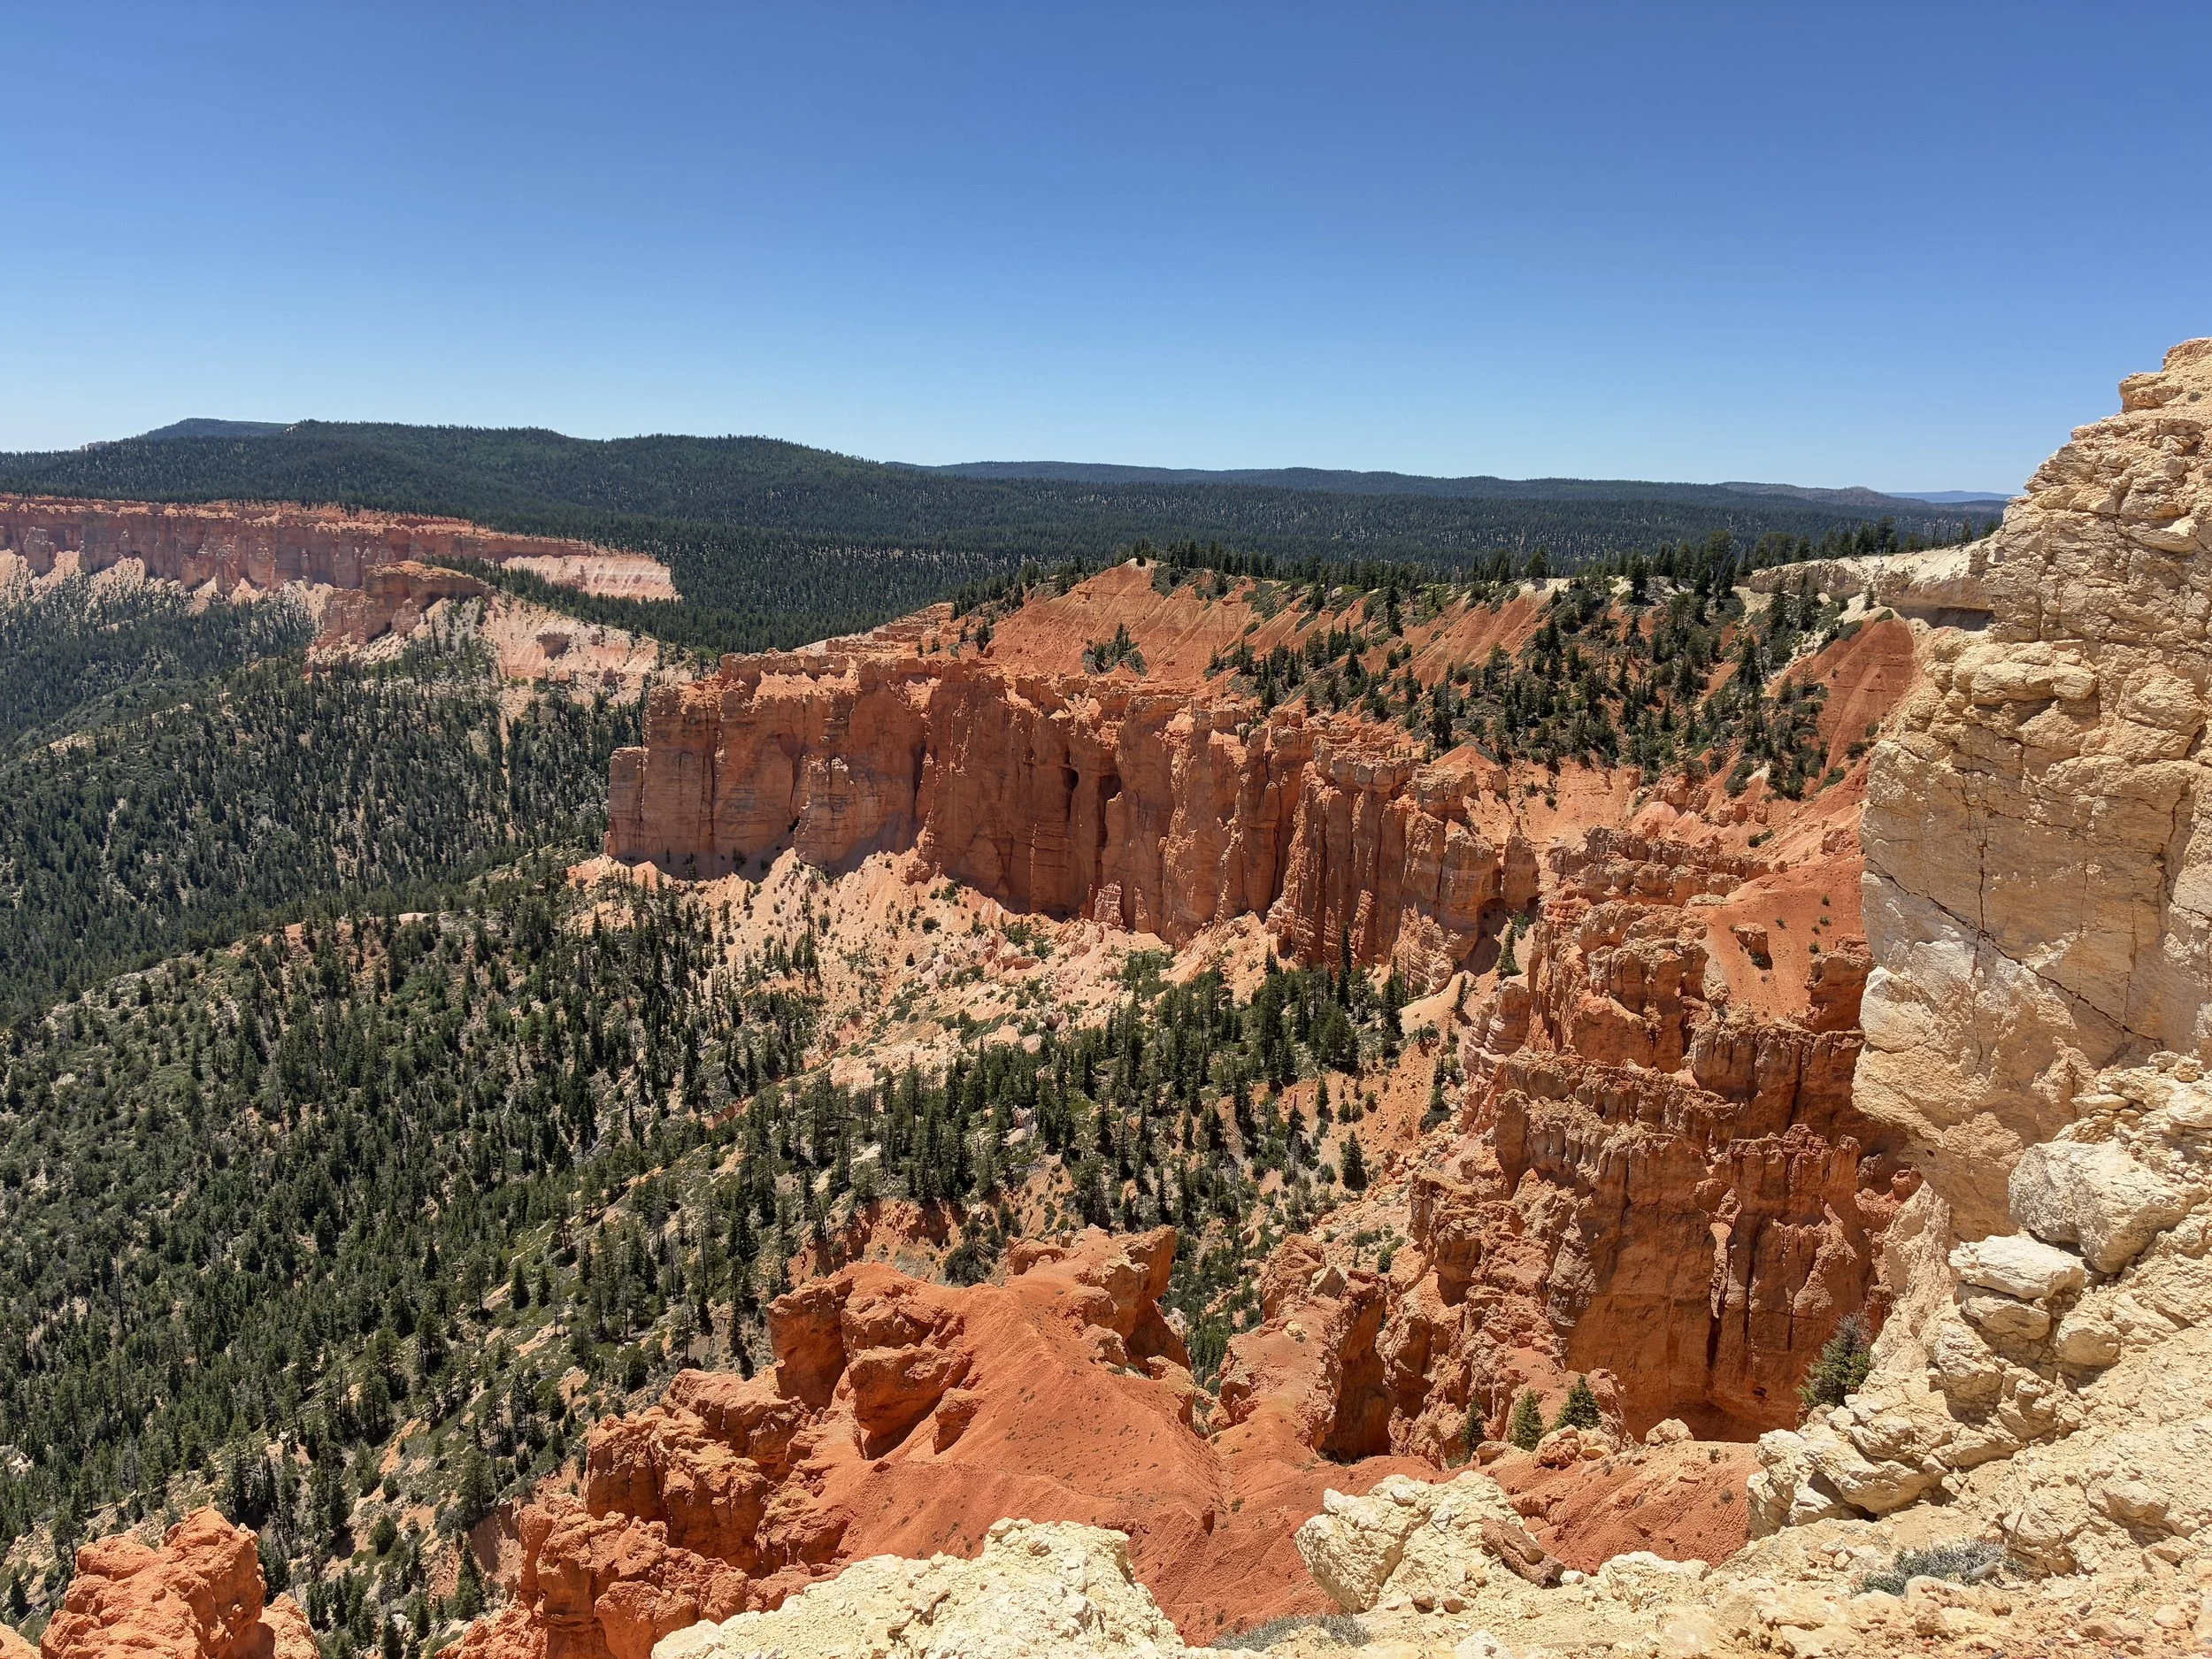
For anyone with time that is driving between Rainbow Point and the main amphitheater section of the park, I think Agua Canyon is worth the time for a quick stop. There’s not much to do other than take a few pictures, but it’s pretty.
Bryce Canyon, Agua Canyon
J) Ponderosa Canyon
Viewpoint Location - Ponderosa Canyon has its own parking lot, between Agua Canyon and Black Birch Canyon. There are no hiking options at Ponderosa Canyon.

Ponderosa Canyon is found between Agua Canyon and Black Birch Canyon
Ponderosa Canyon is another nice quick stop for anyone already out on the road that has a few extra minutes. Nothing amazing, but still very pretty.
Bryce Canyon, Ponderosa Canyon
K) Black Birch Canyon
Viewpoint Location - Black Birch Canyon has its own parking lot, between Ponderosa Canyon and Rainbow Point. There are no hiking options at Black Birch Canyon.

Black Birch Canyon is found between Ponderosa Canyon and Rainbow Point
Black Birch Canyon is definitely worth stopping at. It’s not quite as pretty as Rainbow Point, but it’s still nice. This is another quick stop. There are no hiking options at Black Birch Canyon.
Bryce Canyon, Black Birch Canyon - The smoke is from the 2025 France Dixie Fire
L) Rainbow Point
Viewpoint Location - Rainbow Point is the last stop along the Bryce Canyon Scenic Drive. There are no shuttle stops at Rainbow Point. The only way to get here is by car.
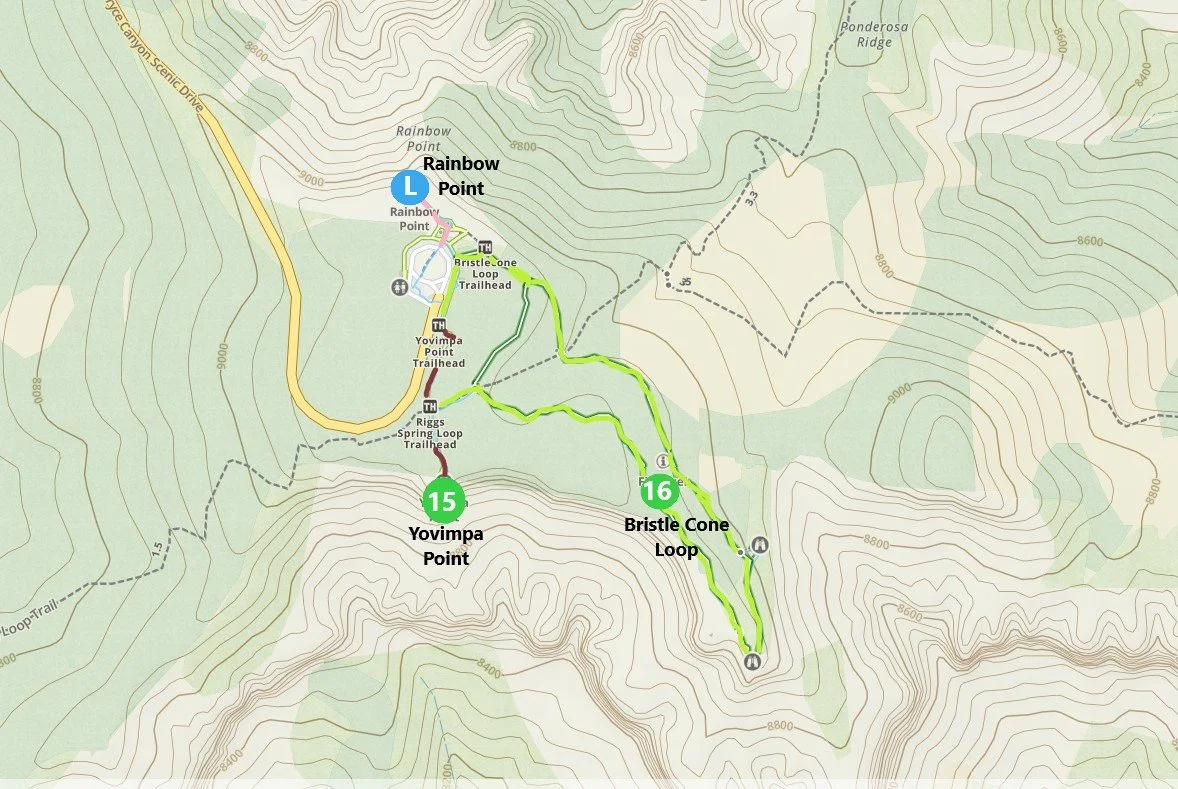
Map of Rainbow Point and the trails to Yovimpa Point and Bristle Cone Loop
It’s just a short stroll to Rainbow Point from the parking lot. Everything is paved and there is no change in elevation. I think it’s worth the drive out here.
Bryce Canyon, Rainbow Point - The smoke is from the 2025 France Dixie Fire
15) Yovimpa Point
Distance - 0.2 miles
Elevation Gain - Flat
Trailhead Location - The trailhead to Yovimpa Point is at Rainbow Point.
Helpful Information - Yovimpa Point is an easy walk to a pretty viewpoint, and can be combined with Bristlecone Loop, another easy hike. This viewpoint is accessible to everyone.

The trail to Yovimpa Point is marked in dark brown.
If you only have time for one viewpoint, pick Rainbow Point over Yovimpa Point. But for anyone with a little bit of time, I really loved the Bristlecone Loop Trail, and Yovimpa is just a short spur that can be added to an easy hike.
Bryce Canyon, Yovimpa Point
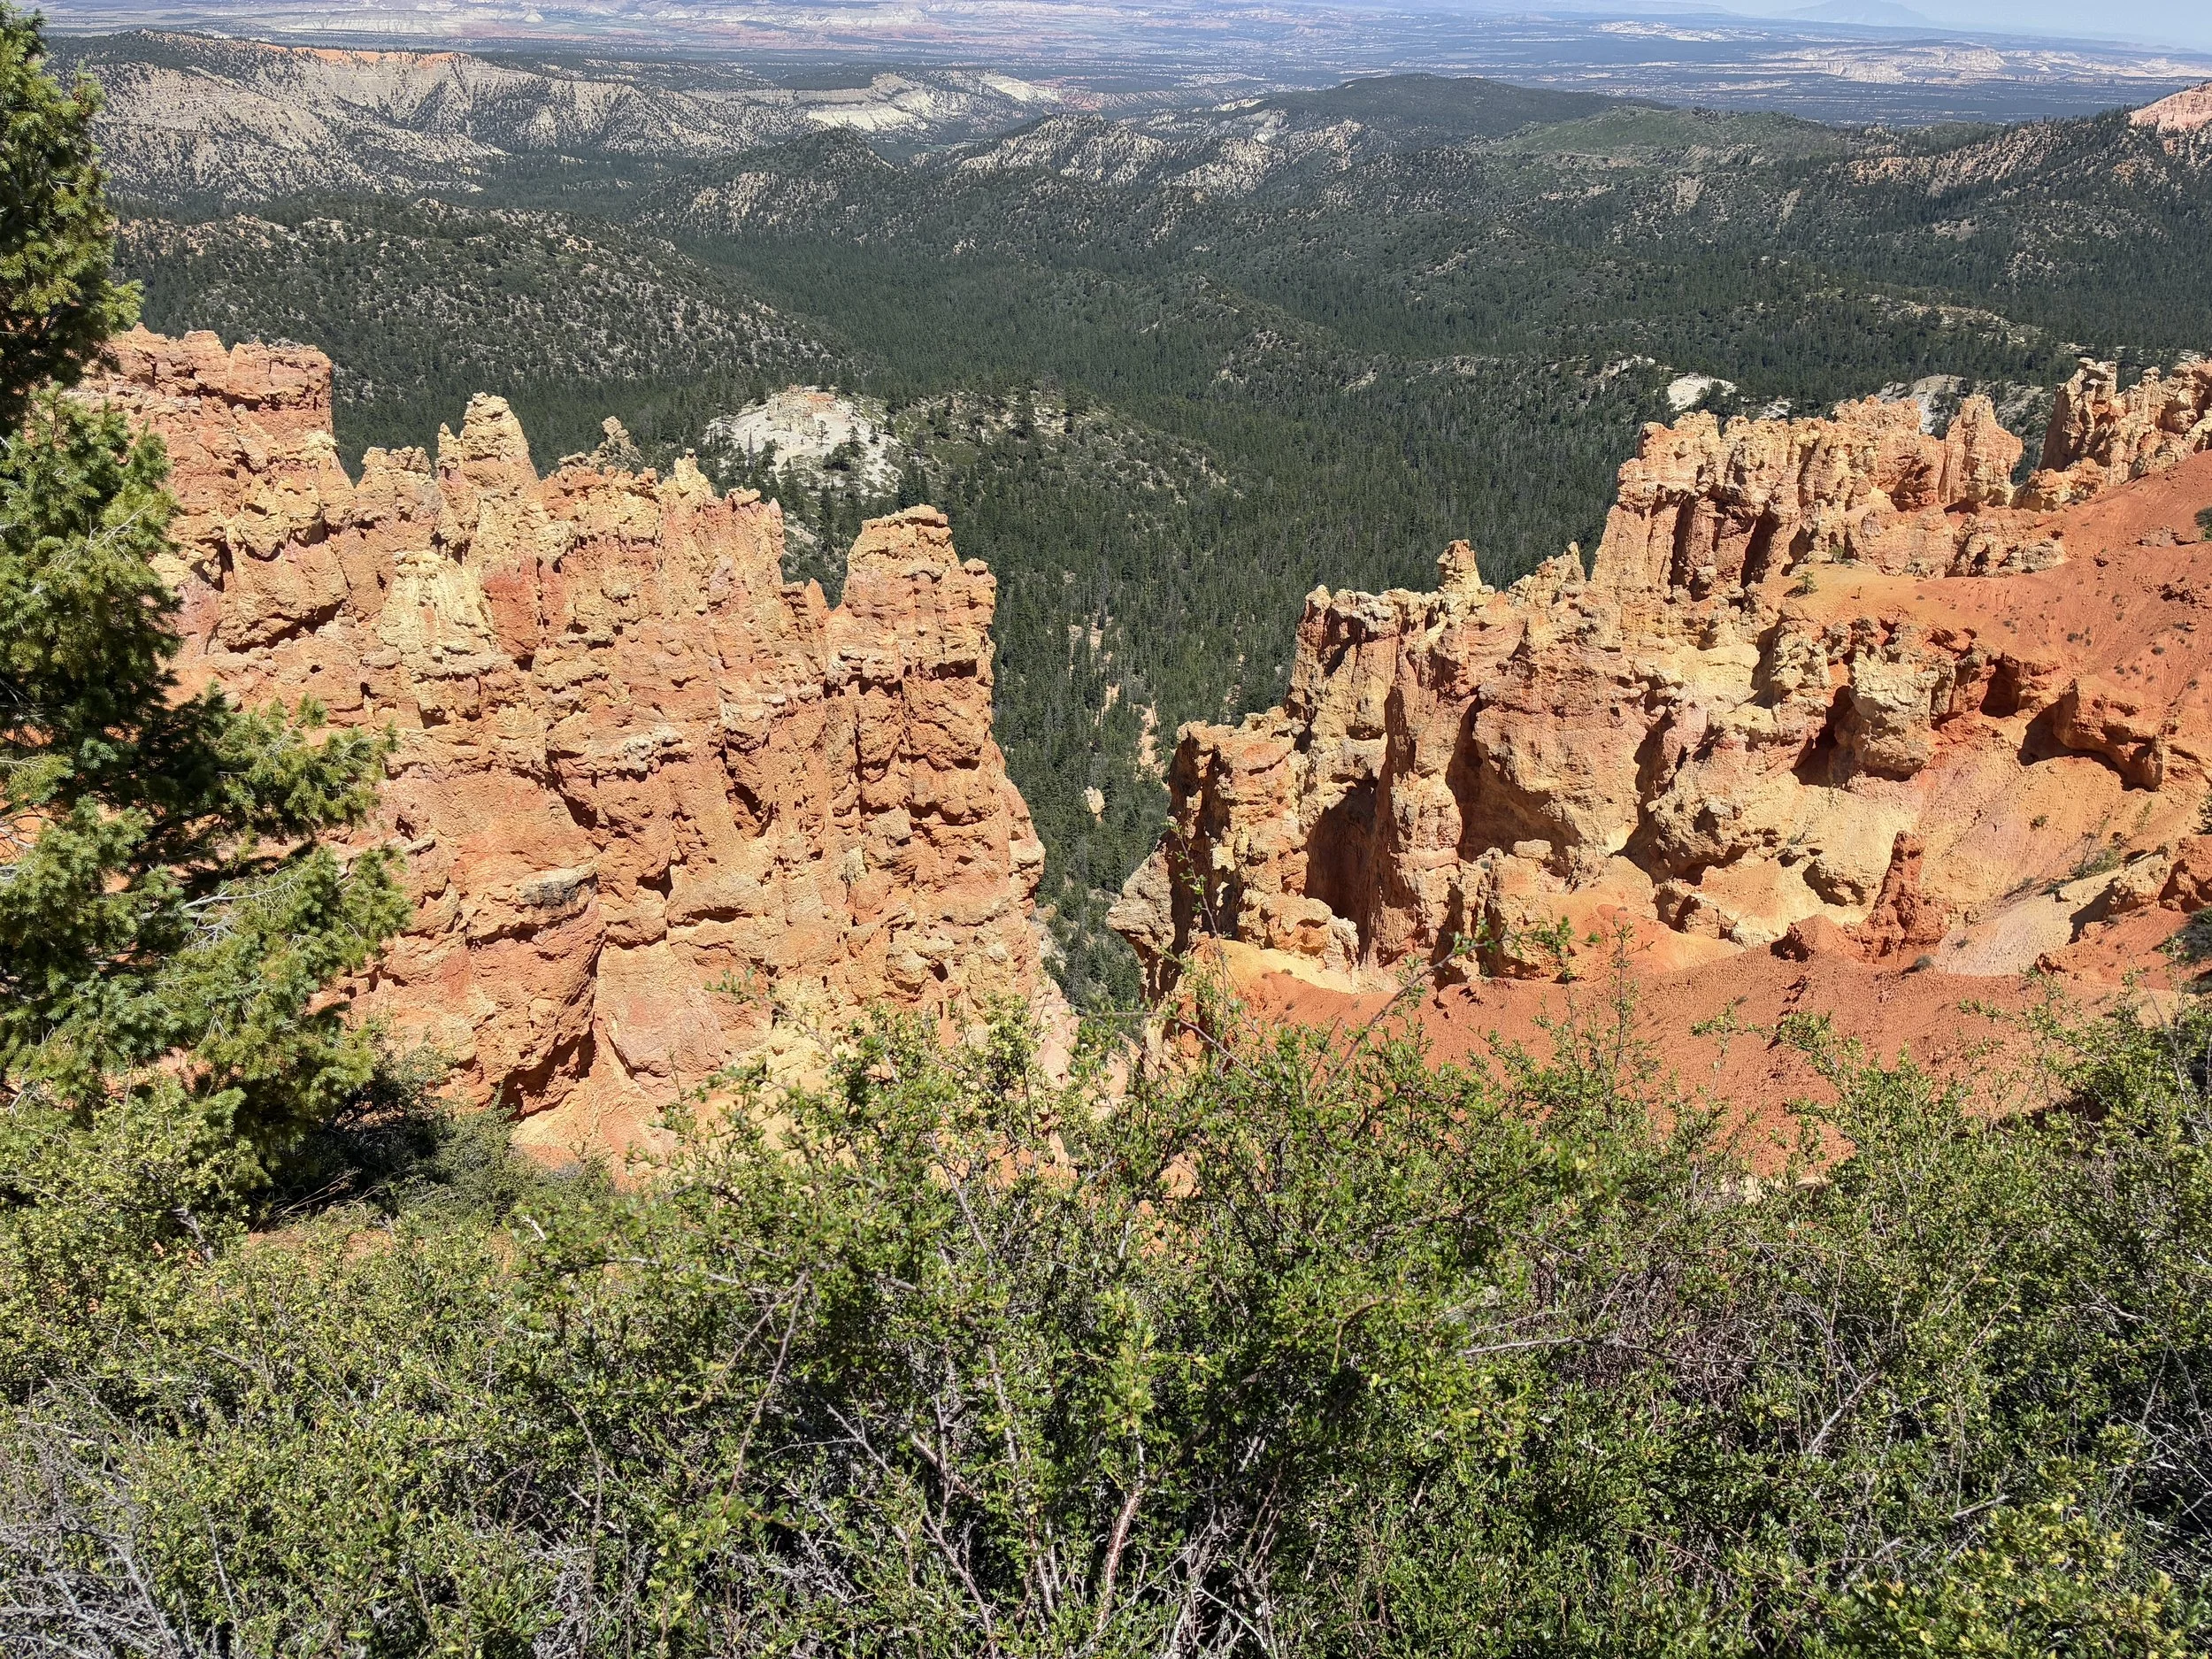
16) Bristlecone Loop
Distance - 1.1 miles
Elevation Gain - 100ft / essentially flat
Trailhead Location - The trailhead to Bristlecone Loop is at Rainbow Point. There is a parking lot here, but not shuttle stop.
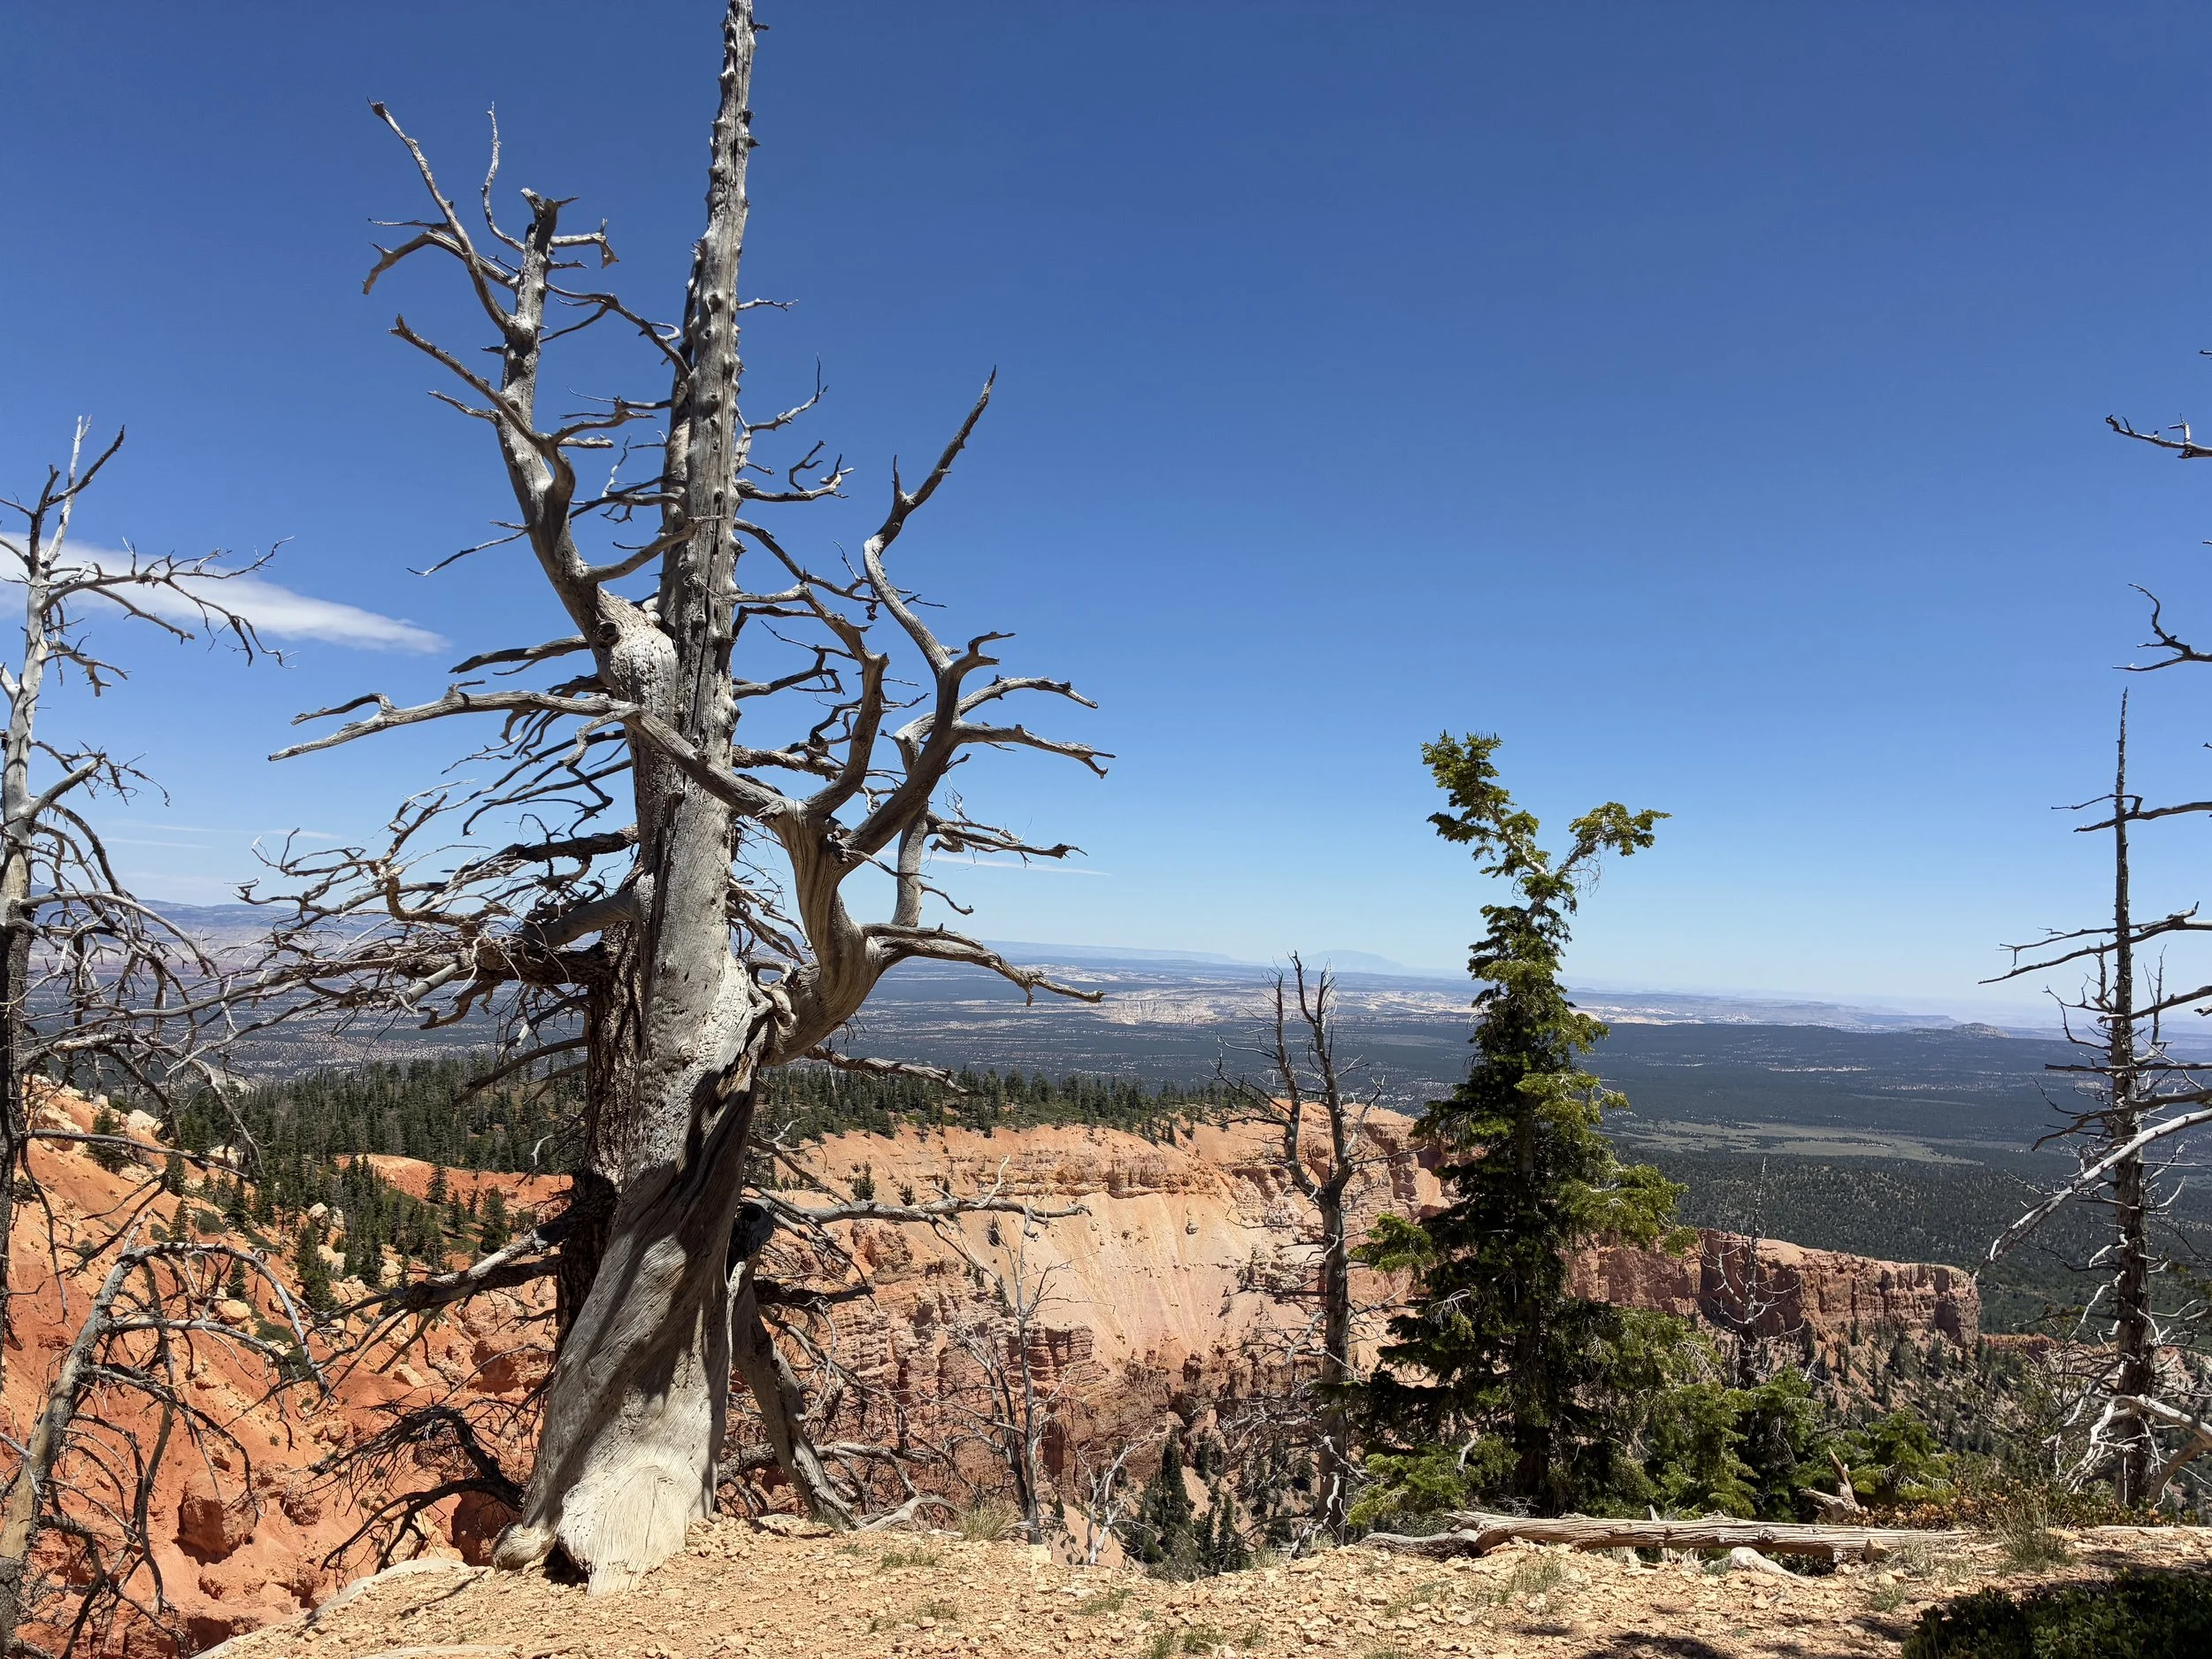
Helpful Information - Bristlecone Loop is an easy walk to a beautiful viewpoint, and the trail highlights some of the oldest trees alive on the planet. This hike can easily be combined with the Yovimpa Point, another easy hike.

Bristlecone Loop is marked in bright green.
Bryce Canyon National Park has a lot of really difficult trails. Even the moderate ones are hard. But Bristlecone is actually an easy hike, and it’s a little bit longer than the other easy hikes in the park. I know the shuttle doesn’t stop here, but I would recommend coming back into the park with a car, and drive all the way to Rainbow Point, just to enjoy the calm air along the Bristlecone Trail.
Bryce Canyon, Bristlecone Loop Trail
Bristlecone Loop is an almost completely flat trail. It’s not paved, so it feels like hiking. It’s a nice place to stretch legs and truly relax inside the park.
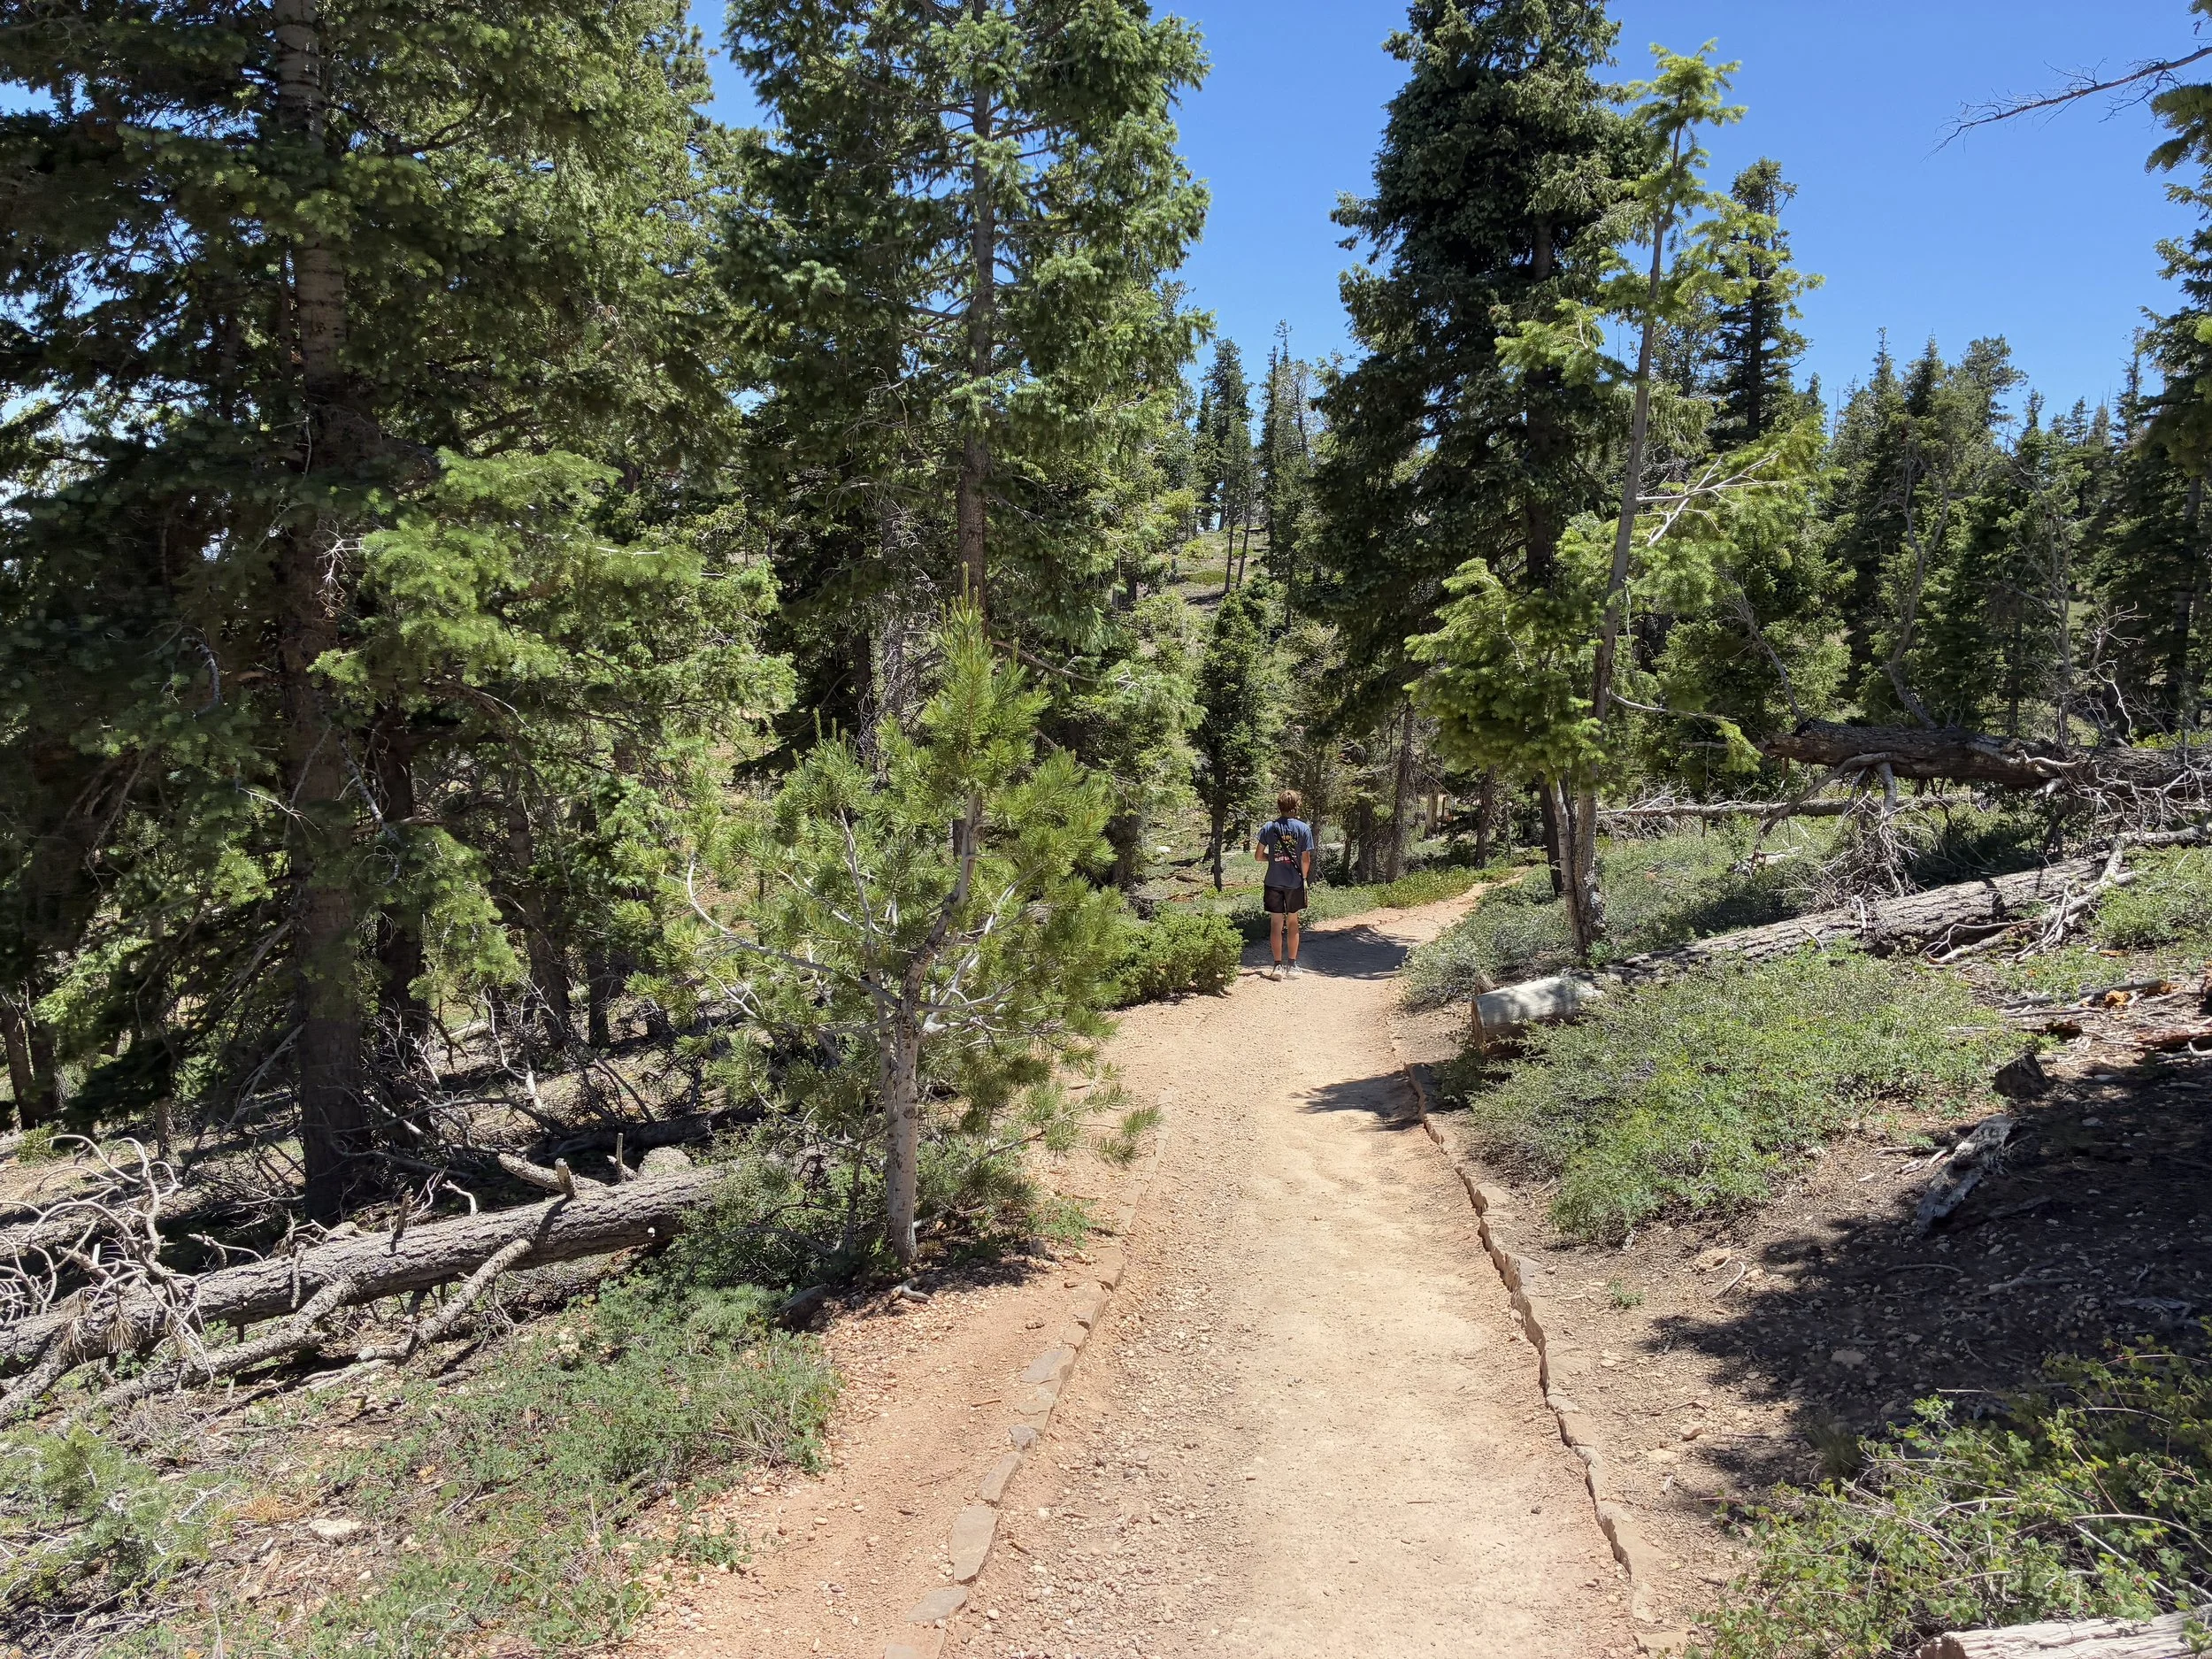
Bryce Canyon, Bristlecone Loop Trail
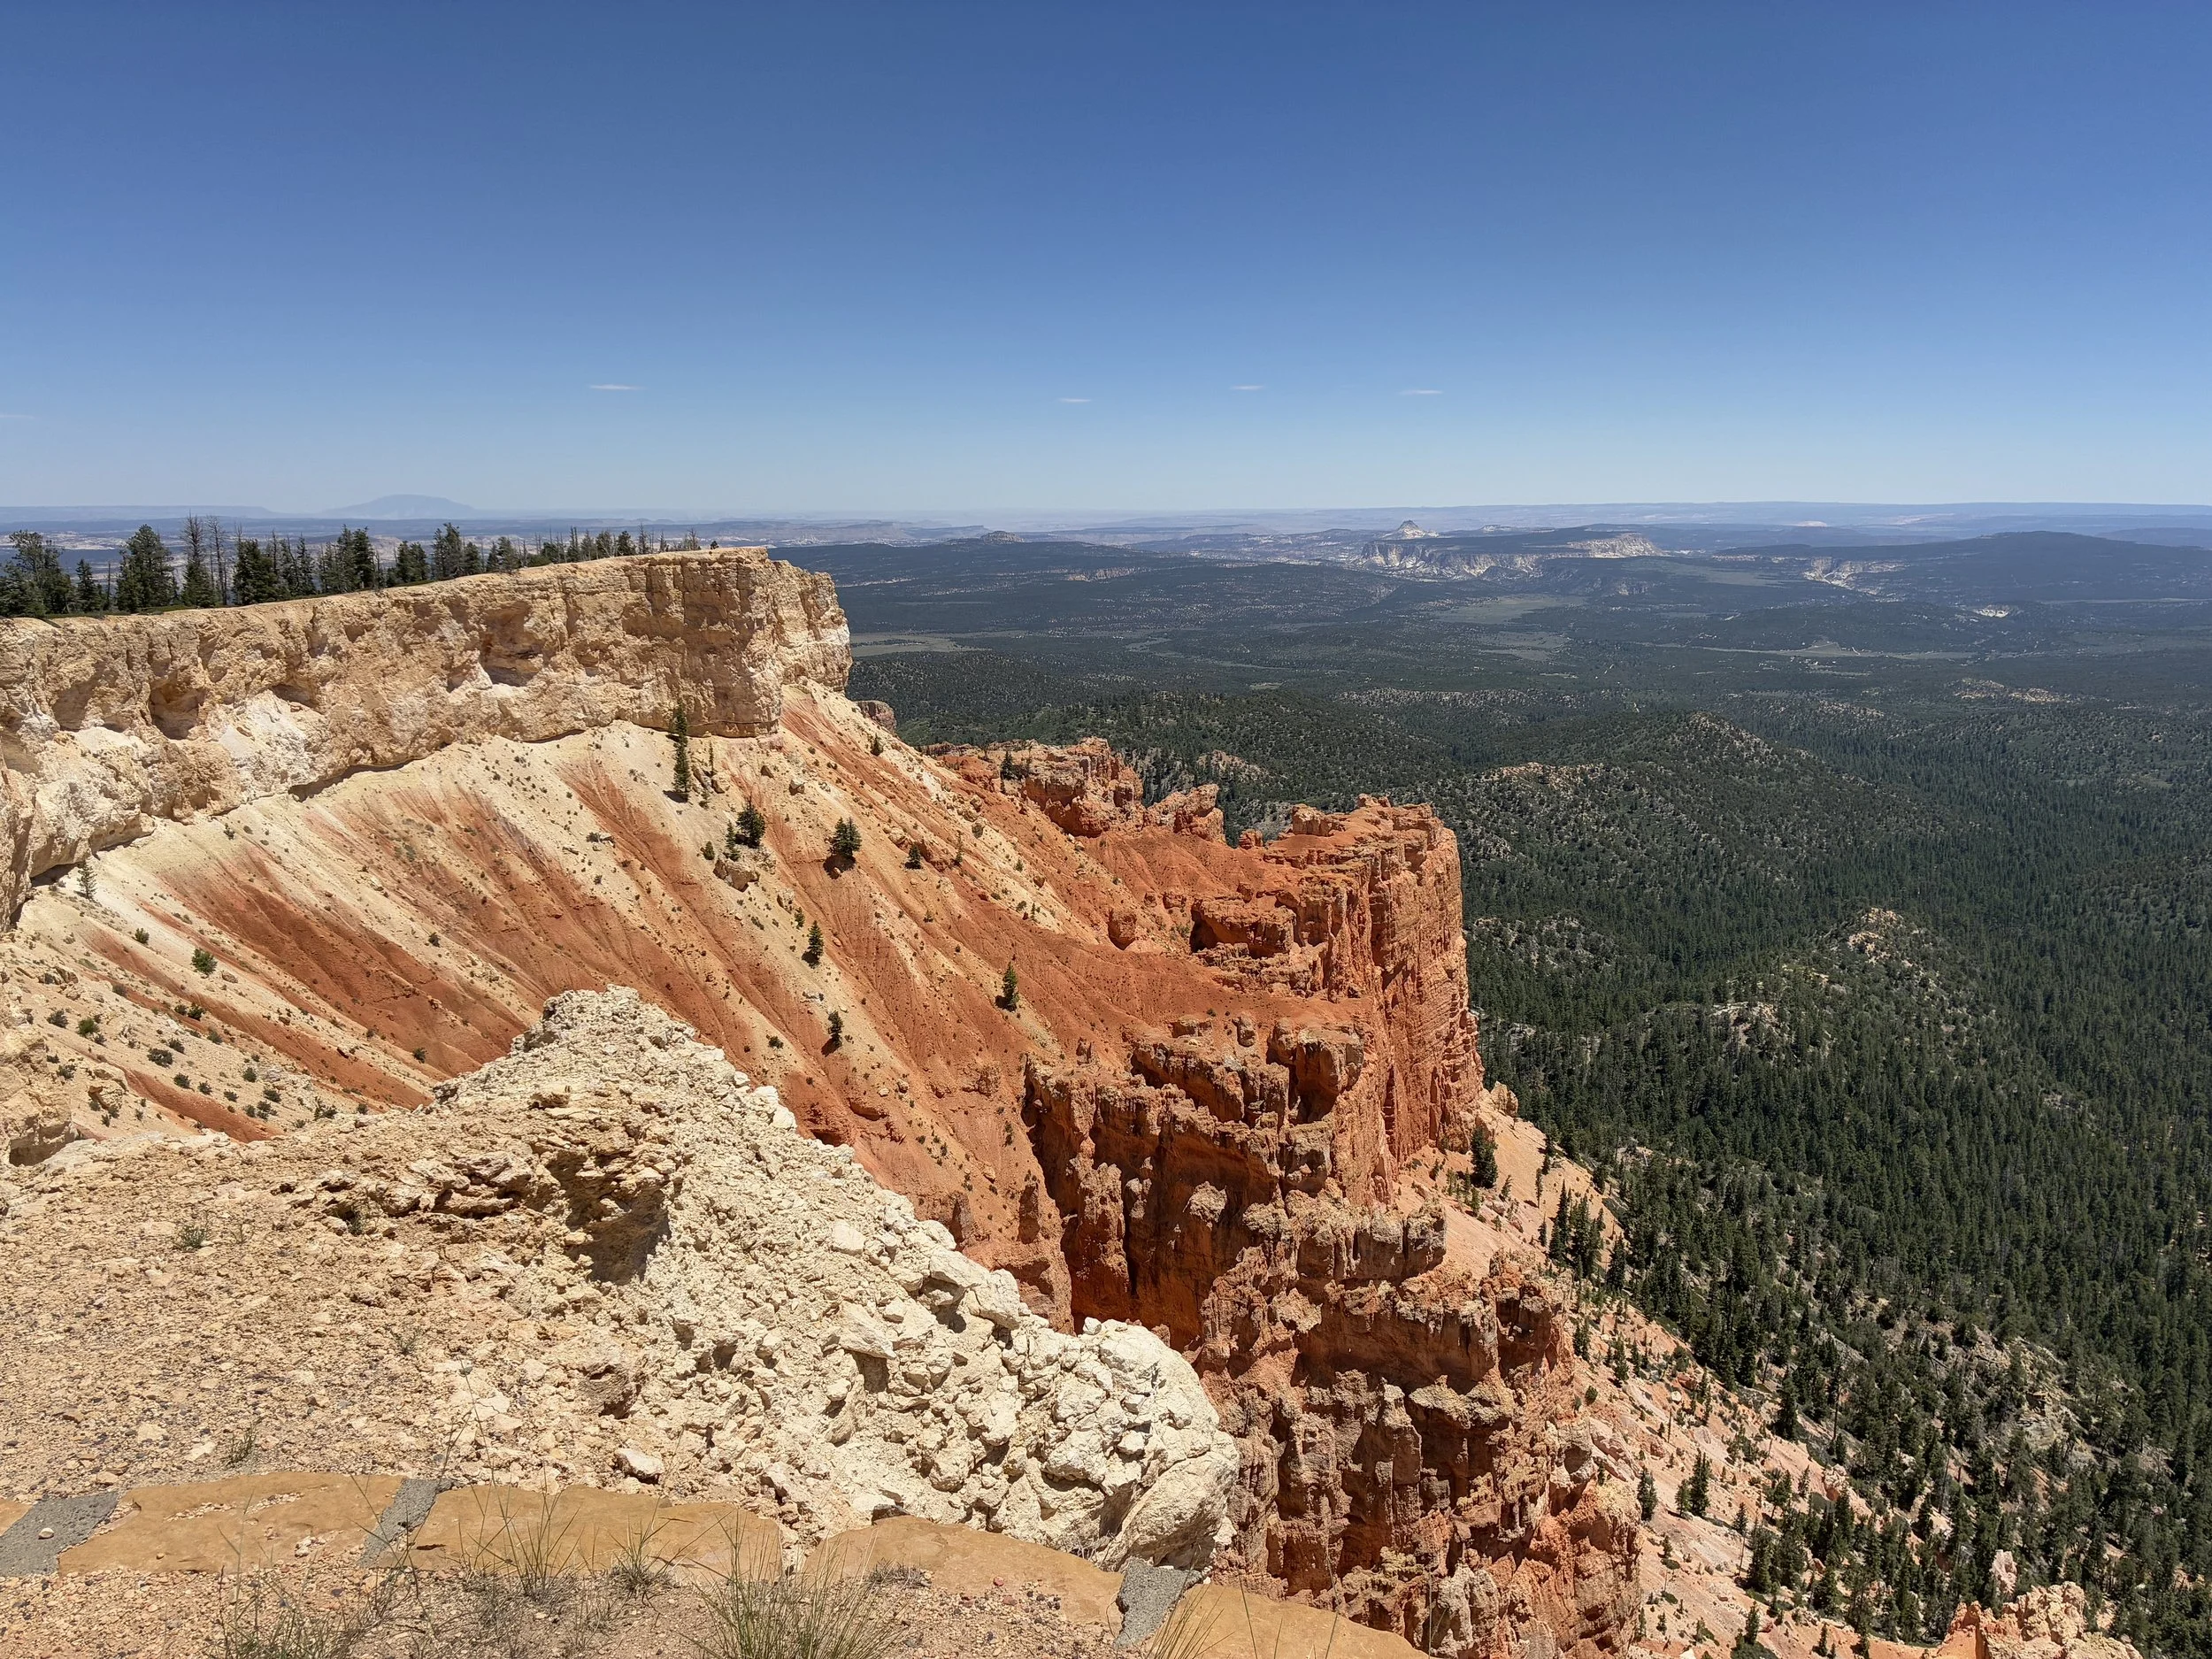
At the southern end of the loop, there is a beautiful unnamed point with an enclosed structure.
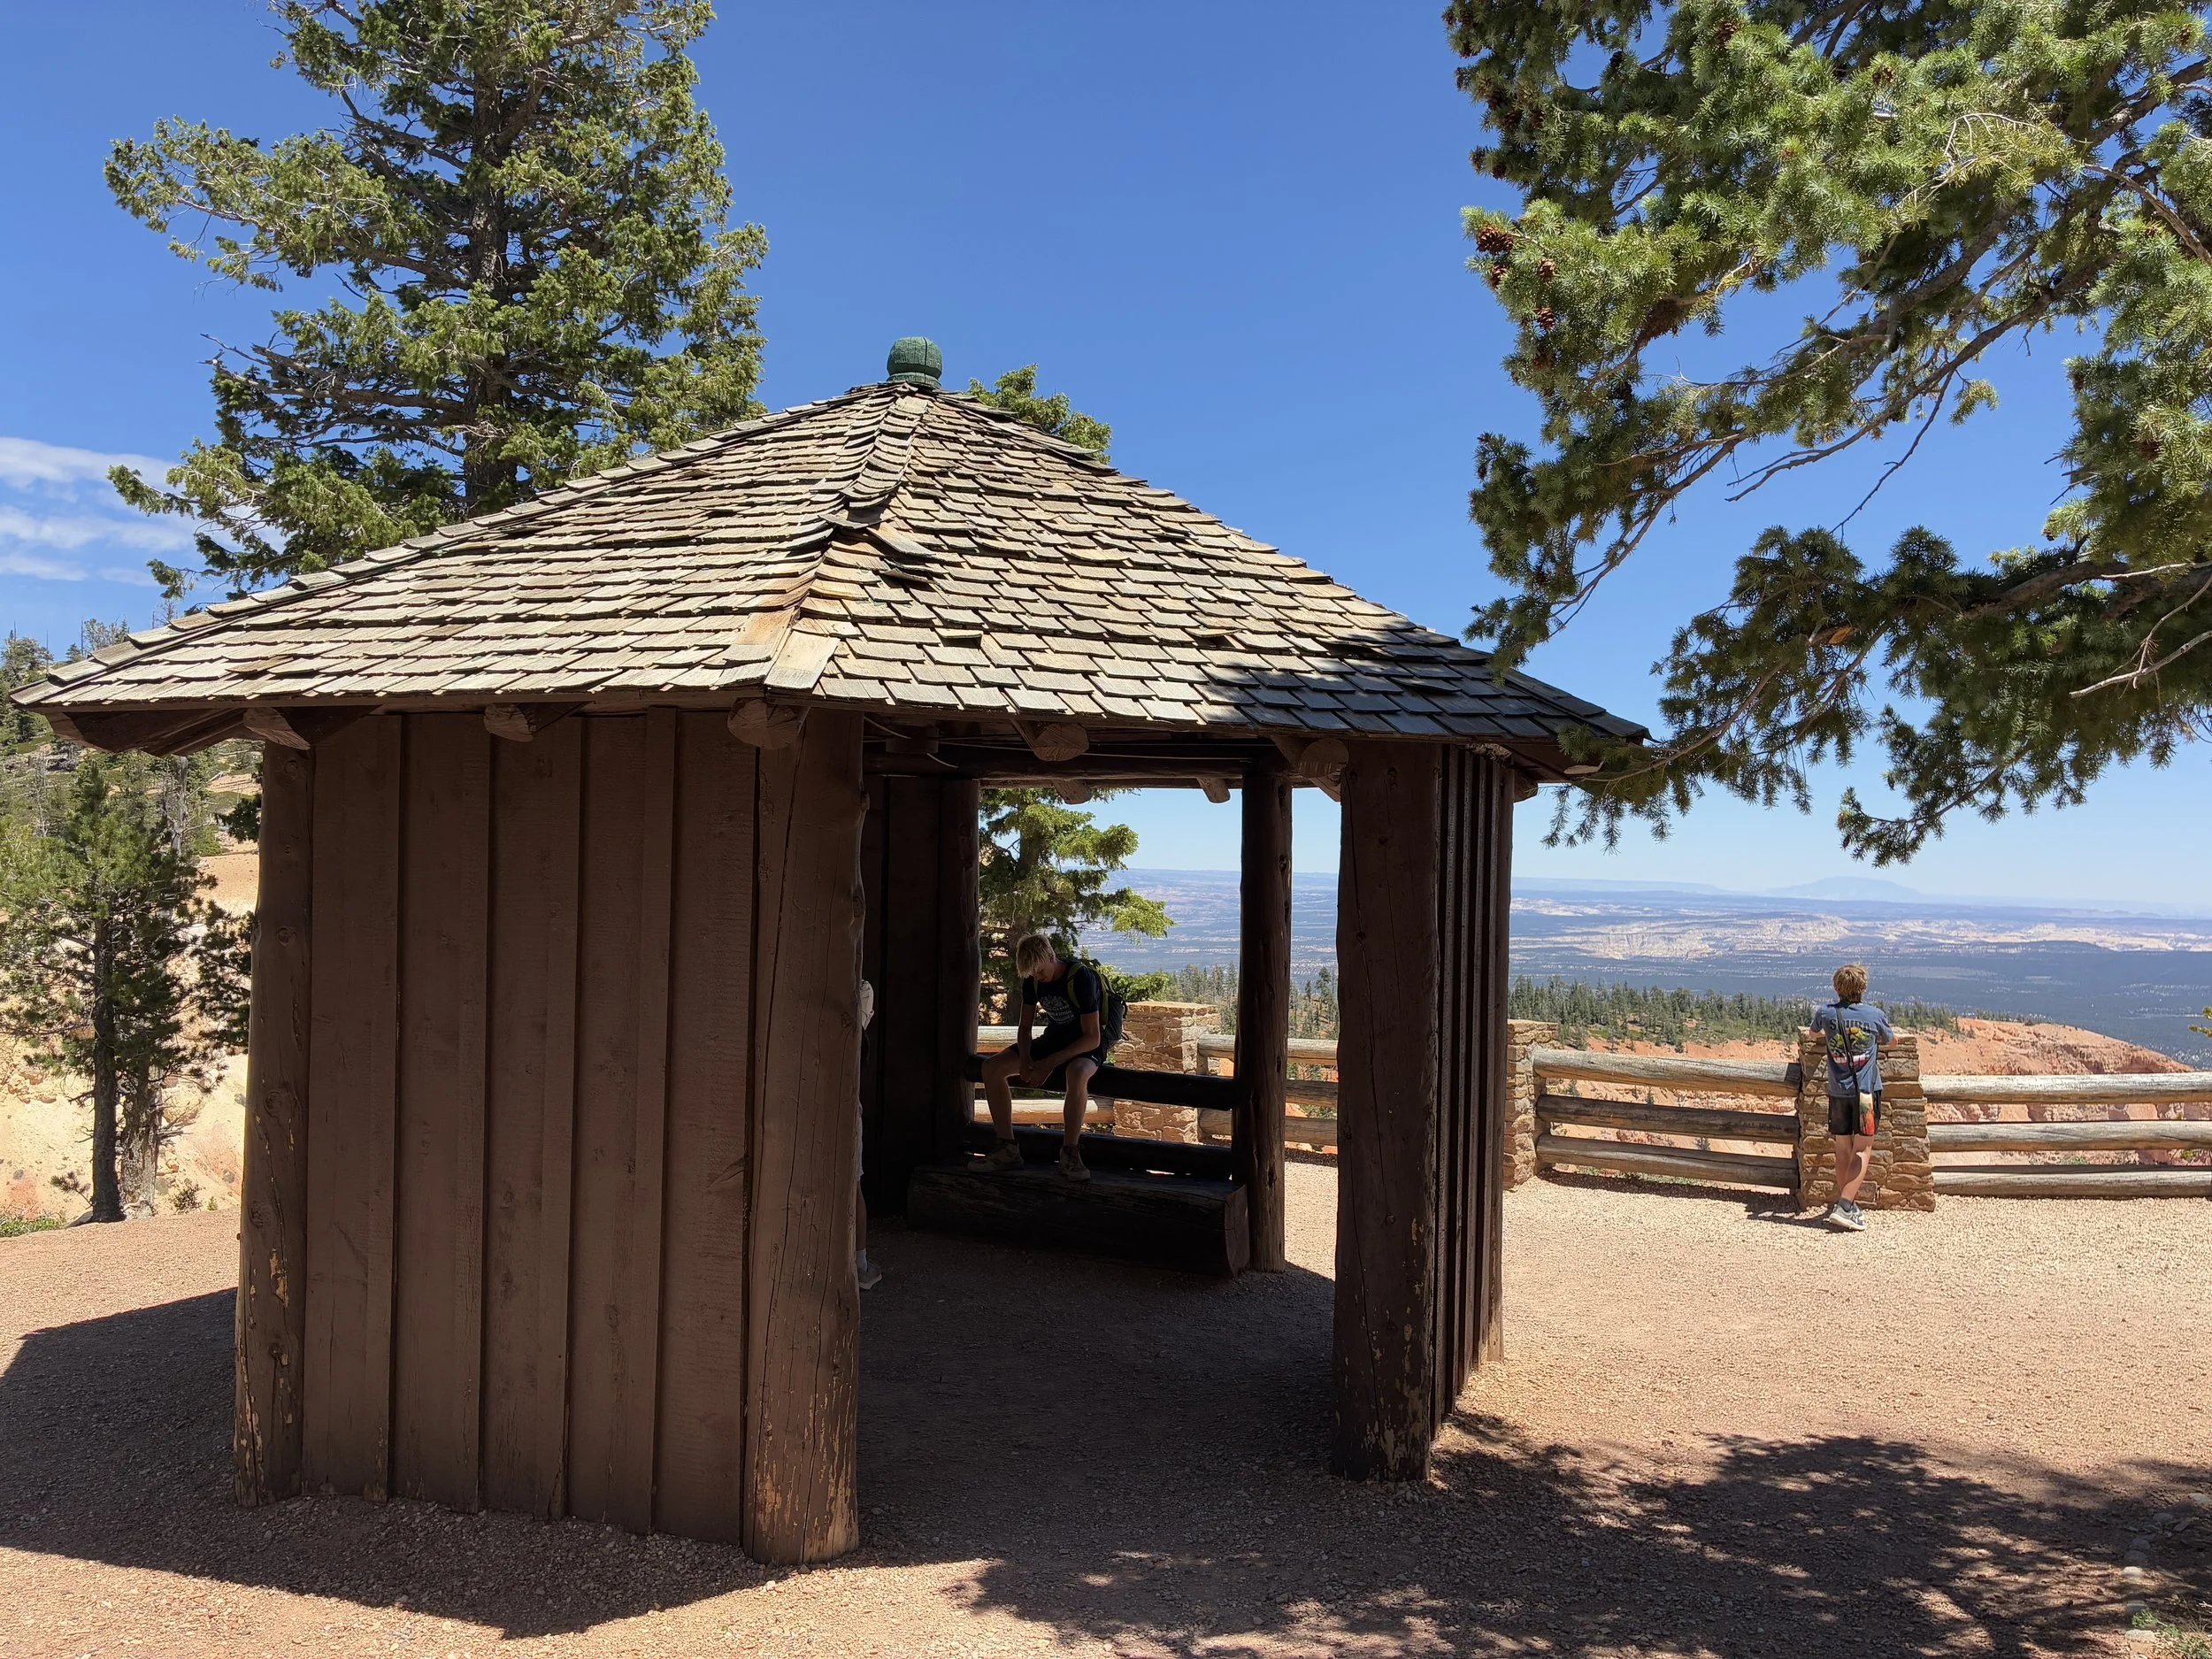
Bryce Canyon, Bristlecone Loop - Viewpoint
There are several Bristlecone Pine Trees along this trail. Near the view point, there is a sign next to one, so visitors know what a Bristlecone Pine Tree looks like. The oldest trees in the park are 1,600 years old.
Bryce Canyon, Bristlecone Loop Trail - Bristlecone is on the left side of the picture
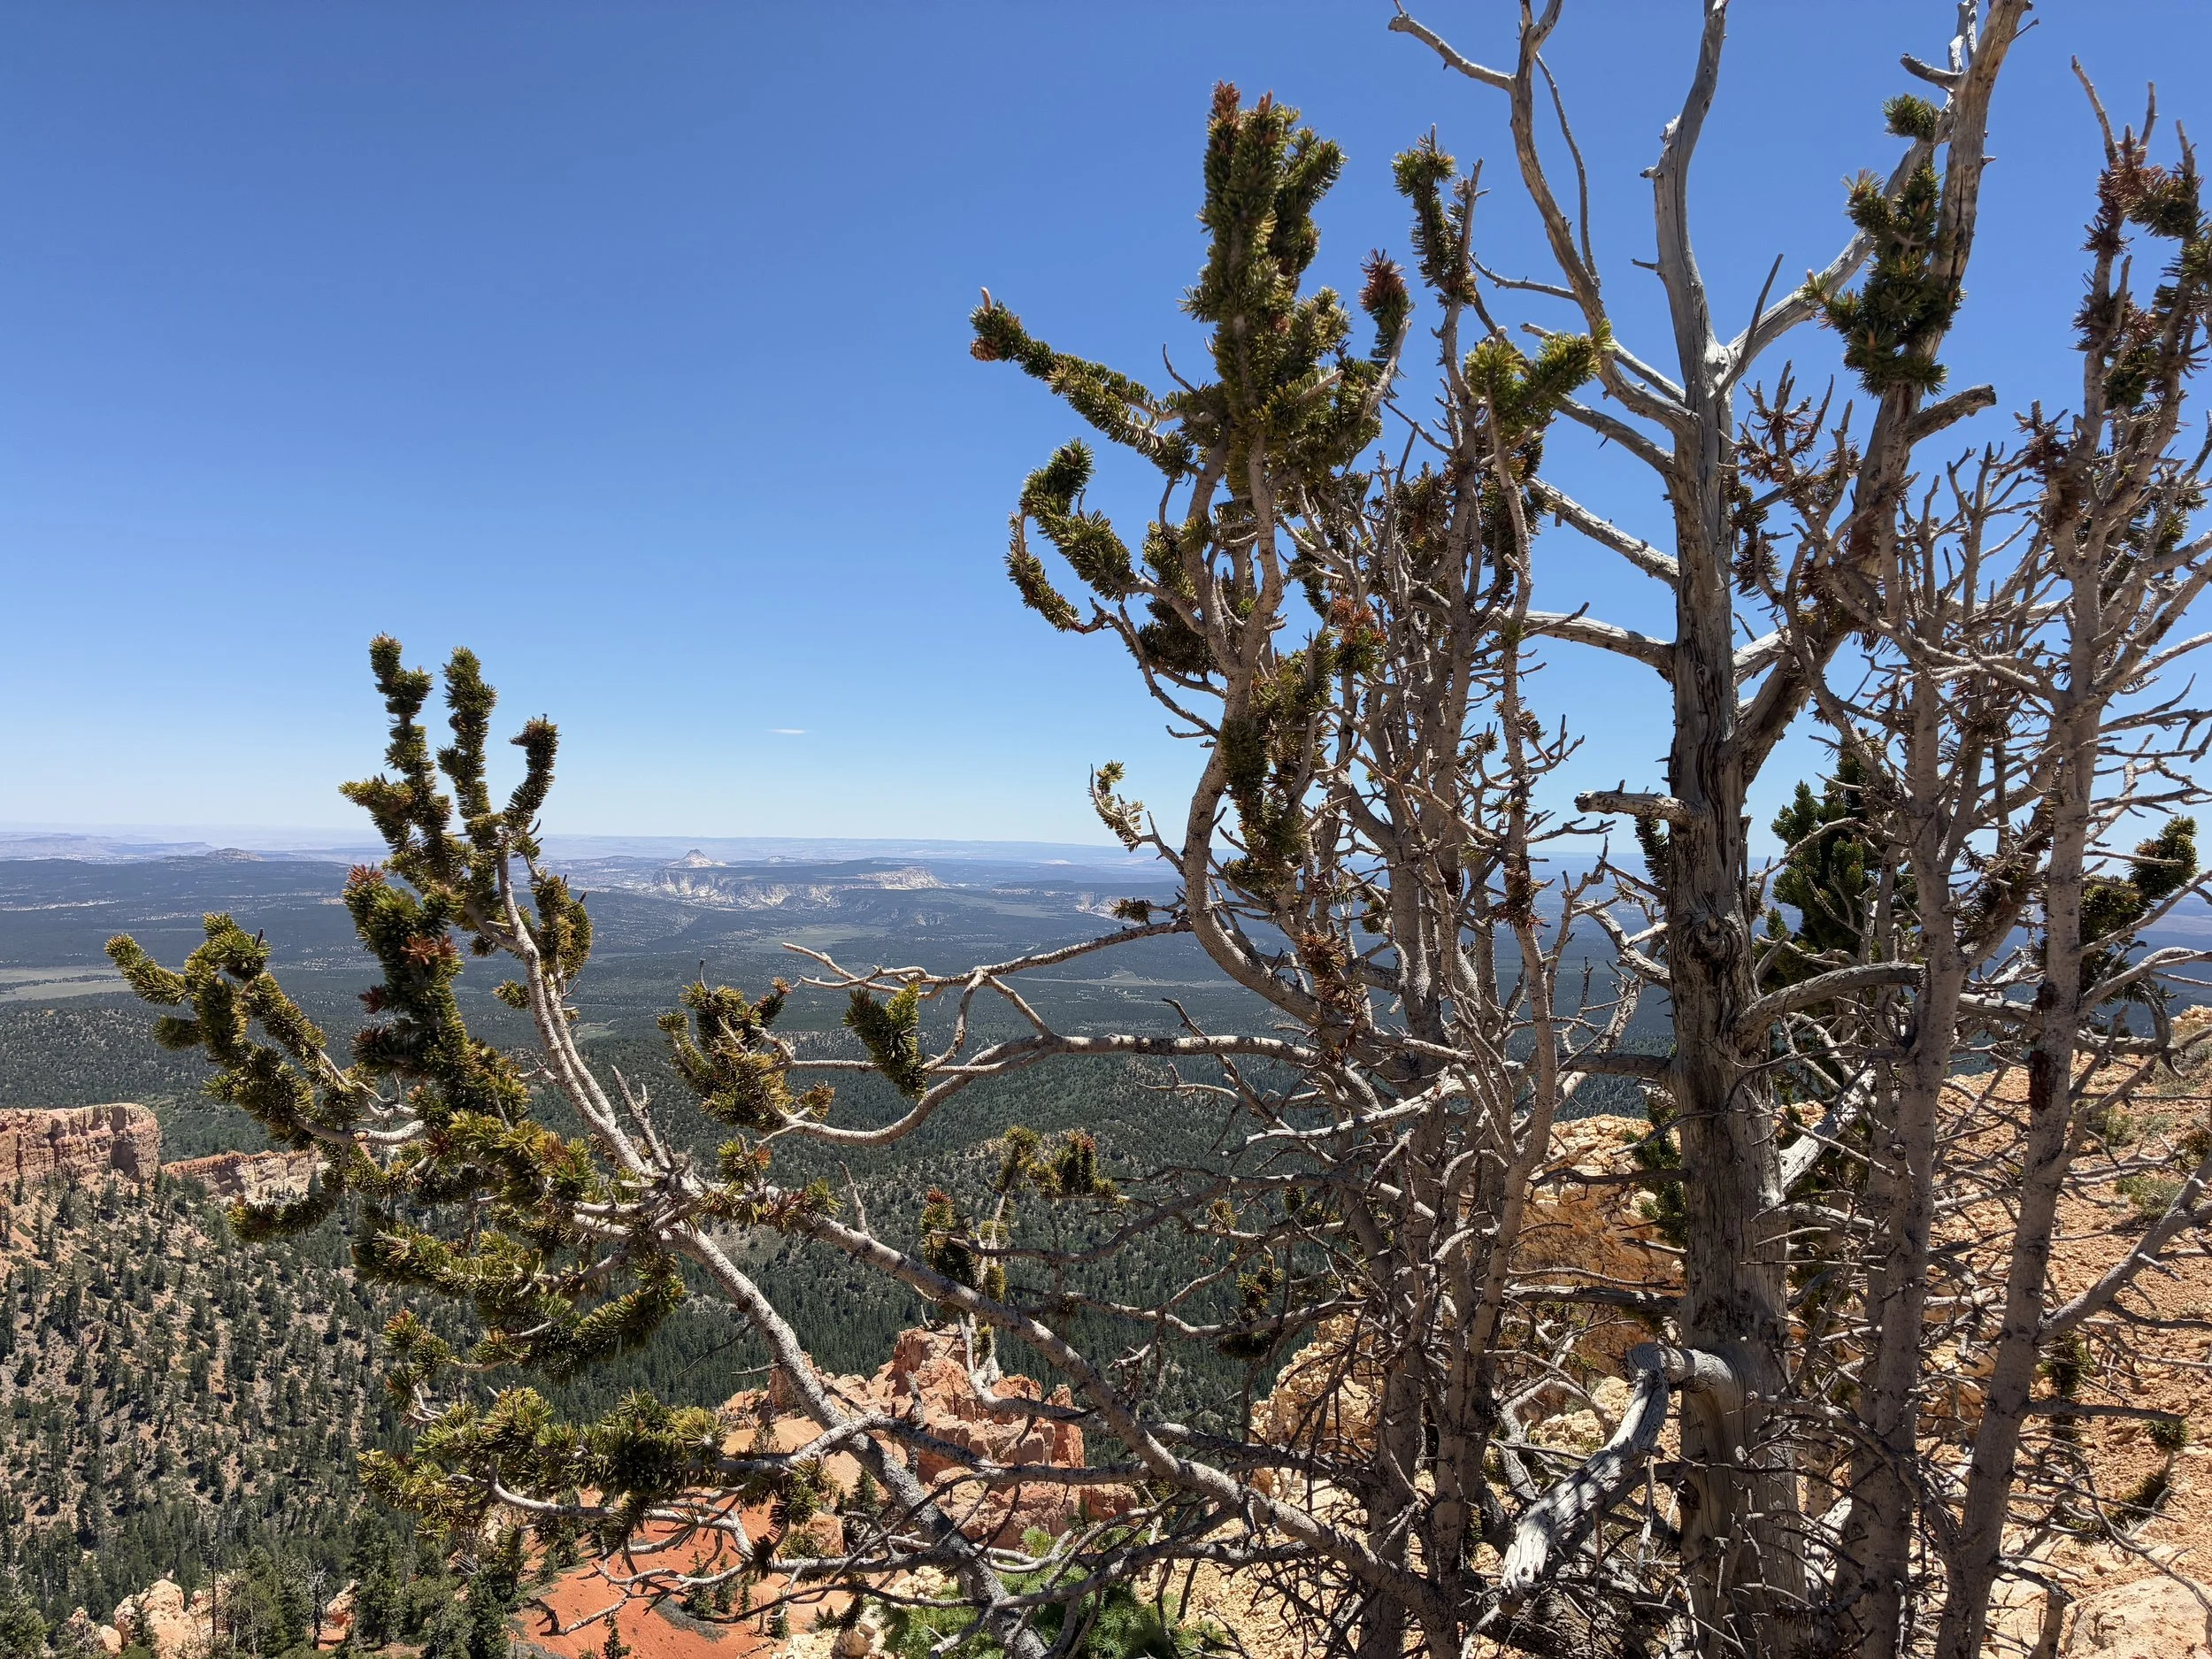
Bryce Canyon, Bristlecone Pine Tree that is less dormant
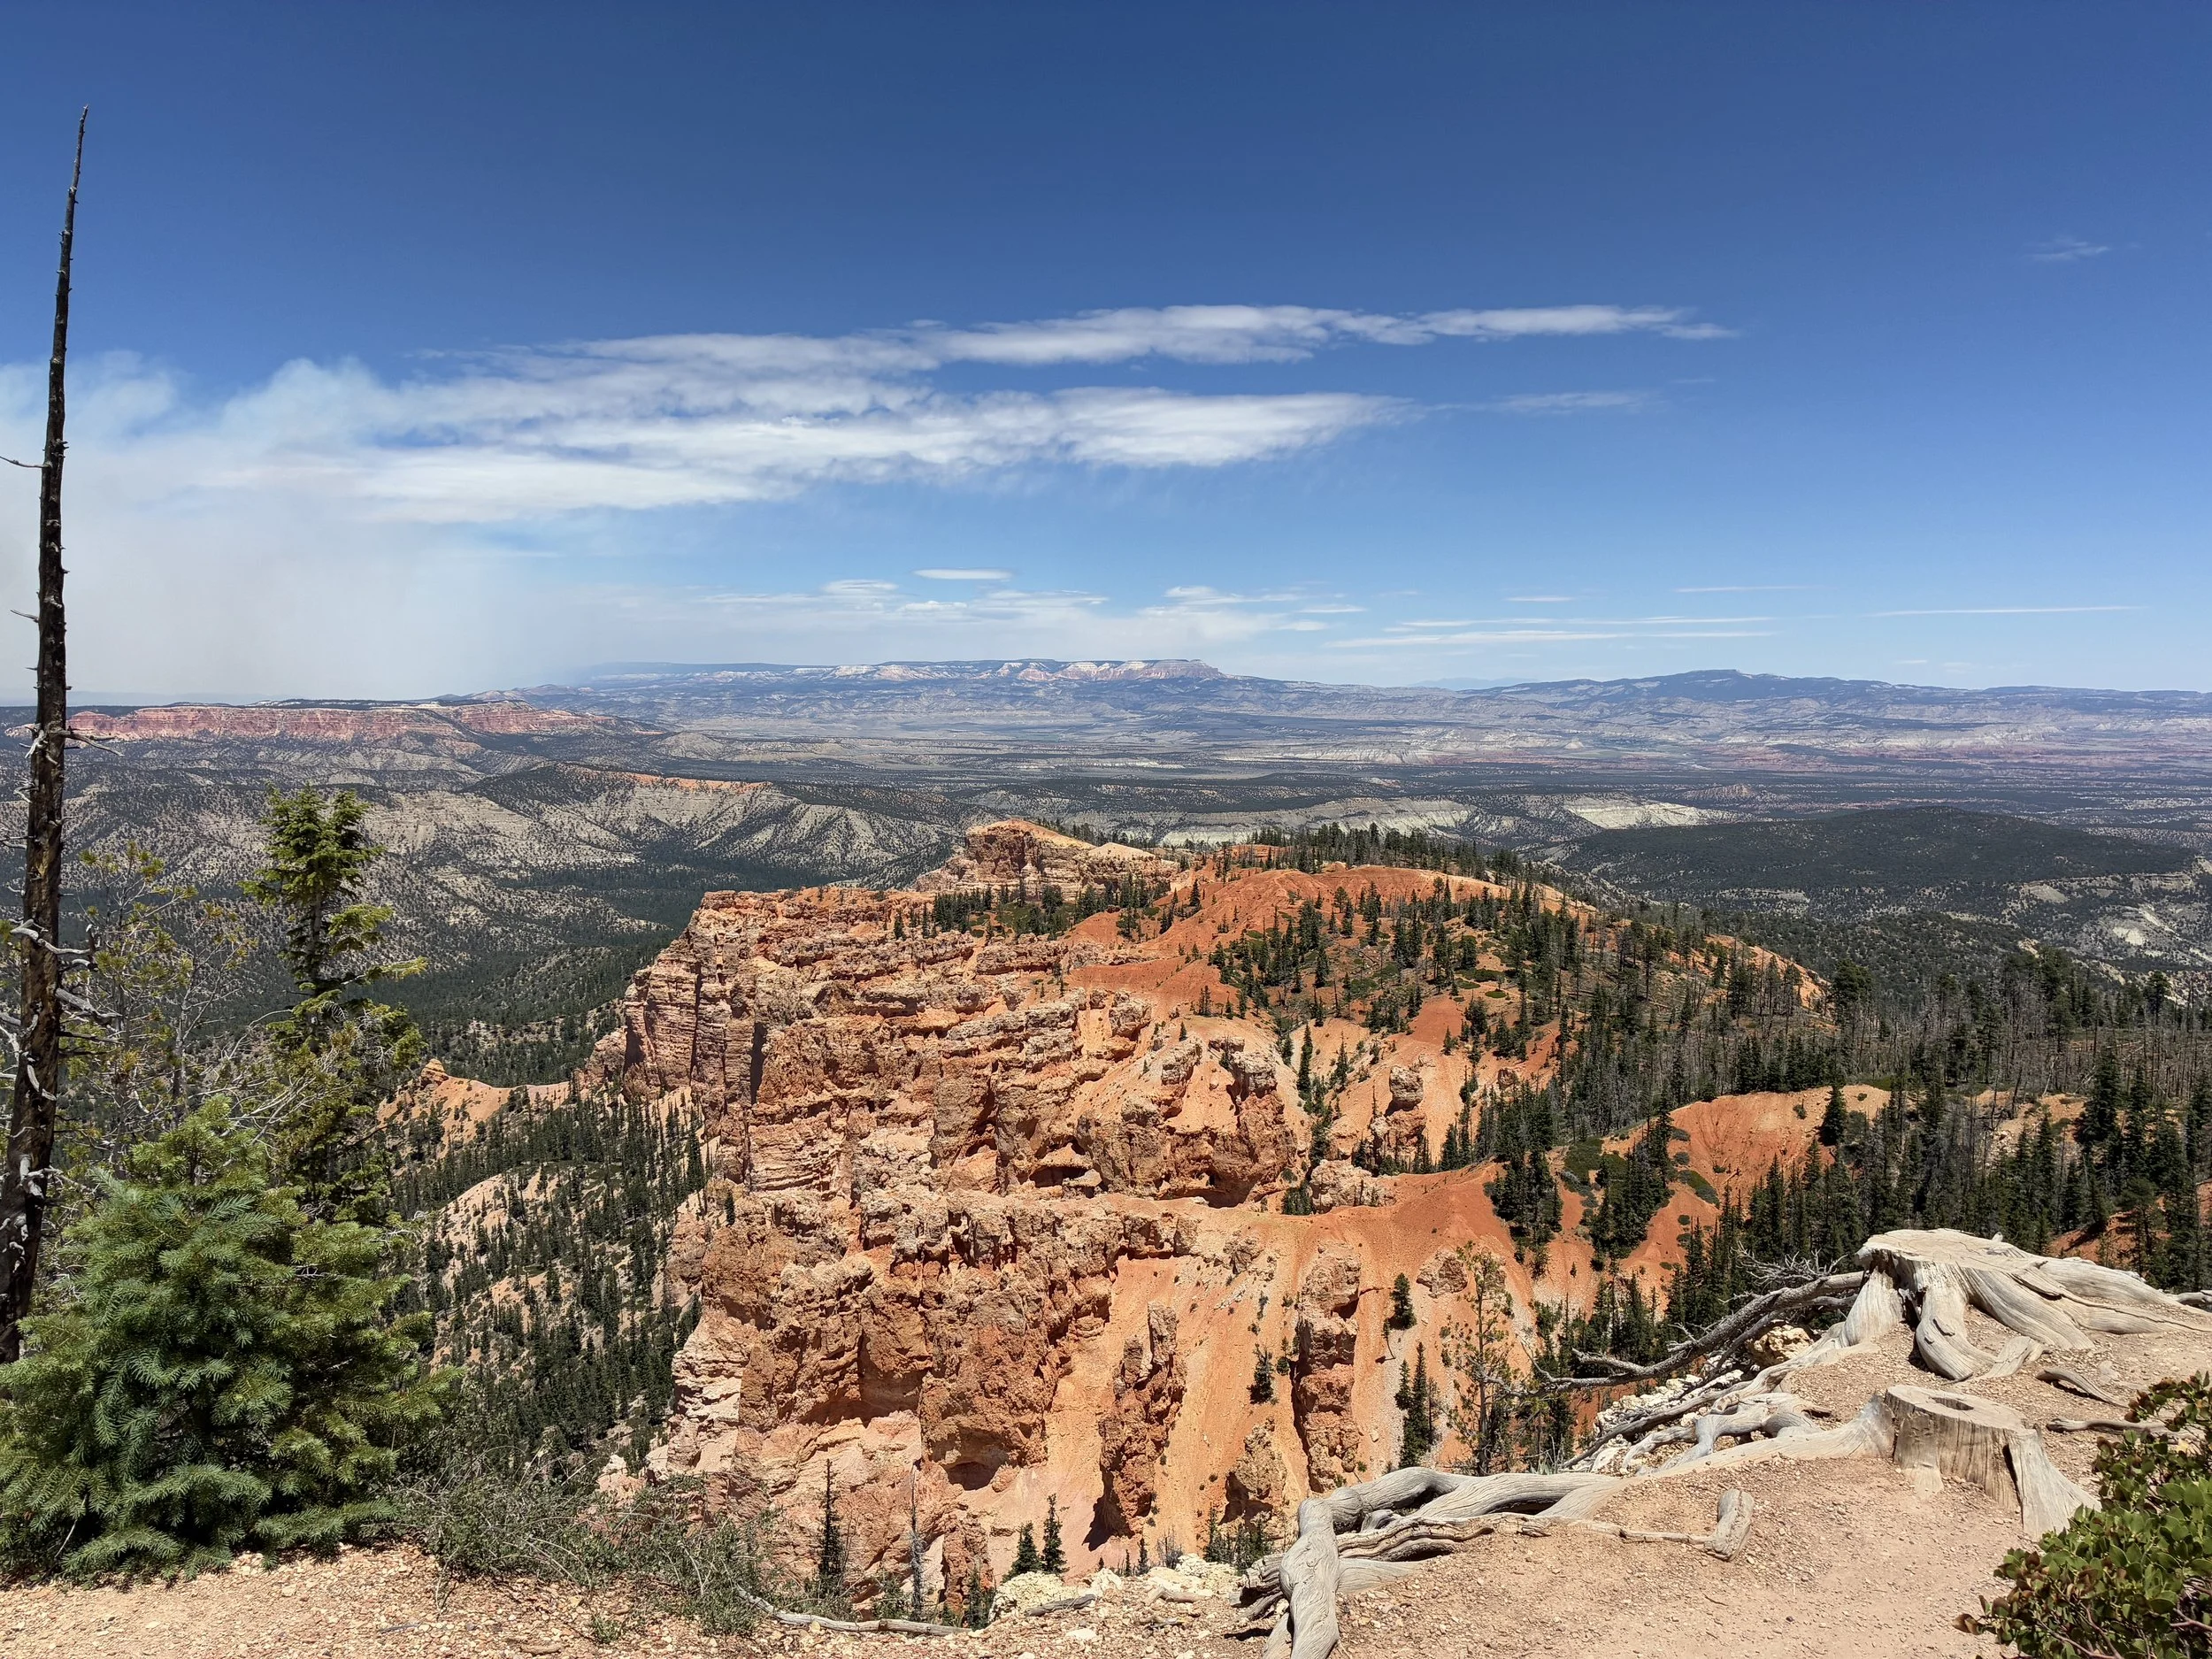
Bryce Canyon, Southern most view in the park
There are several trees which have burned in a previous fire along the Bristlecone Trail. These trees were intentionally burned in 2018, to prevent a wildfire from spreading into the park by creating a buffer zone. It was a humbling site to walk along this trail while the 2025 France Dixie Fire was burning in the background. Fire is a force we can influence, but it’s difficult to fully control.
Bryce Canyon, Bristle Cone Trail
More from www.NatureImpactsUs.com
Below there are additional posts I’ve written attached to each pin. Use two fingers to move around within the map.