Last updated - November 2025

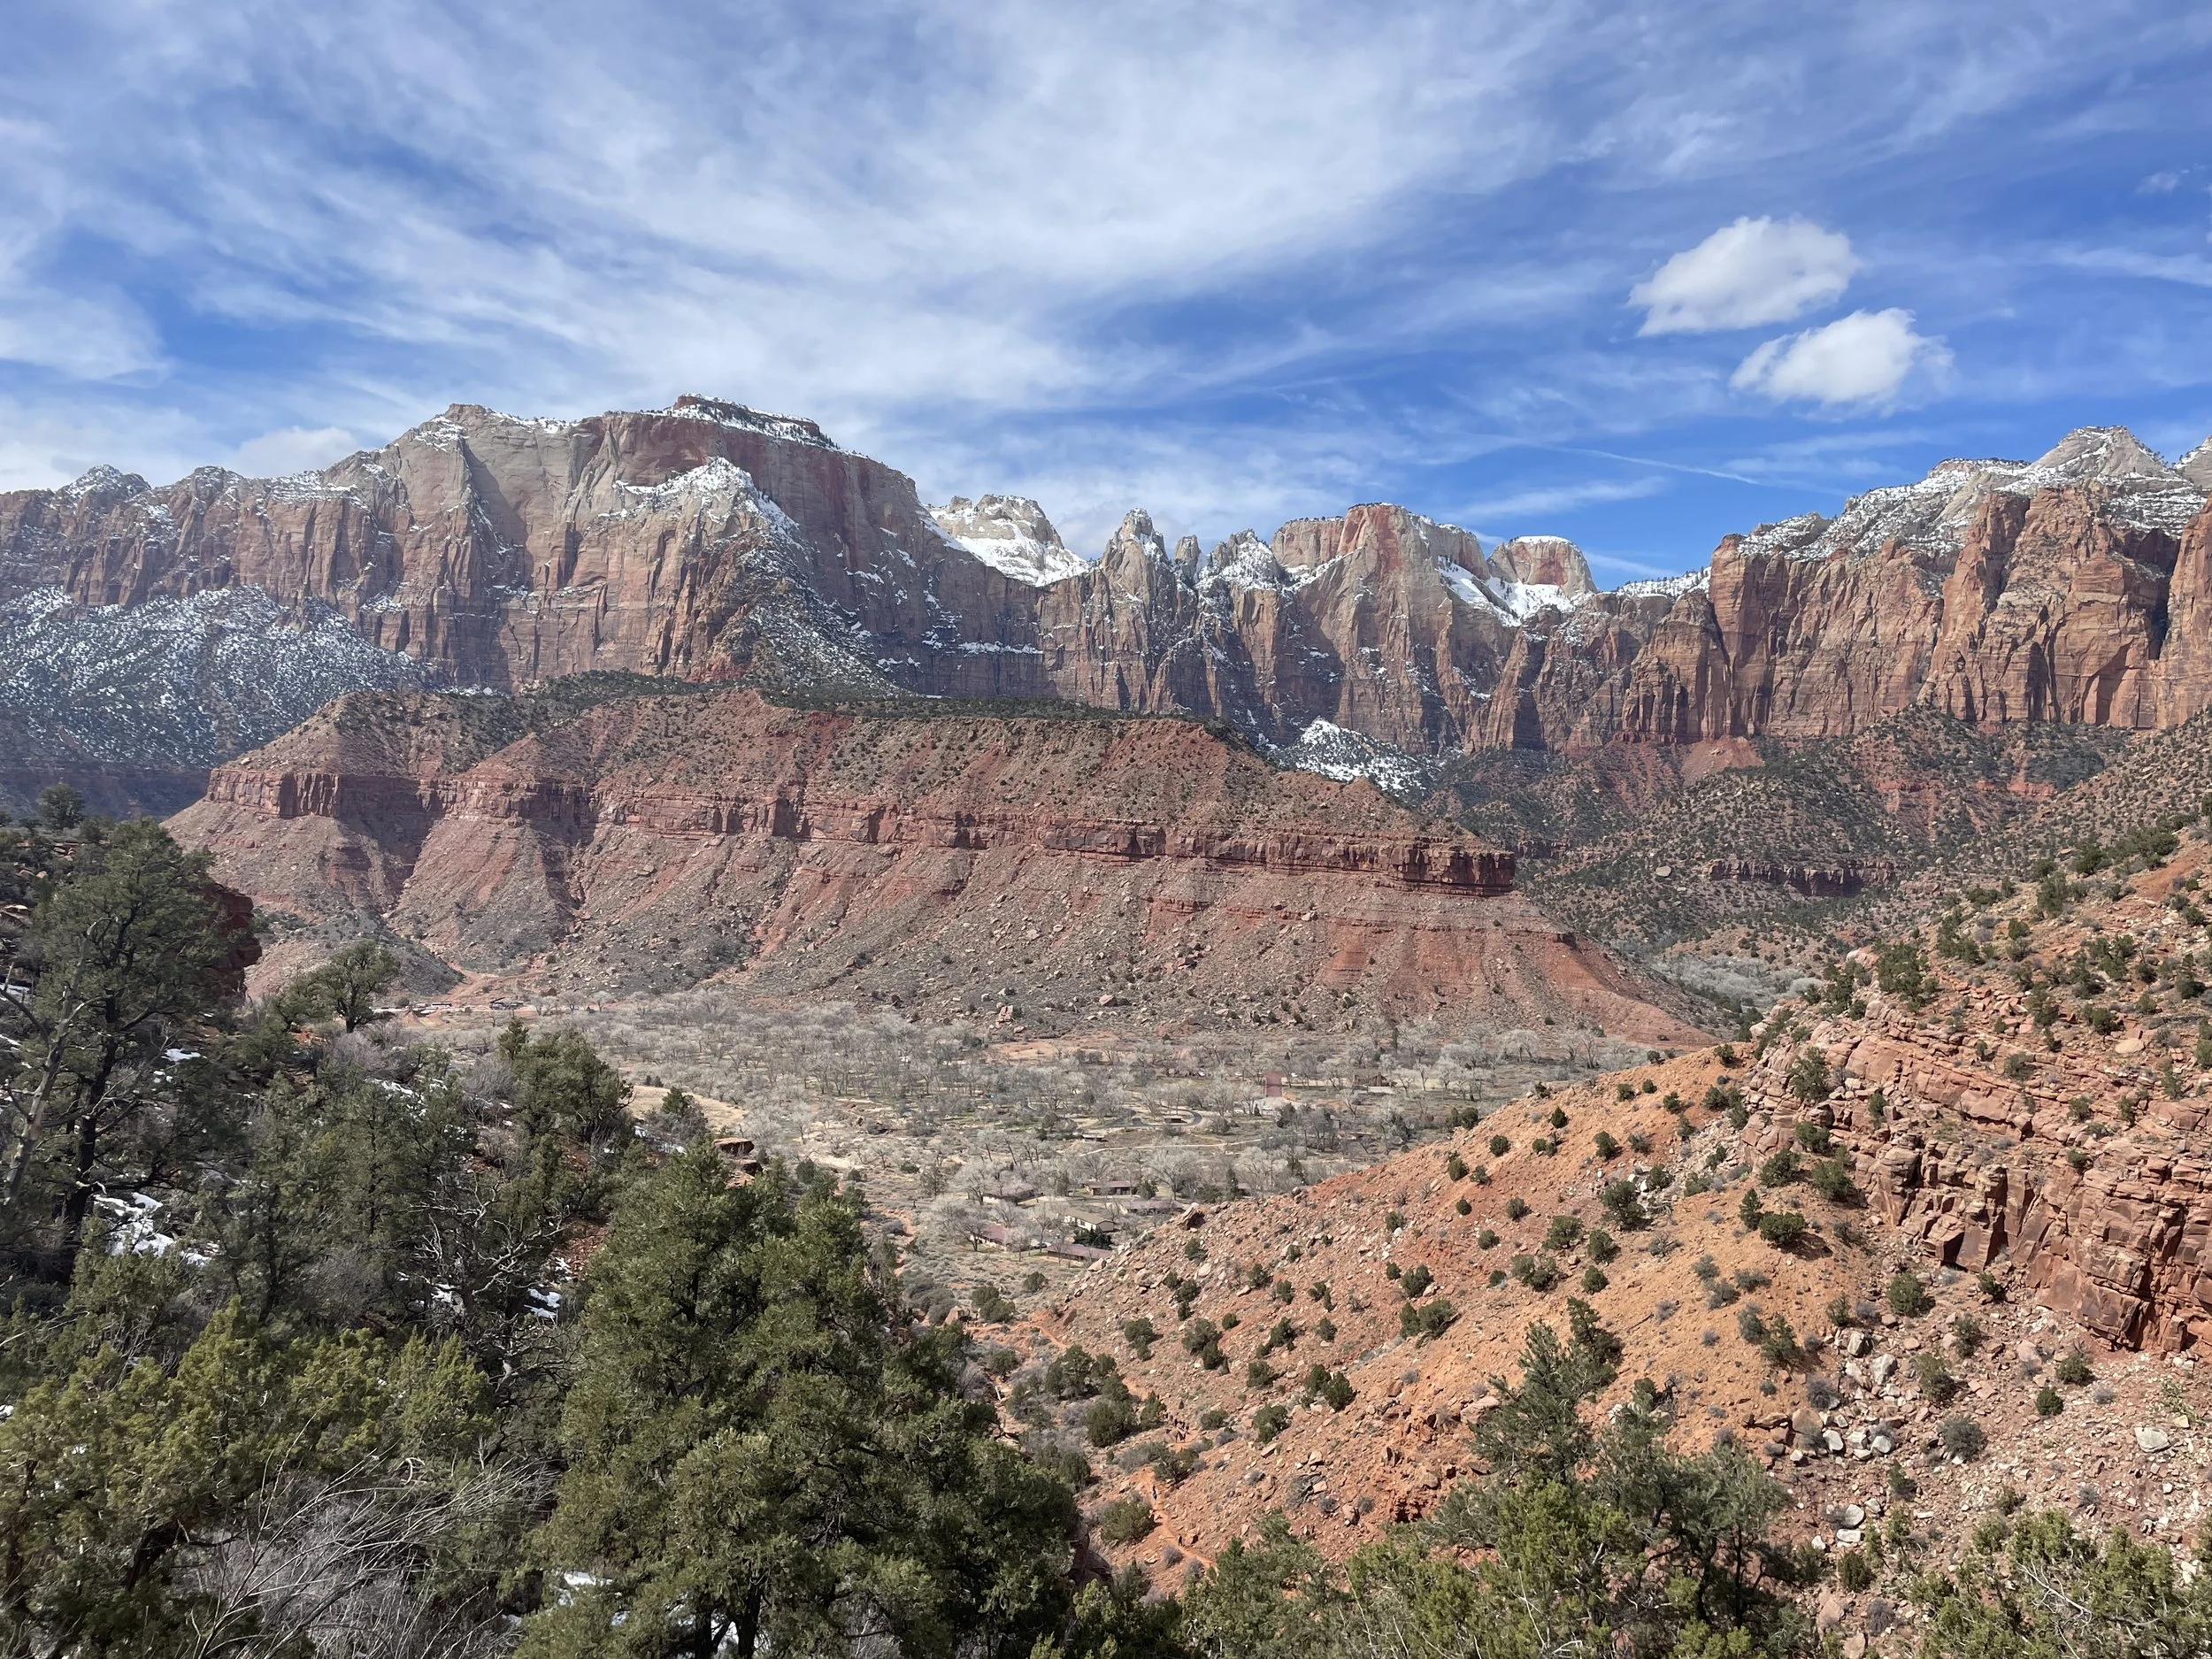
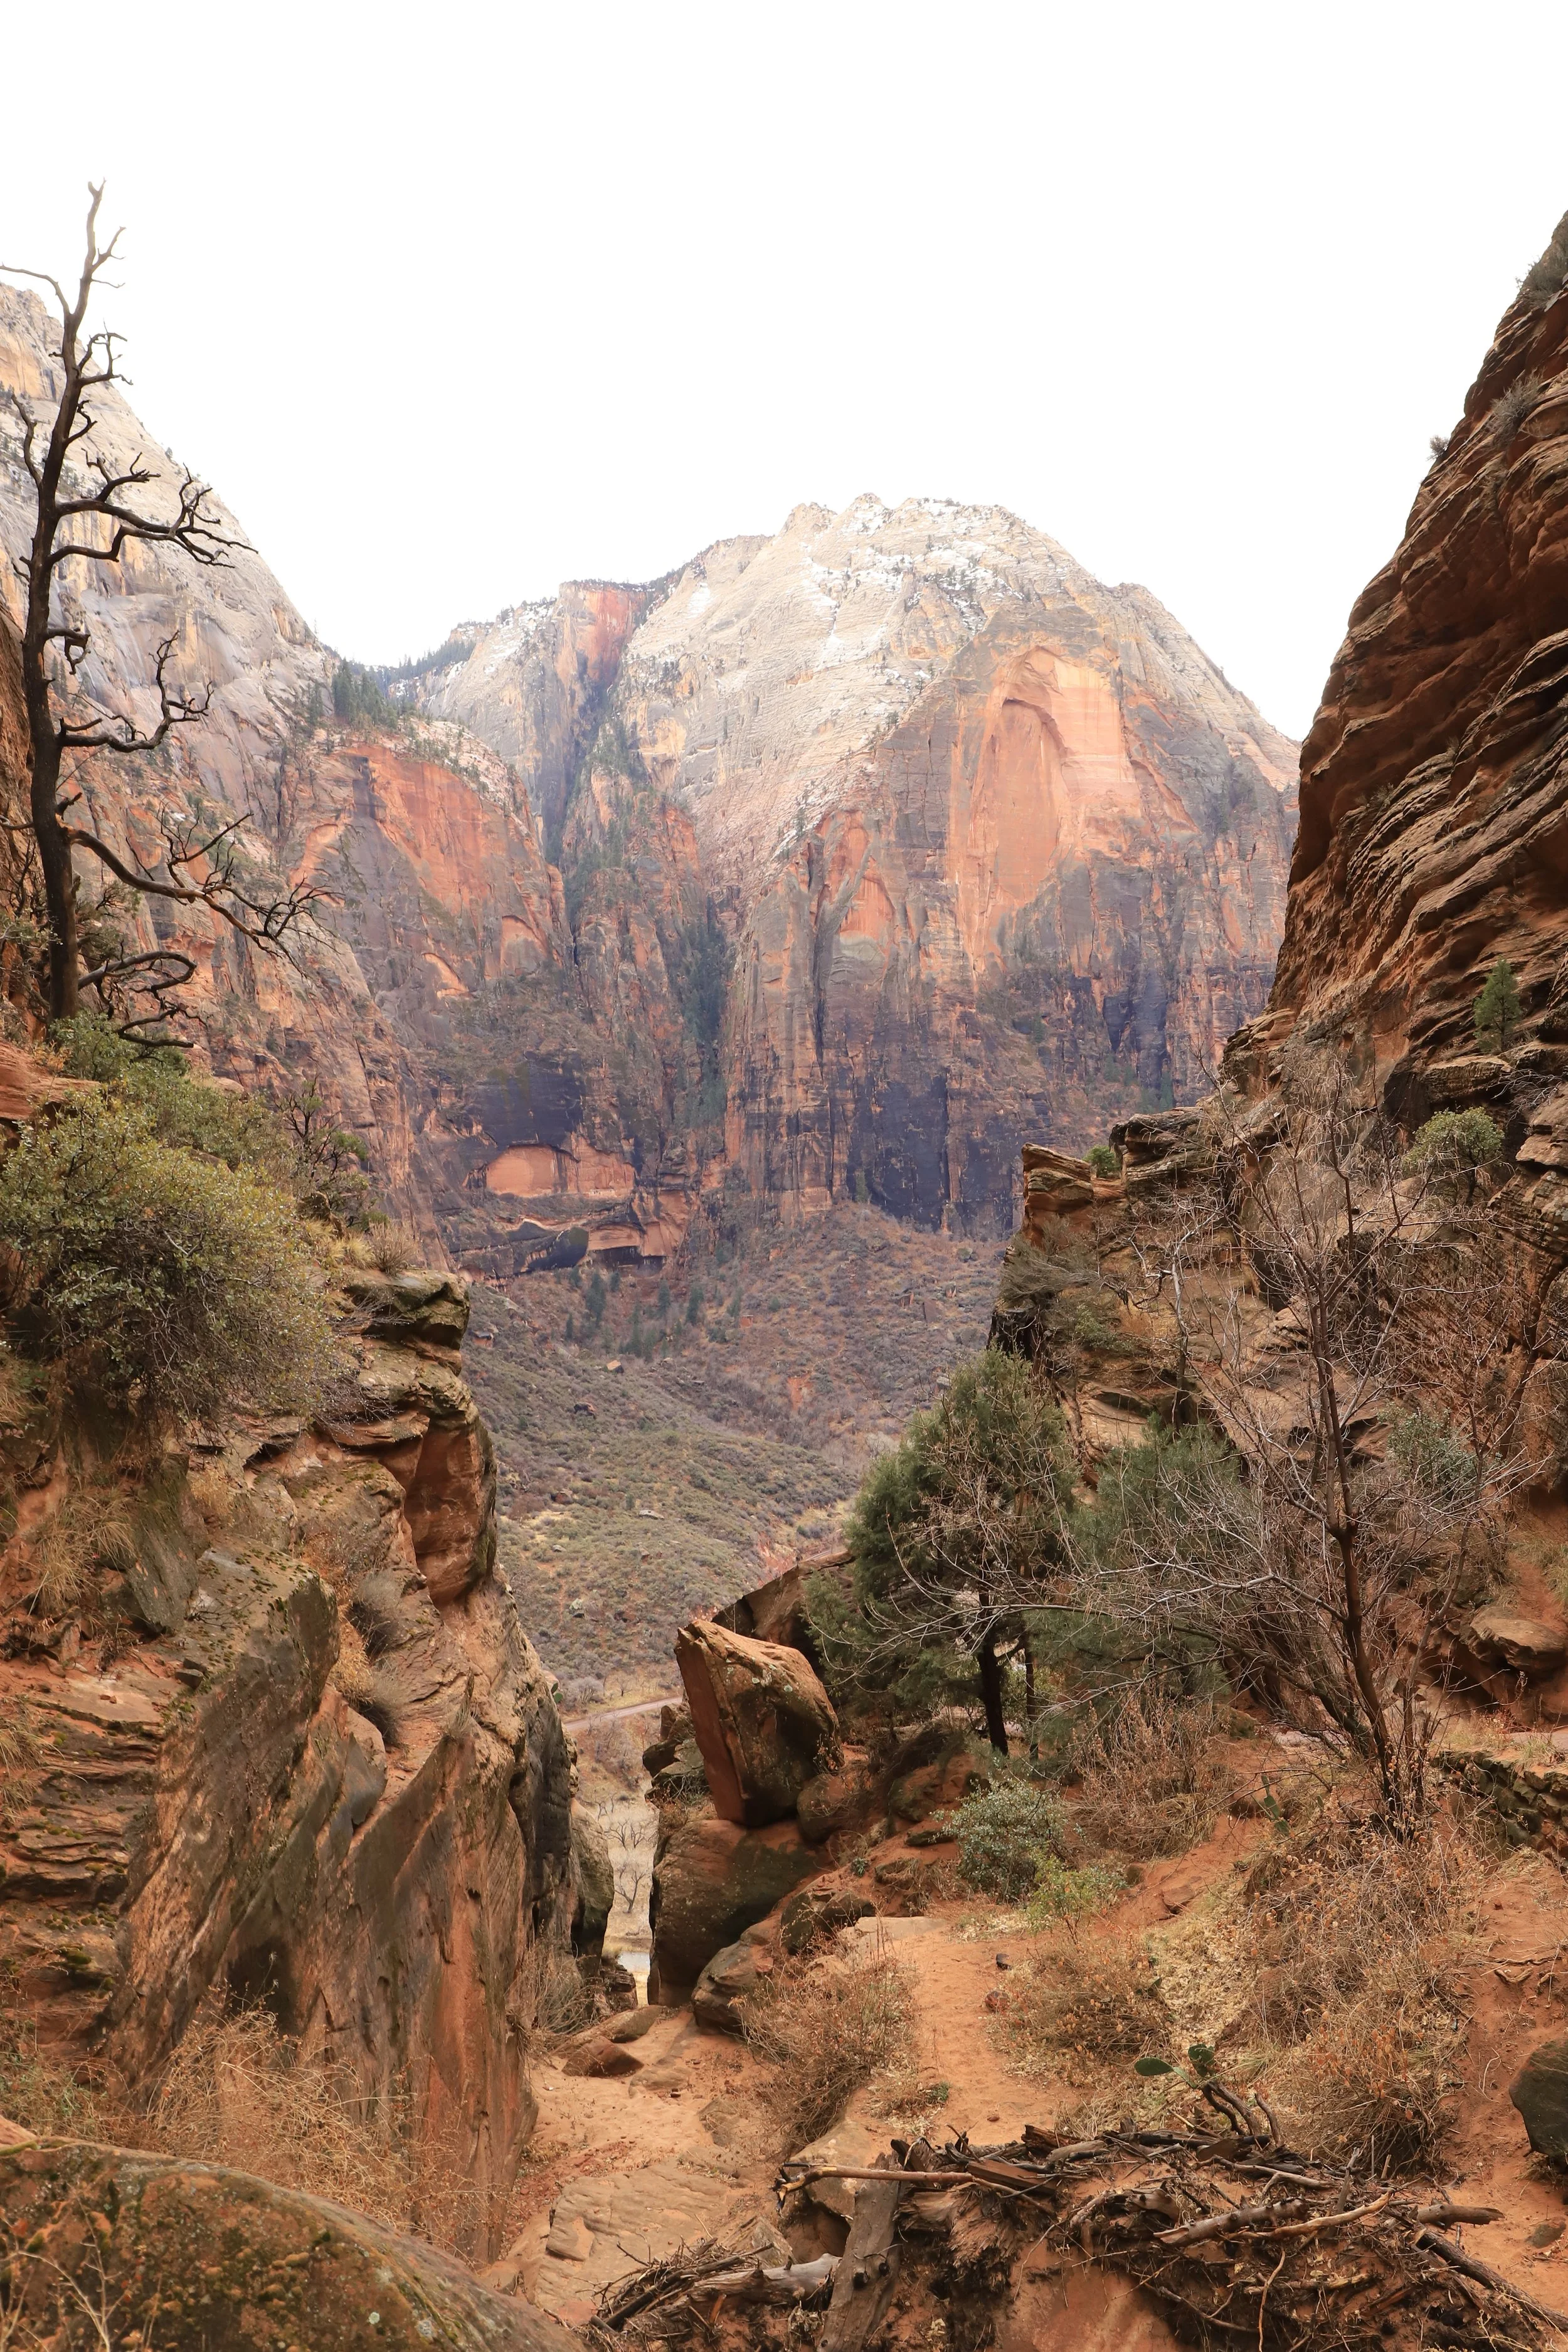
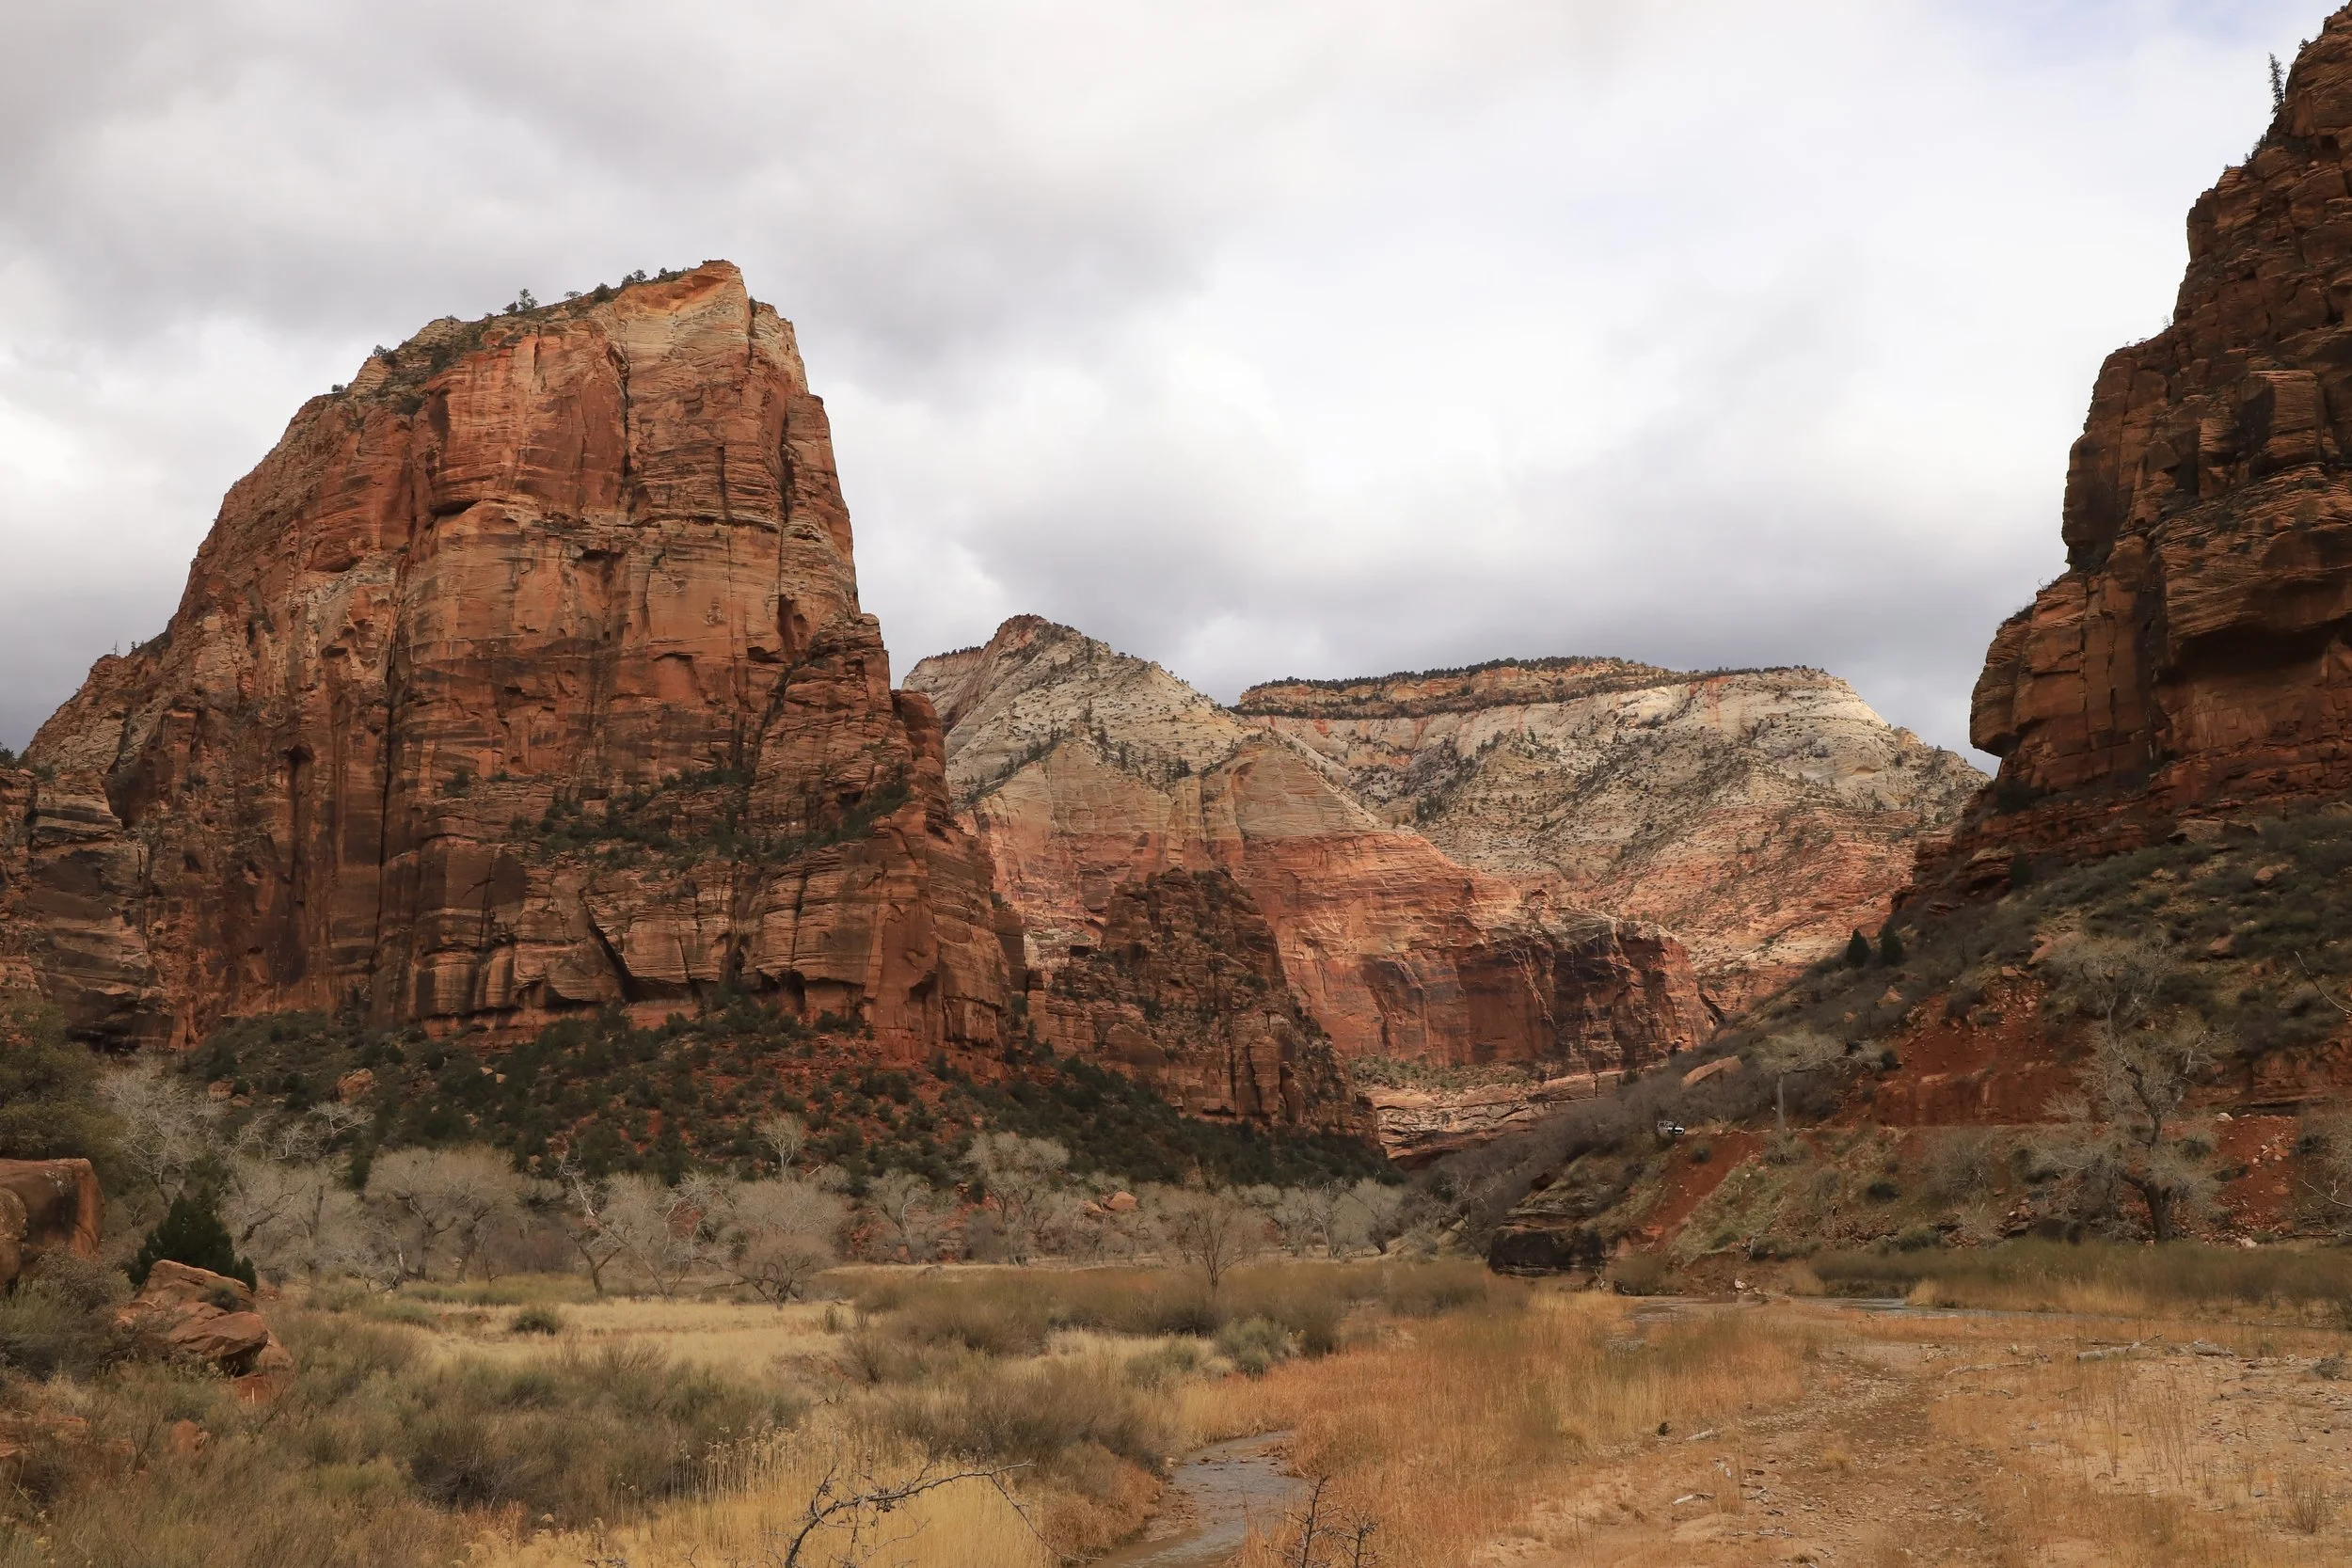
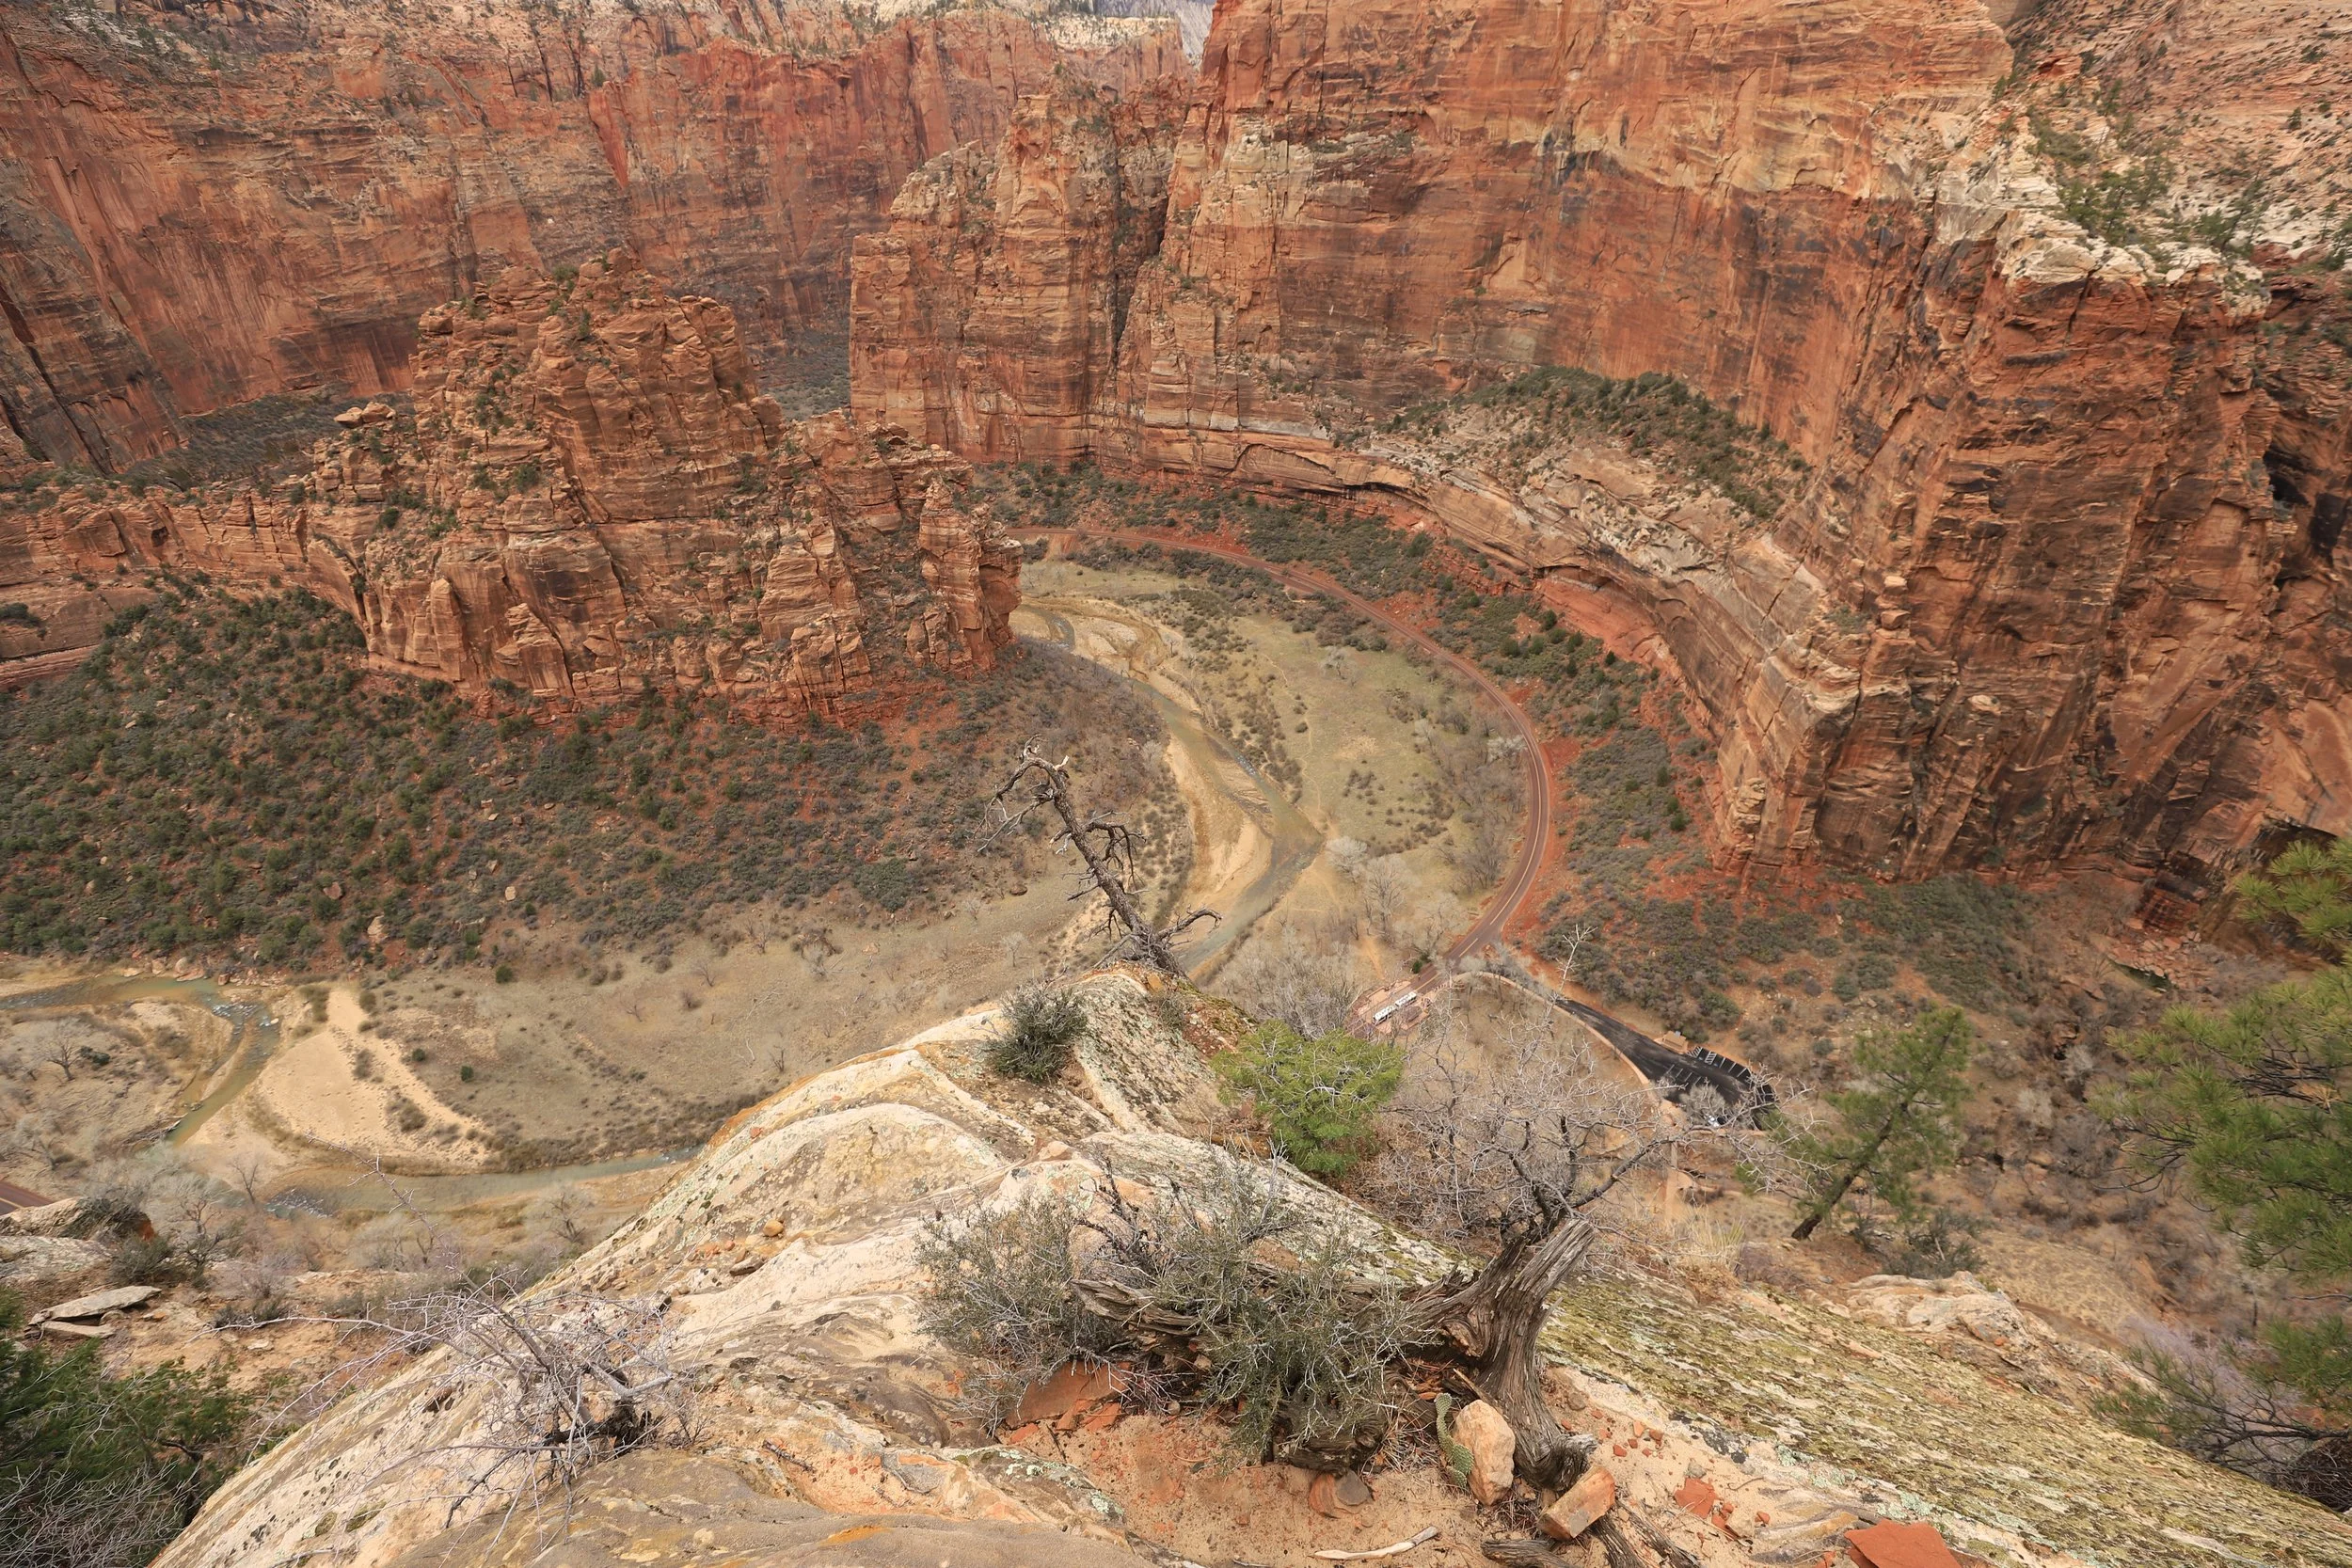
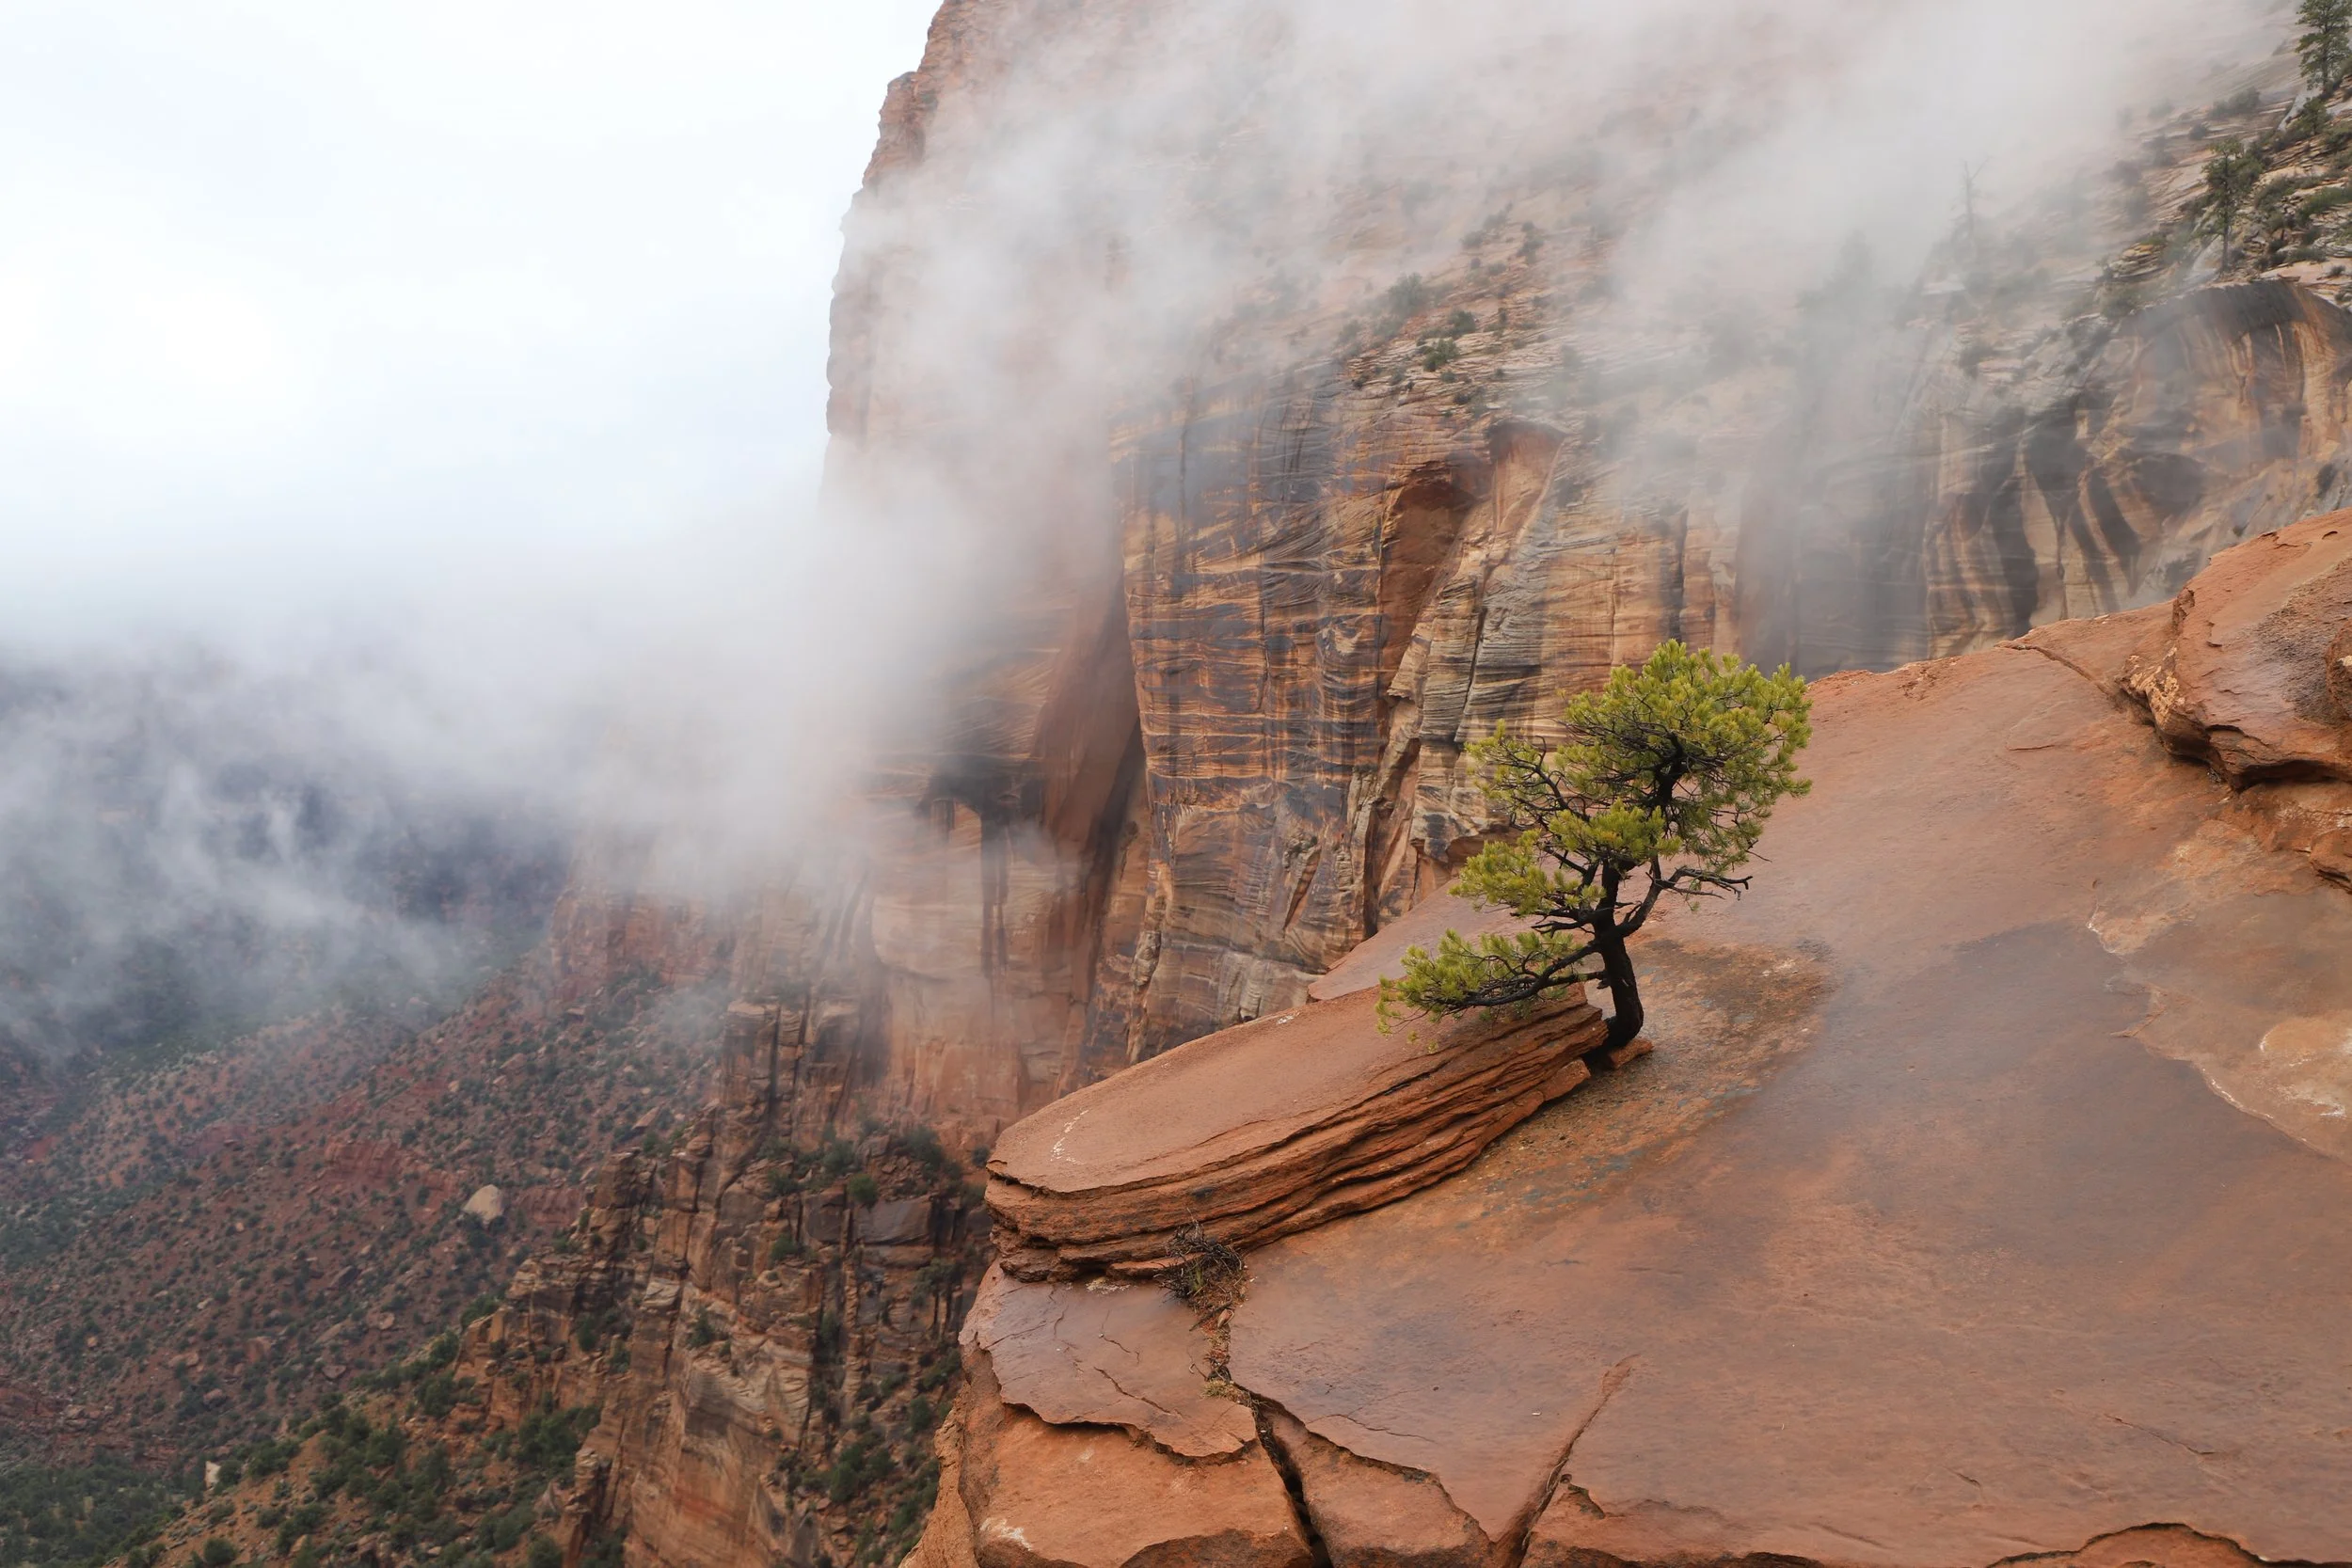
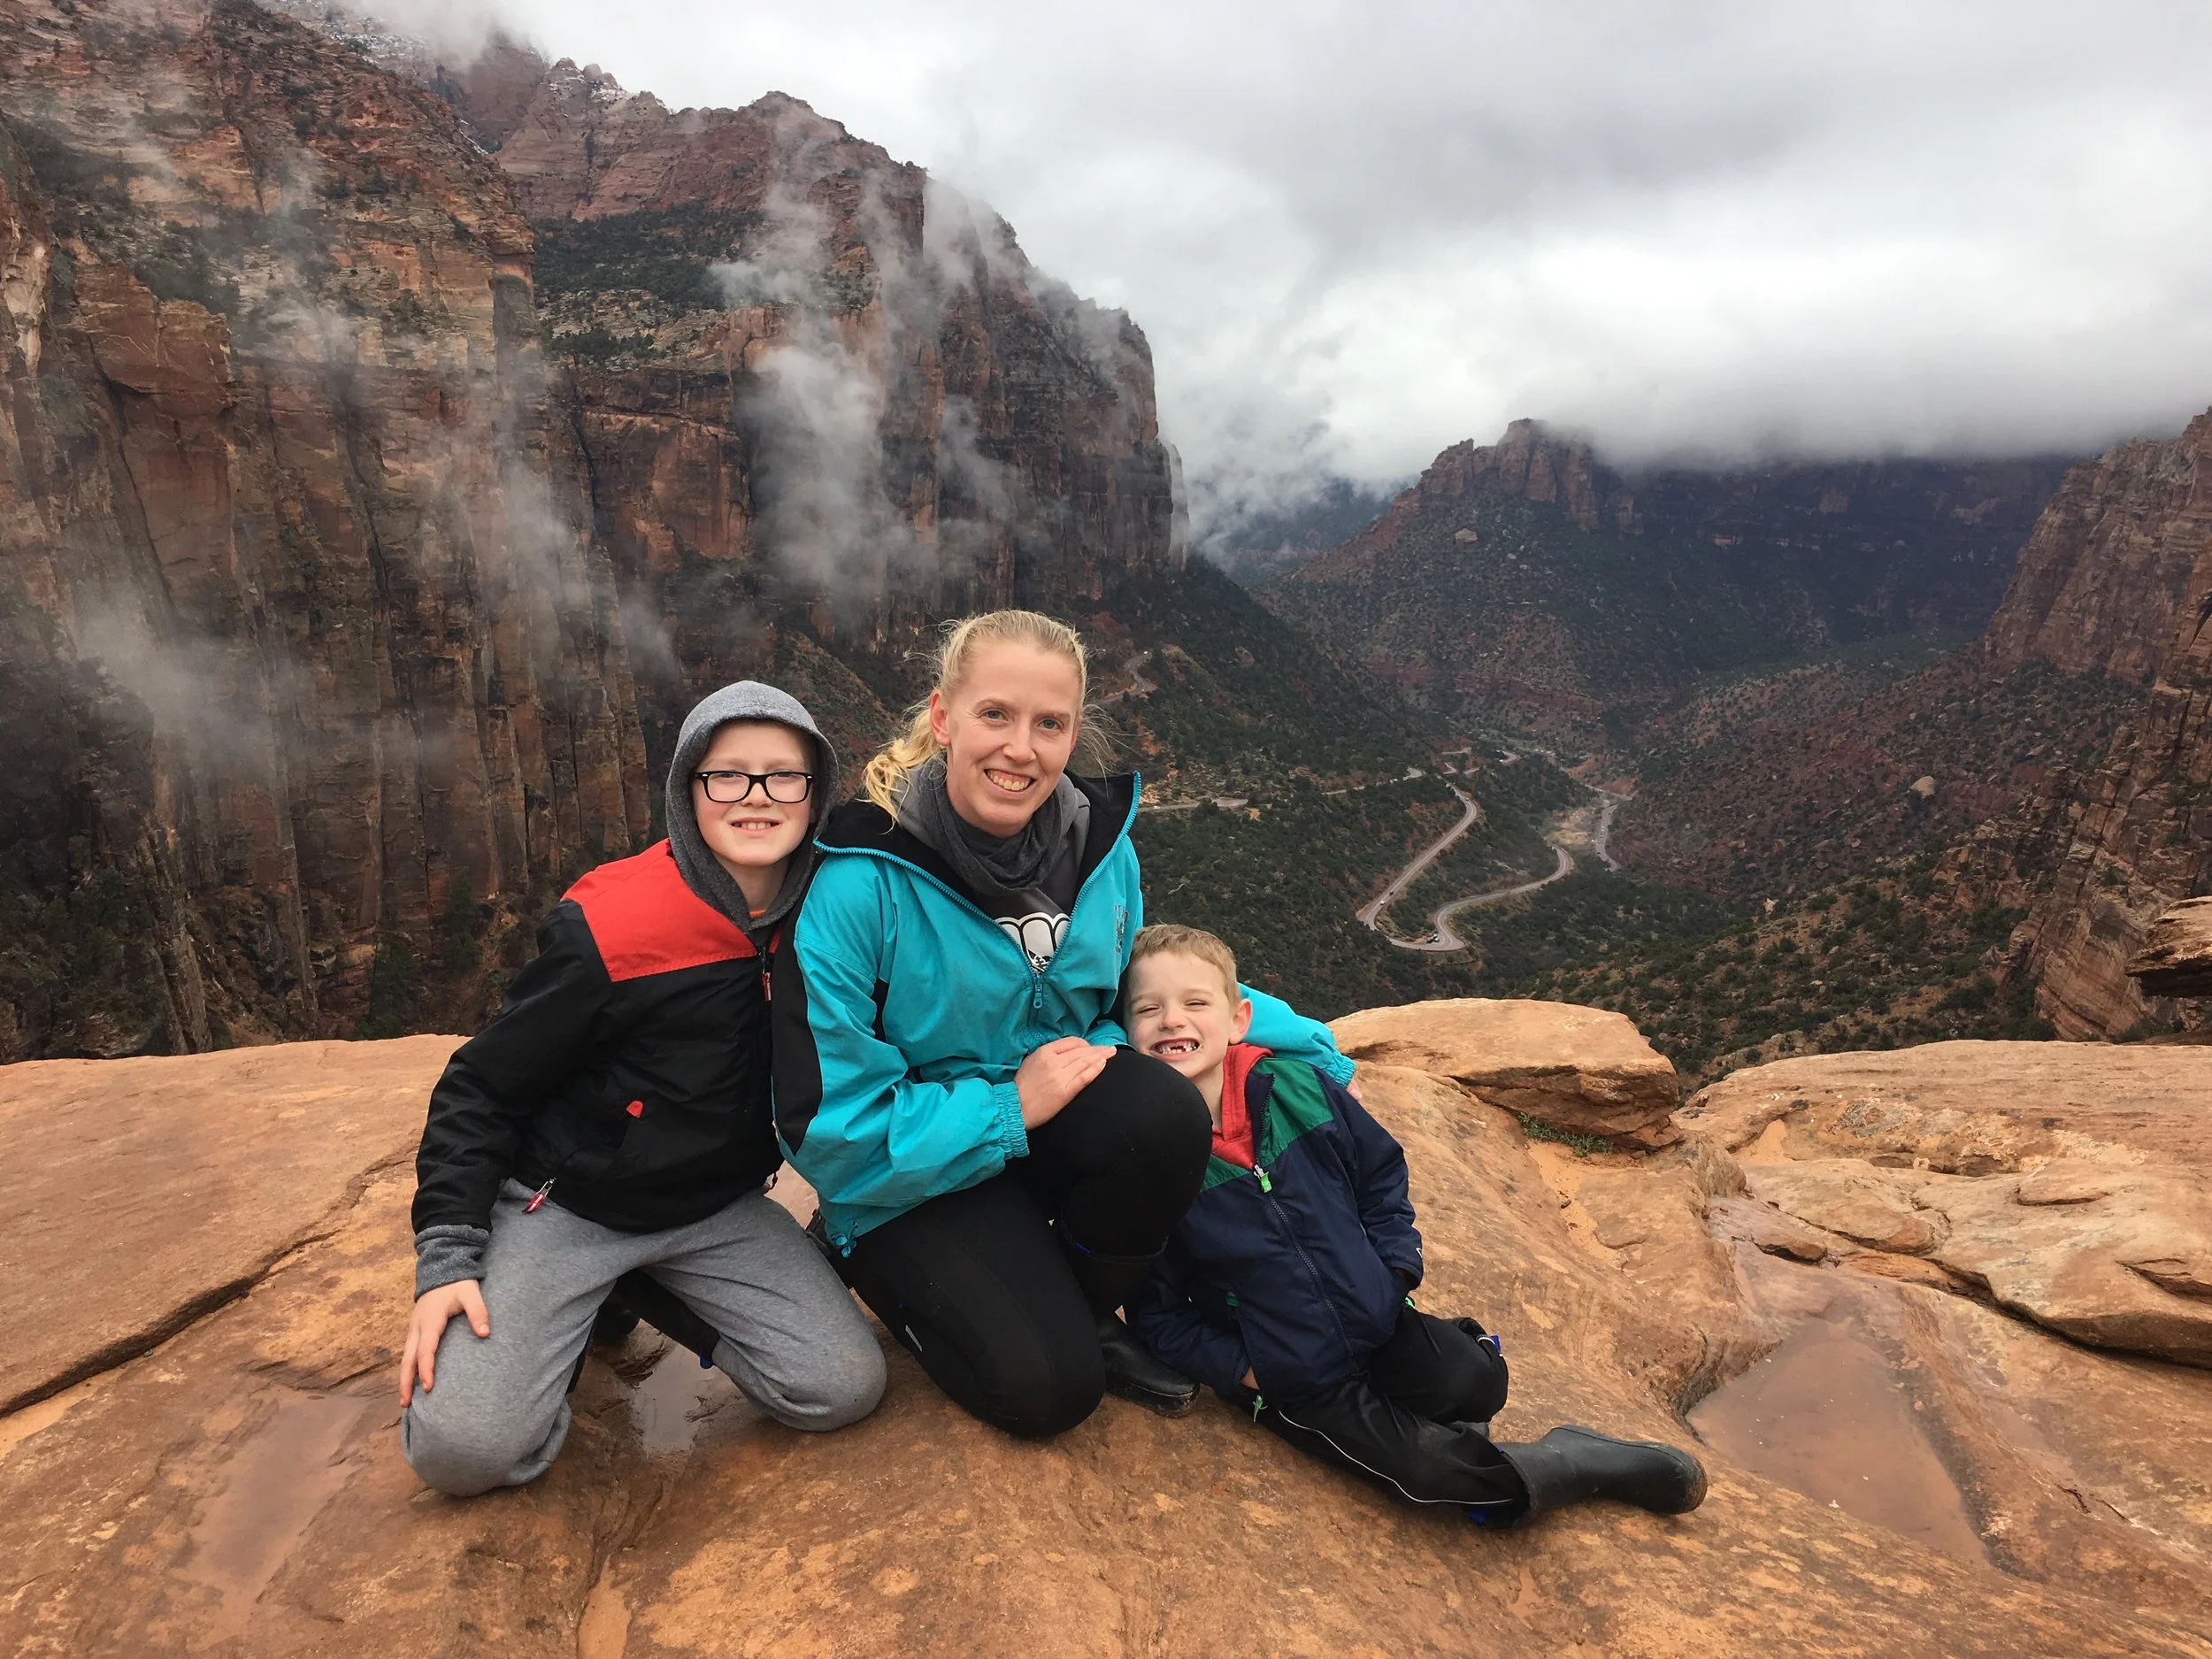
March 2018 - View from Angel’s Landing - Zion
If you enjoy my posts, please consider signing up below to get email notifications of my latest blogs. I will not share your email.

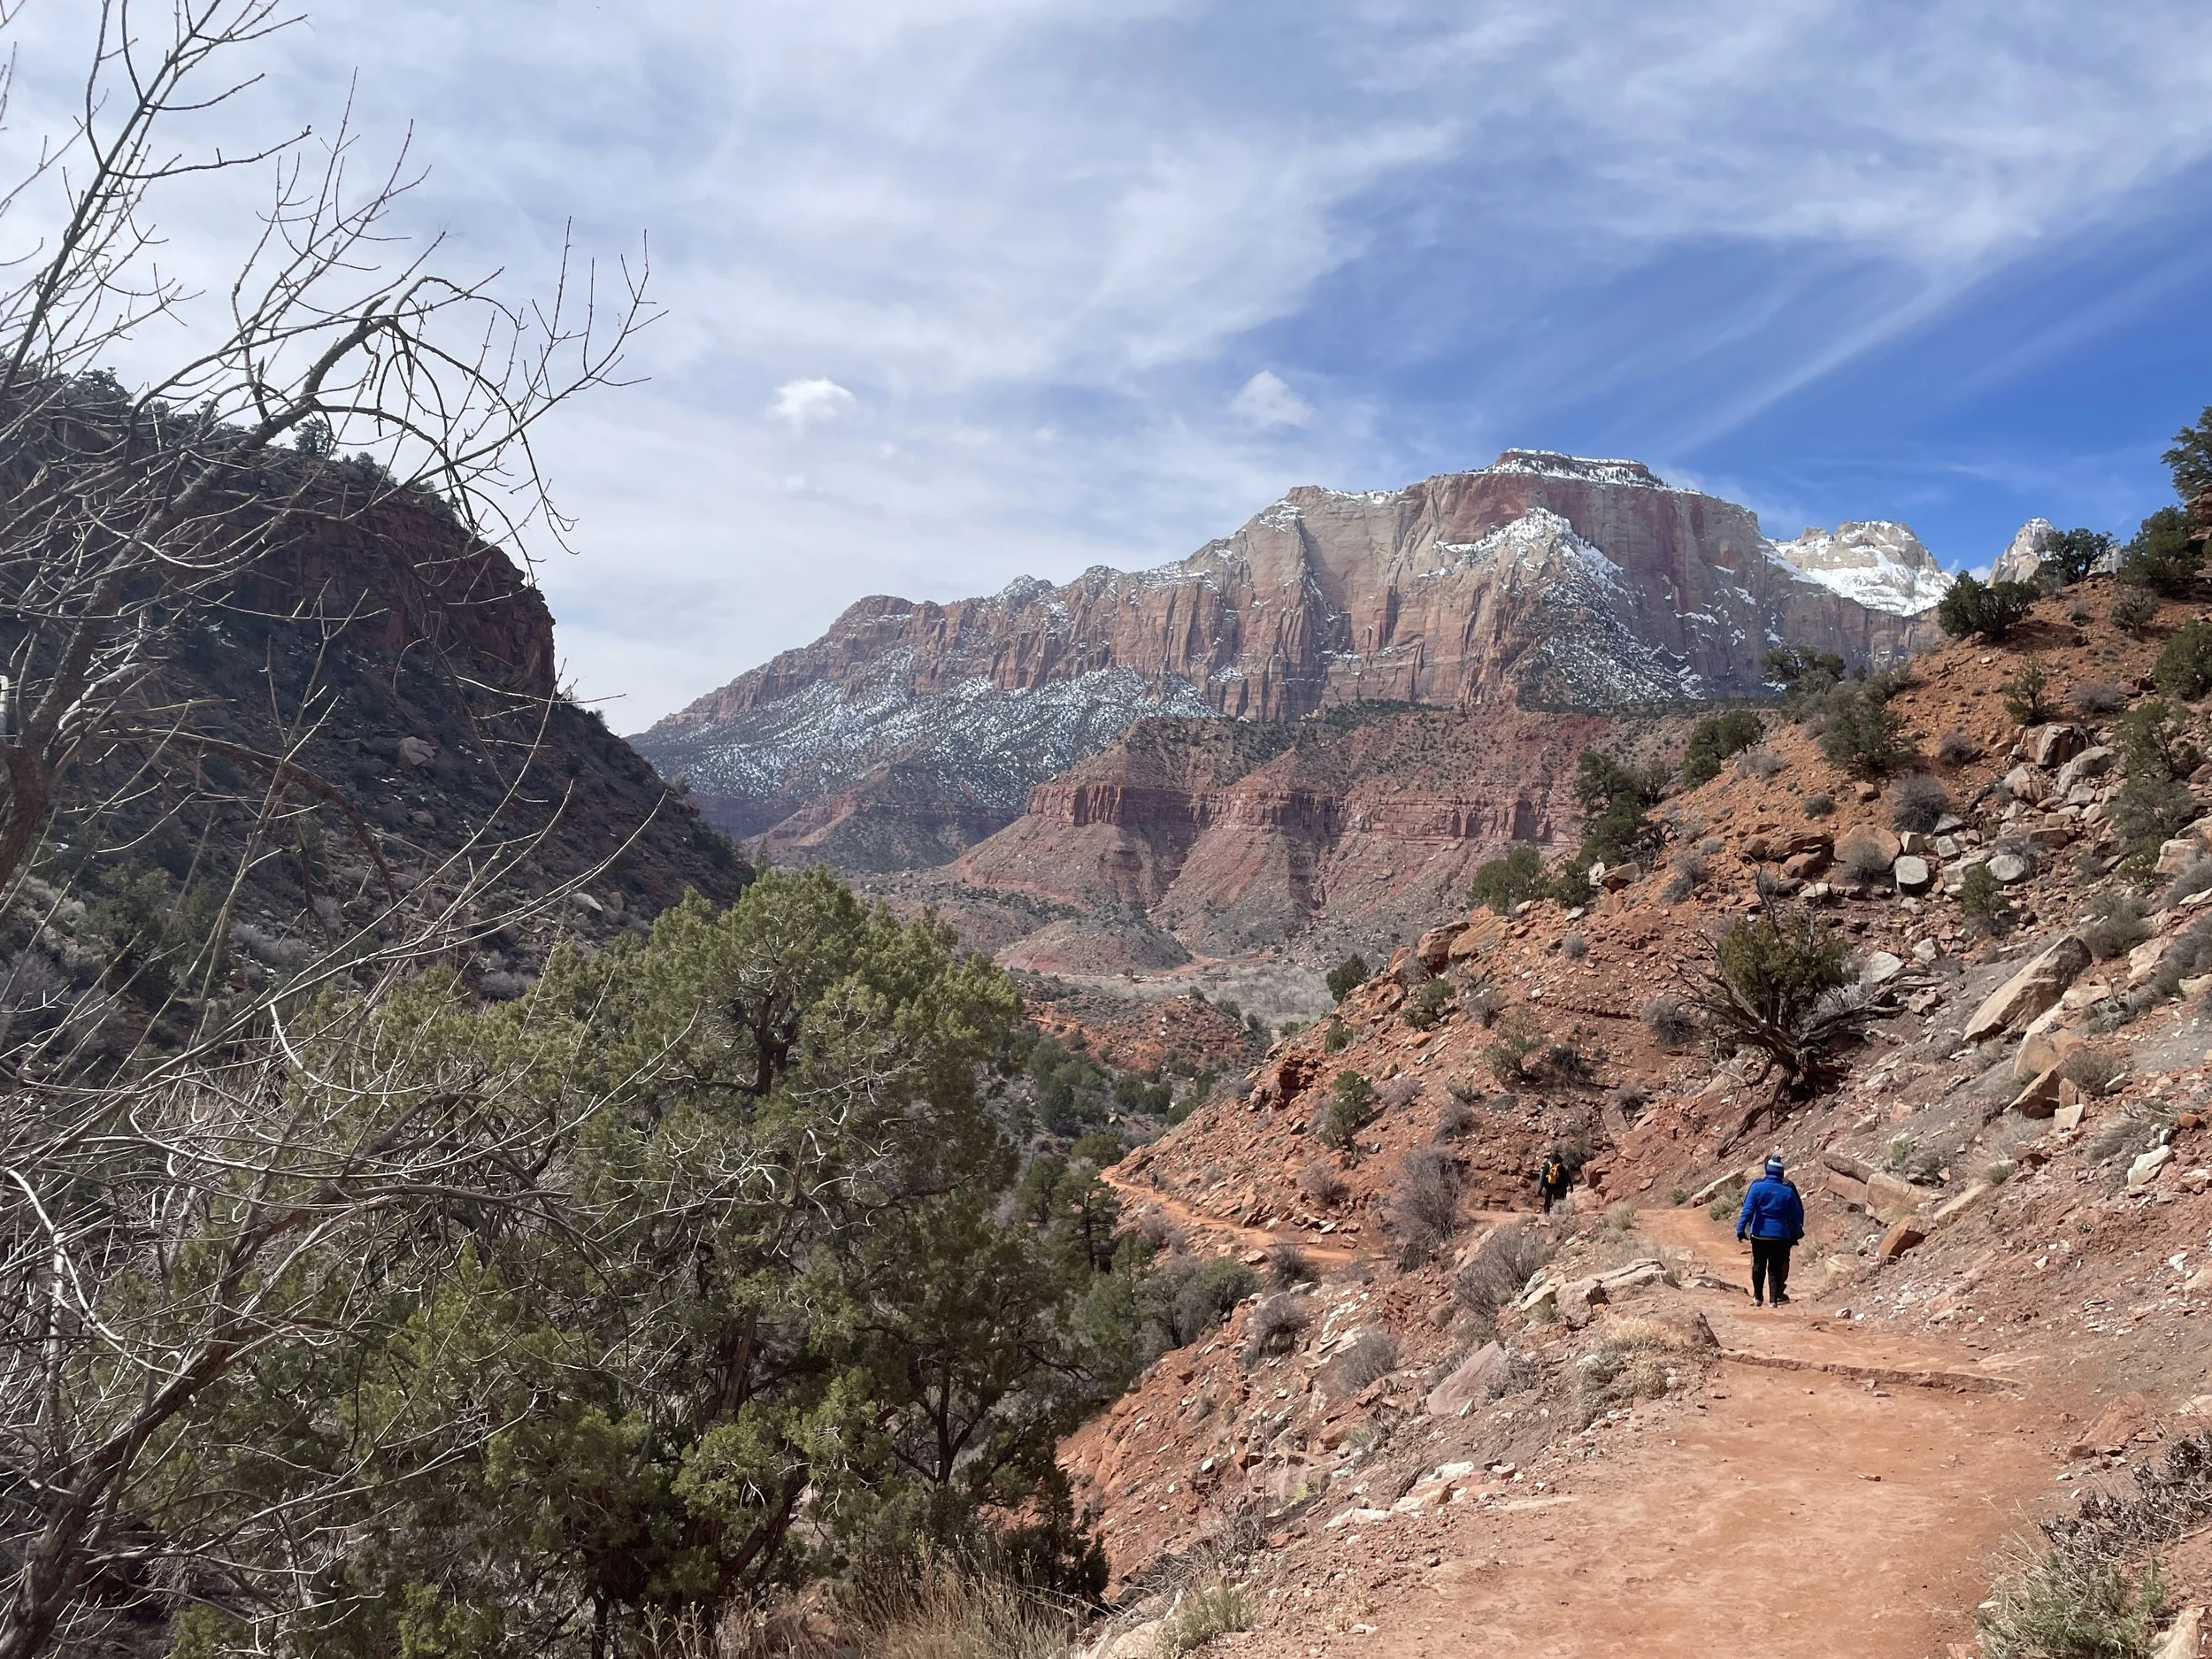
June 2-25 - Hiking Zion Narrows Top-Down
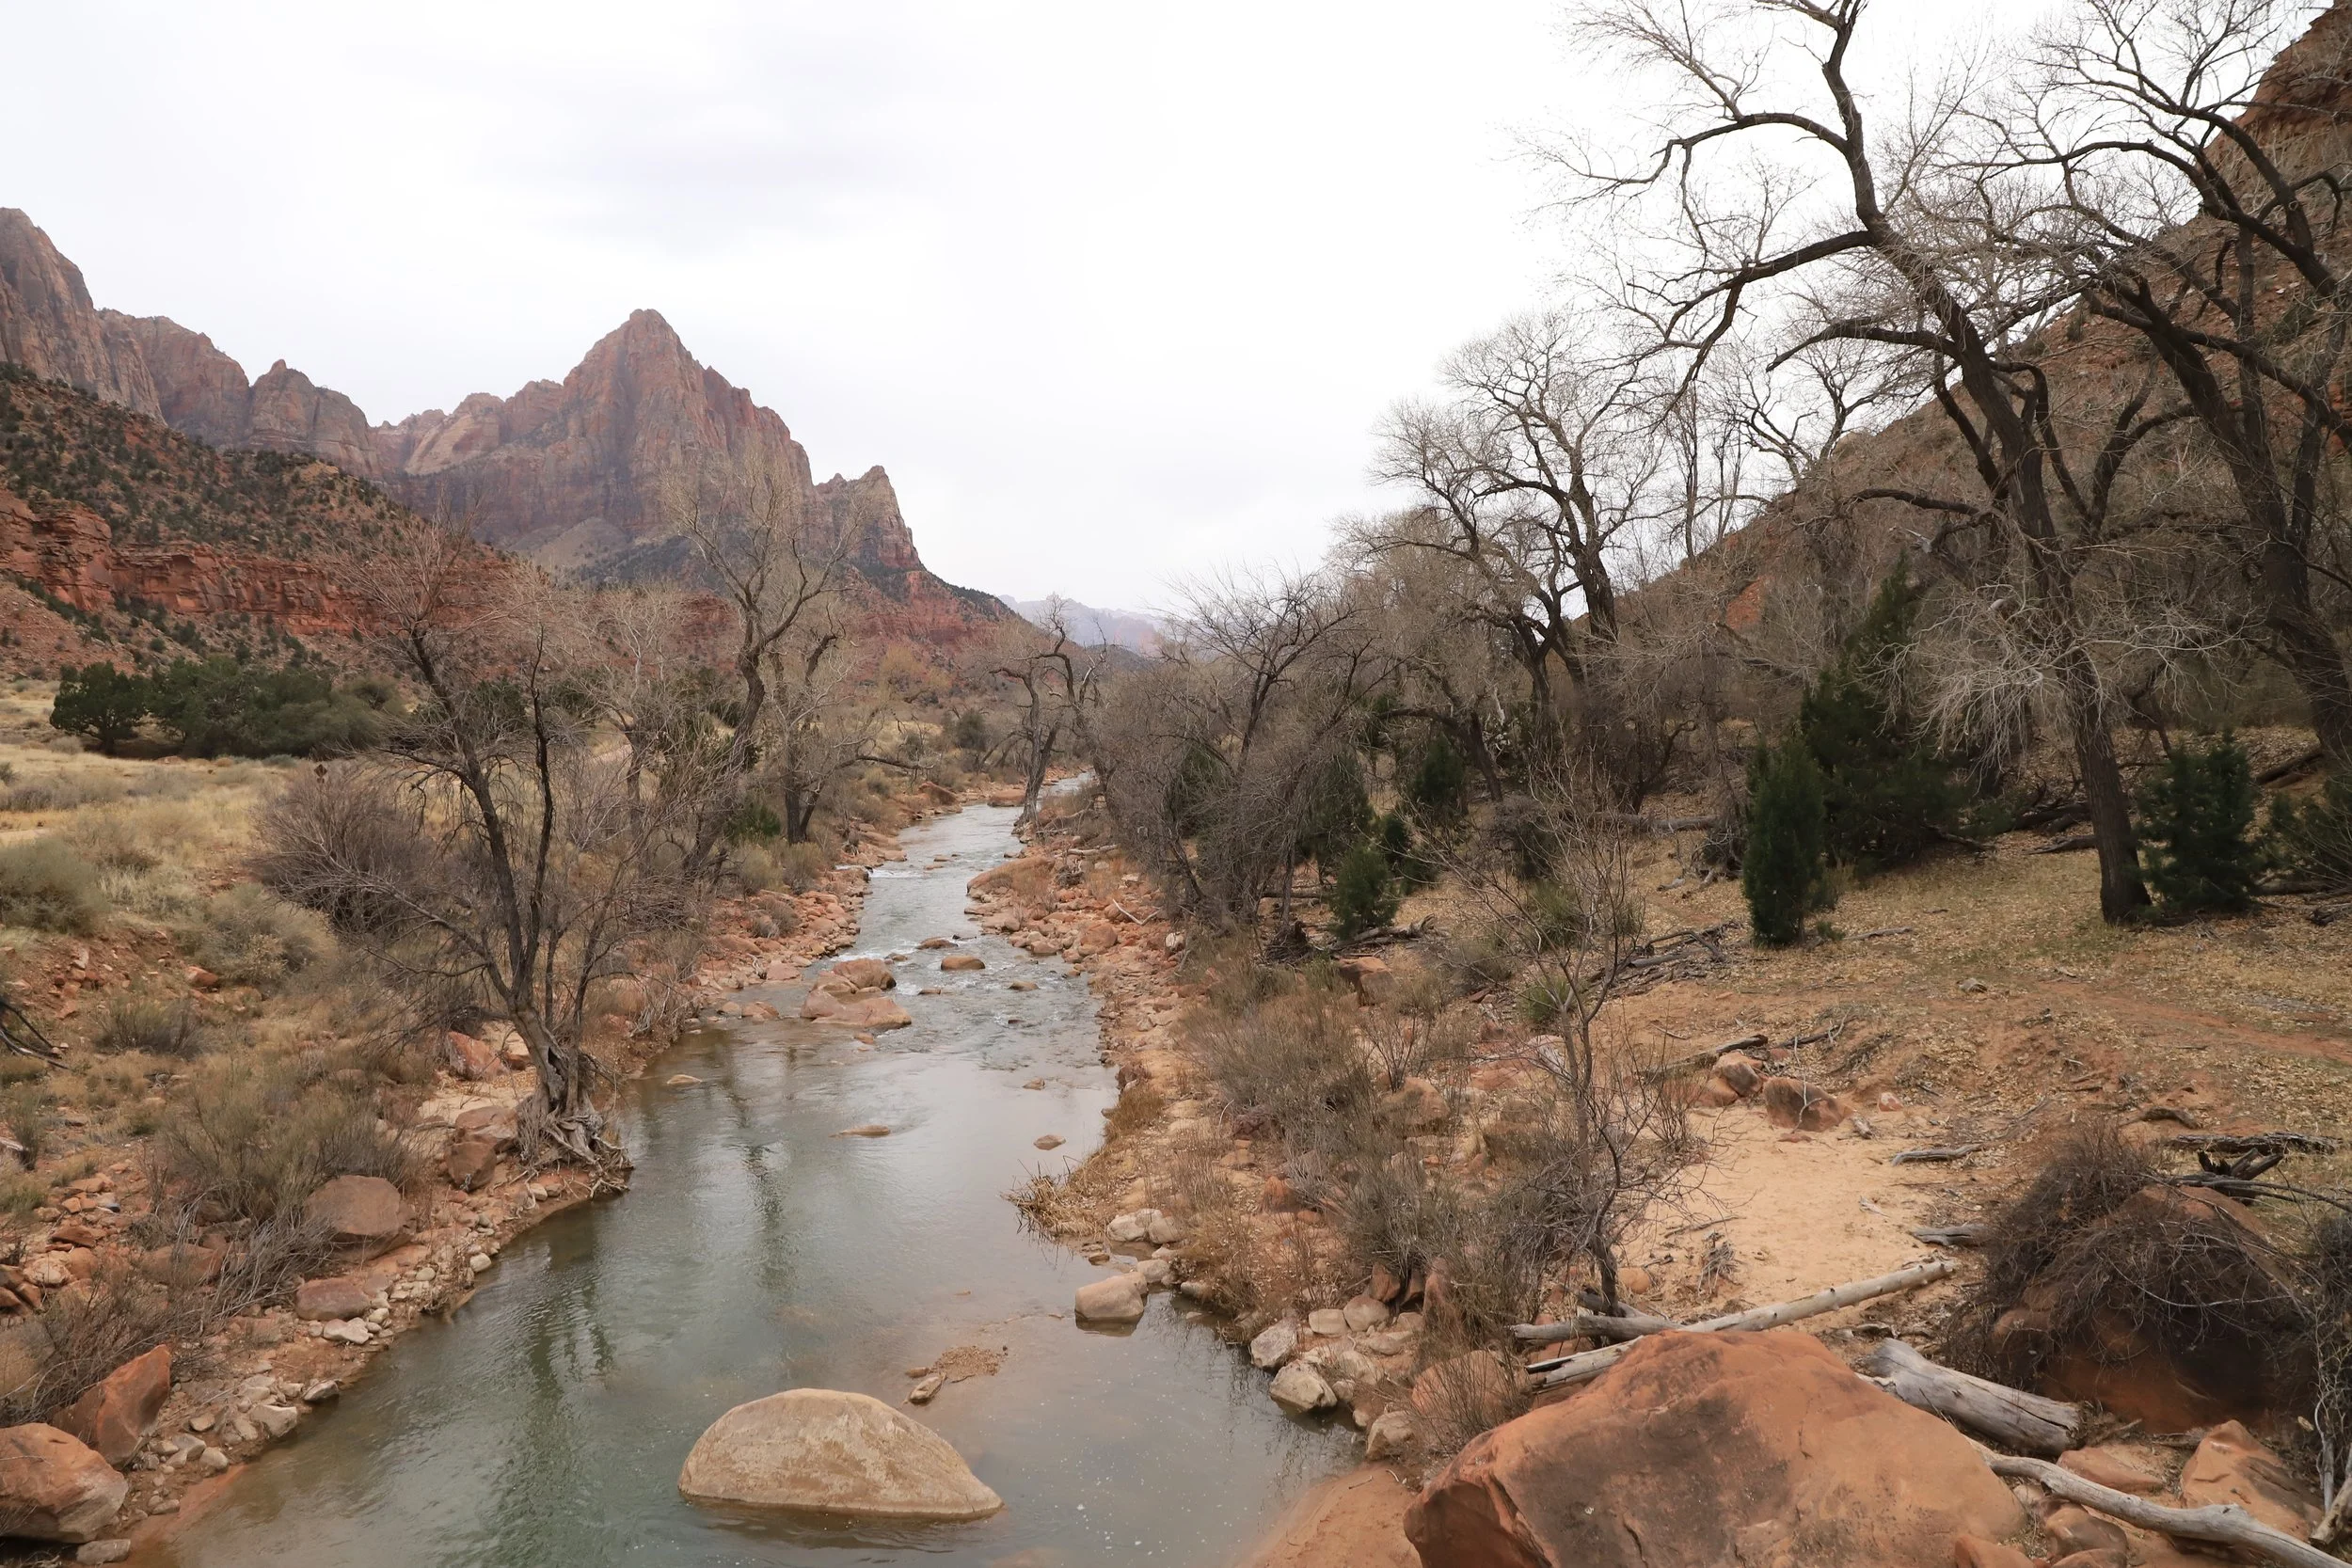
Zion National Park
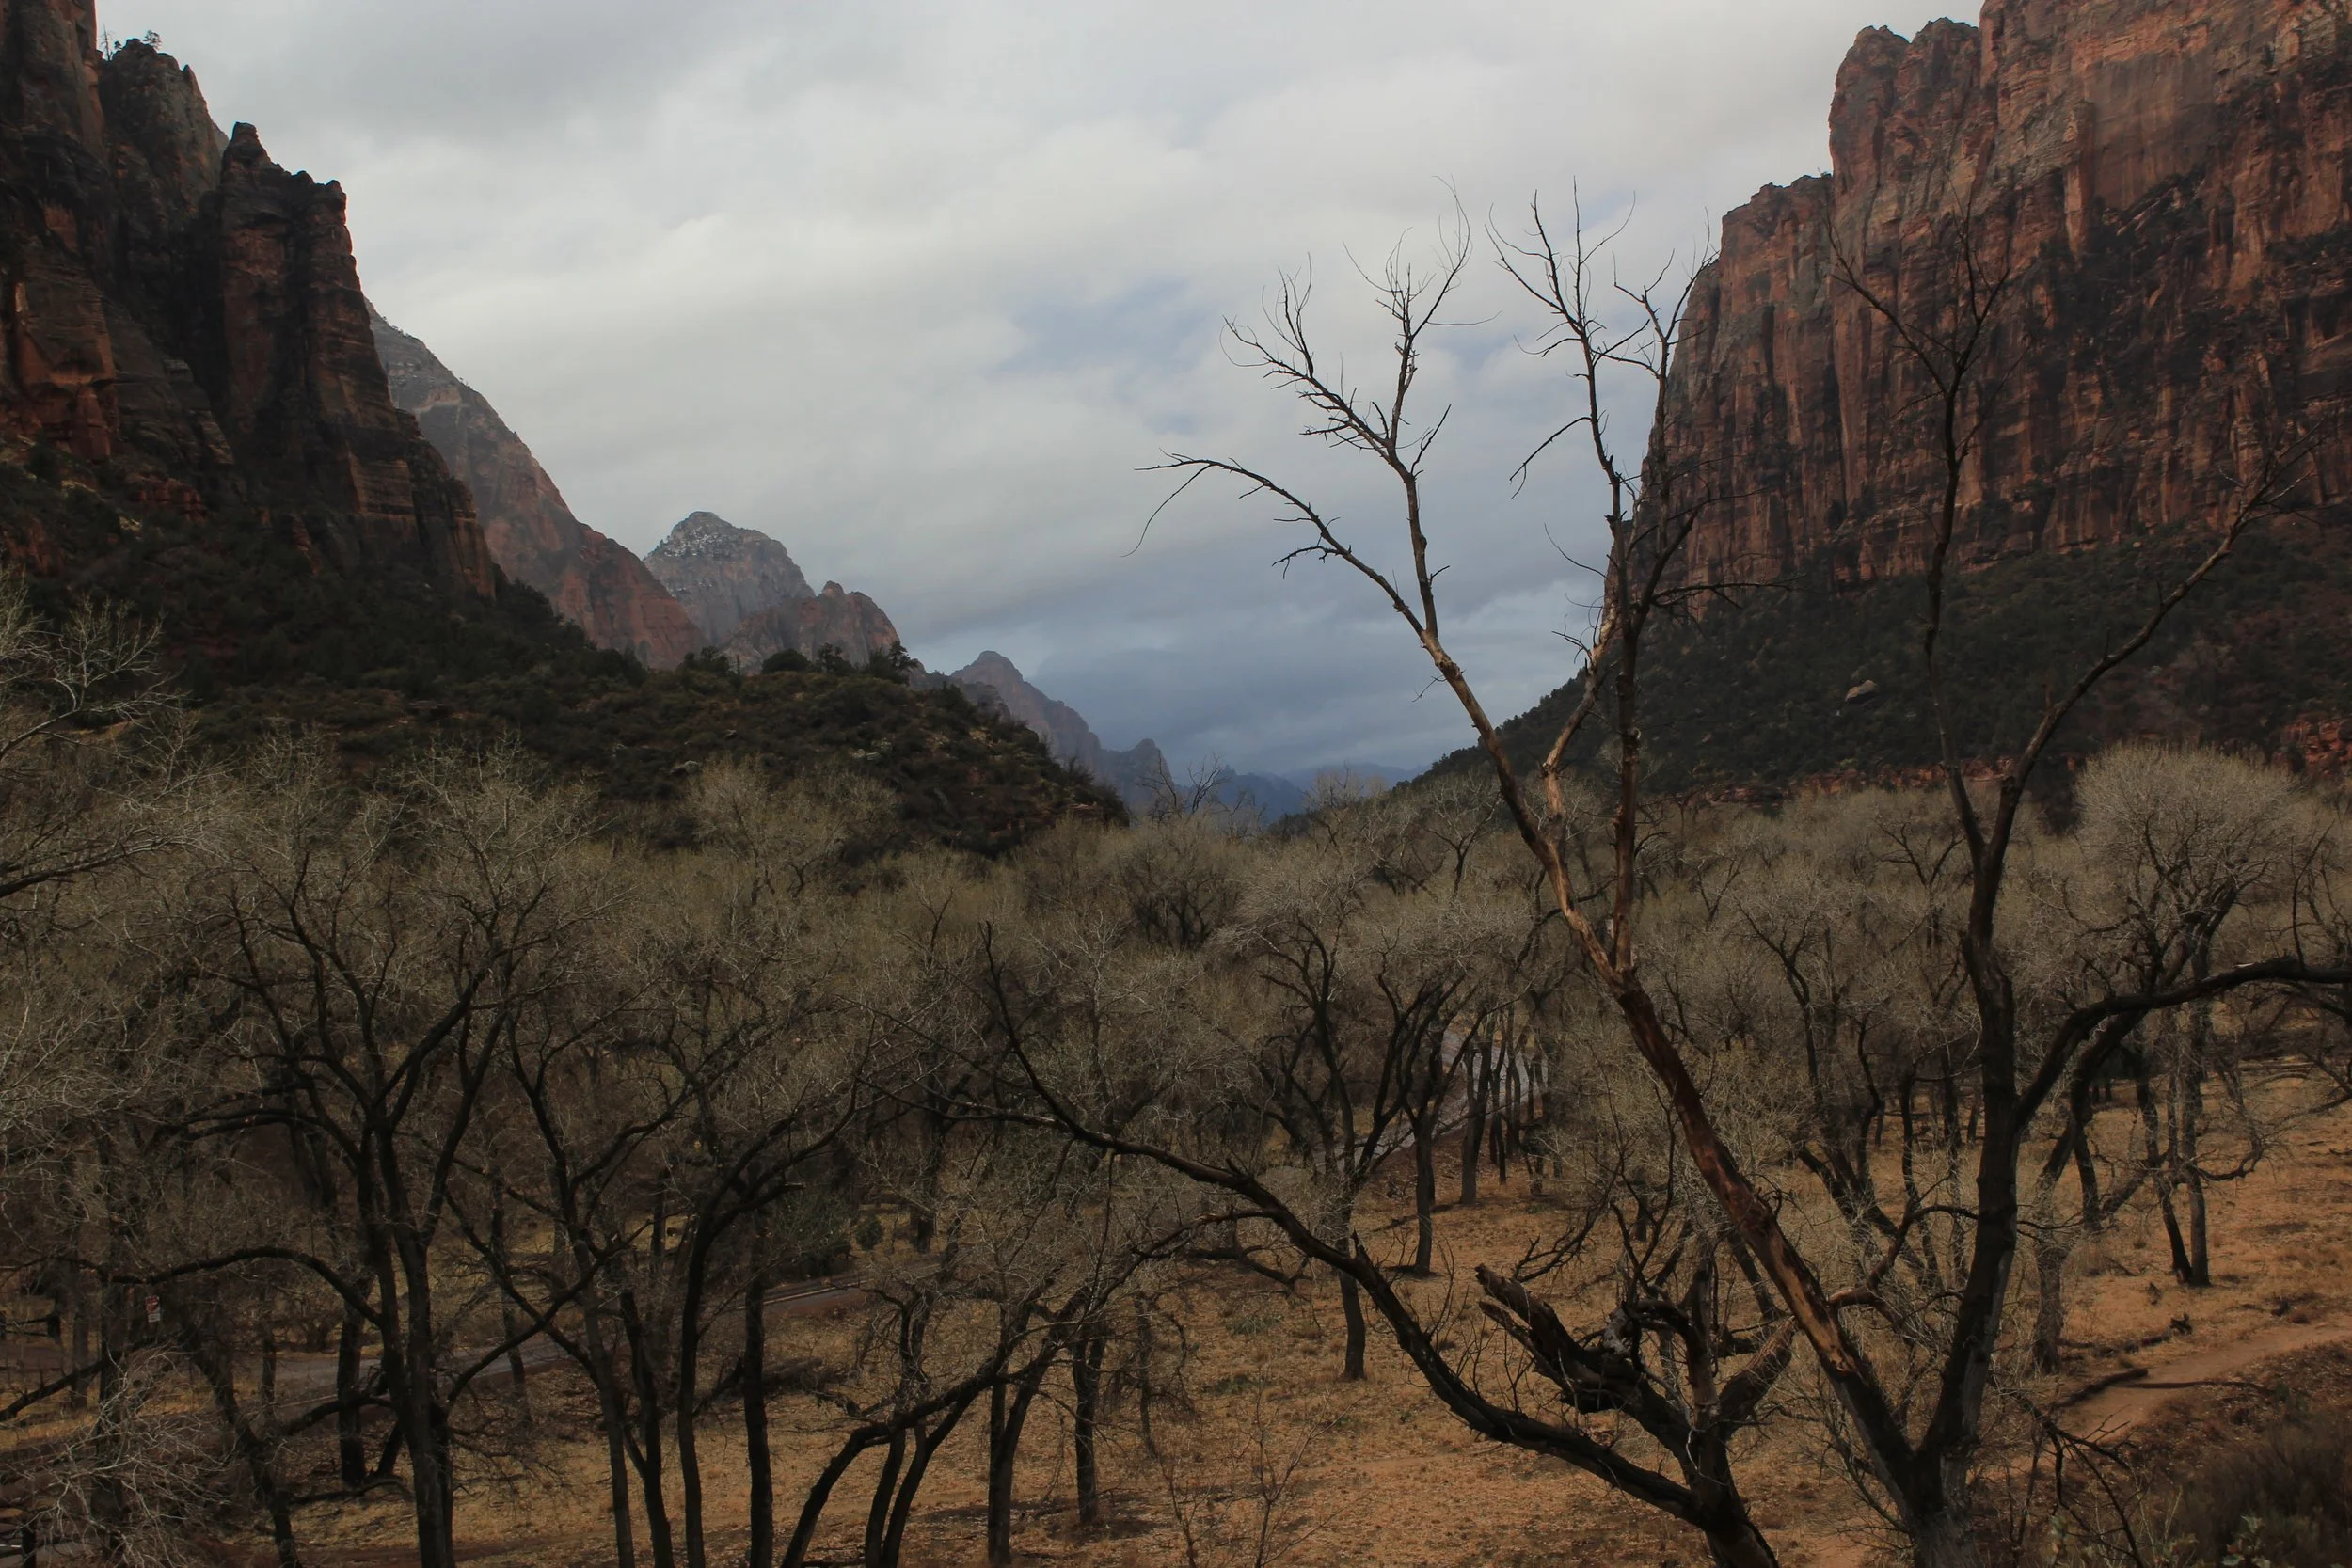
There are several National Parks that I love, but this particular park holds such a special place in our hearts that we named our rescue dog Zion. Our 2025 summer vacation was my sixth time to Zion National Park. Even with six trips, you’ll see below that I still have a handful of hikes that I’d like to do and haven’t yet had the time. (Yes, I write these posts for myself too, so I know exactly where to go the next time I return.)
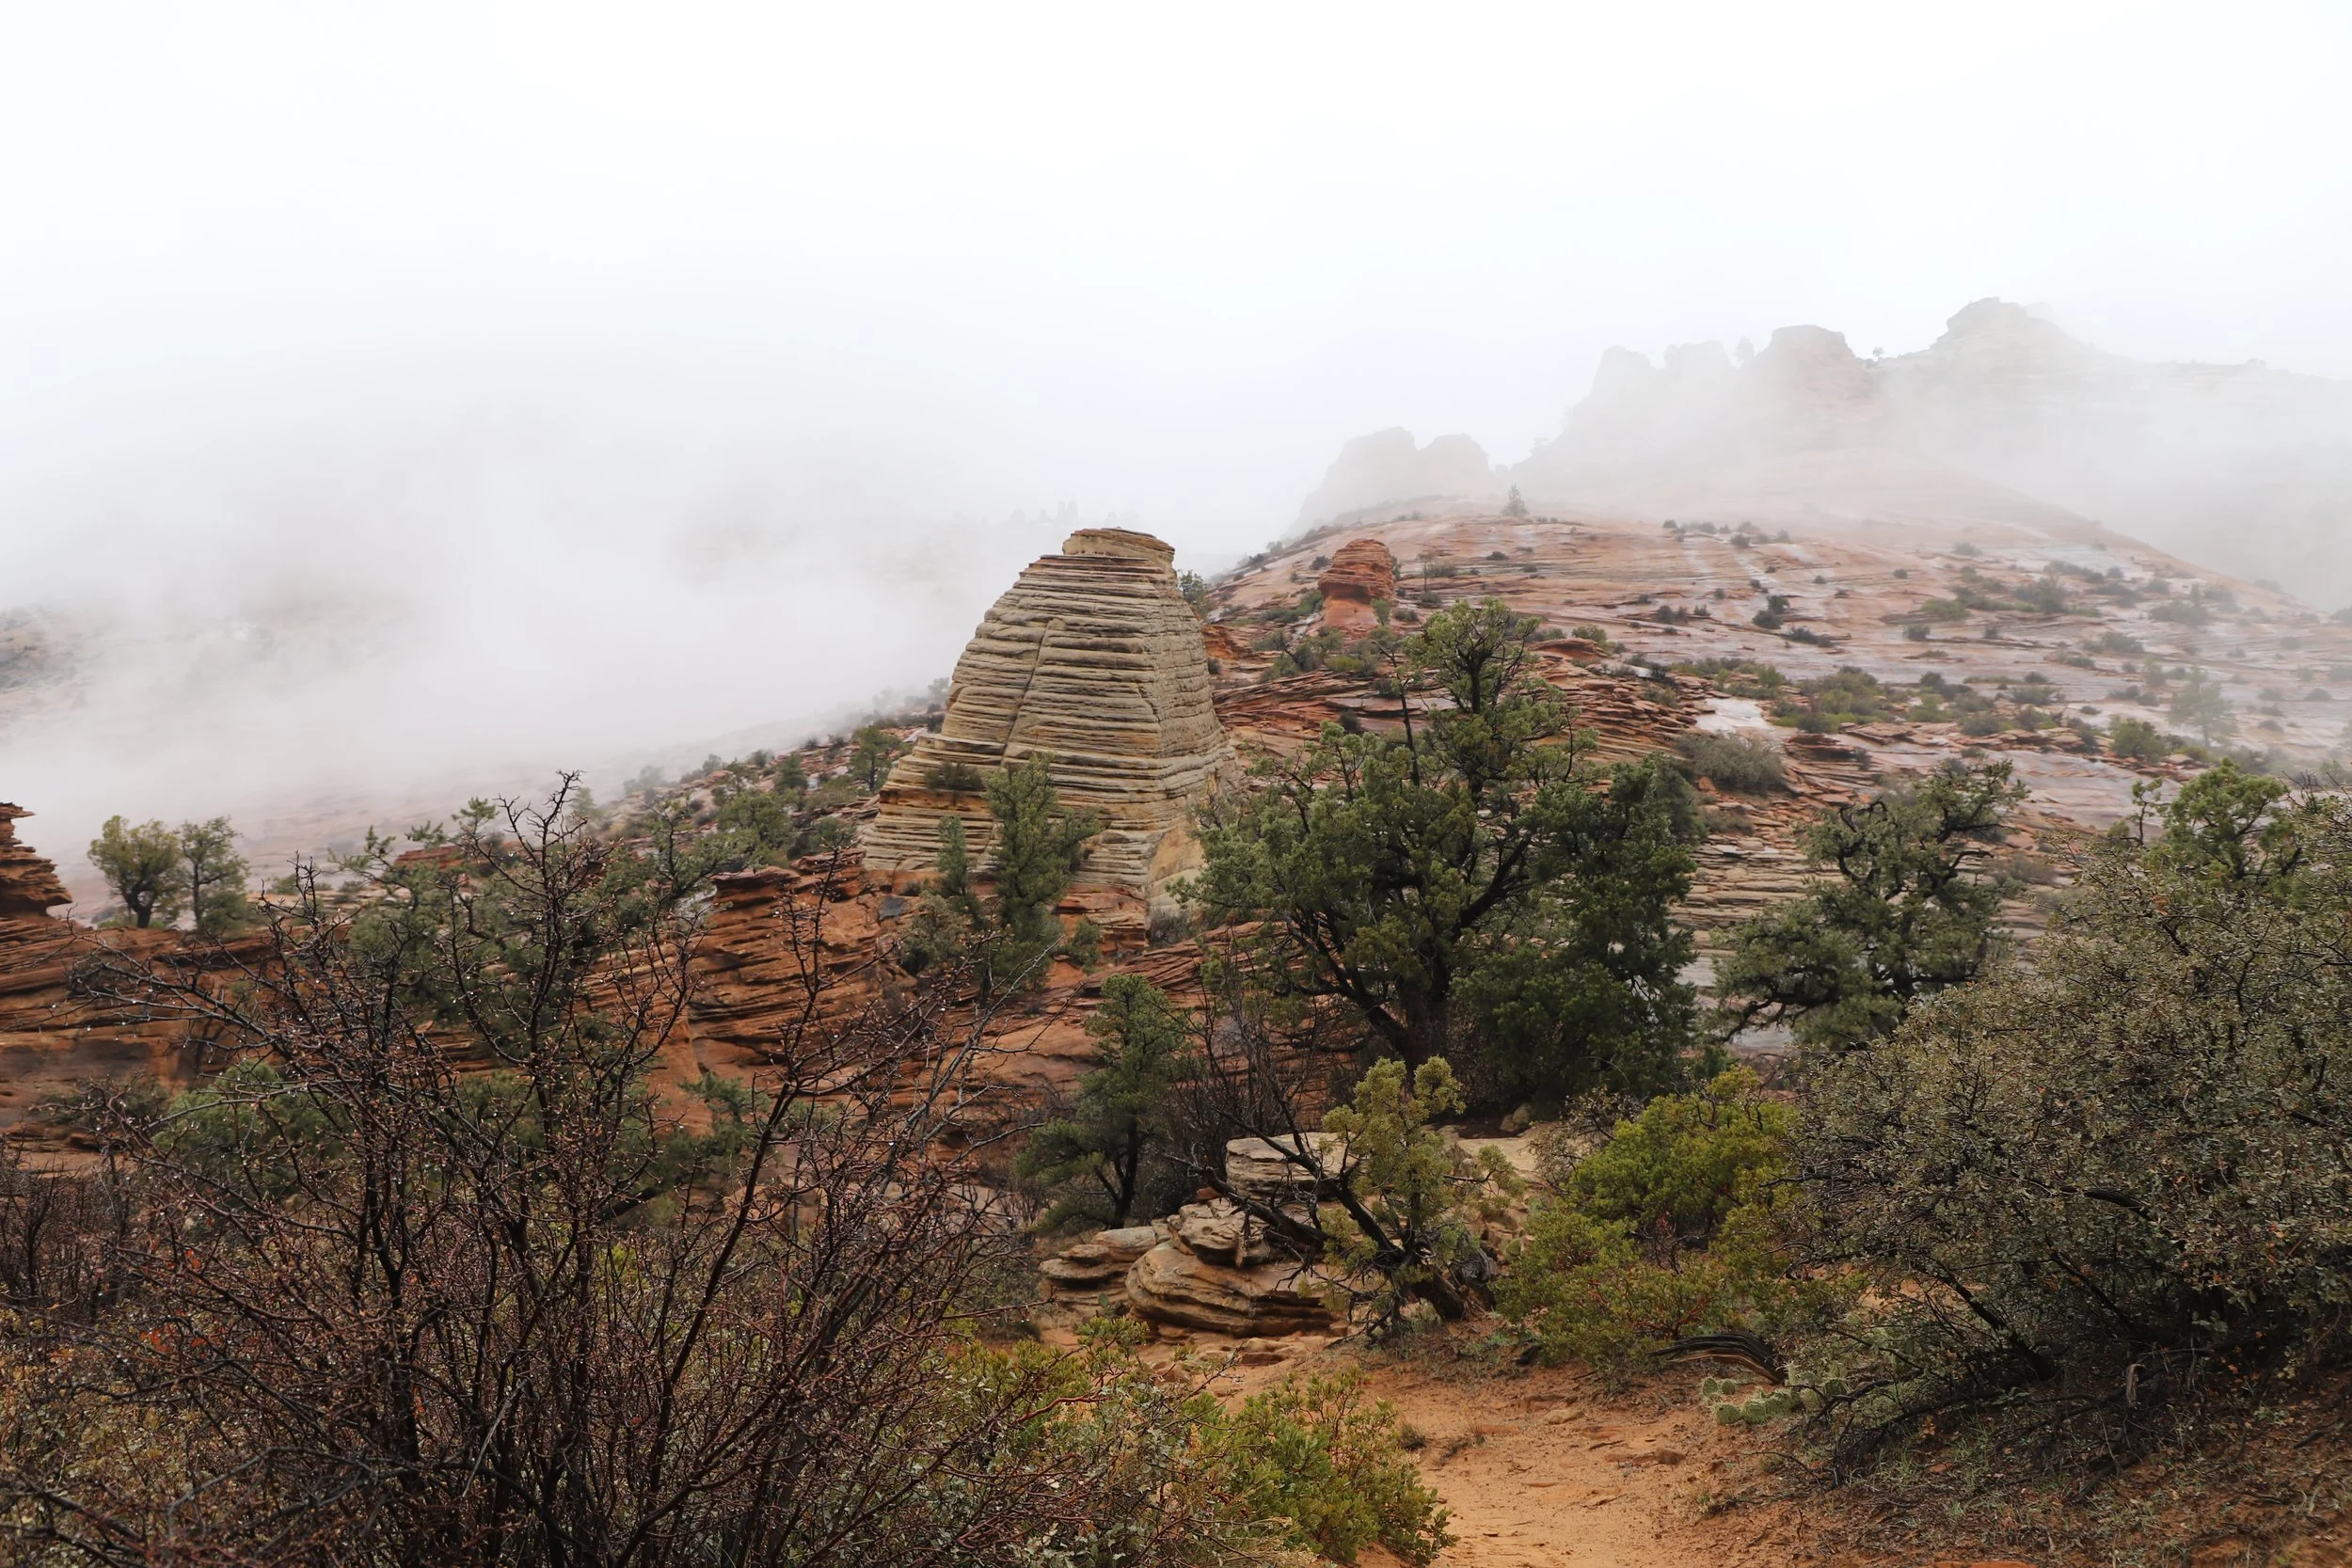
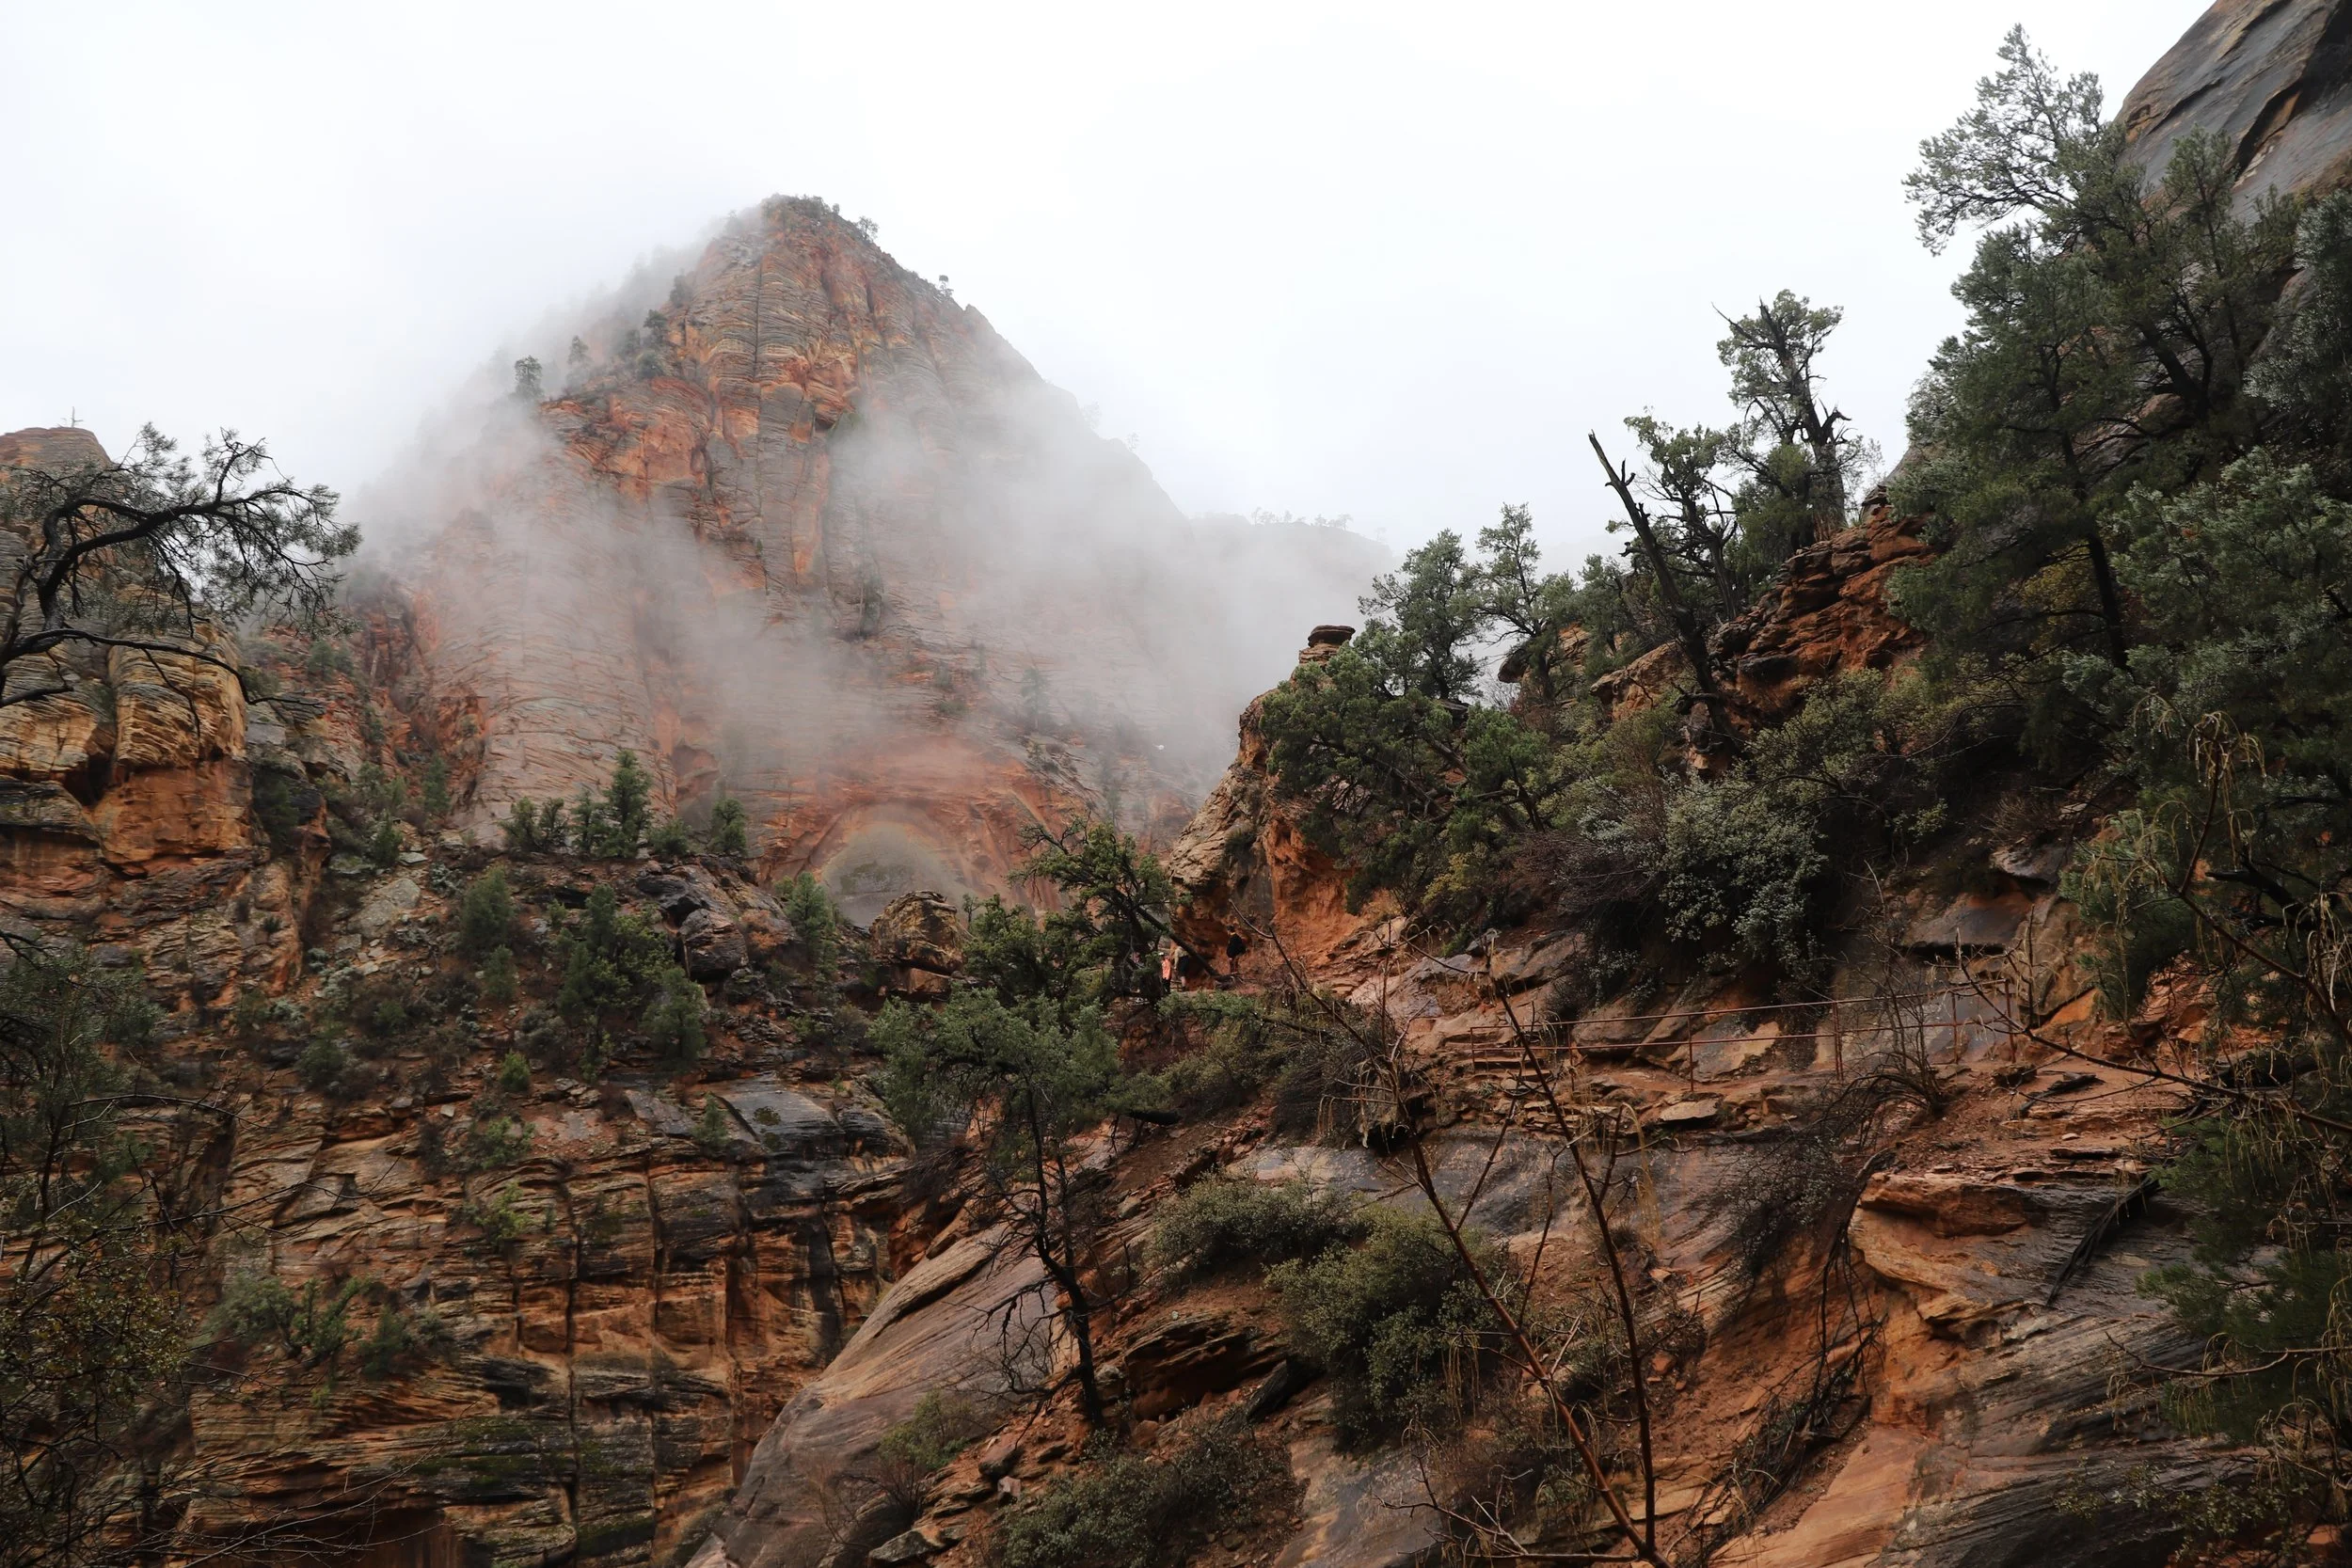
Zion has epic hikes for all hiker abilities - from super little hikers with short legs who might not want to walk far but may prefer to climb over boulders and splash in the water, to hikers that may want to spend a day with some quiet reflection time in the canyon, to adventurous hikers that bring their own helmets, ropes, and rappelling gear. There are hikes perfect for when it’s cooler, maybe even a little snowy, and hikes that are awesome in the summer, even when the park reaches temps over 100 deg F. Some trails are crazy crowded, and other spots in the park you will likely have all to yourselves. Pick your own adventure - but a little bit of pre-planning will go a long way to making sure you have the perfect trip with so many different options. Hopefully this guide can help with that planning process.
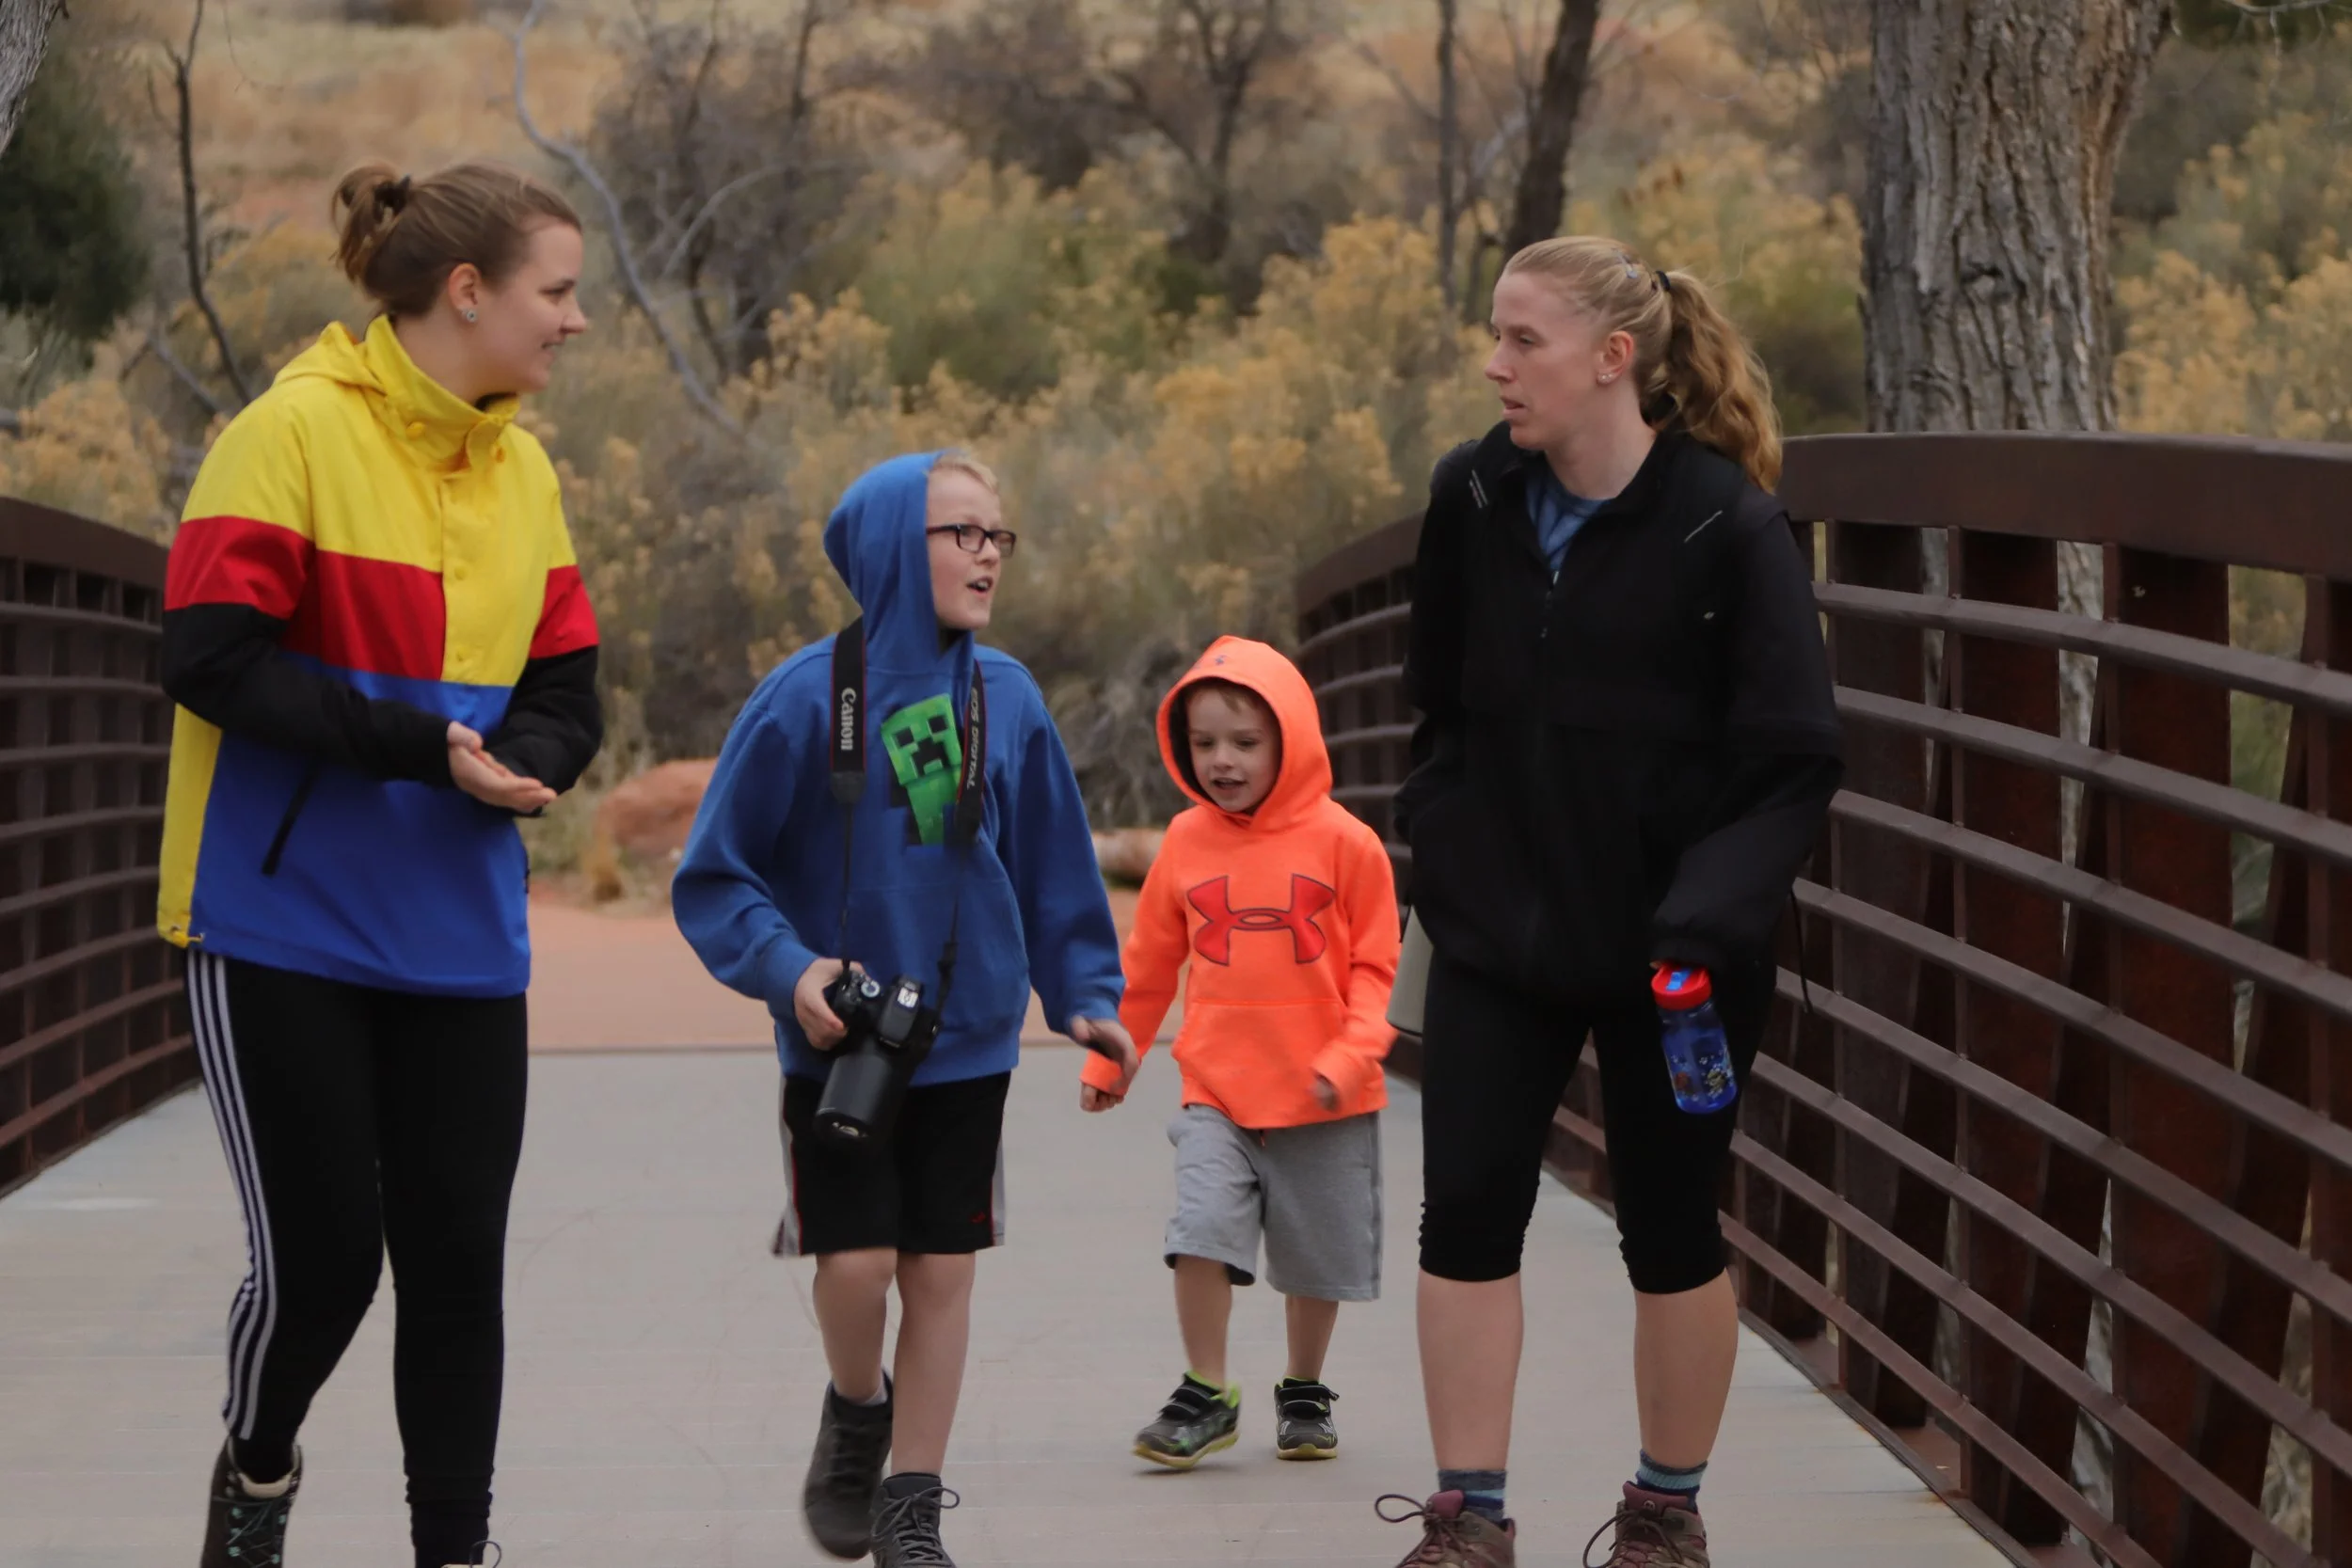
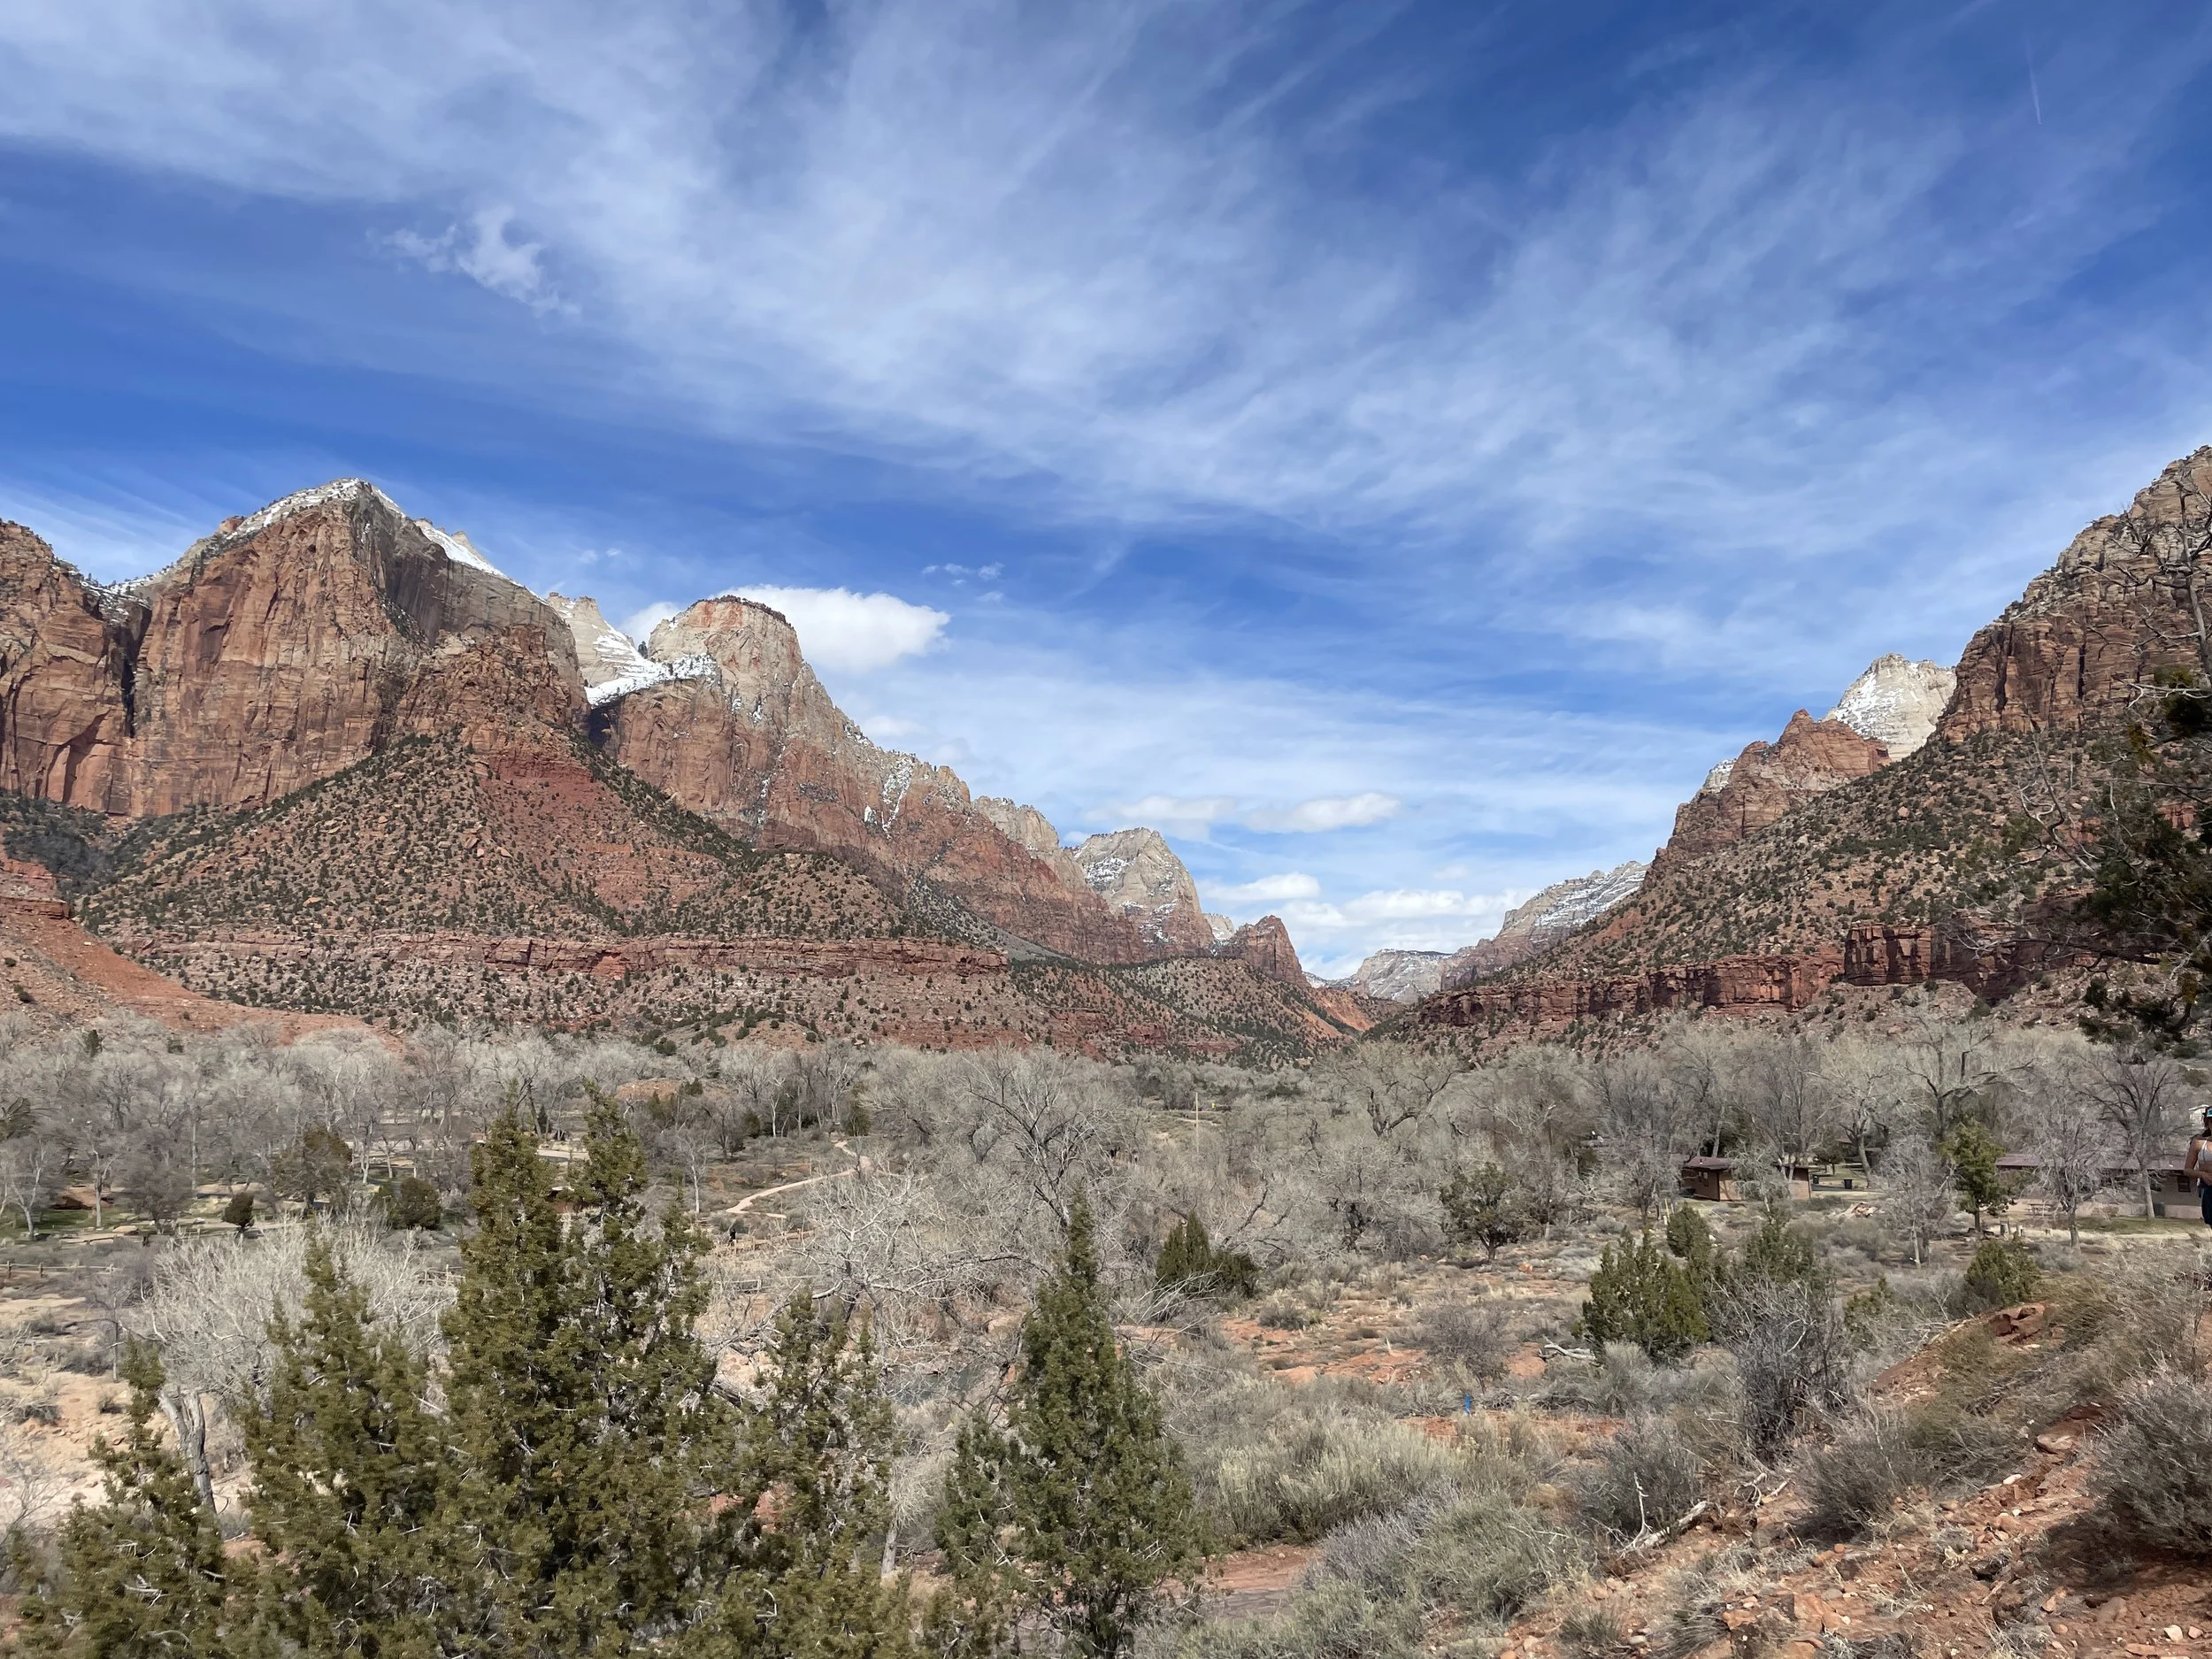
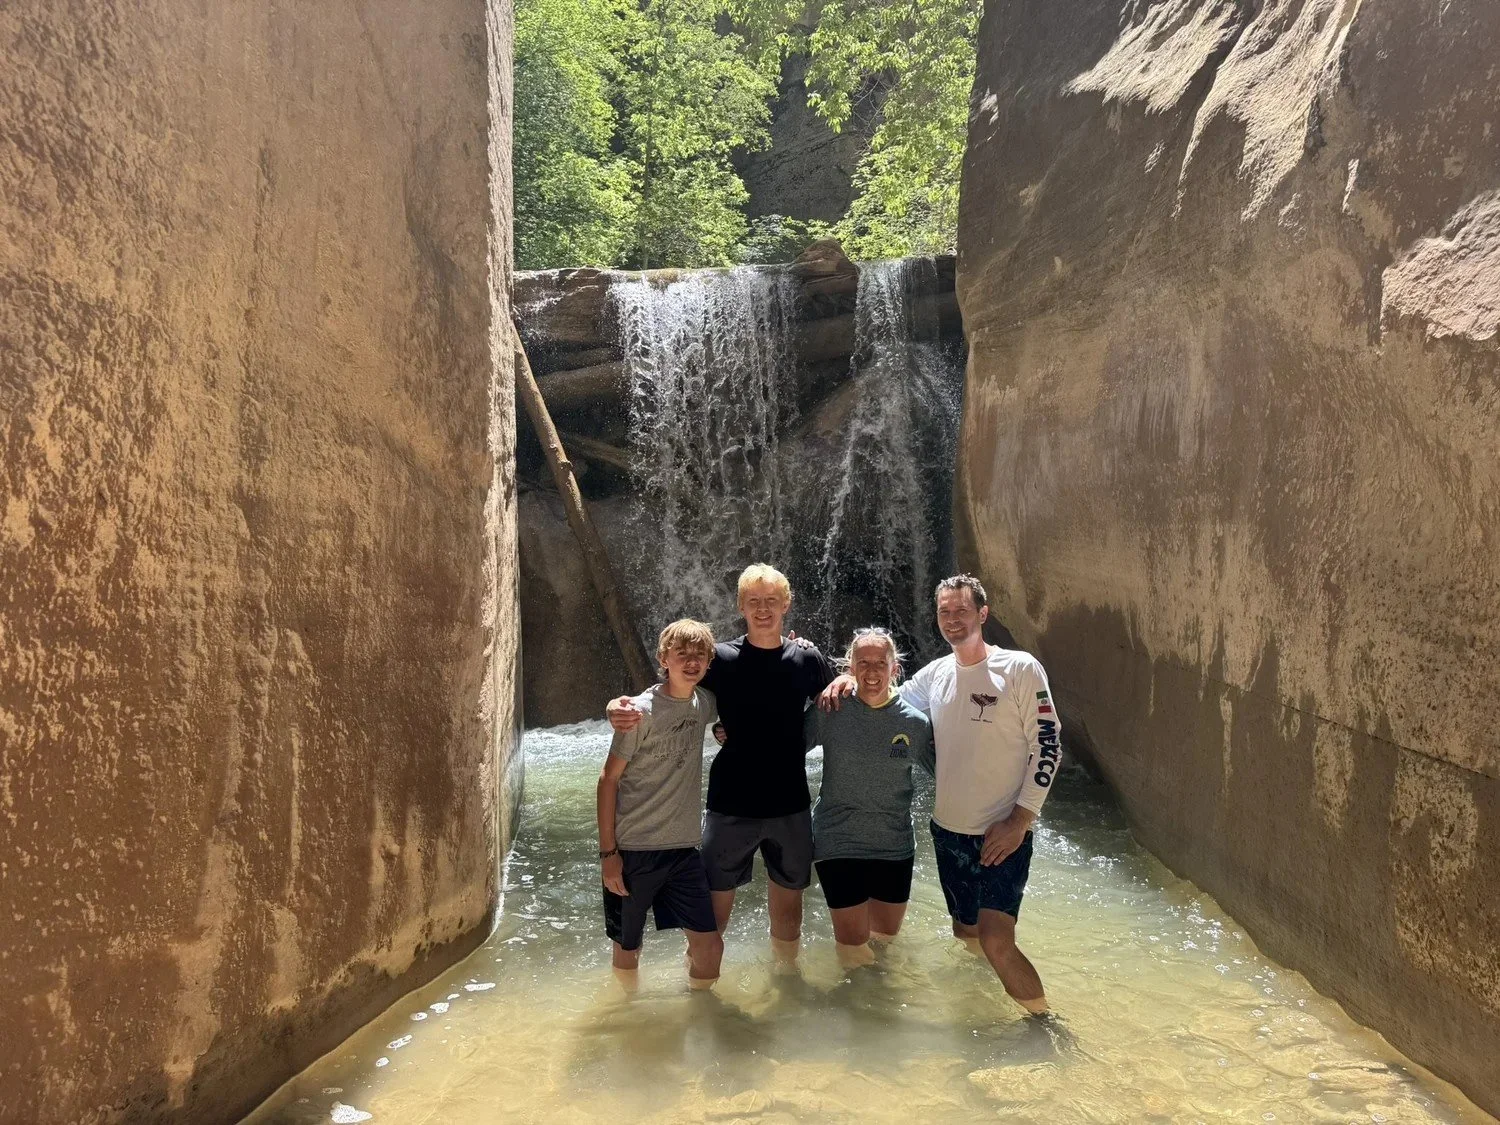
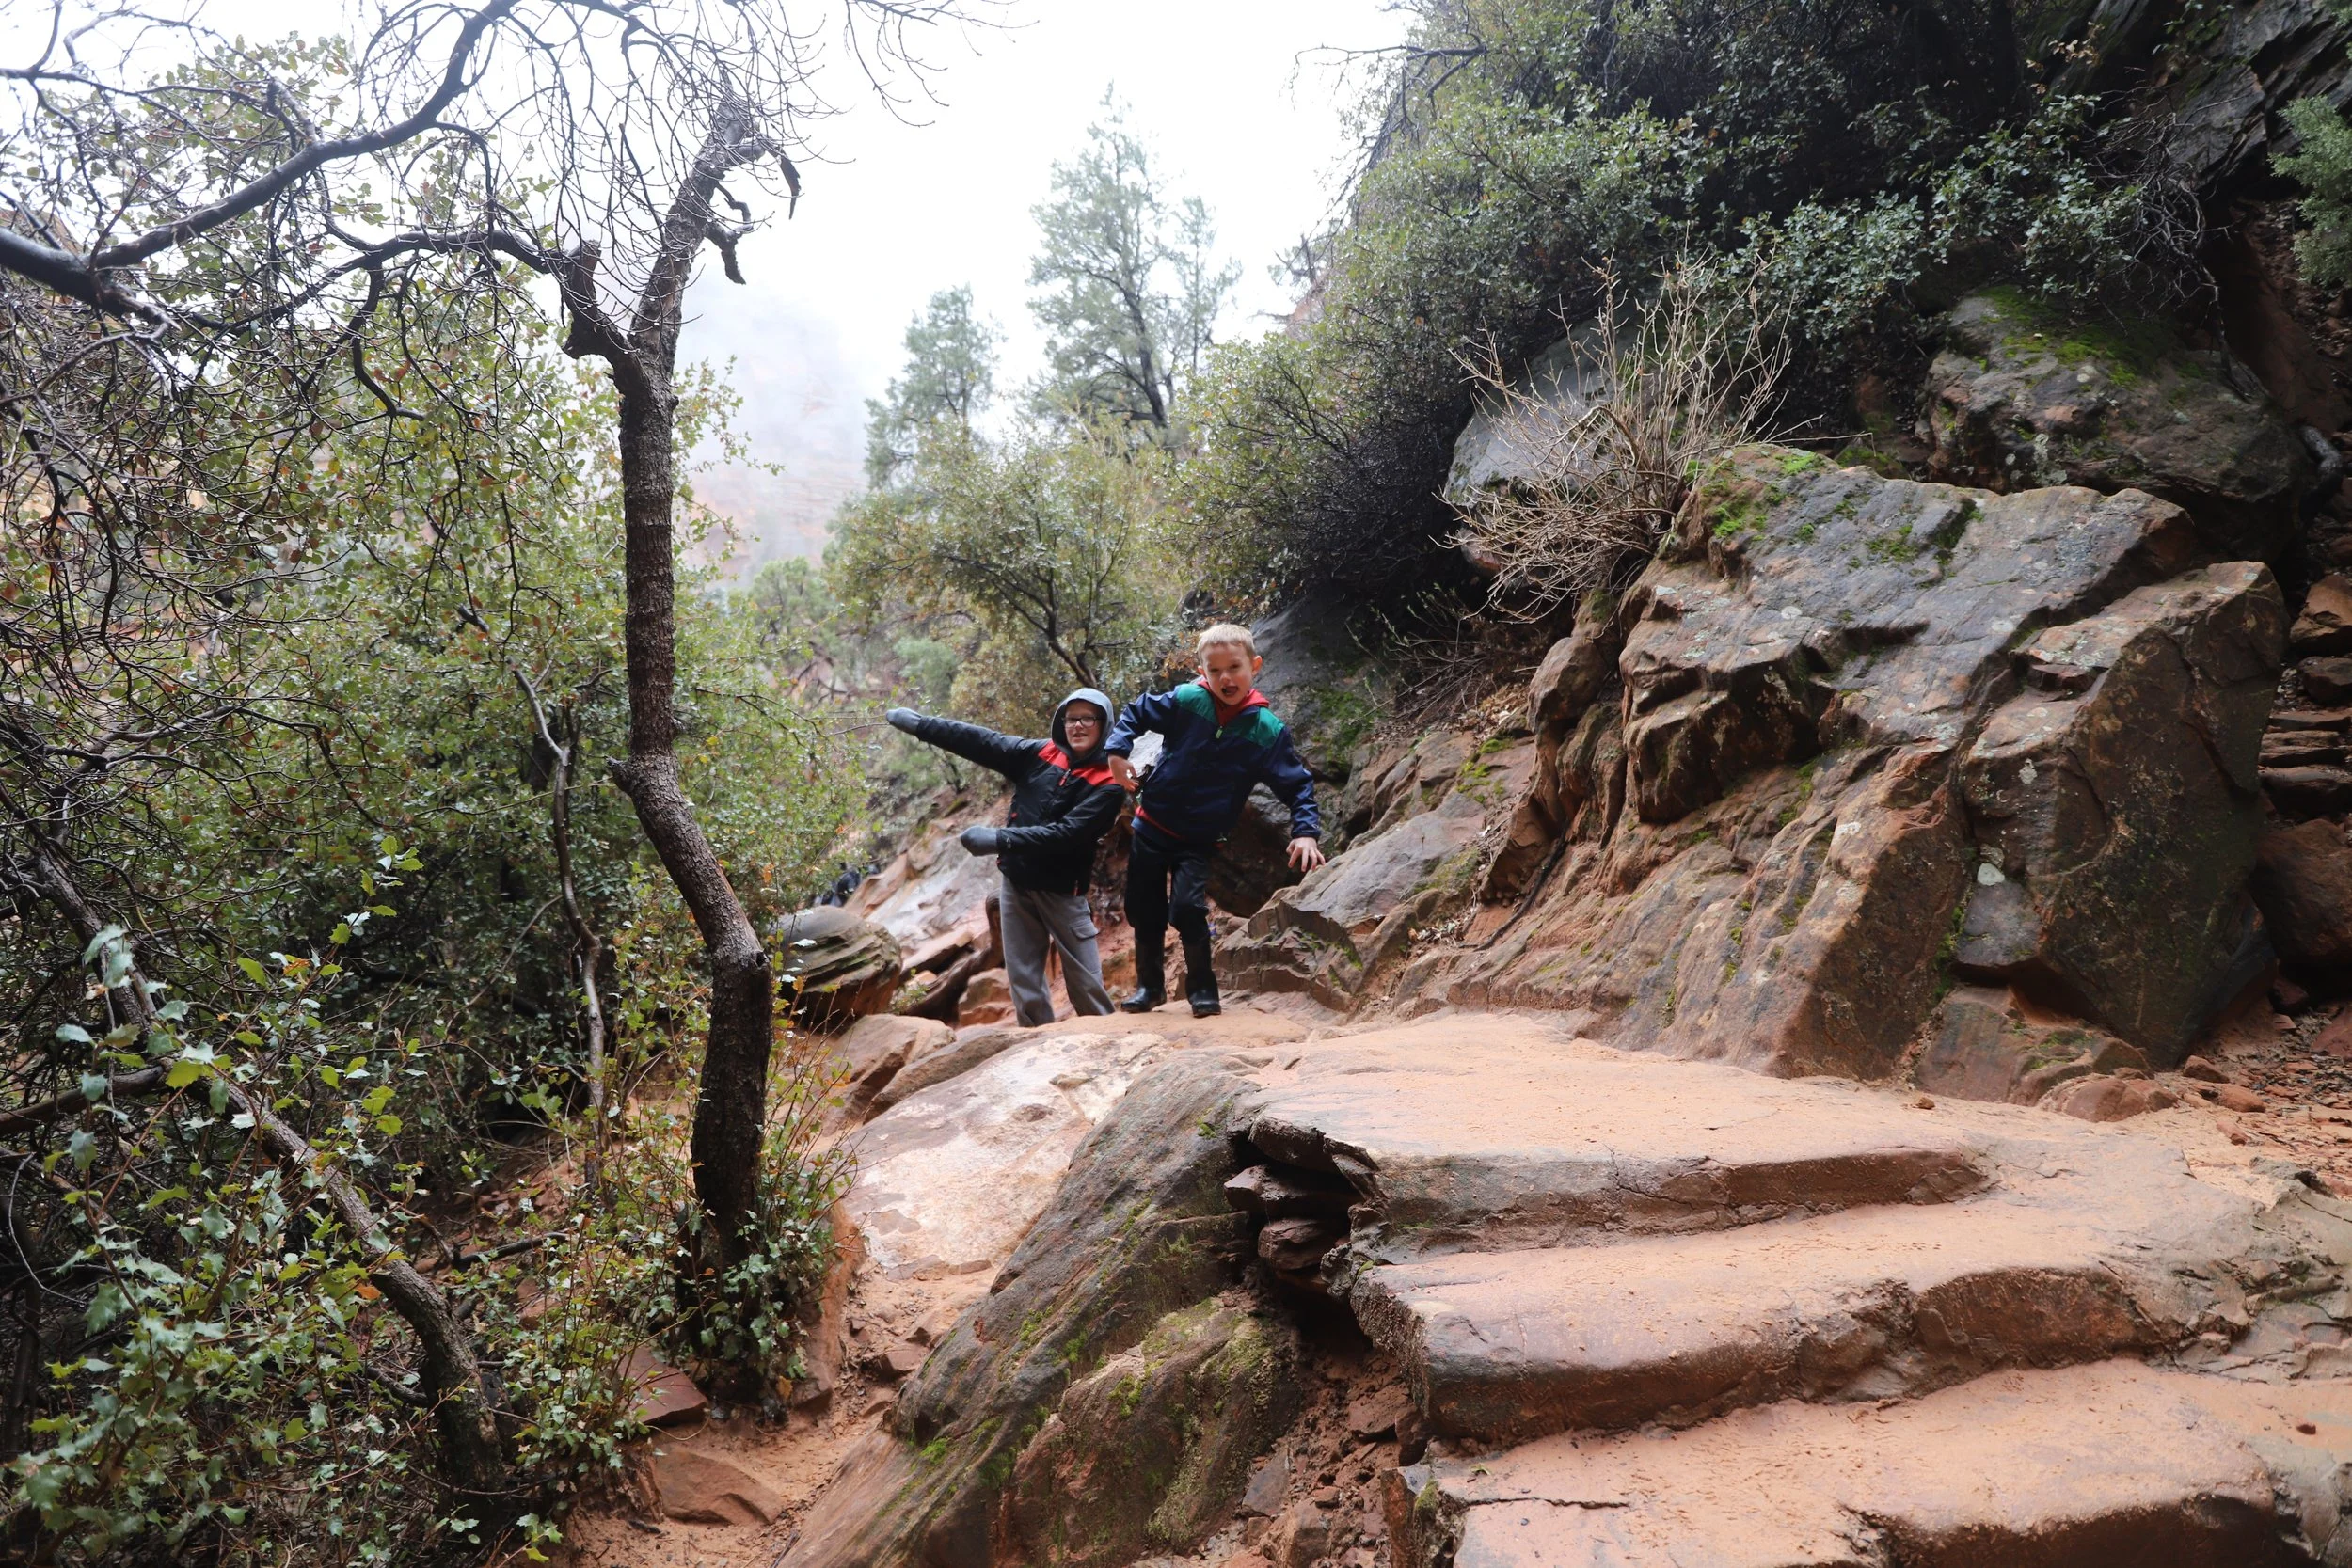
March 2018 - Zion National Park - Planning a trip for my boys (ages 4 & 8) and our exchange student from Finland (age 17). You’d think this would be a hard thing to do - but Zion has a little bit of everything for everyone. We all ended up with a fantastic trip!
Planning Your Trip
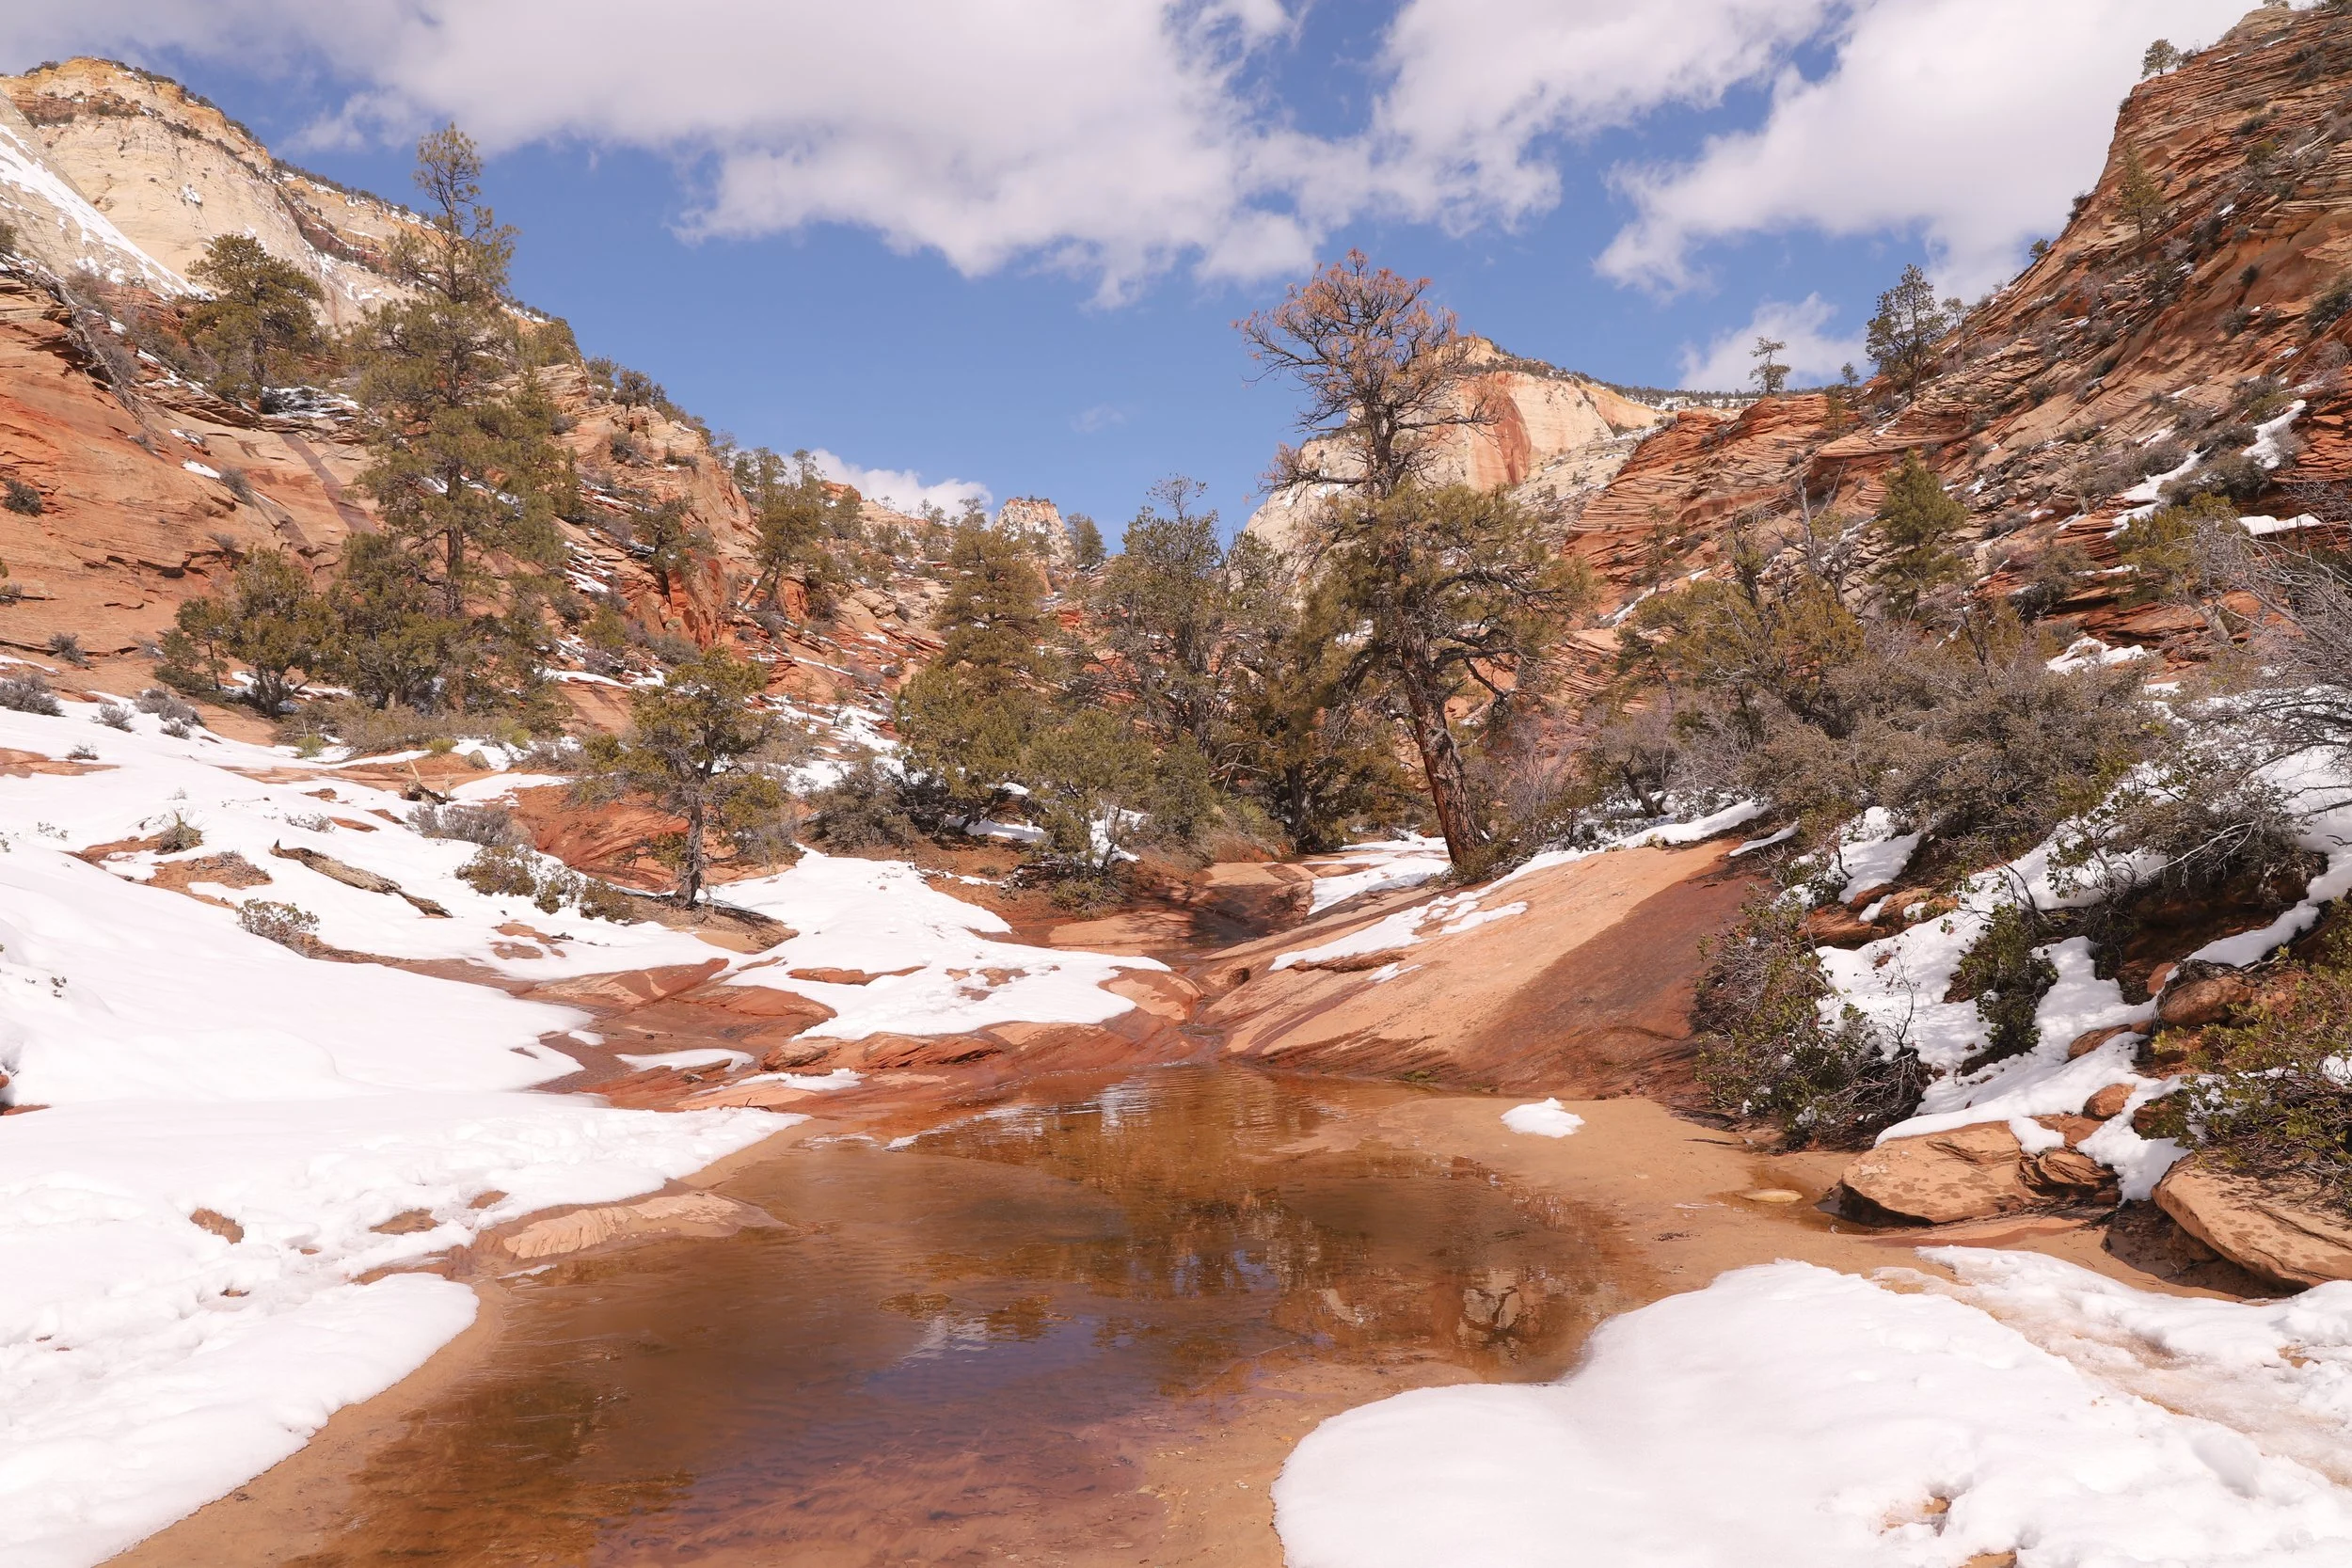
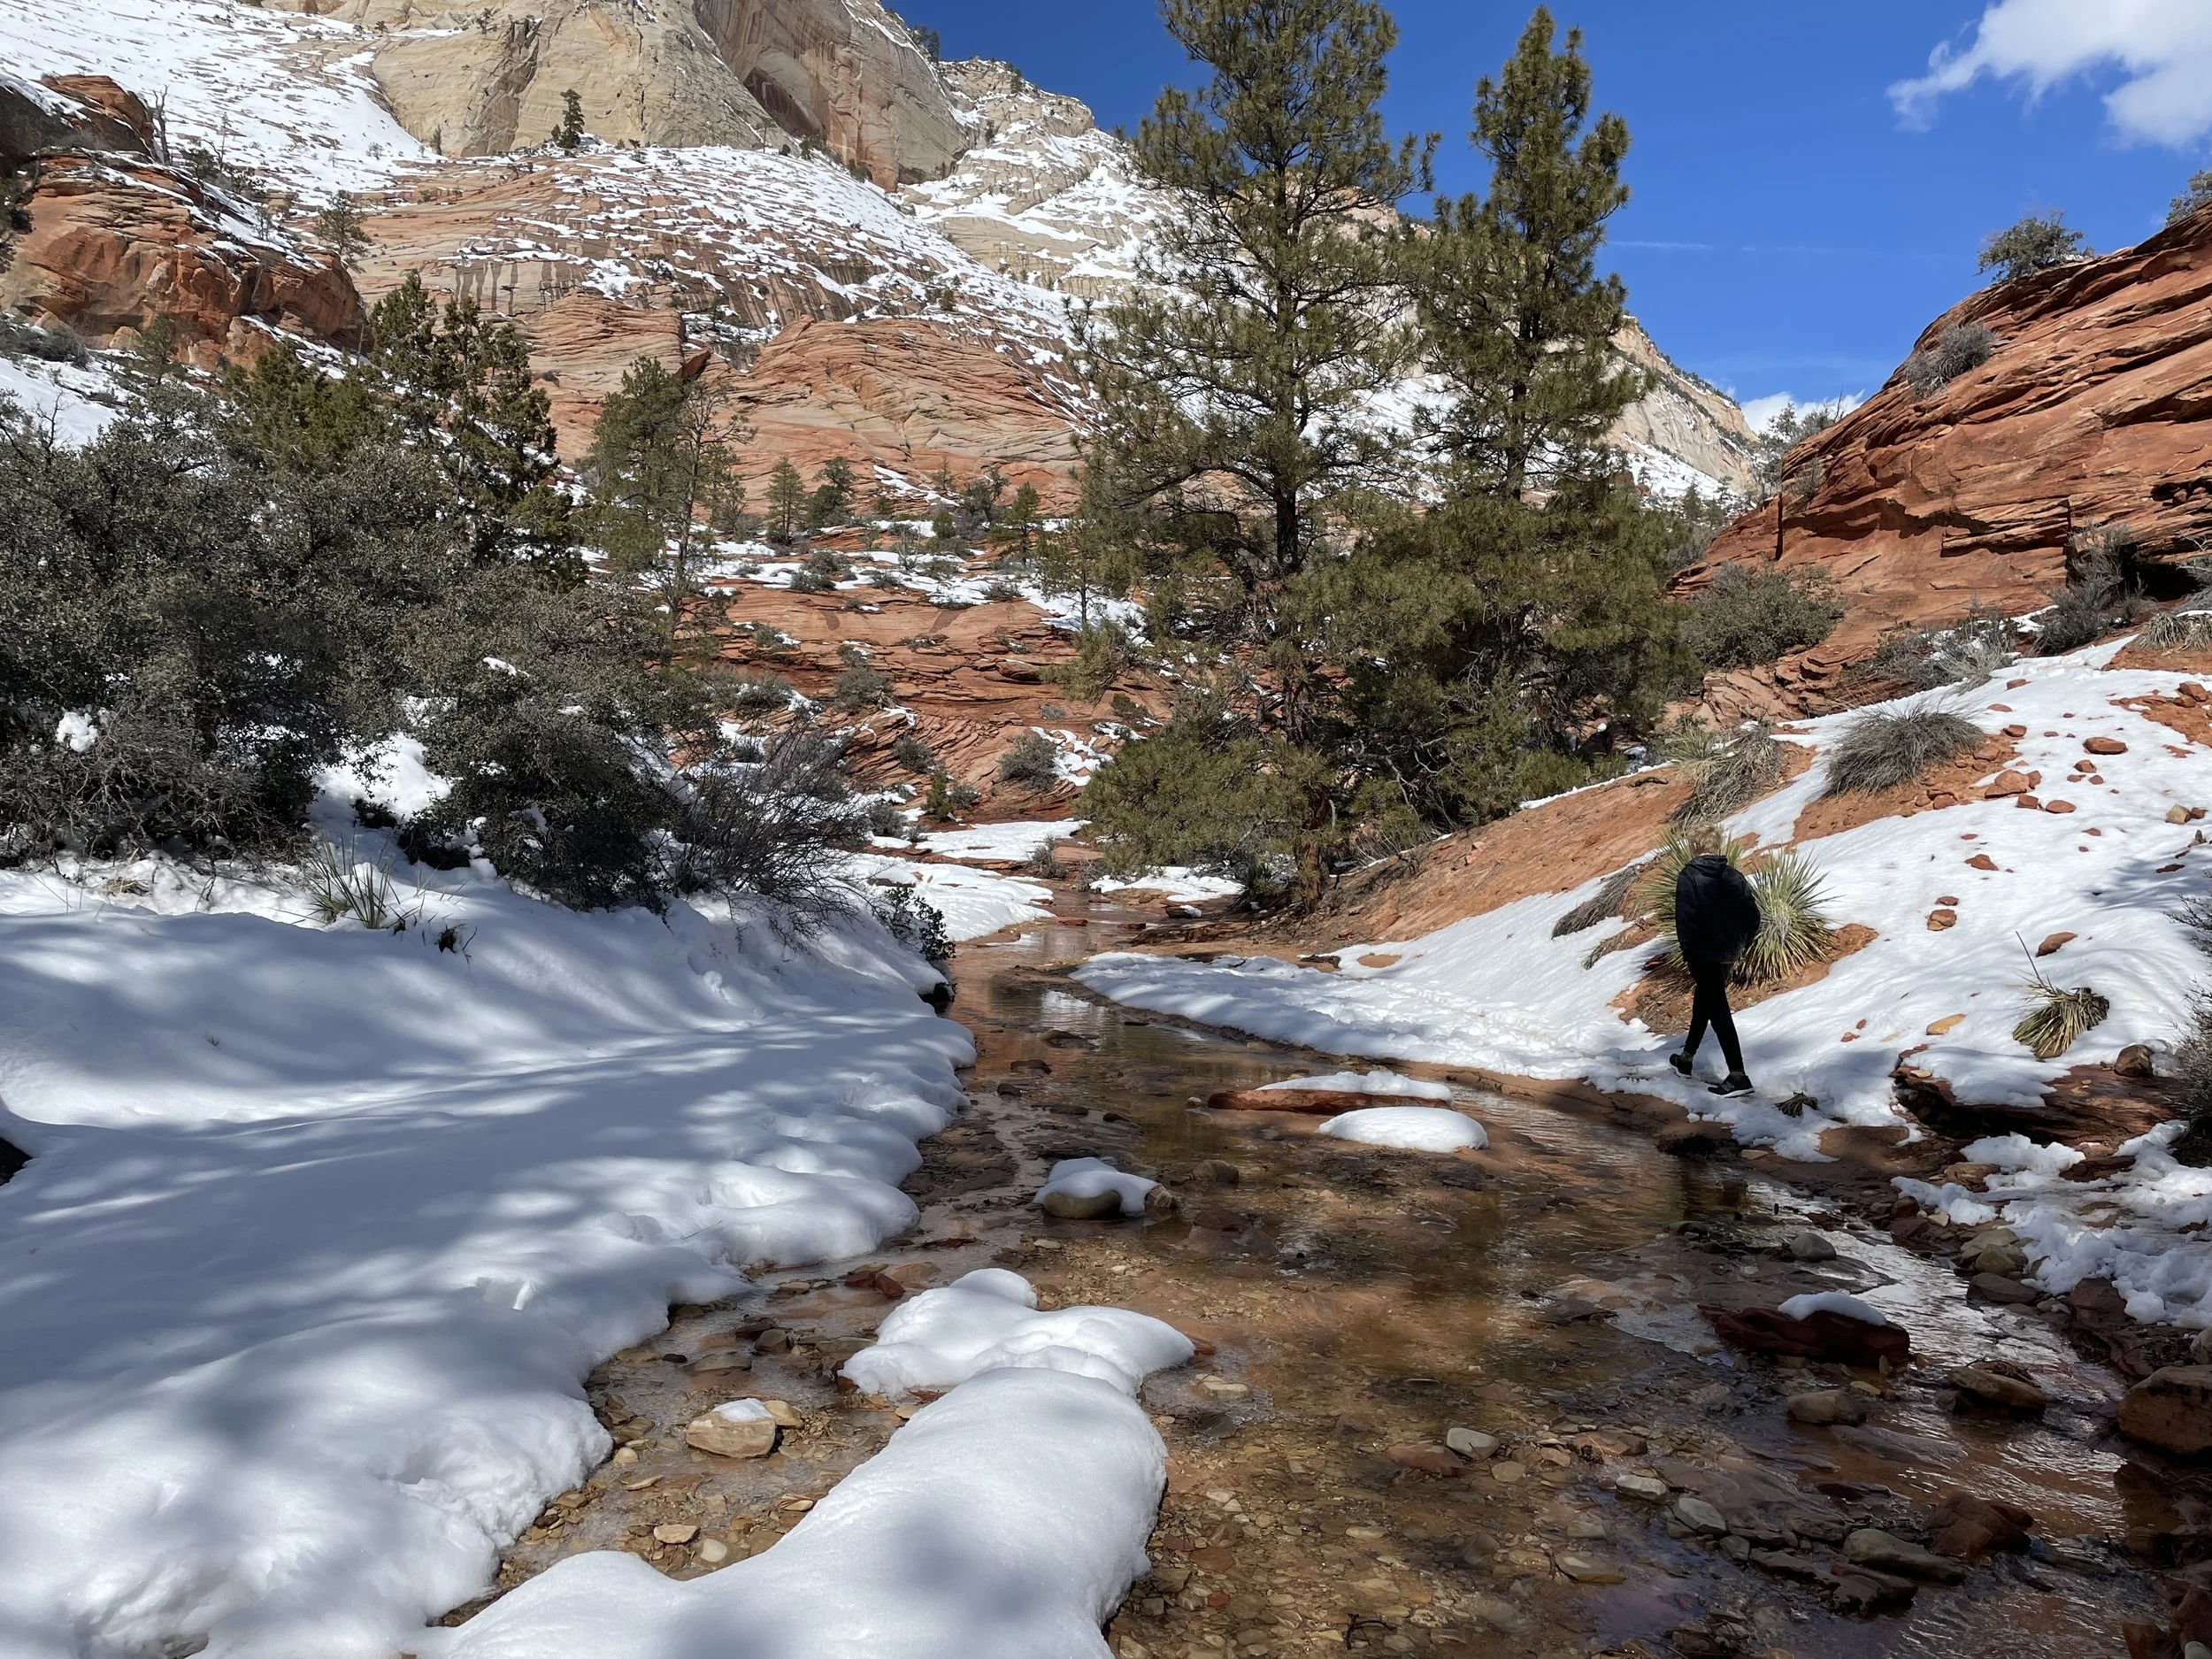
Five of our trips to Zion have been over spring break, and this is a great time to visit the park for most of the trails. Over the years we have encountered absolutely perfect weather - sunny, mid 70s, and we’ve had some trips with slight amounts of snow. I’ve tried to visit Kolob Canyon twice in March, however, and both times were epic fails due to several inches of snow and clouds that hung so low the canyon couldn’t be viewed. Kolob Canyon is better suited for warmer weather but be aware that summer afternoons are quite hot without much available shade.
March 2019 - Timber Creek in Kolob Canyon, Zion National Park
Our one summer trip to Zion was June 2025. It did get up to 106 deg F one day. I would say this would be awful conditions for any hike that doesn’t involve being in the water. But there are some great options that involve wet feet. We had a great day hiking the Narrows top down and had some fun rappelling through a slot canyon with water so cold that we needed wet suits.
June 2025 - On our way into Keyhole Canyon
I’d recommend at least two full days to enjoy Zion. For avid hikers, it would be easy to spend a week here. As I mentioned, we’ve been here 6 times and only repeated a handful of hikes, with several more that we still want to try.
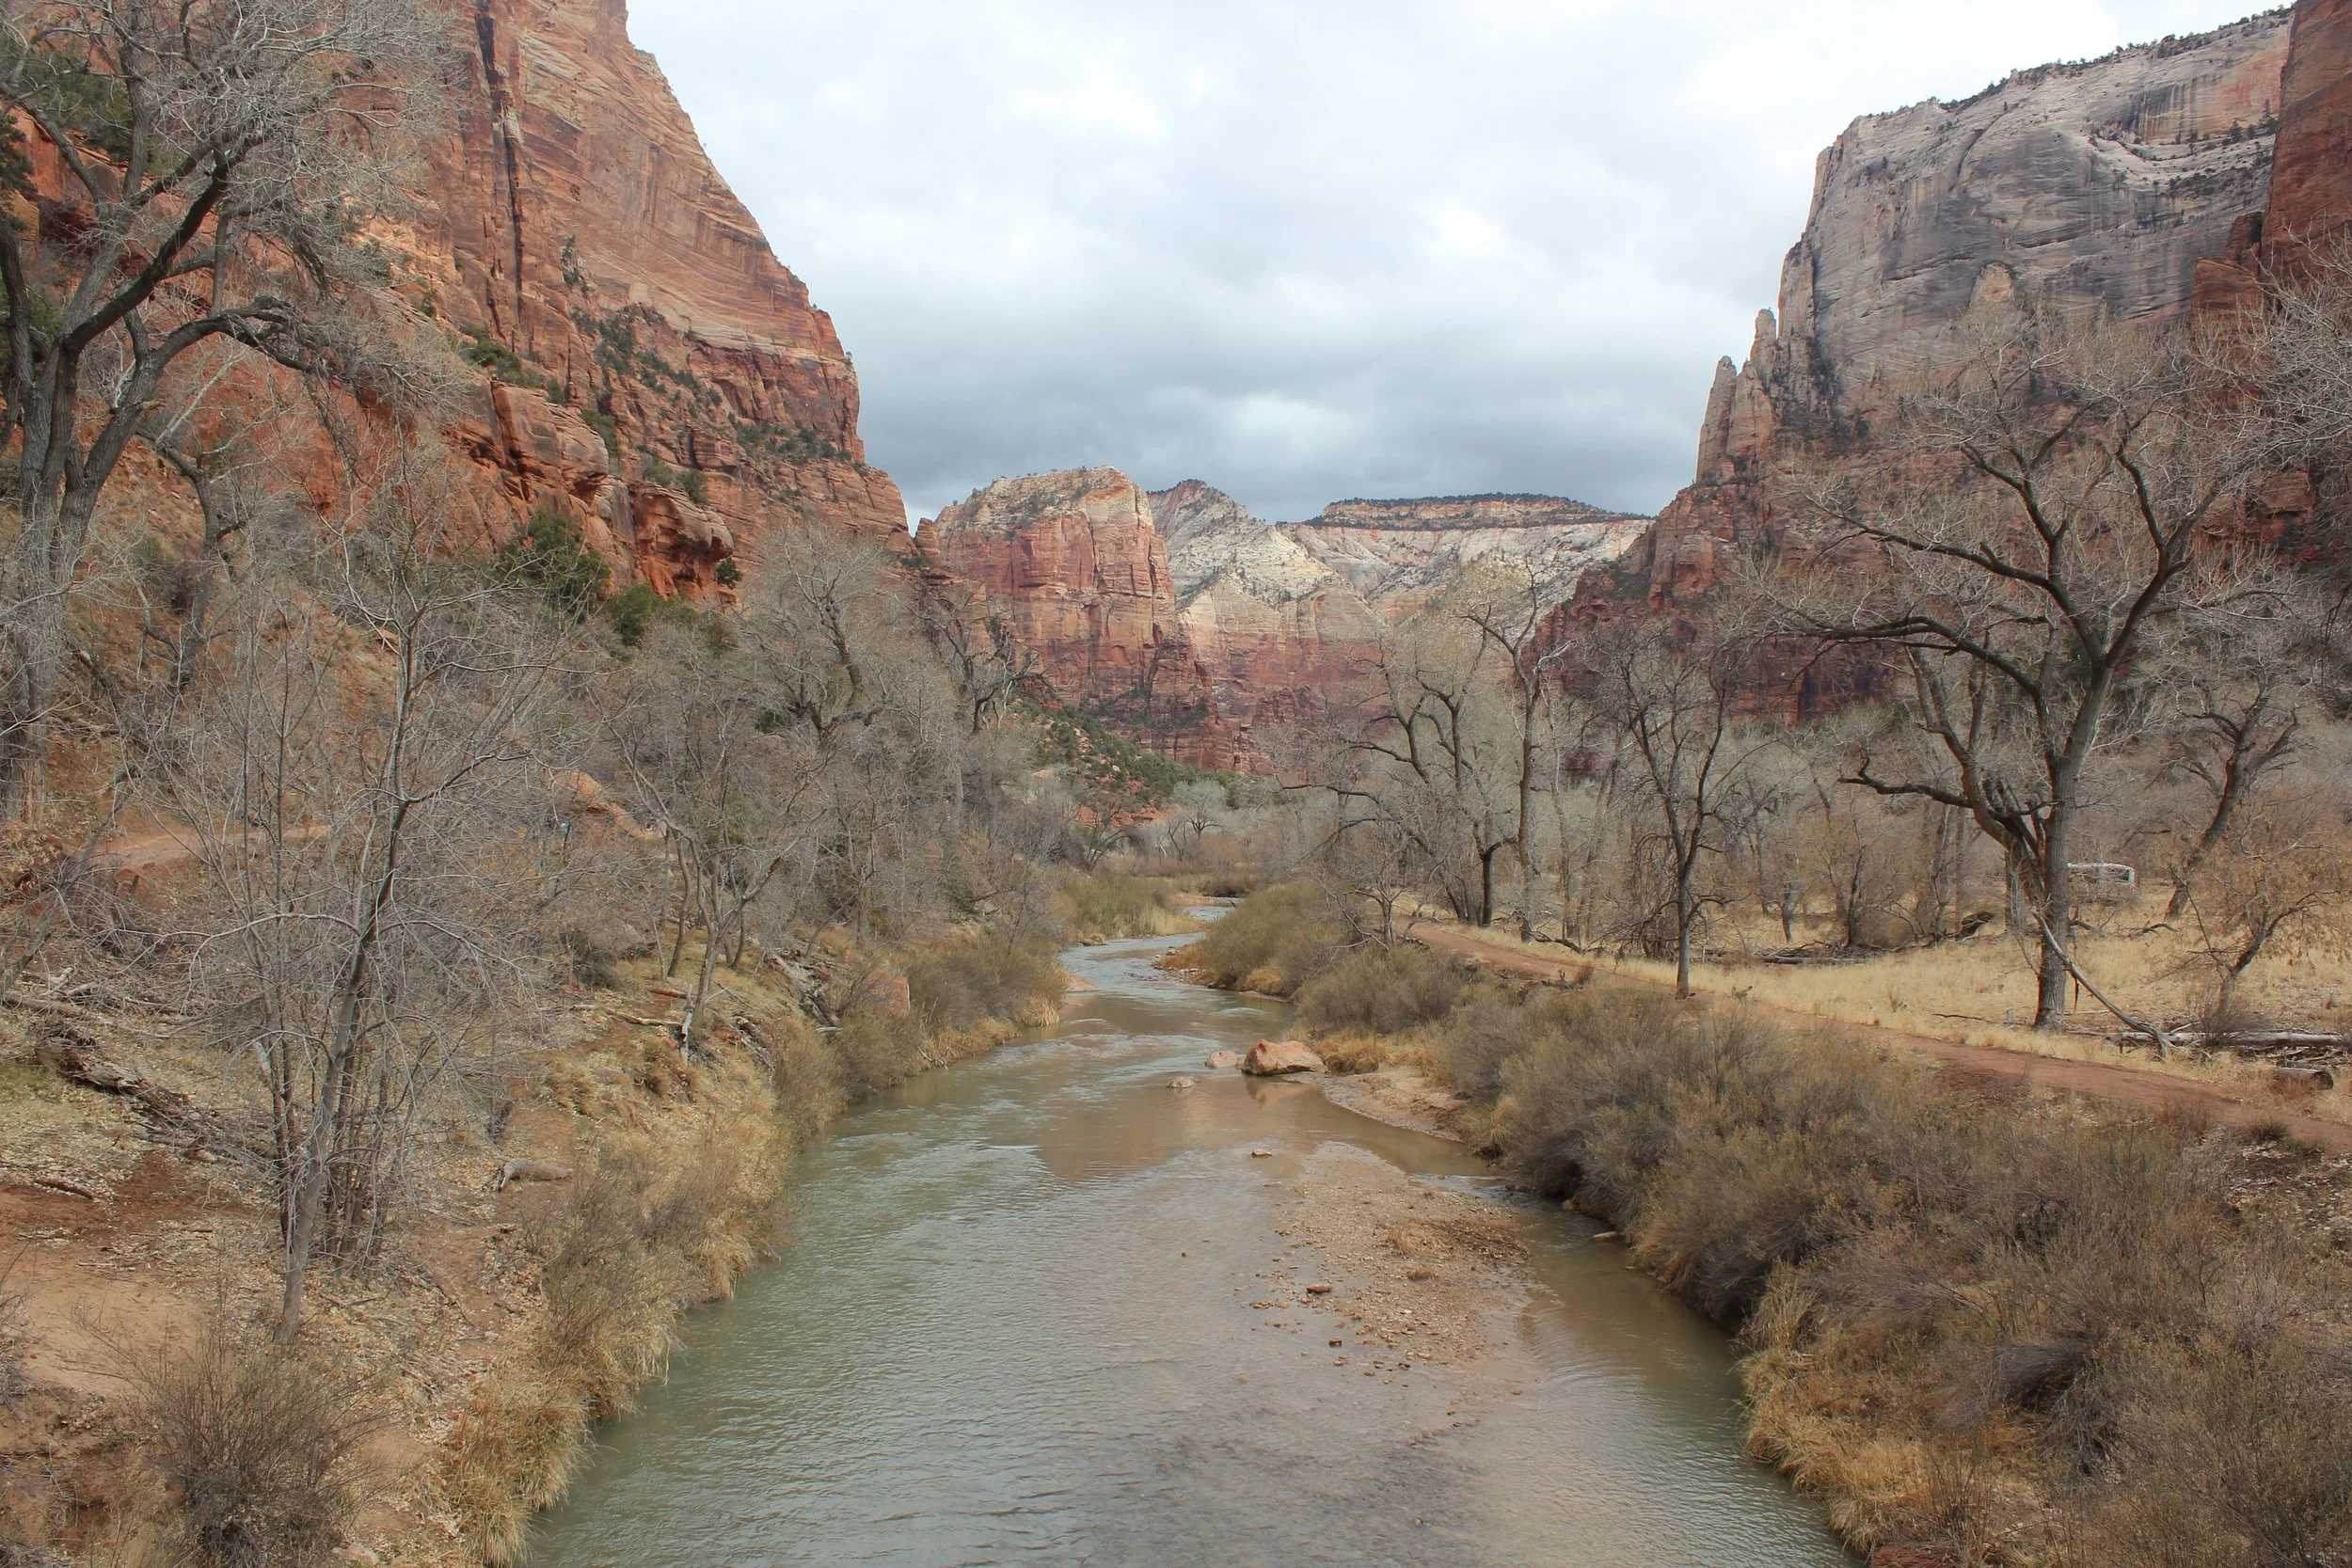
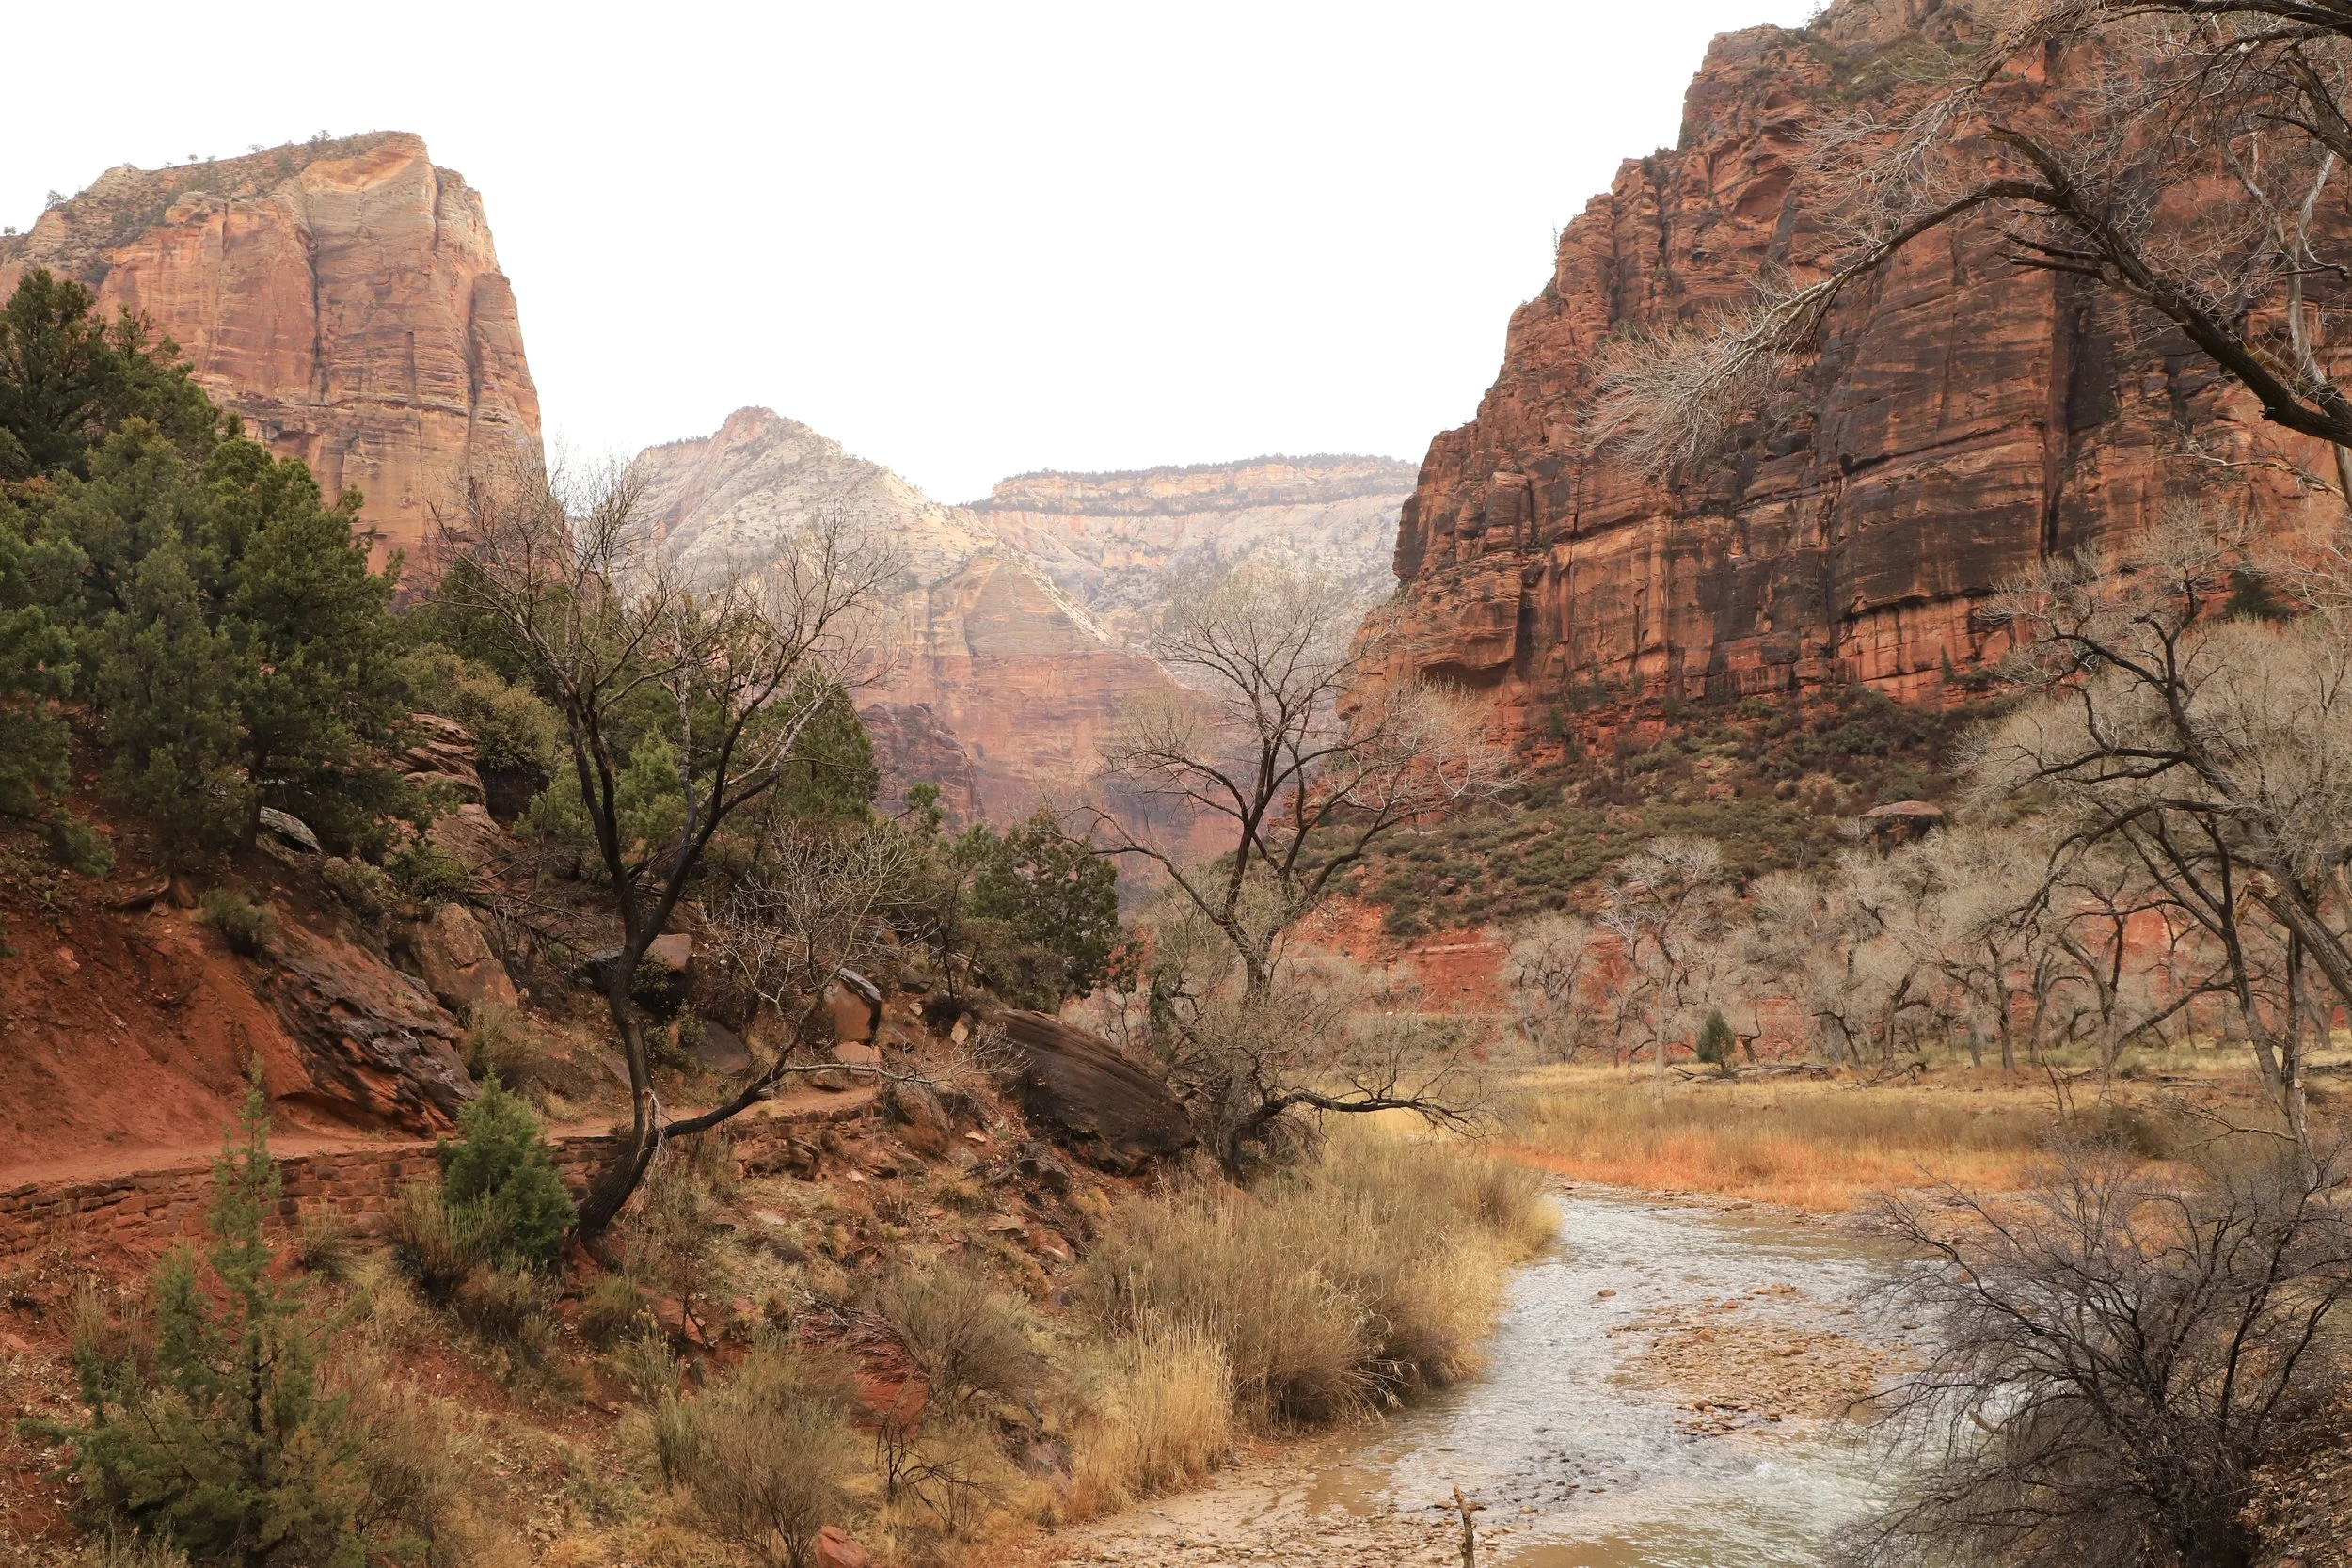
I absolutely love the Virgin River and any of the easy hikes along the riverbank (or in the river) should be on an itinerary. Zion is different than the Grand Canyon and Bryce Canyon - In Zion, you enter the park at the bottom of the canyon and look up. Pa’rus Trail isn’t a busy trail and it’s lovely. Conversely, the Riverside Walk is also beautiful, but it’s going to be crazy busy. Kayenta Trail also follows the Virigin River, and makes for an interesting one-way hike when combined with Emerald Pools and Zion’s free shuttle. Sand Bench Trail is another option along the Virgin River that we have not hiked.
March 2018 - Zion National Park - Pa’rus Trail
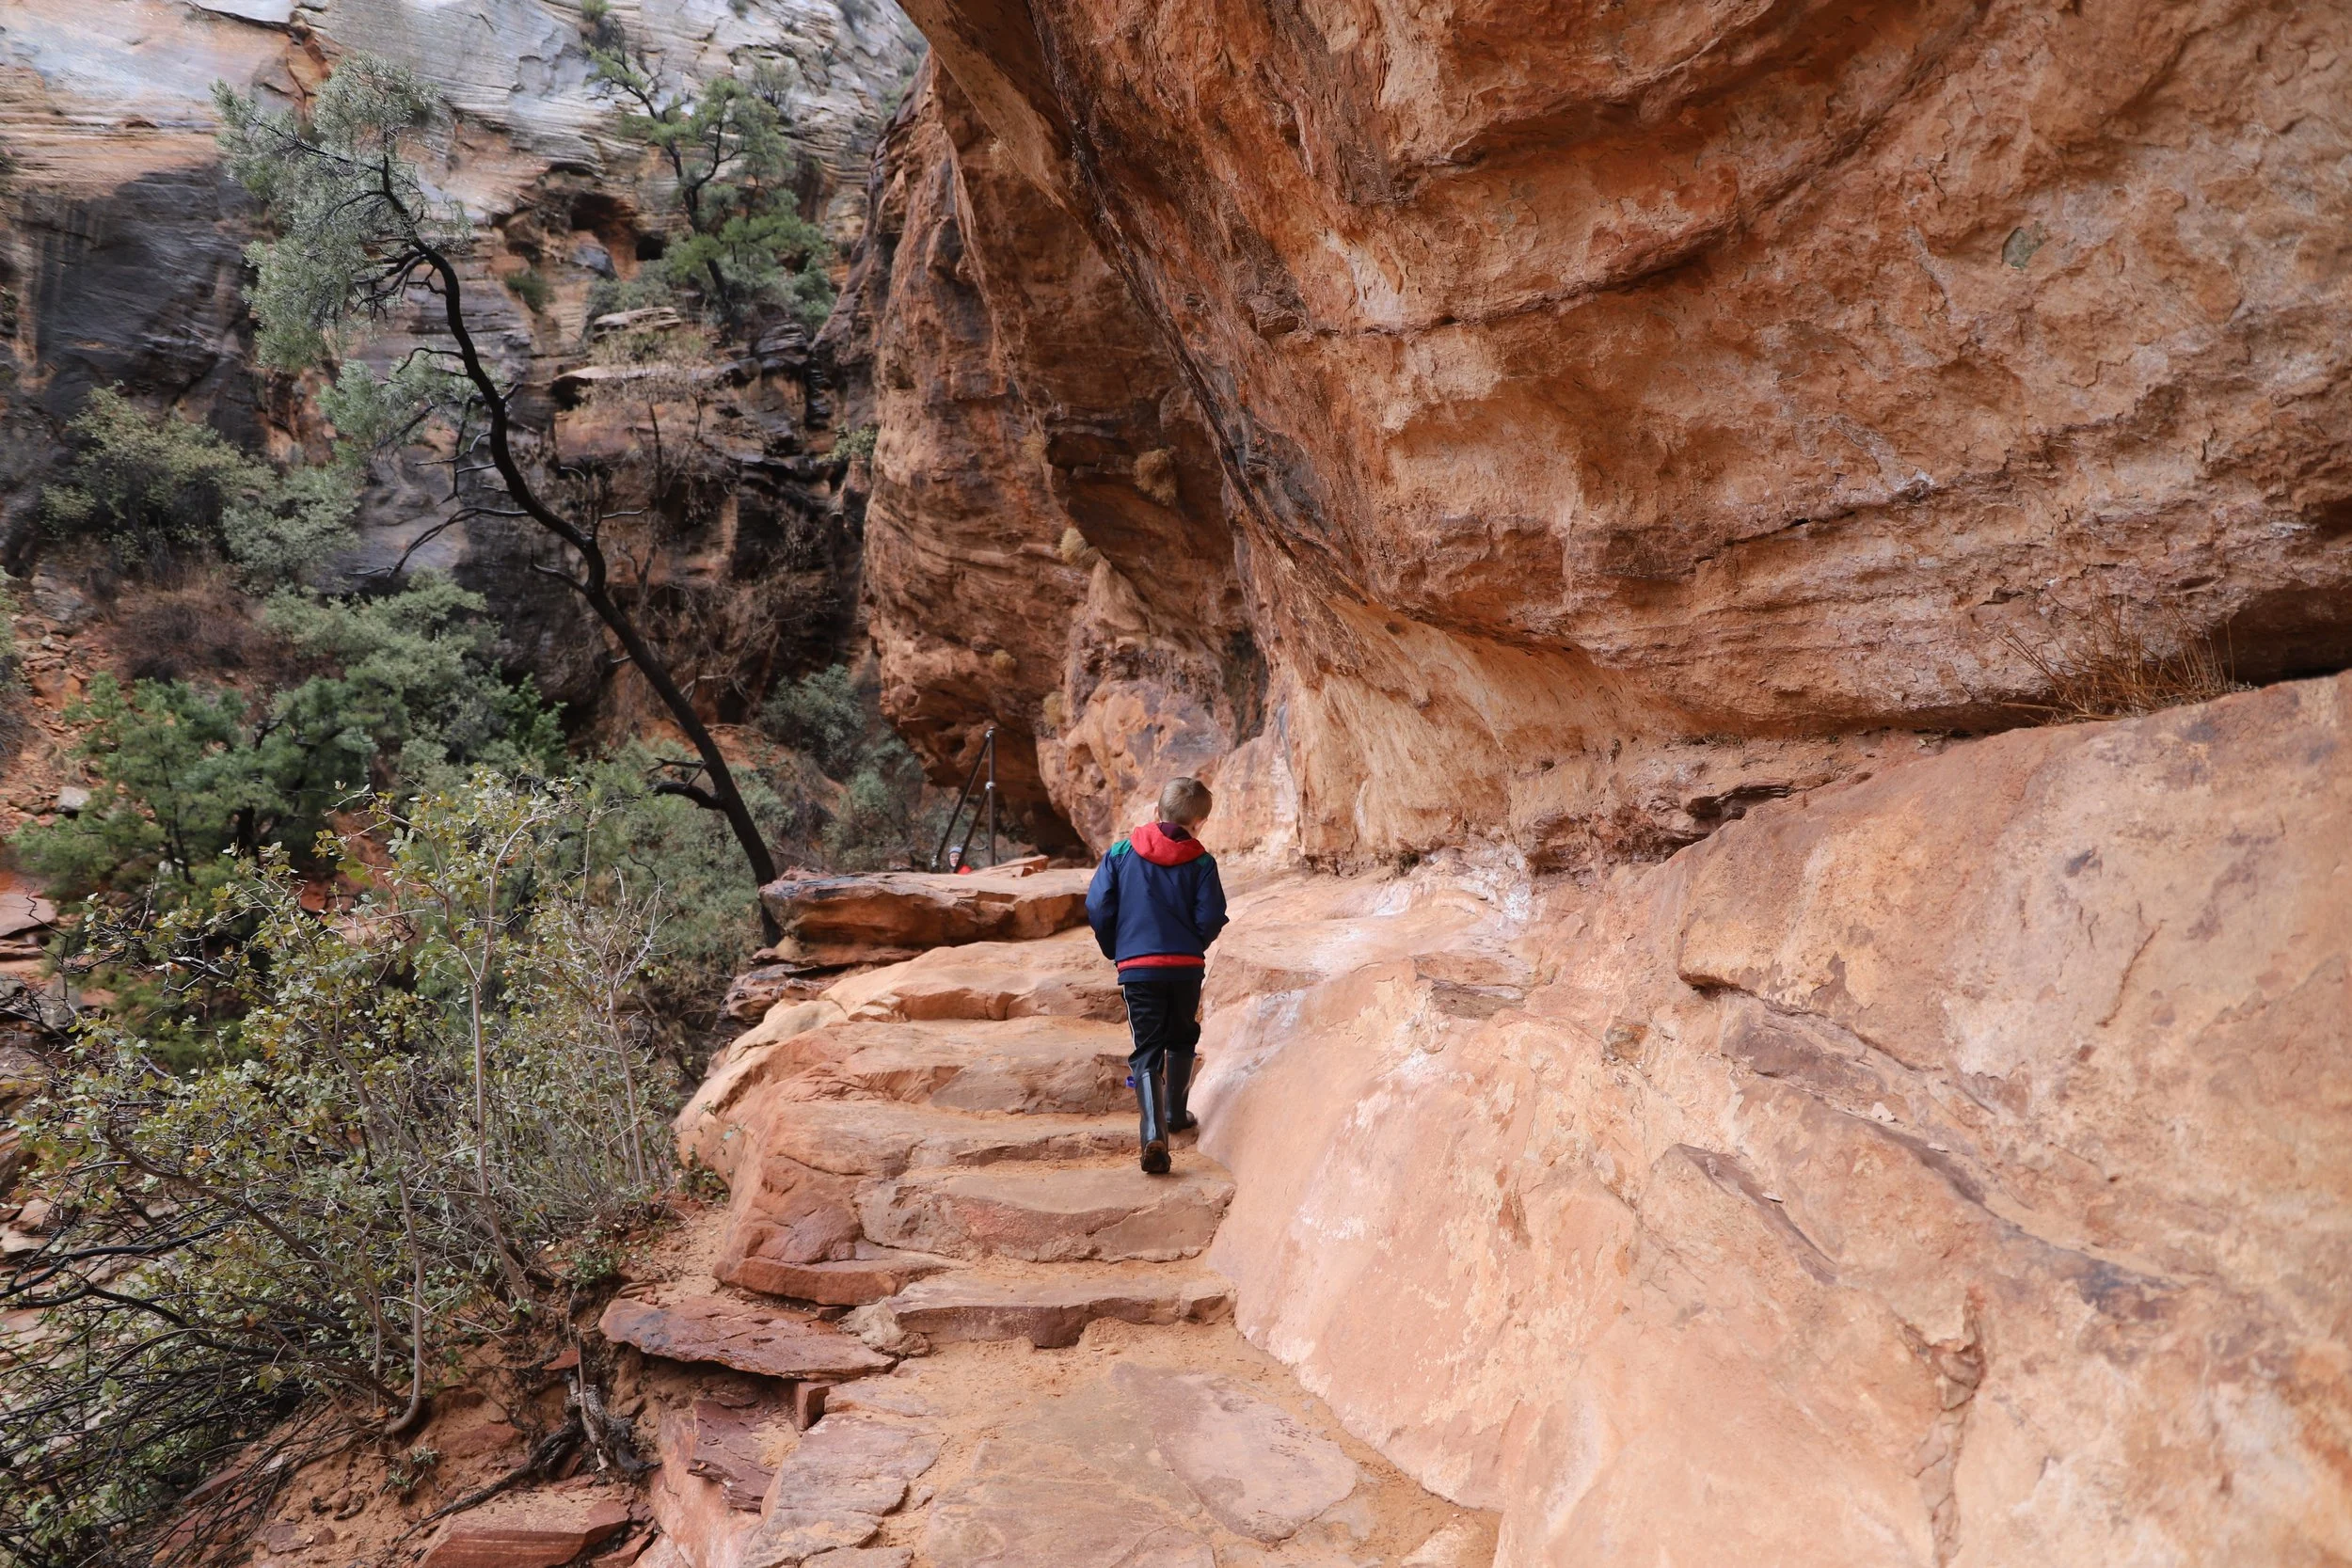
My other must-do recommendation is to visit the east side of the park. Drive through the Zion-Mount Carmel Tunnel. Parking is difficult, but my absolute favorite easy hike in the park is the Canyon Overlook Trail, which is the first parking lot east of the tunnel. After the Overlook Trail, continue east-ward, and park at any of the pullouts and explore. We’ve found petroglyphs and waterfalls. Compared to how many people are on the trails near the main Springdale entrance, it’s shocking how few visitors there are on the east side of the park. These informal “trails” aren’t marked. Stick to the slickrock to avoid creating a trail, follow the waterways, and see what you can find. If that’s a bit too adventurous, pre-download trail maps on AllTrails or GAIA apps.
March 2023 - Zion National Park - Cascade Falls (Many Pools)
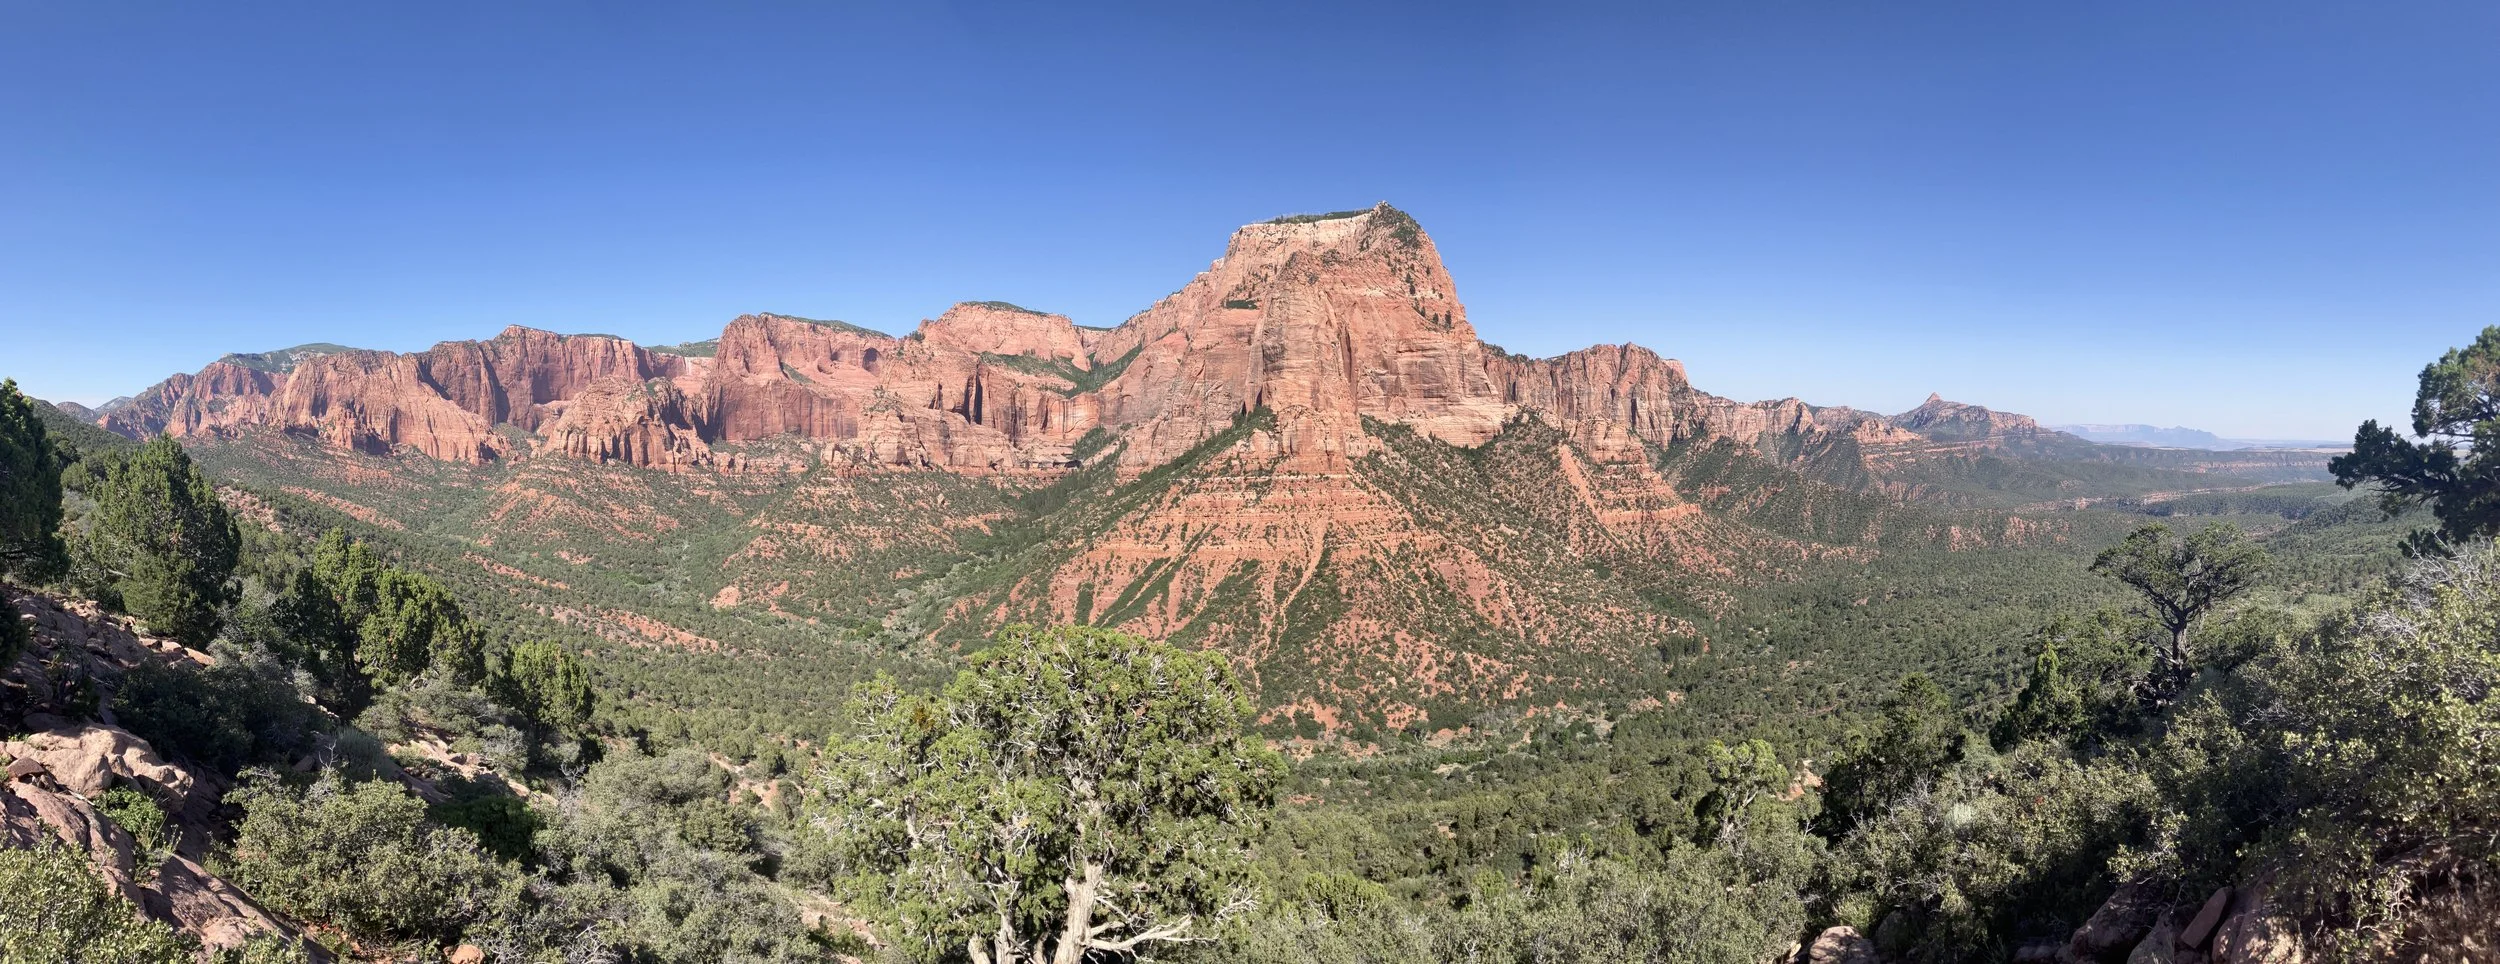
If it isn’t snowing, my third recommendation would be to spend a half to full day over at Kolob Canyon on the northwest side of the park. This part of the park is not connected to the other entrances. Head north along I15 from Springdale. Kolob Canyon has its own exit from I15. This part of Zion is just as pretty as the main part of the park, with well-marked trails, and very few visitors. For anyone looking just for views without hiking required, drive all the way to the end of the road at Timber Creek. The parking lot includes a particularly stunning view. This part of the park is quite a bit higher in elevation, however, expect snow in the winter months.
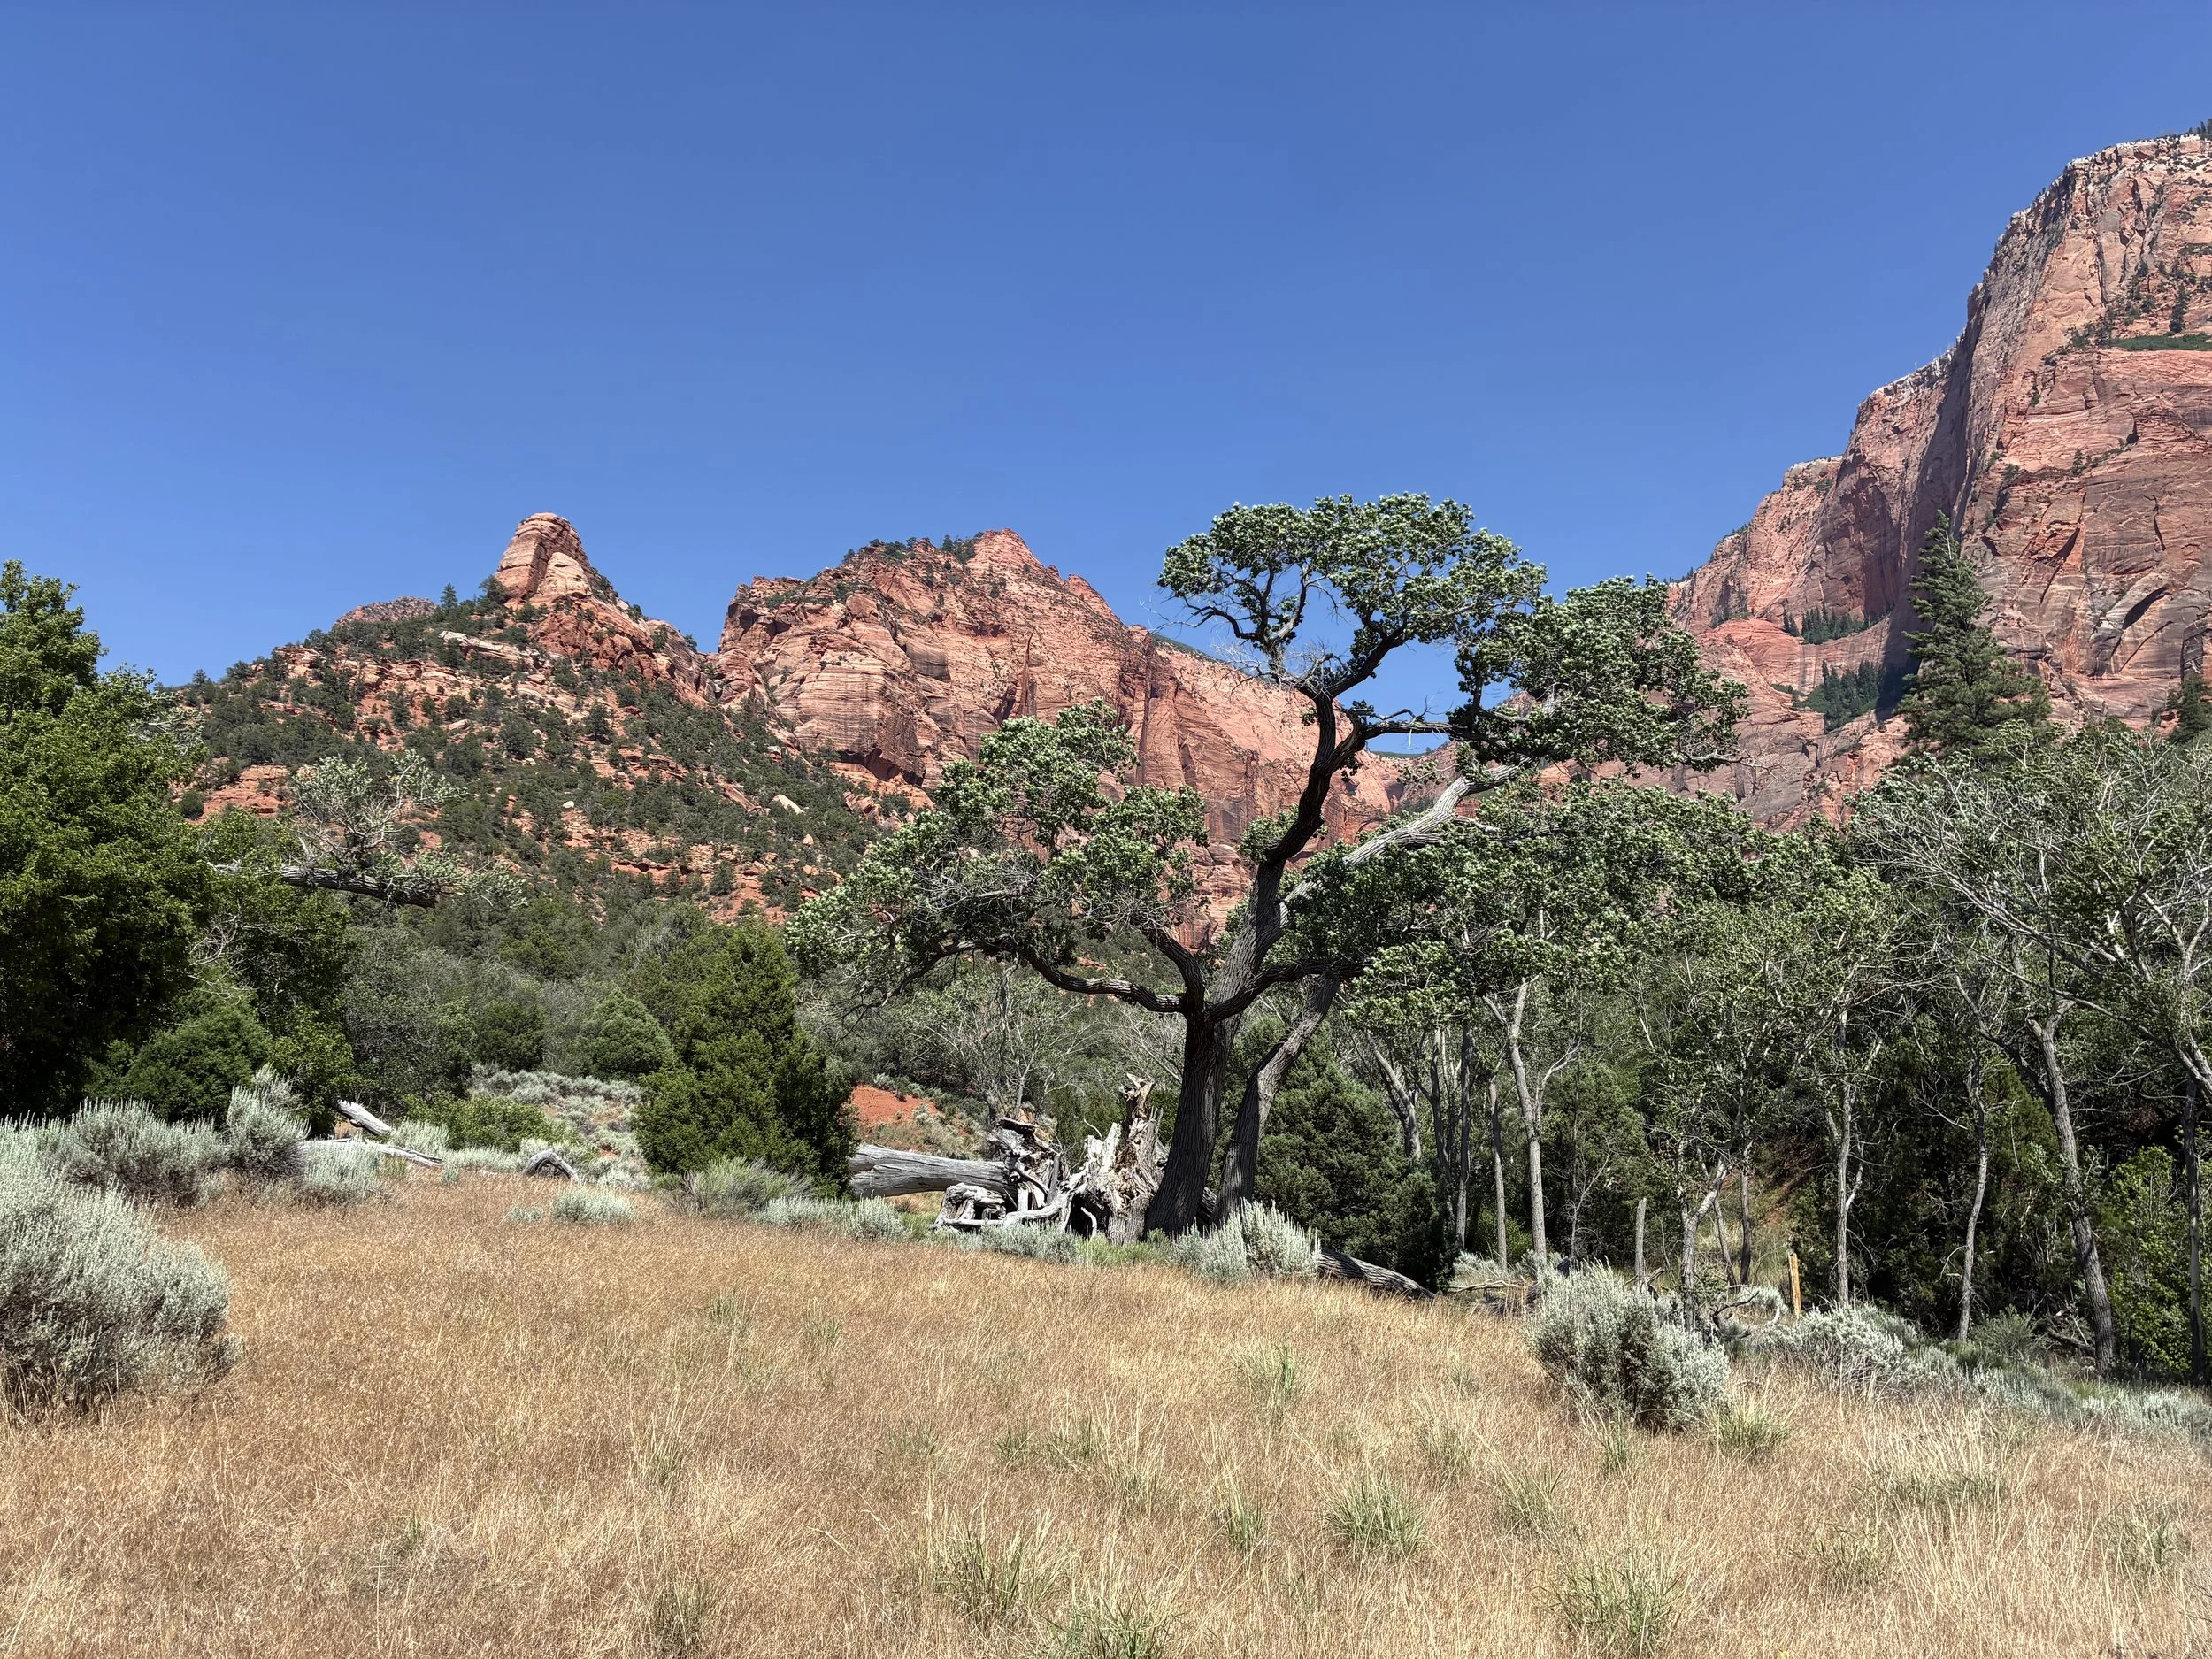
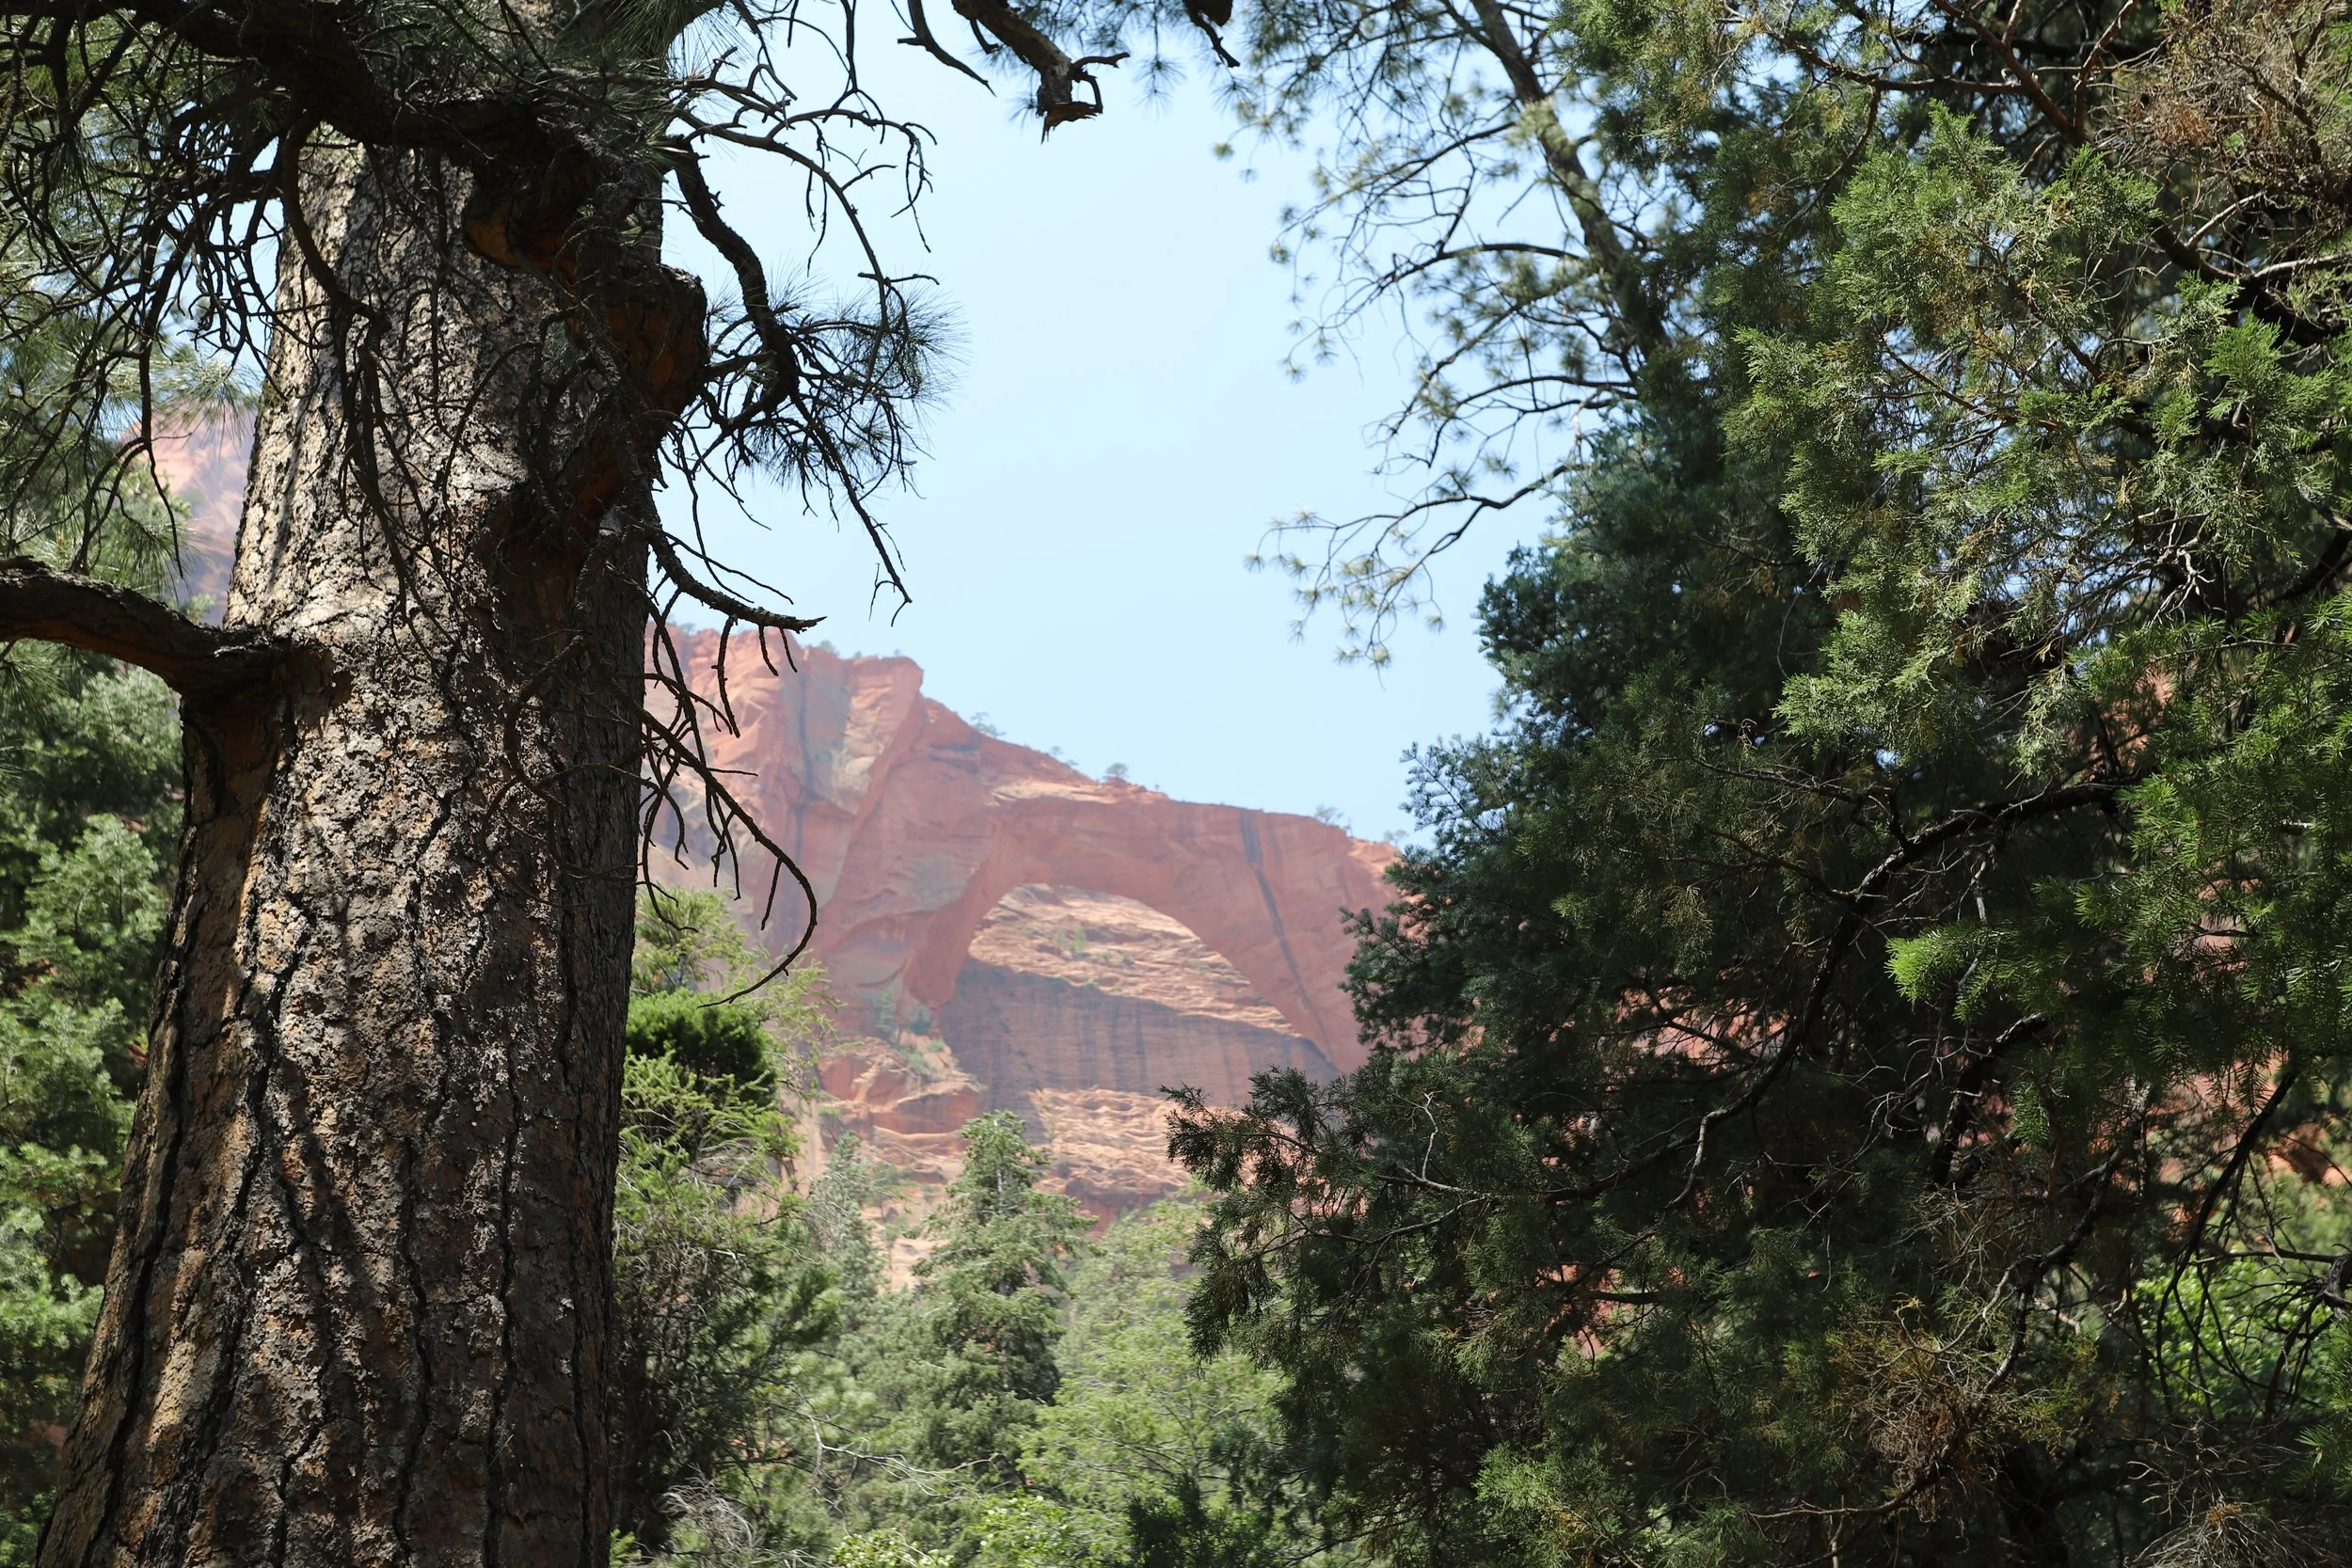
June 2025 - Kolob Canyon - This picture is from the beginning of La Verkin Creek on our way to Kolob Arch trail. This view is pretty similar to what is visible from the road. For non-hikers, this would be a worthwhile trek for the beautiful views from the road.
Additionally, there are some fun places to hike nearby but outside of Zion - check out the map below for other places closer to St. George and Kanab. Click the pins for additional posts. I’ll have additional links to these posts at the end.
Lodging Options and Nearby Towns
There are three main lodging options in and around Zion National Park - camping, cabins, and hotels. There are campgrounds directly inside of Zion National Park. The other lodging options are going to be located in Springdale (right next to the main entrance on the west side of the park), St. George (about an hour west of the main entrance), and Kanab (about 40 minutes southeast of the east entrance). Throughout our trips, we’ve stayed in all places.
Springdale is the most obvious choice for anyone that hasn’t been to Zion before due to its close proximity to the park entrance, which makes it a convenient choice. I think the three main downsides to staying in Springdale are limited options for food (and it’s going to be really busy at all of them), difficulty parking anywhere except your hotel and the park visitor center, and turning onto the Zion-Mount Carmel Highway (when you leave the hotel) is busy at just about any time of day.
March 2018 - Watching the sunrise from our hotel room at Zion Canyon Lodge in Springdale, Utah
St. George is probably the least obvious choice due to being further away from the park. The huge benefit of staying in St. George though is that it’s a pretty decent sized city. There are tons of hotels, places to eat, and shops in case you have forgotten something or broken something… We had to replace a pair of my boy’s shoes one year as they had literally hiked through them by this point in our trip. The hour-long drive to Zion means waking up earlier to be able to find a parking spot at the lot in the visitor center, but there are some big advantages in the afternoon / evening. There are also lots of other fun places to hike outside of Zion that are close to St. George - Snow Canyon State Park, Yant Flat Candy Cliffs, Red Reef Trail (and dinosaur tracks), Pioneer Park, and Kanarra Falls. In June 2025, we stayed in Hurricane - a midpoint between Springdale and St. George. We stayed in an air-conditioned cabin at a KOA. That was honestly perfect as we spent time at Kanarra Falls, Yant Flats, Kolob Canyon, and a couple of hikes in the main part of Zion, and we splurged on suppers at Olive Garden (our boy’s favorite), Hungry Howie’s Pizza (a favorite of ours from Arizona State University), and In N Out Burger (I honestly don’t understand why we don’t have these in the midwest…).
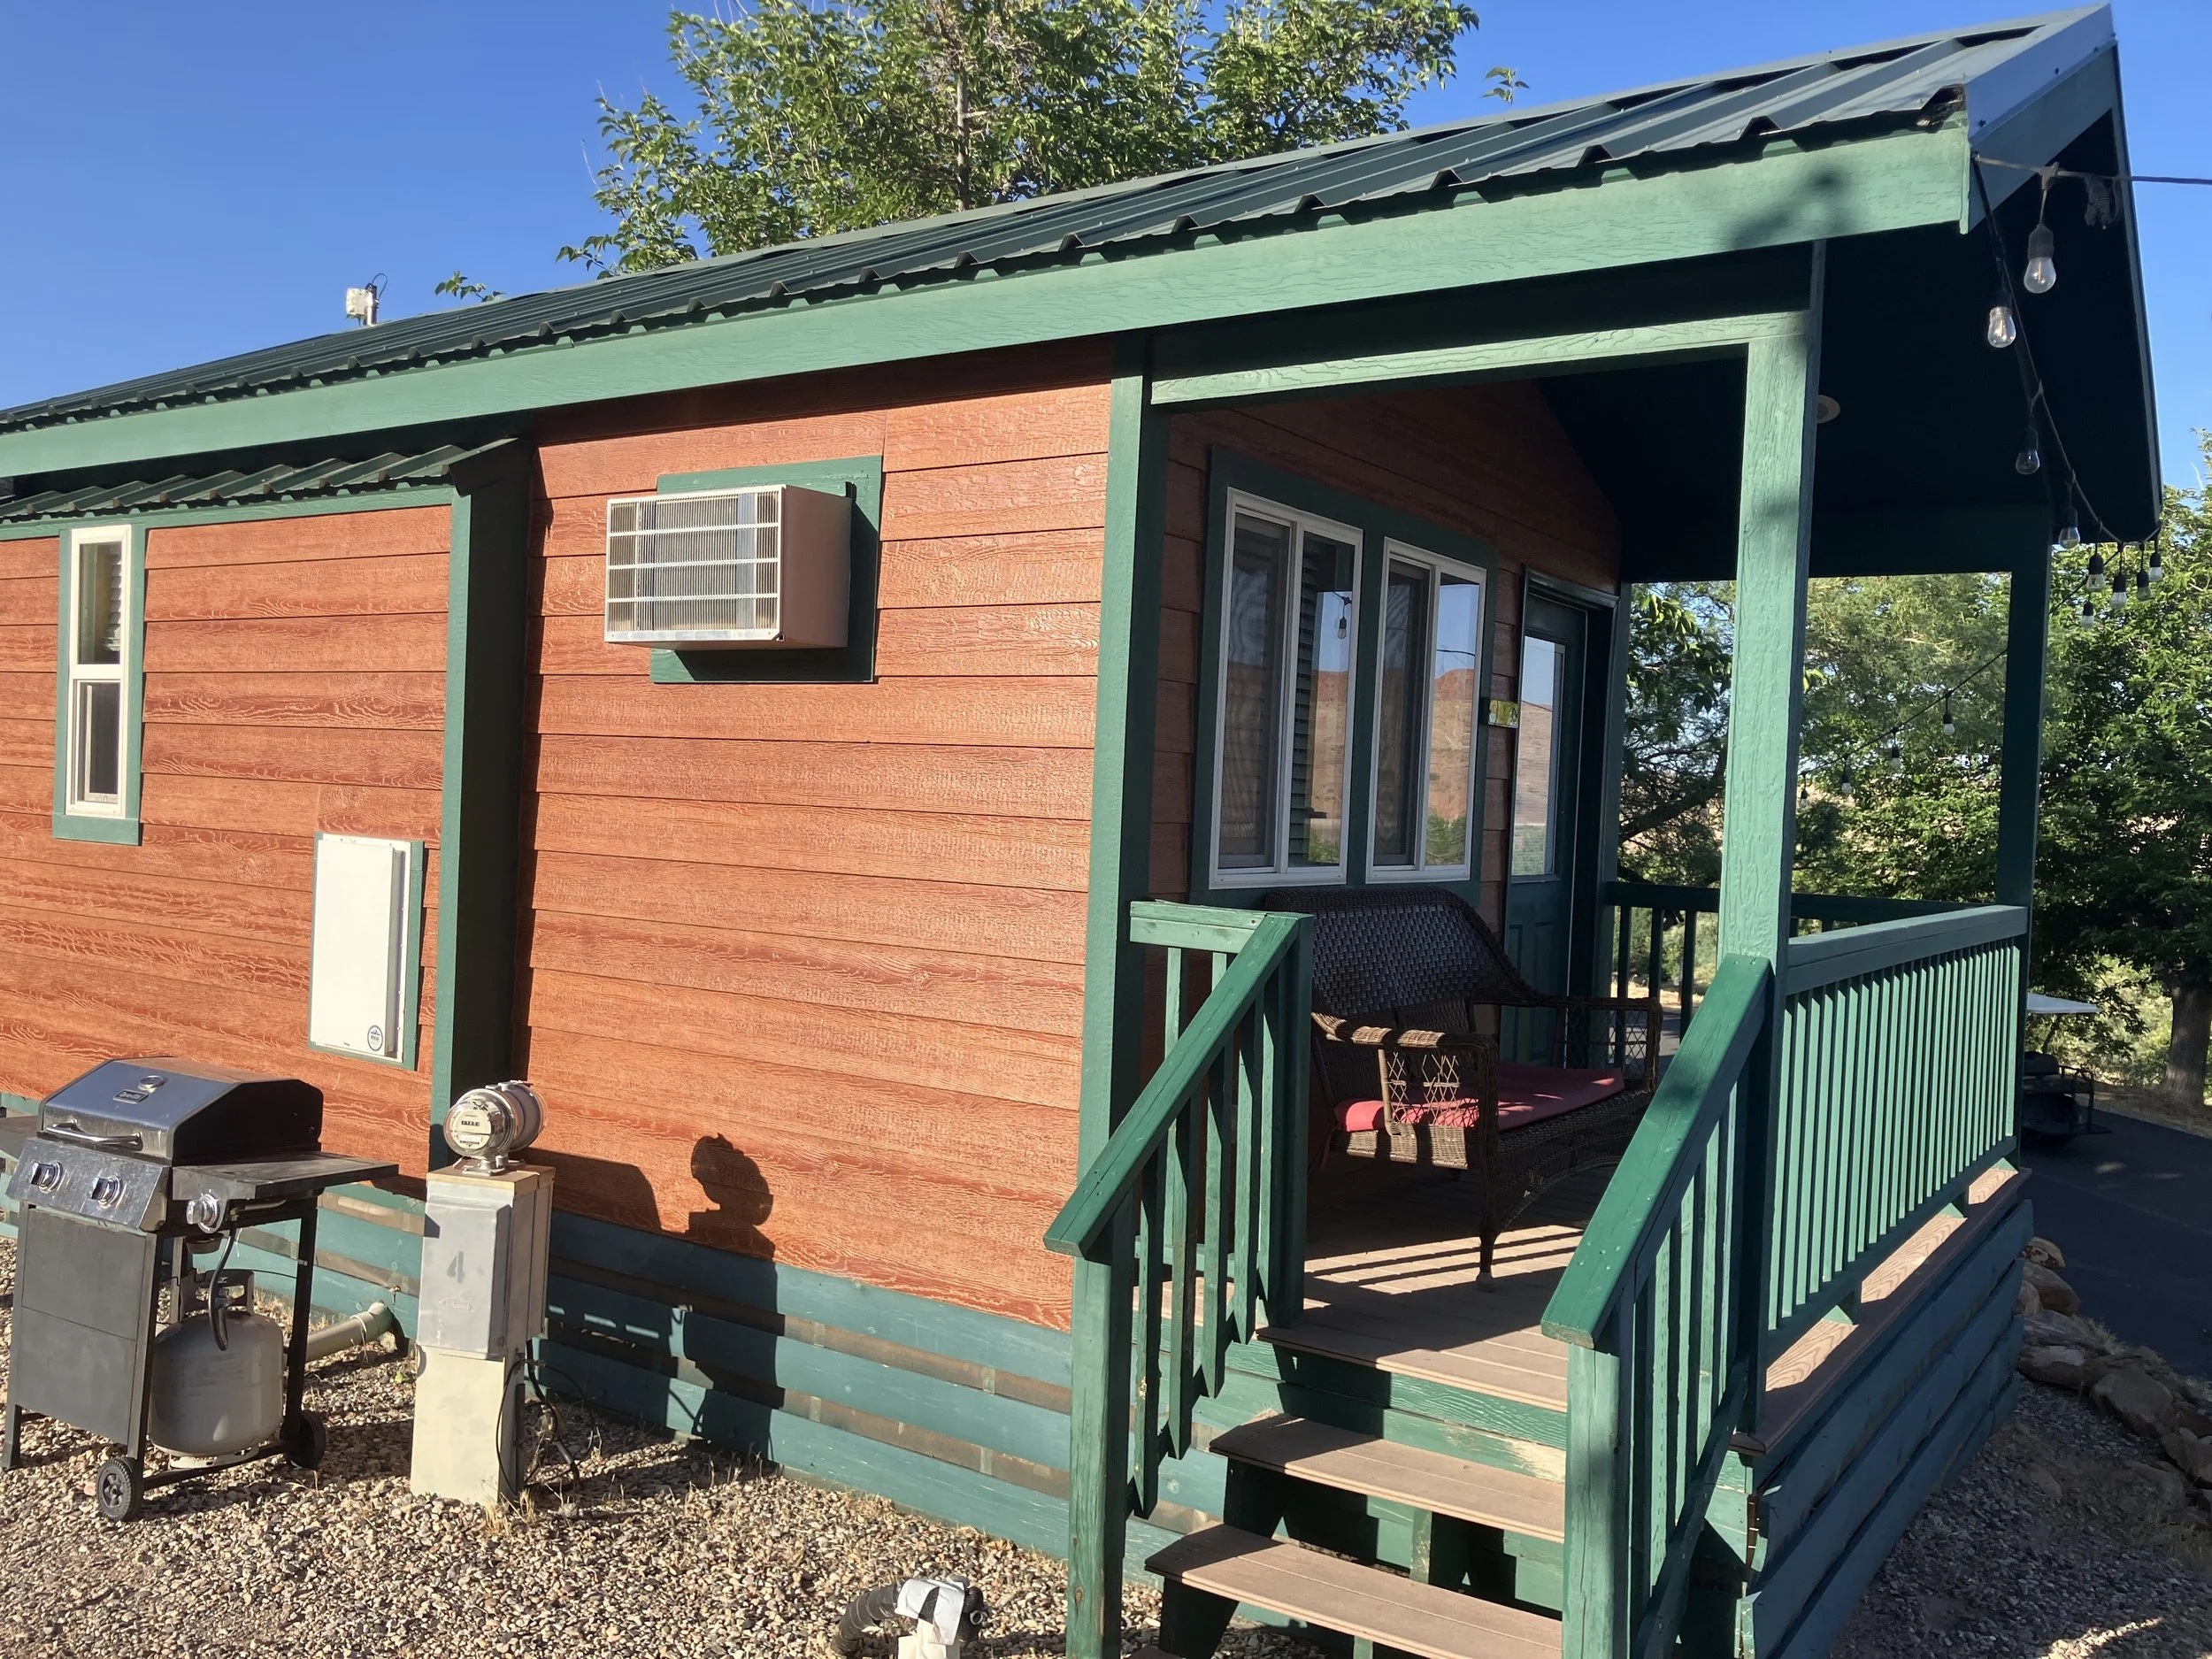
June 2025 - Staying at a cabin in a KOA Campground in Hurricane, Utah (just outside of St. George).
Kanab is the third choice, and I don’t mean to make it sound like it’s the lowest option of the three. We’ve stayed in Kanab twice. I strongly prefer the Hampton Inn over Days Inn… But we may just have hit the Days Inn during a time of construction, maybe. Kanab is fun because it has a super small town feel without the crowds of a nearby National Park. Most of the restaurants are locally owned, which are fun to try out. We loved the low key, great food, and reasonable prices at Don Beto’s Mexican Food. The pizza was great at Lotsa Motsa Pizza. We’ve been to Escobar’s Mexican Restaurant twice because we enjoyed it so much. Staying in Kanab opens up some other options as well. It’s close to Coral Pink Sand Dunes State Park, as well as any day excursions you might want to plan (UTV rentals, All Ways Adventures, etc.) which operate out of Kanab. Kanab is a good option - don’t assume you have to get a hotel in Springdale.
Hiking at Zion National Park
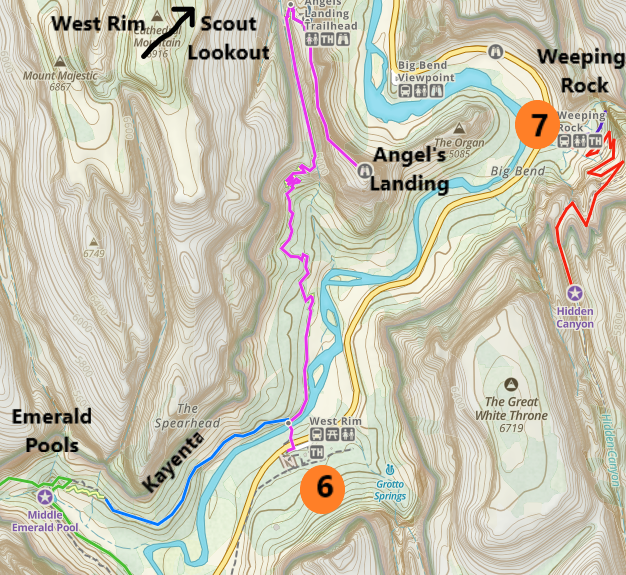
The below map gives a high-level view of where the trailheads, visitor centers, and other places of interest in Zion. Sometimes it’s nice to simply see where things are at (what’s near what) so you can easily plan your trip. I’ll use the same numbering system throughout the rest of this post. There are hyperlinks as well - if you click on the trail names, it will bring you to descriptions of each trail as well as pictures. This is a long post, so the hyperlinks can help you navigate quickly through it if there are specific trails you already know you are interested in. There will be a link back to this map at the end of each trail description.

Points of Interest (red): A - Kolob Canyons Visitor Center, B - Zion Canyon Visitor Center, C - Zion National Park Lodge, D - Zion East Entrance
Easy Trails (green): 3 - Timber Creek, 6 - Pa’rus, 12 - Weeping Rock, 14 - Riverside Walk, 18 - Canyon Overlook, 20 - Cascade Falls (Many Pools), 21 - Petroglyph Canyon
Moderate Trails (yellow): 1 - Taylor Creek, 5 - Watchman Overlook, 7 - Emerald Pools, 8 - Kayenta Trail, 13 - Hidden Canyon, 17 - Pine Creek Waterfall, 19 - Hobbit Hole*
Hard Trails (blue): 2 - Kolob Arch, 10 - Scout’s Lookout, 11 - West Rim Trail, 15 - Narrows Bottom-Up, 23 - Observation Point / East Rim Trail*
Permit Required (purple): 4 - Subway (Technical Canyoneering Required)*, 9 - Angel’s Landing, 16 - Narrows Top-Down, 22 - Keyhole Canyon (Technical Canyoneering Required)
*Gray circles indicate trails that I have marked for my next trip(s) to Zion - I have not yet hiked these trails; therefore, I will not include a review. I have them marked however for anyone interested in looking them up on your own.
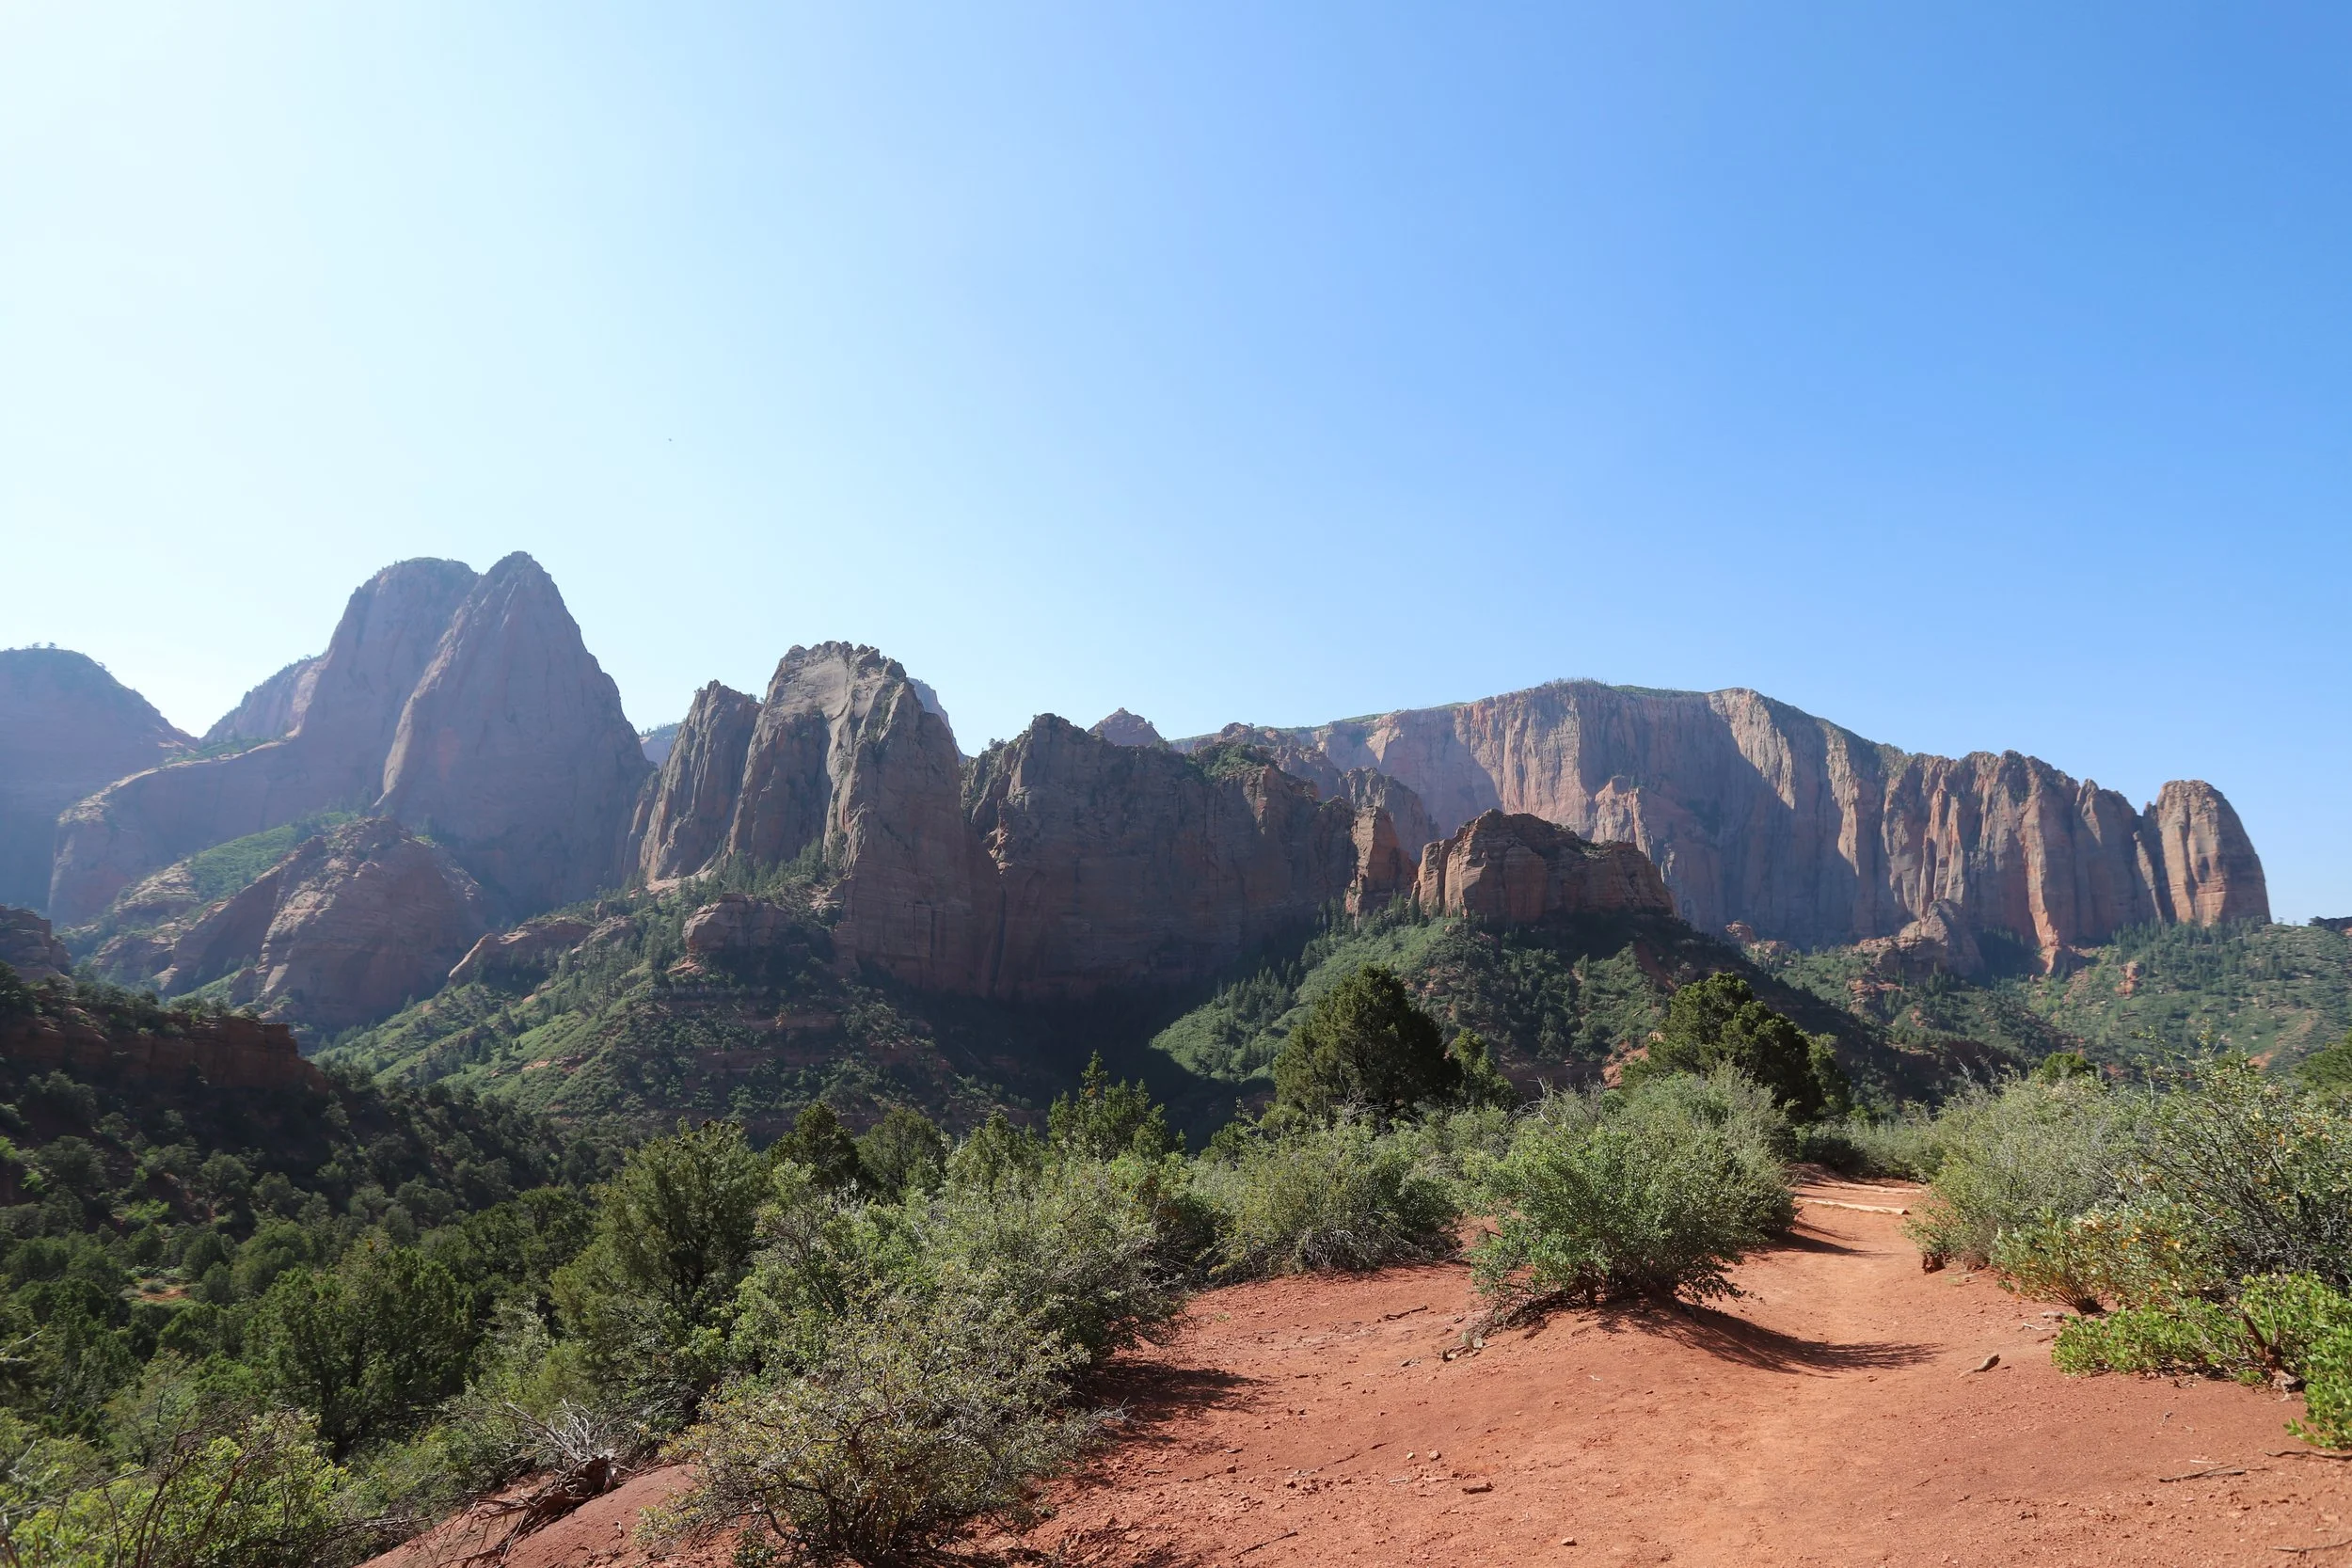
Kolob Canyon
The trails of Kolob are located in a separate part of Zion National Park. I’m starting with this part of the National Park due to it being quiet, much less visited, and just as beautiful as the main part of the park. This is usually what I’m looking for first - the hidden, less-traveled parts of a park. To get to Kolob Canyon, take I-15 going north. Take exit 40 - to Kolob Canyon on E Kolob Canyons Road. The Visitor Center is located right near the exit. All trails take off from Kolob Canyons Road.
I have tried this part of the park in early March a couple of times, and you will see from the pictures that I dealt with snow. Kolob Canyons is at higher elevation (approximately 7,000ft) versus the main section of Zion at the Springdale southern entrance (approximately 4,000ft). I’d recommend checking the weather before planning a trek up to Kolob Canyons. This was a great part of the park to visit in June, although it was pretty hot (even at the higher elevation) for the long hike out to Kolob Arch.
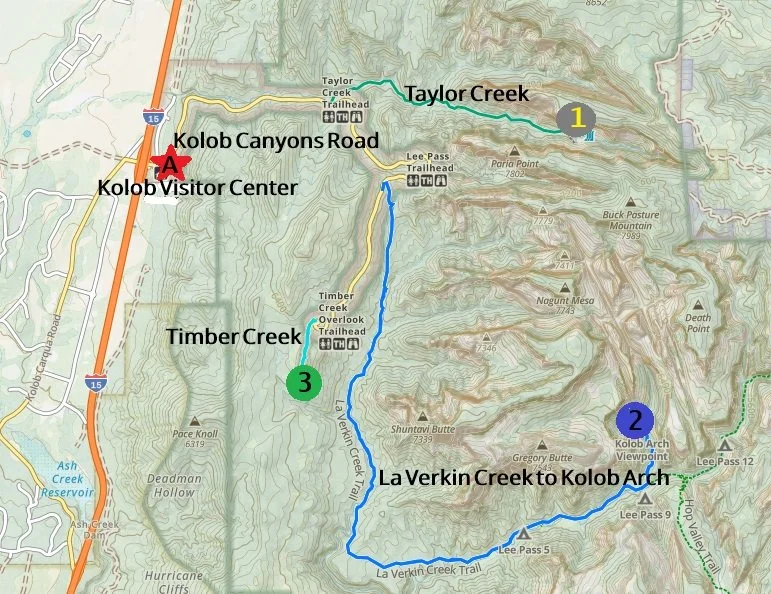
1 - Taylor Creek (moderate)*, 2 - La Verkin Creek to Kolob Arch (hard), 3 - Timber Creek (easy)
* I have not hiked this trail - marked for my own personal planning on my next trip.
1 - Taylor Creek
Distance - 5 miles (out-and-back)
Elevation Gain - 620ft
Trailhead Location - Approximately 2 miles on Kolob Canyons Road past the Visitor Center.
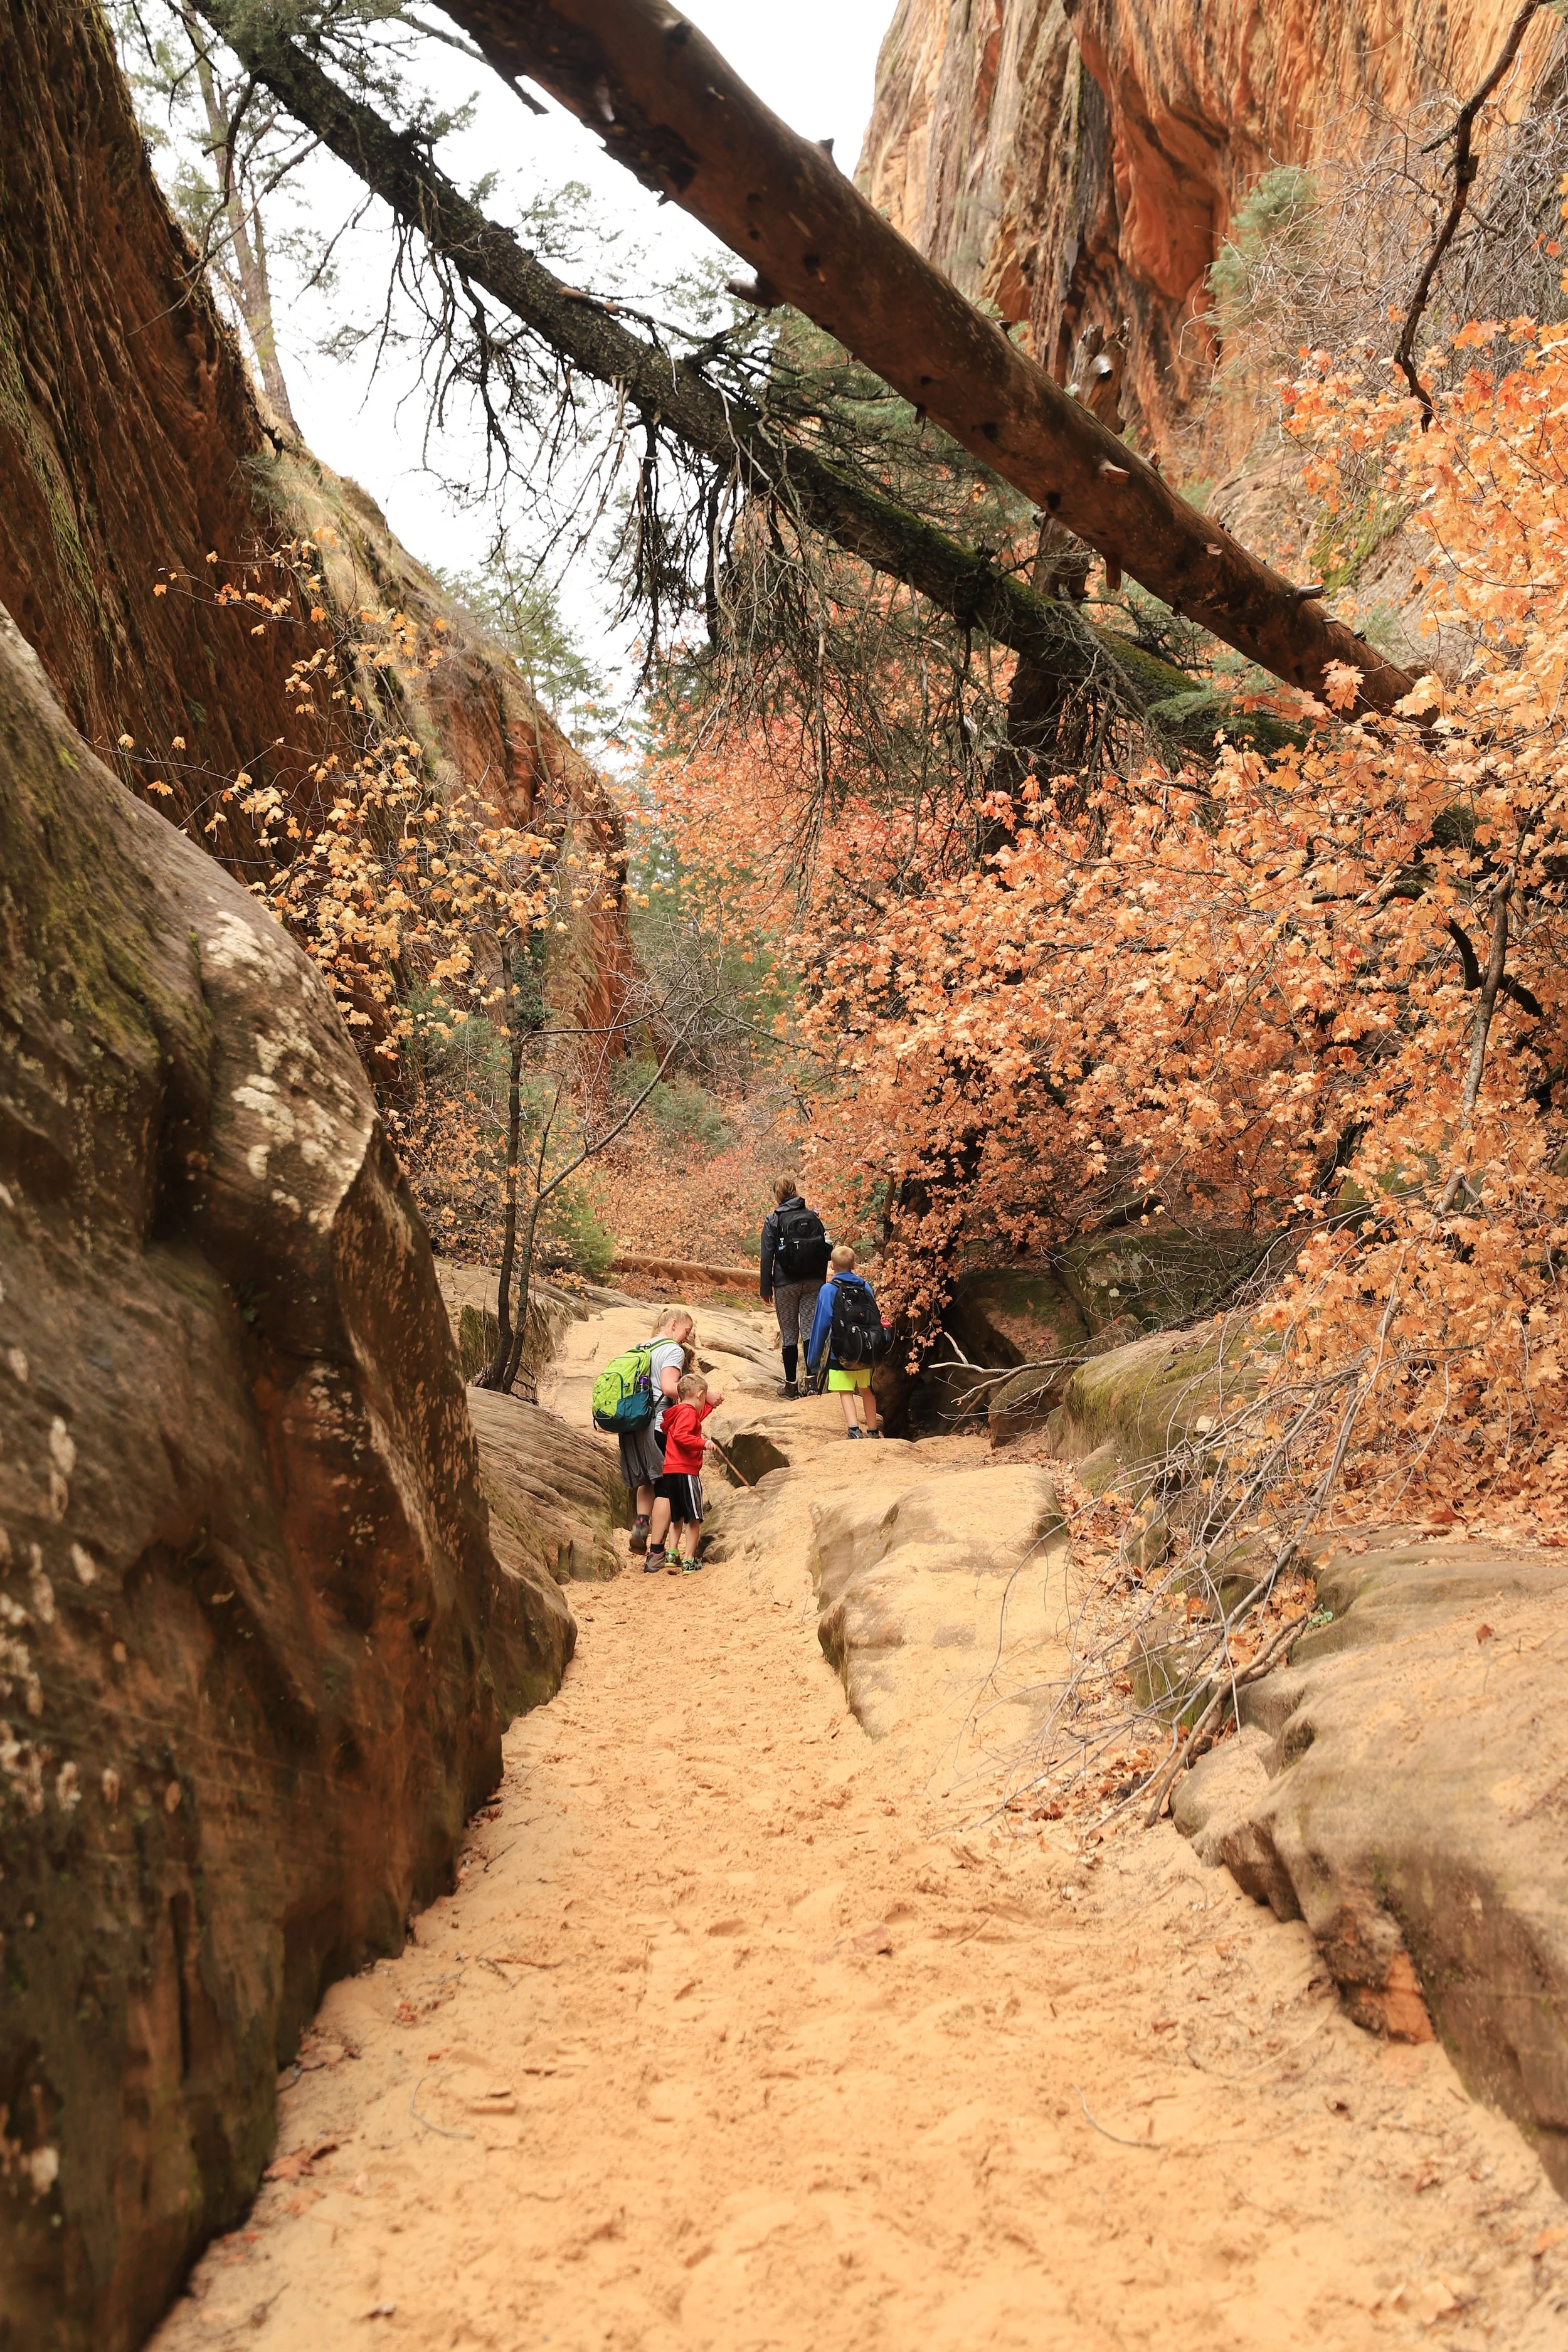
We haven’t yet had a chance to hike Taylor Creek. When we visited in June 2025, we were working on the Boy Scout Hiking Merit badge and needed trails over 10 miles long. No one wanted to hike an extra 5 miles after Kolob Arch (myself included). Next time.
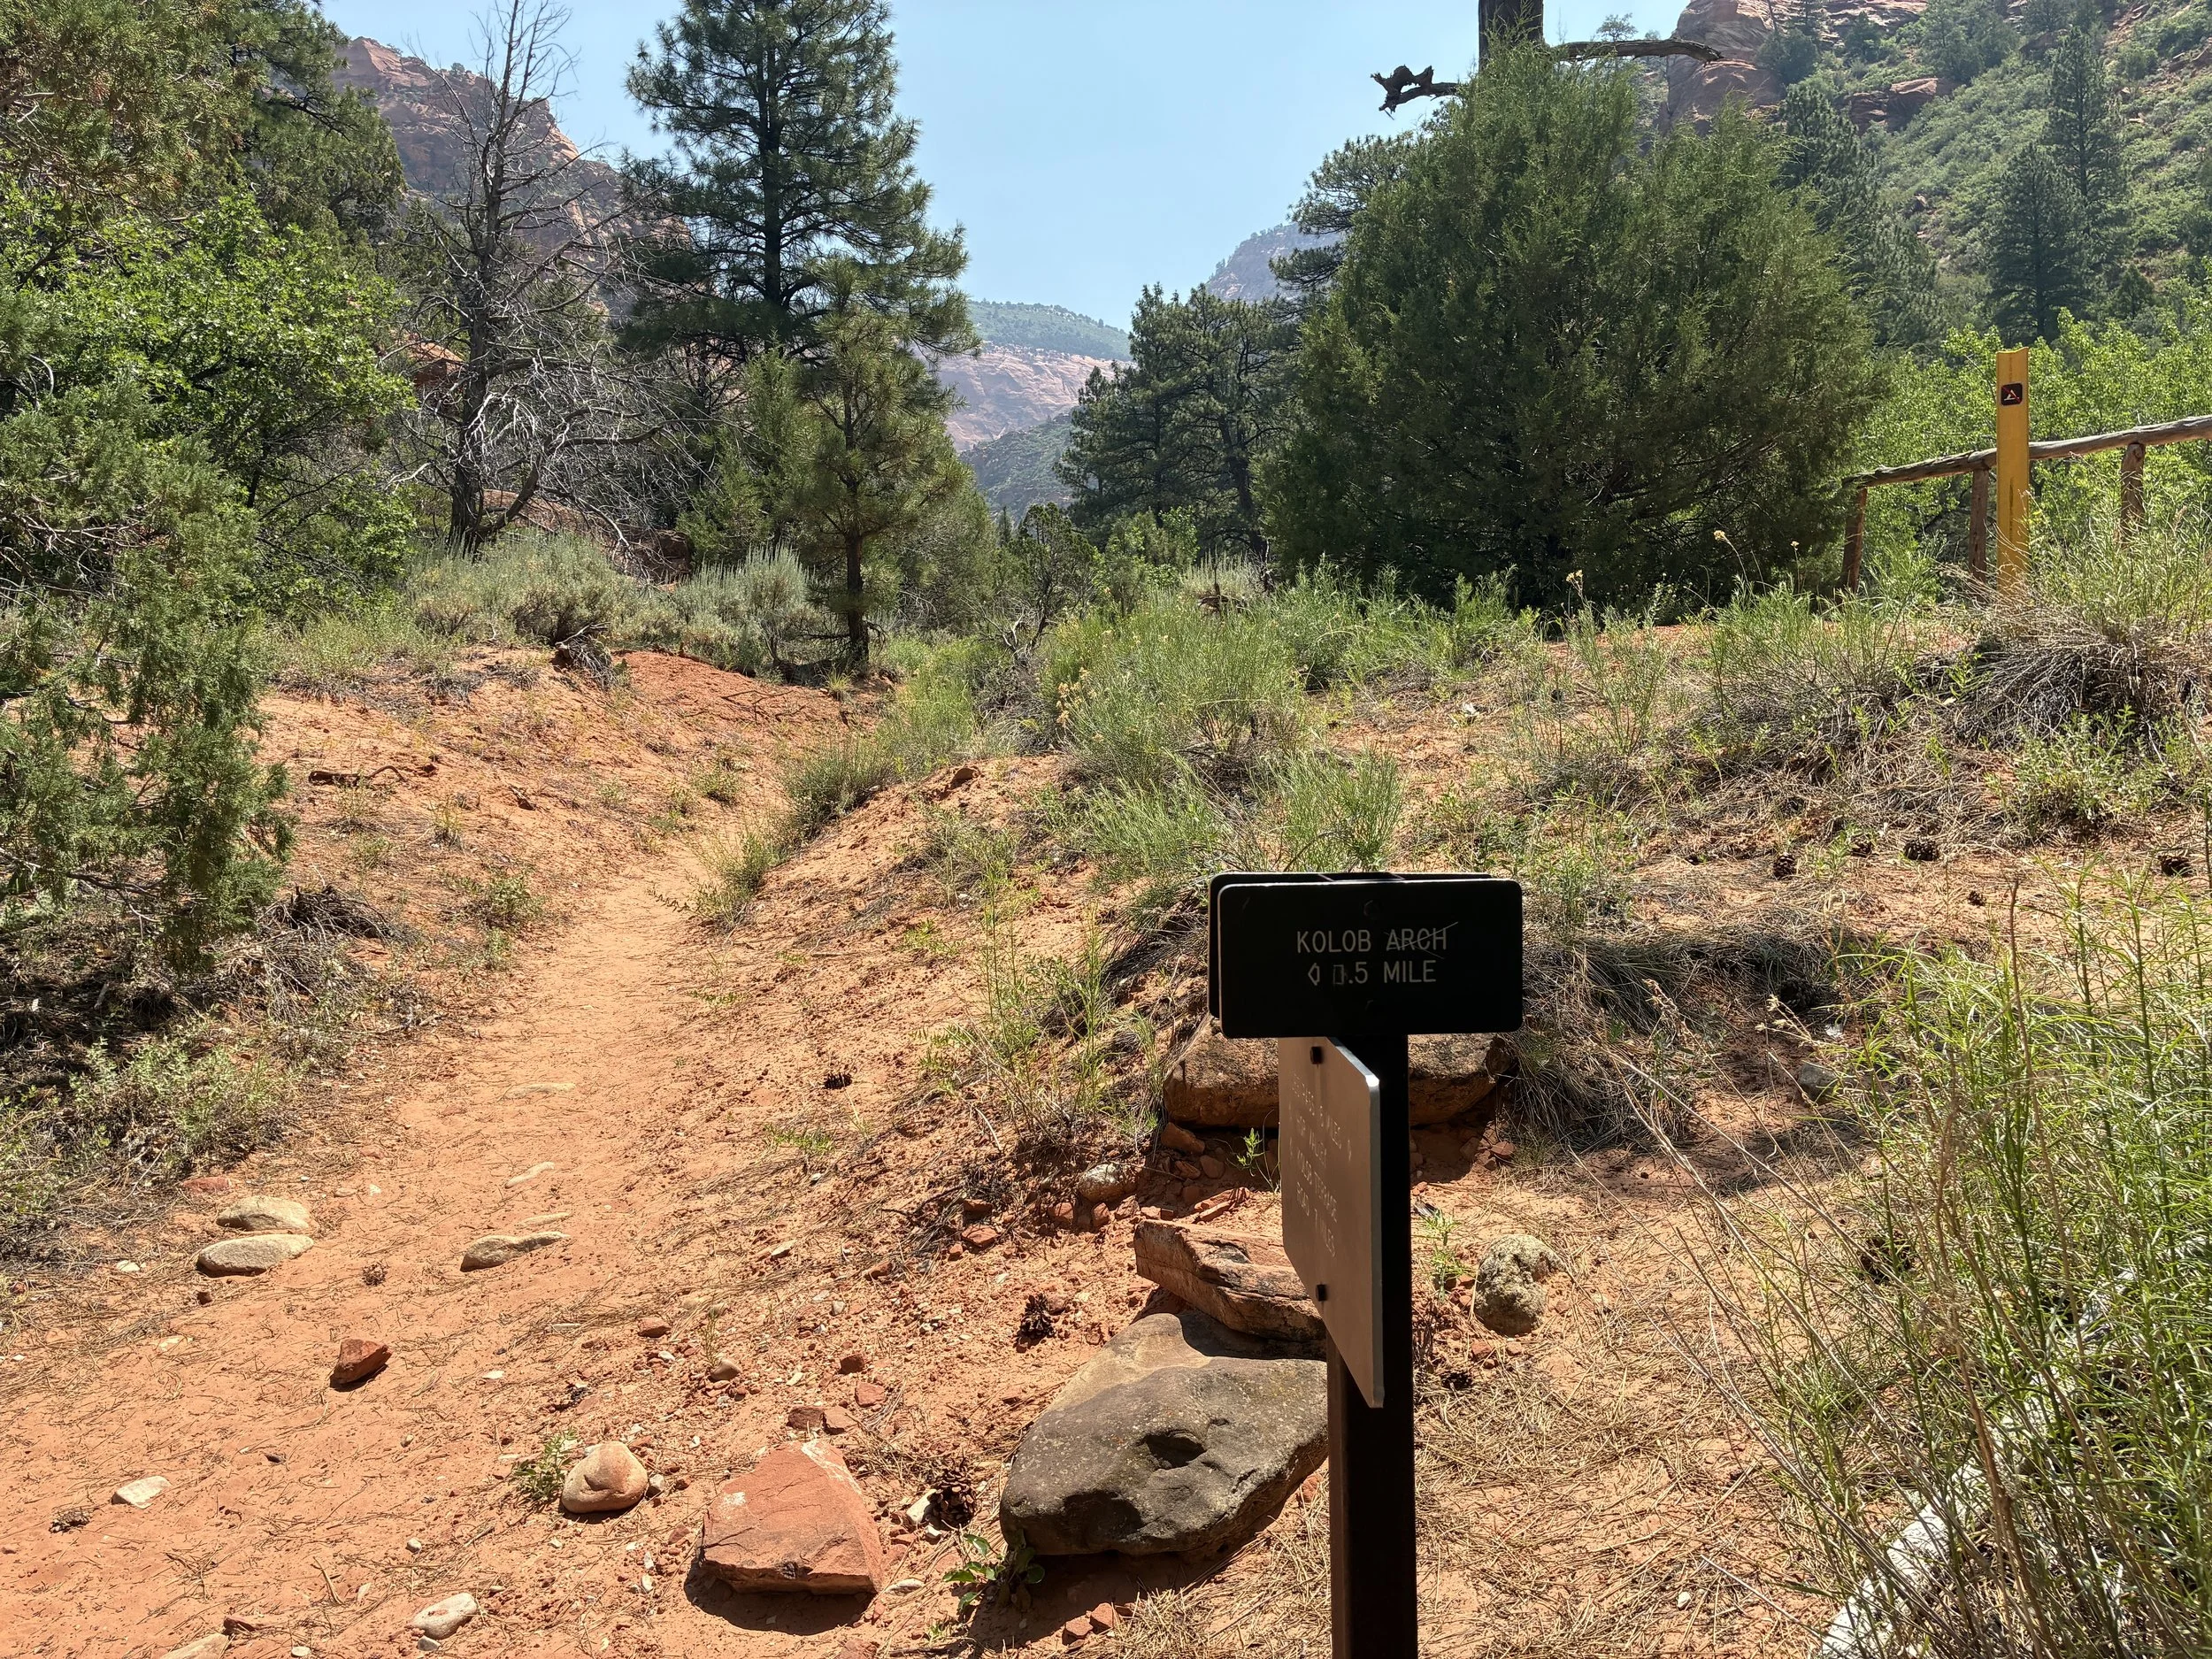
2 - La Verkin Creek to Kolob Arch

Map to Kolob Arch
Distance - 14 miles (out-and-back)
Elevation Gain - 1,670ft
Trailhead Location - Approximately 3.5 miles on Kolob Canyons Road past the Visitor Center.
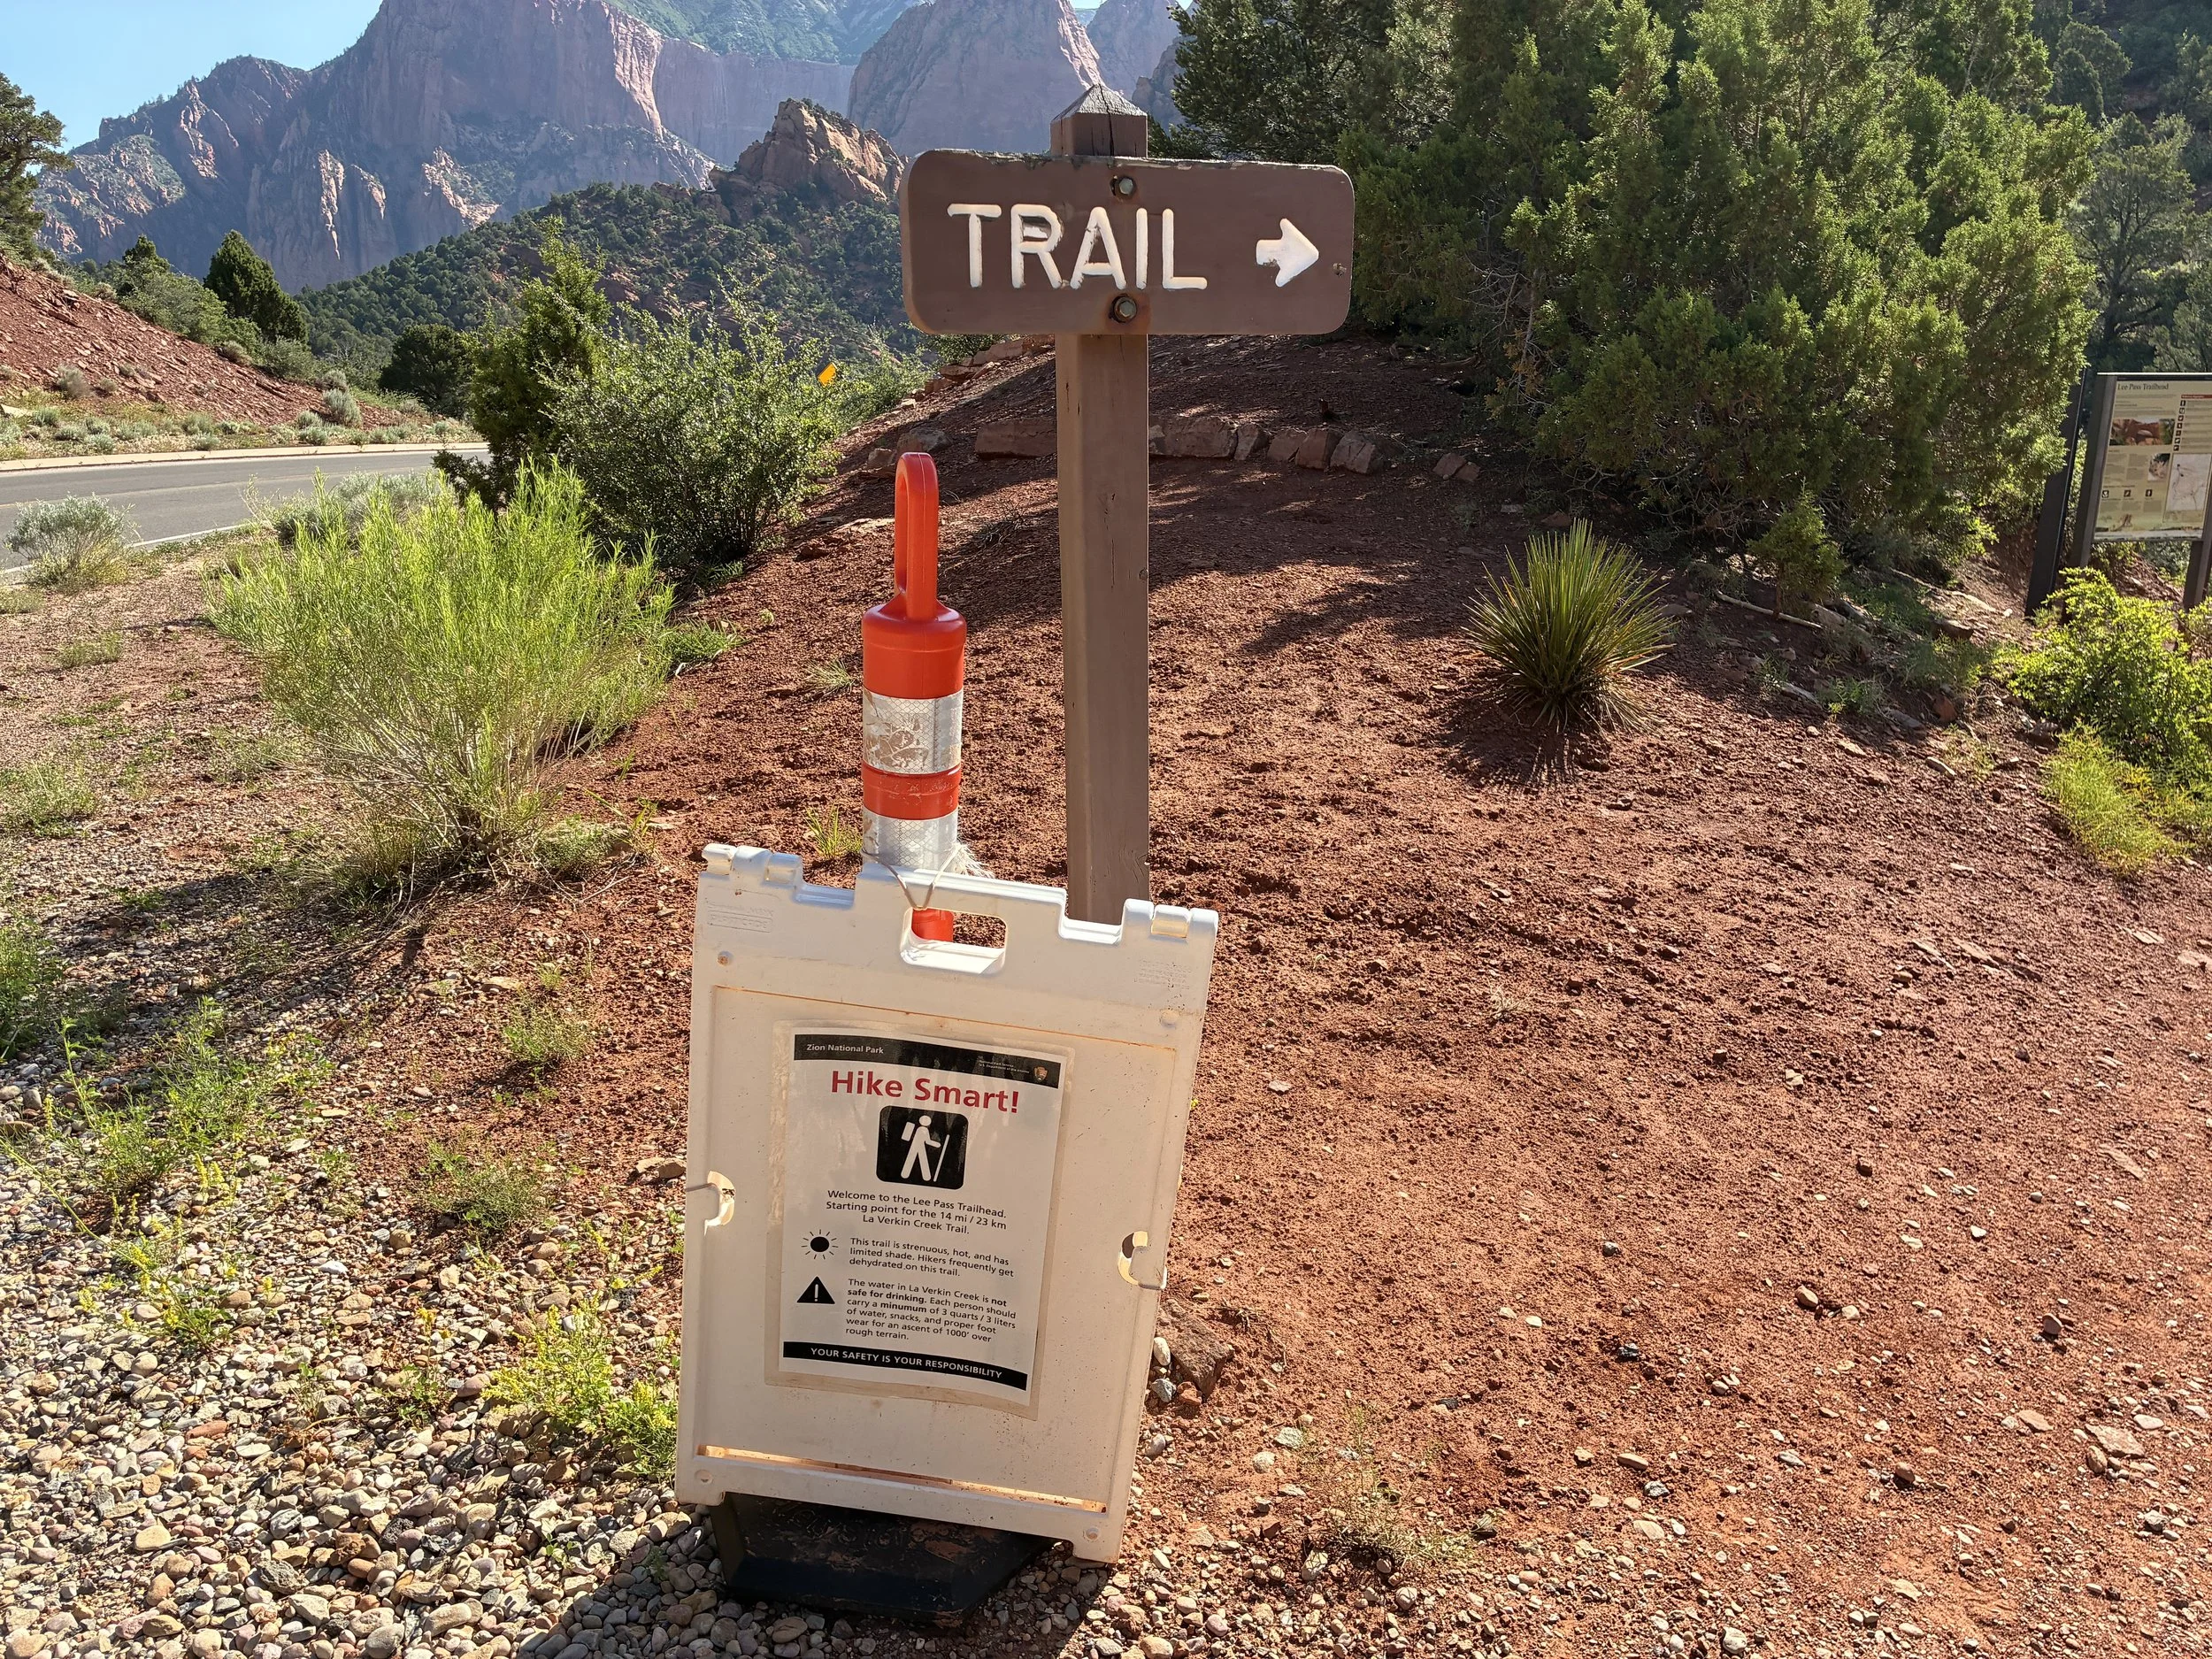
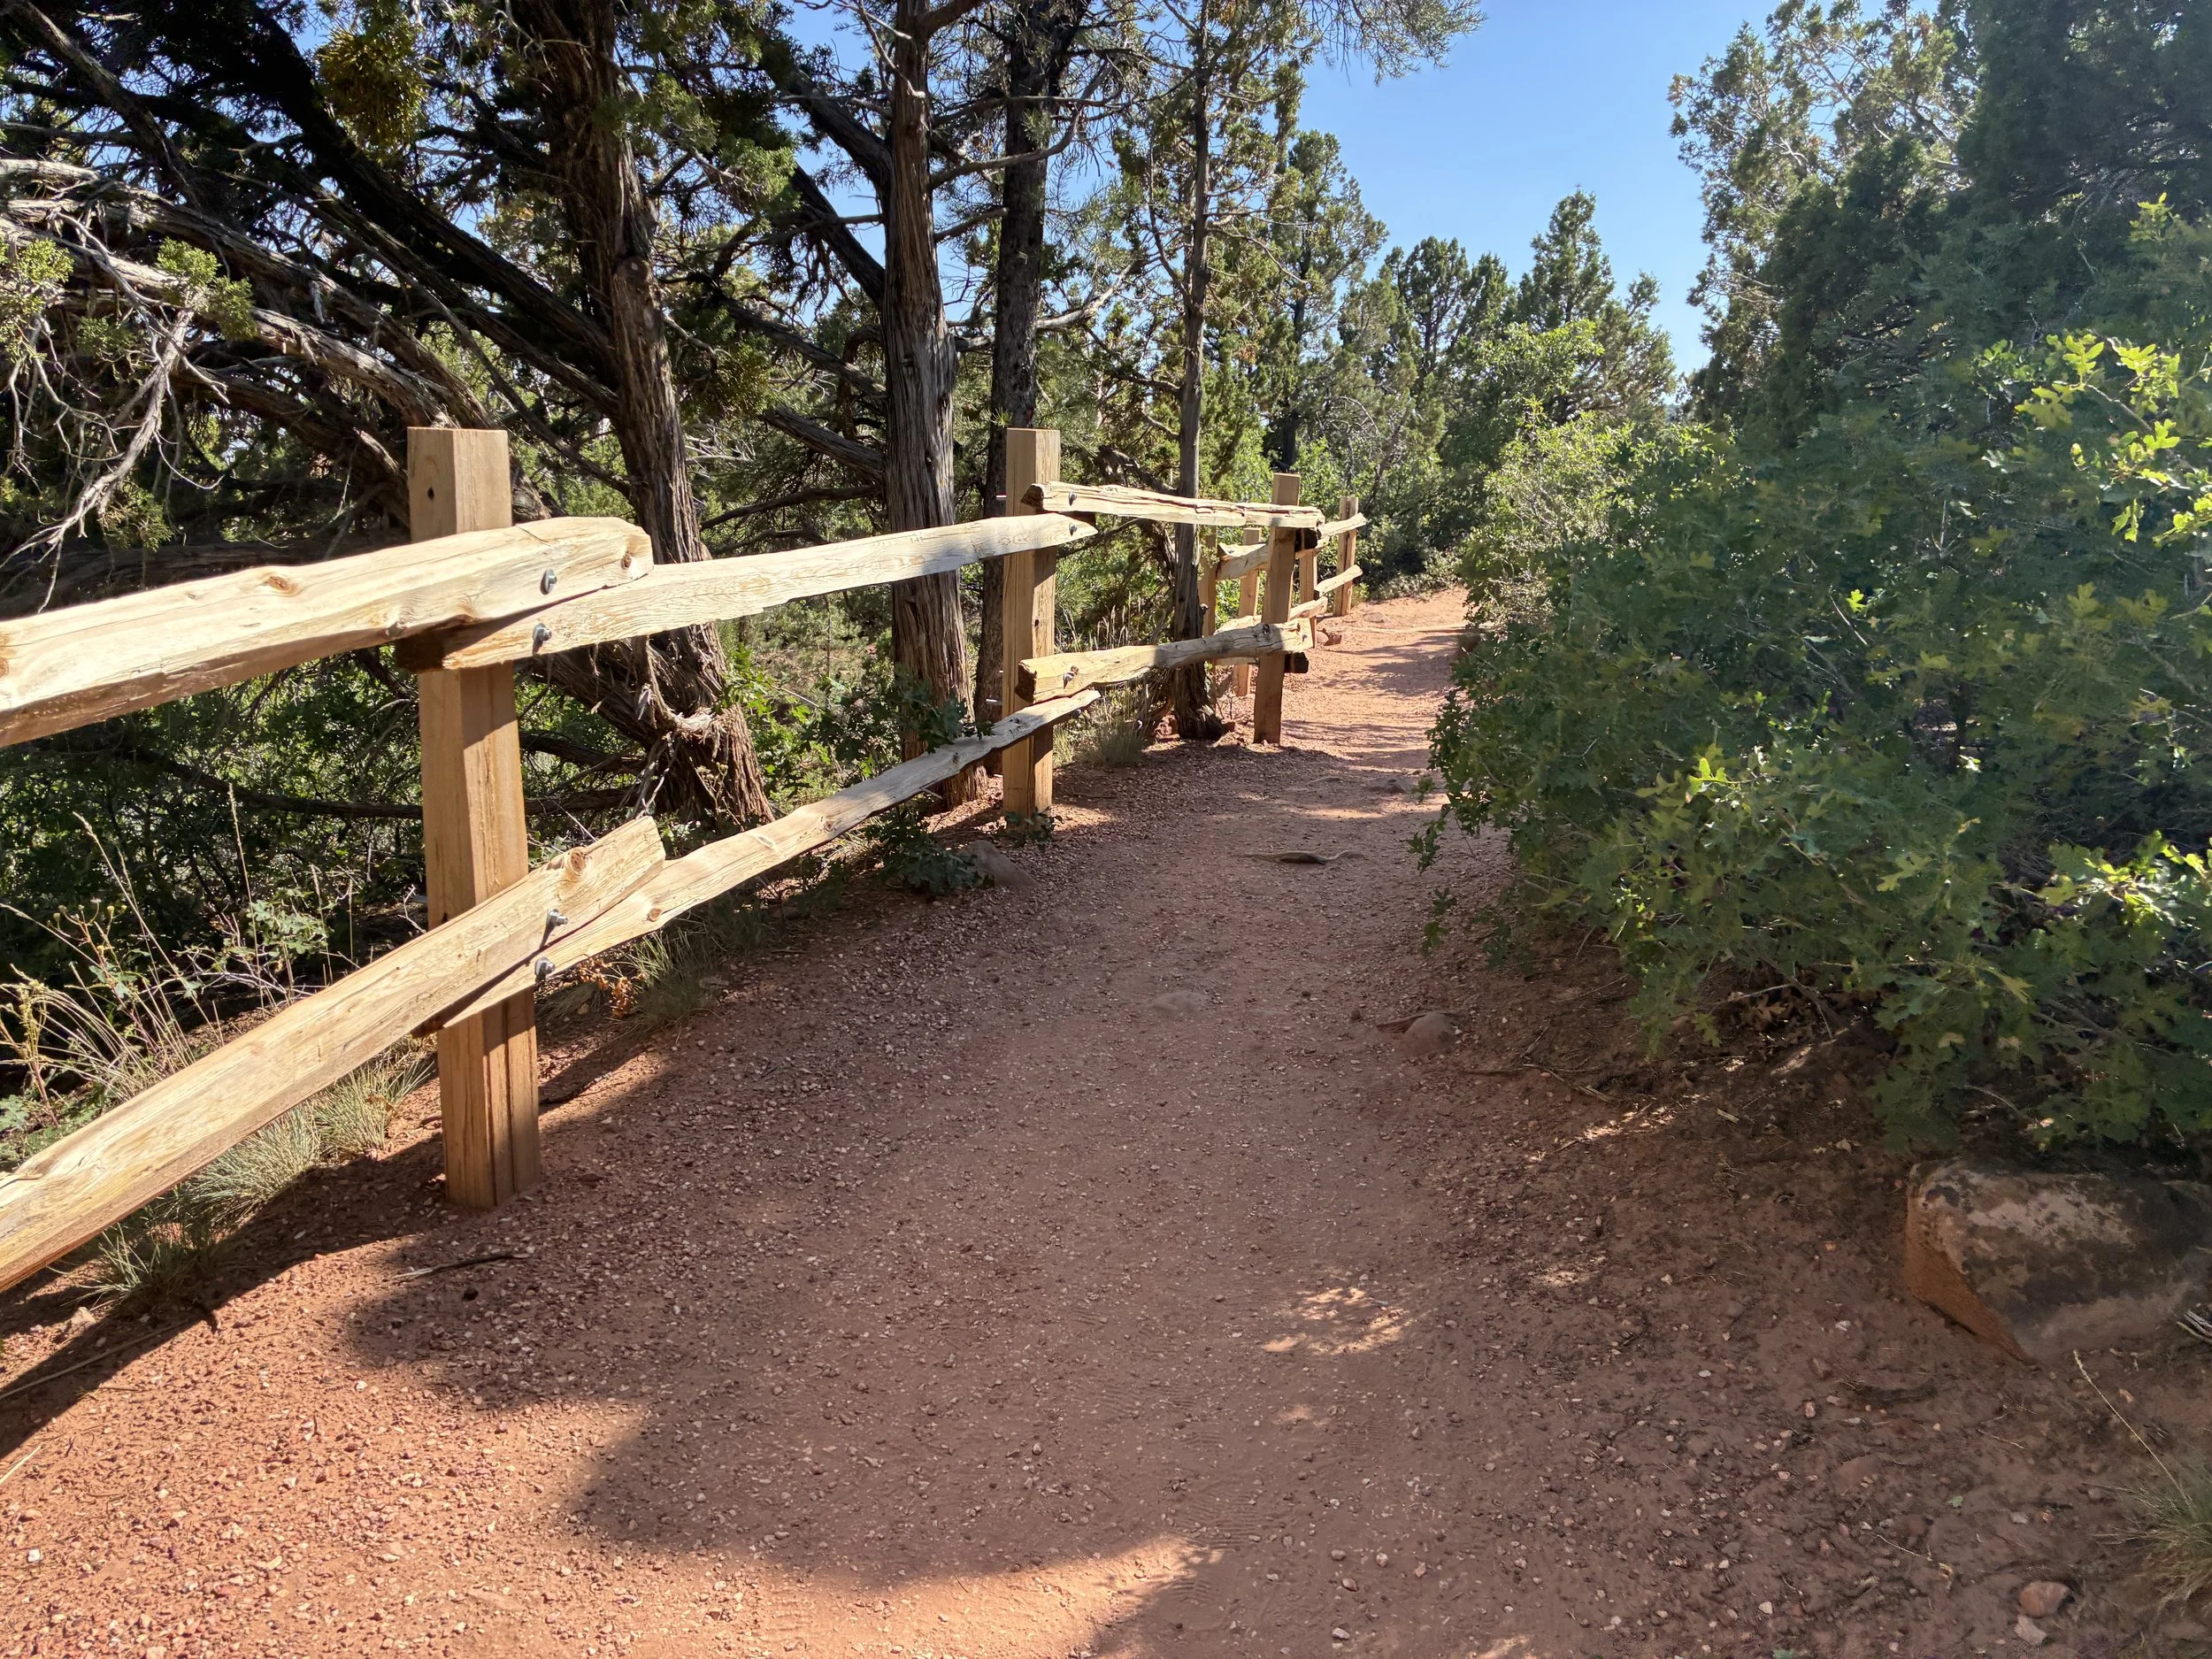
June 2025 - Hiking out to Kolob Arch - Trailhead
The trail out to Kolob was long, but not very steep. The hardest part is the last ascent up on the way back, but honestly, it seemed like it would be harder than it actually was. After that last ascent, you are in the parking lot. Most of the other up sections are connected with an easy down section.
The most difficult thing for us was the heat. I incorrectly assumed that the elevation difference between the main section of Zion and Kolob Canyon would mean June would be a perfect time to hike. This trail is very exposed to the sun, however. It probably was 20 or so degrees cooler than the trails near Springdale, but in the sun, 80F is still pretty hot while hiking all day. That sign above states to bring 3L of water per person. We each carried 4L. My boys and I drank most of it and had maybe a liter left between the three of us.
June 2025 - Descending into Kolob Canyon.
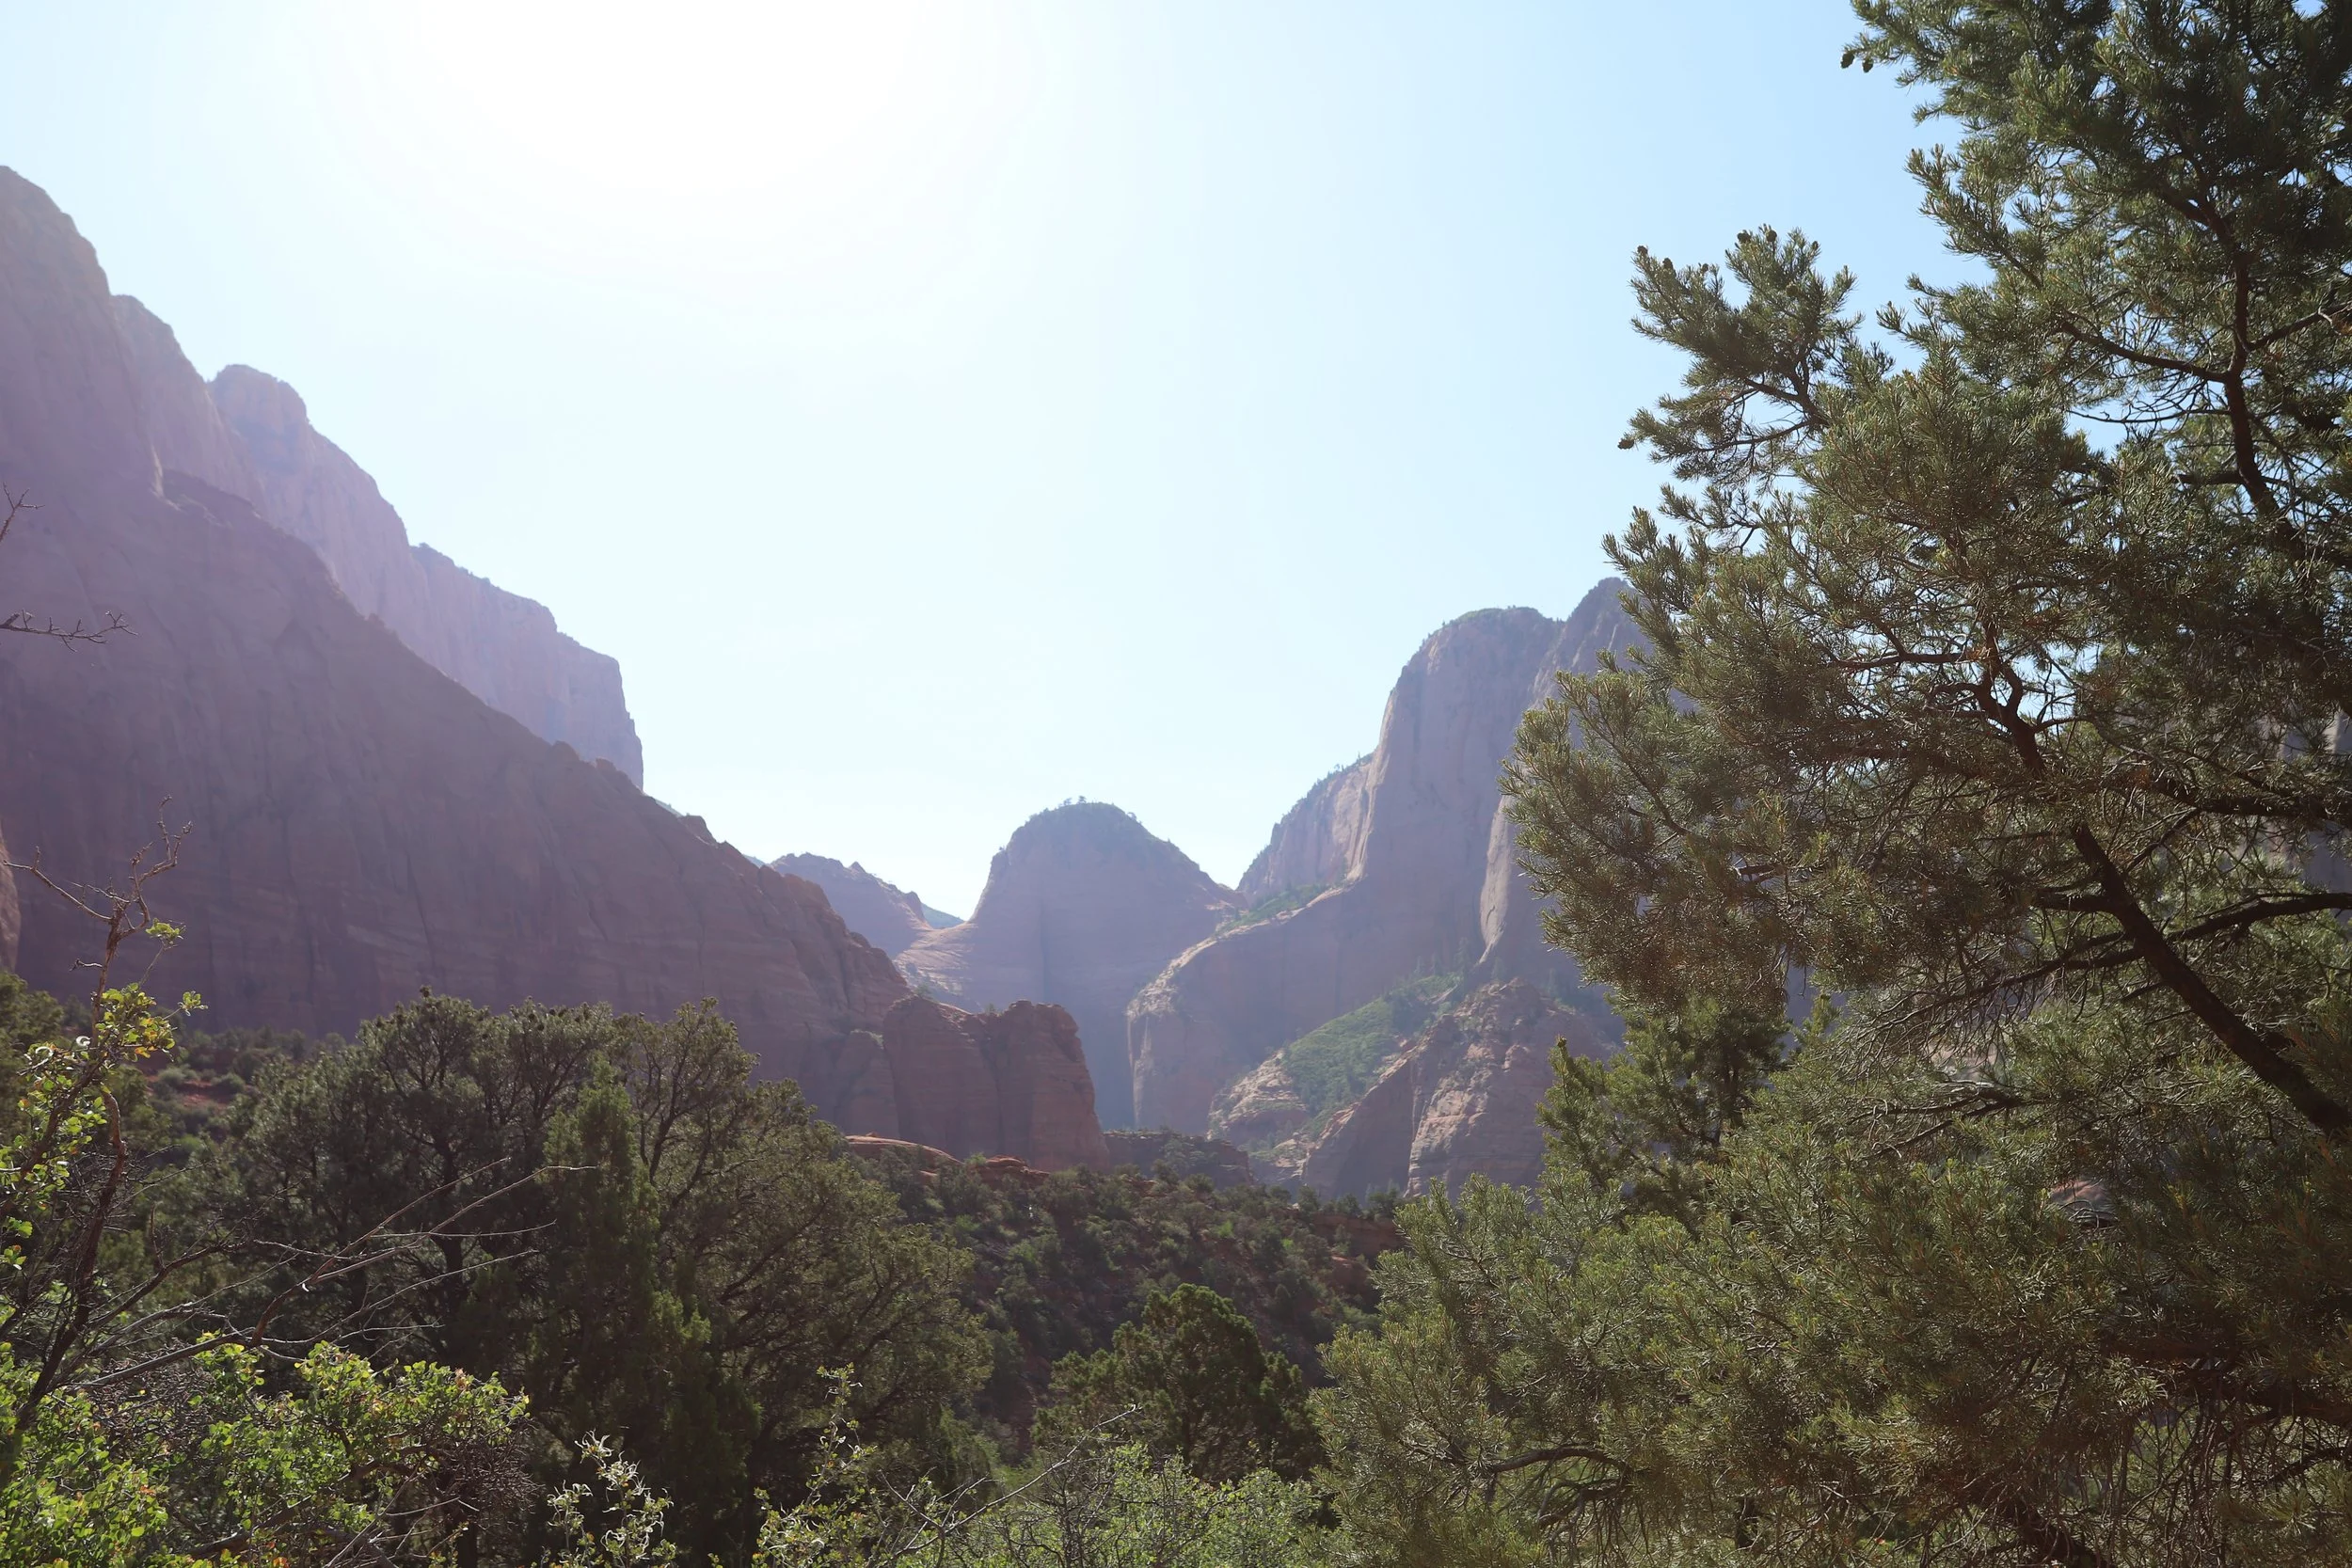
This is such a beautiful section of Zion. While the trails from the Springdale entrance are all packed, and the shuttles are packed, and everywhere you look there are people, Kolob Canyon is so absolutely quiet. It was June - we crossed paths with 5 people backpacking, and that was it on this trail. This hike was absolutely stunning the whole way, and such a nice long quiet hike made for a great day to de-stress.
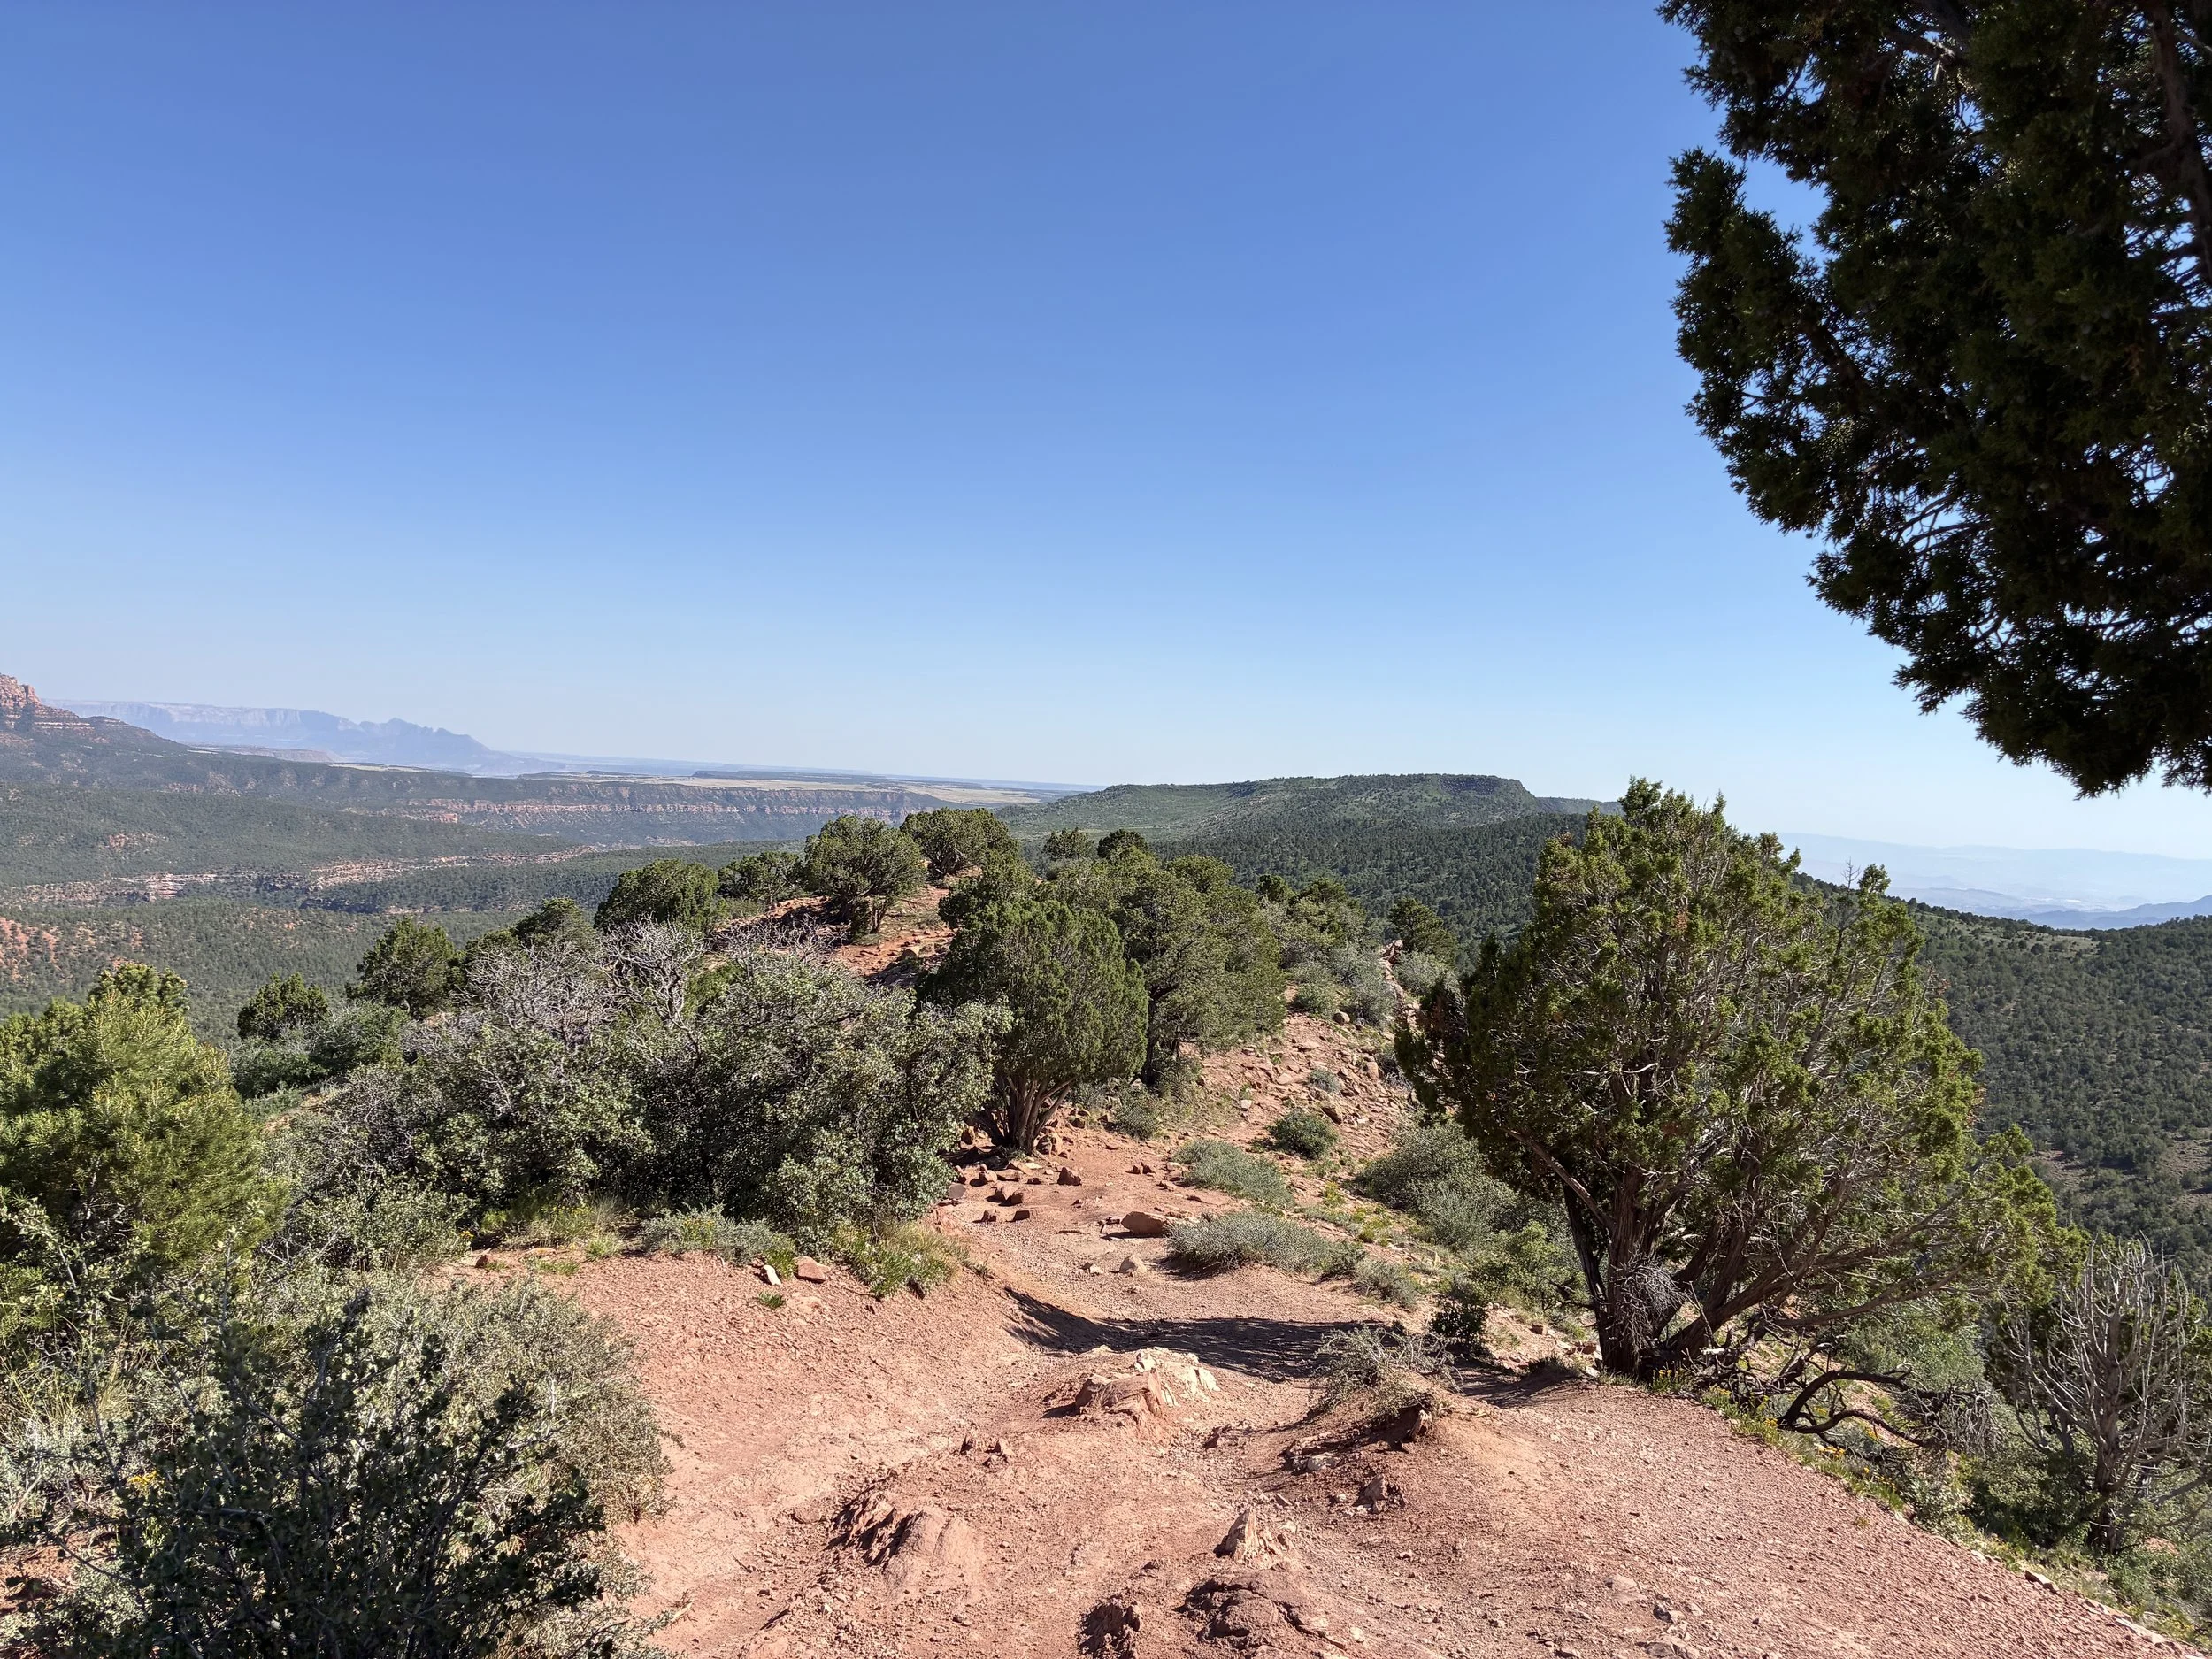
June 2025 - Hiking into Kolob Canyon
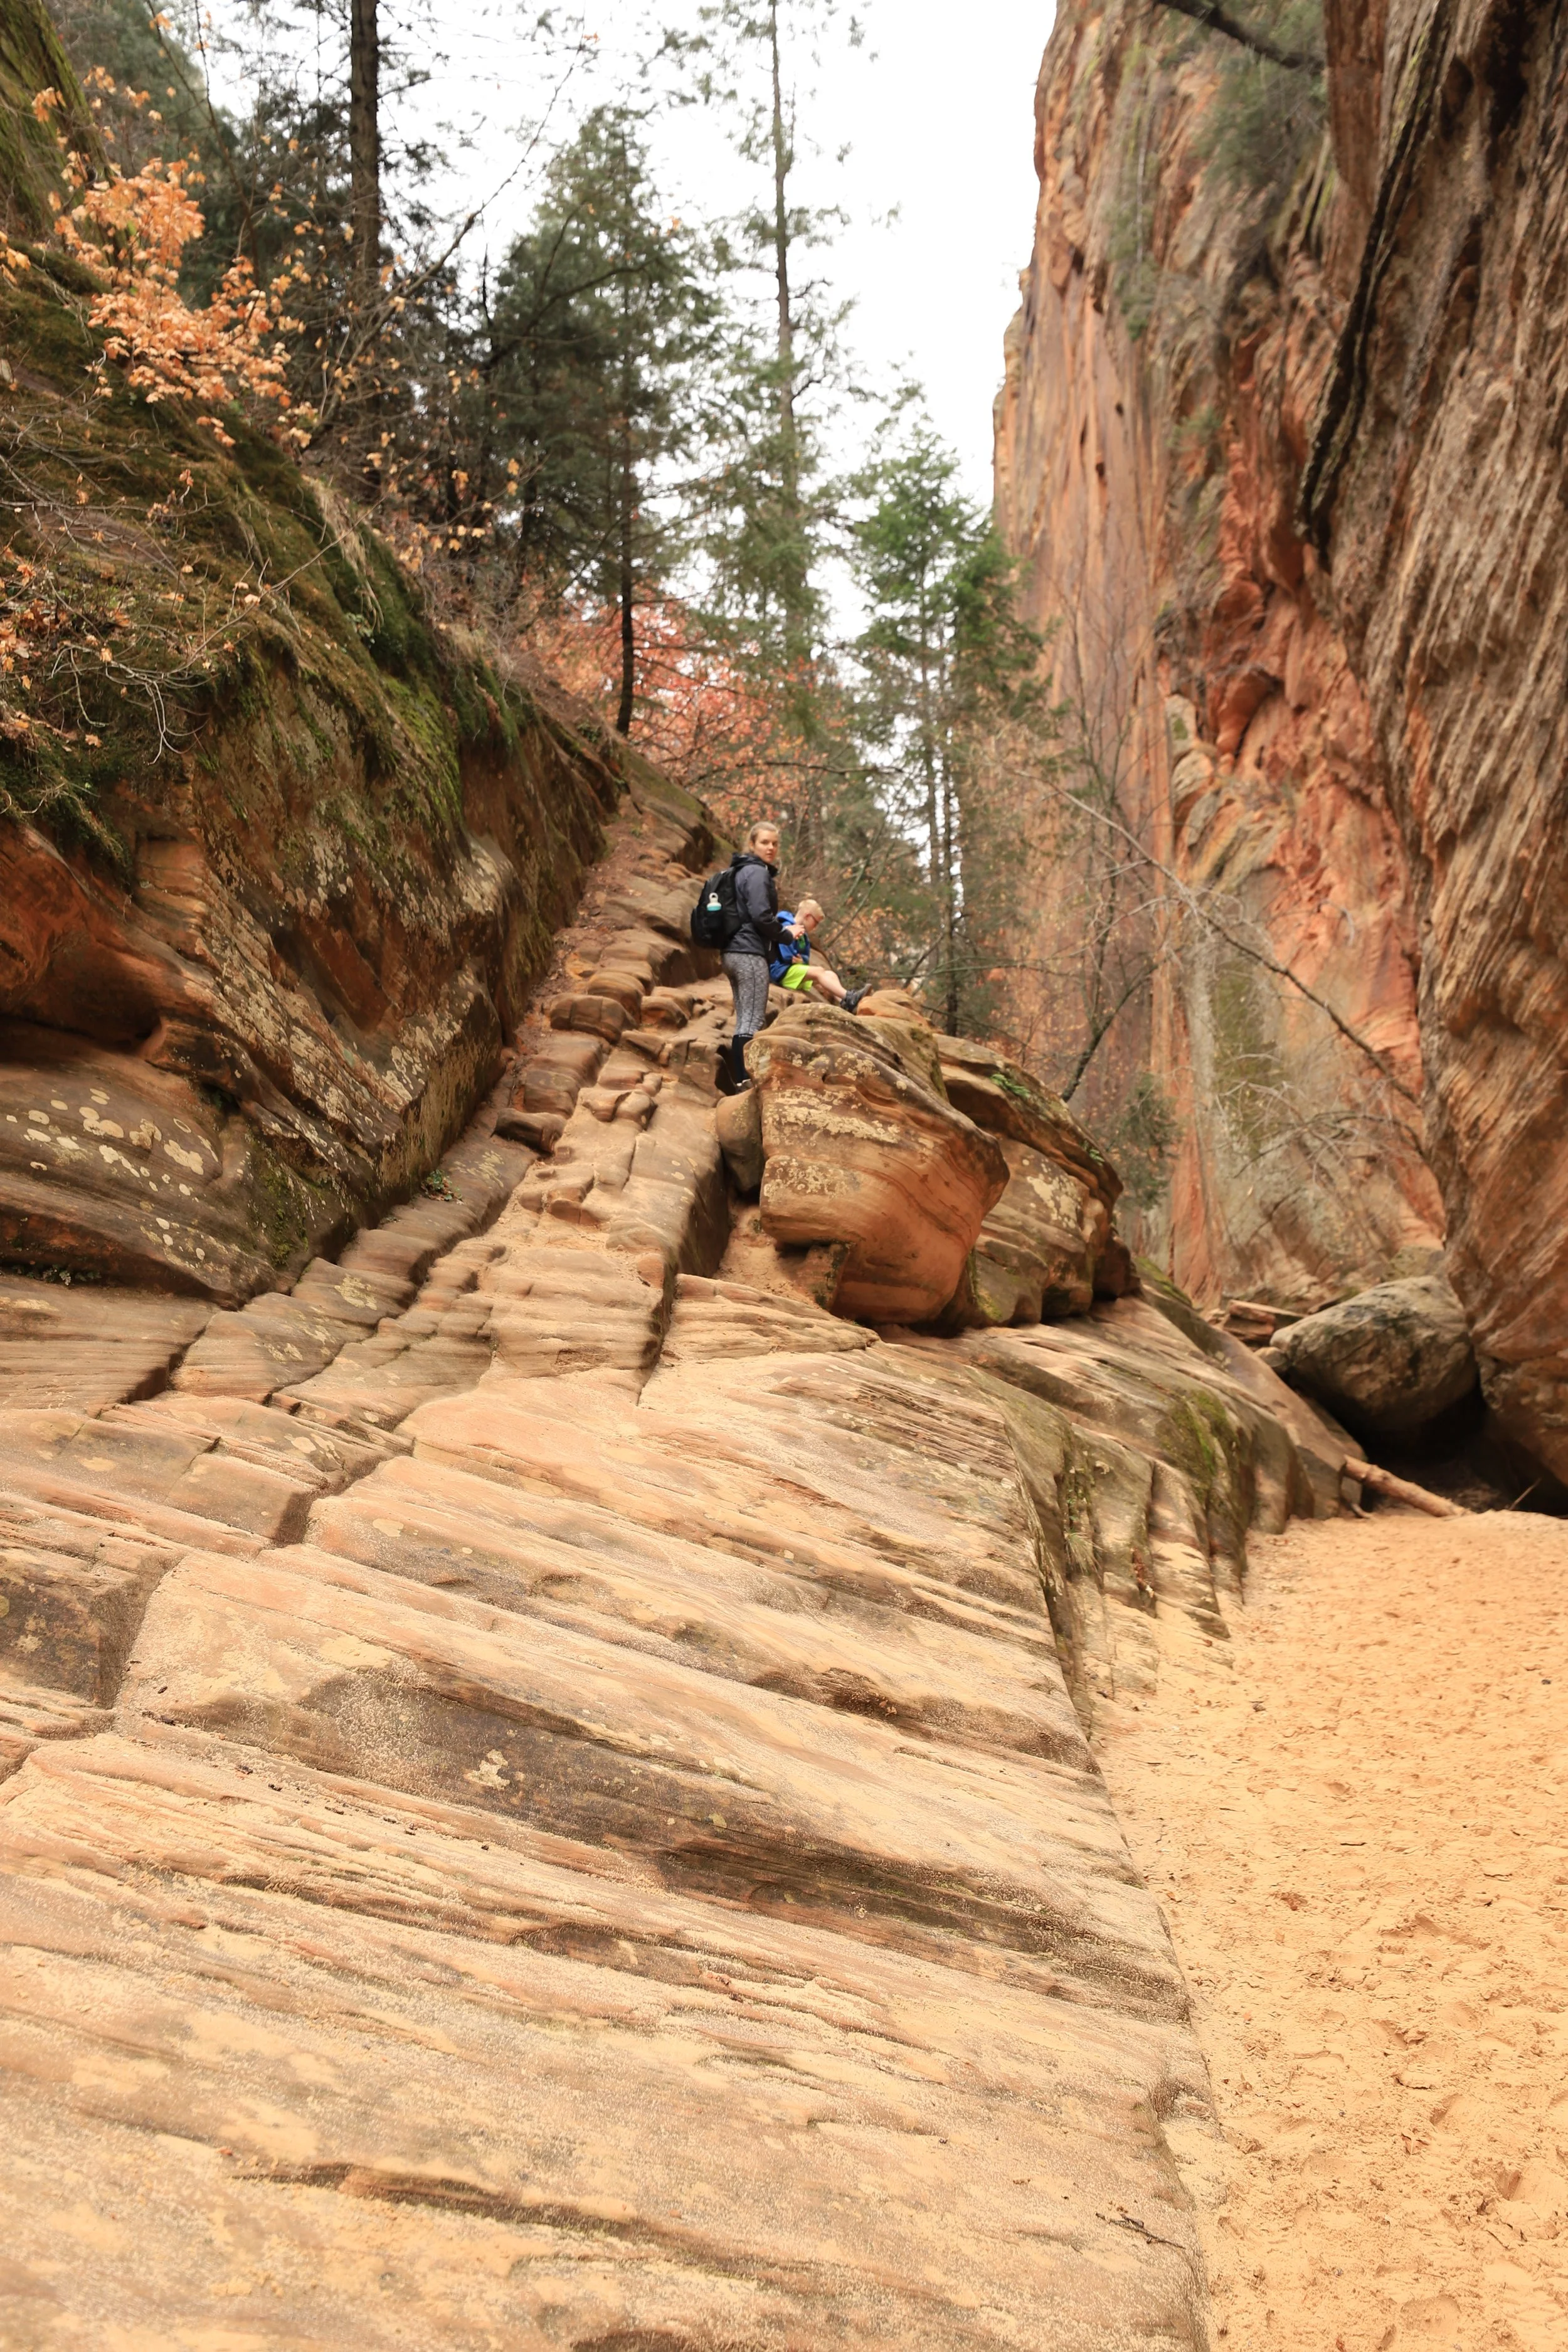
The majority of the trail is hard packed red dirt, but between backpack site #6 and the arch, it’s a lot of loose sand. You are going to feel this in your calves the next morning.
Maybe one other thing to point out for anyone planning on backpacking here - sites 1 & 2 look like they are near a water source. The picture below is that water source all dried up… If you stop here during a dry part of summer, you are going to need to walk all the way to site 4 before you might find water to filter.
June 2025 - Crossing a dry creek bed near backpacking site 2 along the La Verkin Creek Trail to Kolob Arch
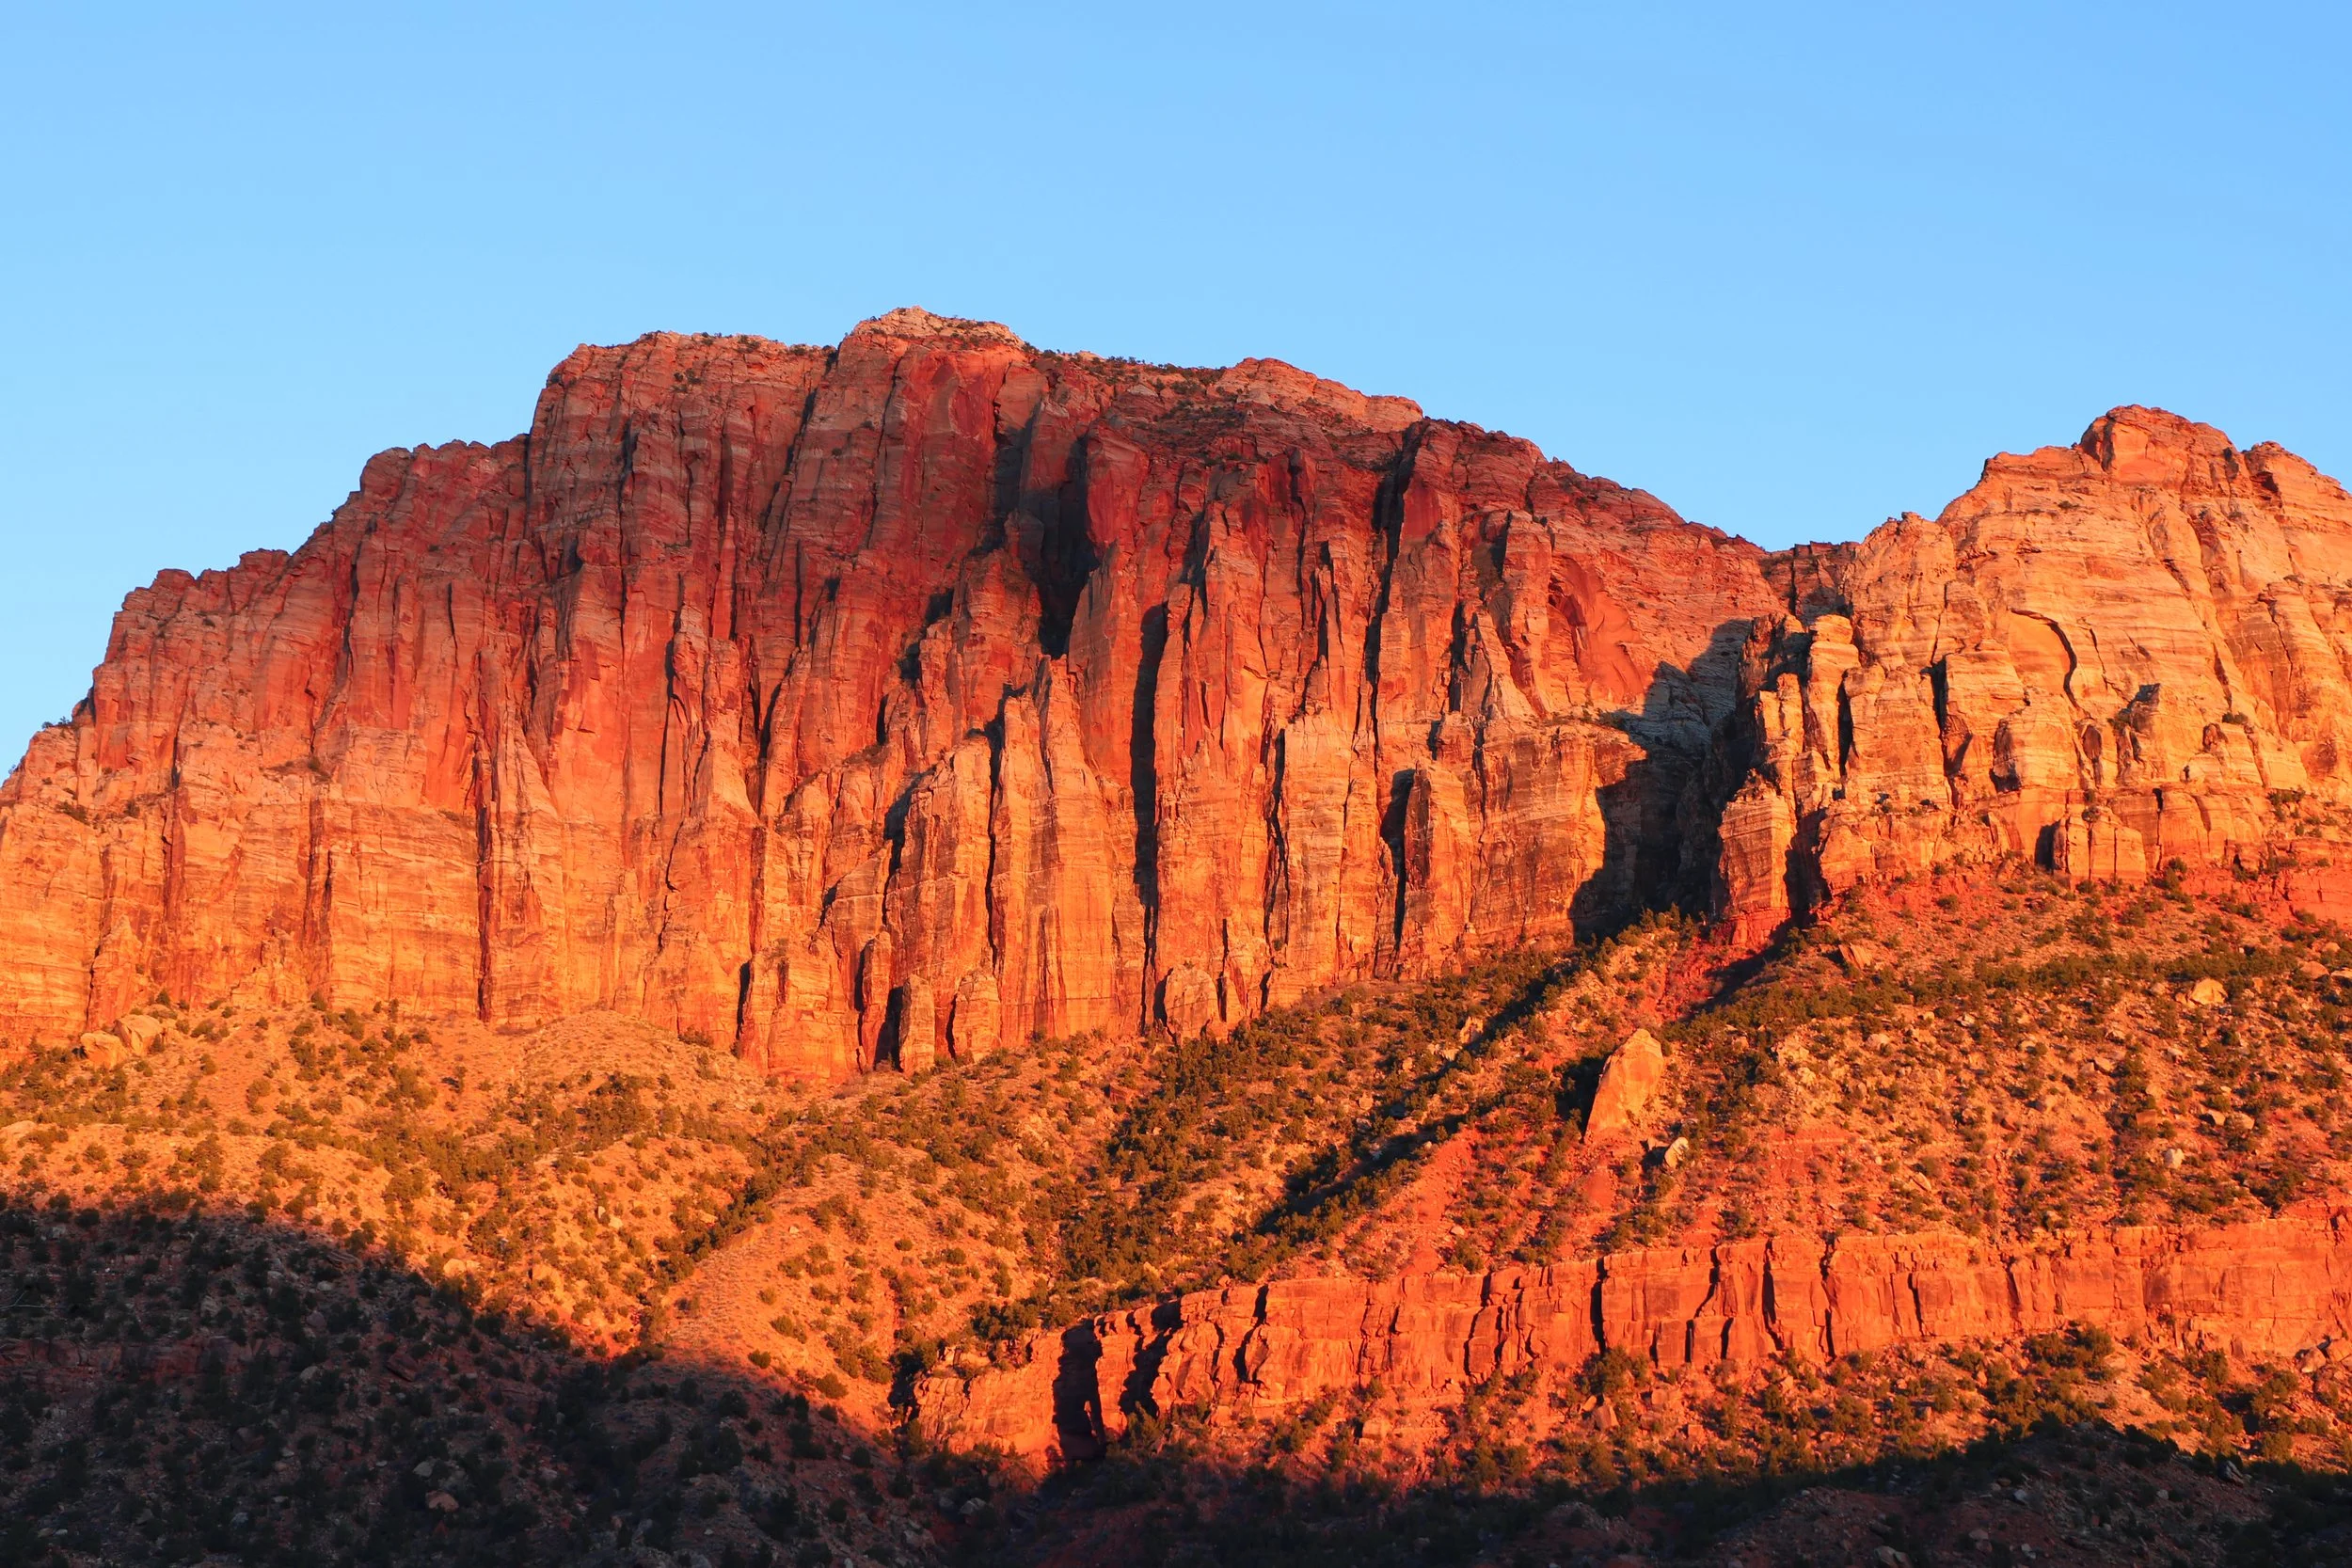
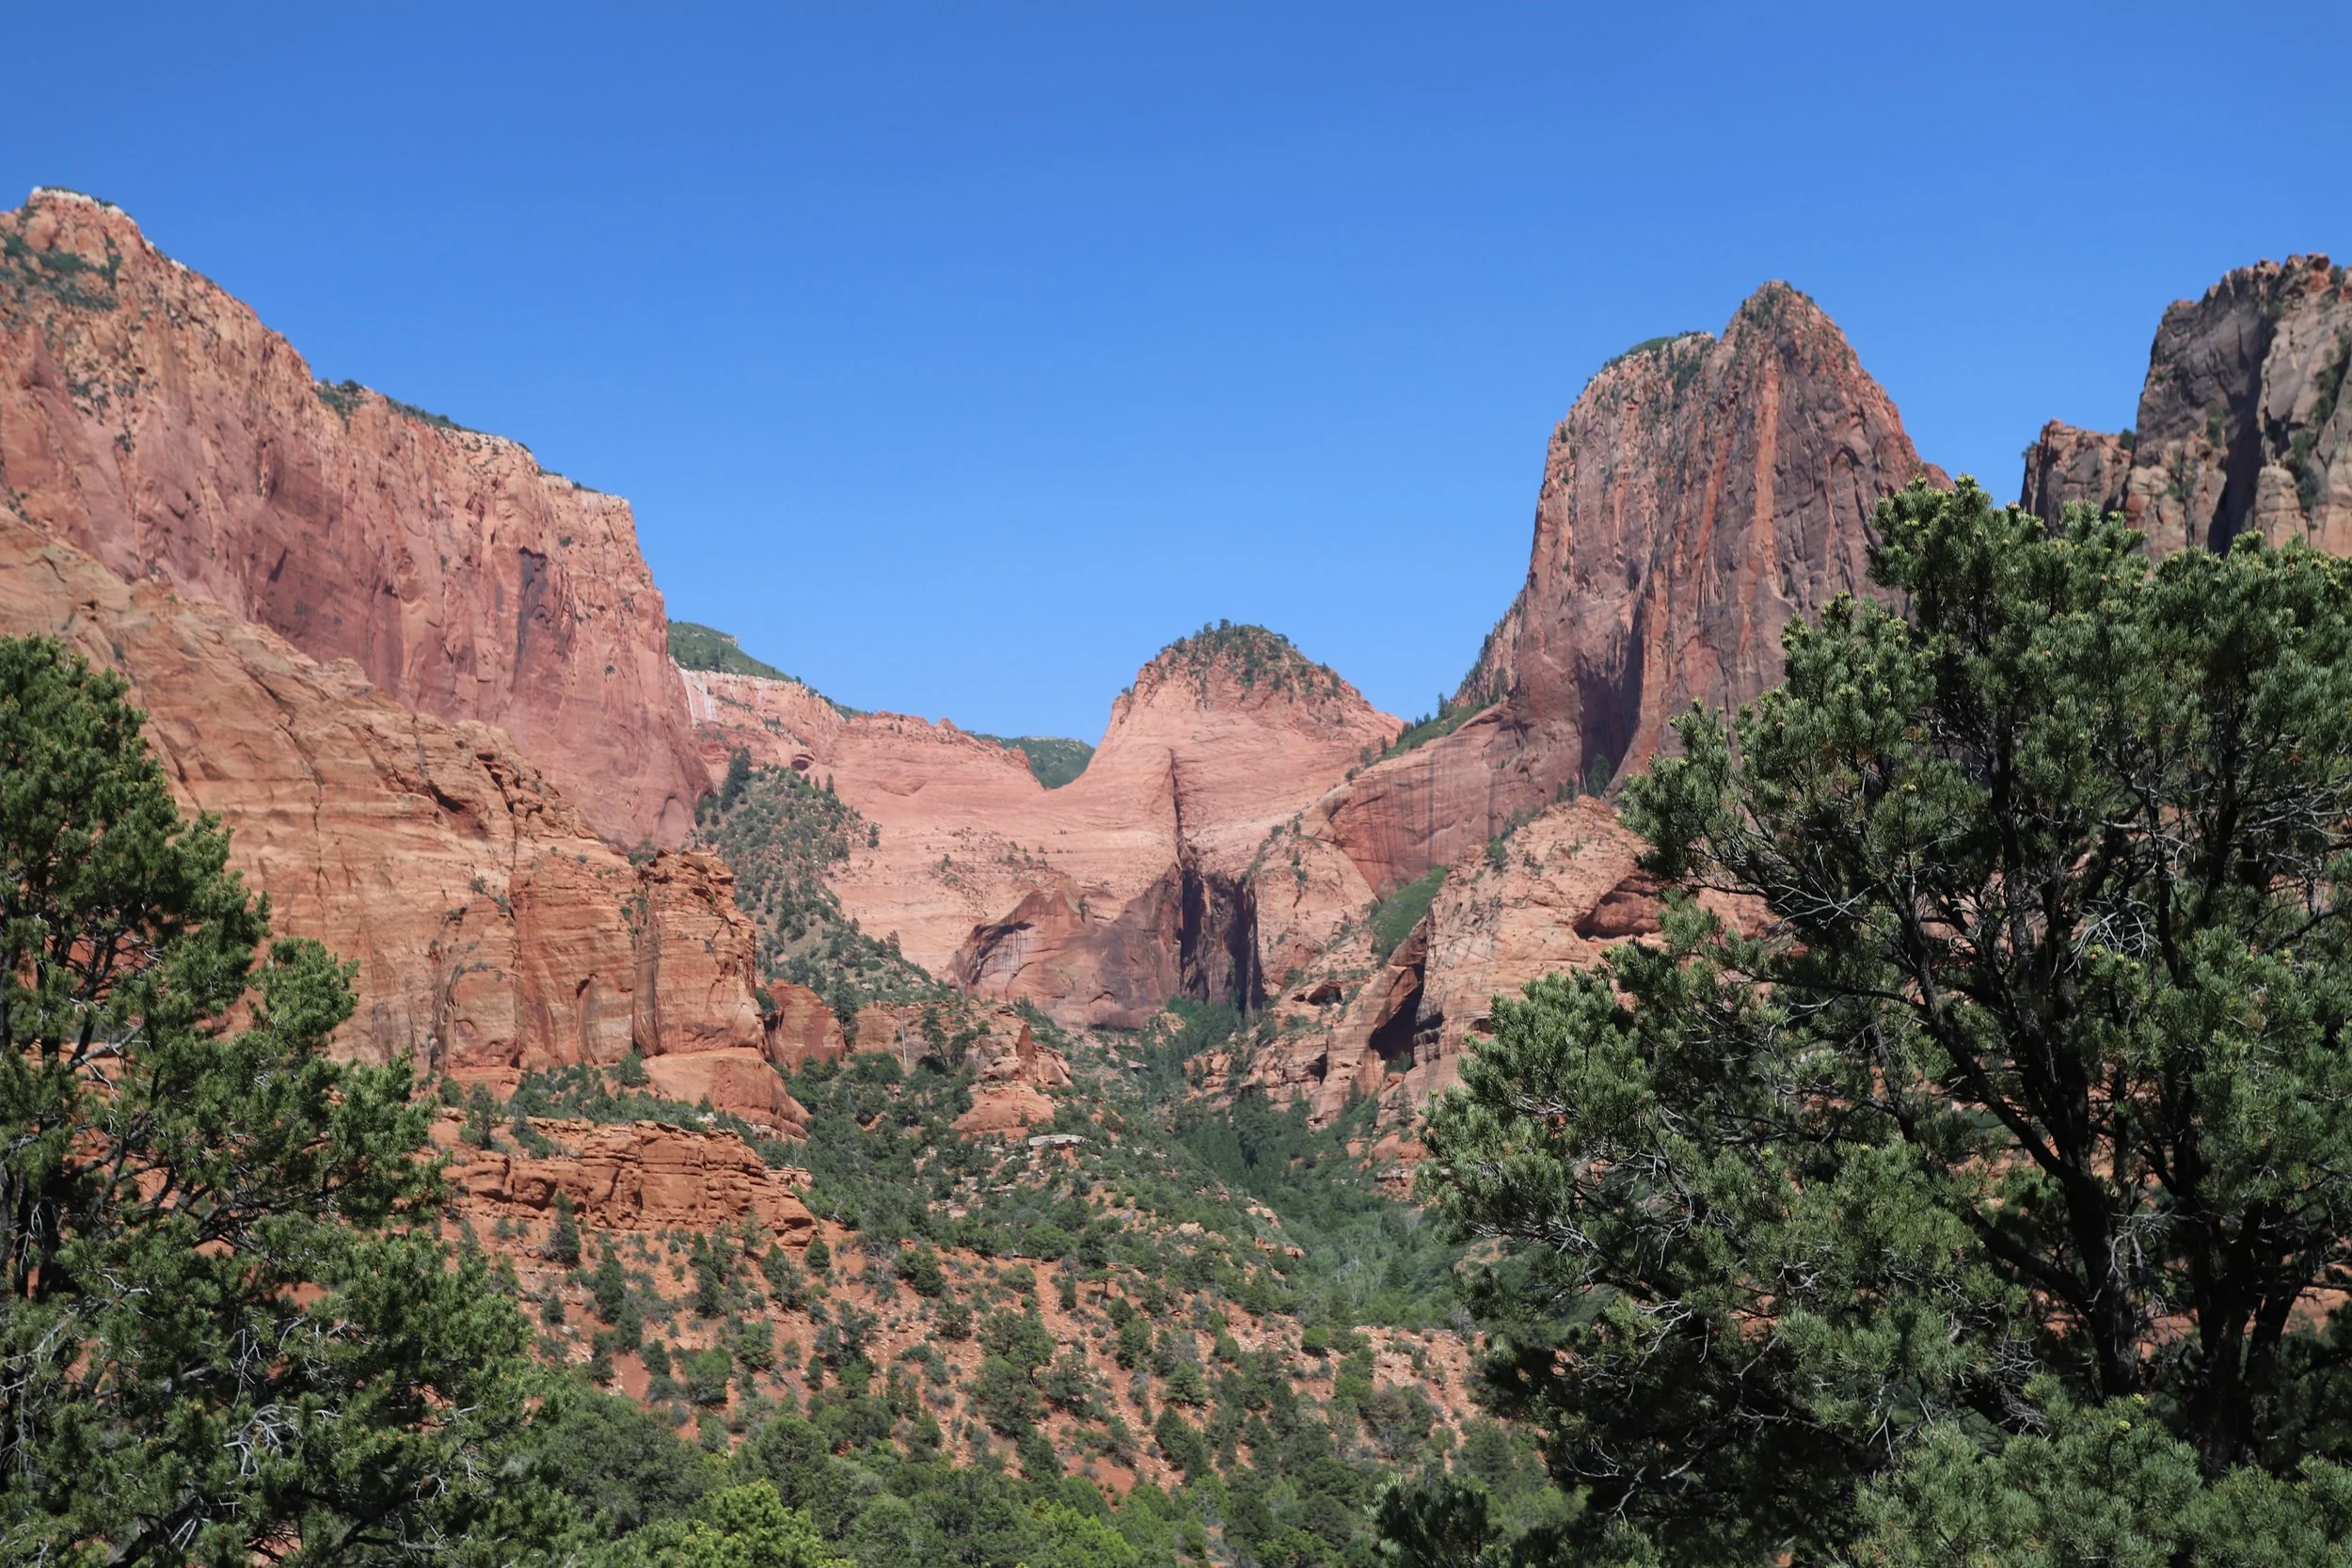
Kolob Canyon reminds me a lot of Sedona, Arizona, with the deep red creatively shaped mountains, green leafy trees, and red dirt that is going to stain white socks permanently.
June 2025 - Hiking through Kolob Canyon, Zion National Park
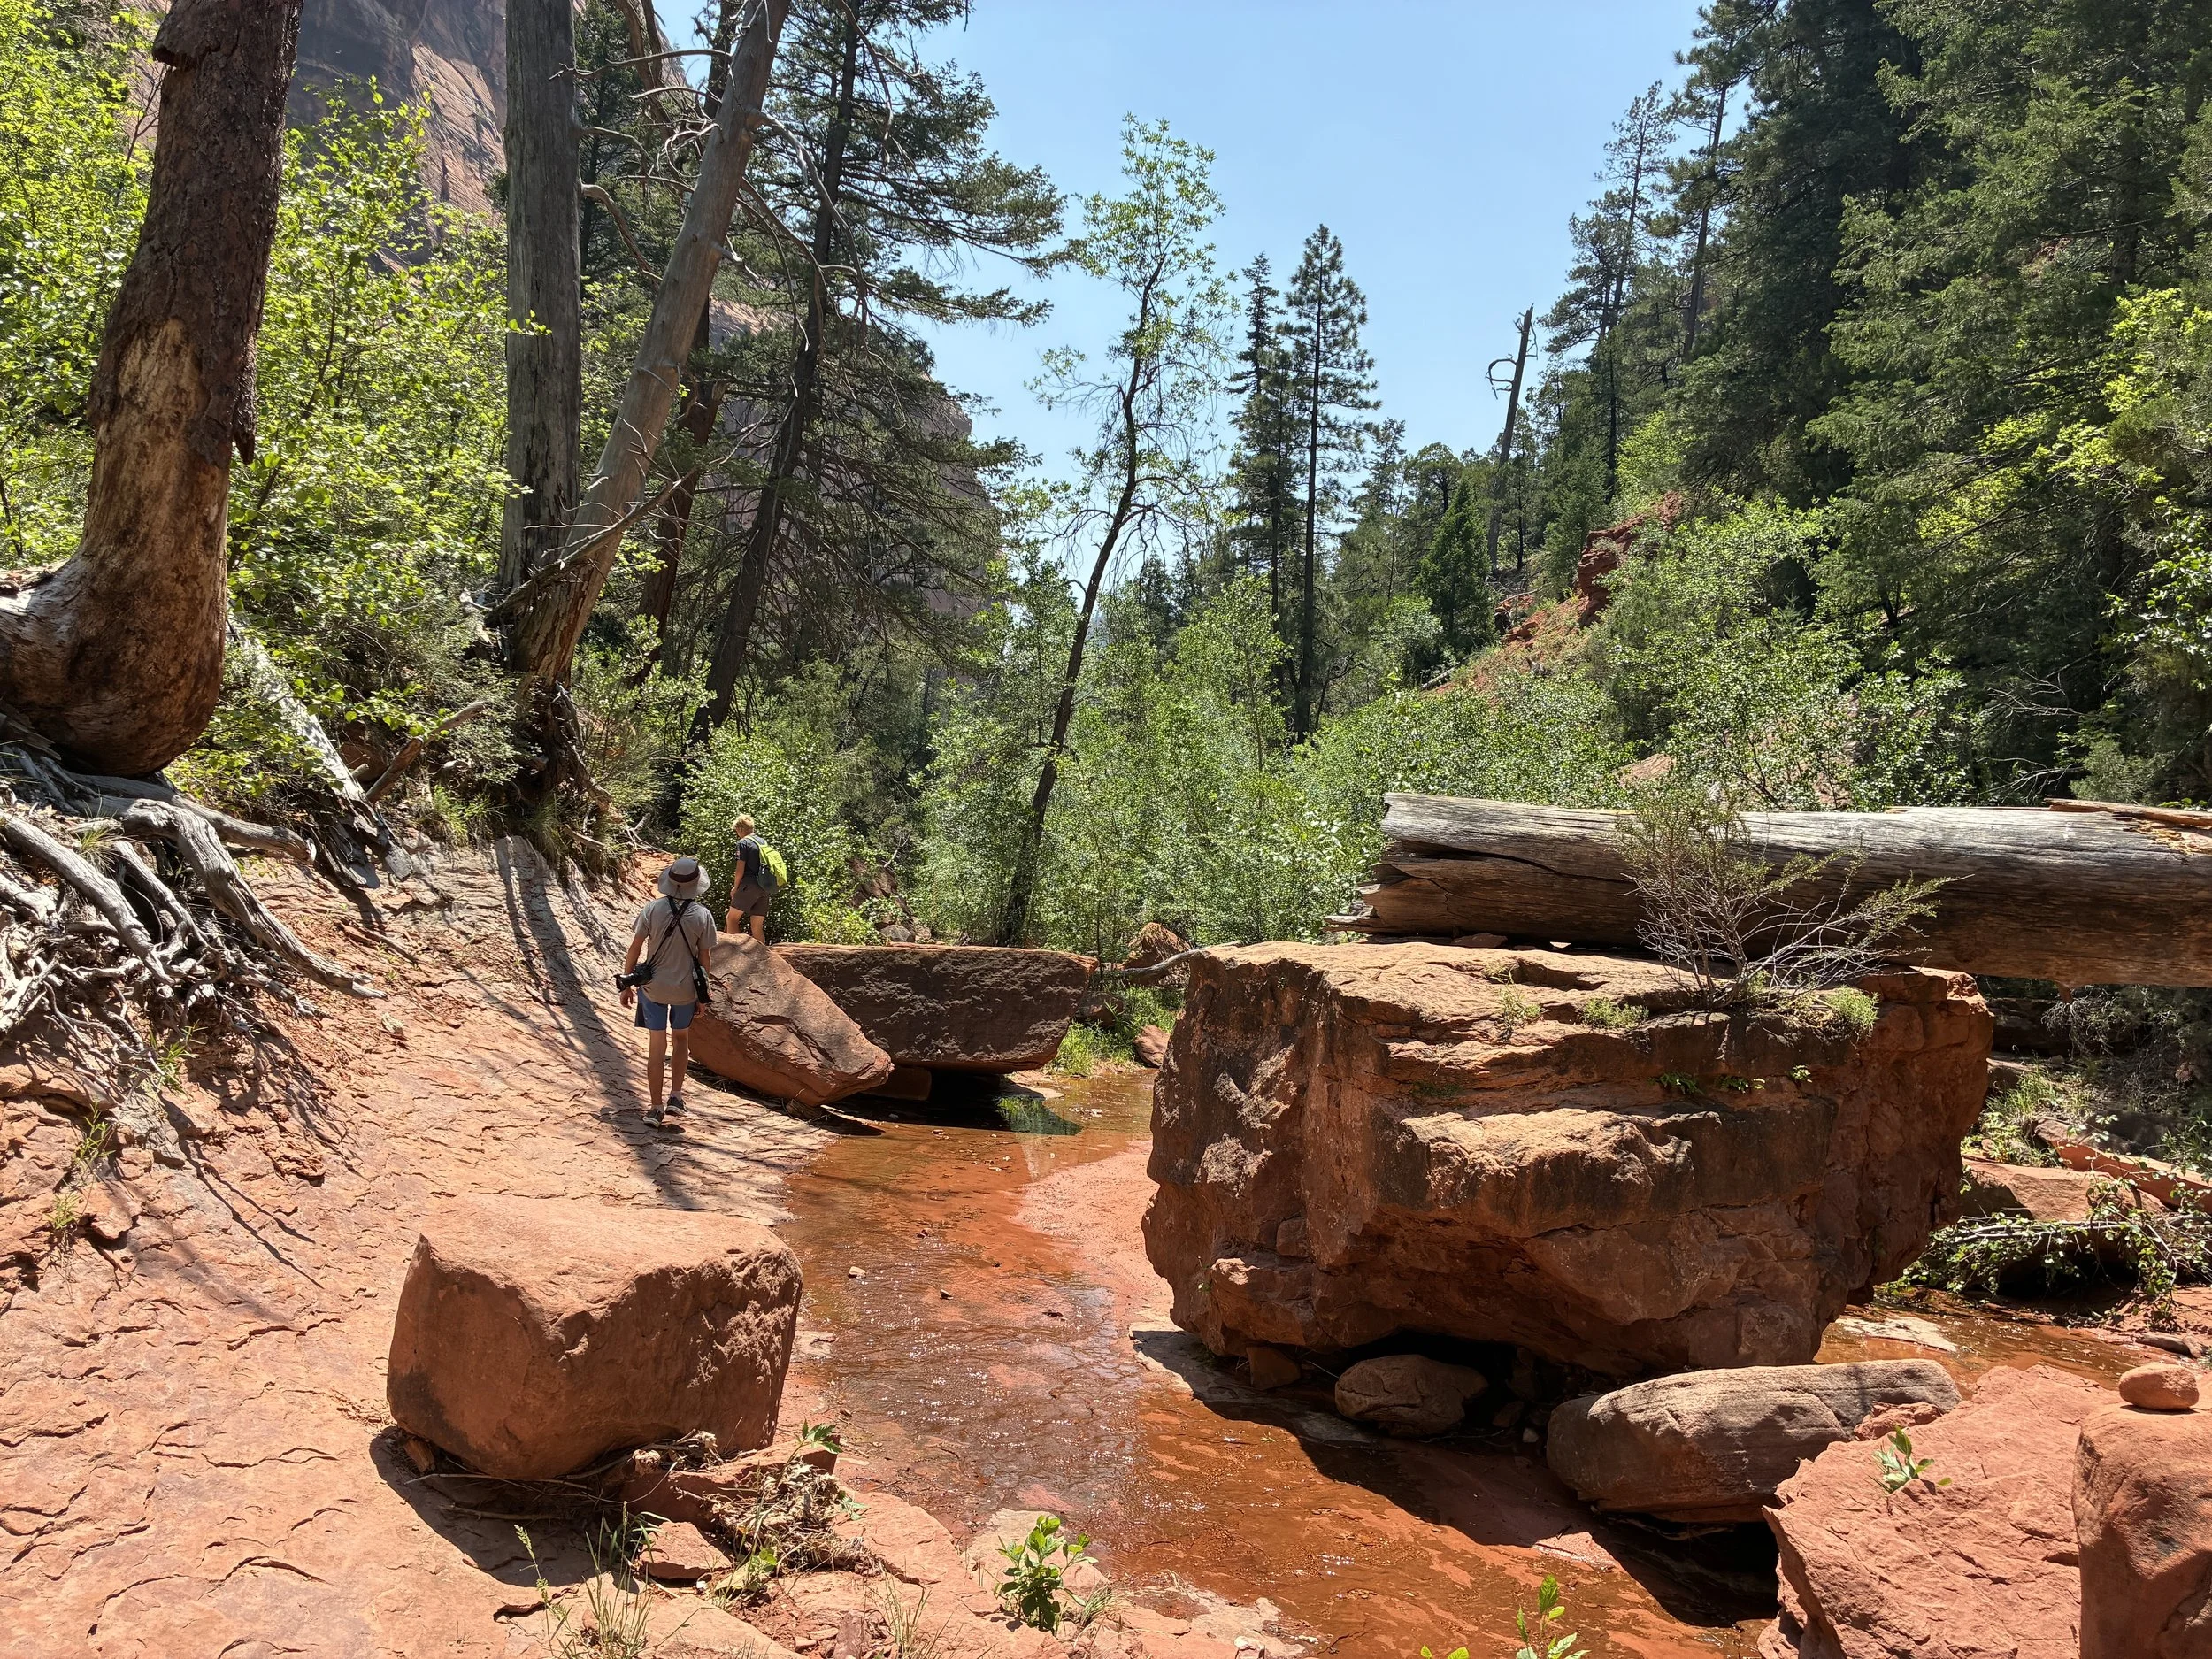
At about the halfway point in the trail, it switches direction, and eventually connects with the La Verkin Creek.
June 2025 - Walking down the trail to the La Verkin Creek
Despite several weeks without rain, there was still a descent amount of water flowing through the La Verkin Creek. Water flowing through the desert is such a pretty site.

June 2025 - La Verkin Creek
June 2025 - La Verkin Creek
This trail is pretty from all of its angles. I would very much recommend this hike, although maybe late spring or early fall when it isn’t quite so hot, or plan to start earlier in the morning than we did.
June 2025 - Hiking to Kolob Arch
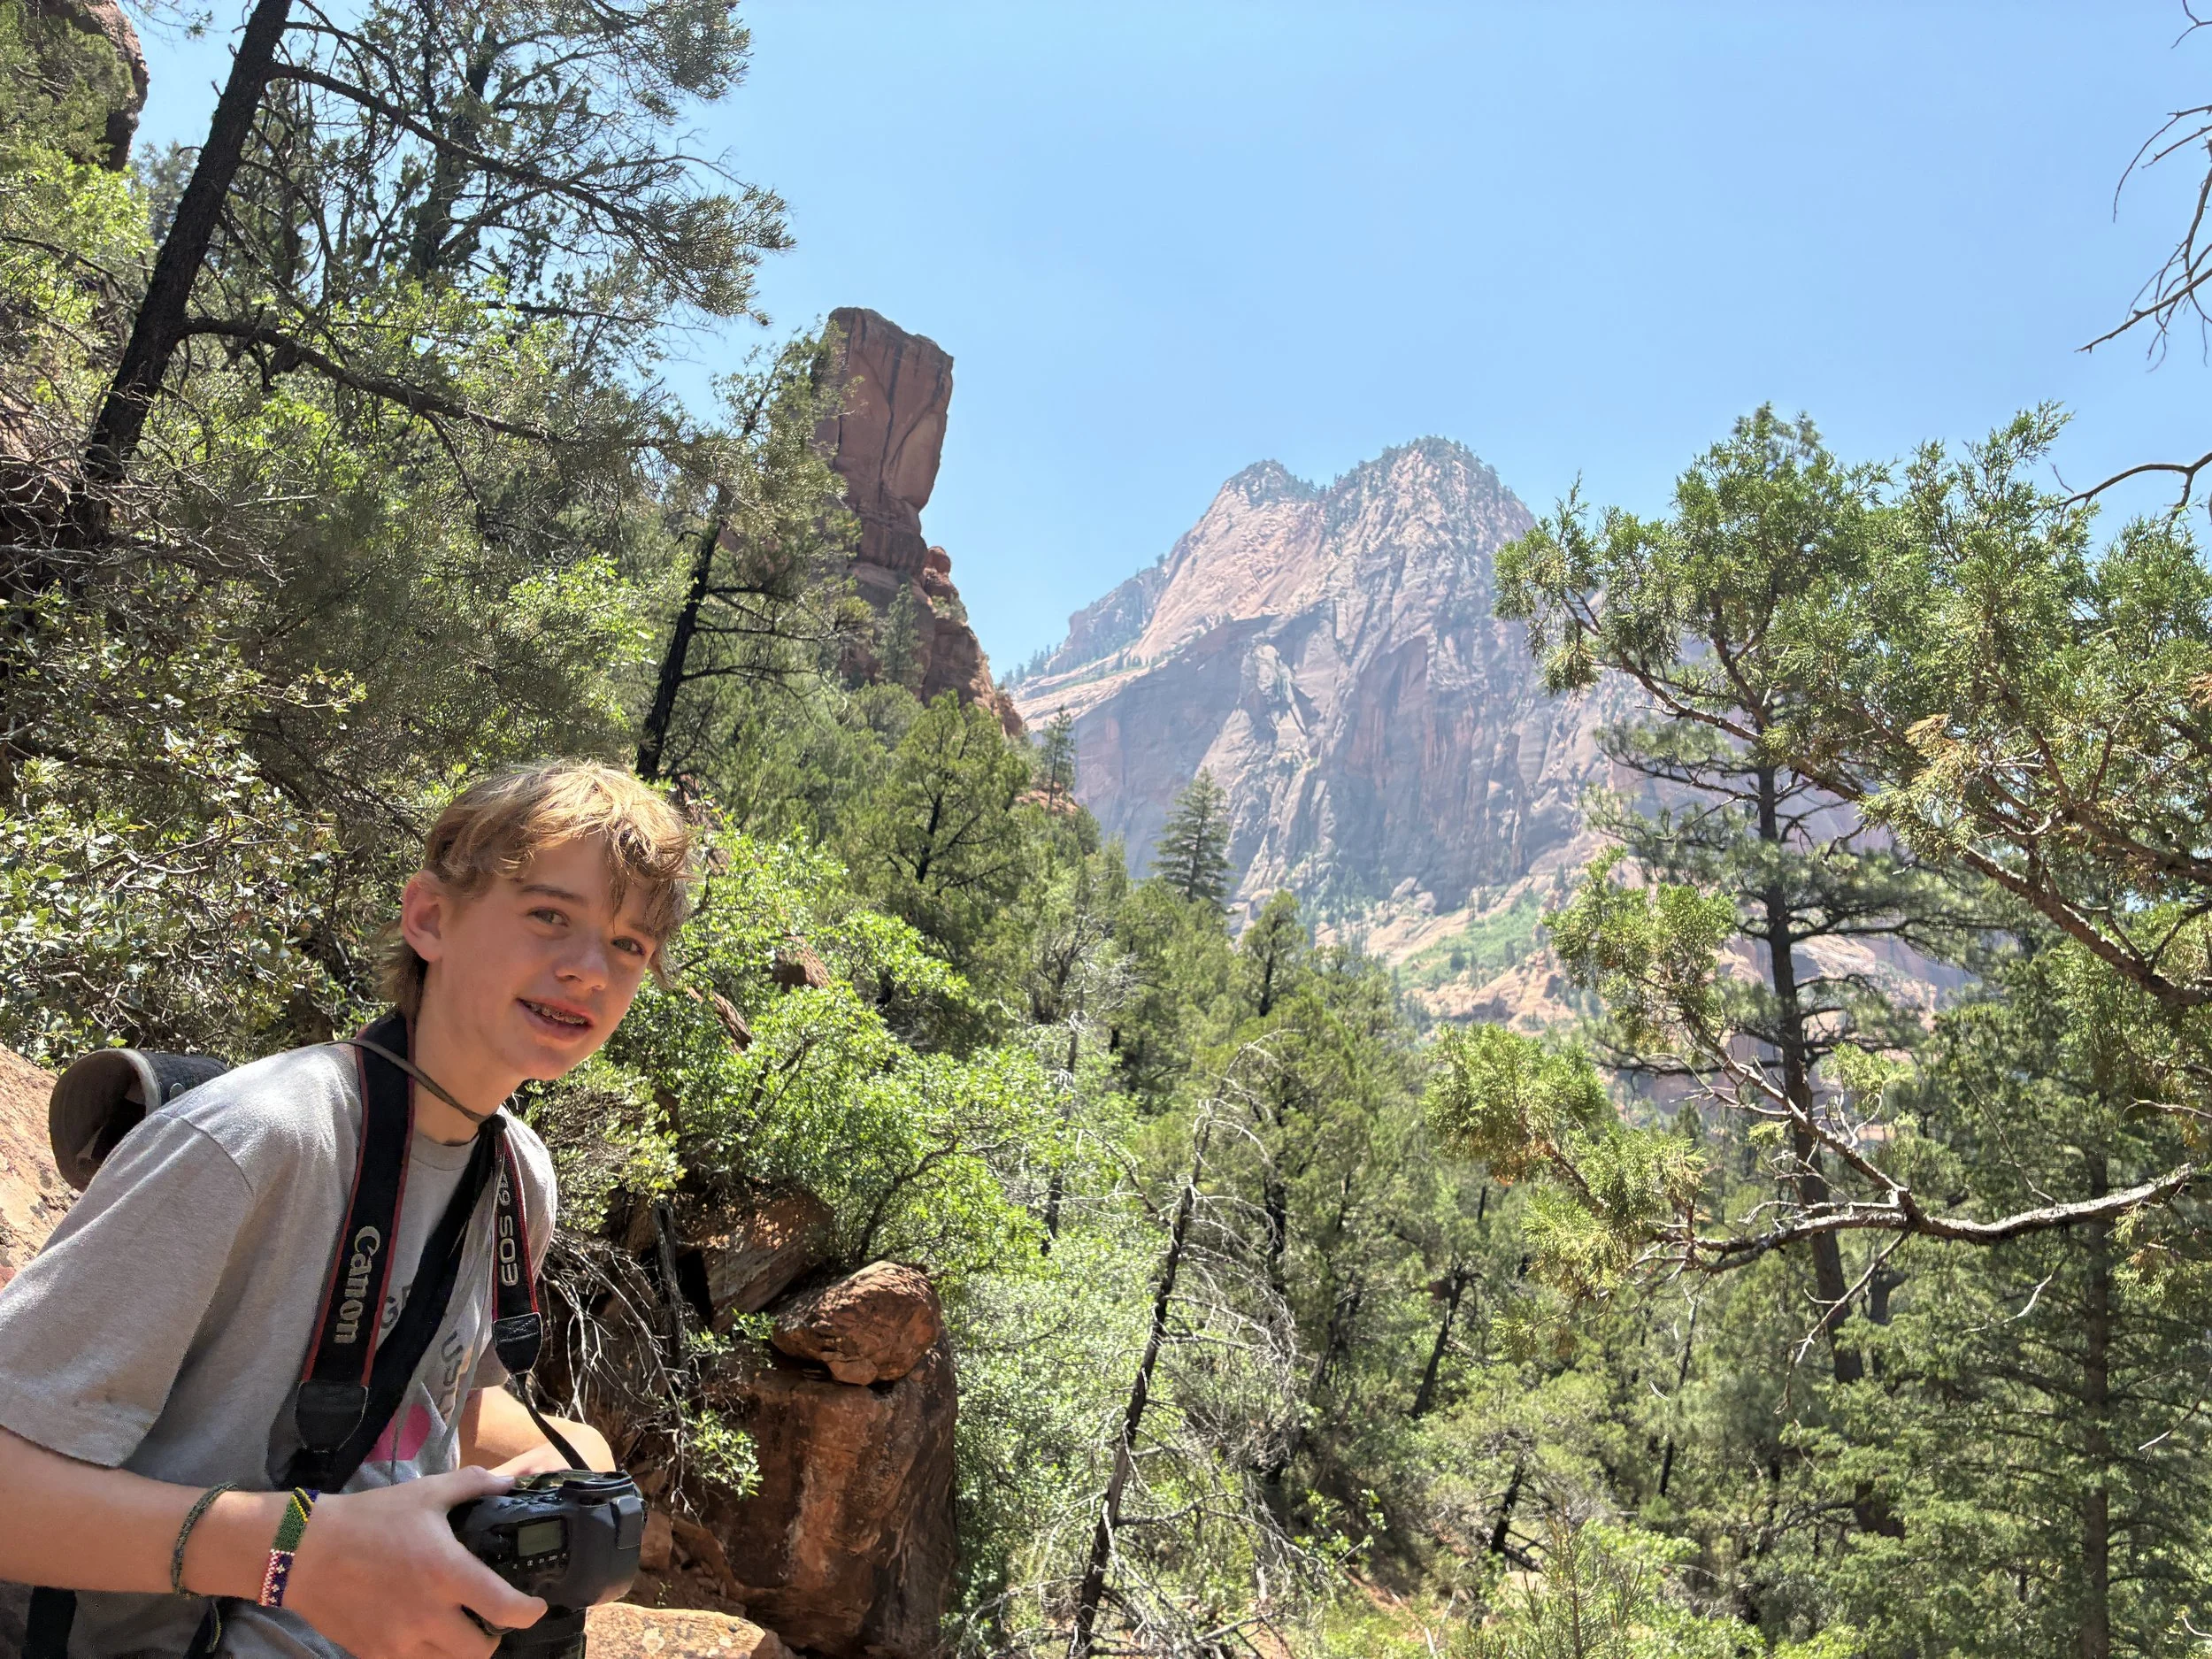
June 2025 - Earning the Boy Scout Hiking Merit Badge
After backpacking sites 8, 9 & 10, there is an intersection where you will need to turn left. There is a sign that says the trail is closed to stock. This really confused me for a bit. The way it was phrased it seemed closed. We re-read it a few times, and it just means it’s closed to horses. It sounds a little silly telling the story, because obviously stock refers to animals, but I didn’t take a picture of the sign to remember fully why we were confused. Anyone, it’s not referring to hikers - keep going.
June 2025 - Intersection to Kolob Arch
From here, the trail has several up and downs, scrambles over boulders and logs. It’s a fun section of trail, but it surprised me in its difficulty.
June 2025 - Spur trail to Kolob Arch
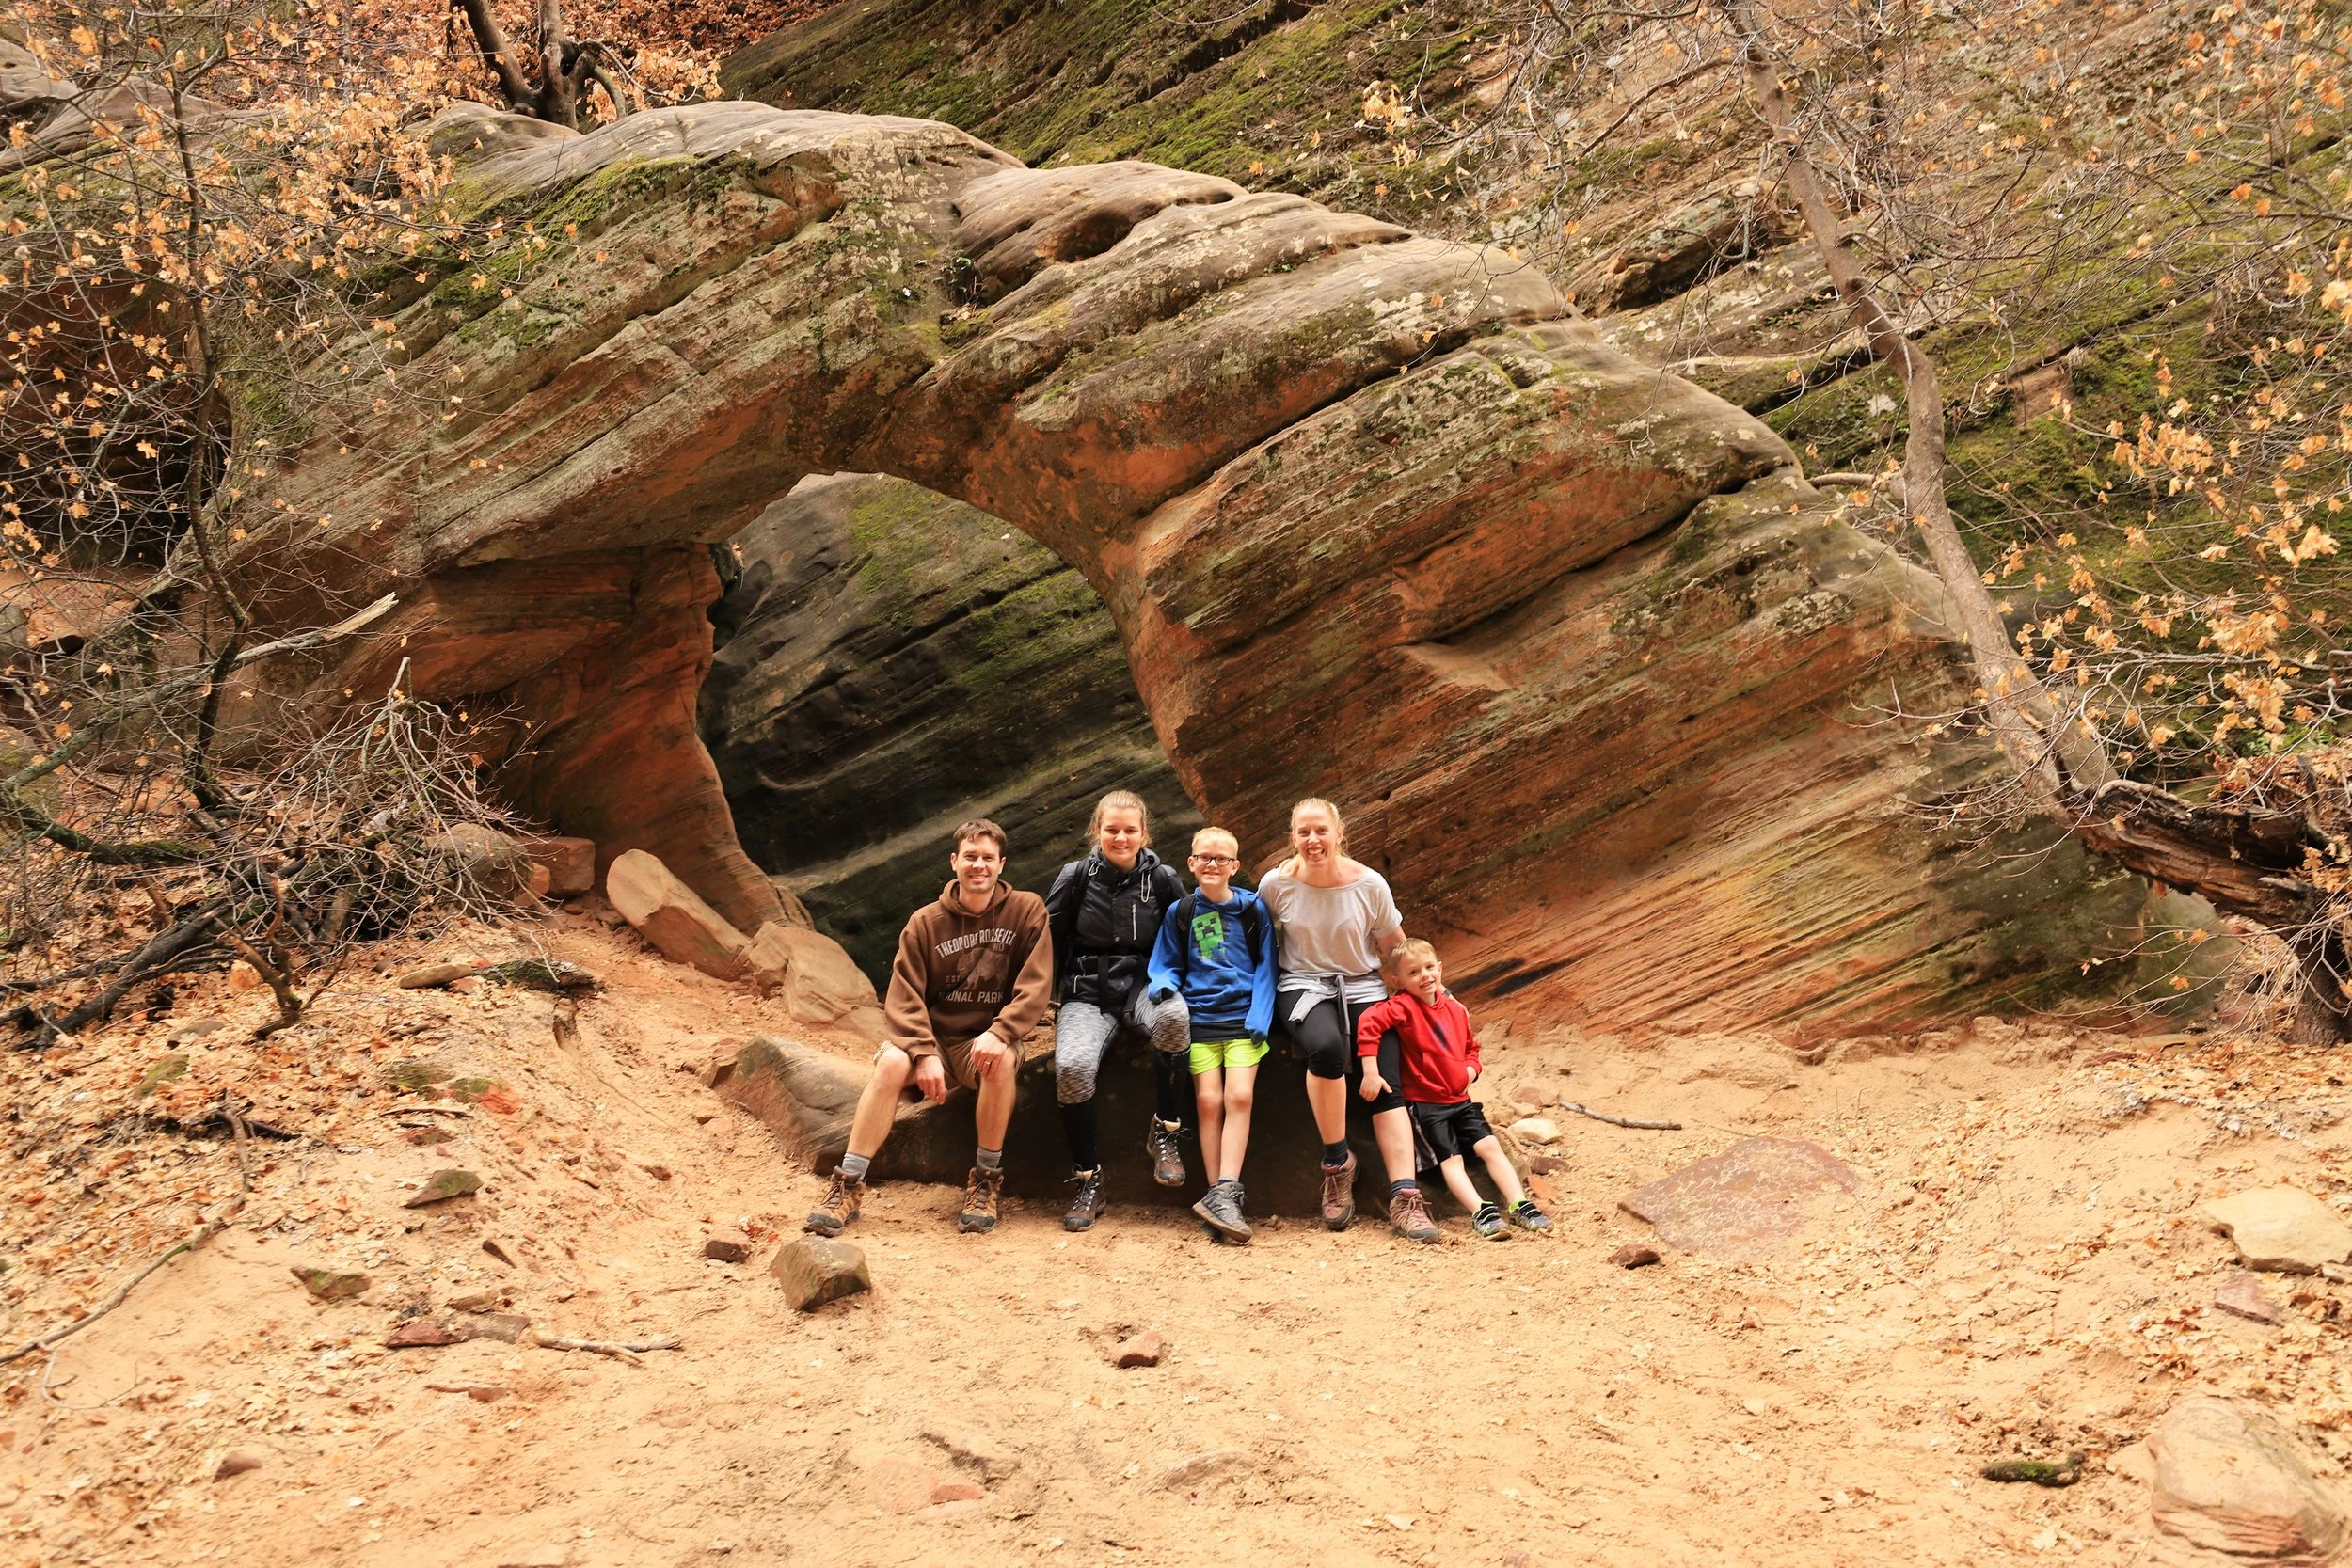
This is as close as the trail gets to Kolob Arch. I knew this going in, so I wasn’t disappointed by the final view. We actually picked this trail because it was over 10 miles (for the merit badge requirements) over having a desire to see the arch, so this was perfect, even if the view is a bit underwhelming. There is a wonderful shady spot to sit and enjoy the arch while eating a picnic lunch.
There are so many pretty viewpoints along this trail, and you will have the majority of the trail to yourself; I would suggest it in a heartbeat over Angels Landing, if someone is looking for a harder hike in Zion National Park.
June 2025 - Kolob Arch, Zion National Park

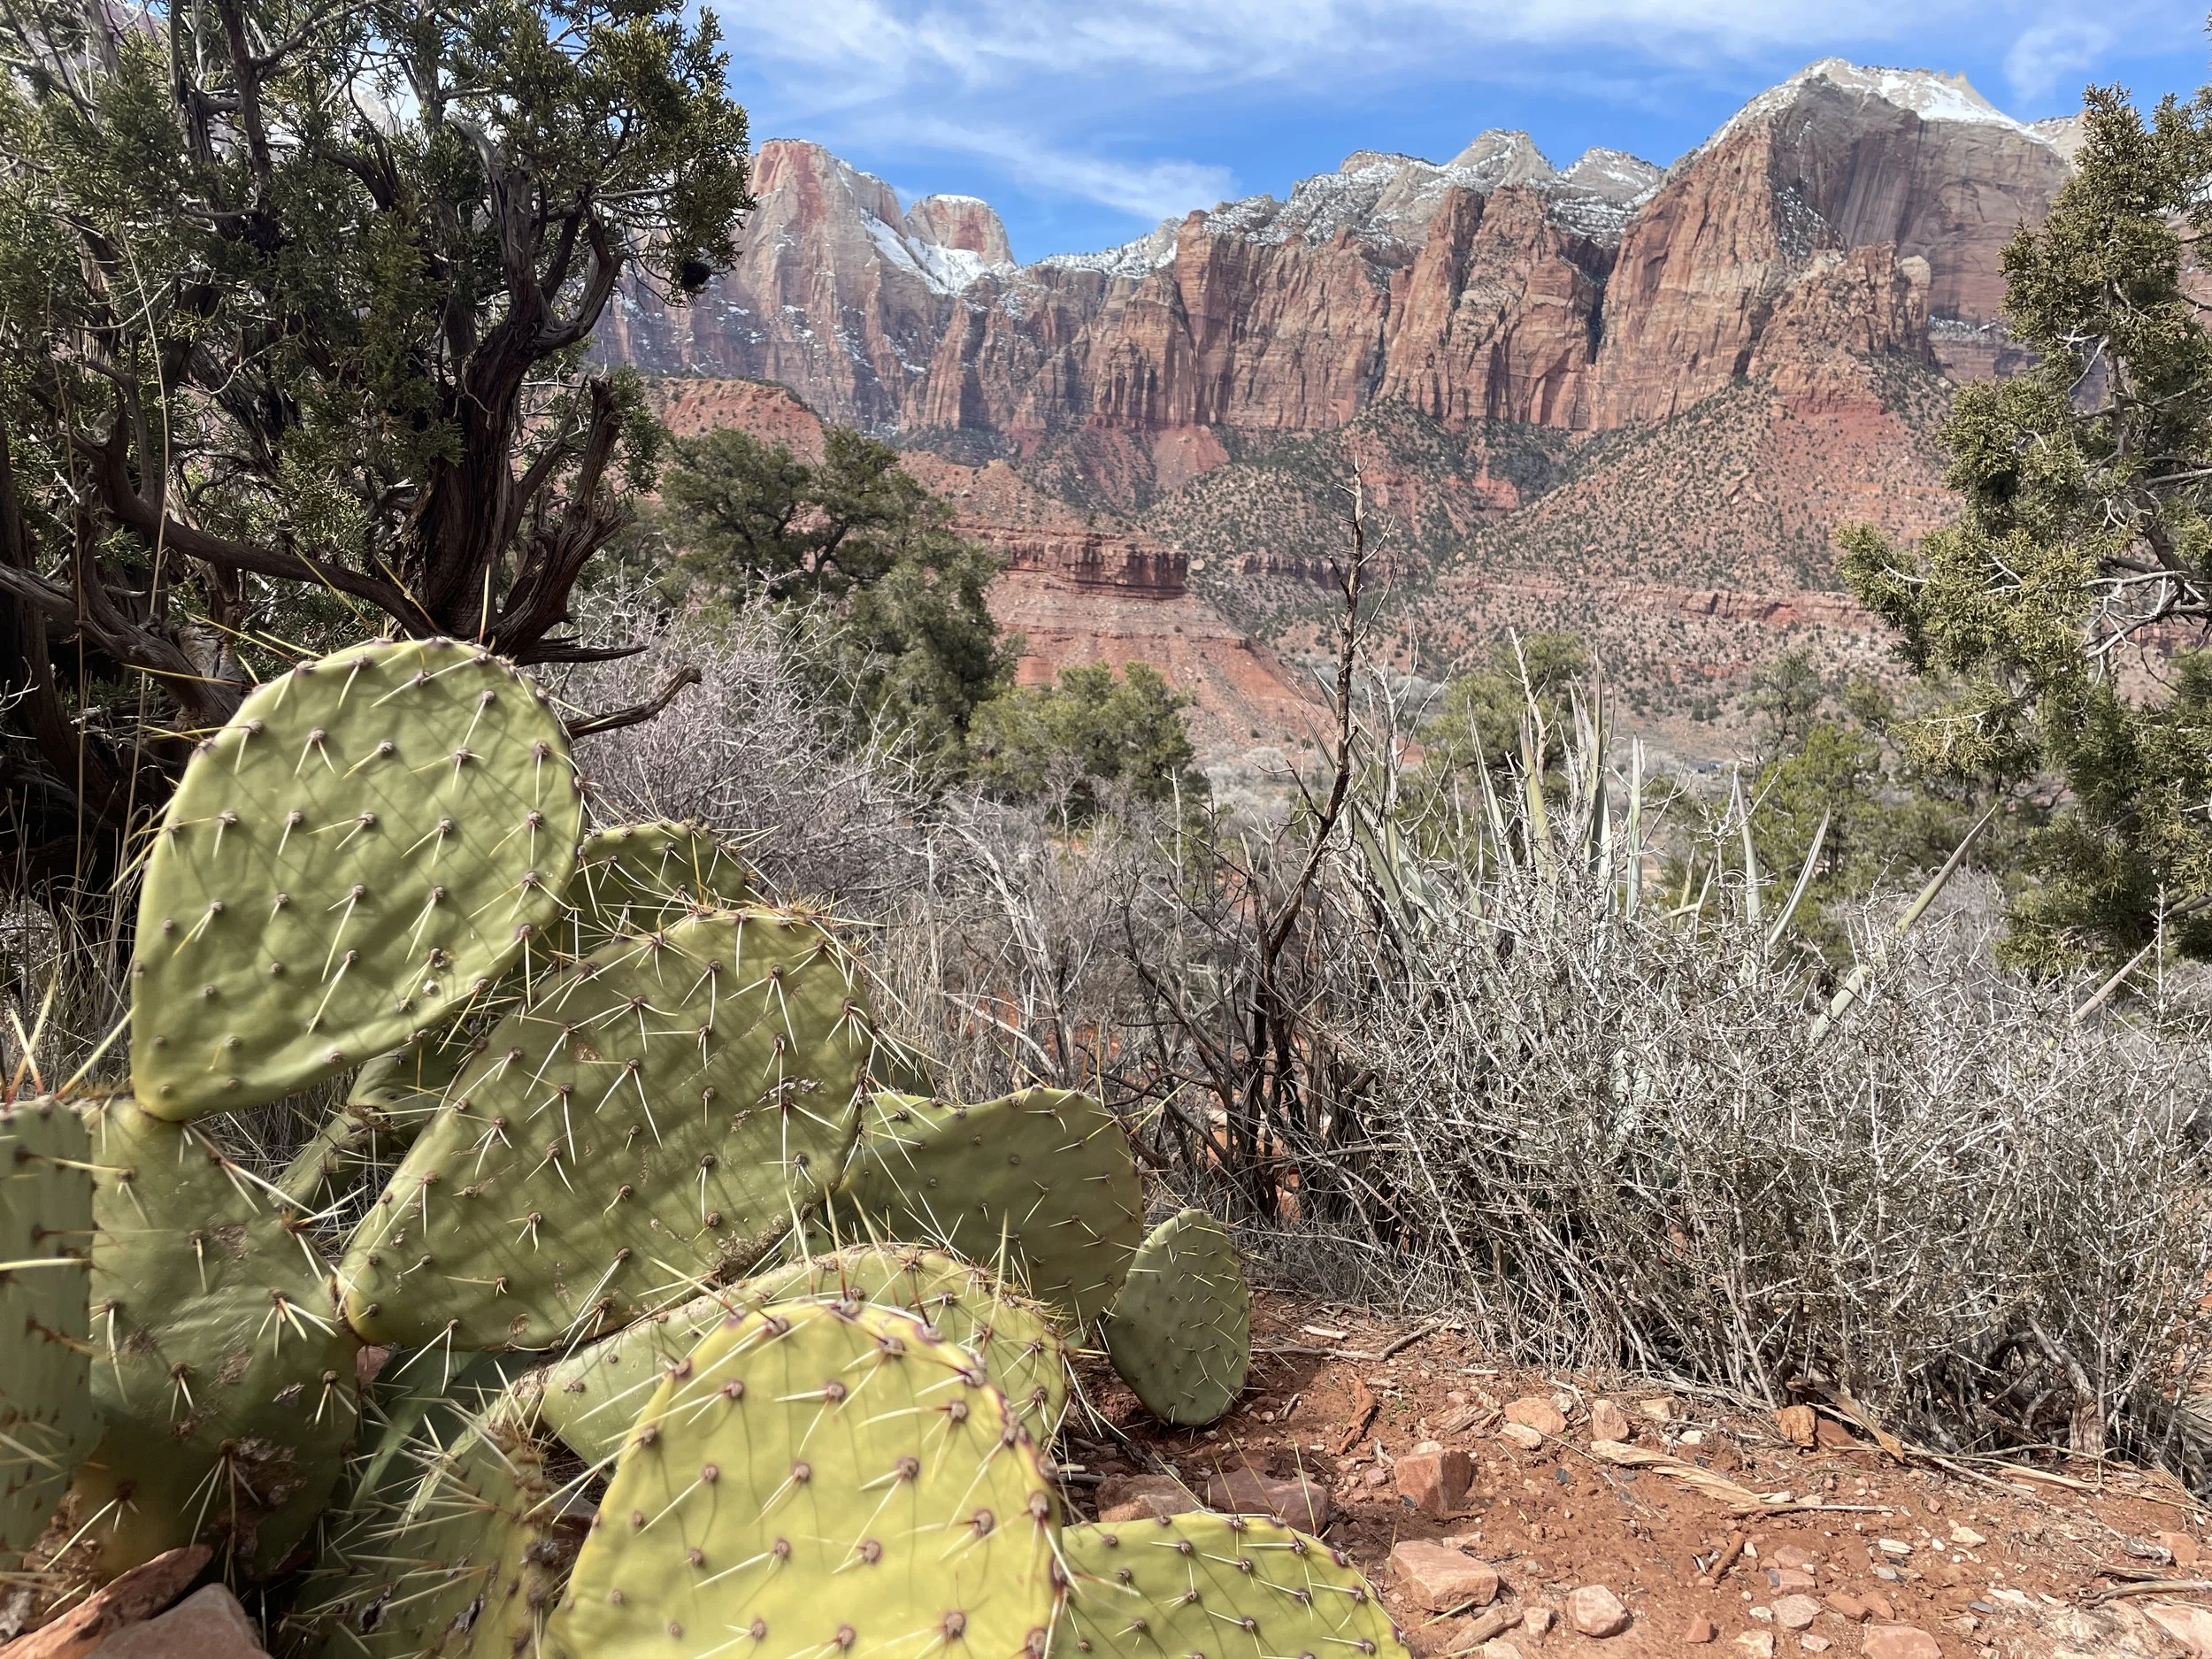
June 2025 - I can’t walk past a cactus blooming without taking a picture - Prickly Pears along trail to Kolob Arch
3 - Timber Creek Overlook

Timber Creek Map - Kolob Canyon, Zion National Park
Distance - 1.15 miles (out-and-back)
Elevation Gain - 115ft
Trailhead Location - Approximately 5 miles on Kolob Canyons Road past the Visitor Center. This trailhead is at the end of the Kolob Canyons Road. There is a vault toilet available at the trailhead.
June 2025 - Timber Creek Trailhead
Timber Creek is a relatively easy trail in terms of length and elevation gain, but the trail is not smooth. It switches between hard dirt and rock, and there are large tree roots and rocks to navigate around.
June 2025 - Timber Creek Trail out to the Viewpoint
Even for someone that isn’t interested in hiking, I would still recommend driving out to the end of Kolob Canyons Road. Most of the views along the Timber Creek Trail (with the exception of the last viewpoint) are pretty similar to views from the parking lot.

June 2025 - View of Kolob Canyon from Timber Creek
The end of Timber Creek Trail was the one point where we ran into people in Kolob Canyon. But when I say “people” this was it - and I’m one of the people in this picture. This part of the park is so worth the short drive!
In the picture below, it’s easier to see in person, but on the horizon towards the right side of the photo, the mountains that are visible are the North Rim of the Grand Canyon - that’s how far you can see on a clear day, and how close the National Parks are to one another.
June 2025 - Timber Creek was the busiest part of Kolob Canyon (all people are pictured). Grand Canyon North Rim is visible on the horizon on the right side of the photo.
June 2025 - Epic views from the end of Timber Creek in Kolob Canyon, Zion National Park
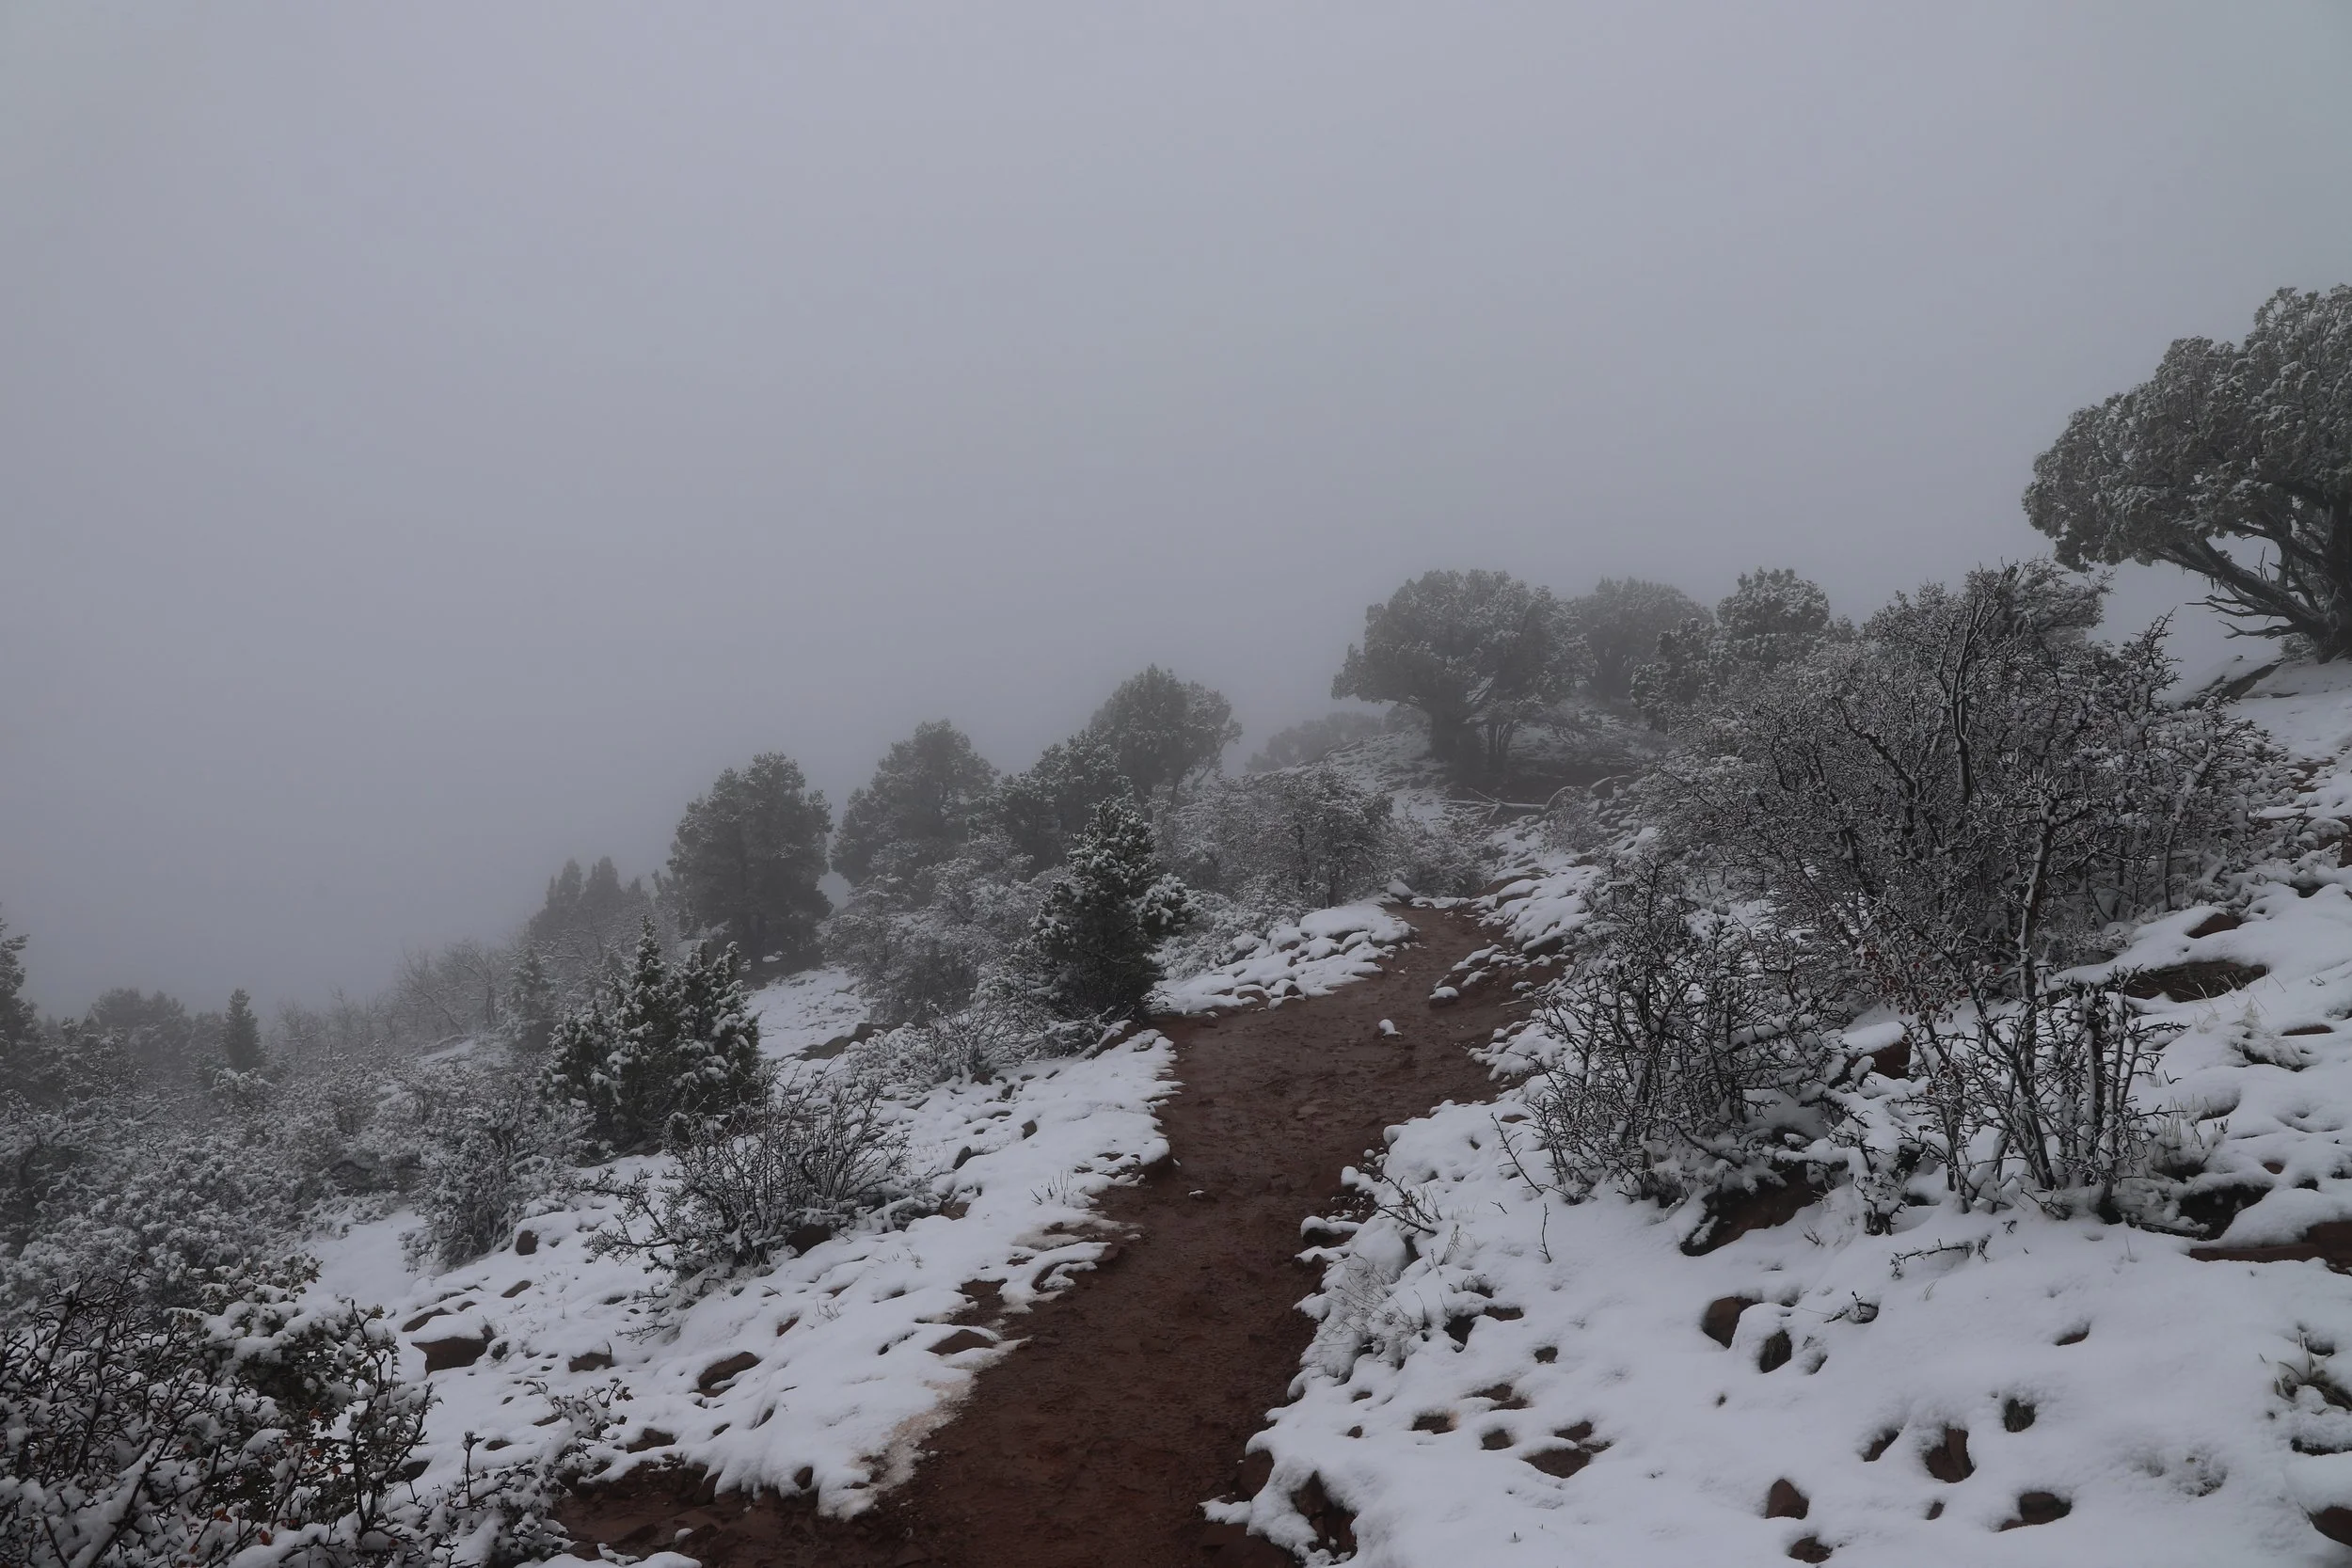
Does it snow in Zion National Park? Absolutely! This is the same Timber Creek Trail in March 2019. We could not see any part of the canyon in front of us… The clouds were too thick. Due to the higher elevations in Kolob Canyon, I wouldn’t recommend visiting in the winter. Try later spring through late fall.
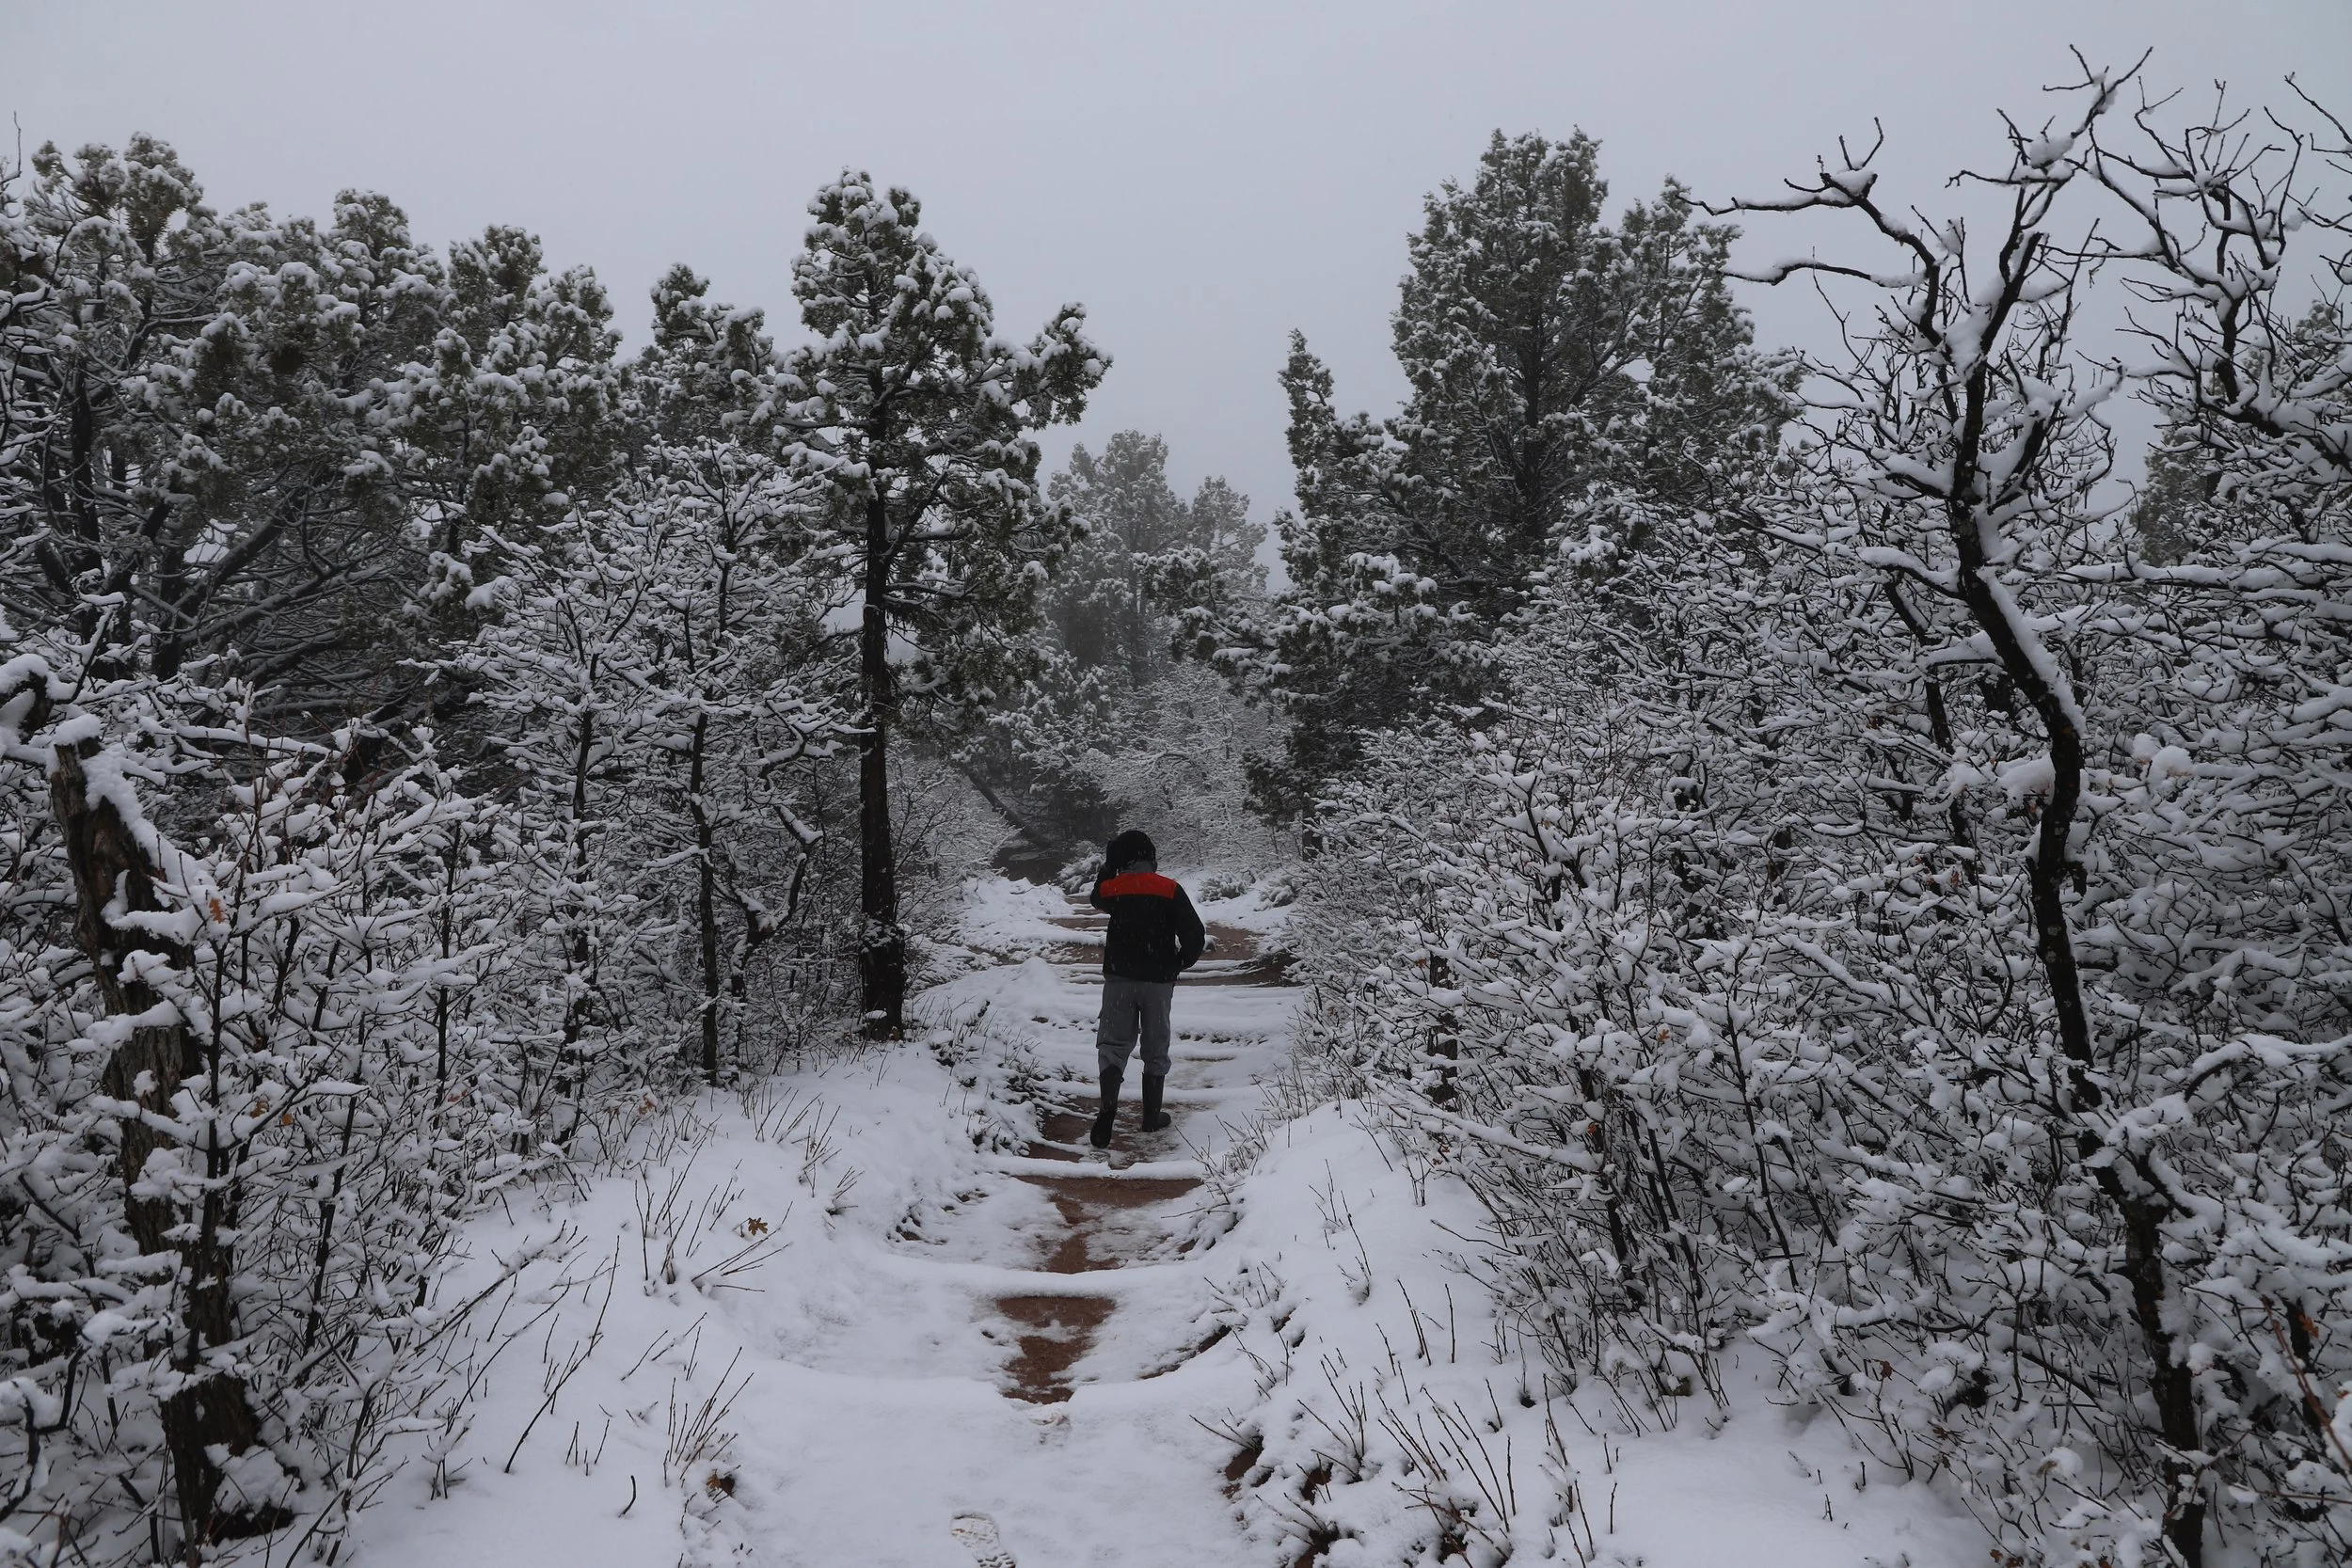
March 2019 - Timber Creek - Kolob Canyon, Zion National Park
Other Hikes Nearby Kolob Canyons (outside Zion)
There are a couple of nearby places to hike that are worth noting here due to their close proximity to Kolob Canyons even though they are outside of Zion National Park.
Kanarra Falls
Kanarra Falls is outside of Zion National Park, so I have it written up in a separate post, but it is only a 12-minute drive from the Kolob Canyons Visitor Center, and I think it’s worth noting this fun and unique hike here. Kanarra Falls is a moderately easy 3.6 mile out-and-back hike to a slot canyon with four waterfalls. You will get wet on this hike. Bring hiking poles for added stability in the water sections and carry extra water to drink as the first mile is quite exposed to the sun. We also wore neoprene booties under our water shoes which kept our feet warm. For more information, see my post on Kanarra Falls.

Kanarra Falls (trailhead is approximately 12 minutes from the Kolob Canyons Visitor Center)
Red Reef Trail
Similarly, Red Reef is outside of Zion, but the trailhead is less than a 30 minute drive from the Kolob Canyon’s Visitor Center. The Red Reef Trail is a relatively easy 1.7-ish mile out-and-back hike along Quail Creek to a stunning canyon just outside of St. George. The Moki steps do require a bit of courage to cross. The trail continues upstream but will likely be underwater in the winter and spring months. For more information, see my post on Red Reef Trail.

4 - The Subway
This is sitting as a hopeful place holder on my blogpost - someday…. To work our way up to this hike, we learned how to rappel in 2025 and have practiced this on a few hikes so far. We have all of our own gear. Now we just need to win some permits. Hopefully this is in our near future.
Zion Main Entrance (Springdale)
The main entrance to Zion National Park is in Springdale, Utah. Right next to the entrance is a parking lot (free), the main Zion Visitor Center, a gift store, and the Zion Canyon Wilderness Desk (where permits are picked up). If the parking lot is full, there are backup lots in nearby Springdale, but these secondary lots will not be free.
The majority of the year, there is a free Zion Canyon Shuttle that runs from the Visitor Center down the main stretch of the trailheads to the Temple of Sinawava (where the Riverside Walk and Zion Narrows trails start). All of the Zion’s popular trailheads (Emerald Pools, Angel’s Landing, Weeping Rock, Riverside Walk, and the Narrows) are accessed by this free park shuttle. The parking lots at the trailheads are simply too small to accommodate the number of hikers the trails see in a day.
The Zion National park website states the shuttles run from April to November, but they are going to run whenever there are crowds and no parking is available at the trailheads. I saw them running in the first week of March 2023. Be prepared to use the shuttle. There are 9 shuttle stops and it’s relatively easy to understand. In my maps below, I’ve marked the shuttle stops in orange circles.
The shuttle is really easy to use from the Visitor Center to each trailhead. The bus will stop at every trailhead. It does get more difficult on the return trip. If the bus is full (and these buses get packed), it won’t stop to pick up anyone else on the way back. This makes it really tricky to get back to the Visitor Center from Emerald Pools or Sand Bench Trail if you are hiking towards the end of the day when the shuttle is ending soon and everyone needs to get out of the park. I would hike those trails early in the day to ensure an easy shuttle ride back. Save some of the trails that take off from the Visitor Center parking lot (like Pa’rus and Watchman Overlook) for the end of the day.
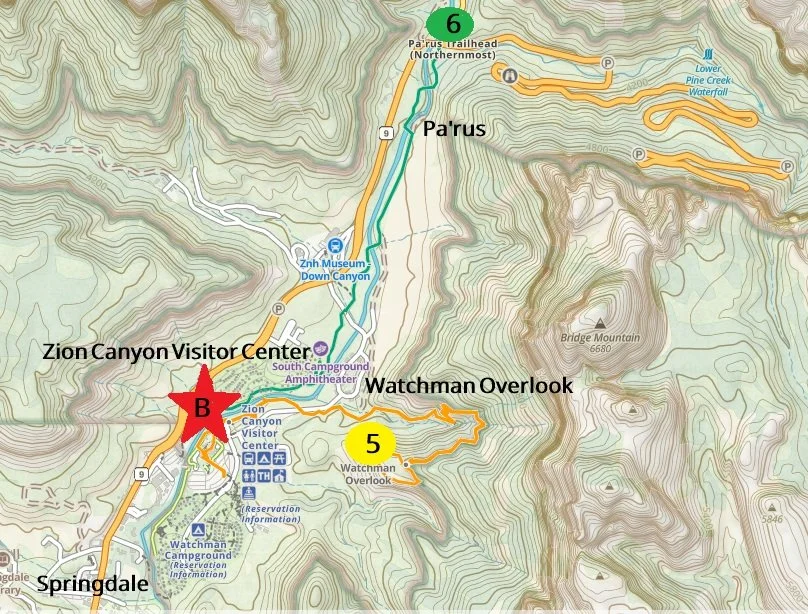
Map of the main entrance to Zion National Park near Springdale, Utah - 5 - Watchman Overlook (moderate), 6 - Pa’rus (easy)
In addition to parking and stopping at the Visitor Center and Gift Store, there are two hikes worthy of shout-outs that do not require use of the Zion shuttle system. These trails take off directly from the Visitor Center parking lot. They are great hikes to do towards the end of the day, when you aren’t going to want to rely on squeezing into a packed shuttle bus to get back to your car.
5 - Watchman Overlook

Map to Watchman Overlook
Distance - 3.2 miles (out-and-back)
Elevation Gain - 650ft
Trailhead Location - The trail starts from the parking lot of the main Zion National Park Visitor Center.
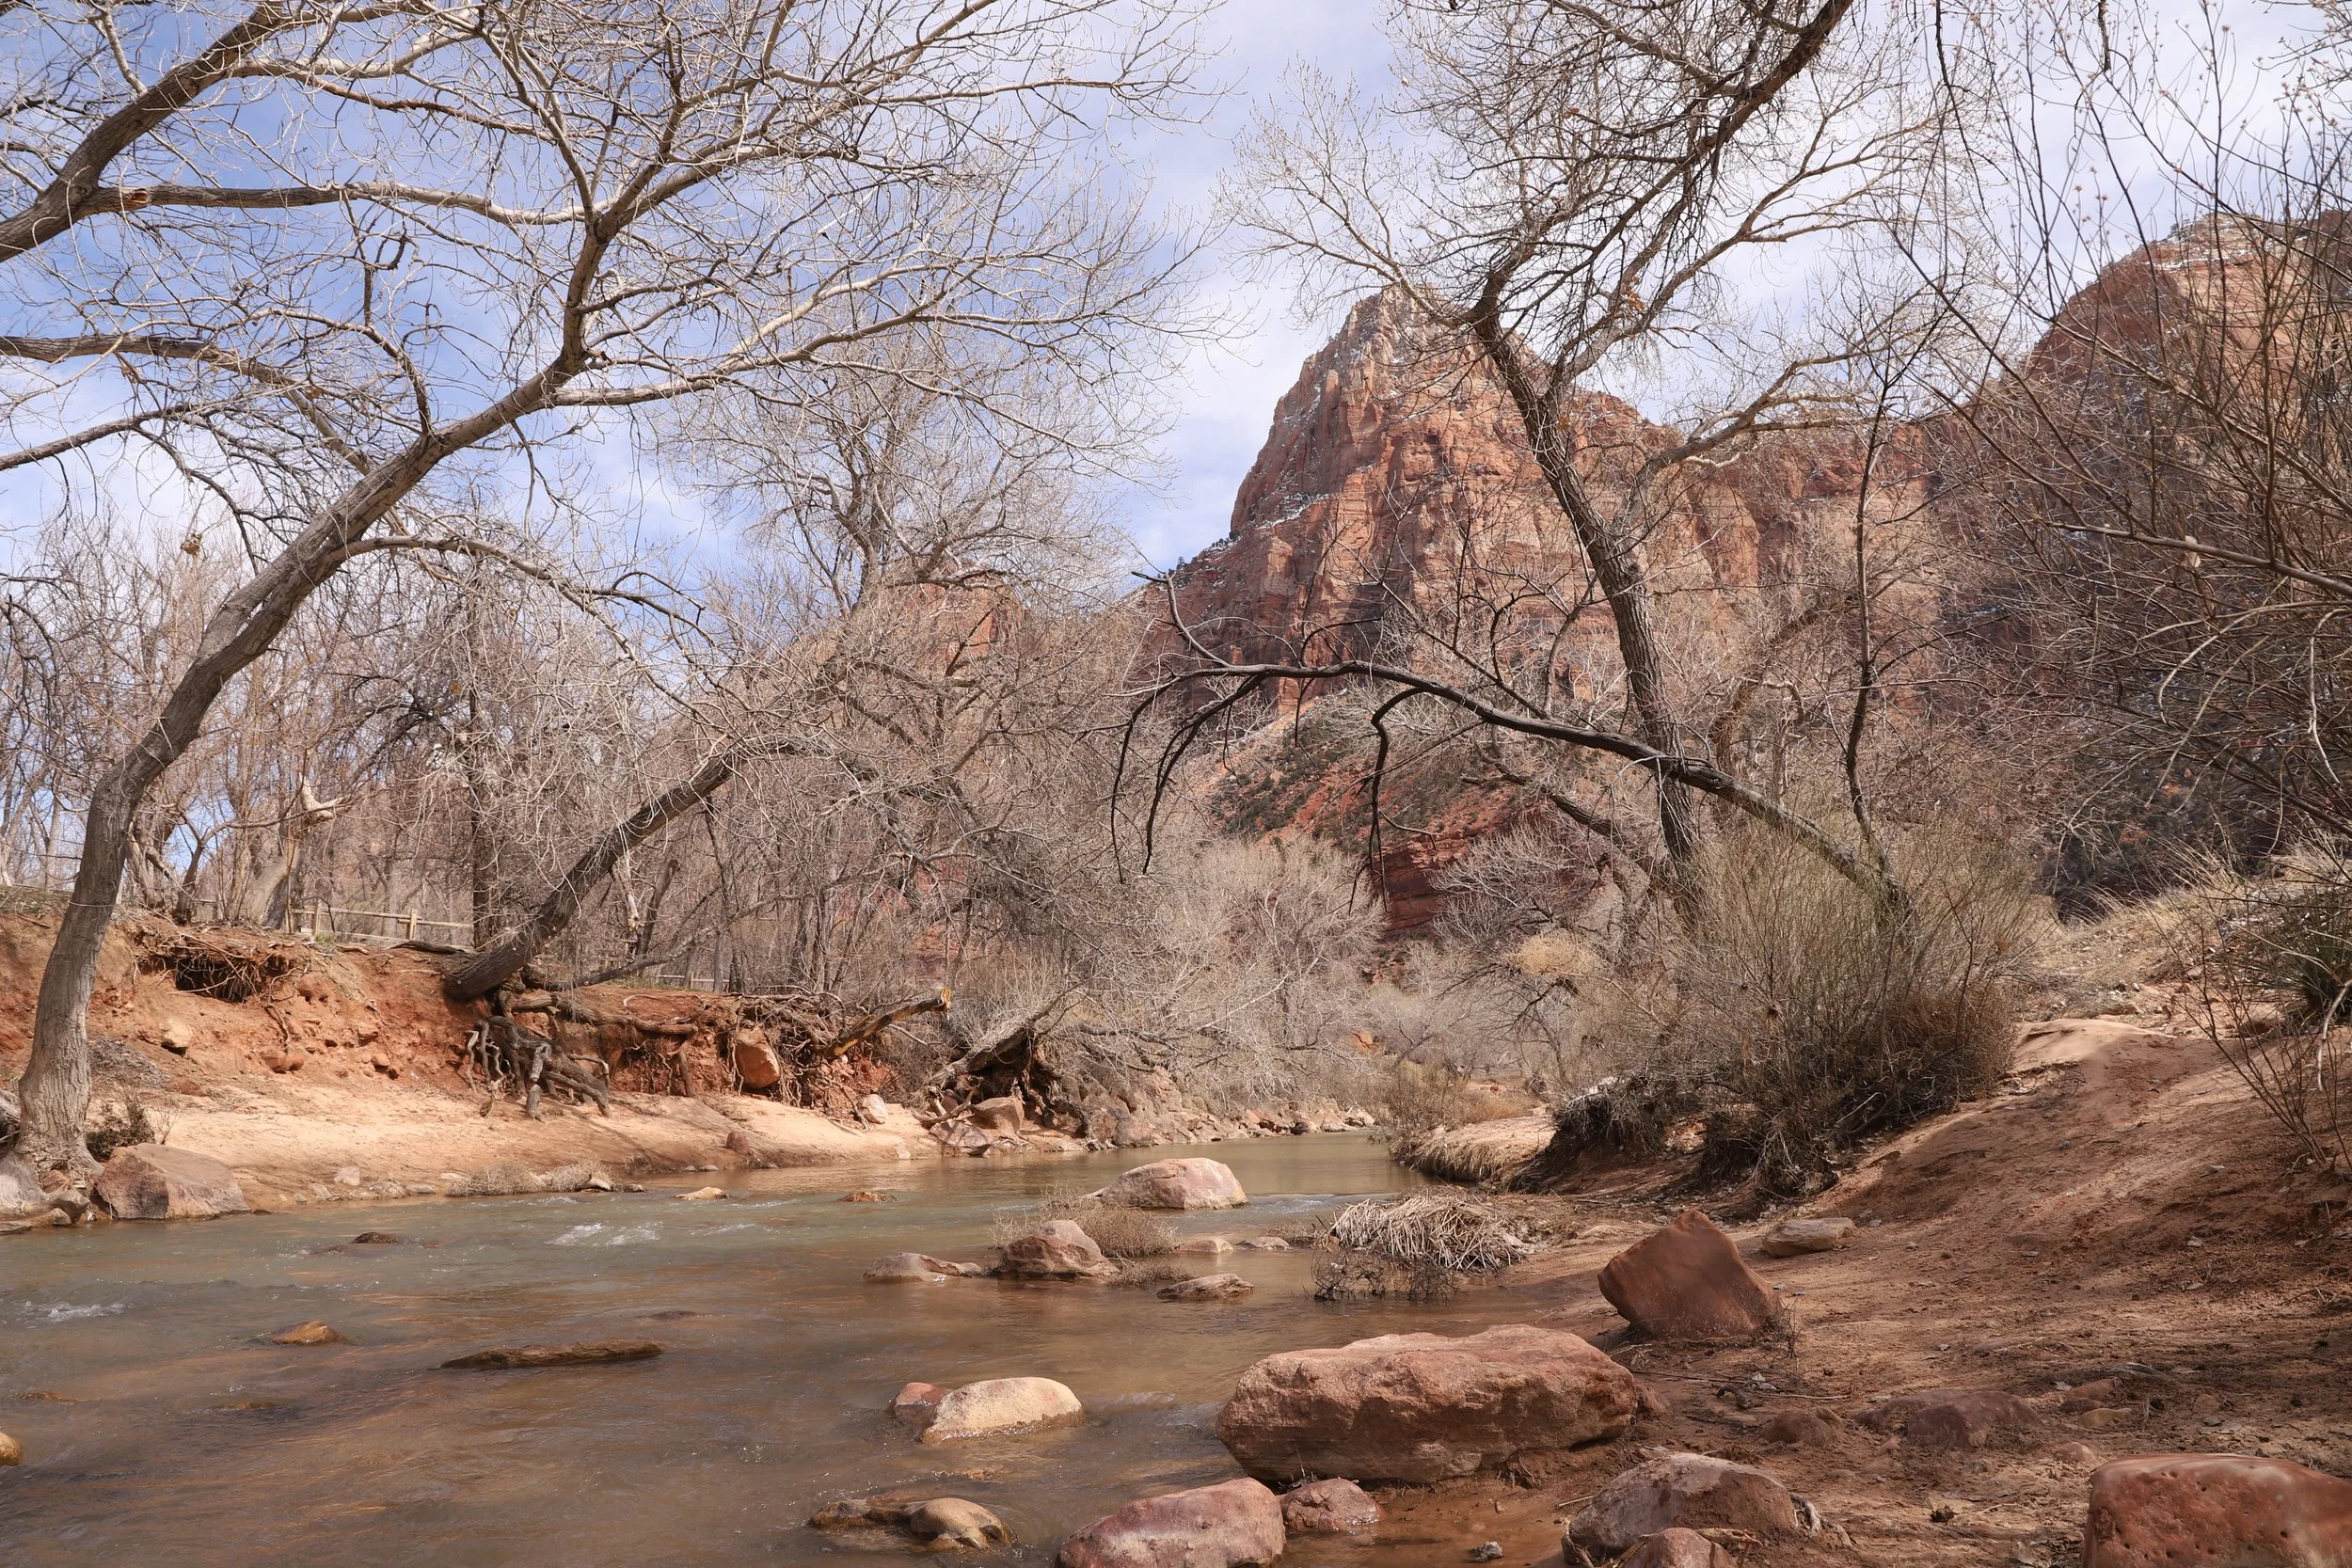
March 2023 - Hiking to Watchman Overlook in Zion National Park, along the Virgin River
March is a really tough time of the year to plan ahead for- weather can impact the best planned trips. I had the goal of hiking Buckskin Gulch on a Spring Break trip in 2023 with my boys. Buckskin Gulch is a slot canyon, so I monitored the weather for about 10 days prior to our trip to have an idea of how much water might be present. In Feb / early March 2023, it snowed, and snowed, and snowed. I was already on edge about the idea of going into a canyon with that much snow which could melt and turn to water. Then I read a trail review that it was awful trying to get to the trailhead due to extreme mud along the road. That was my tipping point in deciding to switch my plans. Luckily, there are great options for back up hikes, and we unexpectedly, spent the day in Zion. We hiked the Watchman Trail and spent the rest of our time on the east side of park.
(I wasn’t so off on my feeling uncomfortable about hiking Buckskin. Later that week, two hikers would die in a flashflood in Buckskin Gulch and a third had to be rescued due to flashfloods. We were able to hike Buckskin Gulch during a return trip in June 2025 - sometimes you just need to go back to Utah and take another vacation.)
March 2023 - Hiking up to the Watchman Overlook
All things considered, Zion National Park was the perfect place to spend an extra day in March 2023. We hadn’t yet hiked up to Watchman, and it seemed like an easy way to enjoy a couple of hours.
March 2023 - Hiking up to Watchman Overlook, Zion National Park
Hiking up 650ft in elevation isn’t nothing, but overall this was a hike that was pretty easy to handle. The hardest part on this particular day of hiking was the mud. We were so crazy dirty after hiking on this trail. A bit of mom advice - always pack extra quarters, a handful of laundry detergent packets, and dryer sheets on a vacation. Hotels and campgrounds often have washers and driers that guests can use. If you forgot quarters, laundry detergent, and/or dryer sheets - ask in the lobby. They probably have what you need for a small charge.
March 2023 - Hiking to the Watchman Overlook in Zion National Park
There are a lot of switchbacks along this trail, but the top is of the trail is quite fun. There are a few different angles and spurs to explore to find the best pictures from the overlook.
I’m not sure that I would say the Watchman Trail is the best trail in Zion, or a must-do trail, but it was perfect for us on this day. We enjoyed the hike, the view, the sun, and no flashfloods…
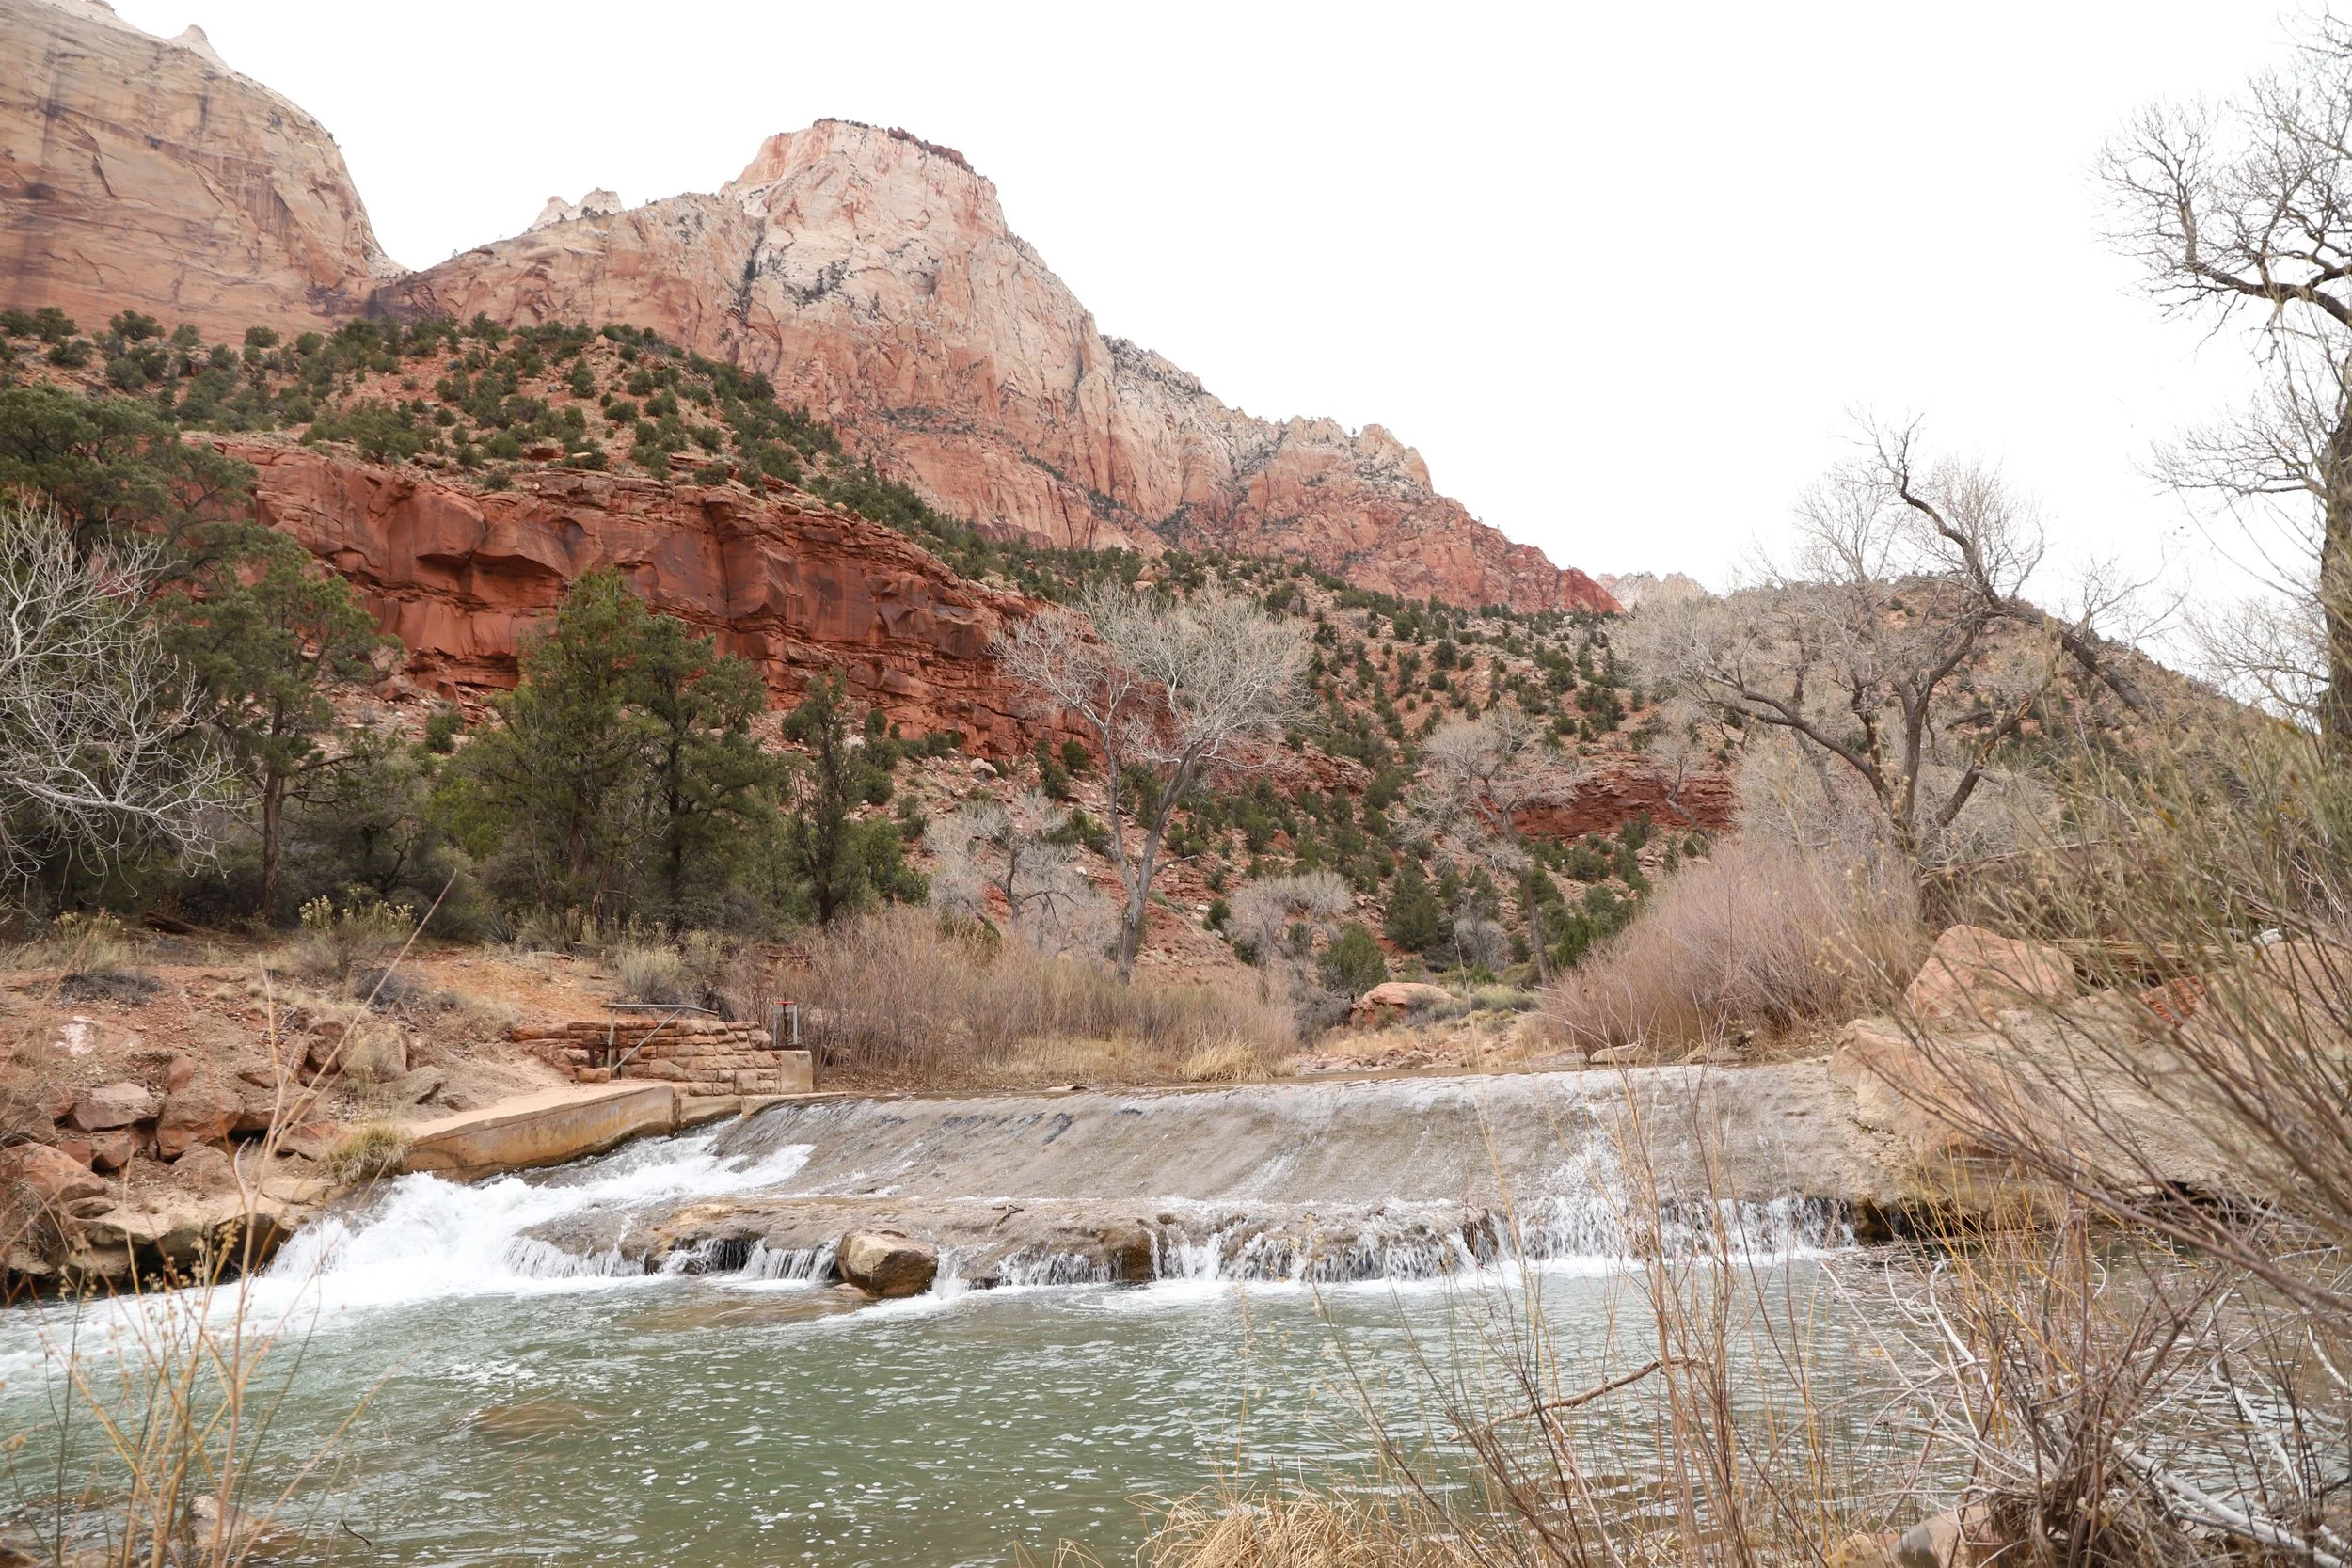
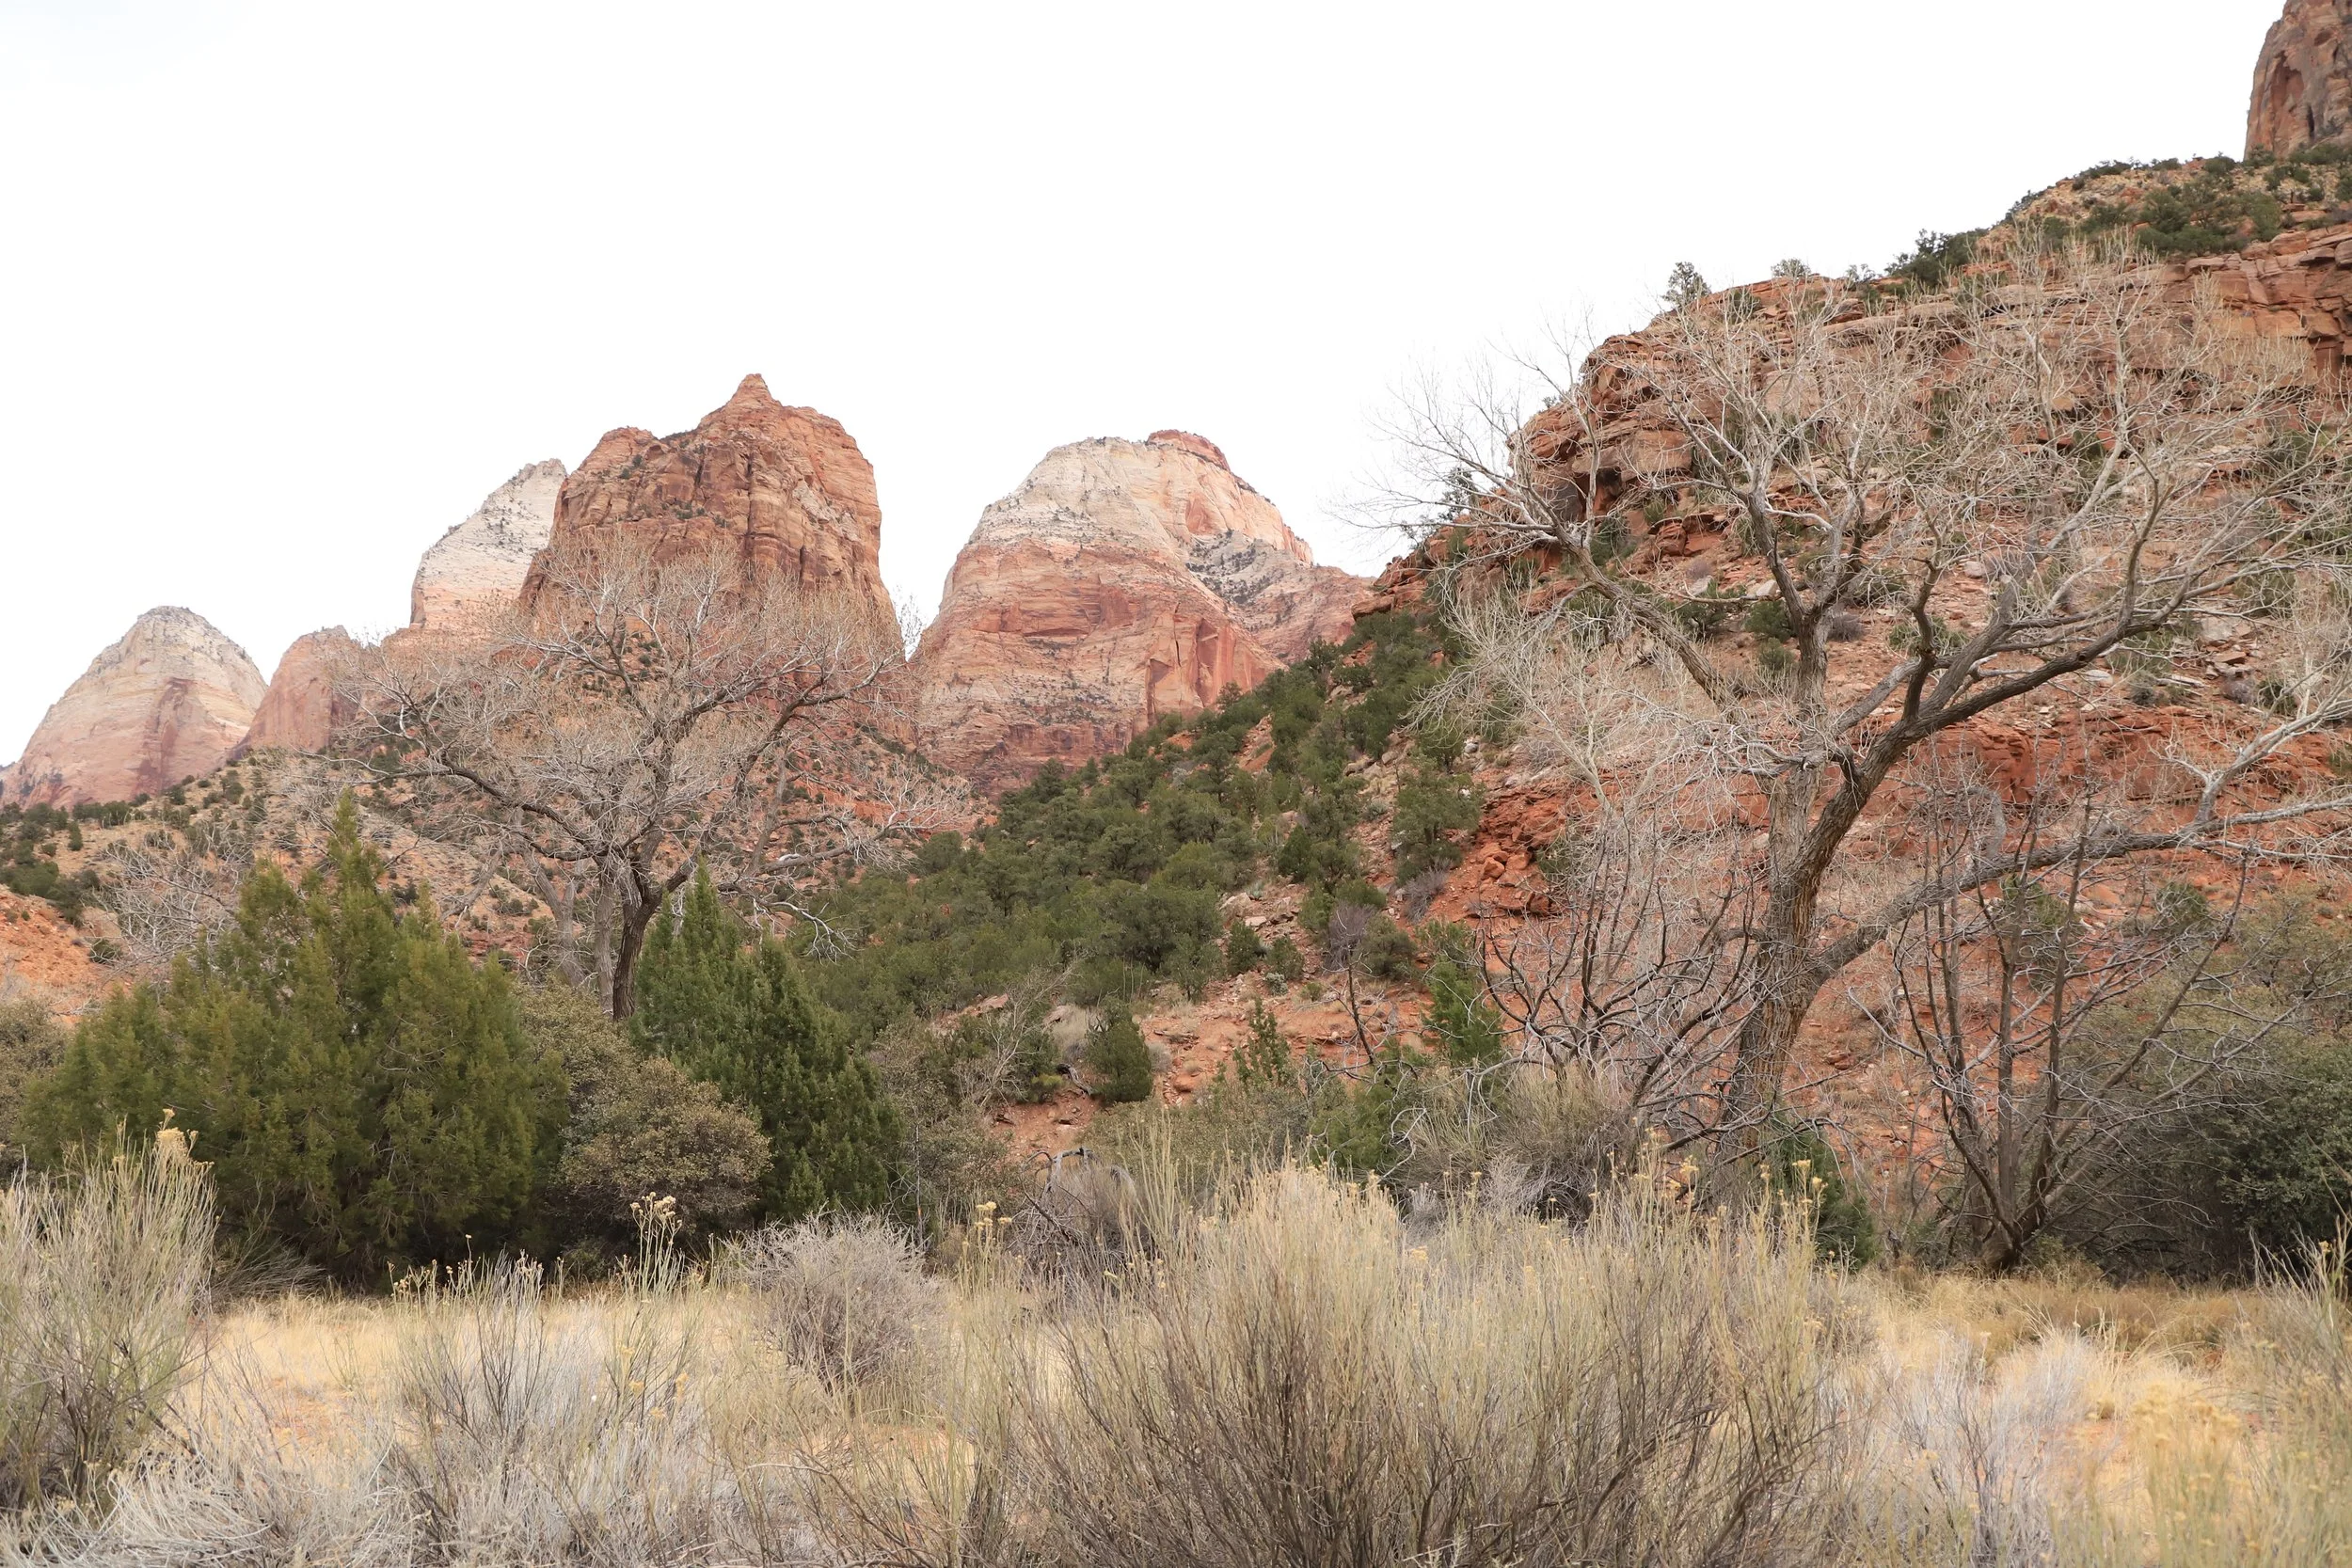
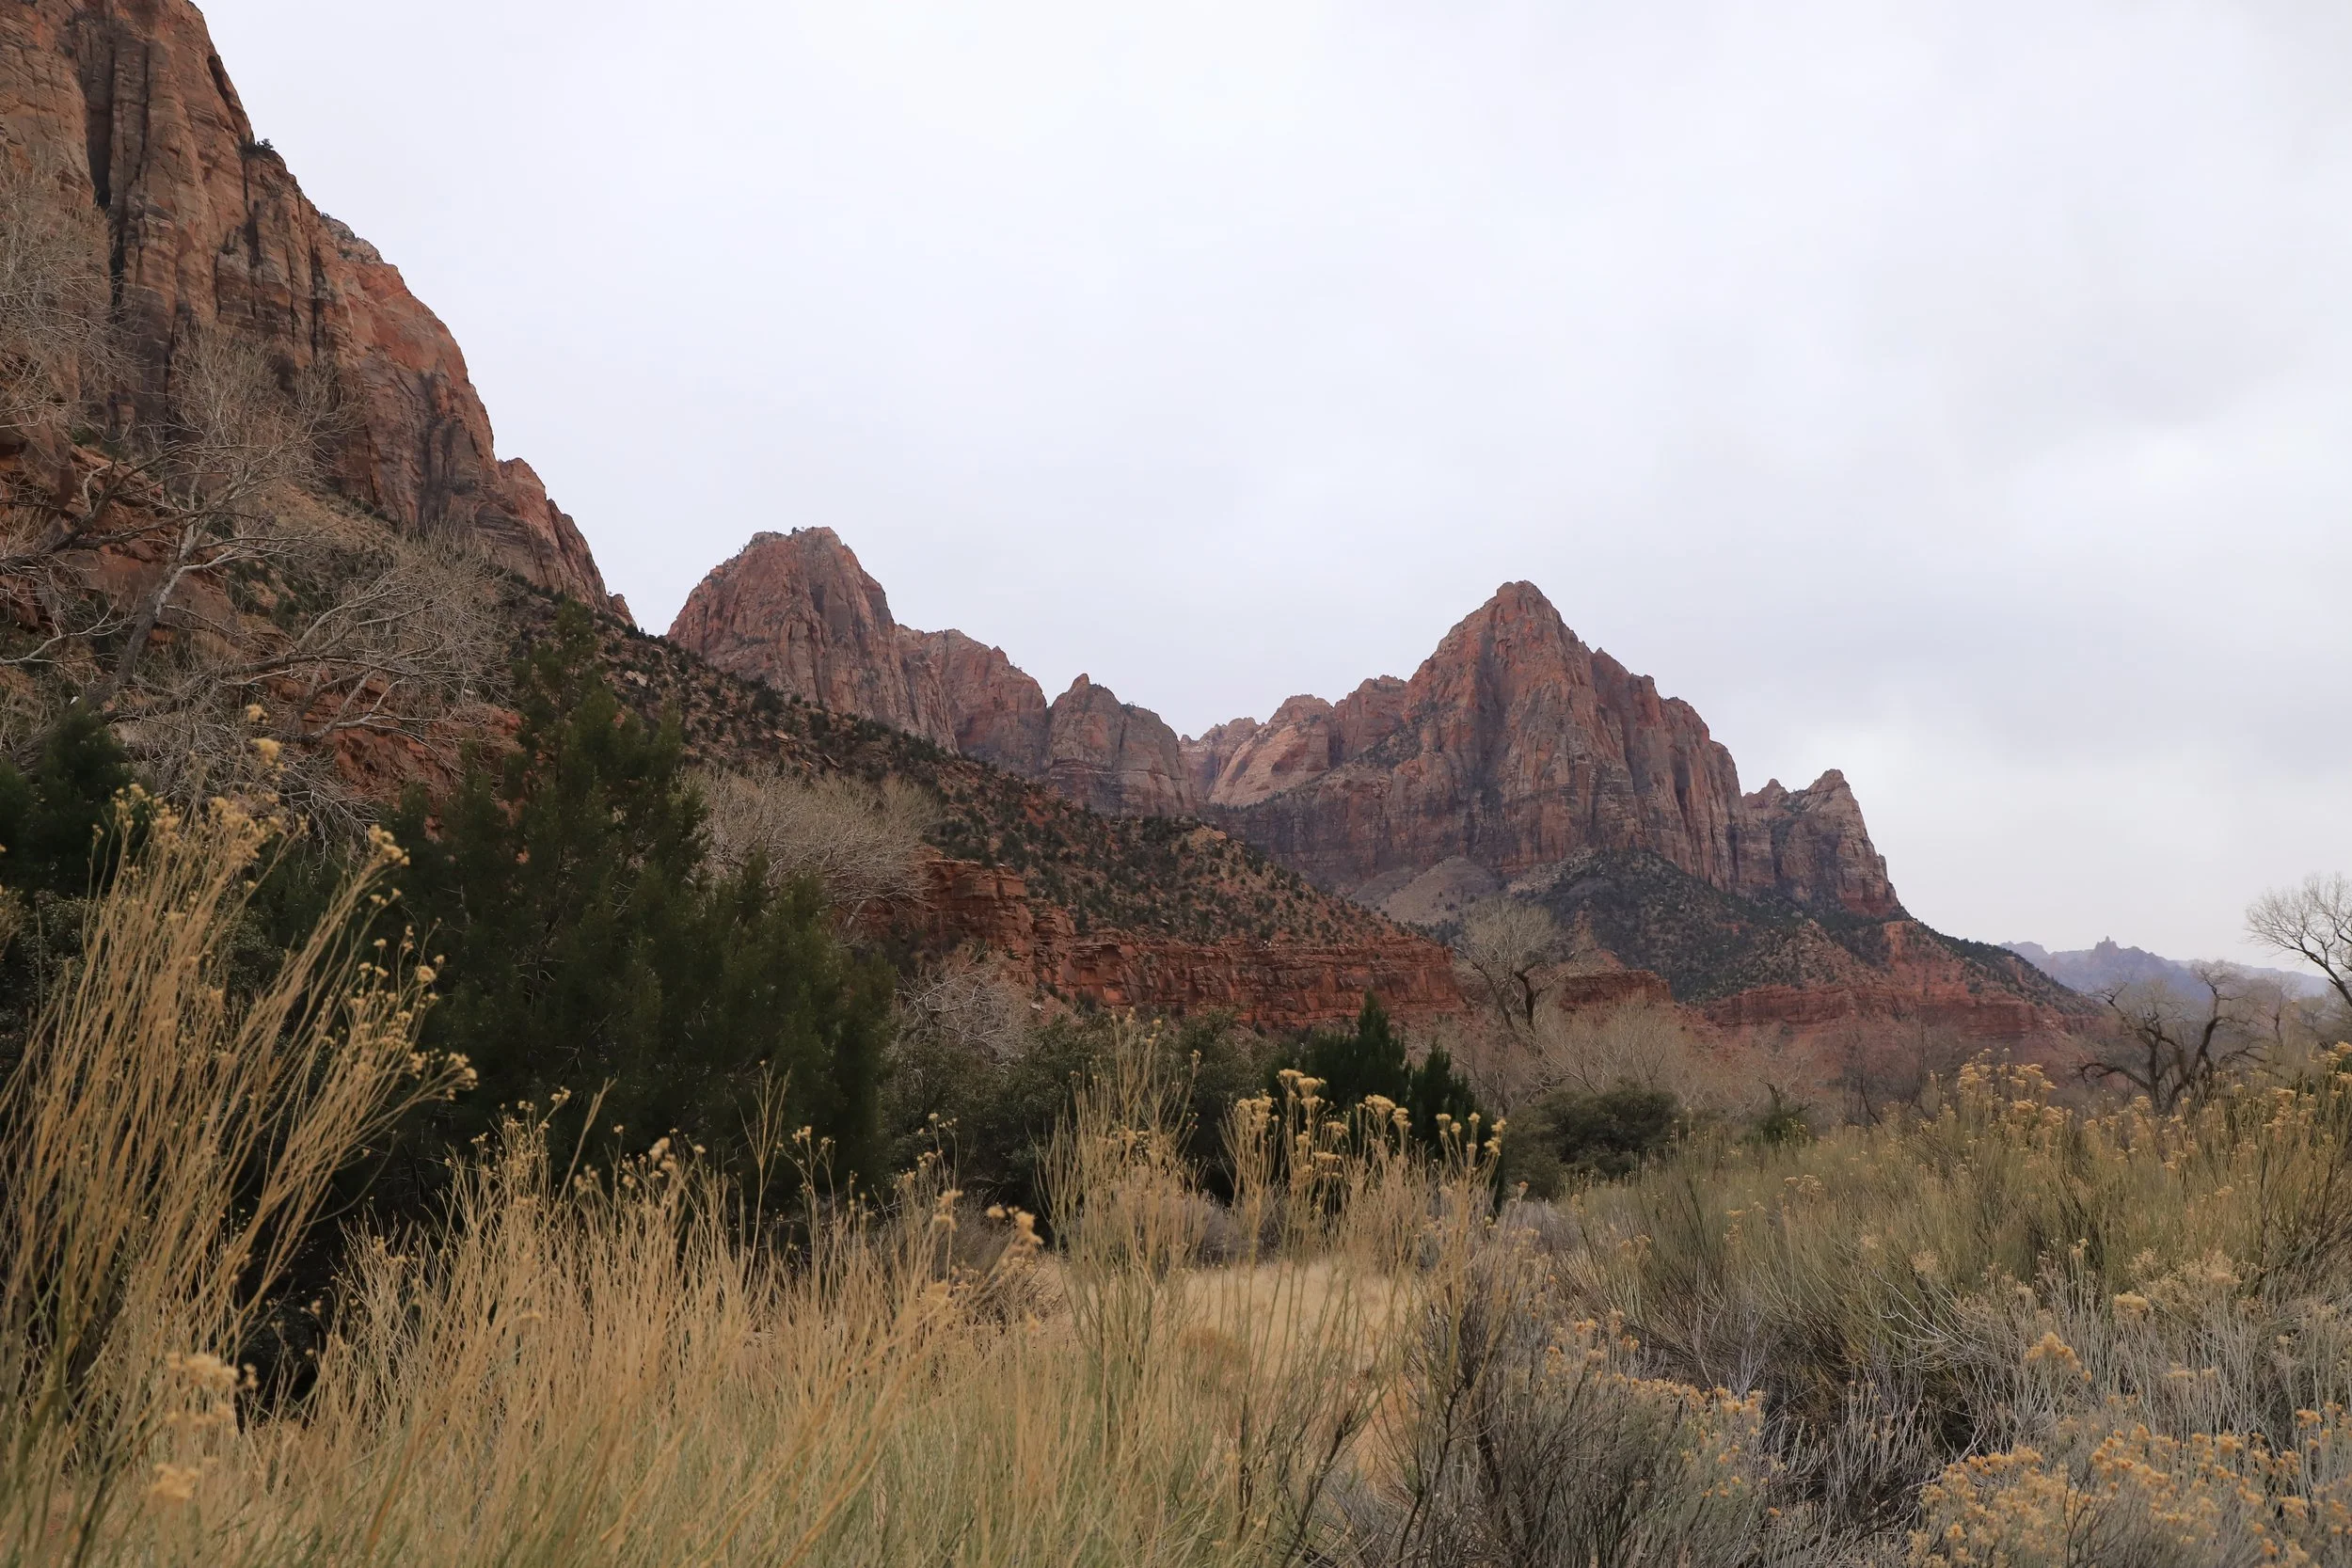
6 - Pa’rus

Map of Pa’rus Trail
Distance - 3.3 miles (out-and-back) or stop earlier - the trail is just along the Virgin River and doesn’t have a special viewpoint at the end - the whole hike is stunning. Walk as far as you would like and turn around.
Elevation Gain - 100ft
Trailhead Location - The trail starts from the parking lot of the main Zion National Park Visitor Center.
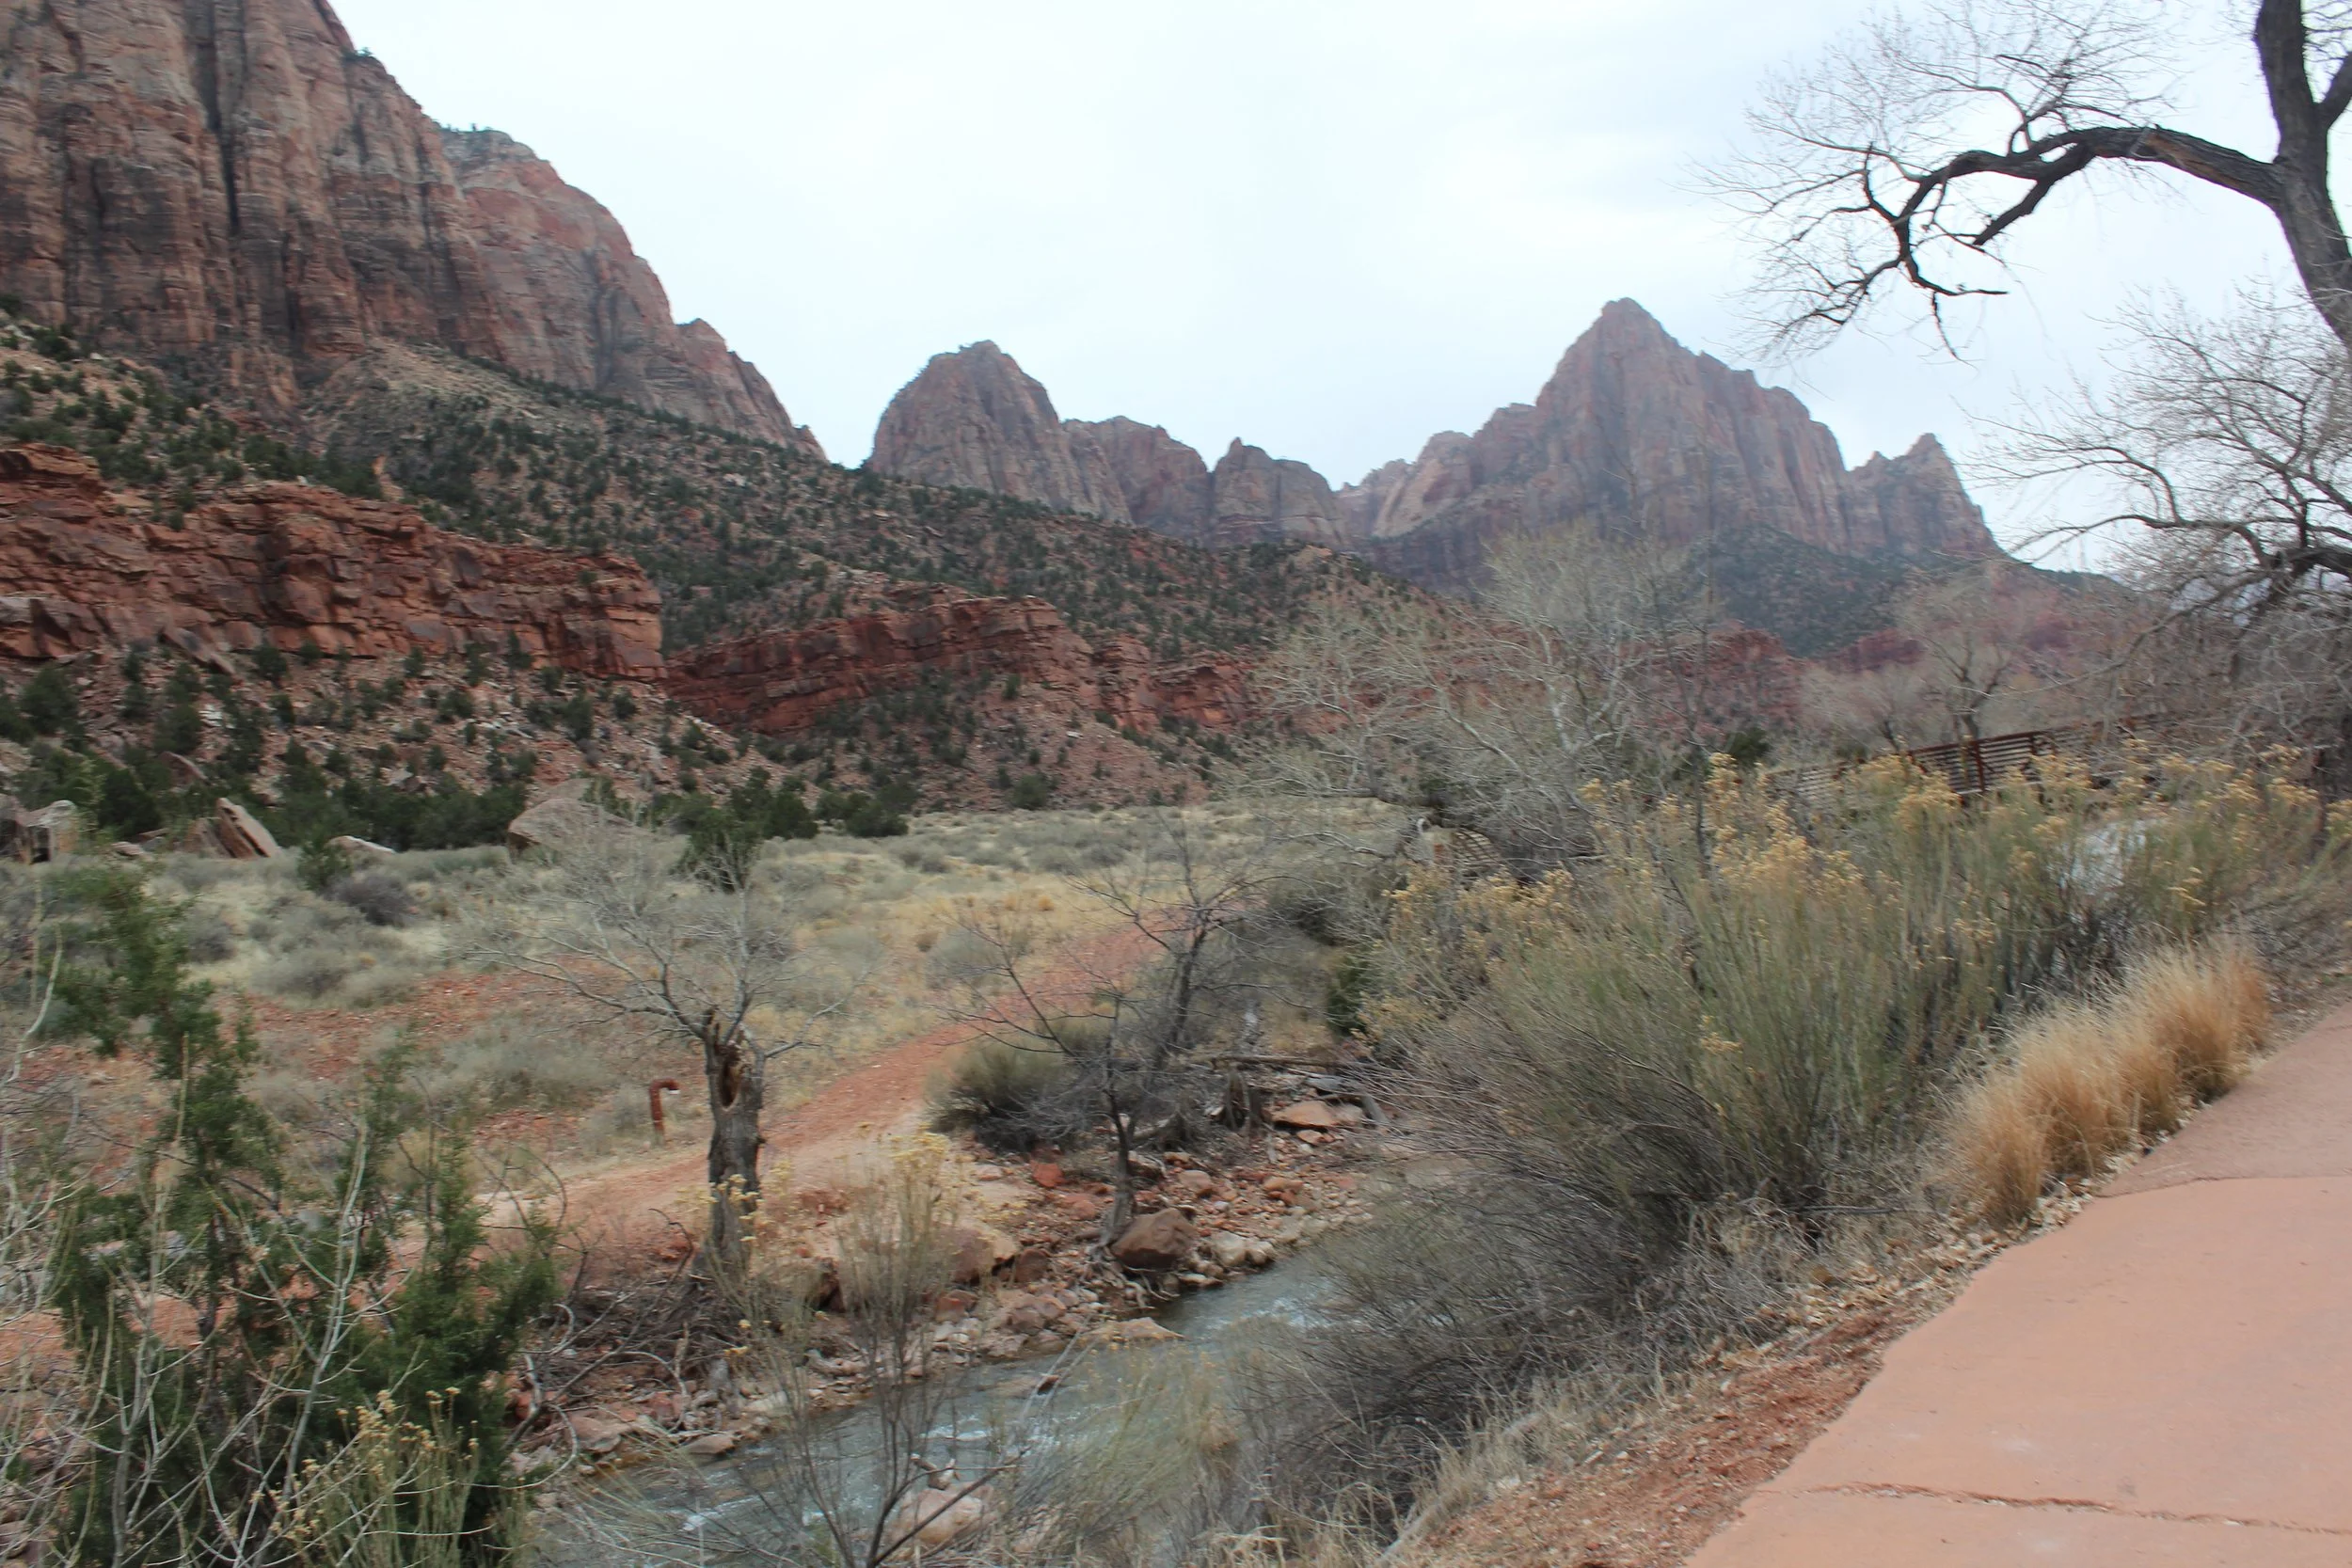
March 2018 - Pa’rus Trail
Pa’rus is an extremely easy trail, right along the edge of the Virgin River, with stunning views of the surrounding canyon. The trail takes off right from the Visitor Center, so there is no need to worry about parking at a trailhead or getting on a shuttle. The trail is smooth and paved, with little elevation gain. A hiker can travel out-and-back along the river as far as they want.
March 2018 - Hiking the Pa’rus Trail
We drove from Minnesota to Zion during our Spring Break in March 2018. The Rocky Mountains separated us from our destination, and not terribly unexpectedly, the day before we left, it became apparent a significant snowfall was predicted in the mountains. We switched our schedules around so we could take off by noon and we ended up driving straight through the night, trying to beat the storm. Of course we did not beat it… Midway through our mountain driving, in the middle of the night, it started to snow. The storm hit earlier than expected. Not the scenario we were excited to be in, but luckily, we ended up behind a snowplow and made it through just fine. Rather than stop in the middle of the day, we just decided to keep going all the way to Zion. We arrived towards the evening and asked the Park Rangers for something simple since we were tired, but everyone wanted to be out of the car and moving around a bit before we went to bed. They suggested Pa’rus, and what a way to end a tough day!
March 2018 - An evening stroll along Pa’rus Trail
Pa’rus is the trail that should be on everyone’s list, yet somehow it seems like it’s on no one’s list (it’s not mentioned on many blogs). The canyon and the river are gorgeous, it’s quiet because no one knows about it, and it’s an easy trail to navigate along.
March 2018 - Easy walk along Pa’rus Trail
There are a couple of spots with small waterfalls along the Pa’rus Trail. My boys had fun throwing sticks in the water and playing along the riverbank.
March 2018 - Waterfalls along the Virgin River from the Pa’rus Trail
It was dusk as we returned to the parking lot, and we crossed several small herds of deer on the way back. We had given both of our boys small, old digital cameras, and they had fun taking pictures of the deer.
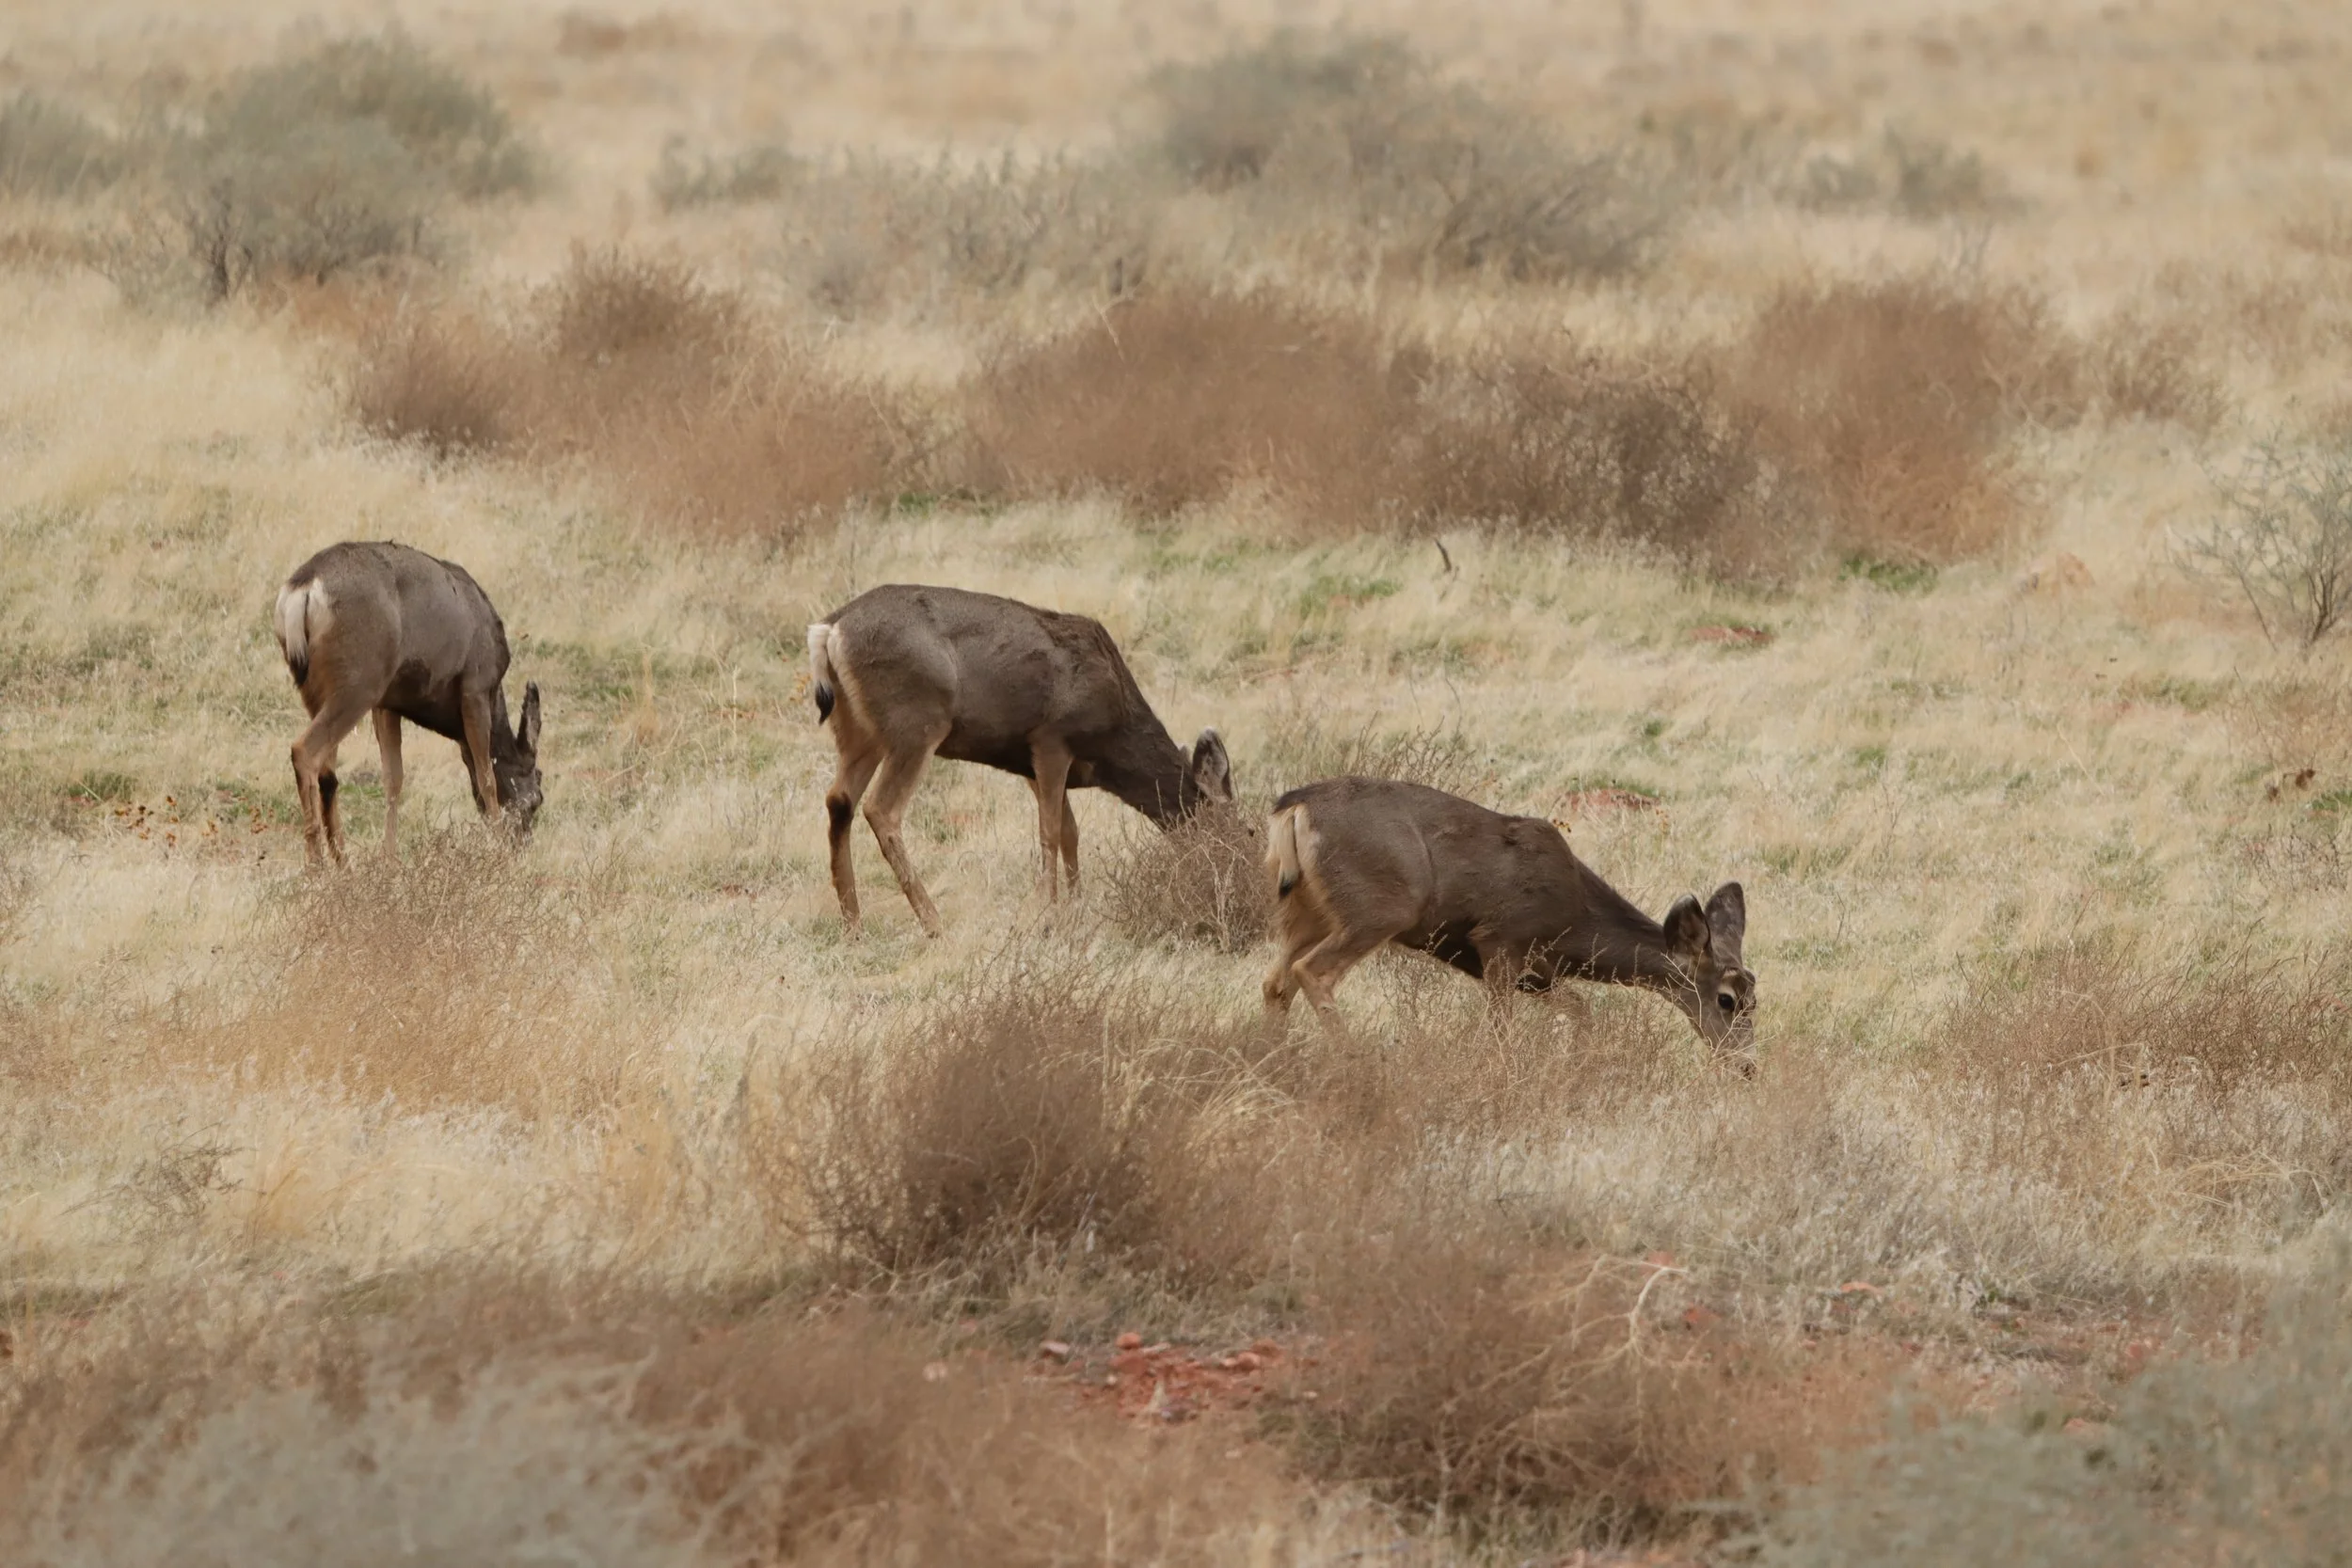
Deer coming out to eat towards evening along the Virgin River
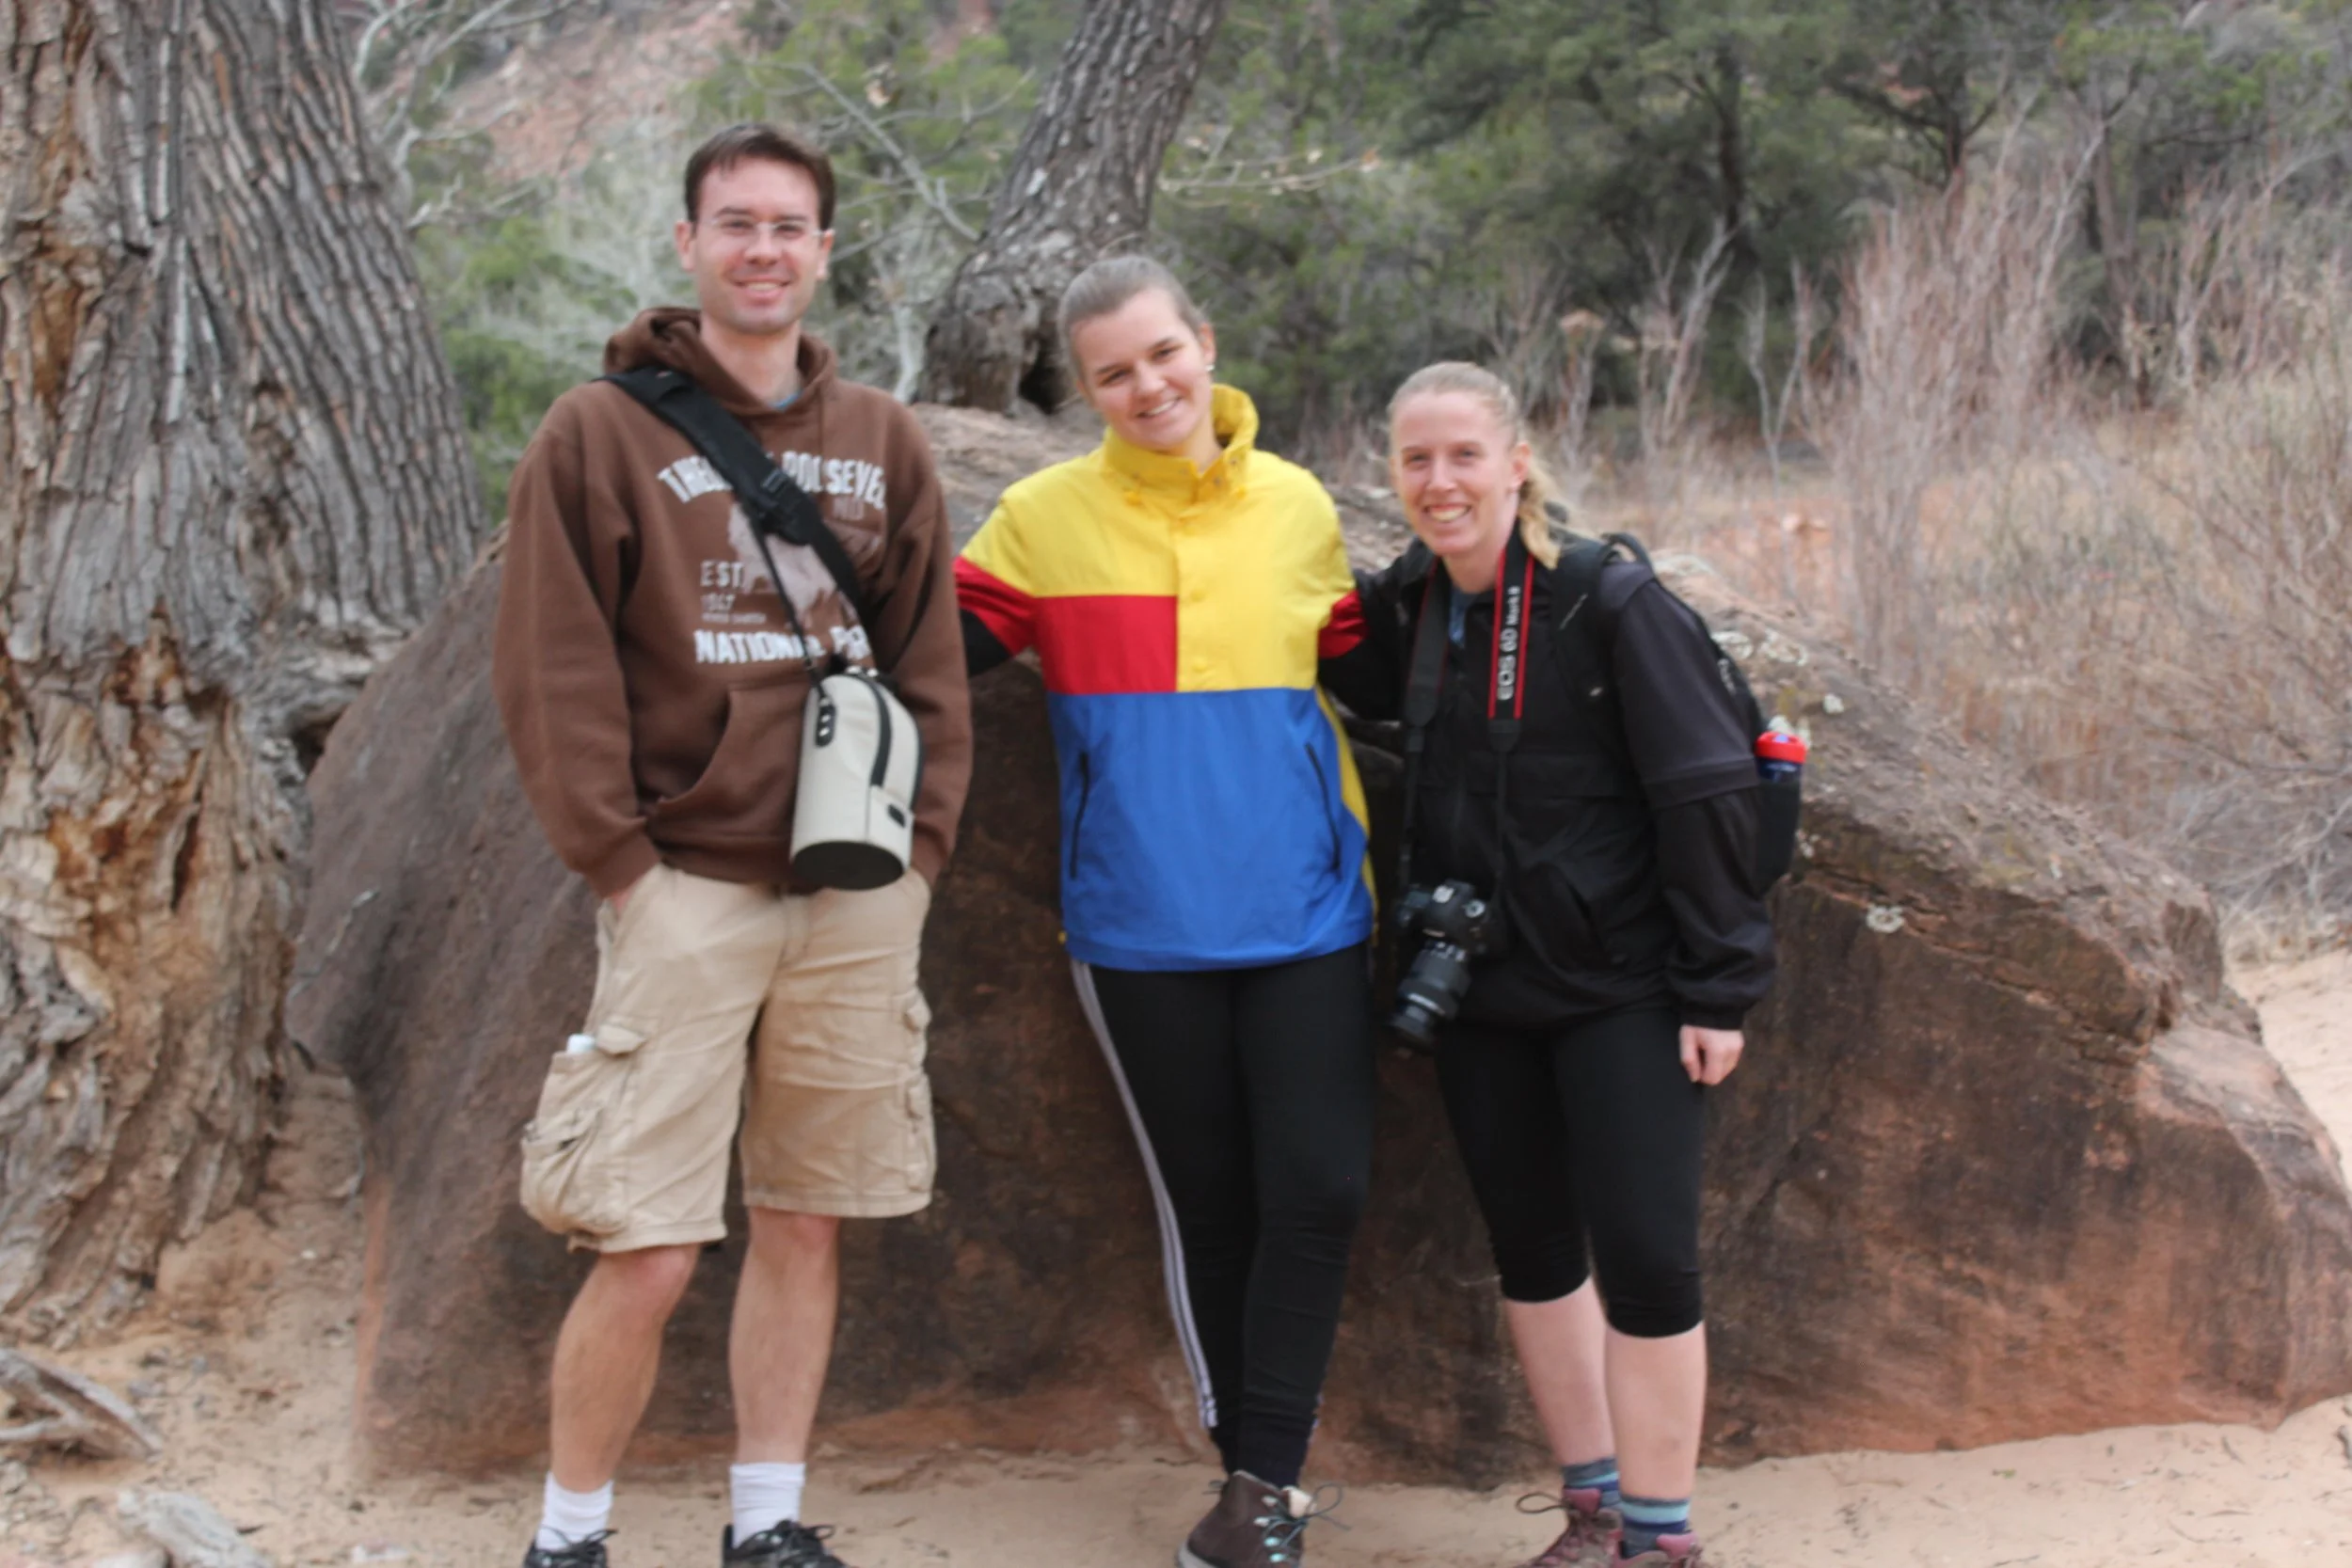
March 2018 - We had our exchange student from Finland with us on this trip
Shuttle Stops 5 (Zion Lodge) and 6 (Grotto)

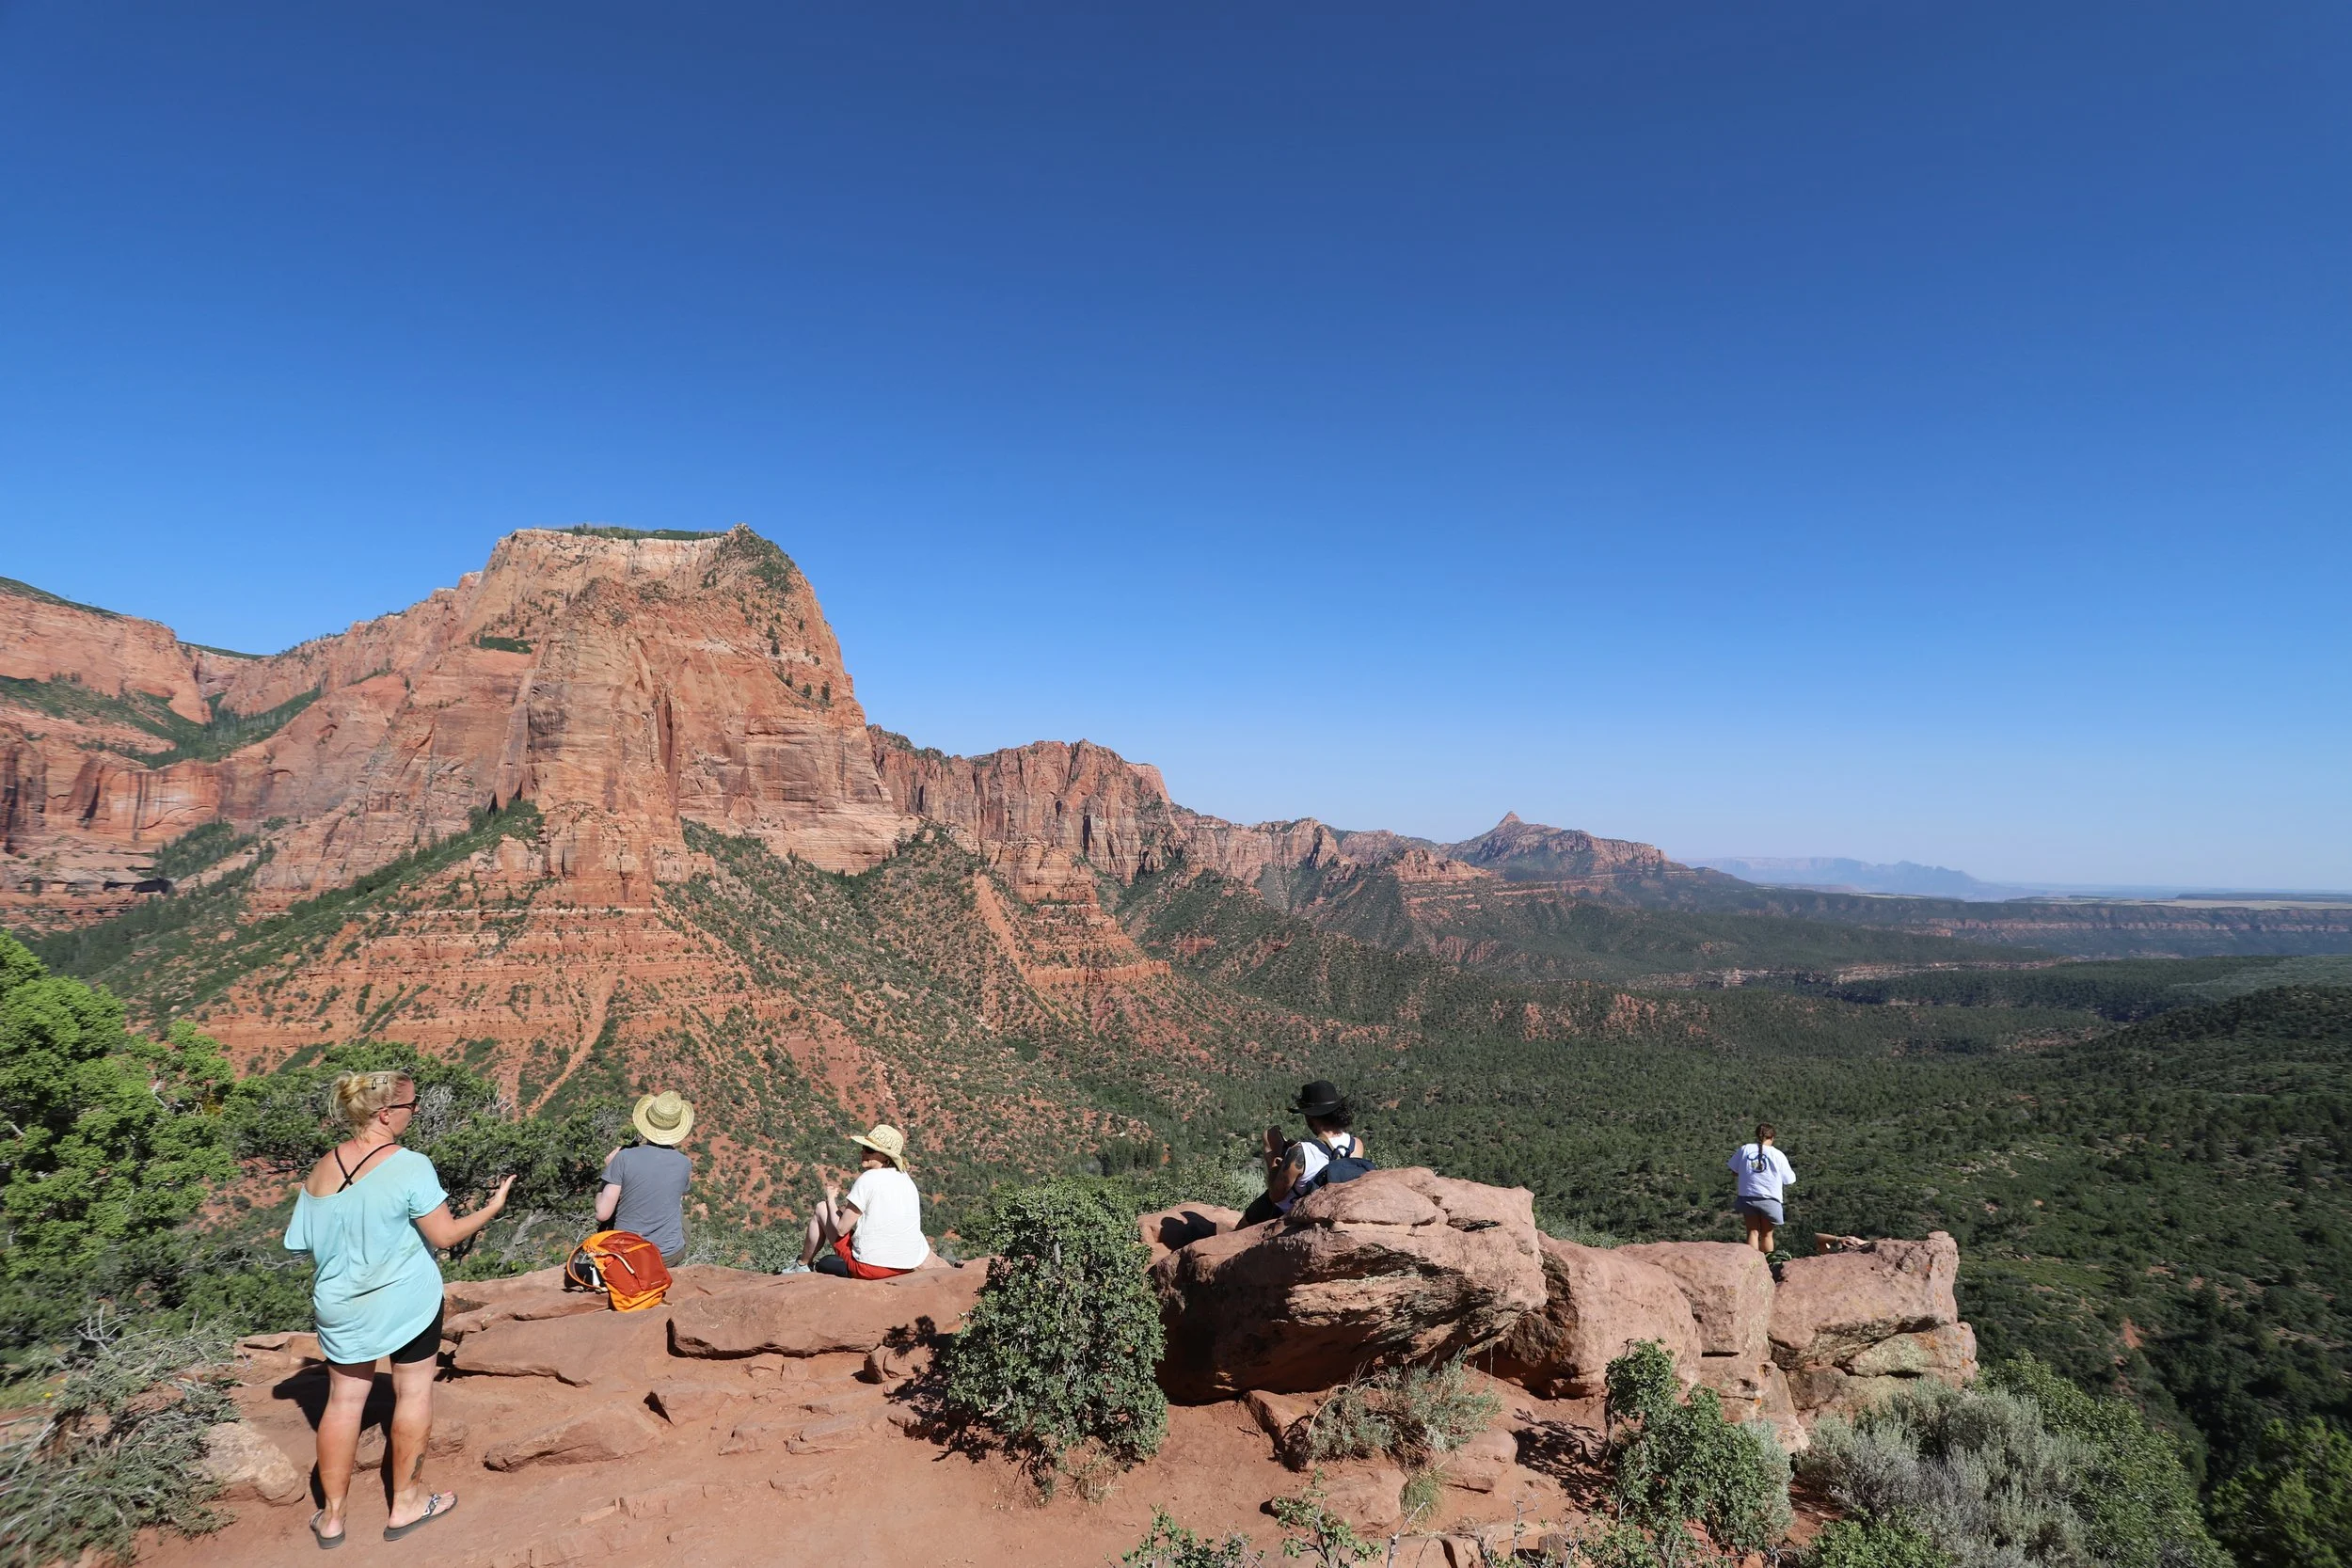
Map of hikes from trailheads at Zion Shuttle Stop #5 (Zion Lodge) and #6 (Grotto)
I’d previously had a chance to hike to Emerald Pools with my parents when I was a kid, and I really wanted to check out Angel’s Landing. Angel’s Landing is not hike for younger children, so during our March 2018 trip, we split out into two separate hikes. My husband and our boys got off at shuttle stop #5 (Zion Lodge) and hiked up Emerald Pools and down Kayenta to shuttle stop #6 (Grotto). My exchange student and I took the shuttle to stop #6 (Grotto), and we hiked to Scout Lookout and then Angel’s Landing. We met back up together at shuttle stop #6. The boys won by a few minutes, but we figured that would happen, and my husband had our lunch food in his backpack, so they started eating before us.
7 - Emerald Pools & Kayenta
Distance - 3 miles (out-and-back) or 2.2 miles (add in Kayenta and make it a one-way trail between two shuttle stops)
Elevation Gain - 560ft
Trailhead Location - Zion Lodge (shuttle stop #5) is the closest trailhead to Emerald Pools. If adding in Kayenta, use the Grotto (shuttle stop #6)
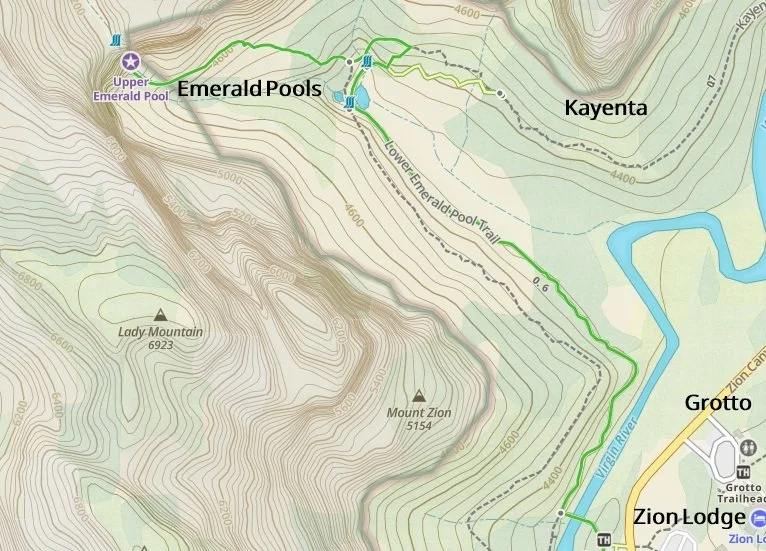
Map of Emerald Pools
The below pictures are from my boys’ hike up to Emerald Pools.
March 2018 - Hiking up to Emerald Pools
My boys have always loved to scramble up boulders, and this trail has a lot of boulders worth climbing.
March 2018 - Emerald Pools
It was pretty dry, despite it being March when you expect there to be snow melt. There was still a little bit of water in the first pool. Not sure why it’s called “emerald” pools though - this water is pretty reddish / brown.
March 2018 - First Emerald Pool
There was a little bit of water in the first waterfall, but not much. I bet this would be a fun hike though on a rainy day (as long as there are no flood warnings).
March 2018 - Emerald Pools
March 2018 - Dry waterfall at Emerald Pools

March 2018 - Rock scrambles along Emerald Pools trail
March 2018 - Emerald Pools - two of the cutest hikers ever?
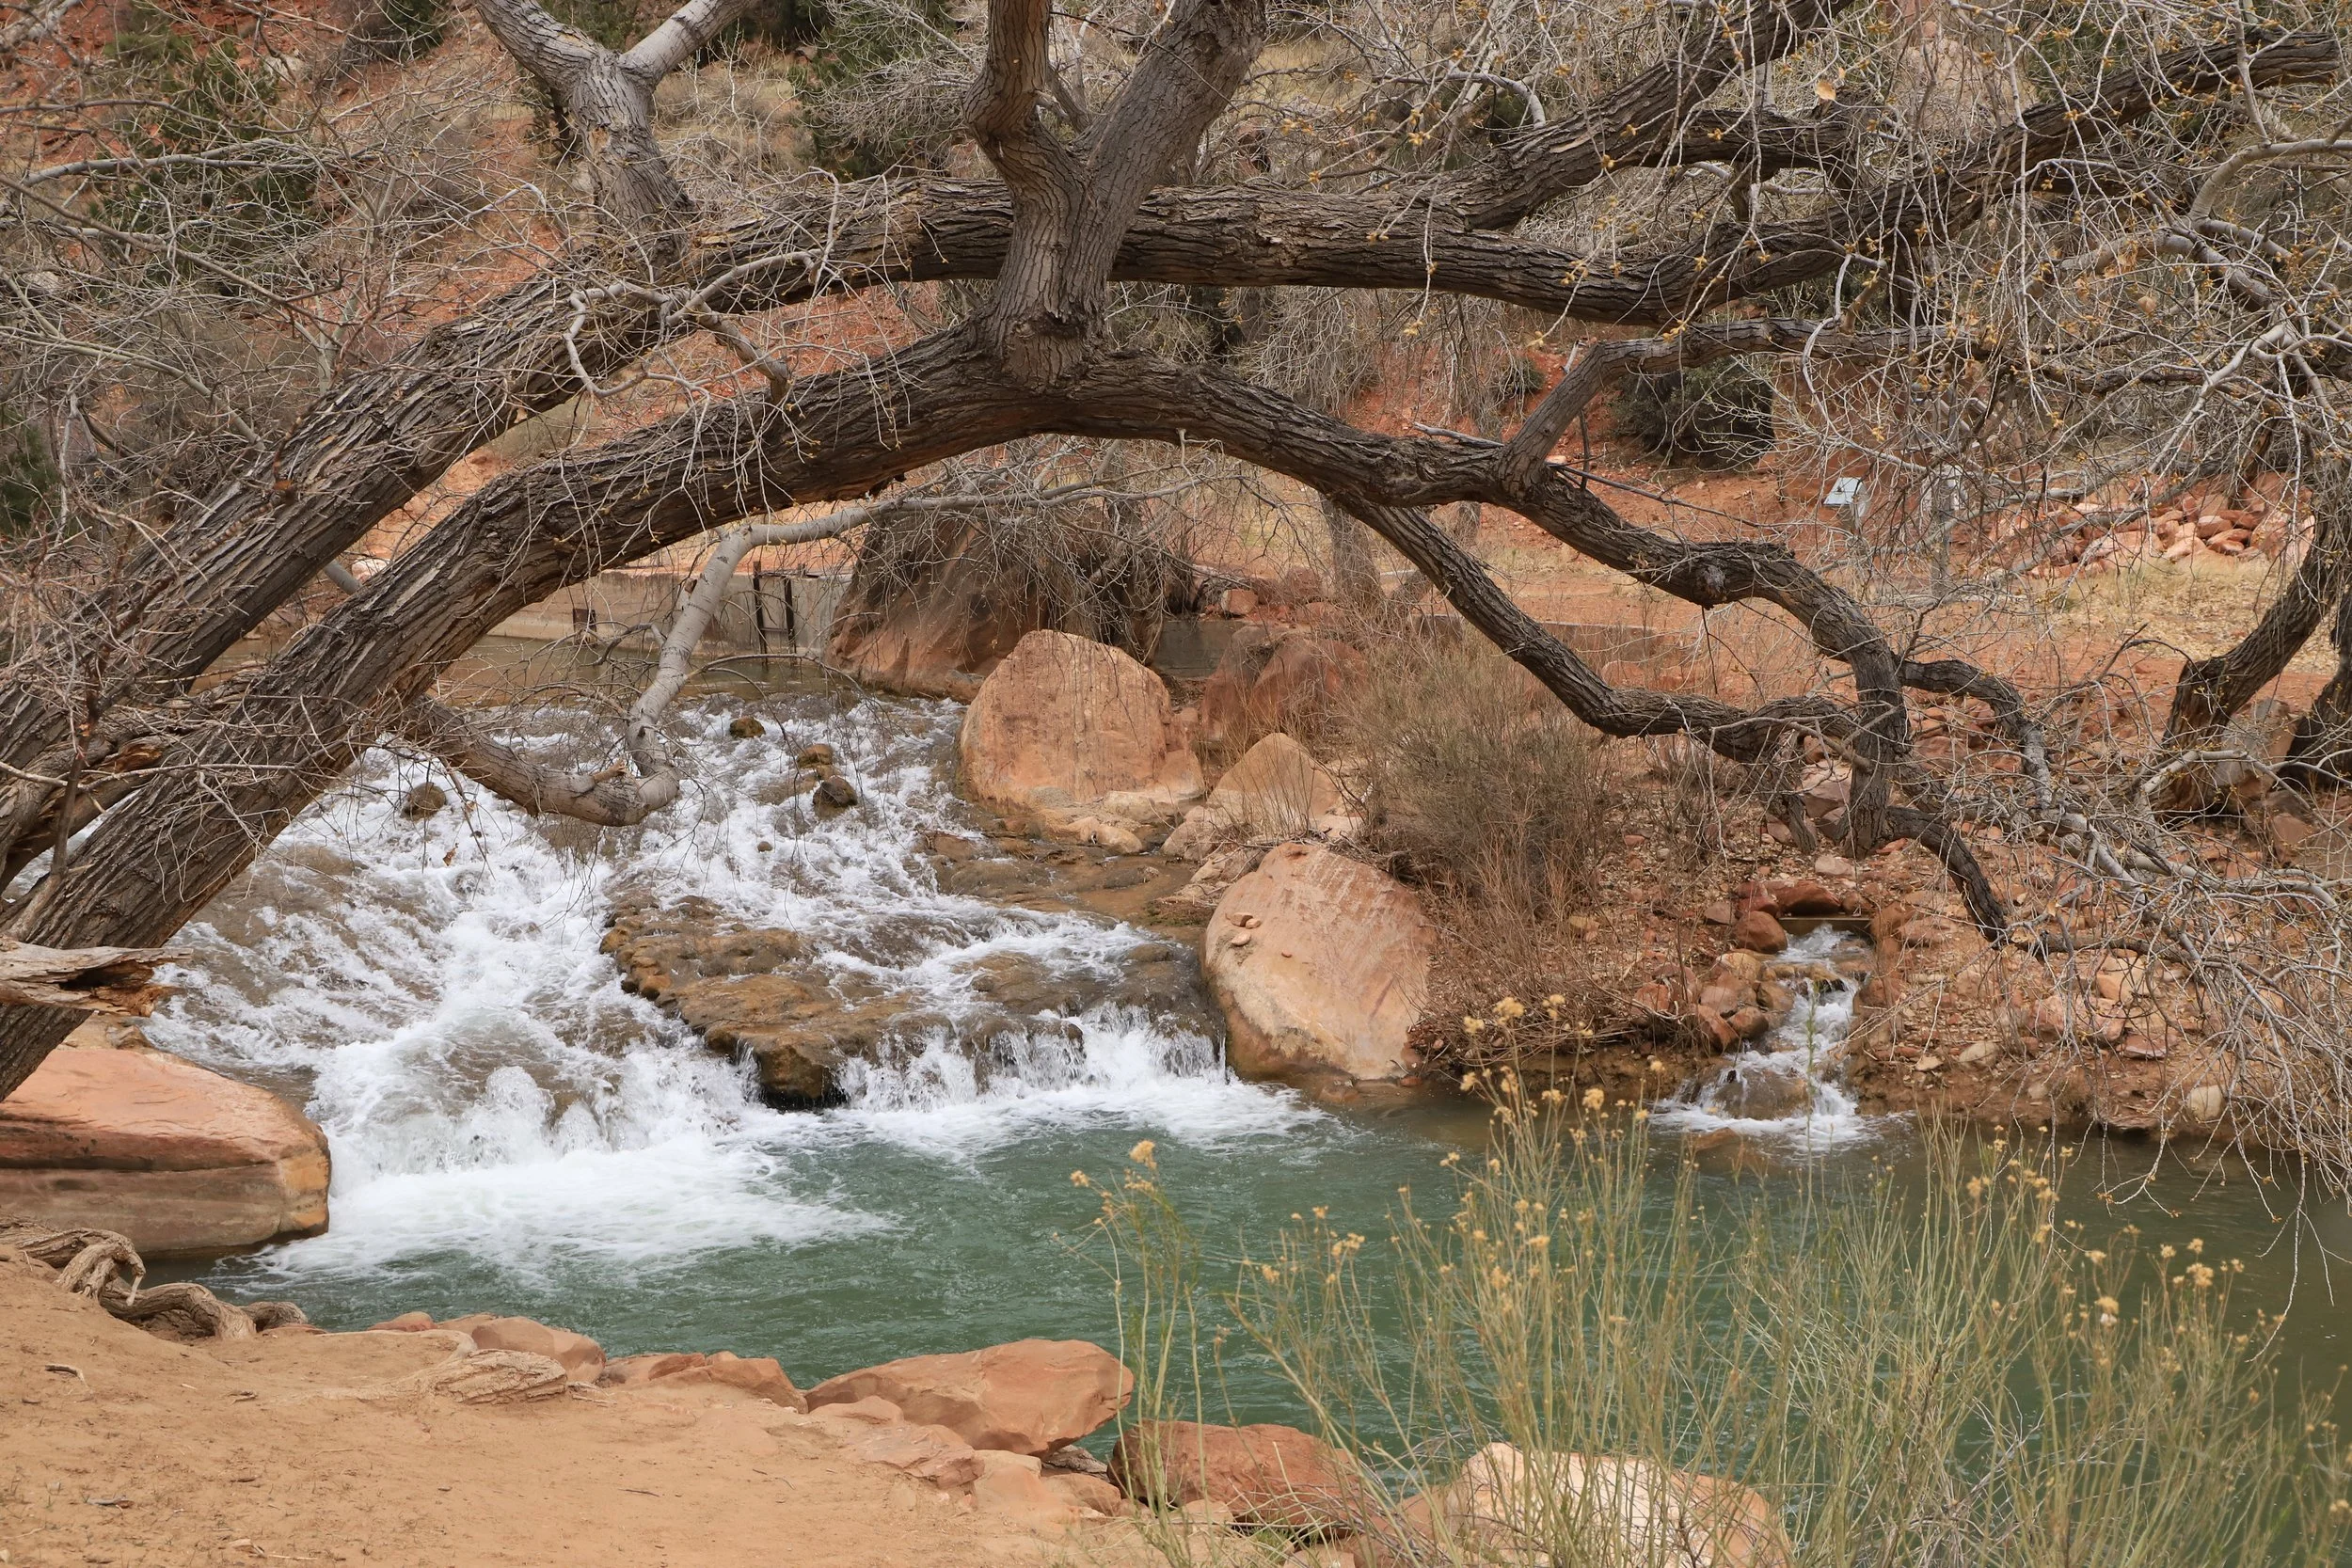
This trail goes up to the upper waterfall and then comes back down, and there is another waterfall on the way back to Kayenta. This one is fun because the trail goes behind the waterfall.

March 2018 - Emerald Pools - Walking back down the trail
March 2018 - Emerald Pools - I love the colors of the rock walls inside Zion National Park
March 2018 - Emerald Pools - Remember to turn around and look at the other side of the canyon. It’s not just the waterfalls that are amazing on his hike.
March 2018 - Backside of last waterfall on Emerald Pools
There was actually water coming down, so it’s hard to pick a favorite picture since this was the best part of the hike.

March 2018 - Waterfall along Emerald Pools

March 2018 - Emerald Pools Waterfall
This picture shows how the trail goes right behind the waterfall.
March 2018 - Hiking behind the waterfall on Emerald Pools

March 2018 - Emerald Pools - looking back on the trail
March 2018 - One last “emerald’ pool
8 - Kayenta
Distance - 0.8 miles (one-way)
Elevation Gain - 100ft (descent if coming from Emerald Pools)
Trailhead Location - The Kayenta Trailhead is at the Grotto Shuttle Stop (#6). The trail then intersects with Emerald Pools.

Map of Kayenta
If you took the shuttle, you don’t have a car, so why not hike a one-way instead of an out-and-back? Plus, the overall hike to Emerald Pools taking Kayenta back to the shuttle is shorter, and you get to see another pretty part of the Virgin River. It’s the same shuttle, you just get on it at a different stop than you go off. No big deal.

March 2018 - Virgin River along the Kayenta Trail
I absolutely love this park! Every trail is so pretty. I love how the Virgin River seems so quaint, when its power is what carved out the surrounding canyon walls.
March 2018 - Kayenta Trail along the Virgin River.
Angel’s Landing / Scout Lookout / West Rim
To access Angel’s Landing, Sout Lookout, and / or the West Rim Trail, take the shuttle to stop #6 (Grotto). Scout Lookout and the West Rim Trail do not require permits. Angel’s Landing does require a permit, which needs to be purchased ahead of time from the National Park website.
For anyone nervous about heights, the view from Scout Lookout is almost as good as Angel’s Landing, and much safer. This is a great turnaround point.
Map of Scout Lookout and Angel’s Landing
9 - Scout Lookout
Distance - 3.5 miles (out-and-back)
Elevation Gain - 1,150ft
Trailhead Location - Take the shuttle to stop #6 (Grotto)
March 2018 - Hiking over the bridge to Scout Lookout and Angel’s Landing
The trail to Angel’s Landing is the same trail to Scout Lookout, it just keeps going further. Anyone can go to Scout Lookout. To continue past this point to Angel’s Landing requires a permit.
March 2018 - Hiking up to Scout Lookout - yep, the trail is going to go all the way to the top of that rock wall
This is a hard, steep trail. Pretty much the whole hike to Scout Lookout is uphill, with a lot of switchbacks. Not impossible, but give yourself time and bring extra water.
March 2018 - Hiking up the switchbacks to Scout Lookout
The trail gains in elevation quickly, provided amazing views of the canyon below.
March 2018 - Amazing views along the trail to Scout Lookout
Walter’s Wiggles are 21 very steep and short switchbacks up to the top of Scout Lookout. These switchbacks are named after the superintendent of Zion National Park when the trail was constructed.
March 2018 - Walter’s Wiggles from the bottom
The view from Scout Lookout is incredible. And this is a great place to stop. If you didn’t get permits for Angel’s Landing, don’t feel too sad. It’s definitely worth the hike to Scout Lookout. I would love to do this hike again, while I have no desire to return to Angel’s Landing.

March 2018 - Scout Lookout
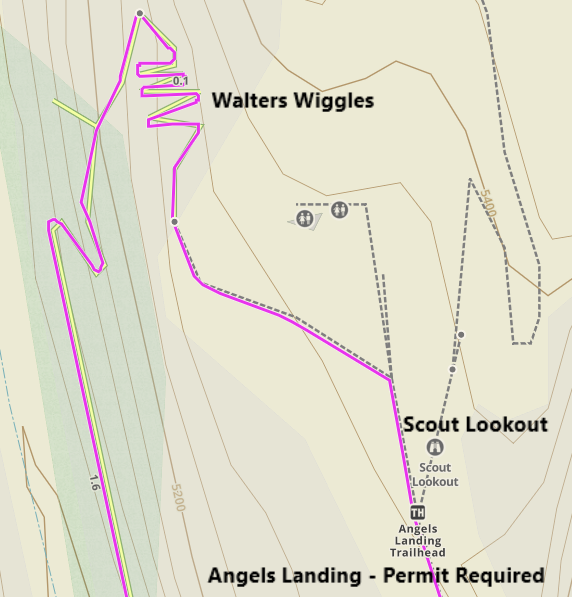
Angel’s Landing Trailhead from Scout Lookout
10 - Angel’s Landing
Distance - 4.2 miles (out-and-back) - this trail goes past Scout Lookout and requires a pre-purchased permit.
Elevation Gain - 1,750ft
Trailhead Location - Take the shuttle to stop #6 (Grotto)
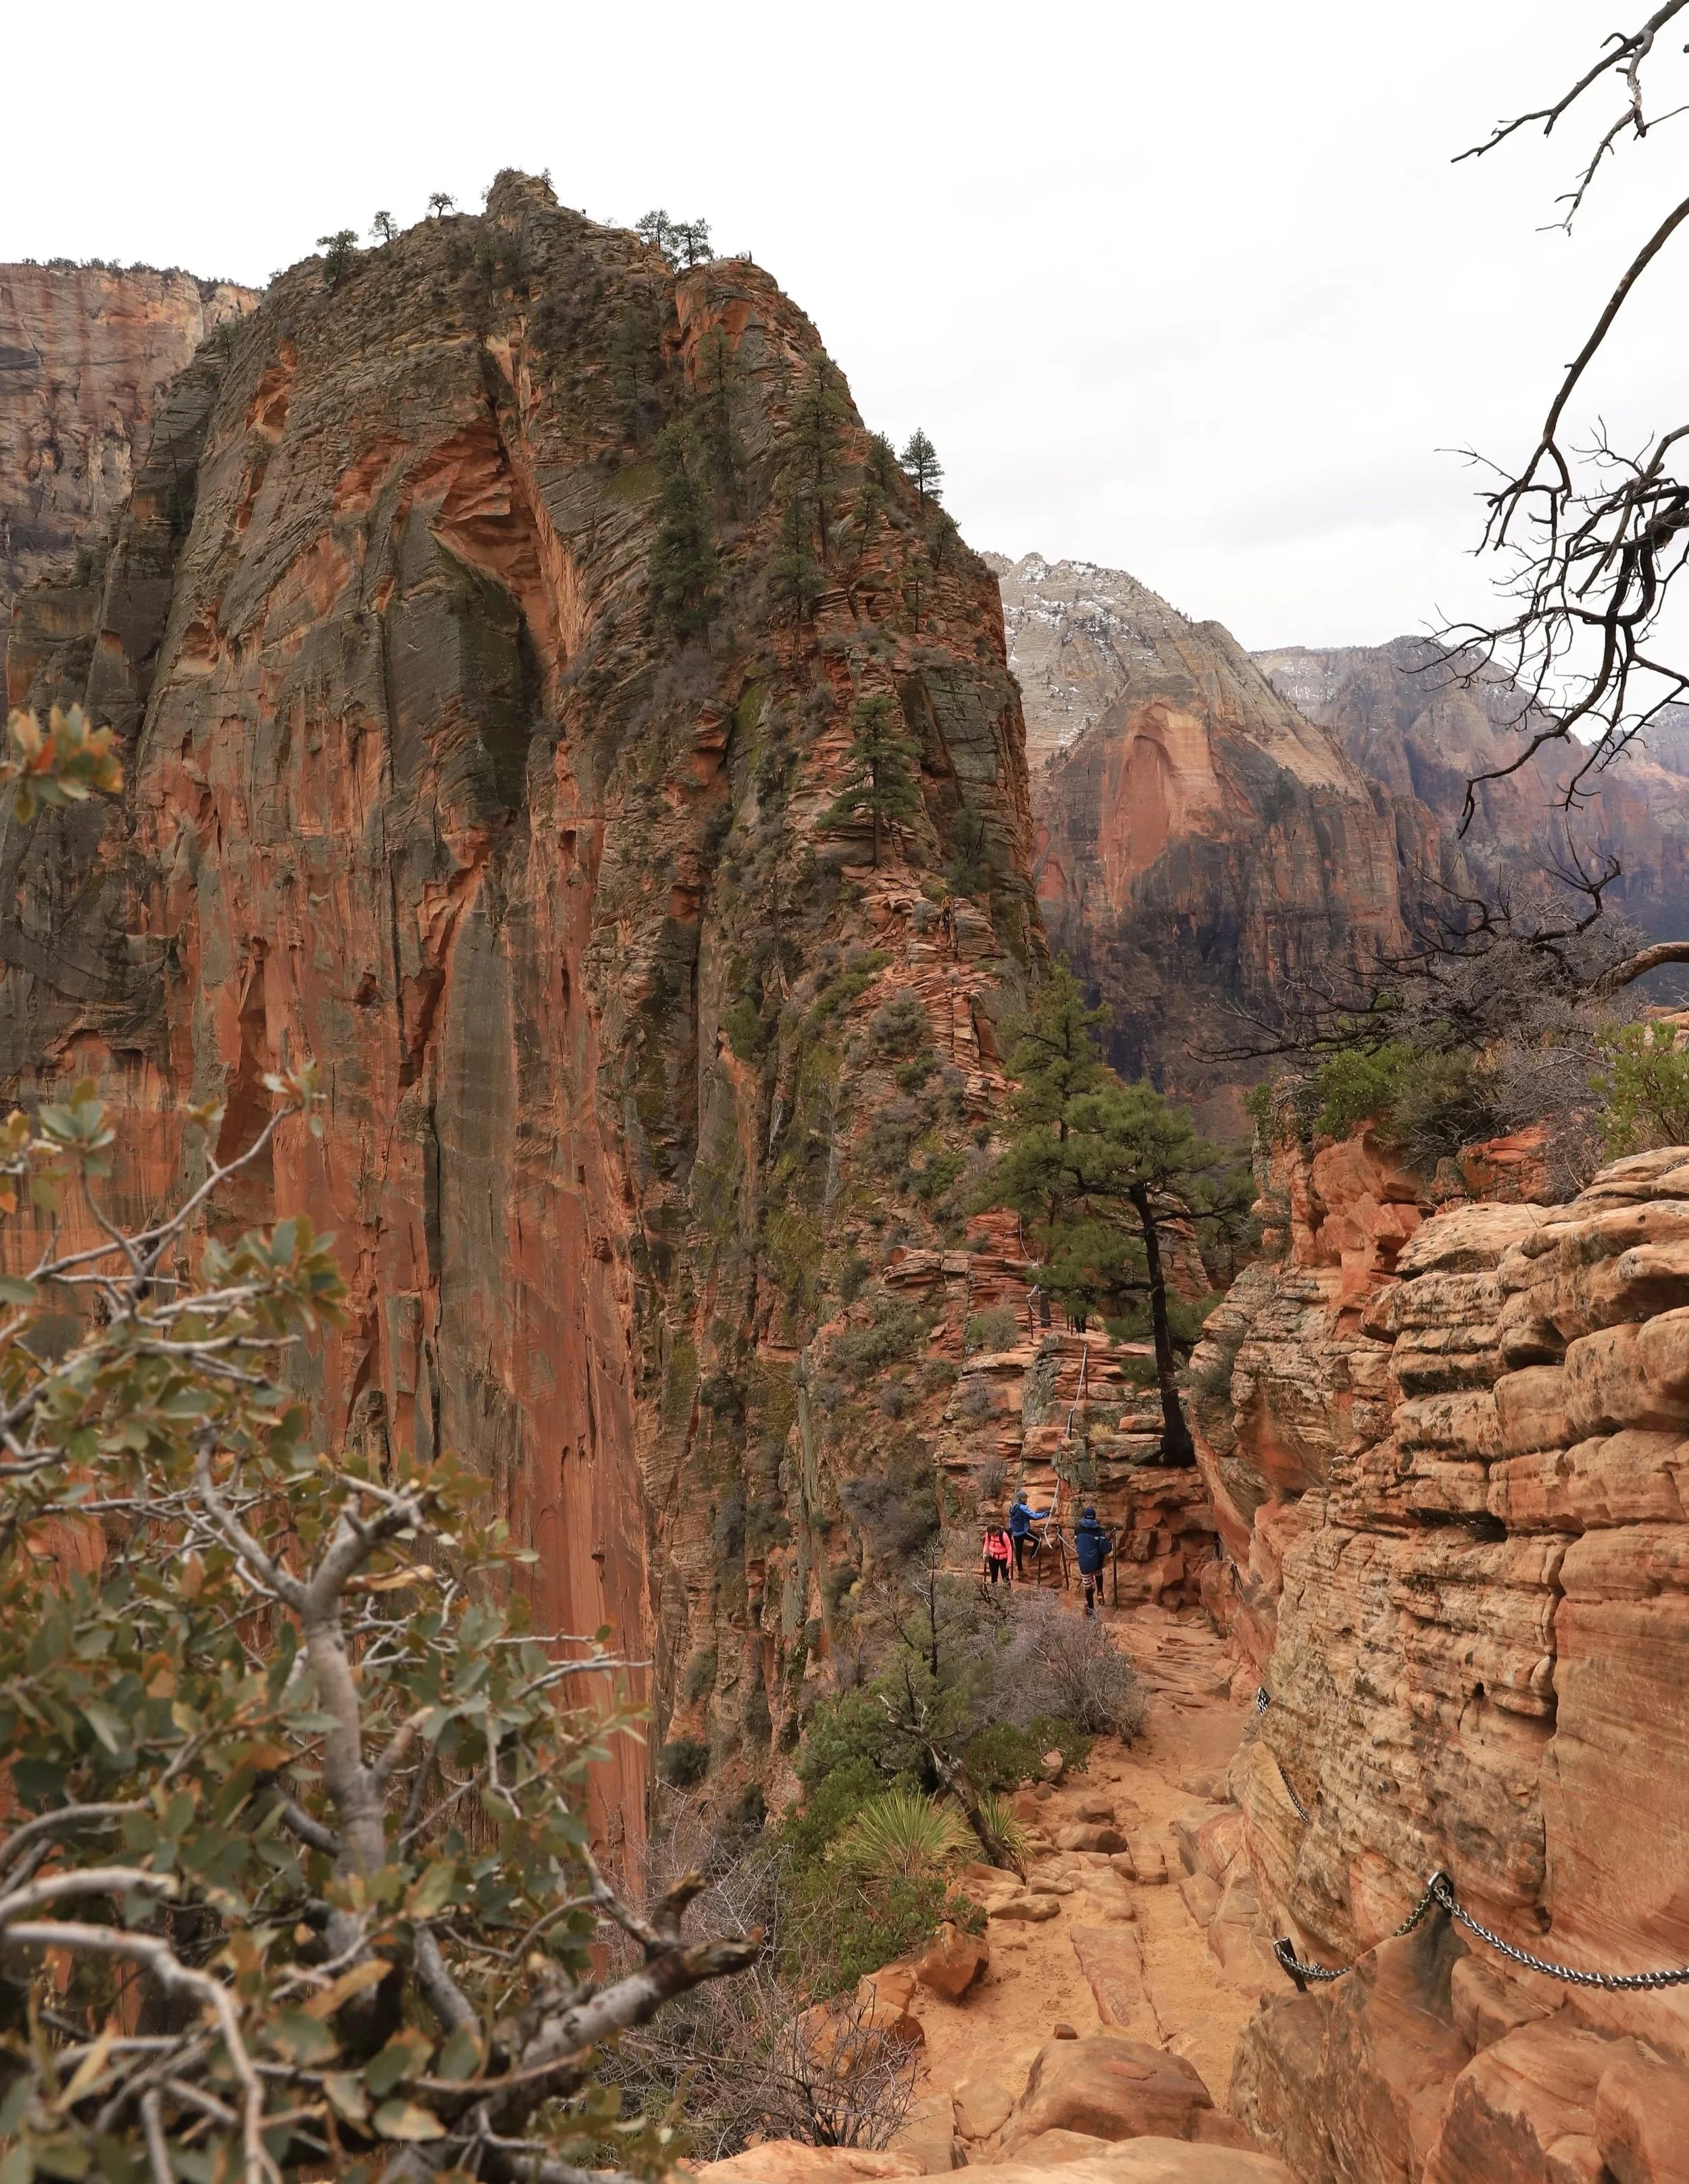
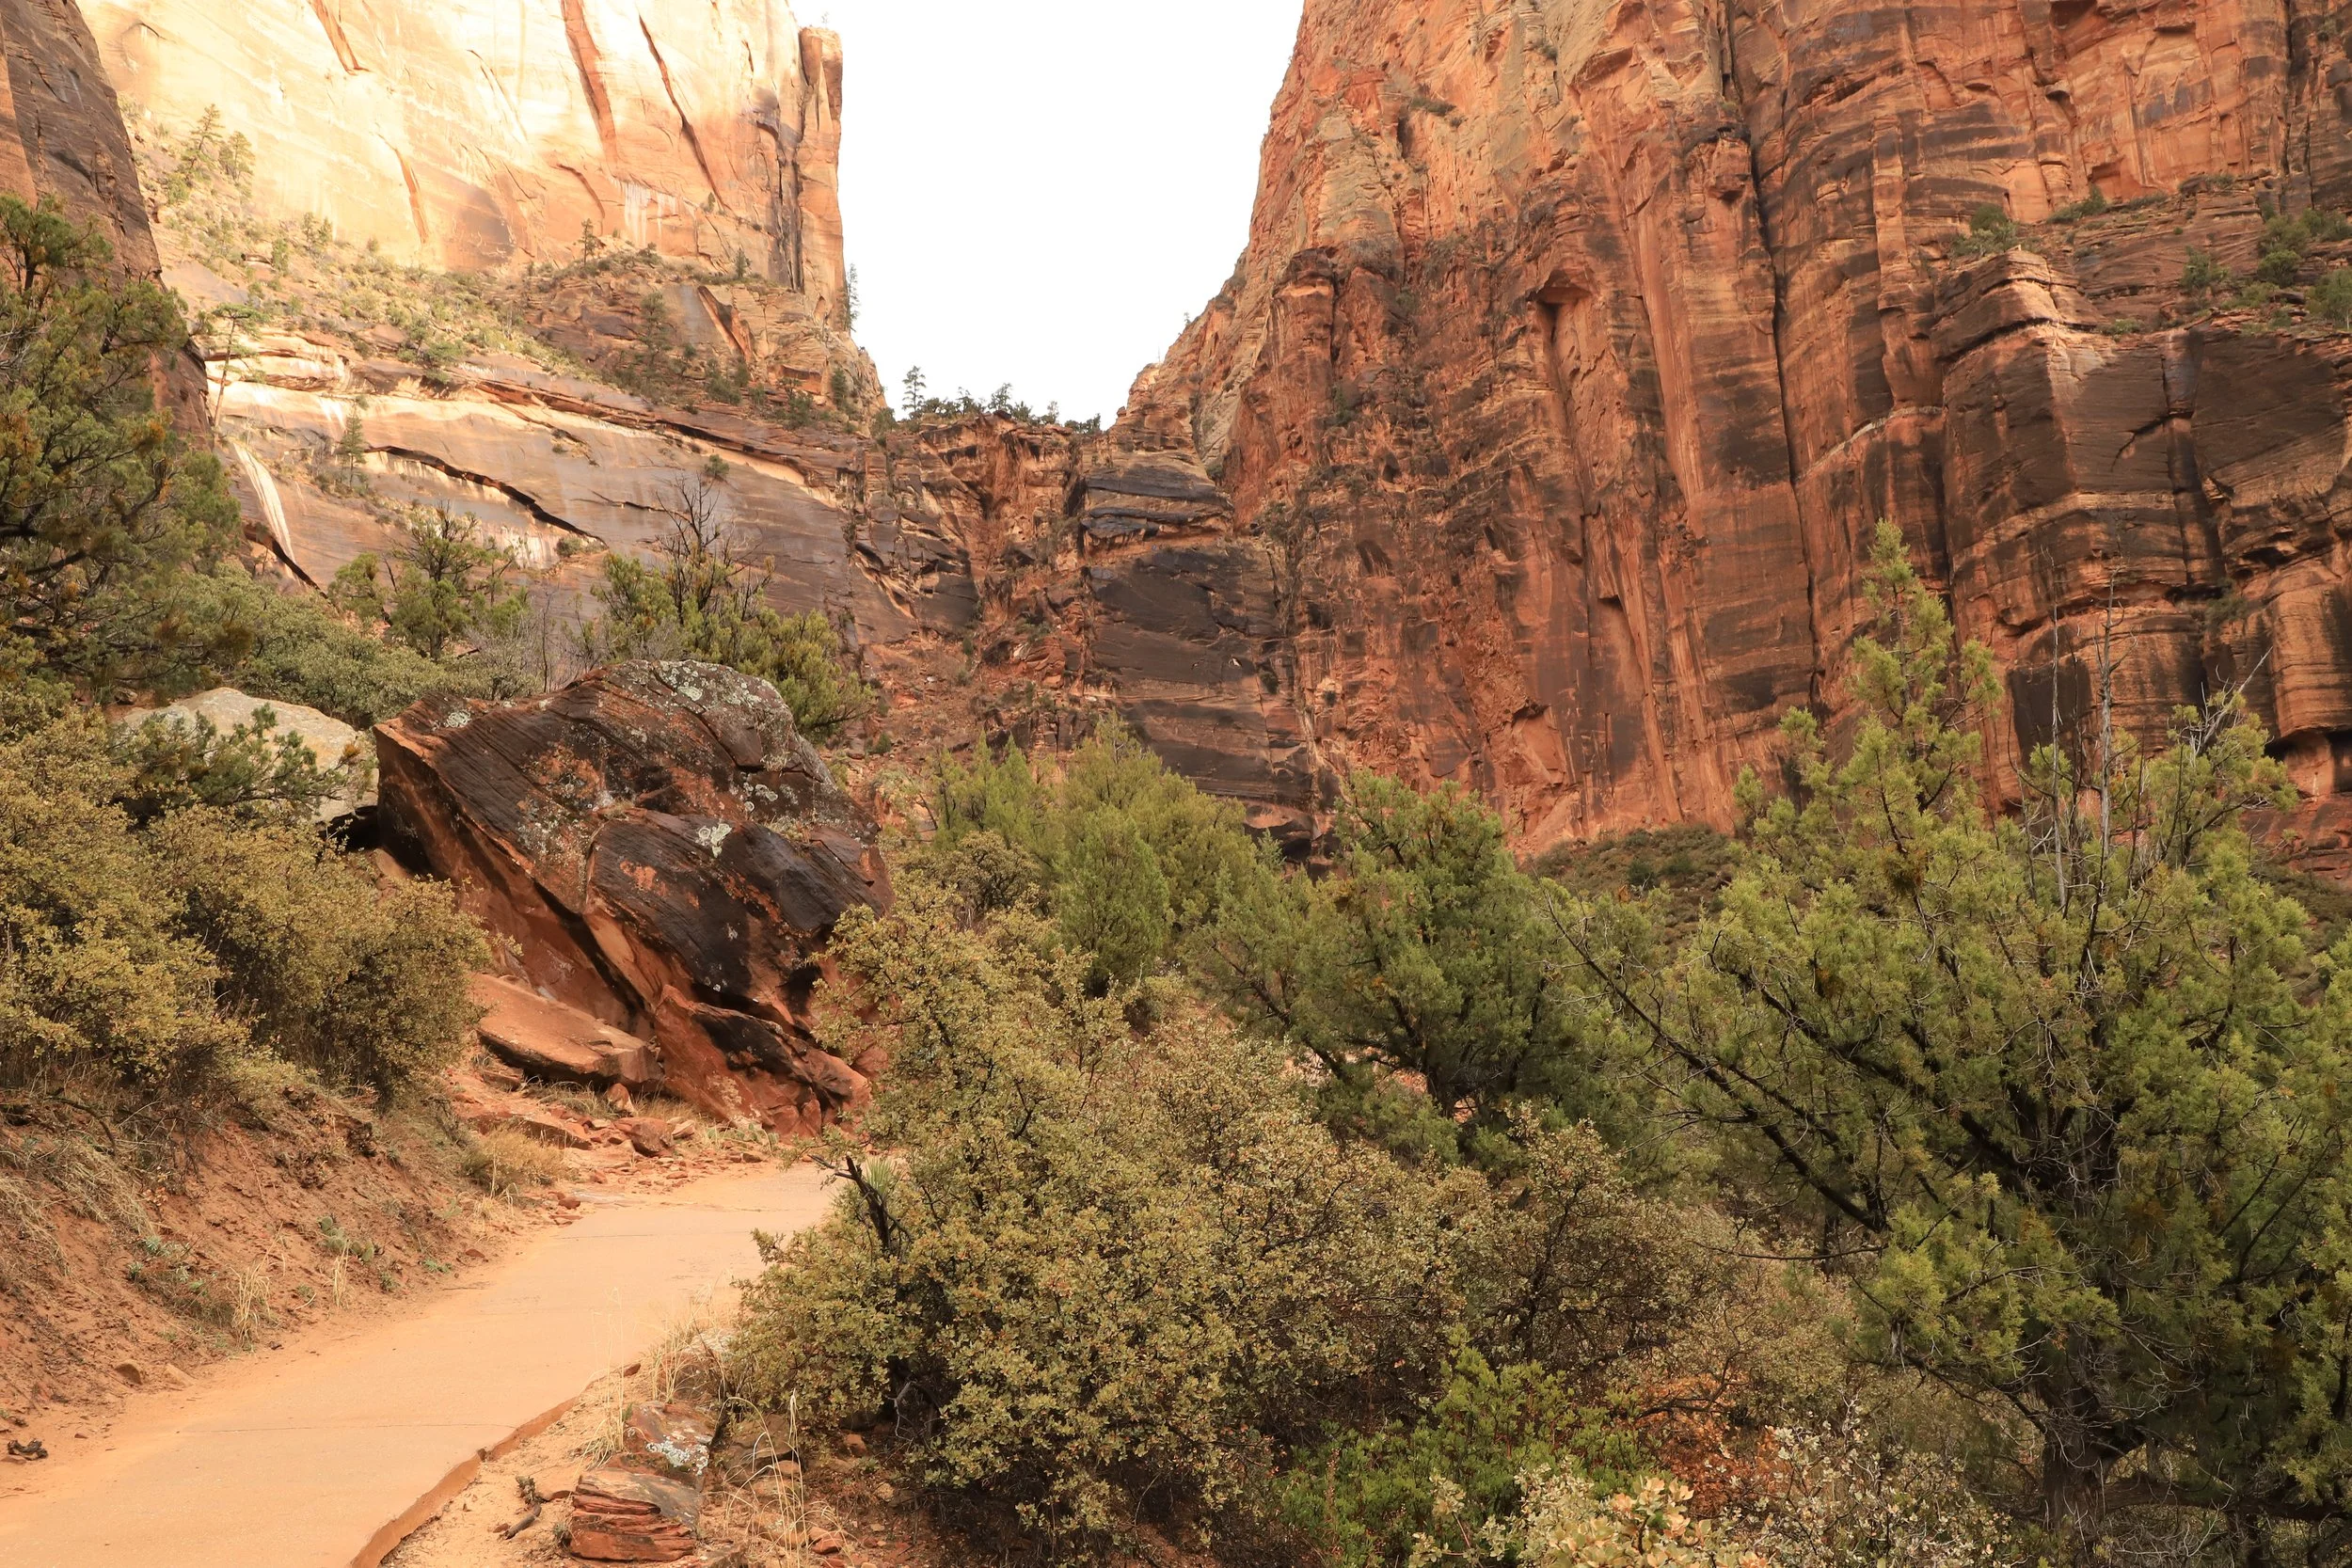
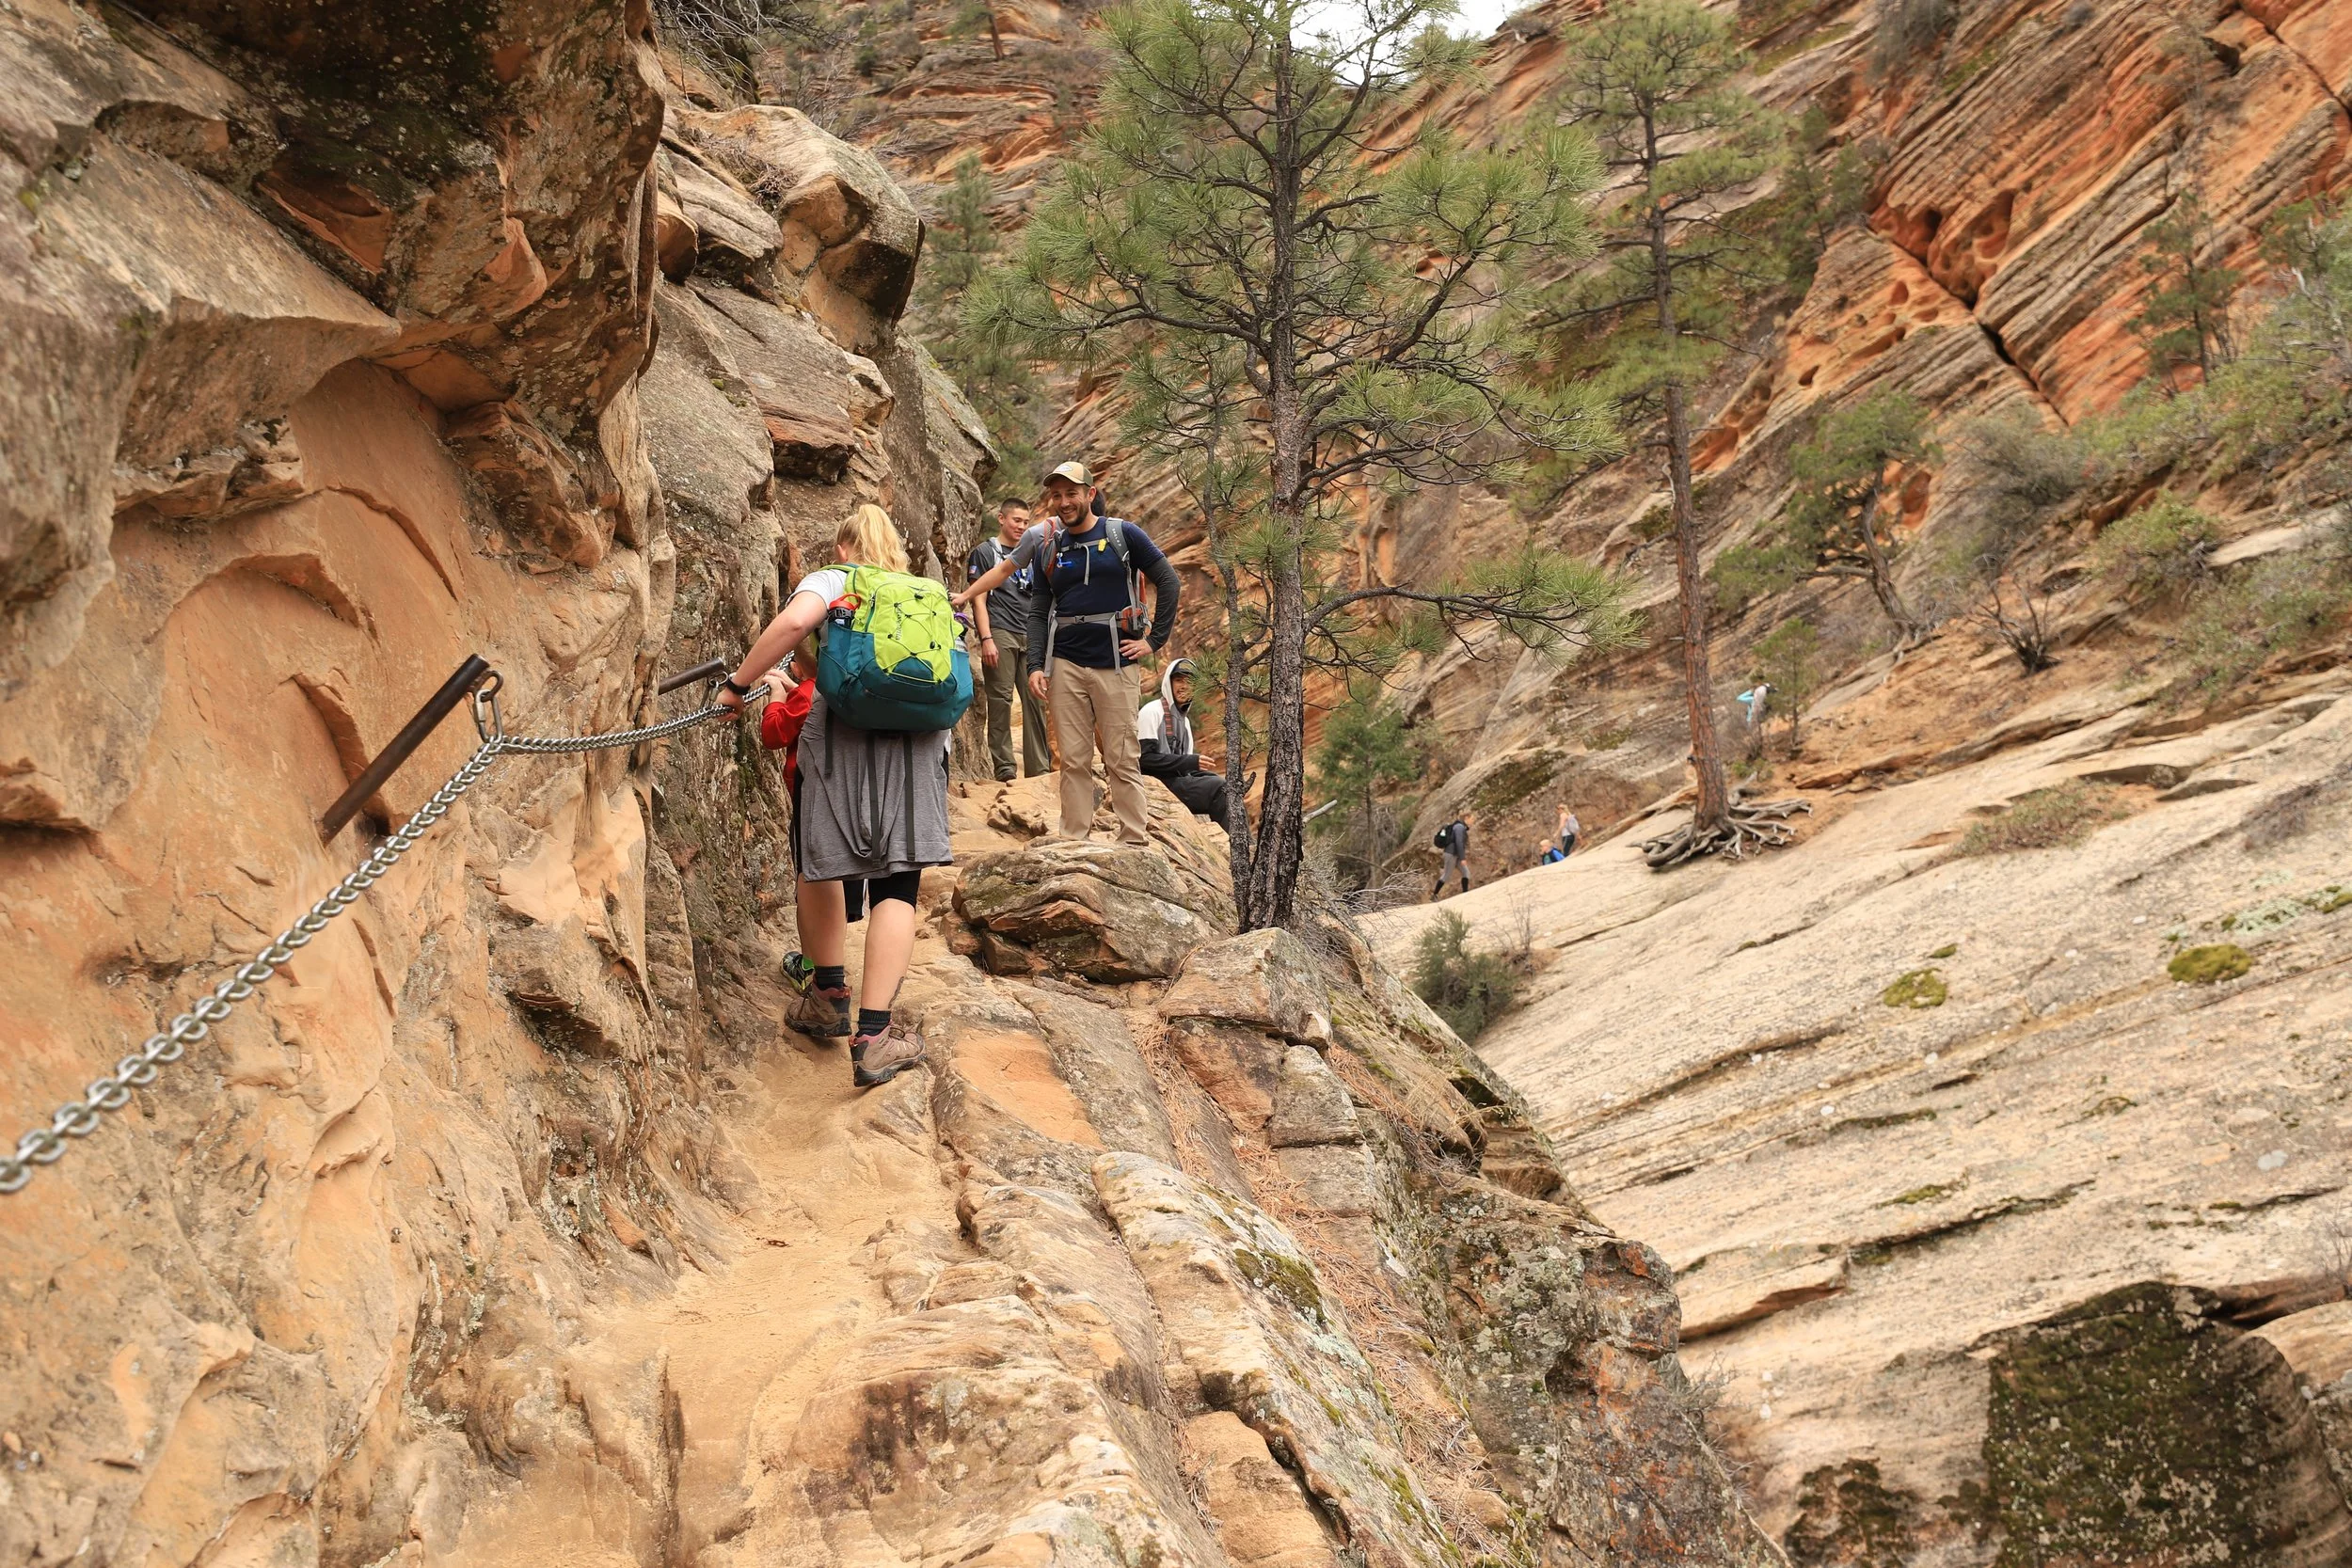
March 2018 - Beginning the trek to Angel’s Landing
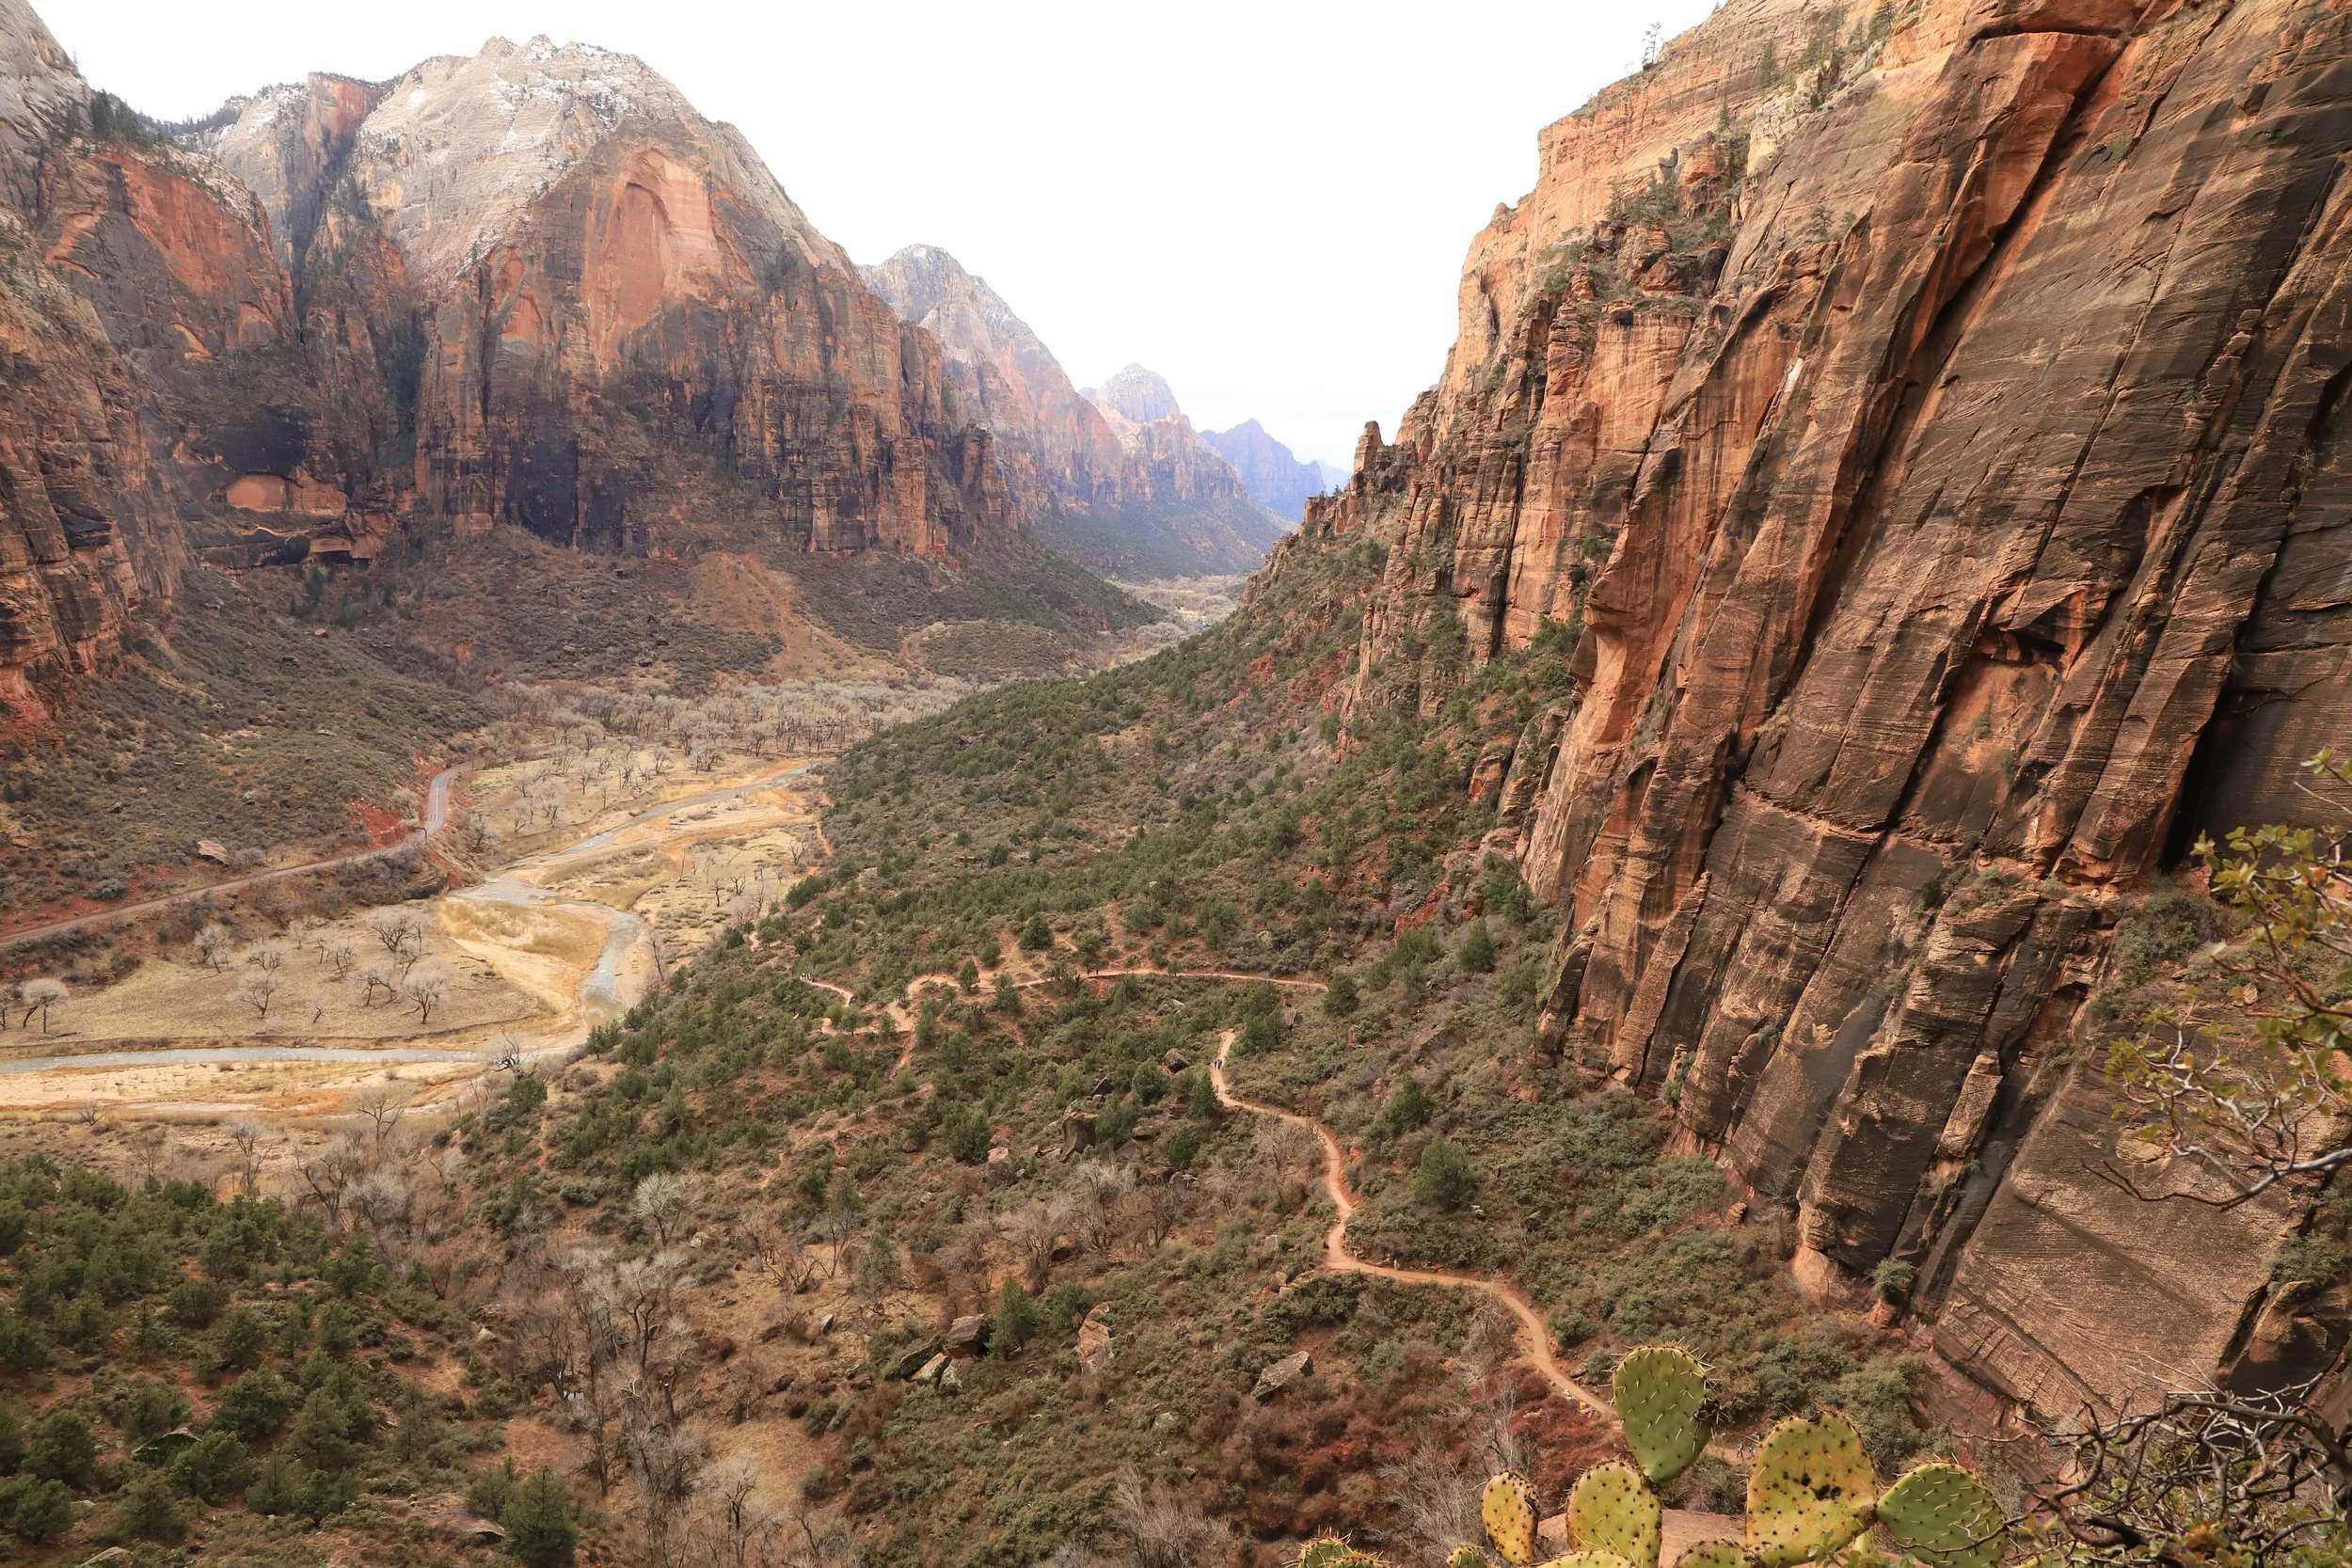
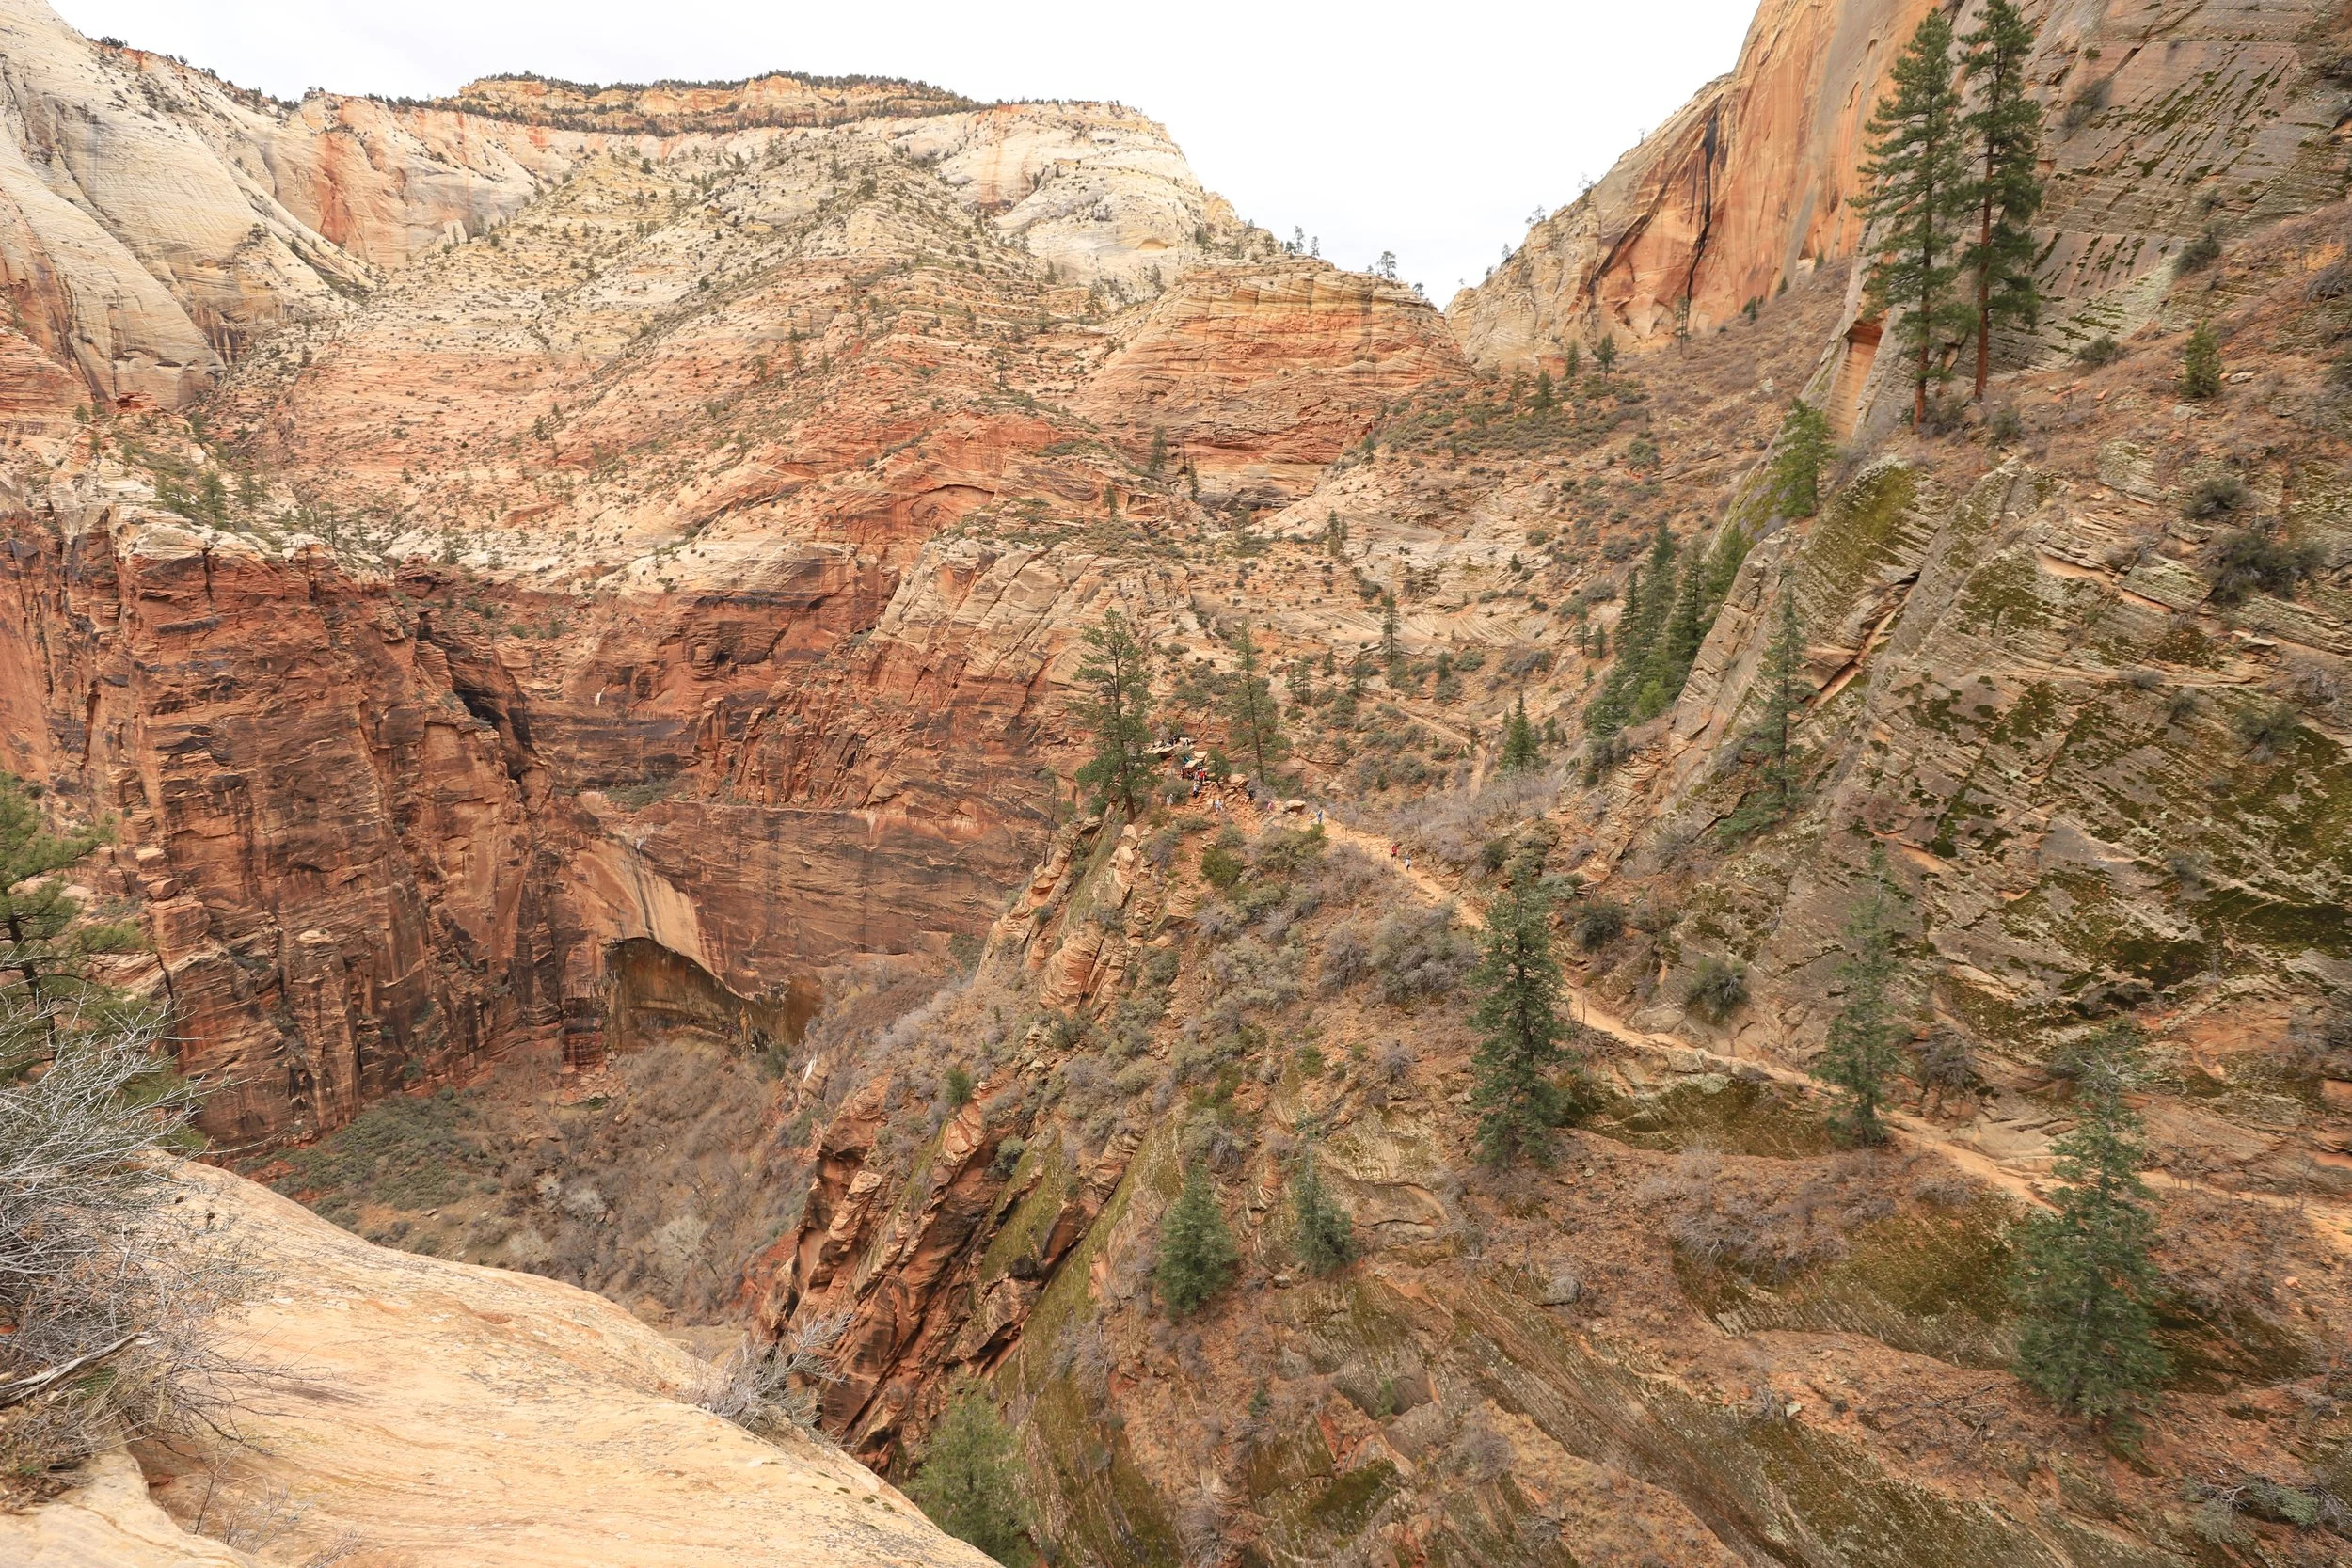
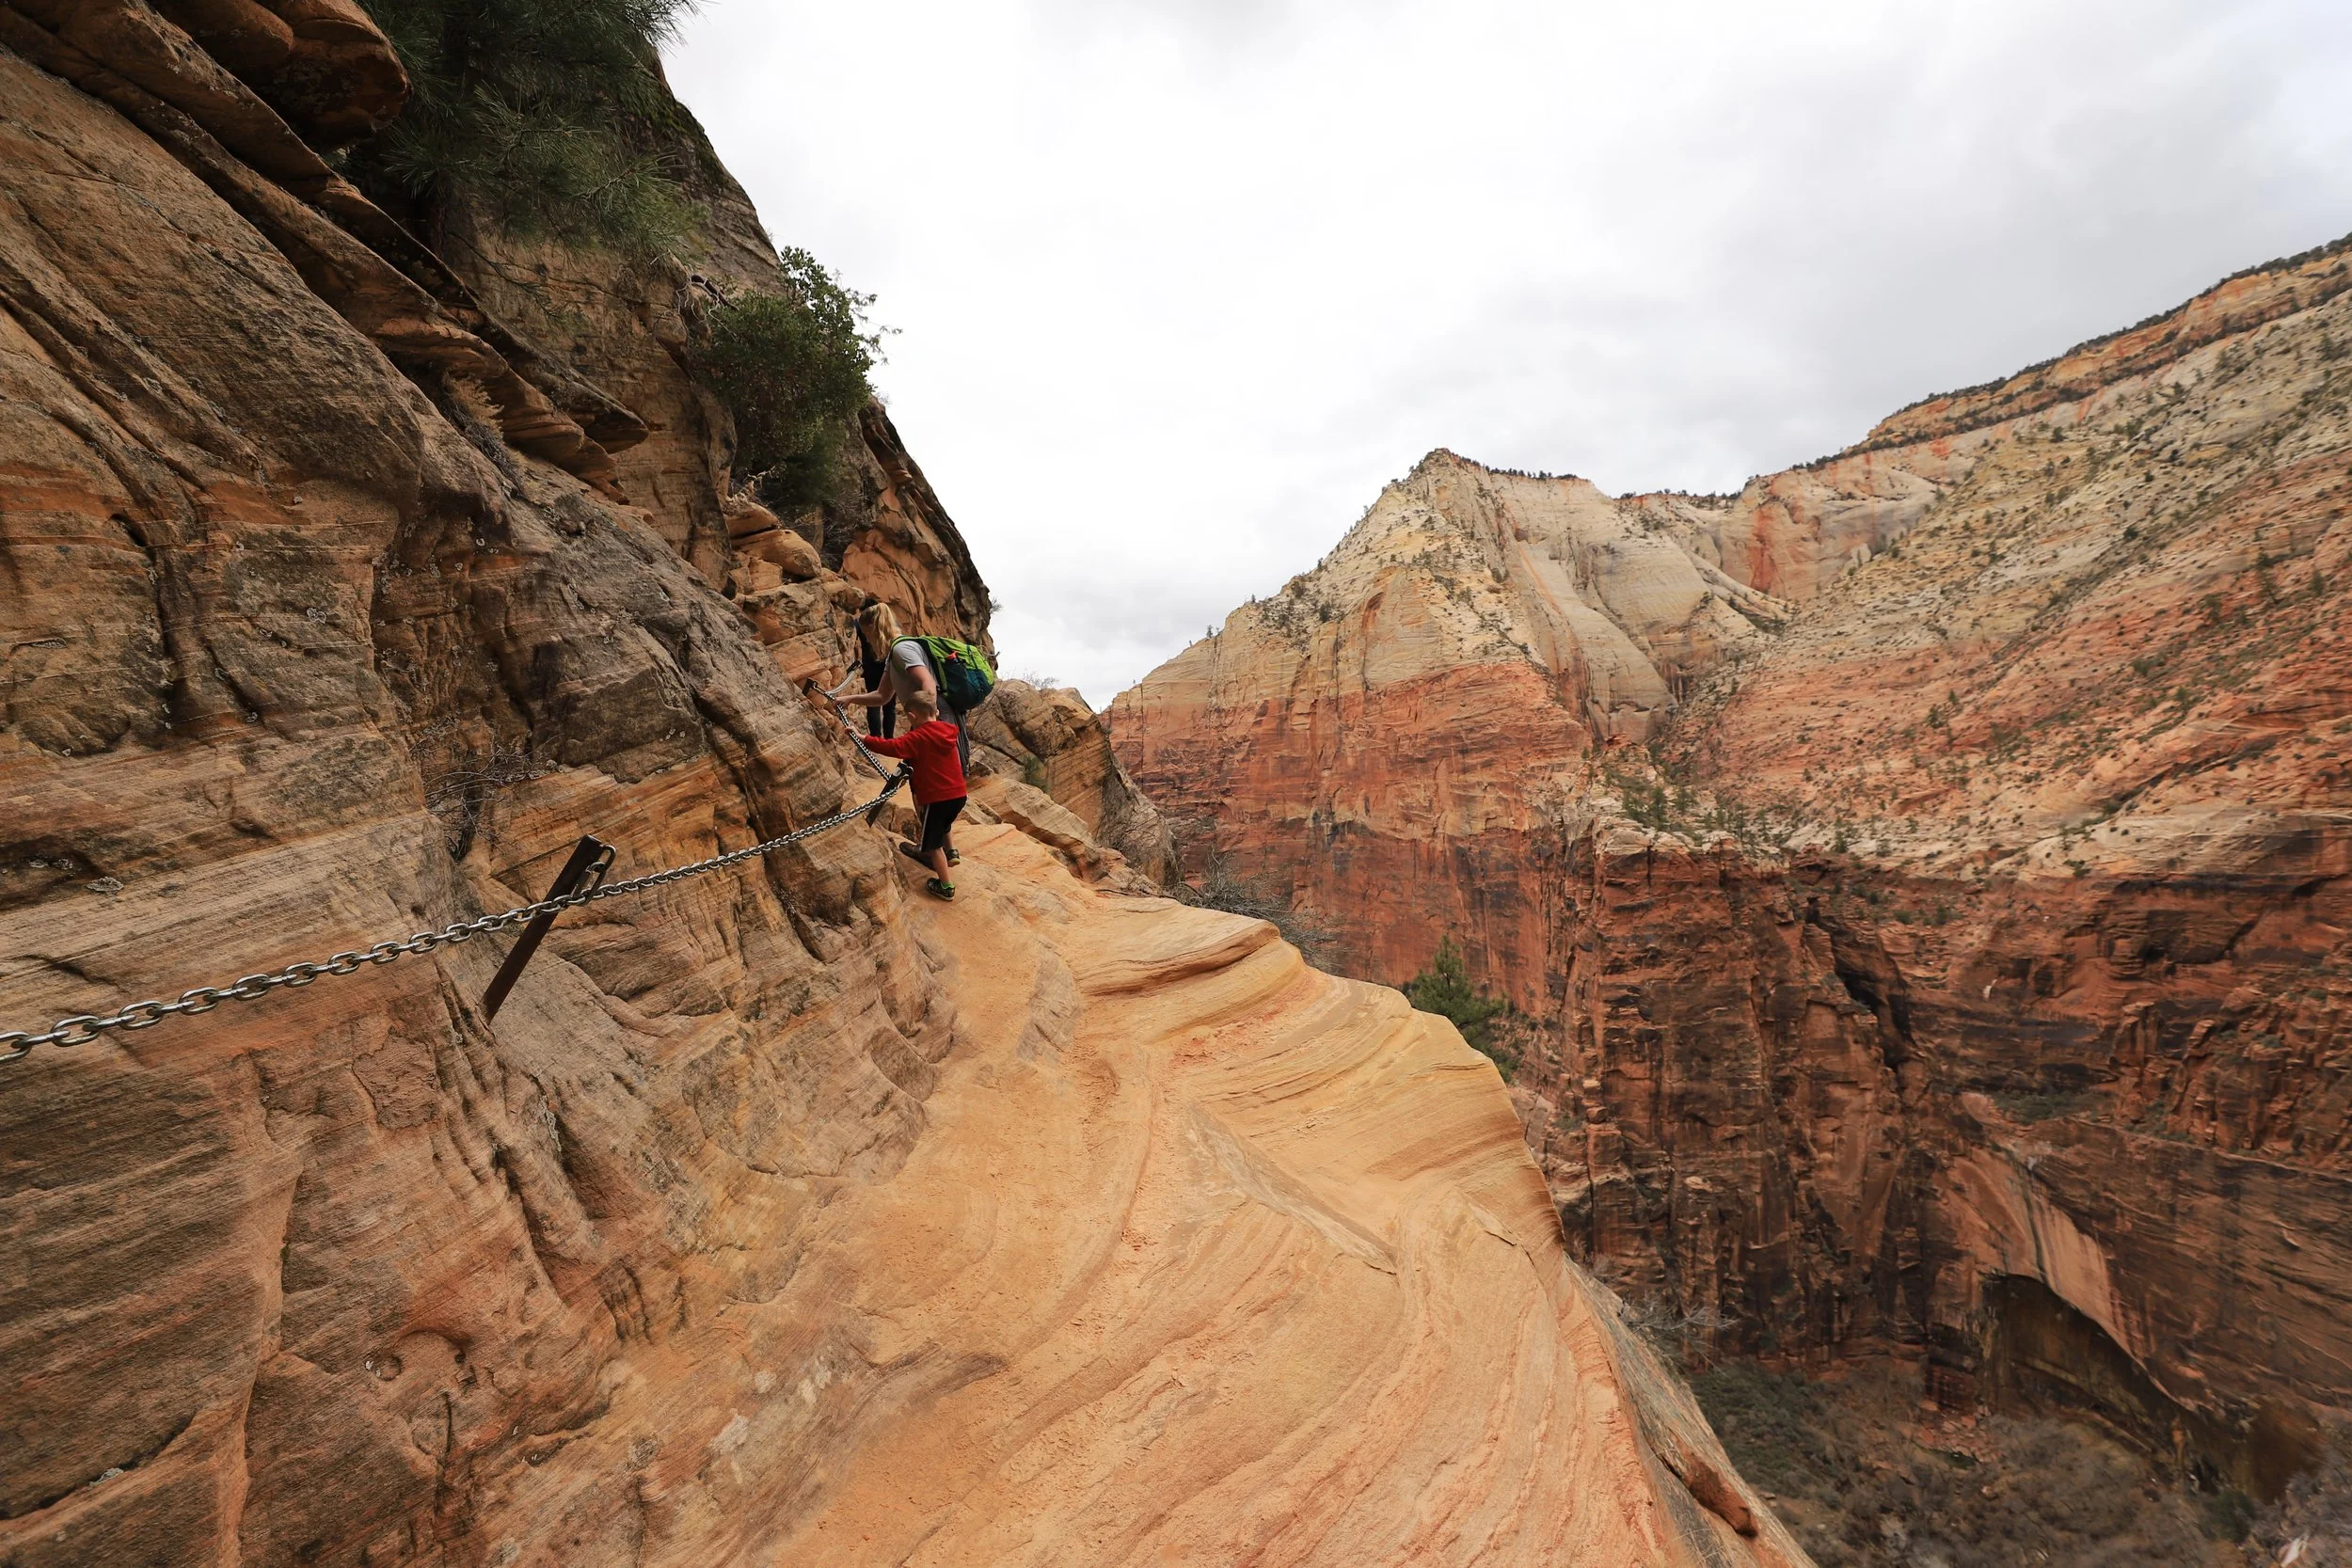
The trail continues past Scout’s Lookout for another ½ mile to Angel’s Landing. This part of the trail is the portion with the 1000ft drop off on both sides of you. There are cables to hold for stability. Yes, it is scary. In addition to holding onto the cables, there are times you will need to use your arms to scramble up small distances. I put my camera away in order to keep my hands free during this part of the hike. When I finally made it to the edge, I was shaking. I’m not sure if it was the strenuous nature of the hike or the dramatic distance to the ground below me. Probably both. Please don’t take your children on this hike.

March 2018 - An easy enough stretch of trail to Angel’s Landing that I got my camera out for a moment.
The view is impressive, however there is the road down at the bottom of the canyon and some of the park buildings are also visible. If you ignore that….

March 2018 - View from Angel’s Landing
I don’t have a desire to do this trail again. The steep 1000ft drops on both sides of the trail seem like an unnecessary risk to take to enjoy the day outside…
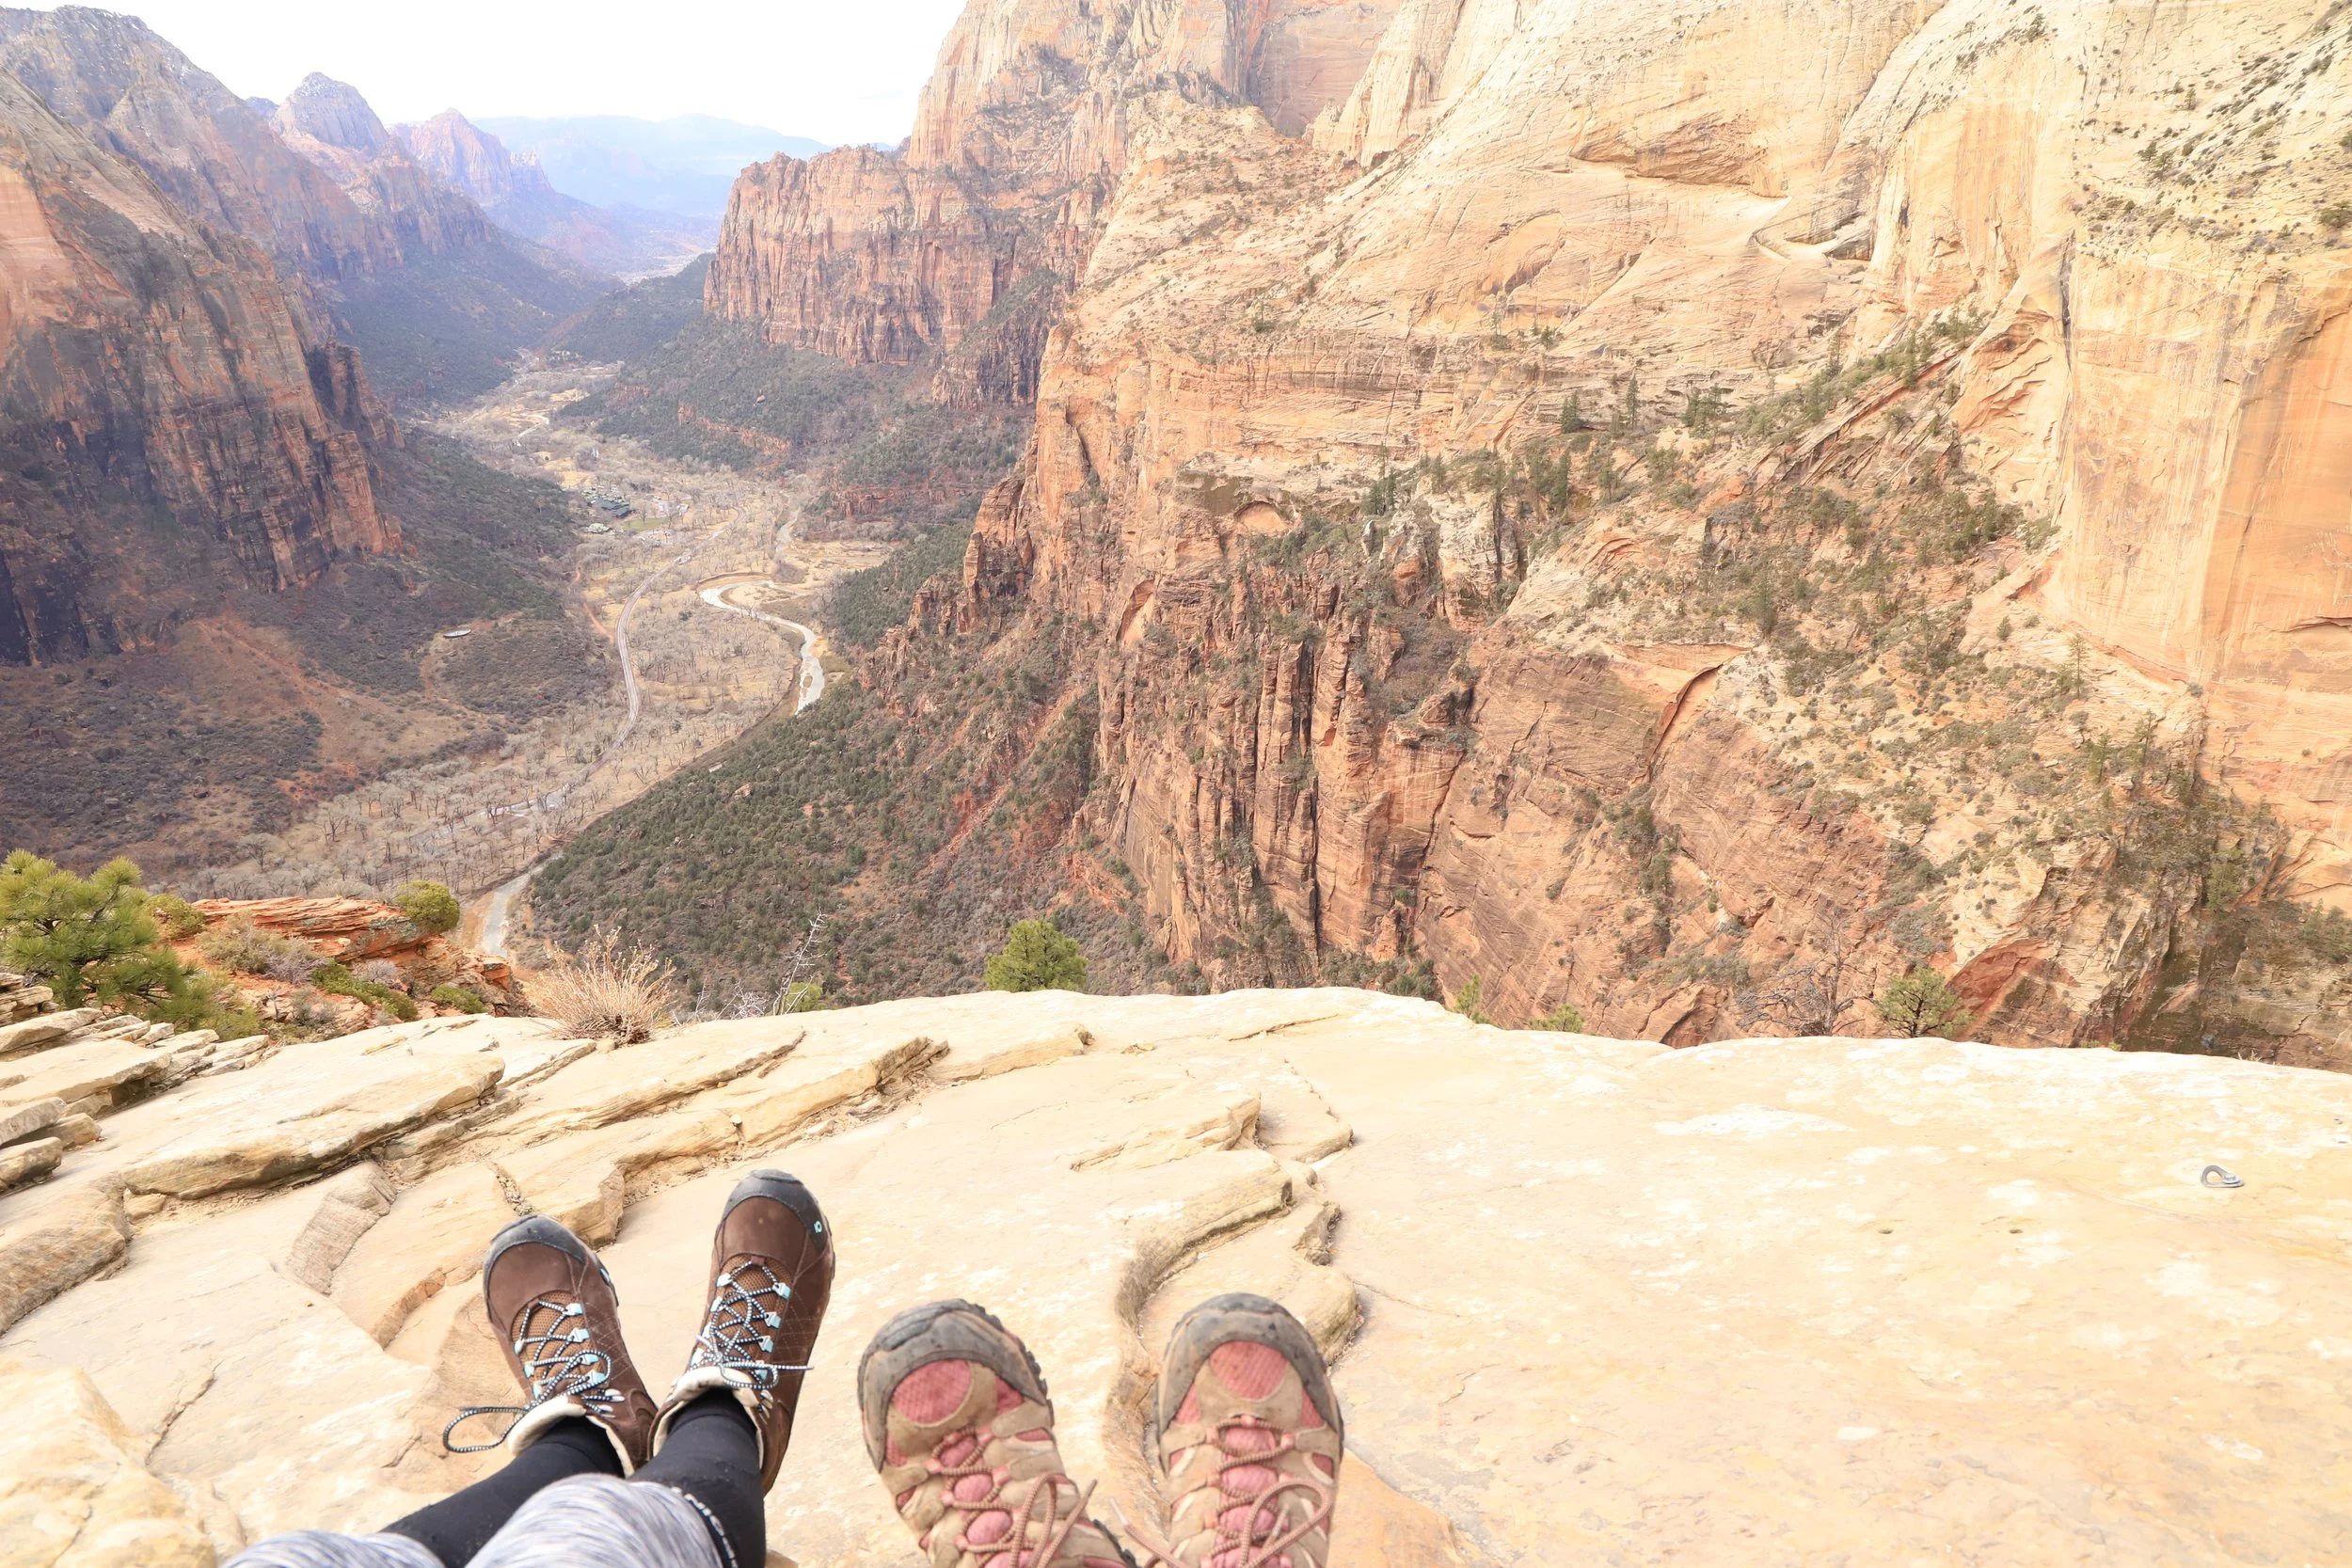
March 2018 - Our feet were happy we made it to the end of Angel’s Landing
The way back to Scout Lookout is going to feel a lot less scary, even though your potential energy (mass * gravity * height) is the same as it was on the way out to Angel’s Landing. I think that I was so much less scarred on the way back is why I don’t want to do this trail again. I can imagine it would be much easier for a misstep when I’m less worried. Try this trail if you want or just enjoy my pictures. My recommendation would be to just stop at Scout Lookout.
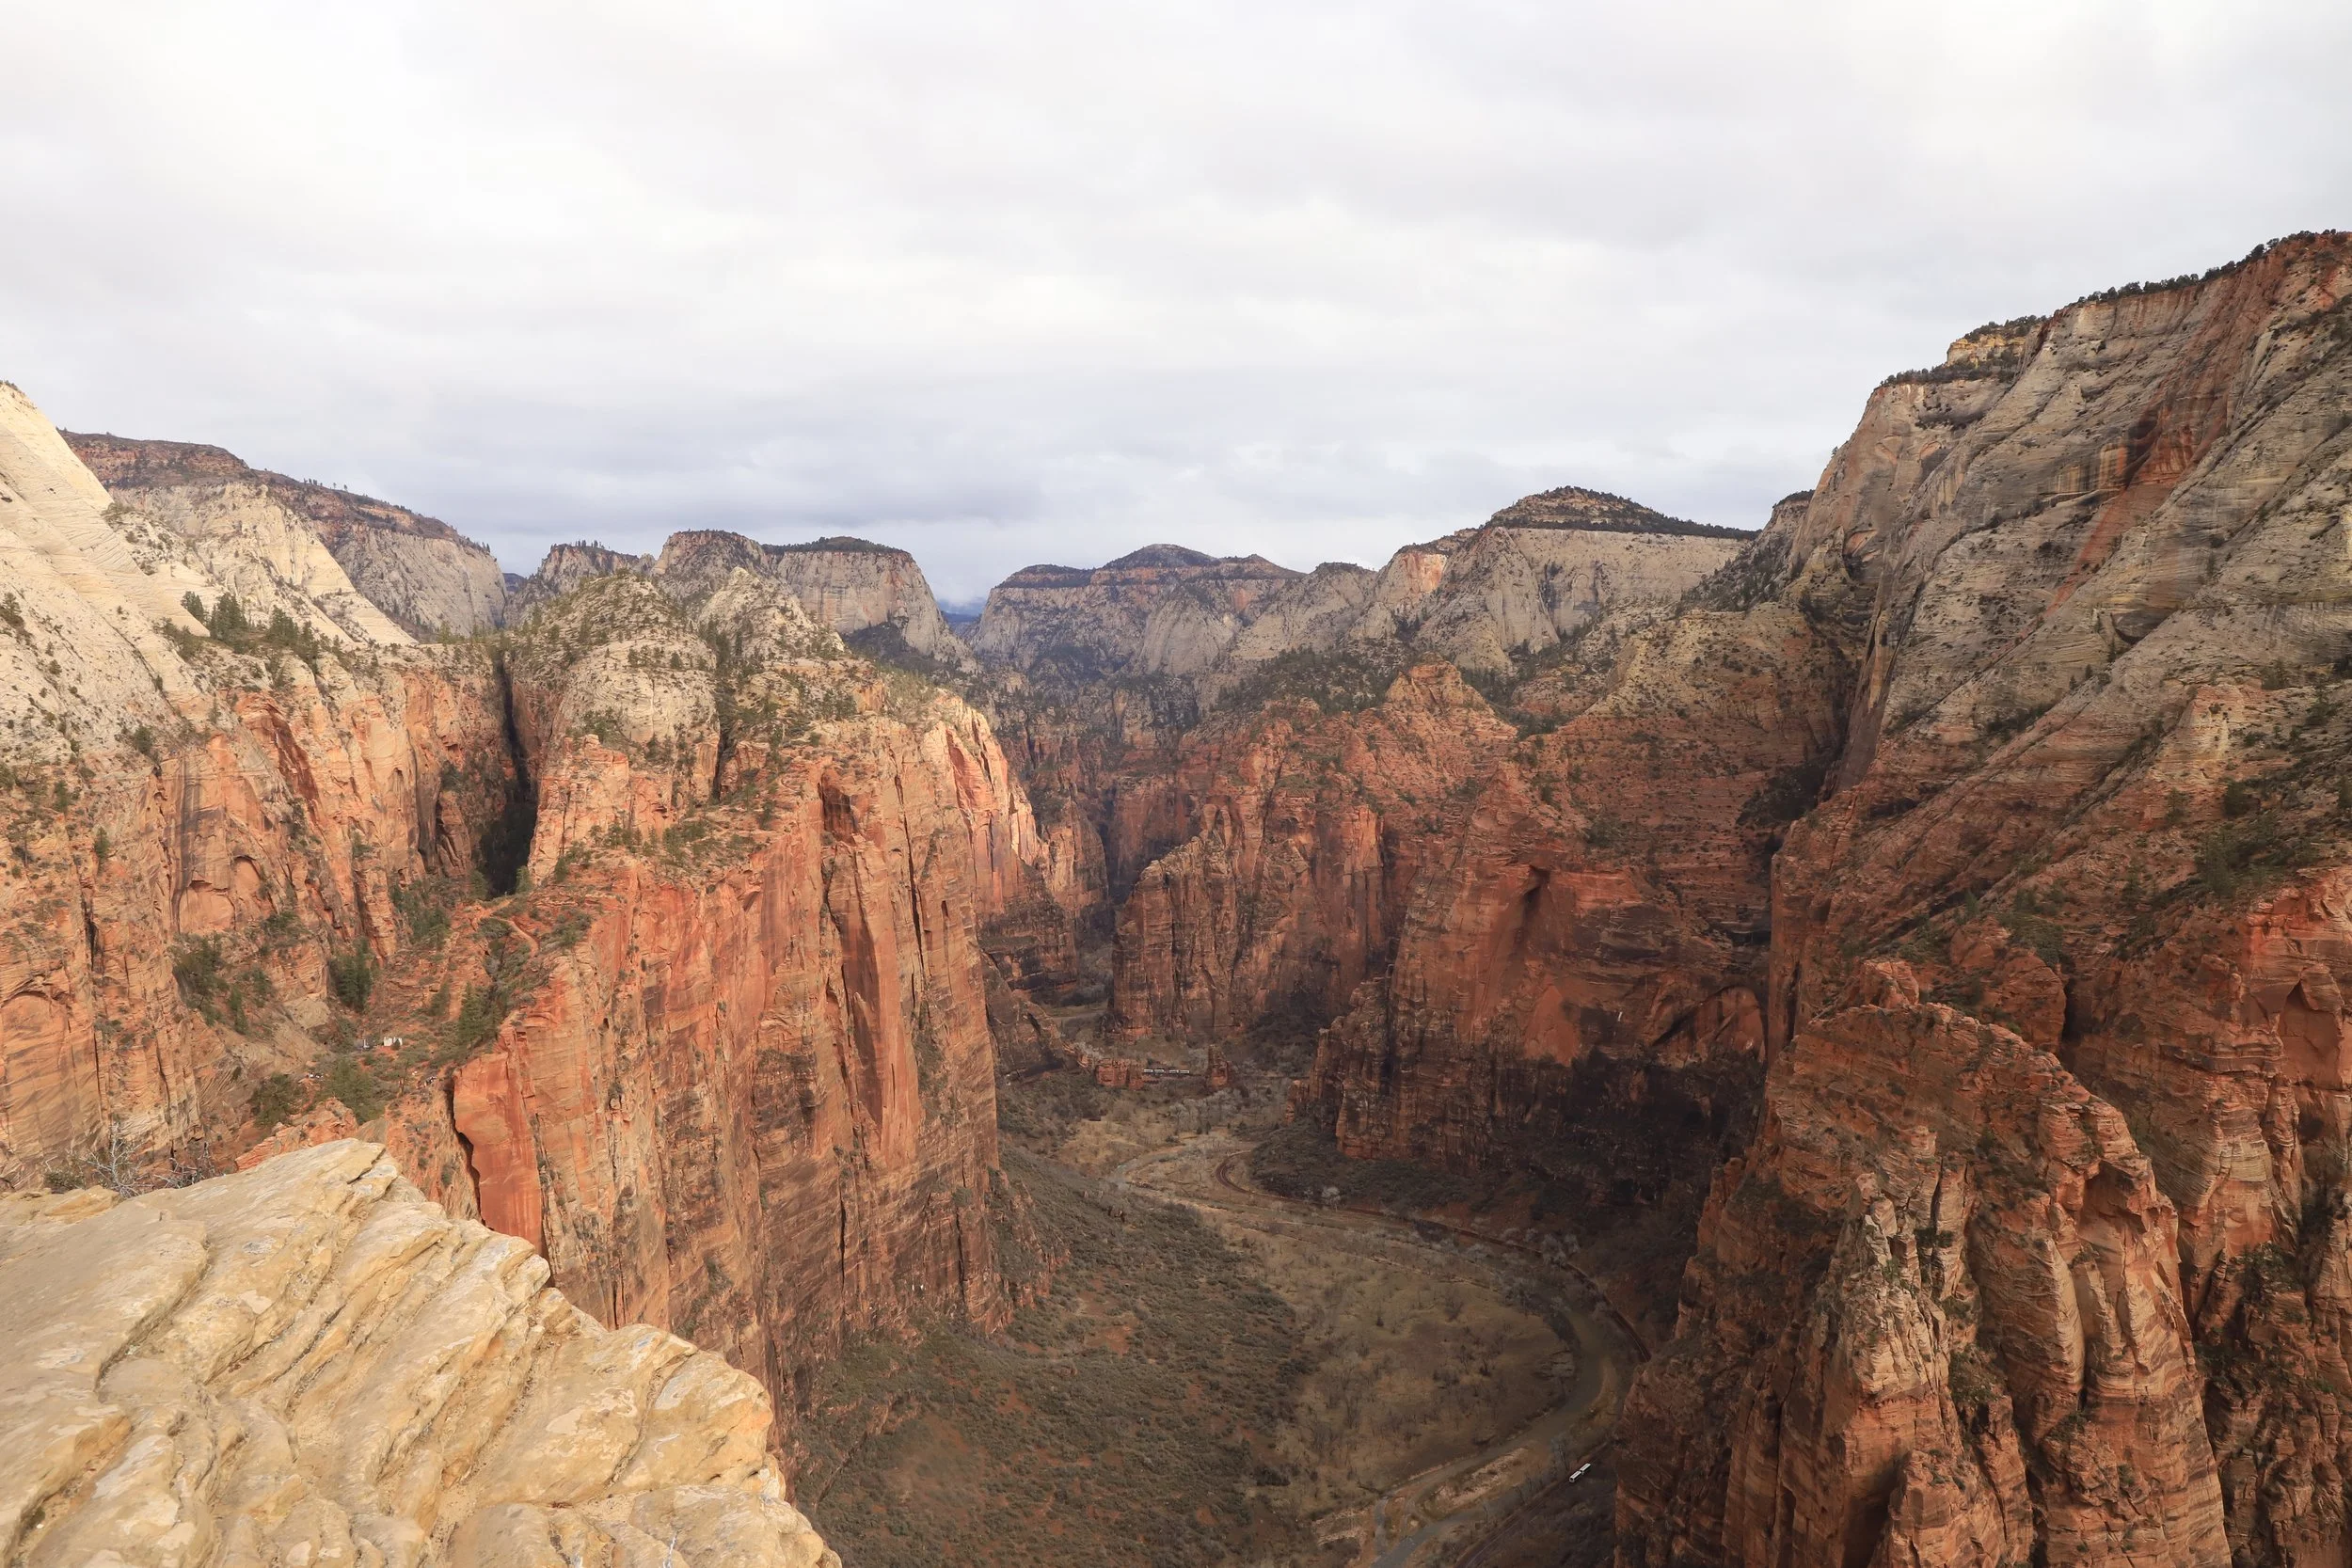
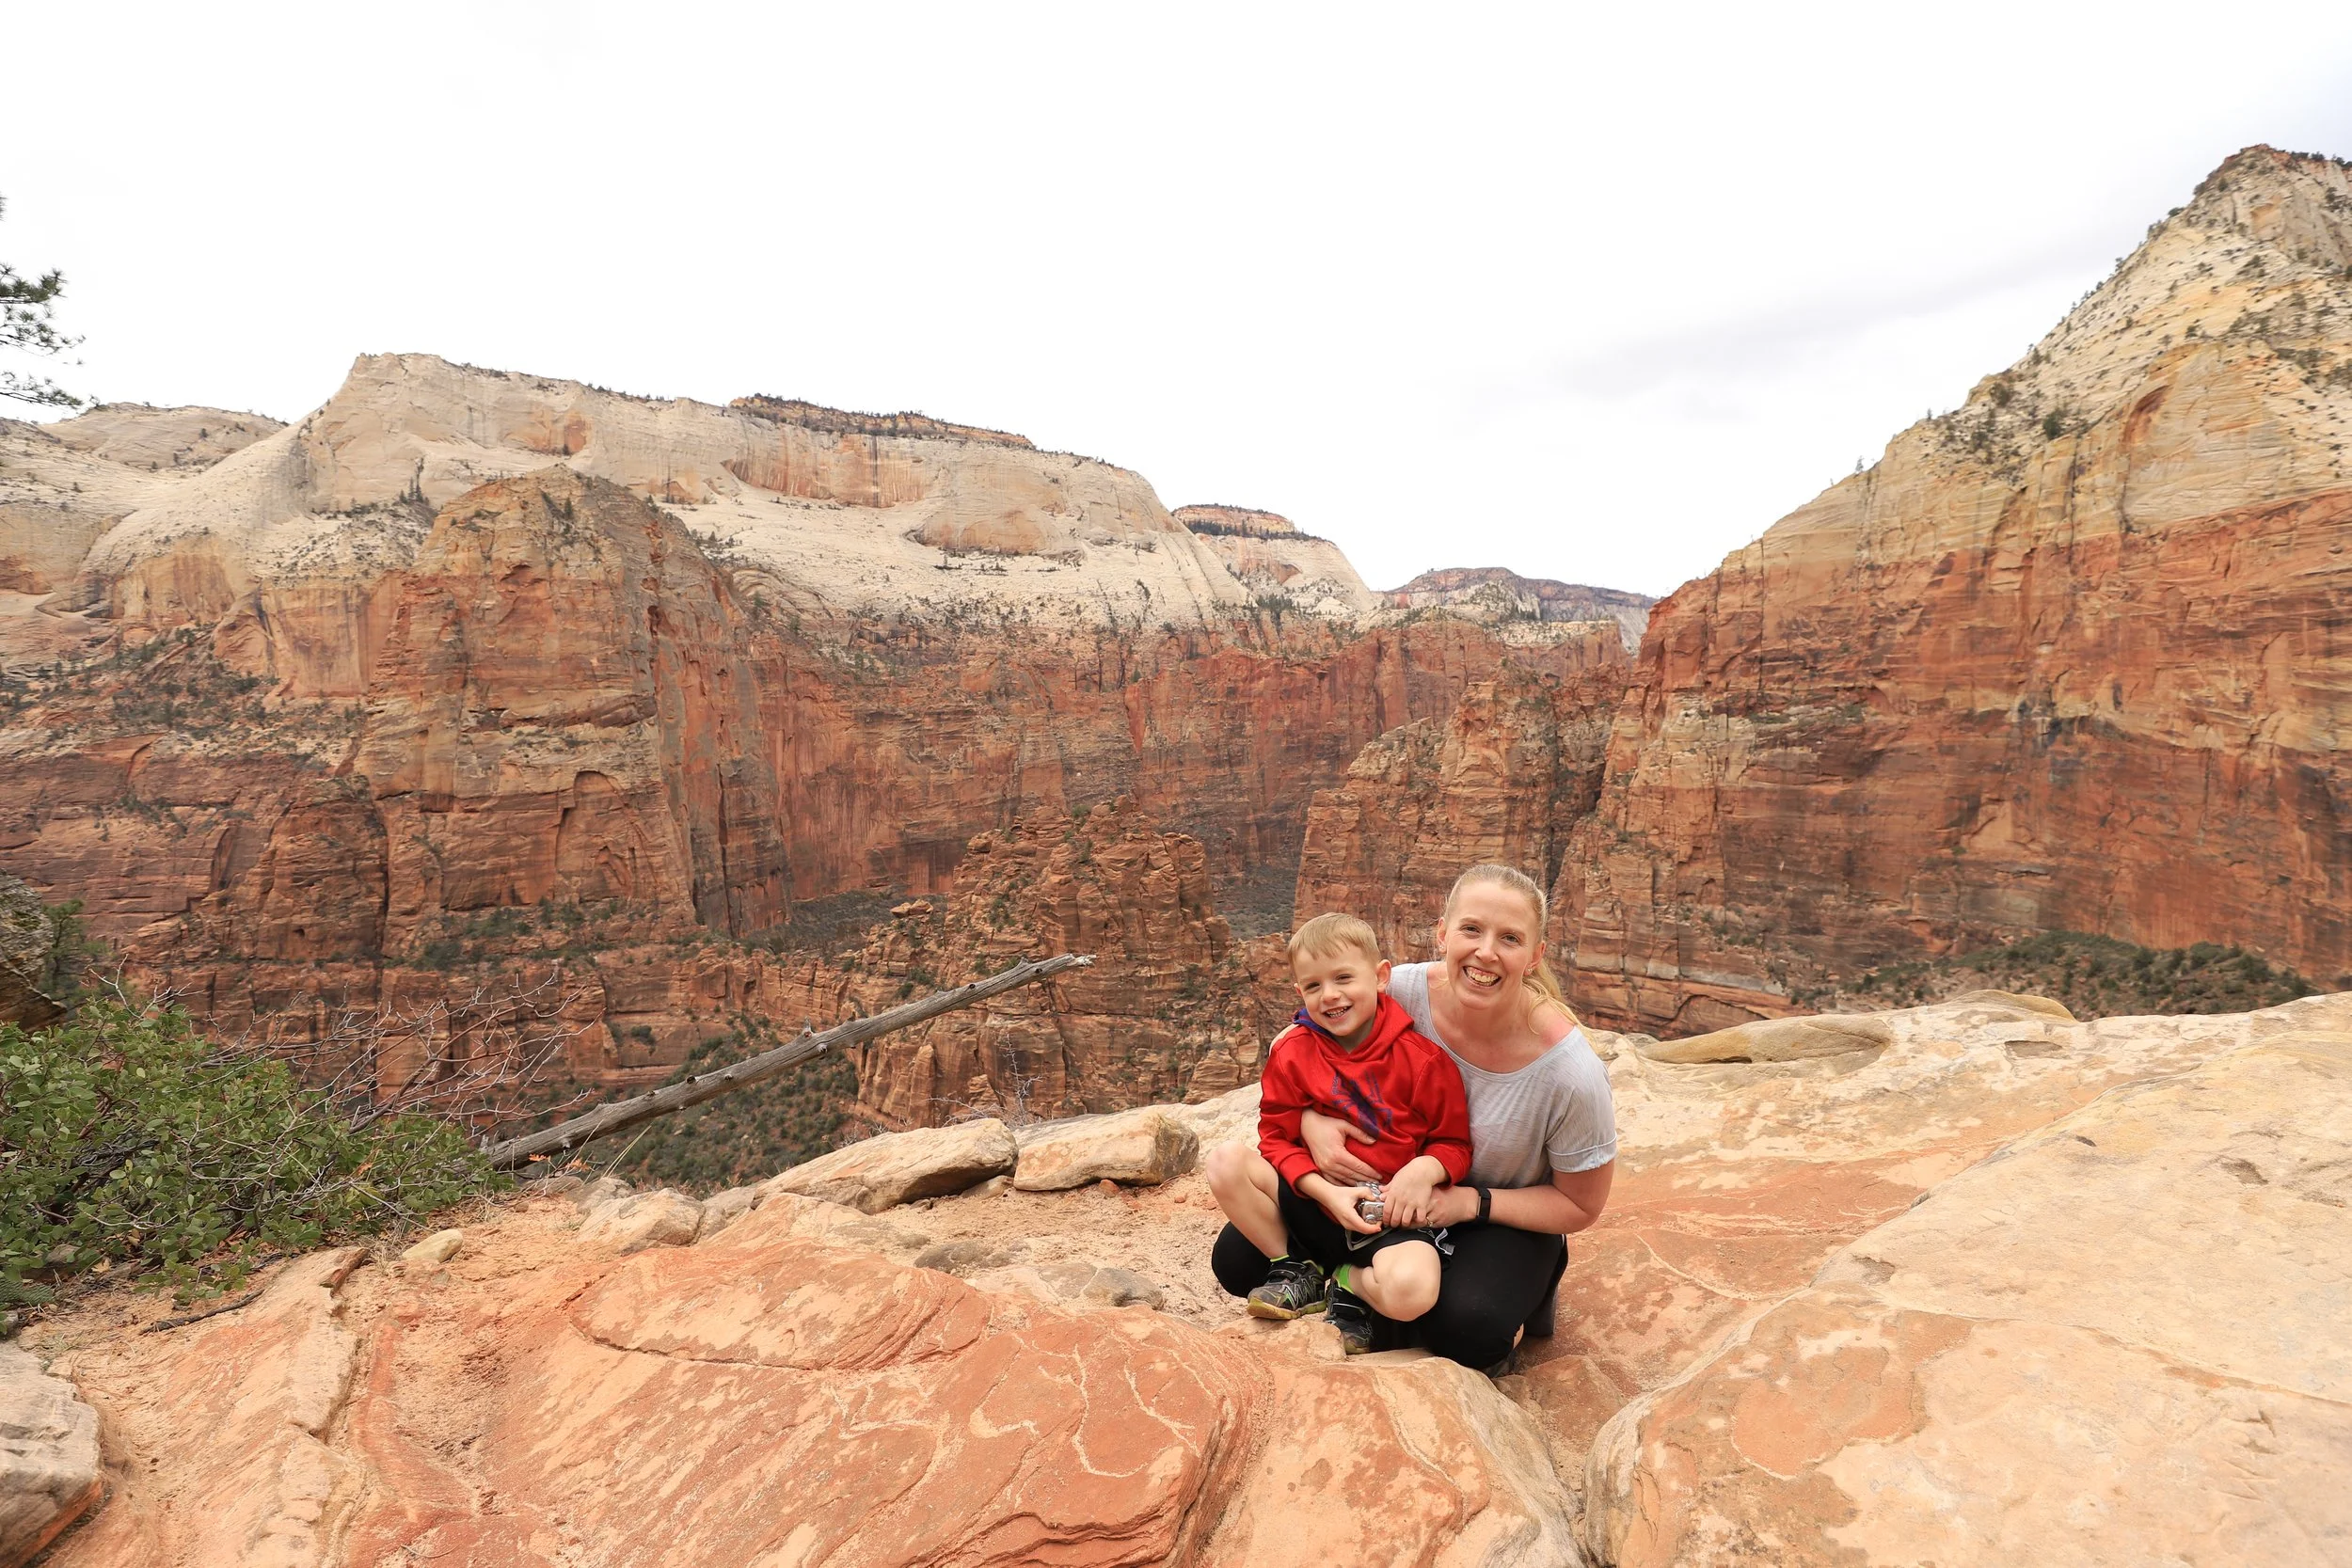
March 2018 - This is the view from the other direction from Angel’s Landing. This was actually the direction I preferred facing while I was sitting up at Angel’s Landing.
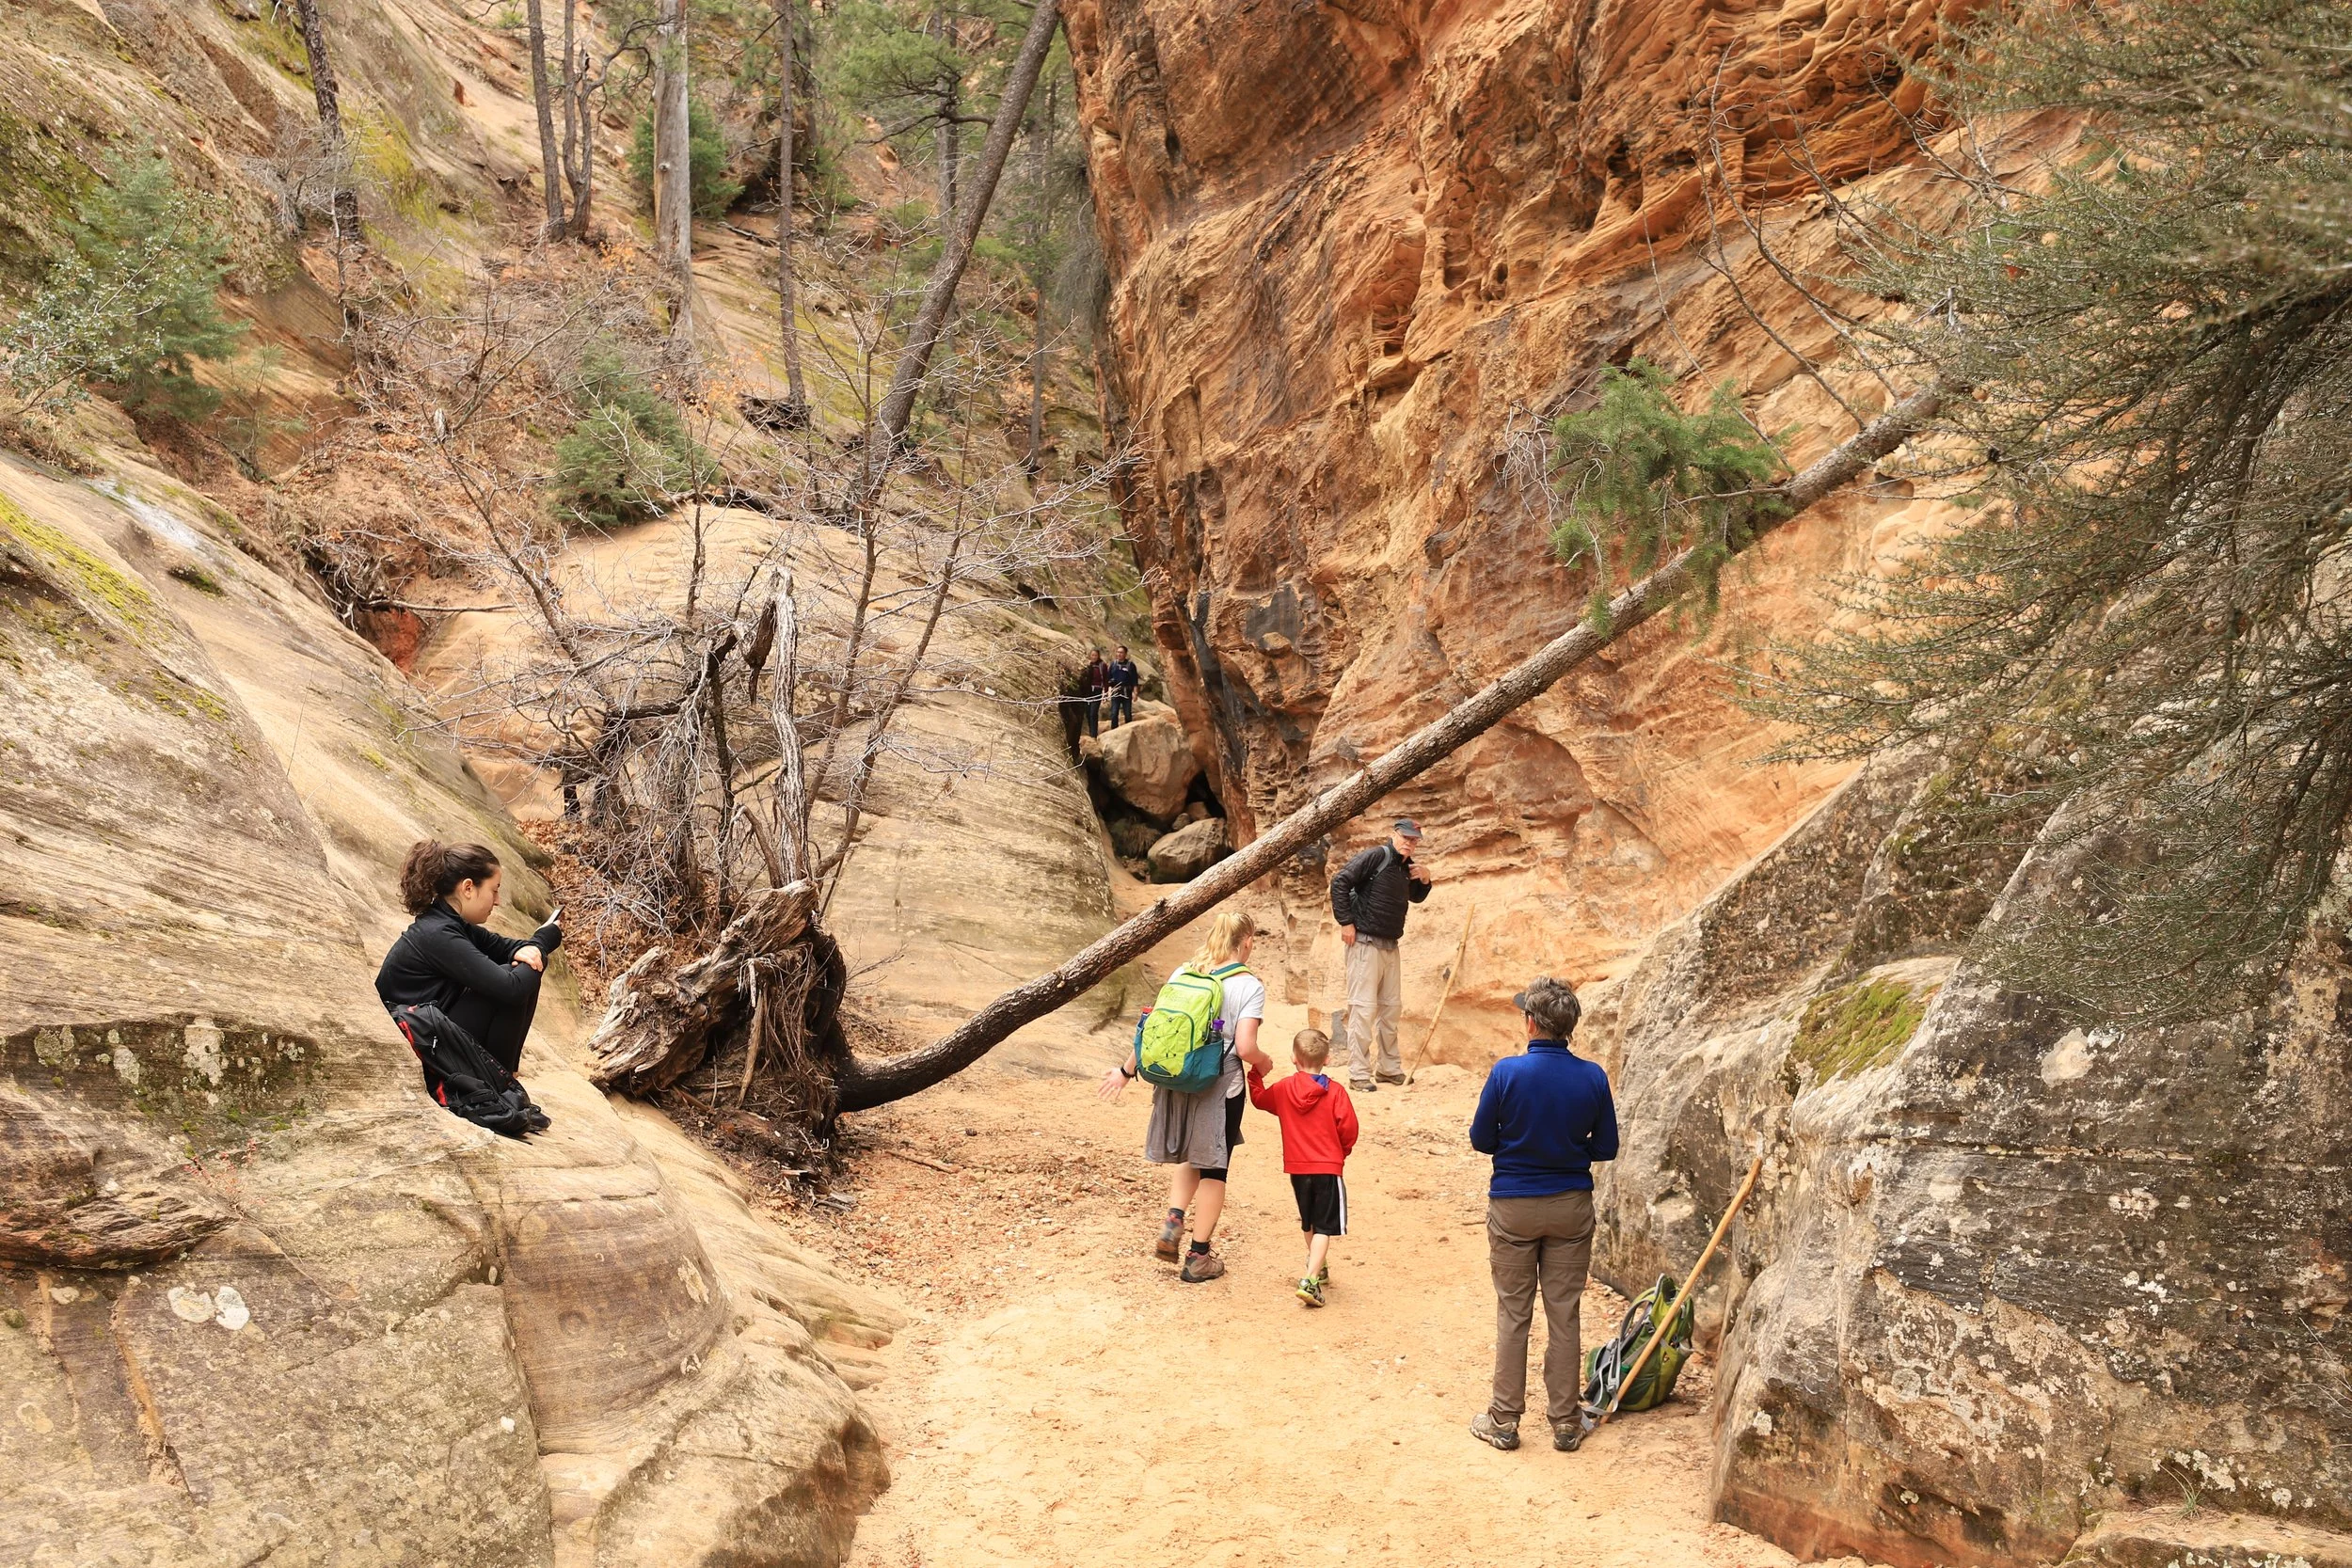
As I mentioned, I didn’t have my camera out while I was hiking on this trail for safety reasons. But I did take a picture of the trail before we started hiking back. The trail goes along the top of the narrow rock. There is a cable for stability, but this is still a scary hike.
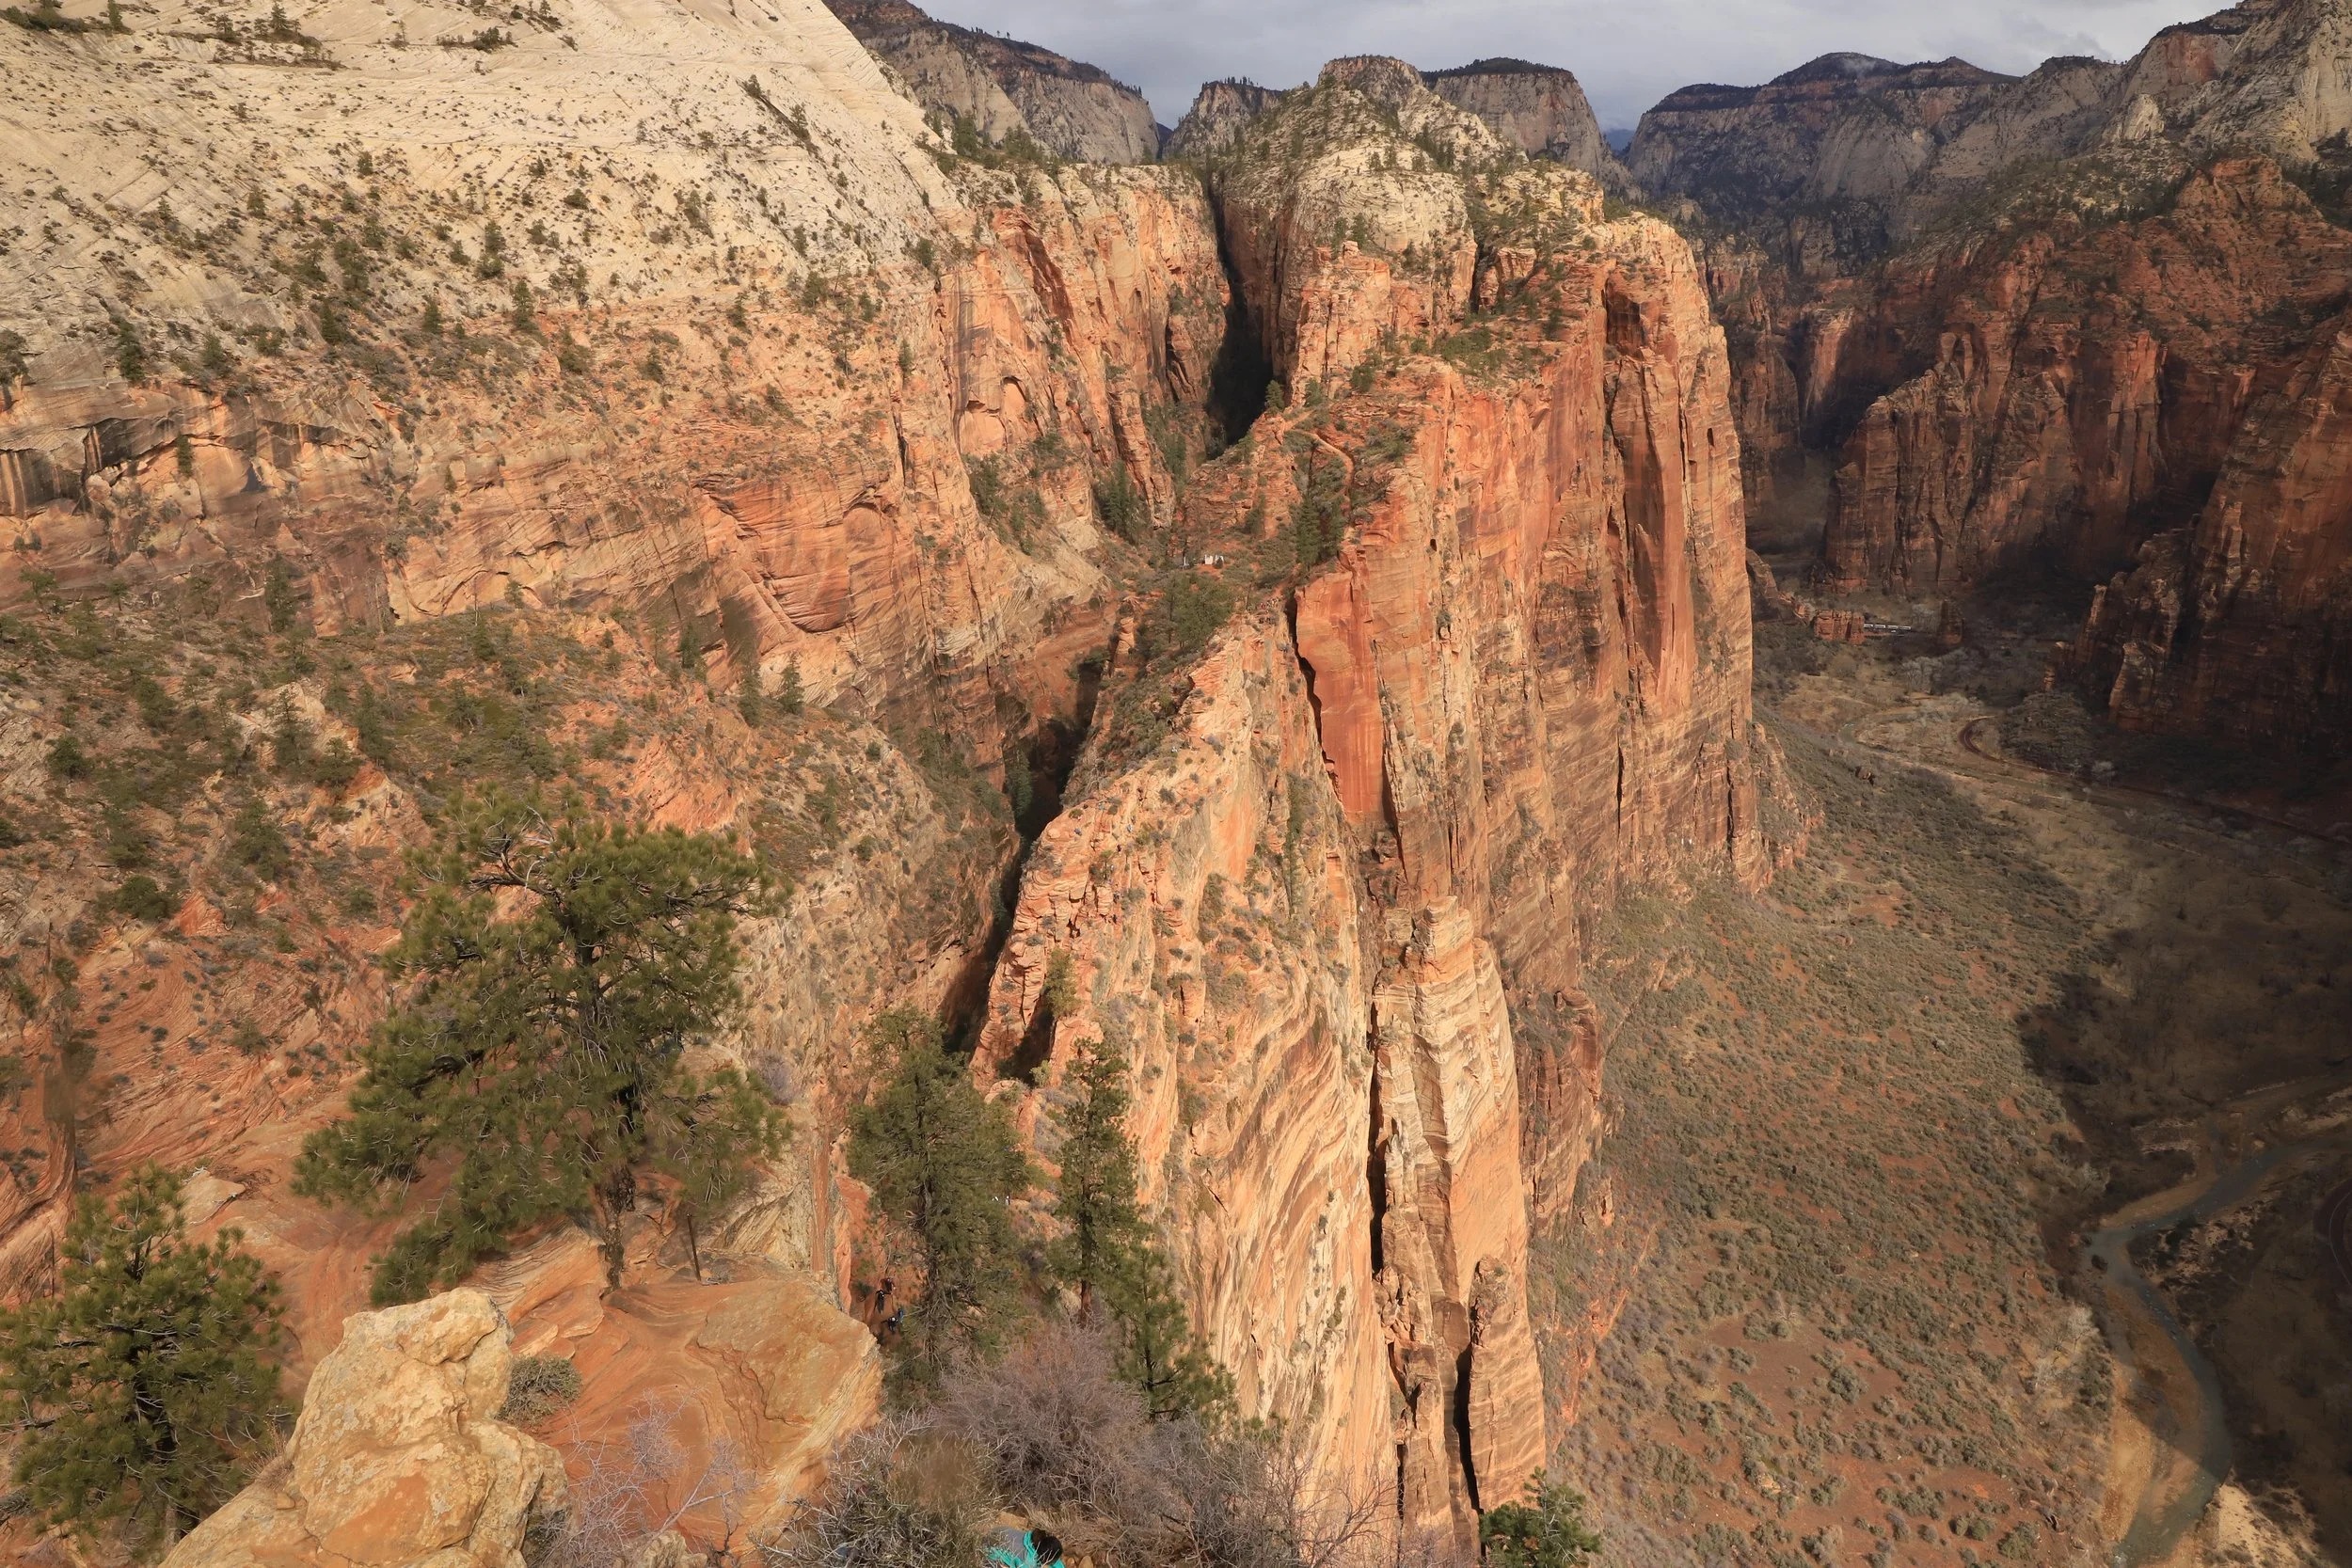
March 2018 - Hiking back to Scout Lookout from Angel’s Landing
11 - West Rim
Distance - 14.5 miles (one-way)
Elevation Gain - 1,500ft
Trailhead Location - An out-and-back along a portion of the West Rim Trail will take off from shuttle stop #6 (Grotto). Or arrange a paid shuttle and hike this trail one way. The paid shuttle (this is not the free Zion shuttle) will drop you off at the Lava Point Trailhead. You will hike back and take the free Zion shuttle back to the Visitor Center.
We haven’t had a chance to hike the West Rim yet, but Red Rock Shuttle is the company we hired to do the Zion Narrows top-down, and they were great. They offer rides to Lava Point as well.
Shuttle Stop 7 (Weeping Rock)
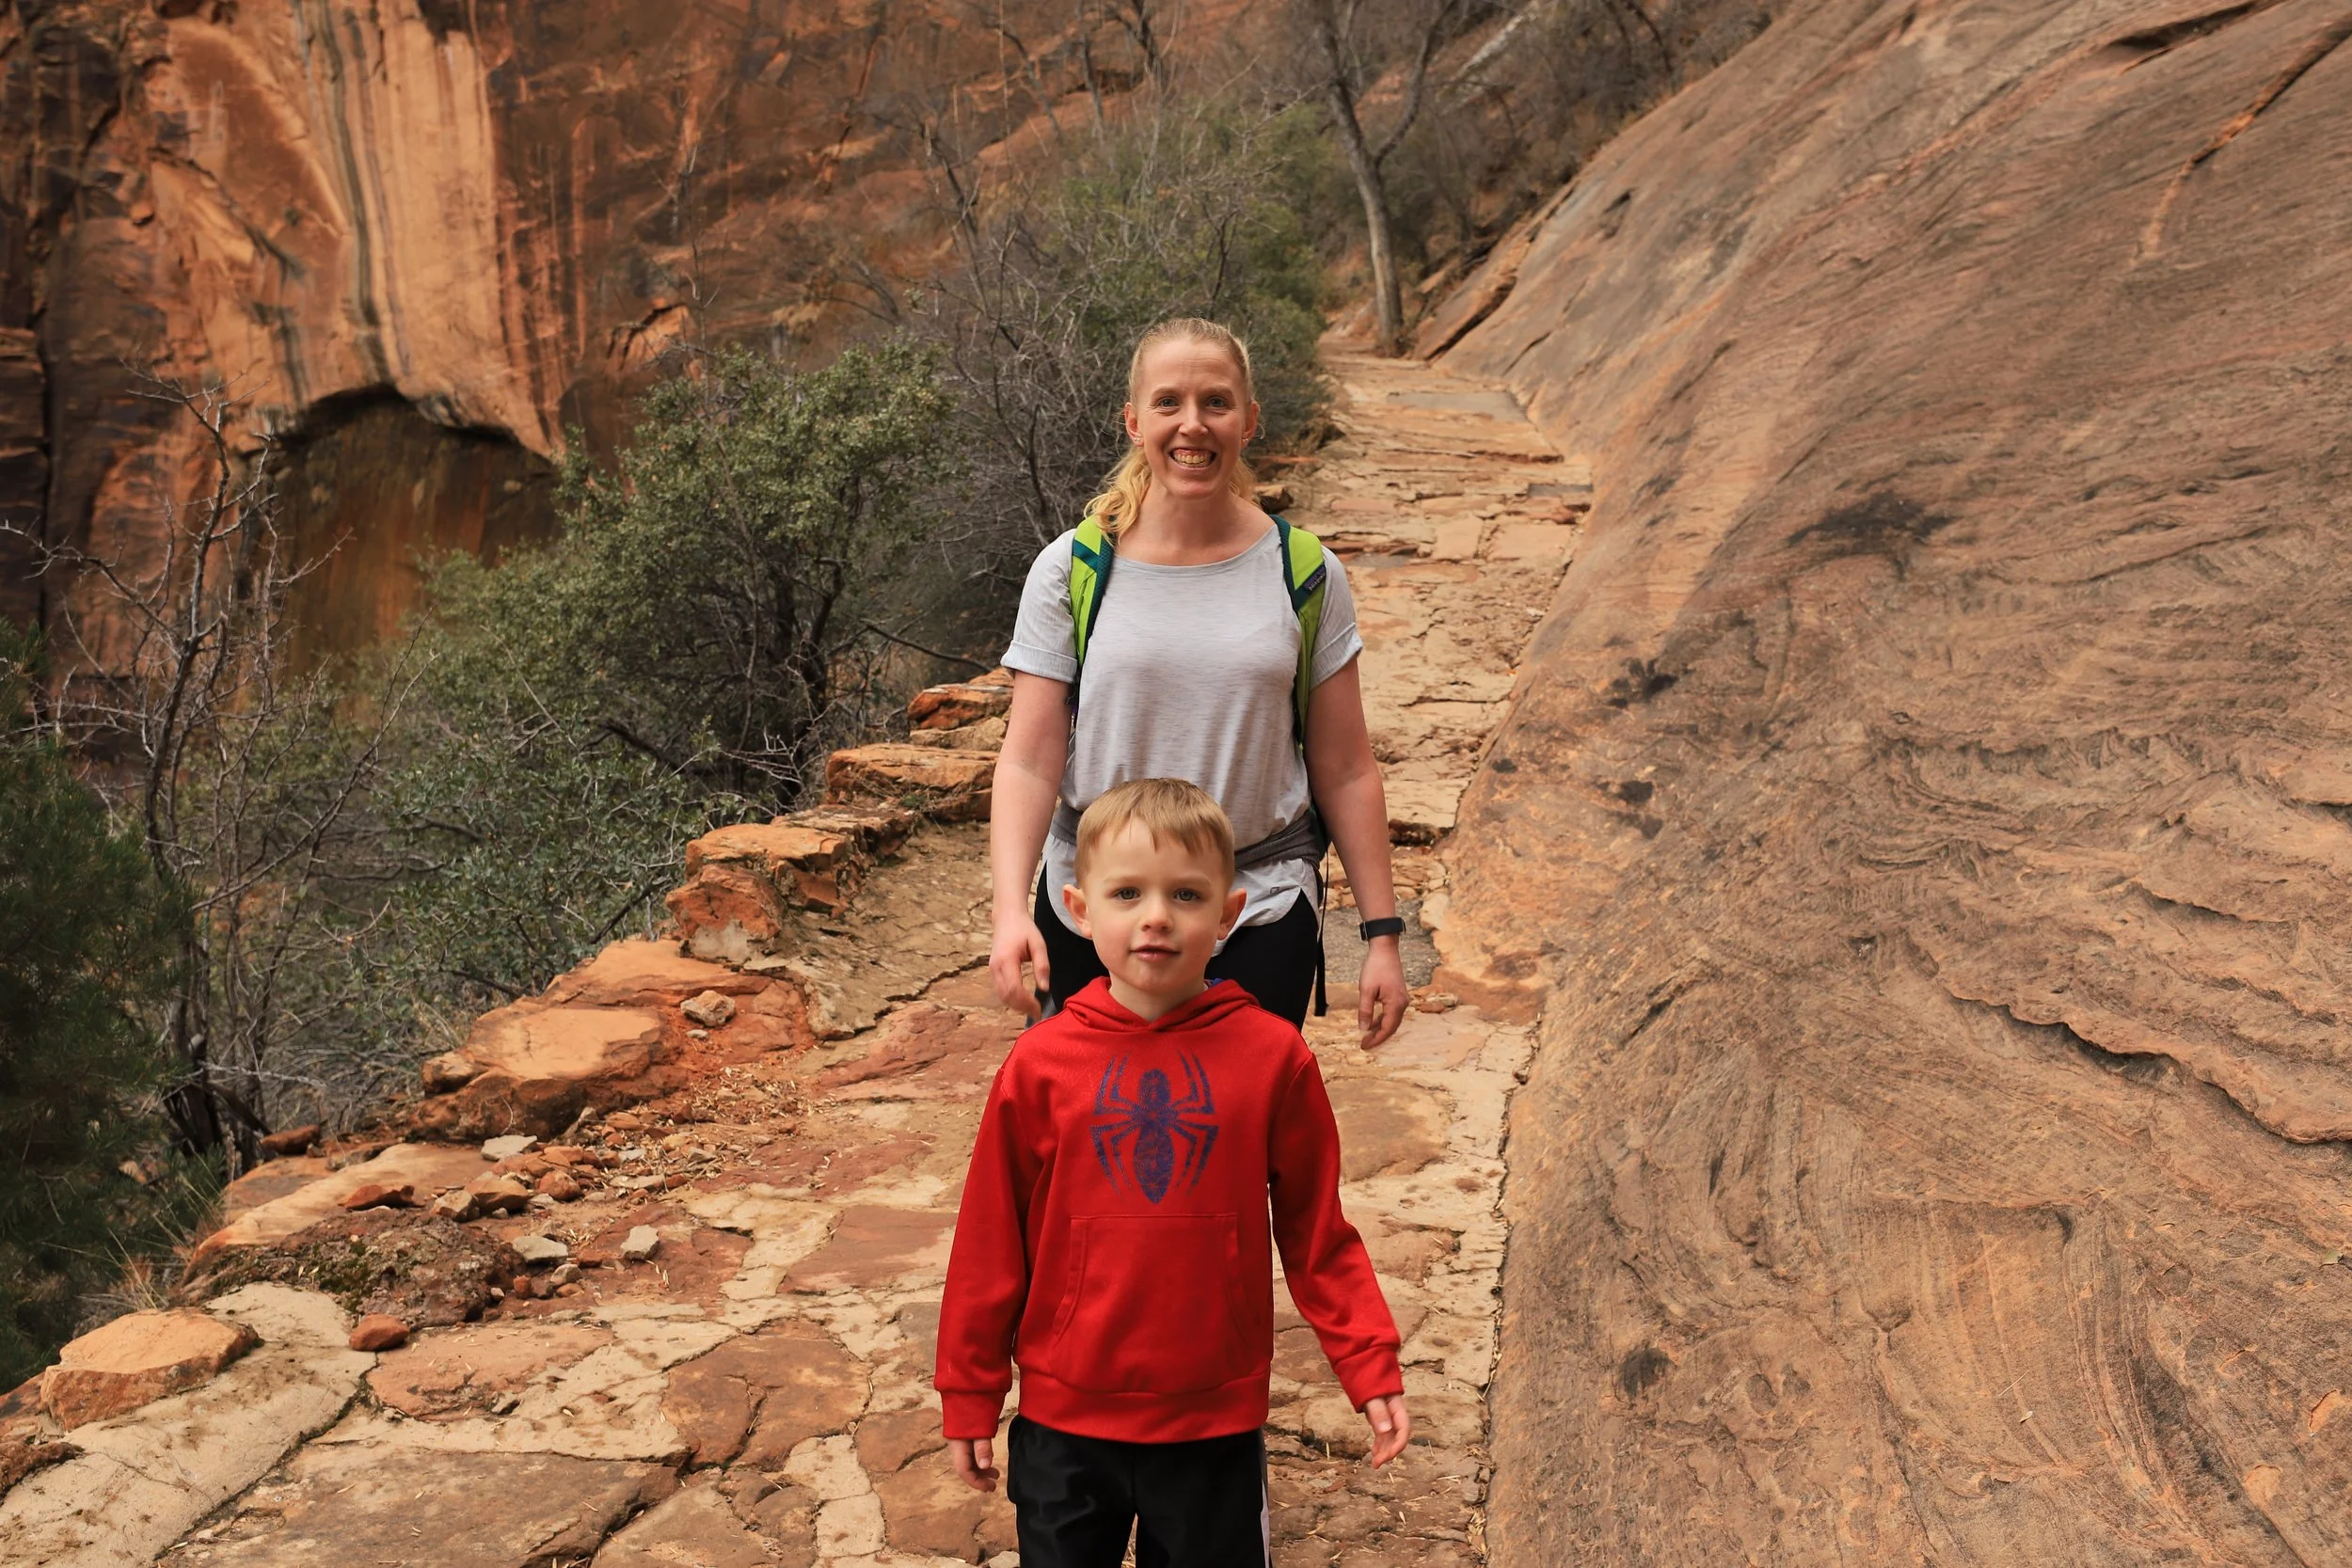
If you are interested in exploring Weeping Rock, first check the park website to see if it is open. This seems to be an active part of the park in terms of rockslides. Weeping Rock has been closed several times over the past few years, as a result. Hidden Canyon is still closed (as of 2025) due to a large rockslide several years ago.
12 - Weeping Rock
Distance - 0.3 miles (out-and-back)
Elevation Gain - 40ft
Trailhead Location - Take the Zion Shuttle to the Weeping Rock stop (#7). Check the park website to make sure this part of the park is open. It has been closed multiple times recently due to rockslides.


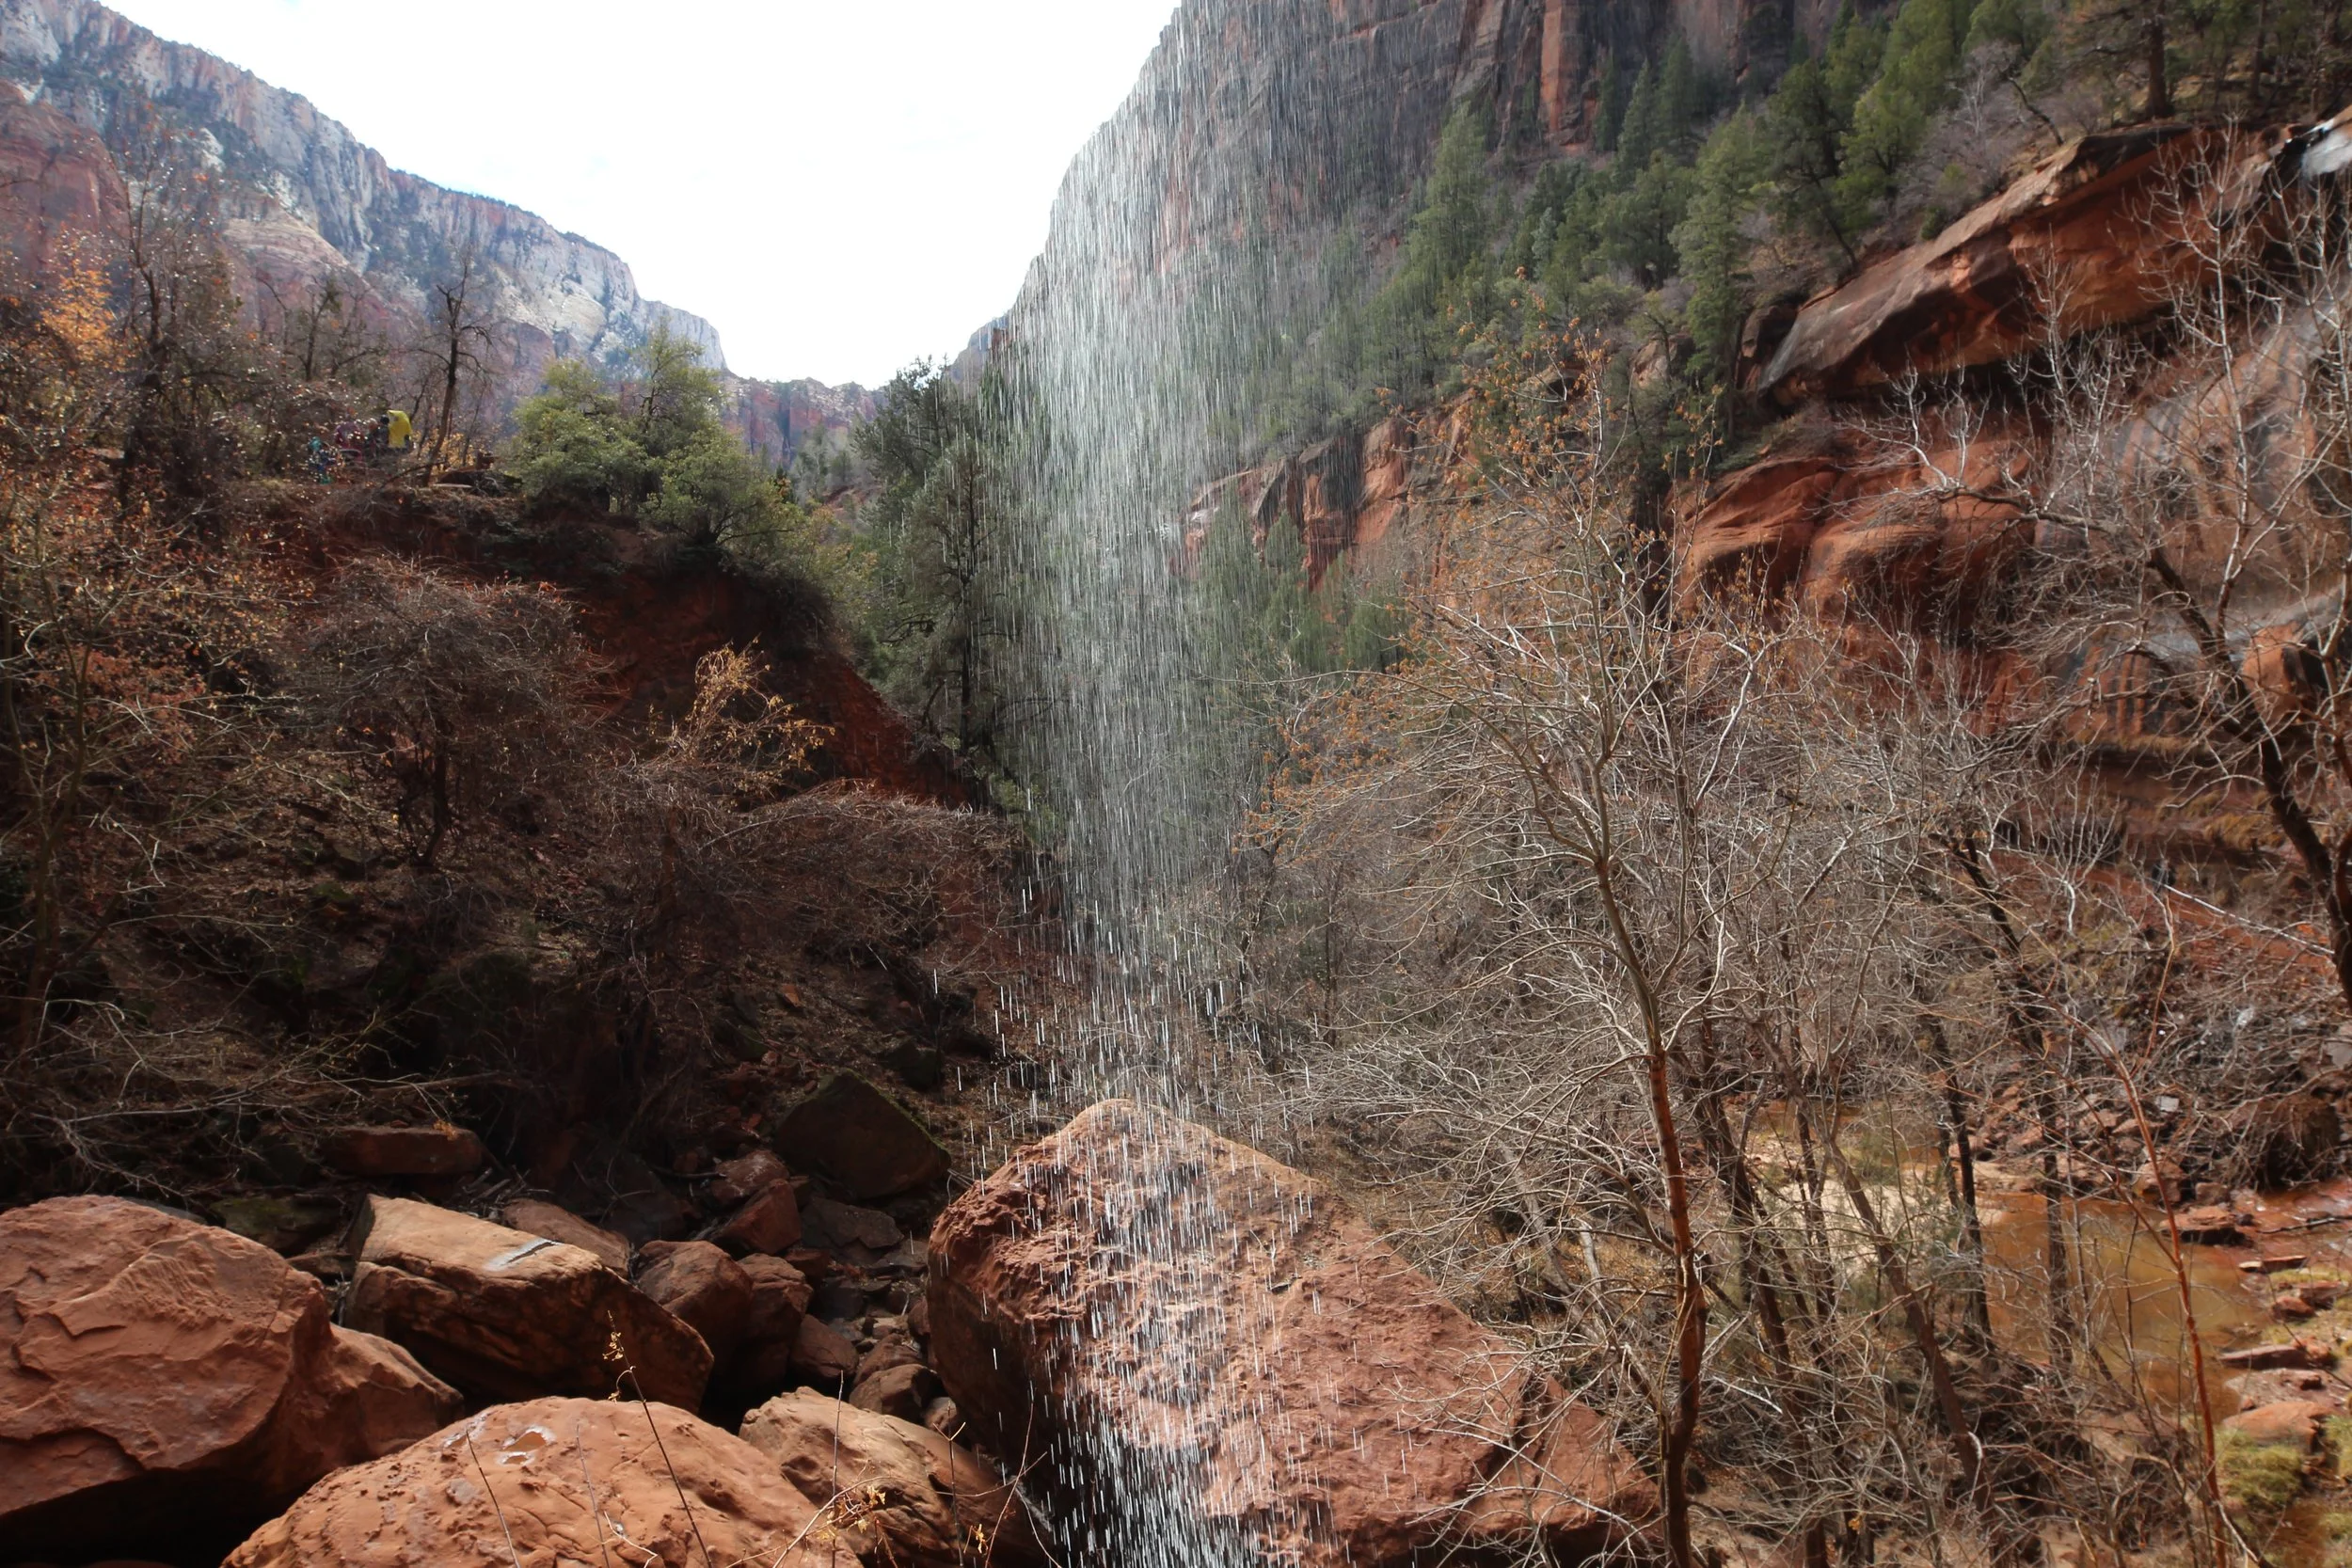
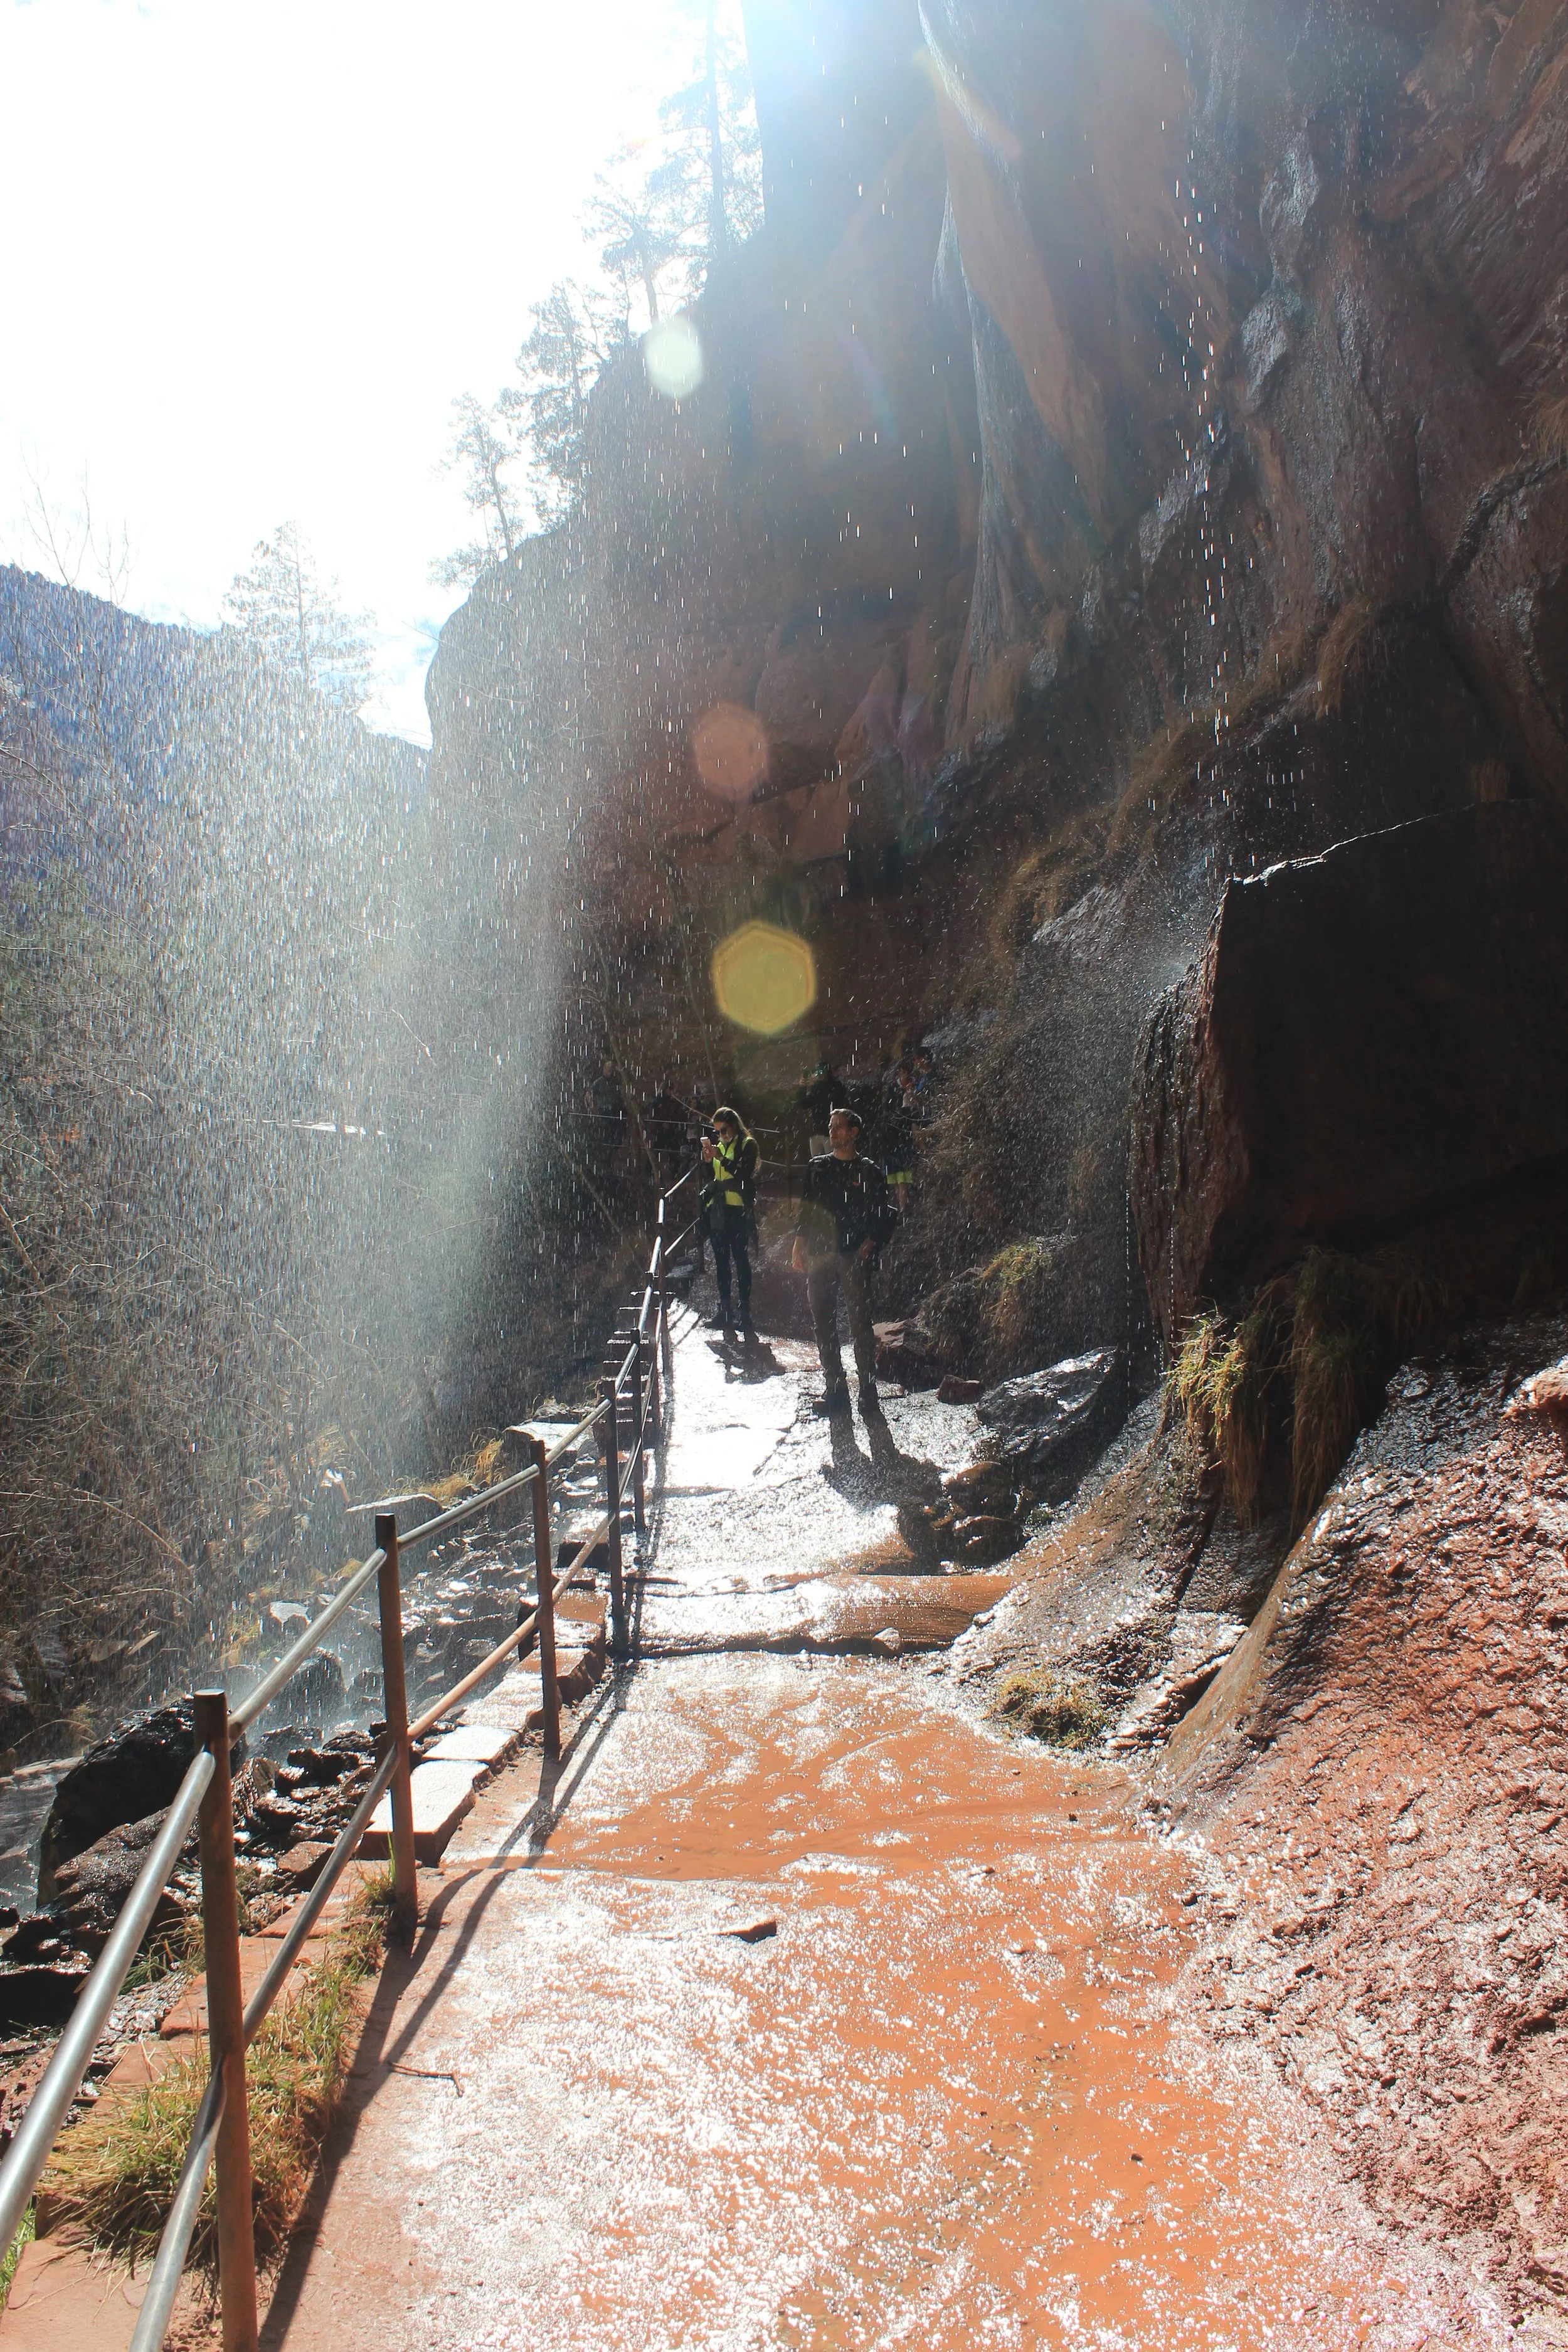
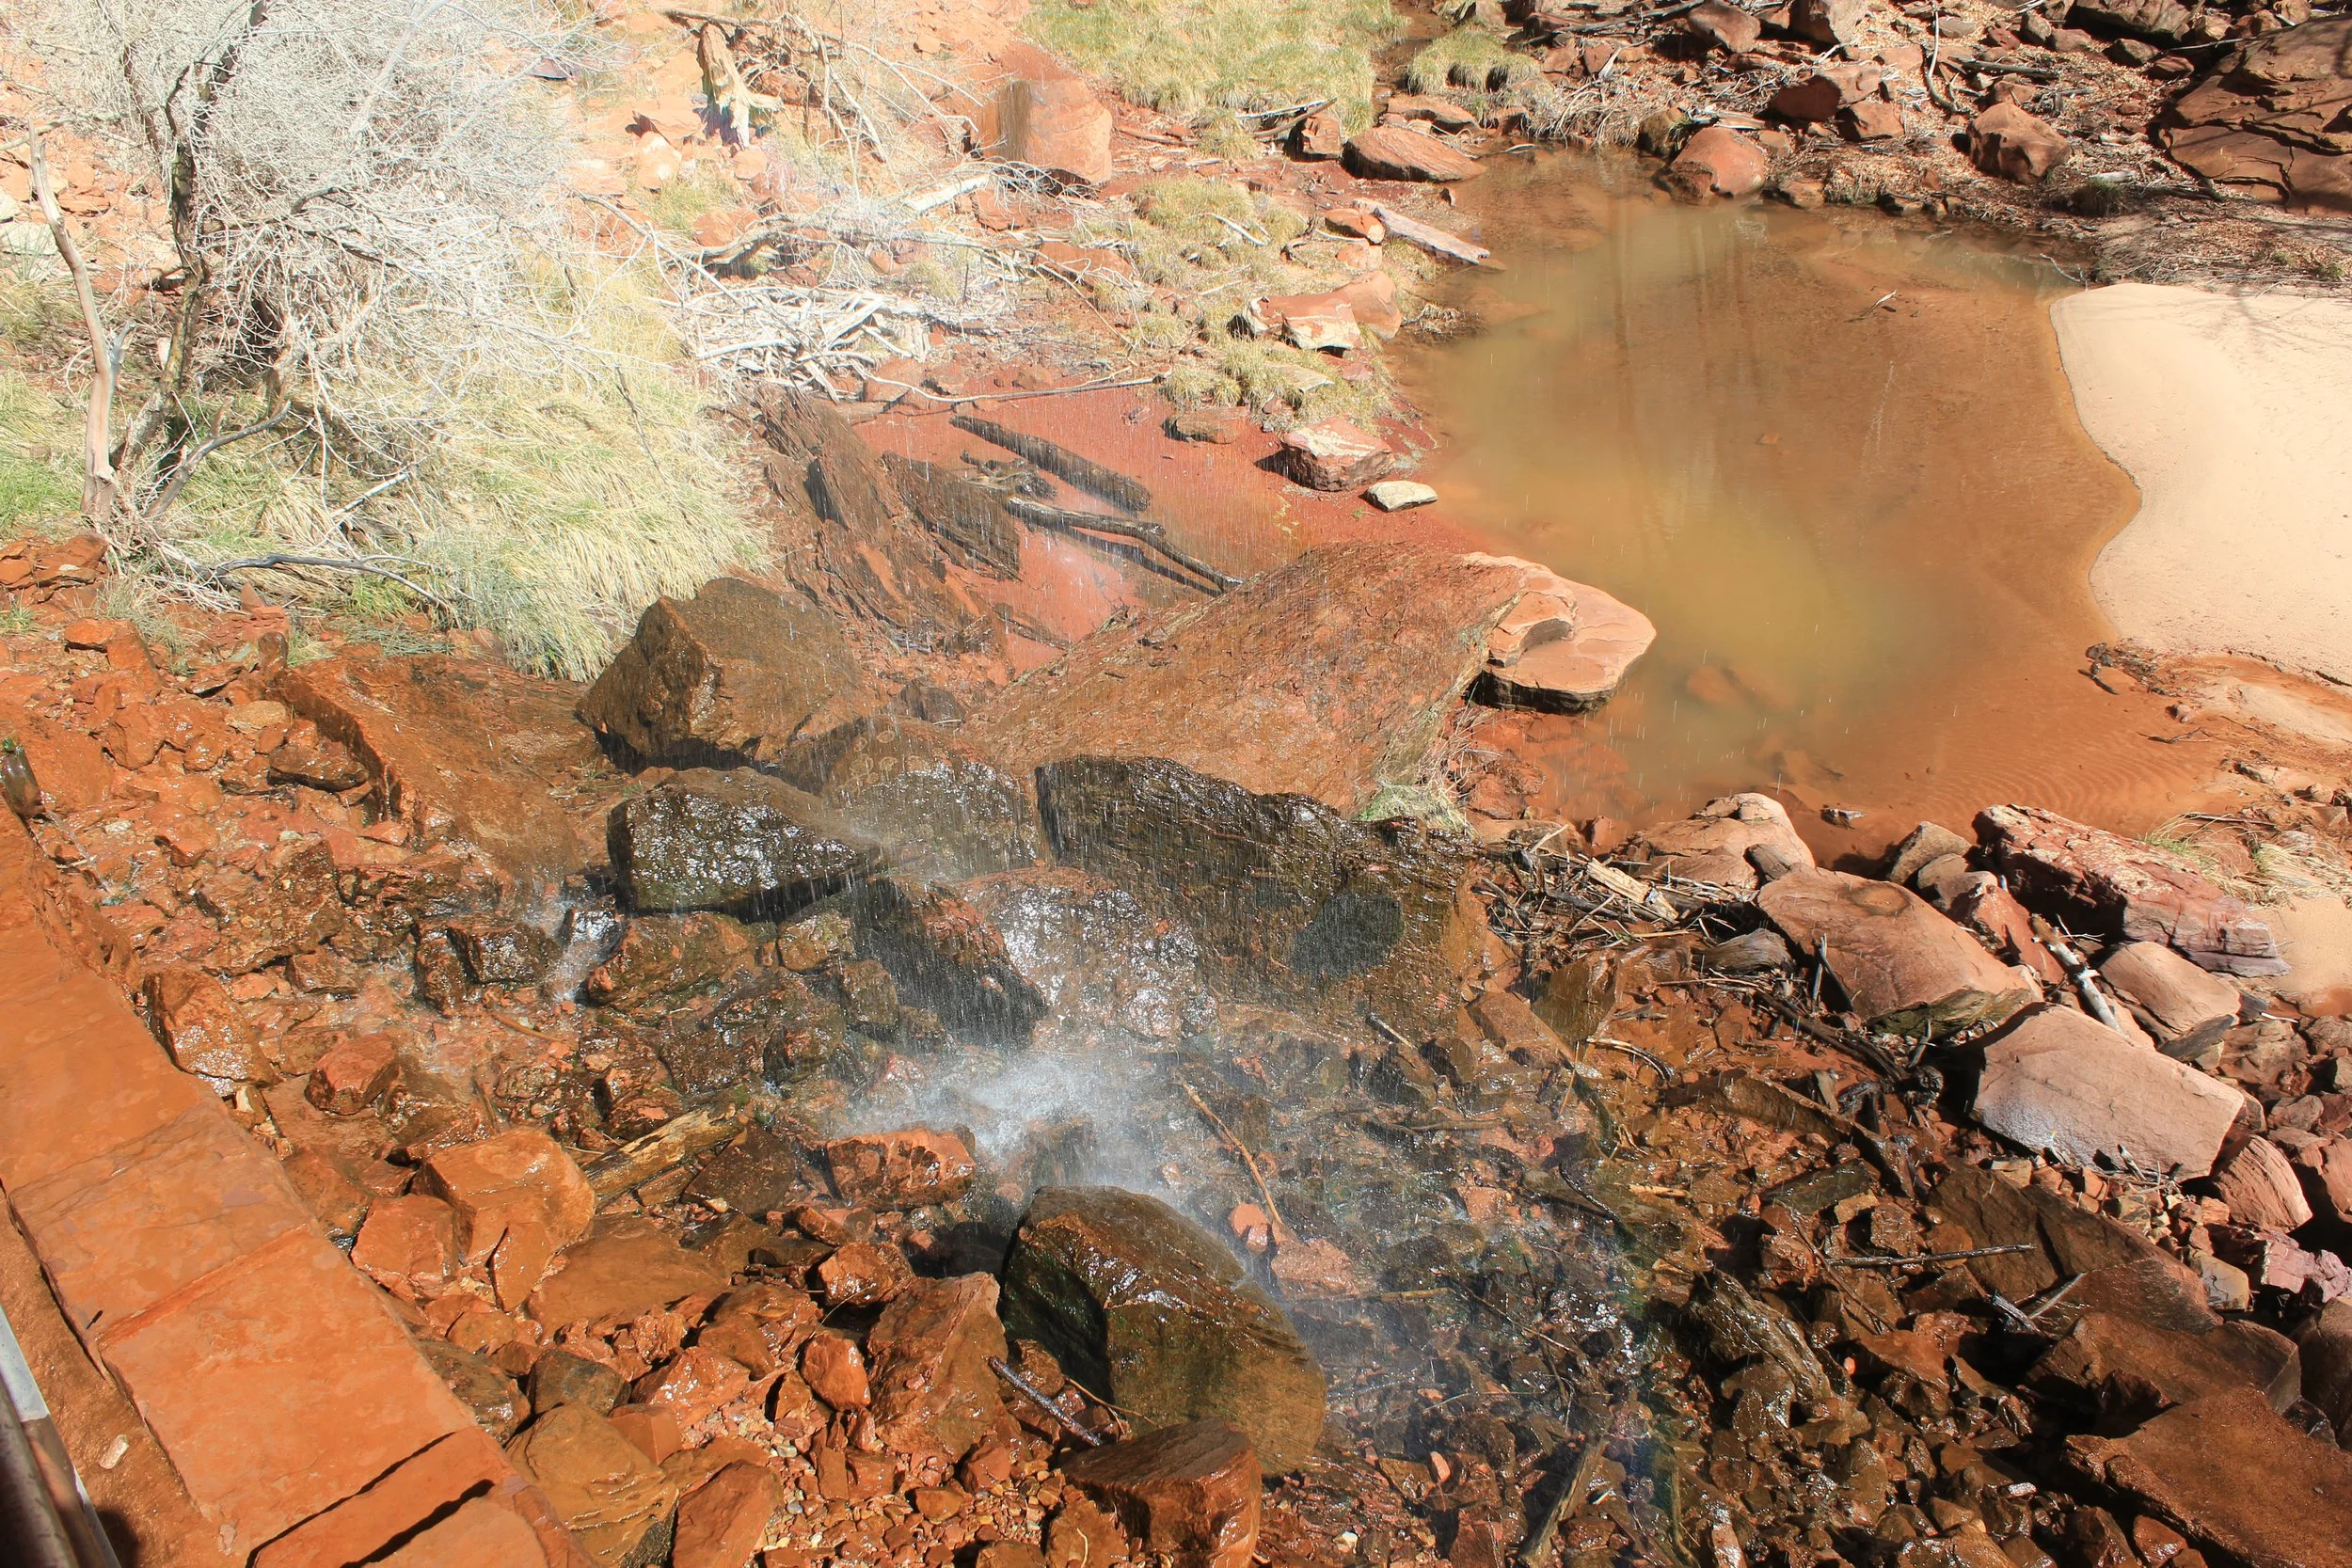
March 2018 - The waterfall at Weeping Rock was mostly dry when we visited. It seems like this would be the place in the park to visit after a rainstorm.
If the Weeping Rock Trailhead is open, this is a fun, easy, short hike that everyone can do. This will be busy part of the park as a result.
13 - Hidden Canyon (Closed)
Distance - 1.5 miles (out-and-back)
Elevation Gain - 650ft
Trailhead Location - The Hidden Canyon trailhead is the same as Weeping Rock. We visited in 2018. As of 2025, this trail is still closed due to a large rockslide in 2019. I’ve included the trail information in case it ever re-opens.
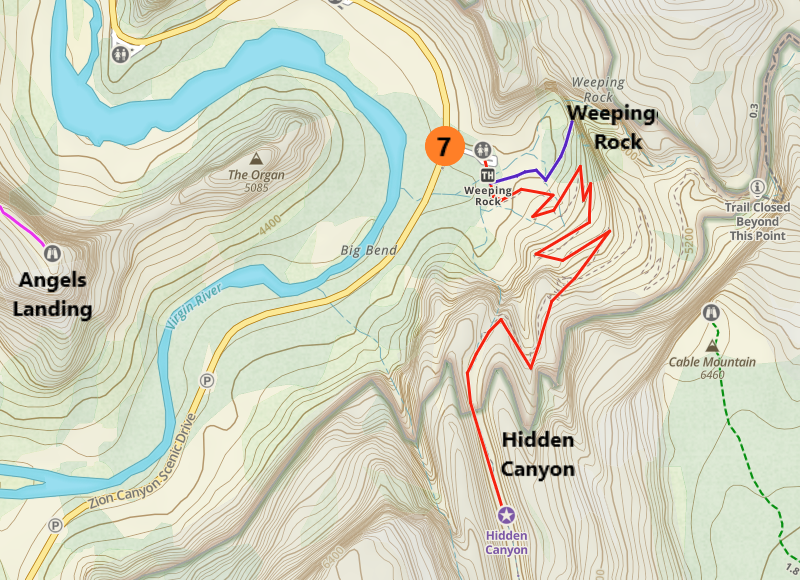
Map to Hidden Canyon
There are cables on this trail, but the drop off is just on one side, instead of two (like Angel’s Landing). My boys were in pre-K and elementary-aged when we hiked up Hidden Canyon. Both of them were pretty scarred when we got to this section of the trail, but they both did just fine, and the rest of this hike is so much fun, they both named this as their favorite hike of our 2018 trip to Zion.
March 2018 - View of the canyon from the base at the start of Hidden Canyon
Immediately at the start of the hike, Hidden Canyon goes up several steep switchbacks.
March 2018 - Looking back down the trail (which started at the bottom of the canyon)
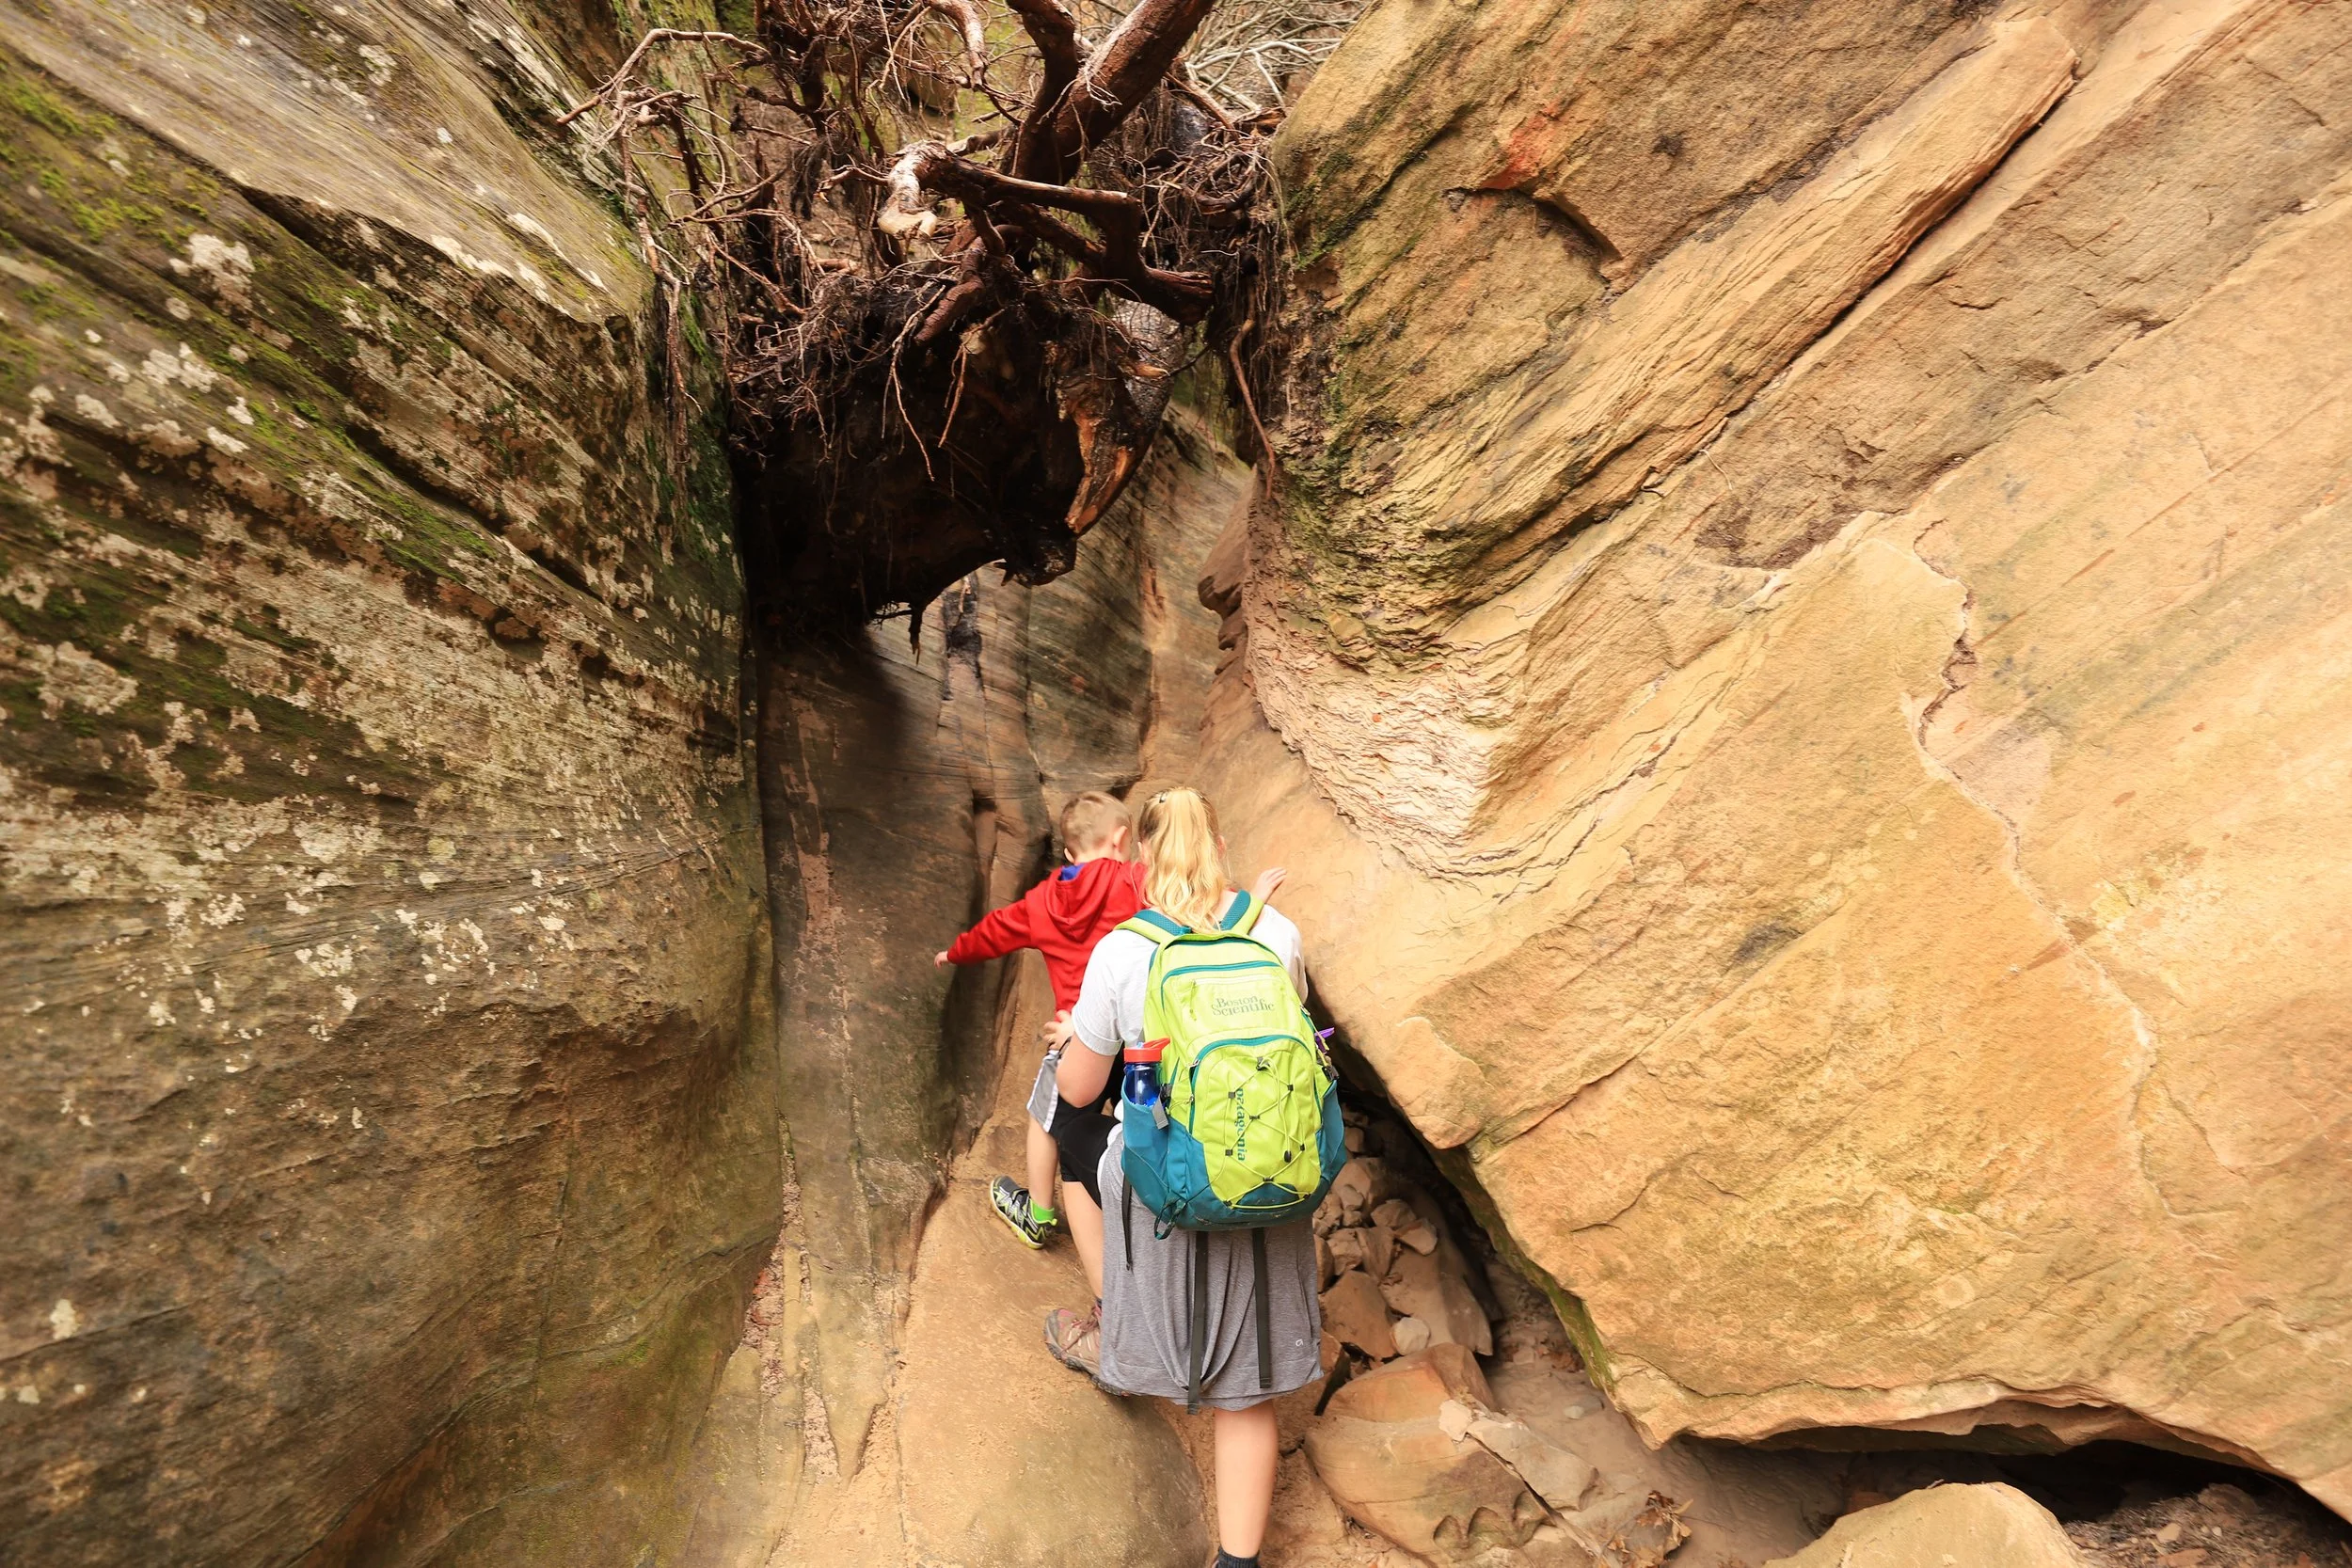
As the boys were pretty scared, we started the cable section surrounding them. They held onto the cables, and we held onto the cable around them, one hand in front of them, the other behind.
March 2018 - Getting comfortable with holding onto a cable while hiking
Hikers are rather amazing people. These strangers encouraged my boys by telling them how impressed they were to see them on this trail and how far they had made it even though it was scary. Pretty soon that helped build enough confidence that we did this more in a side-by-side movement (although I stayed pretty close to my younger son).
March 2018 - Hiking the cable section to Hidden Canyon
At the top of the canyon is where the fun starts, but first we had to take some pictures to show how high up we had climbed.
March 2018 - Top of Hidden Canyon (trail starts at the canyon floor)
March 2018 - Tah Dah! Feeling so proud at the top of Hidden Canyon
At the top of the canyon, the trail opens up into this small side canyon (Hidden Canyon) with obstacles that are fun to figure out how to maneuver past. There are tight spots, fallen logs, arches, etc. It felt very adventurous. Both of my boys loved this section of the trail.
March 2018 - Hiking into Hidden Canyon
At some spots, the walls are so tight it feels like a slot canyon. There are boulders to maneuver up and over between the canyon walls.
March 2018 - Exploring Hidden Canyon
In other sections, the canyon would widen out significantly.
March 2018 - Hiking through Hidden Canyon
March 2018 - This was another fun section of the hike where we had to scale up the rocks to find a passage through the canyon
There is a small arch inside of Hidden Canyon. We explored a short distance past the arch and then turned around.
March 2018 - Family picture inside of Hidden Canyon
Just like Angel’s Landing, the cables weren’t as scary for the kids on the way back – no tears this time. This was one of my favorite hikes during our March 2018 trip, because my 5-year-old wanted to hold my hand the majority of the way back.
I love hiking with my boys! I love spending time with them. I love hearing all of the stories they come up with over the course of a multi-hour hike. I love that I got to hold their hands through the scary parts.

March 2018 - Hiking back down the canyon to the Weeping Rock shuttle stop
March 2018 - Me and my little
Shuttle Stop 9 (Temple of Sinawava)
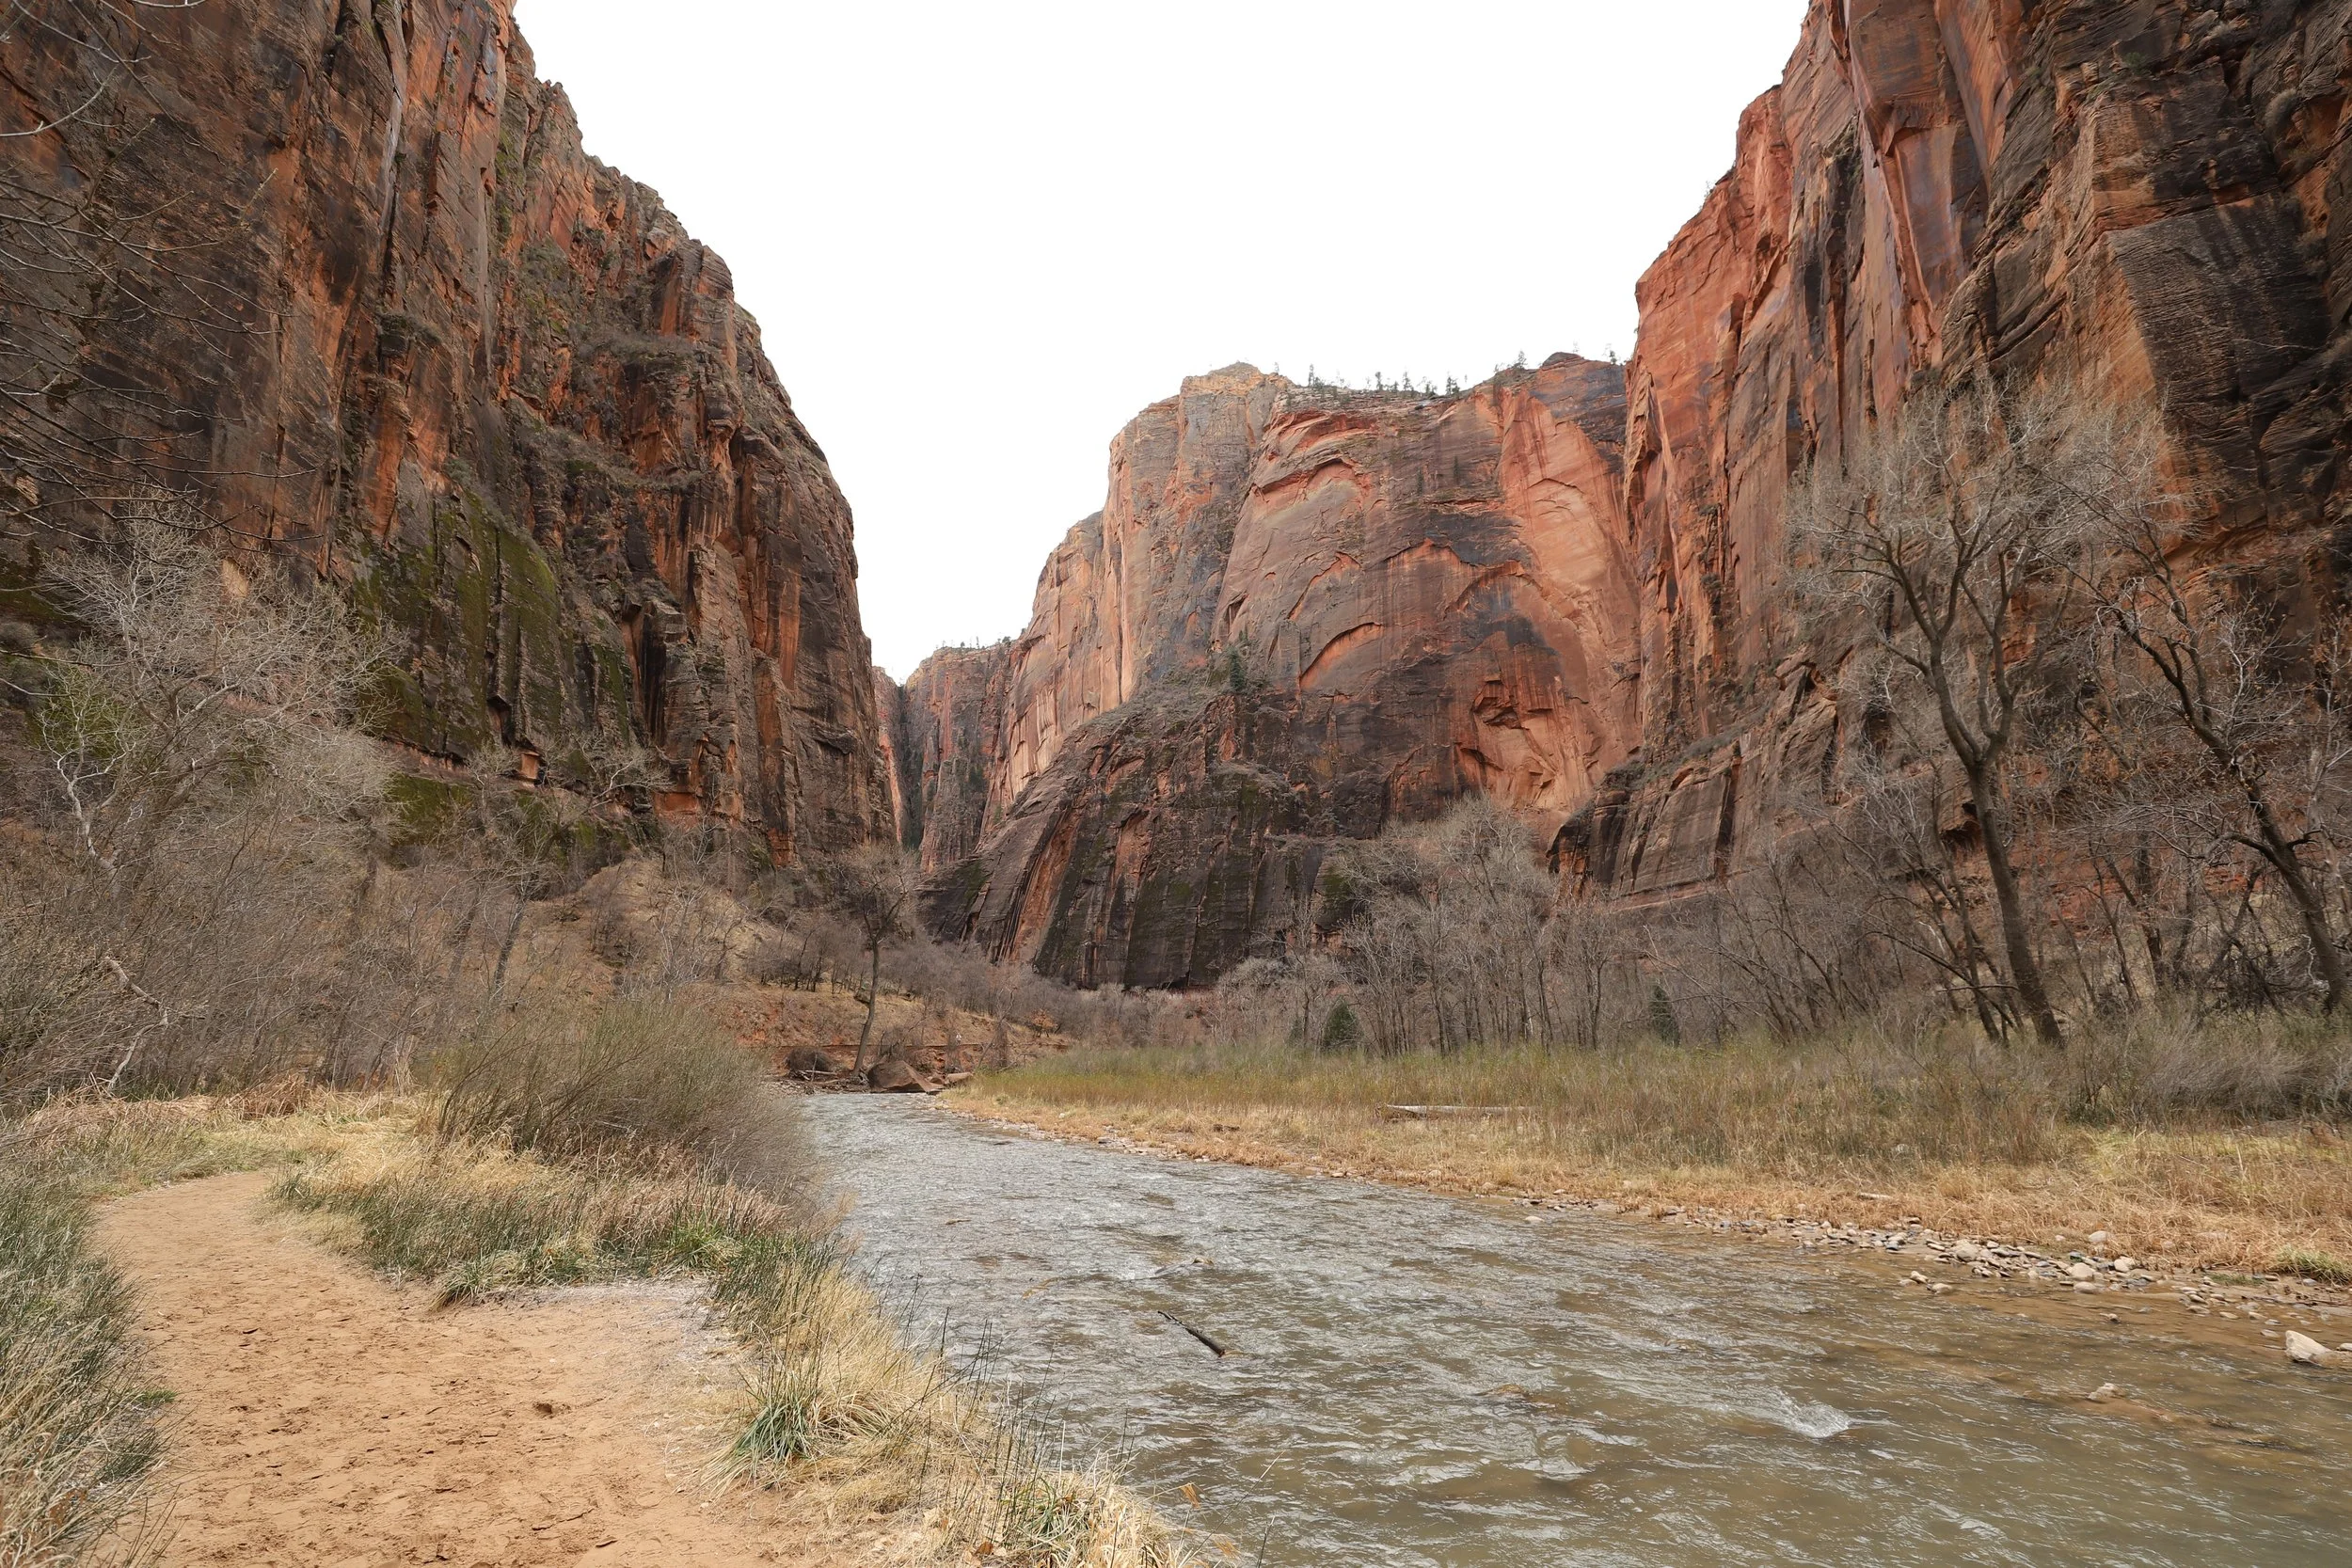
The last shuttle stop is the Temple of Sinawava, which is the trailhead for the Riverside Walk. Anyone interested in hiking the Narrows bottom-up will take this exit as well. The Narrows starts at the end of the Riverside Walk. Anyone hiking the Narrows top-down will end here and take the shuttle back to the Visitor Center parking lot.
The Narrows is a long and beautiful hike on its own, and this post is big enough. I’m going to have a couple of pictures here and just the most basic information. For anyone interested in hiking the Narrows, please see my complete post - Hiking Zion’s Narrow’s in 100 photos. We hiked top-down in June 2025.

Map of Riverside Walk and the beginning section of the Narrows
14 - Riverside Walk
Distance - 2 miles (out-and-back)
Elevation Gain - 200ft
Trailhead Location - Take the Zion Shuttle all the way to the last stop (#9) Temple of Sinawava.

March 2018 - Hiking along the Riverside Walk
The Riverside Walk is an easy, mostly flat, accessible trail for everyone through a beautiful section of the canyon along the Virgin River. You will stay dry along this trail. This would be on my recommended list for all of Zion’s visitors to enjoy.
March 2018 - Spur trail down to the Virgin River from the Riverside Walk
Along Riverside Walk, there are several spur trails to walk down closer to the Virgin River, with a sandy trail at the water’s edge.
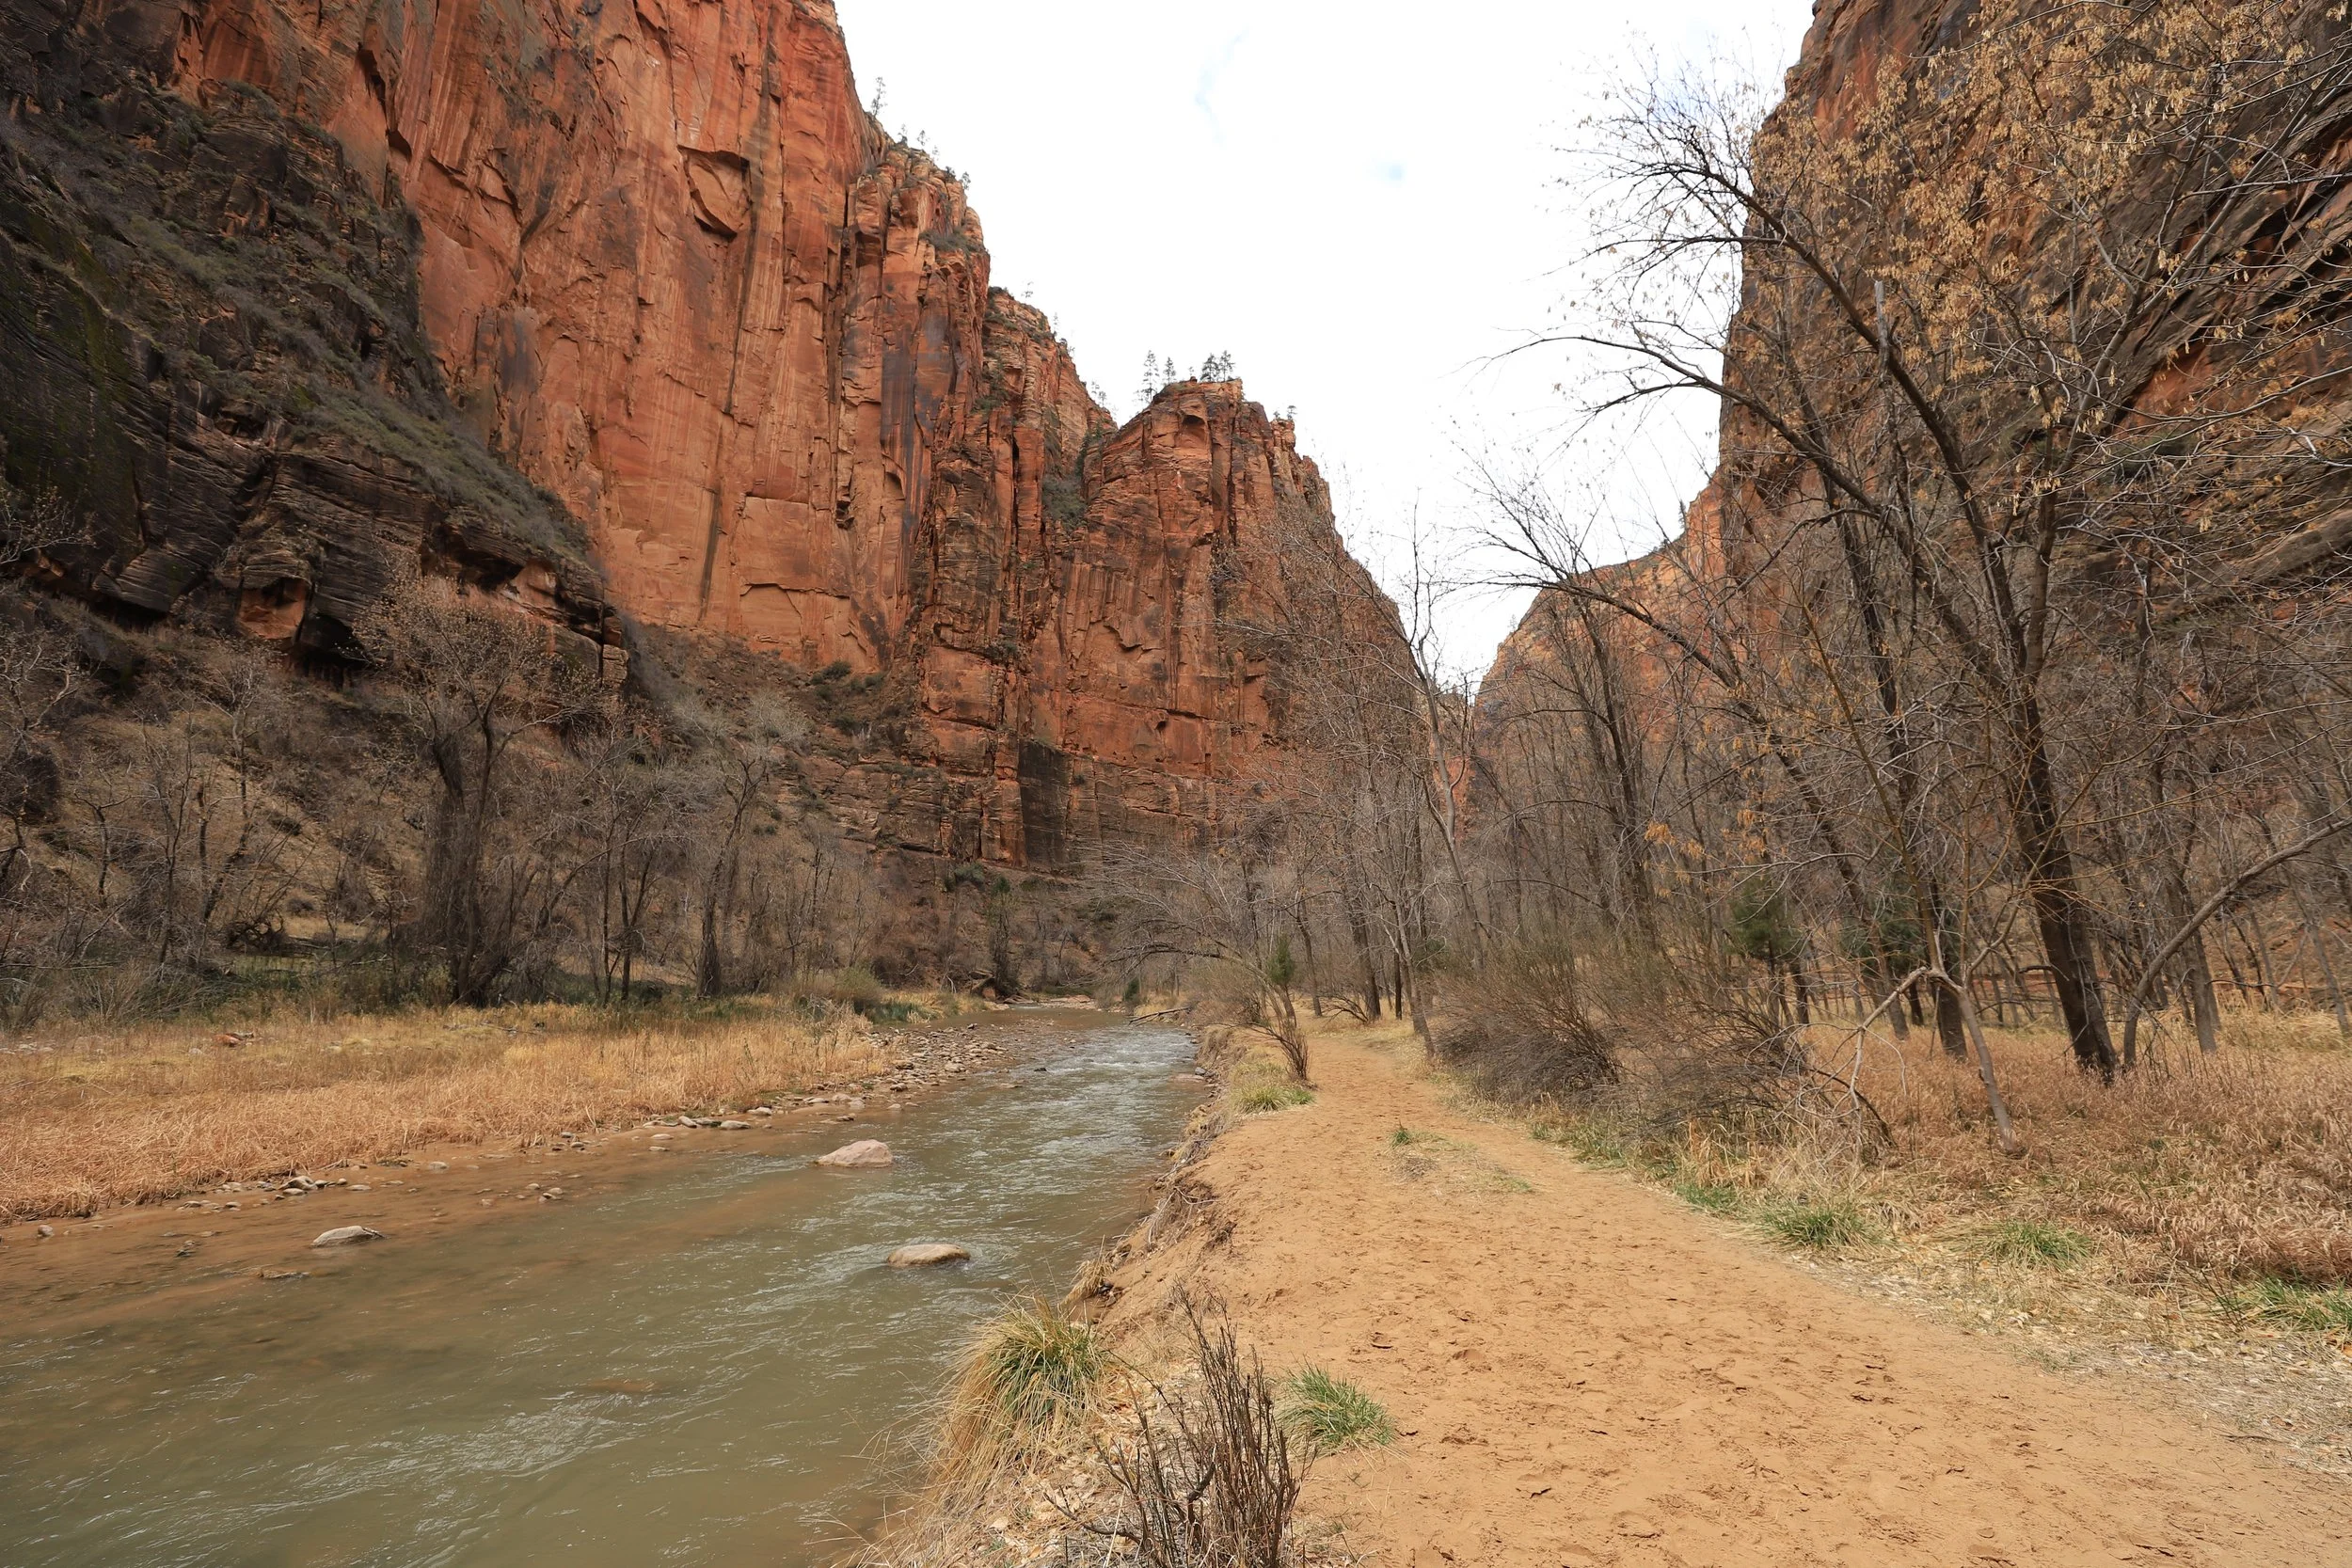
March 2018 - Walking along the Virgin River
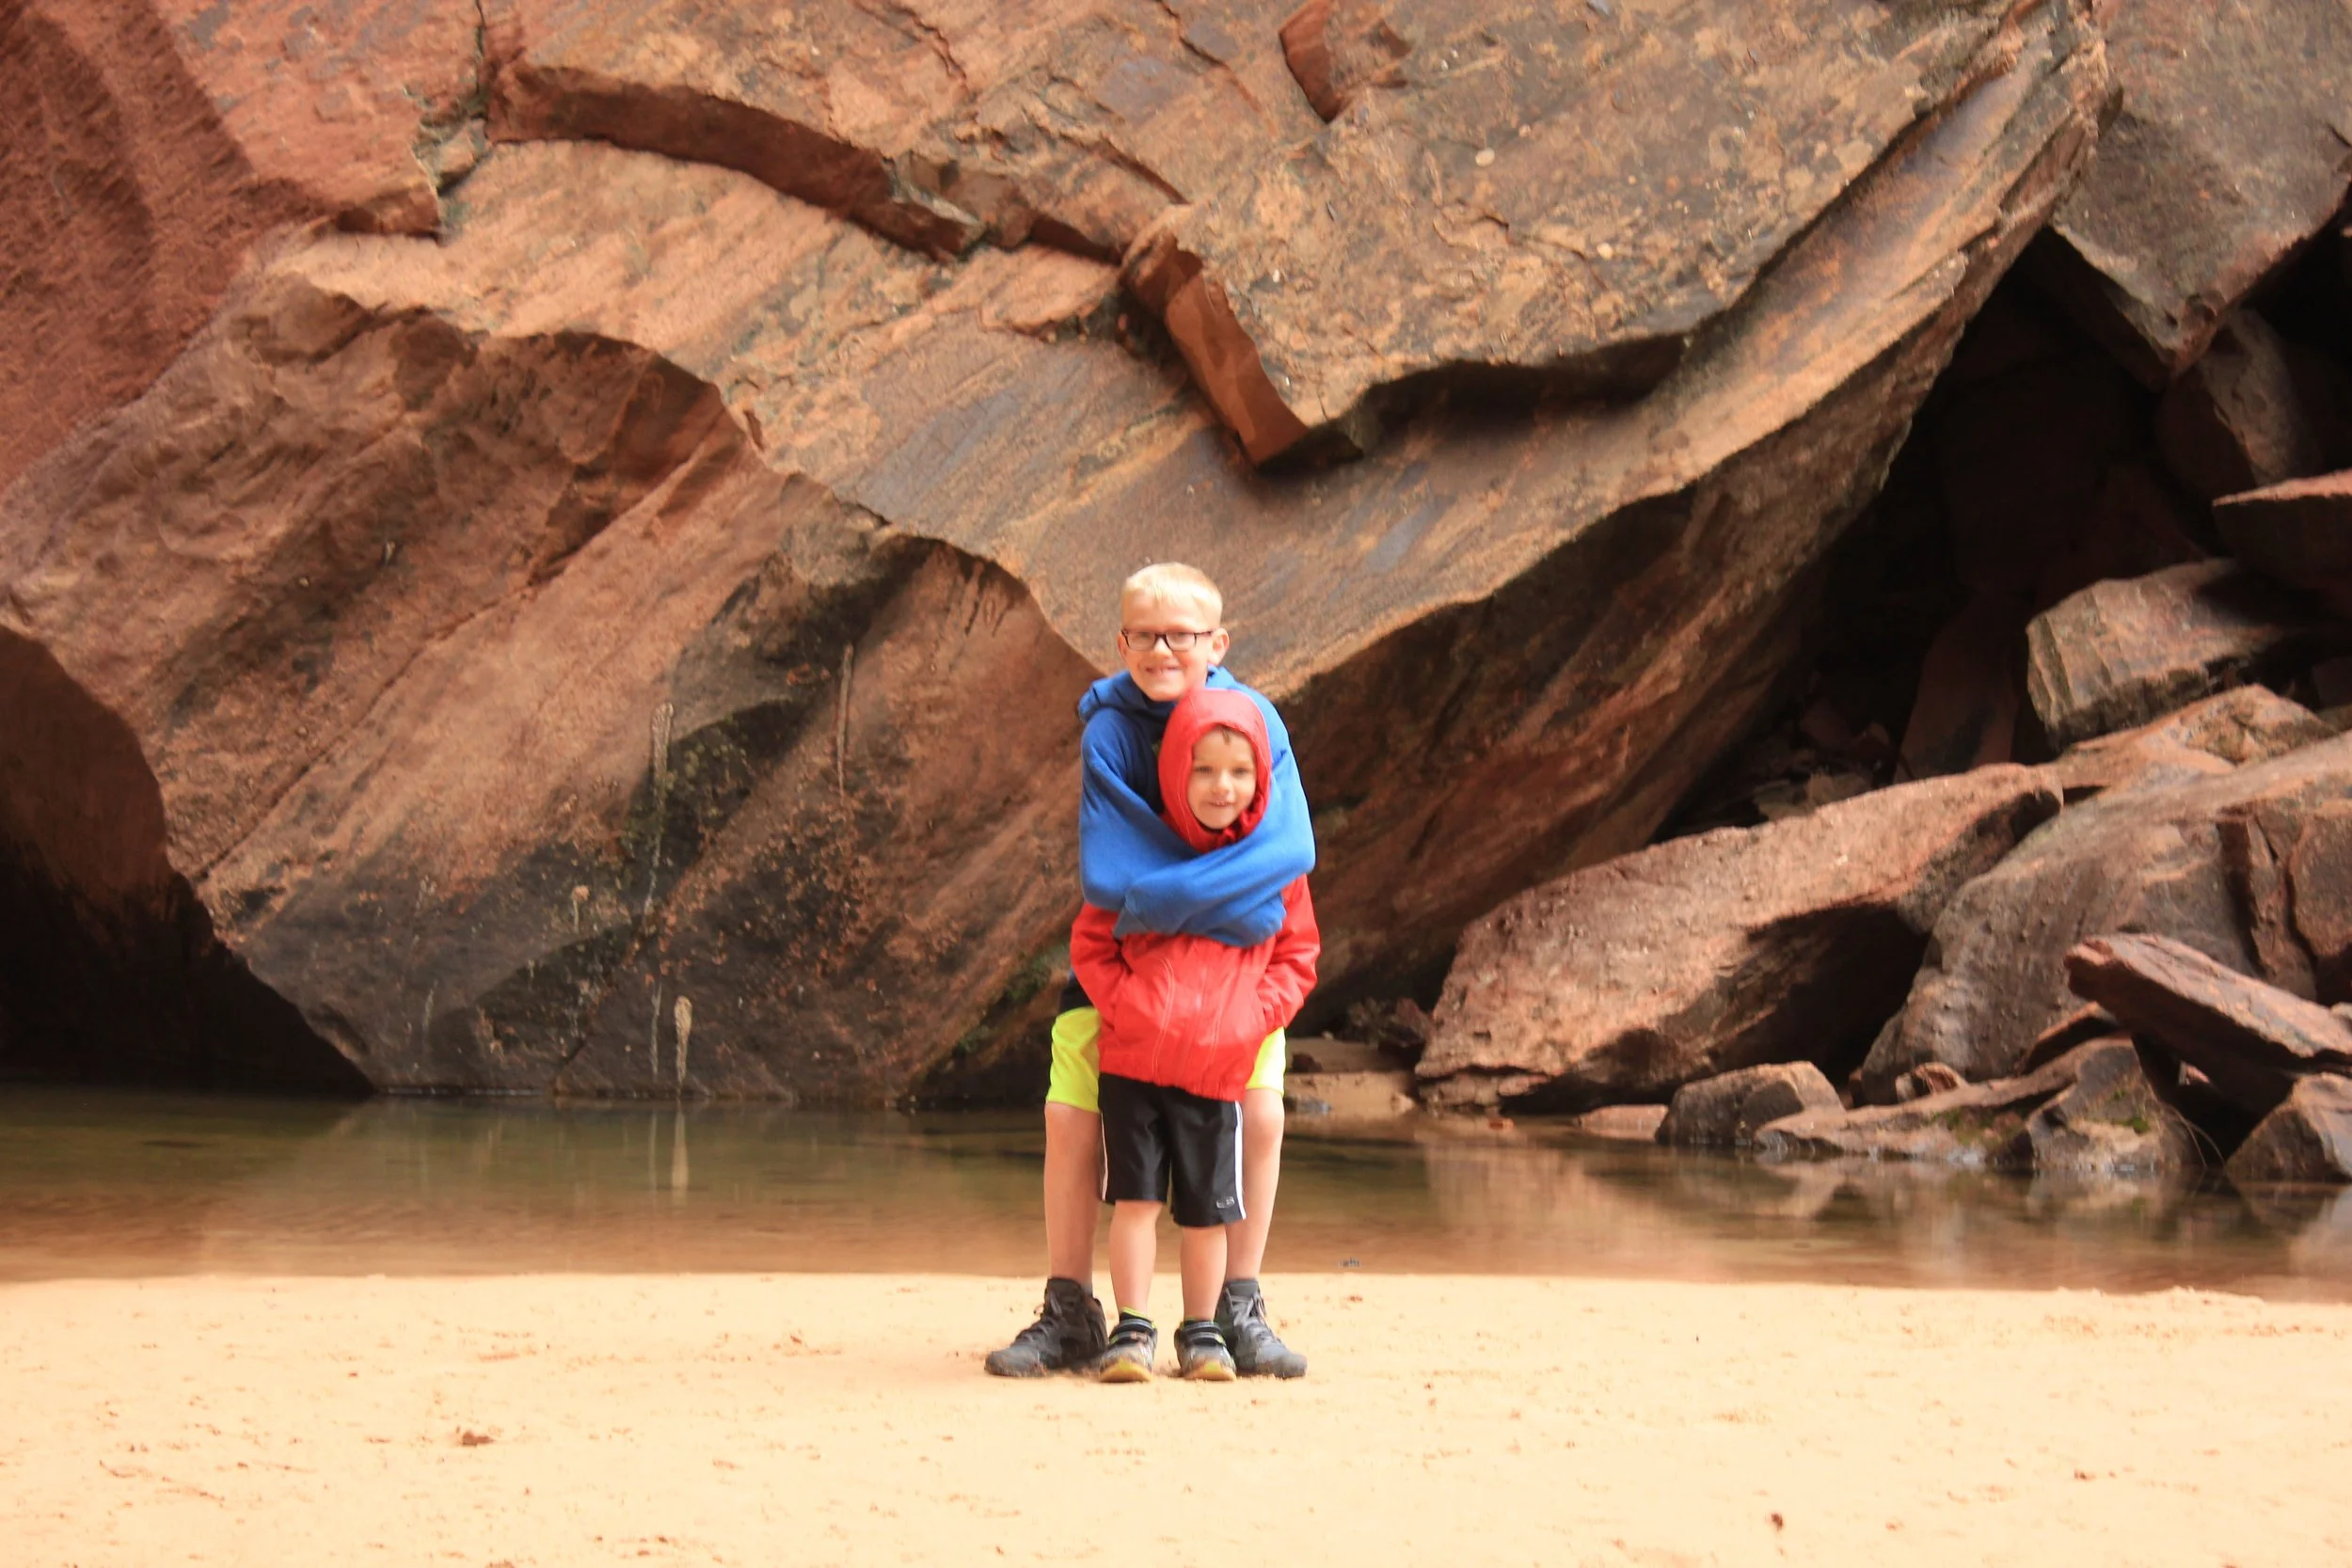
This hike in March 2018 on the Riverside Trail ended up being a teaser for us. It was apparent at the end that we all wanted to see more after the trail ended. But the boys weren’t old enough yet to handle that hard of a hike. June 2025, we returned to Zion and hiked the Narrow’s Top Down, enjoying every inch of the canyon along the way.

March 2018 - Riverside Walk
What’s up with turkey picture? When we were almost at the bottom of the Narrows in June 2025, there was a turkey who found us, had no fear of us, and befriended us. When I was going through pictures of our March 2018 trip, I came across this picture of a turkey as well, at the end of the Riverside Trail. Which made me laugh. Clearly there is a turkey family that has survived for some generations at the end of the Riverside Trail. If you find a turkey, or one finds you, tell it “Hi” from us!
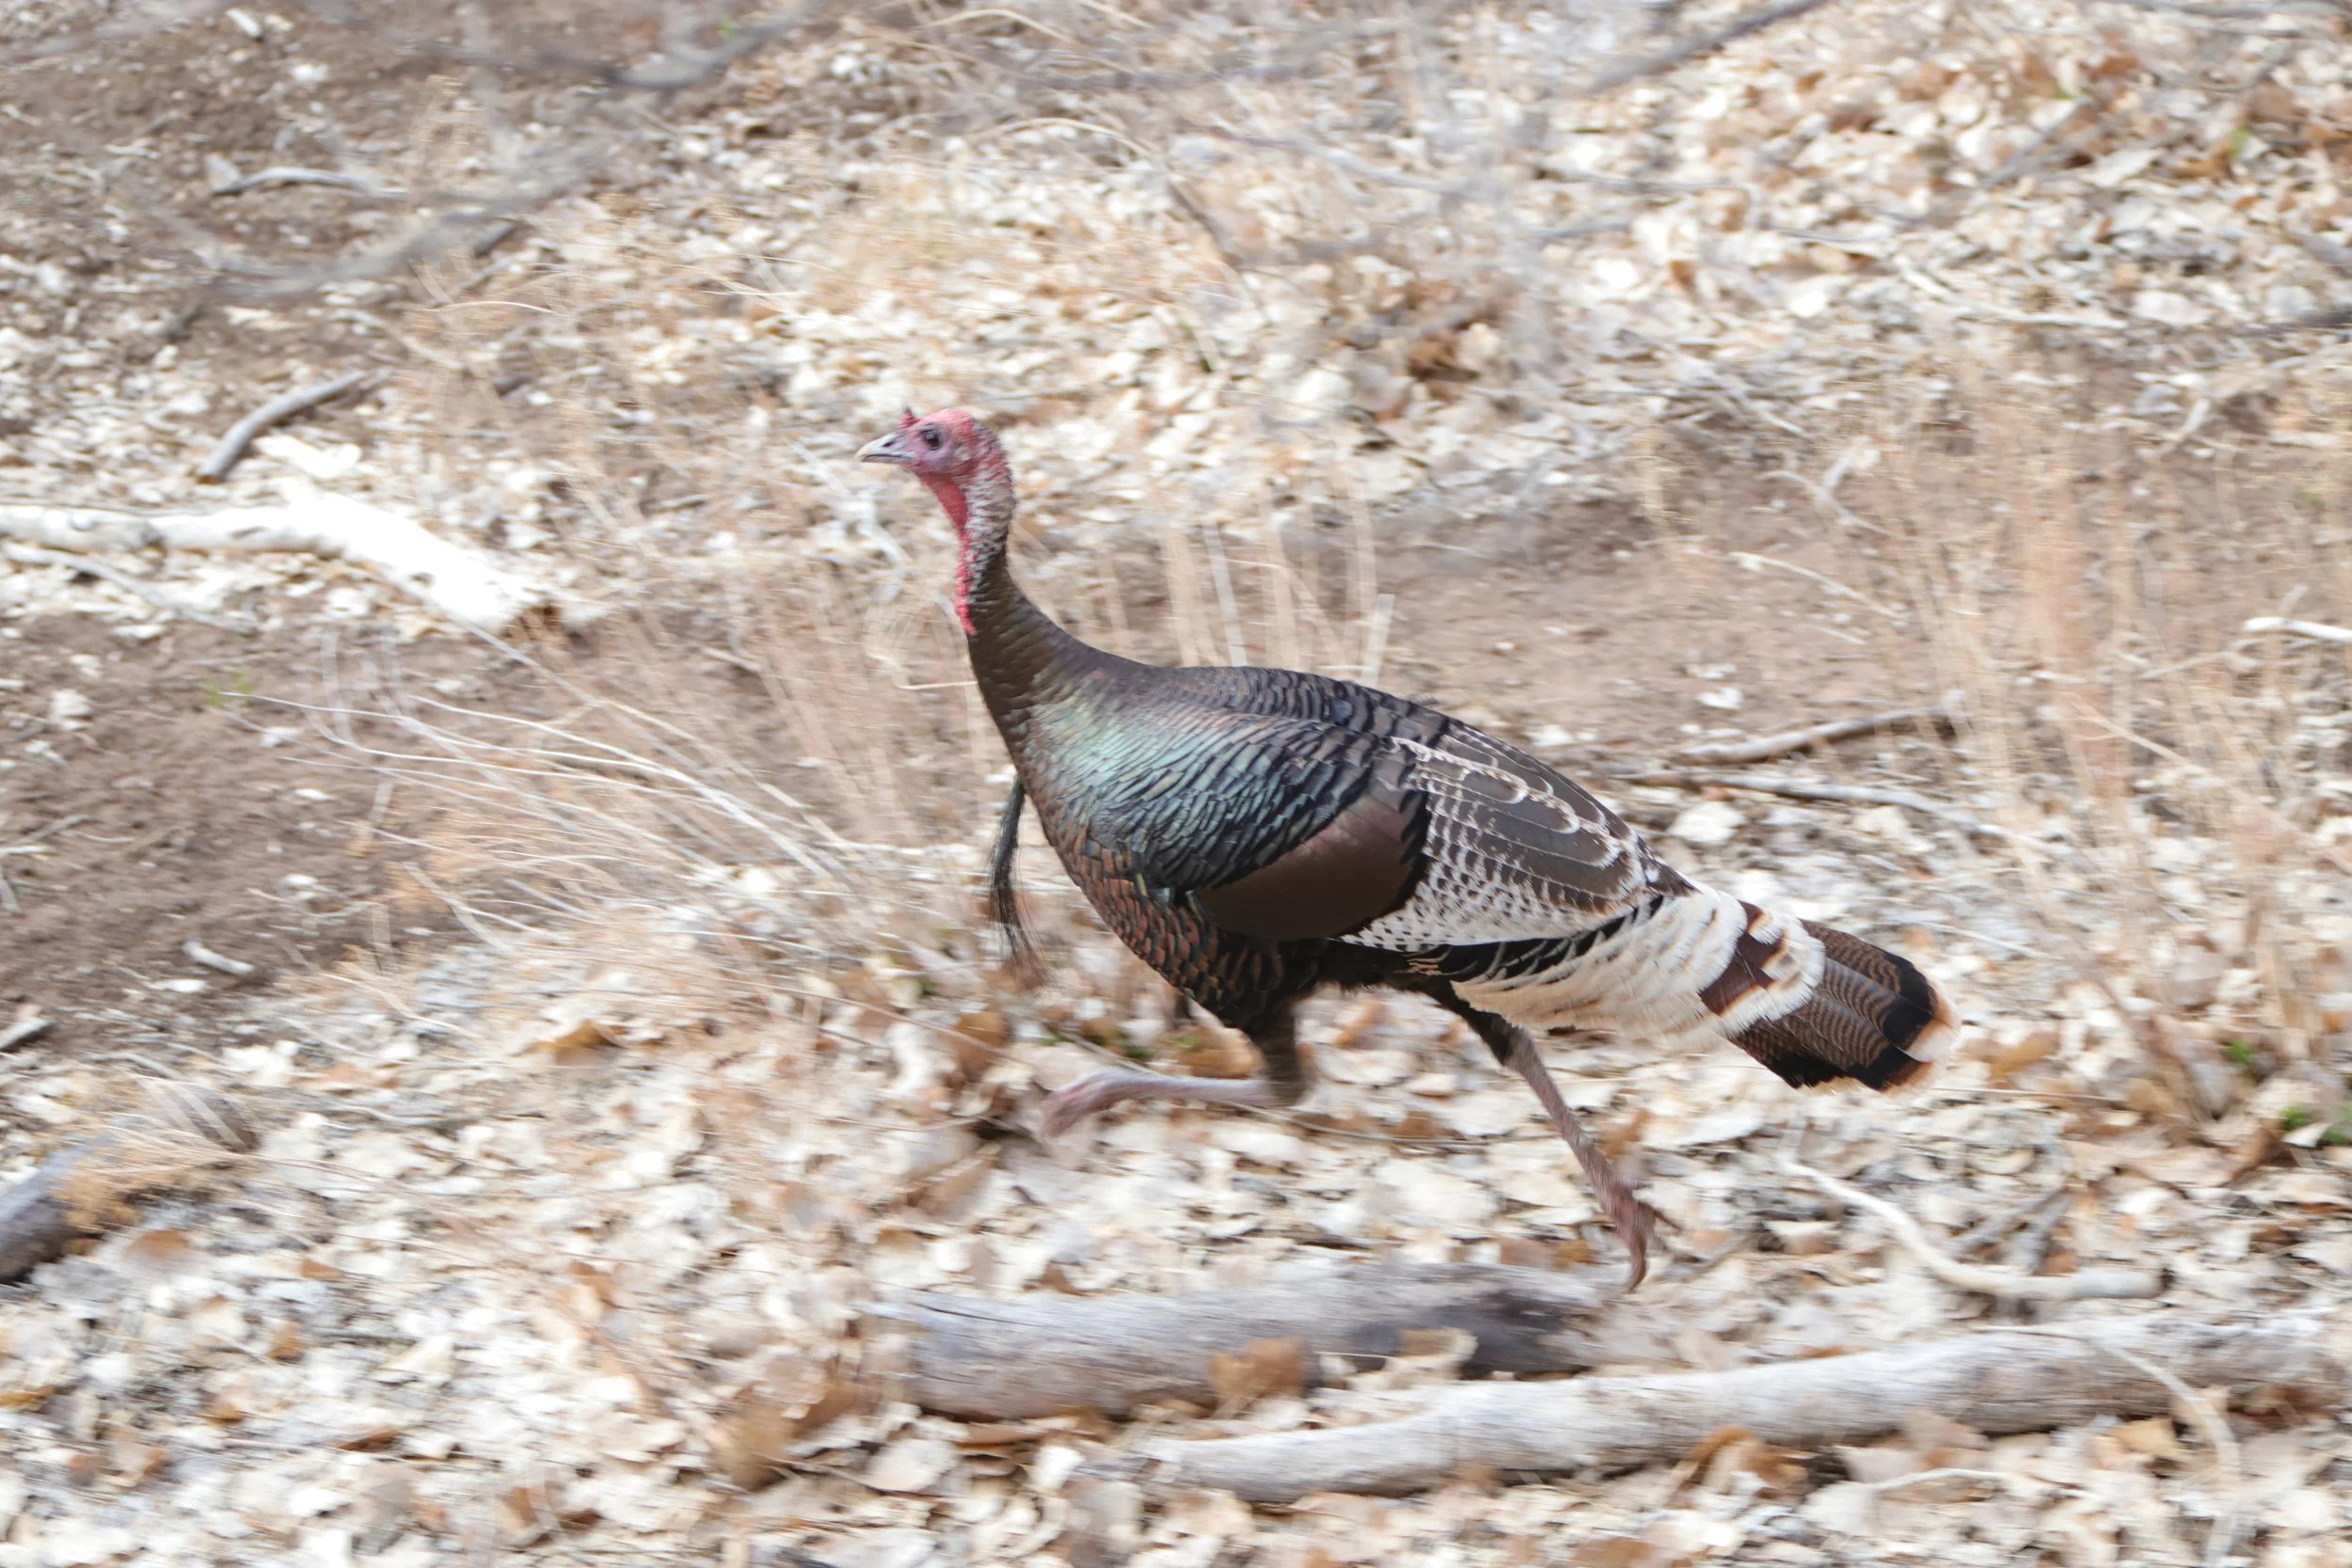
March 2018 - Turkey towards the end of the Riverside Trail

June 2025 - Hiking down the Riverside Trail at the end of our Narrows Top-Down hike
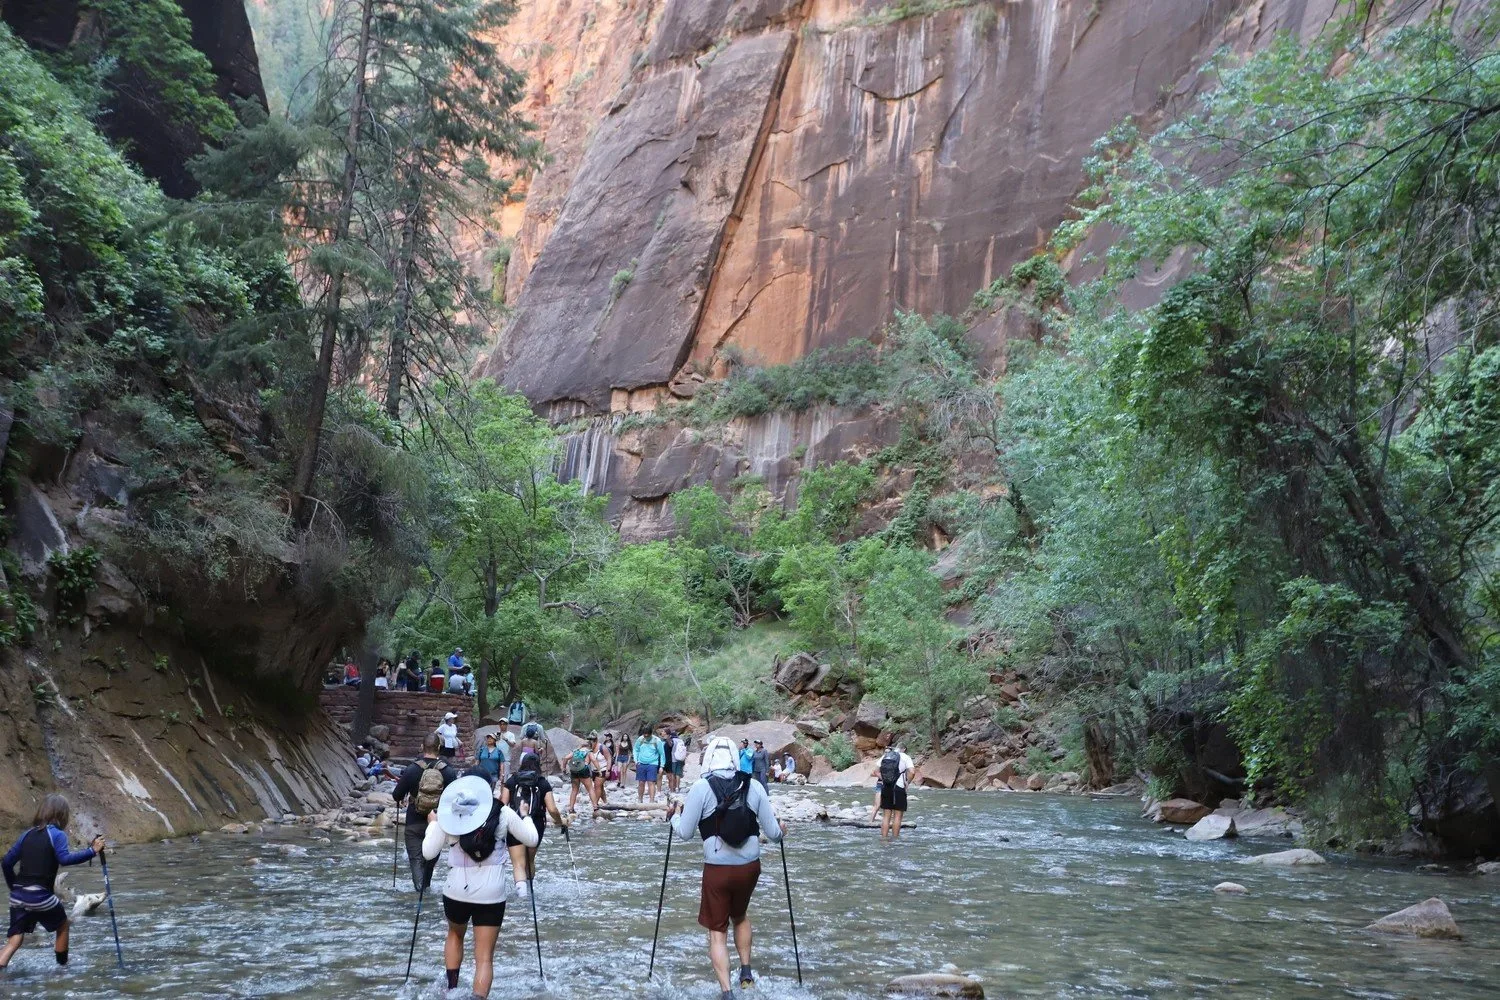
15 - Zion Narrows Bottom-Up
Distance - It’s 2 miles out-and-back along just the Riverside Trail. Without a permit, hikers cannot go beyond Big Springs, so the max total hiking distance is 9 miles. Where you turn around makes this hike somewhere between 2 and 9 miles.
Elevation Gain - 700ft (between the shuttle stop and Big Springs) - This is super gradual, and you won’t notice it.
Trailhead Location - Take the Zion Shuttle all the way to the last stop (#9) Temple of Sinawava. Hike down the Riverside Walk. The Narrows starts at the end of Riverside Walk - just head into the Virgin River.
You will get wet on this hike. The deepest part of the river is less than 10 minutes from the trailhead. See my detailed Zion Narrow post for what to wear, how to prepare, and enjoy our pictures.
June 2025 - This is where the Narrows trail ends and hikers climb out of the water, returning to the shuttle stop along the Riverside Trail
As I mentioned, the deepest part of the Virgin River is going to be just a few minutes into a bottom-up hike. It was waist-deep when we hiked in June 2025

June 2025 - Hiking through the deepest part of the Virgin River (near the Riverside Trail entrance)
The busiest section of the Narrows is the trailhead to the Grotto, where most people turn around. I didn’t think this was an especially pretty part of the canyon. I would keep hiking up at least another 30 minutes to see the more dramatic canyon walls.

June 2025 - Hiking in the Narrows past the Grotto
Adding a couple more pictures as reason to keep hiking up.

June 2025 - Hiking the Narrows - Floating Rock

June 2025 - Hiking through the Narrows
The river eventually gets very bouldery. It feels like walking on a field of greased bowling balls. This section of the Narrows is hard, and it takes a long time to walk it. Additionally, this section of the canyon has no high ground. If there is a flashflood, there’s no place to go. Do not do this hike if it has recently rained or if it might rain while you are hiking.

June 2025 - Hiking through the Narrows

June 2025 - Hiking the Narrows
For anyone hiking bottom-up, Big Springs is the mandatory turnaround point. All hikers up river of the waterfall need to have a permit.

June 2025 - Big Springs waterfall within the Narrows
For anyone interested in learning more about the Narrows, or if you want to see more pictures, here is a supplementary blogpost of our June 2025 trip: Hiking Zion’s Narrow’s in 100 photos.
16 - Zion Narrows Top-Down
Distance - This trail is a minimum of 16 miles (it will be more than that due to walking back and forth through the Virgin River). The trail is one-way. You will hire a driver to drop you off at Chamberlain Ranch. You need a permit for this hike.
Elevation Gain - There’s not much elevation gain to this hike, but a lot of descent. Walking down the river will result in a 2,000ft drop, but you will hardly notice it. This trail is plenty hard even with the advantage of walking downhill the whole way.
Trailhead Location - We used the Red Rock Shuttle, and we met in Springdale. Park at the Zion Visitor Center lot for free and just walk over to Springdale. It takes 5ish minutes. Your driver will take you up to Chamberlain Ranch. From there, you will walk 16+ miles down the Virgin River to catch the free Zion Shuttle at the Temple of Sinawava back to the Visitor Center parking lot. You are on the clock to avoid an extra 7 mile walk on the road in the dark, and need to get to the trailhead before the shuttle stops for the day.
There’s a lot of information that is worth figuring out while planning for this hike - how to obtain permits, how to hire a driver, what to buy or rent and wear, what to bring with, and how to plan out the day. See my detailed post on hiking Zion Narrows top-down. I’ve tried to answer all of the questions that I had in preparation for this hike.

June 2025 - Hiking the Narrows top-down
There is a beautiful waterfall along the top-down hike through the Narrows. The trail bypasses the waterfall and re-enters the Virgin River below the falls. Then you walk in the river back up stream a few steps to see the waterfall from below.
June 2025 - Family picture while hiking the Narrows top-down
I don’t know how many times I’ve used the term “favorite trail” in this post… But this is my favorite, favorite trail in Zion National Park. This was a hard hike, but one of the best days I’ve spent with my hiking boots on.

June 2025 - Hiking the Narrows Top-Down
If you want to see more information on how to prepare for the Narrows top-down hike, of if you’d like to see more pictures, here is my supplementary post: hiking Zion Narrow’s top-down.
17 - Pine Creek Waterfall
This is not an official trail, and I only recently learned about it, and therefore haven’t had a chance to verify it. I’m listing it here as a placeholder for myself the next time I return to Zion. I am not going to list any more information here without verify the trail, but you can Google it yourself if you are interested.
East Zion
As beautiful as all of the other places in the rest of the park are, don’t forget to drive east of the Zion-Mount Carmel Tunnel. Other than the Canyon Overlook and East Mesa Trail, there aren’t formal trails on this side of the park, which makes it fun, adventurous, and quiet. Parking consists mainly of tiny pullouts, which limits the number of people that can explore a particular area. If you can snag one of those parking spots, this side of Zion can be so much fun.
June 2025 - Zion’s Checkerboard Mesa - a pullout alongside the Zion-Mount Carmel Highway to see an interesting geometric pattern built by sand dunes and freezing and thawing ice within the sandstone.
This section of Zion National Park requires your car. Follow the Zion-Mount Carmel Highway through an impressive tunnel, to the east side of the park. Note that there can be short back-ups at the tunnel entrance. Pedestrians are not allowed to hike through the tunnel, and there is no stopping inside the tunnel.

Trails on the east side of the park: 18 - Canyon Overlook, 19 - Cascade Falls (Many Pools), 20 - Petroglyph Canyon, 21 - Keyhole Canyon* (requires a permit and gear for technical canyoneering)
18 - Canyon Overlook
Distance - 0.9 miles out-and-back
Elevation Gain - 150ft
Trailhead Location - Just east of the Zion-Mount Carmel tunnel, start looking for parking and take any spot available. There are two small parking lots. It’s a short trail, so people are leaving all the time. But, the small parking lot does make it difficult to wait for an open spot. Another option is to keep driving and take the next pullout available, but that is going to add considerable distance to a short trail. Other advice would be to start here early in the morning, or plan to hike a little bit before sunset when trails are typically less busy.

Map of Canyon Overlook
The Canyon Overlook Trail is a trail that I would recommend for all hikers while visiting Zion National Park. The view is amazing, and the trail is easy but feels adventurous.
March 2019 - Canyon Overlook Trail
The Canyon Overlook Trail is one of only a couple of trails that I have ever hiked twice. My parents had taken me on a spring break trip to Zion when I was in middle school. I was enamored with the Grand Canyon, in awe of Bryce Canyon, and the trails we went on while at Zion (Weeping Rock and Emerald Pools) just didn’t get up high enough to see the view of Zion Canyon from above, so I remember feeling a bit underwhelmed at this park. My second trip to Zion was with my husband (then boyfriend) on a spring break trip during college. This was the first time I hiked Canyon Overlook, and I promptly fell in love with Zion. Unfortunately, the pictures from our college trip were not yet in digital form, so not as easy to share on a blog, and the day I returned with my boys in March 2019 we happened to be met with clouds which partially obstructed the valley view.
March 2019 - Hiking along Canyon Overlook Trail
This is an easy hike to an incredible viewpoint to see Zion Canyon from above. Your car does all of the work for you to get to the top of the canyon.
March 2019 - My boys having a blast on this fun hike
The east side of Zion looks different than the main part of the canyon where most visitors stay. The rocks have different colors, shapes, and geometric patterns, like the below beehive-shaped rock.
March 2019 - Hiking the Canyon Overlook Trail.
The one watch out on this hike is that it is full of steep, dramatic drops. If hiking with younger kids, hold their hands throughout the trail.
March 2019 - Hiking along Canyon Overlook past a steep valley below
At the end of the trail, there are large flat slabs of rocks to sit and look out at the valley below. To me, this view was just as great as from Angel’s Landing, but this is a much easier trail.
March 2019 - View from the end of the Canyon Overlook Trail
March 2019 - Hiking the Canyon Overlook Trail on a trip with my boys
19 - Hobbit Hole
This is another placeholder for myself that I have learned about since our latest trip to Zion in June 2025. Similar as above, since this is not an official trail, I can’t verify it, but feel free to Google it.
20 - Cascade Falls (also known as Many Pools)
Distance - 2.1 miles (out-and-back)
Elevation Gain - 575ft
Trailhead Location - The trailhead is about 0.9 miles east of the Zion-Mount Carmel tunnel. There are a couple of pullouts nearby to park. The “trail” goes north of the road and follows along the rocks near the waterway.

Map of the unofficial trail to Cascade Falls (also referred to as Many Pools)
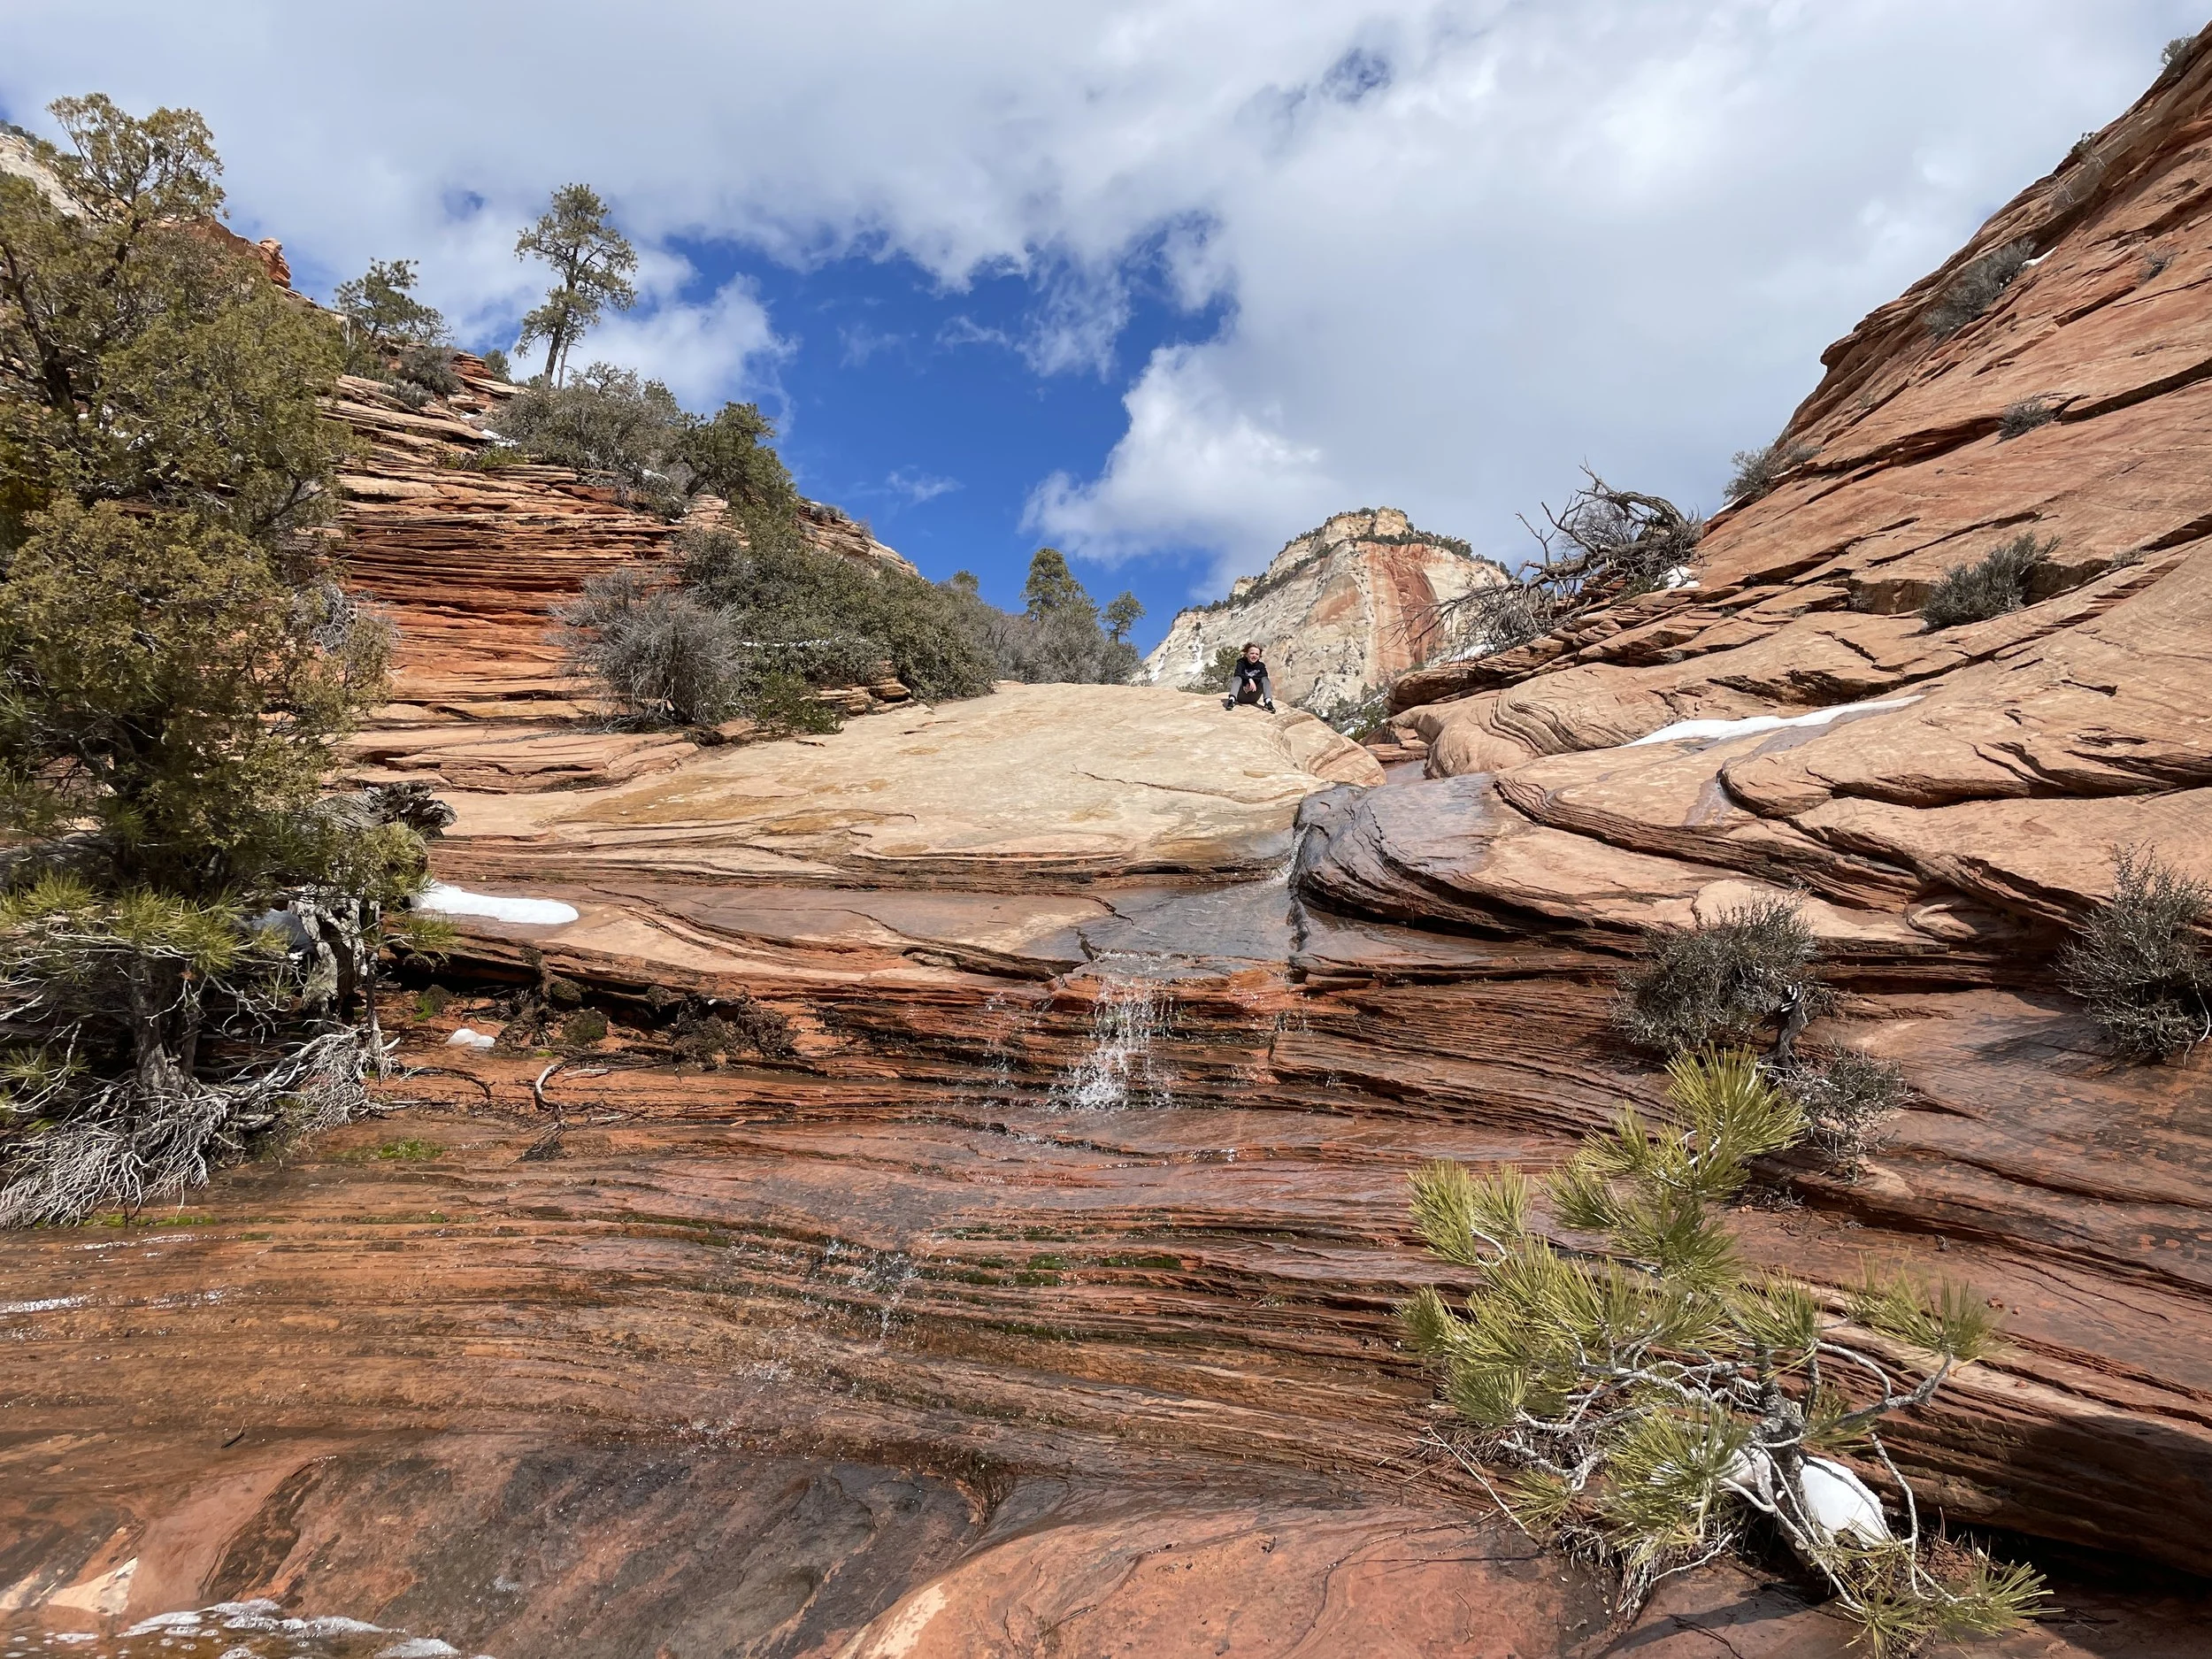
As I’d mentioned earlier in this post, in March 2023, I had been planning on taking my boys to Buckskin Gulch, but due to the amount of recent snow and rain, I ended up deciding it didn’t feel safe to enter. So, we had a free day and decided to return to Zion. As I was looking on AllTrails for hikes we hadn’t been on before, I was so surprised to see trails indicated on the east side of the park. None of these are marked on the official park map. We’d noticed the pullouts along the Zion-Mount Carmel highway but assumed these were for people to just take pictures from. There are tons of short and moderate-length “trails” to explore. These trails are not marked and often follow on the top of slick-rock, making them at times hard to follow. Using an app like AllTrails or GAIA, with pre-downloaded maps, can help both throughout navigation, but also just getting back to your car.
March 2023 - Hiking along Cascade Falls
From the pullout, walk north of the highway and follow the slickrock down to the small creek. Stay on the slickrock to protect the nearby vegetation. Follow the creek uphill.
March 2023 - We did not see another hiker the whole hike out. We passed two small groups as we got close to our car on the way back.
This was such a pretty trail, and my first experience at Zion where there were no other hikers around. I couldn’t believe how special this day turned out to be, especially since it was my plan B.
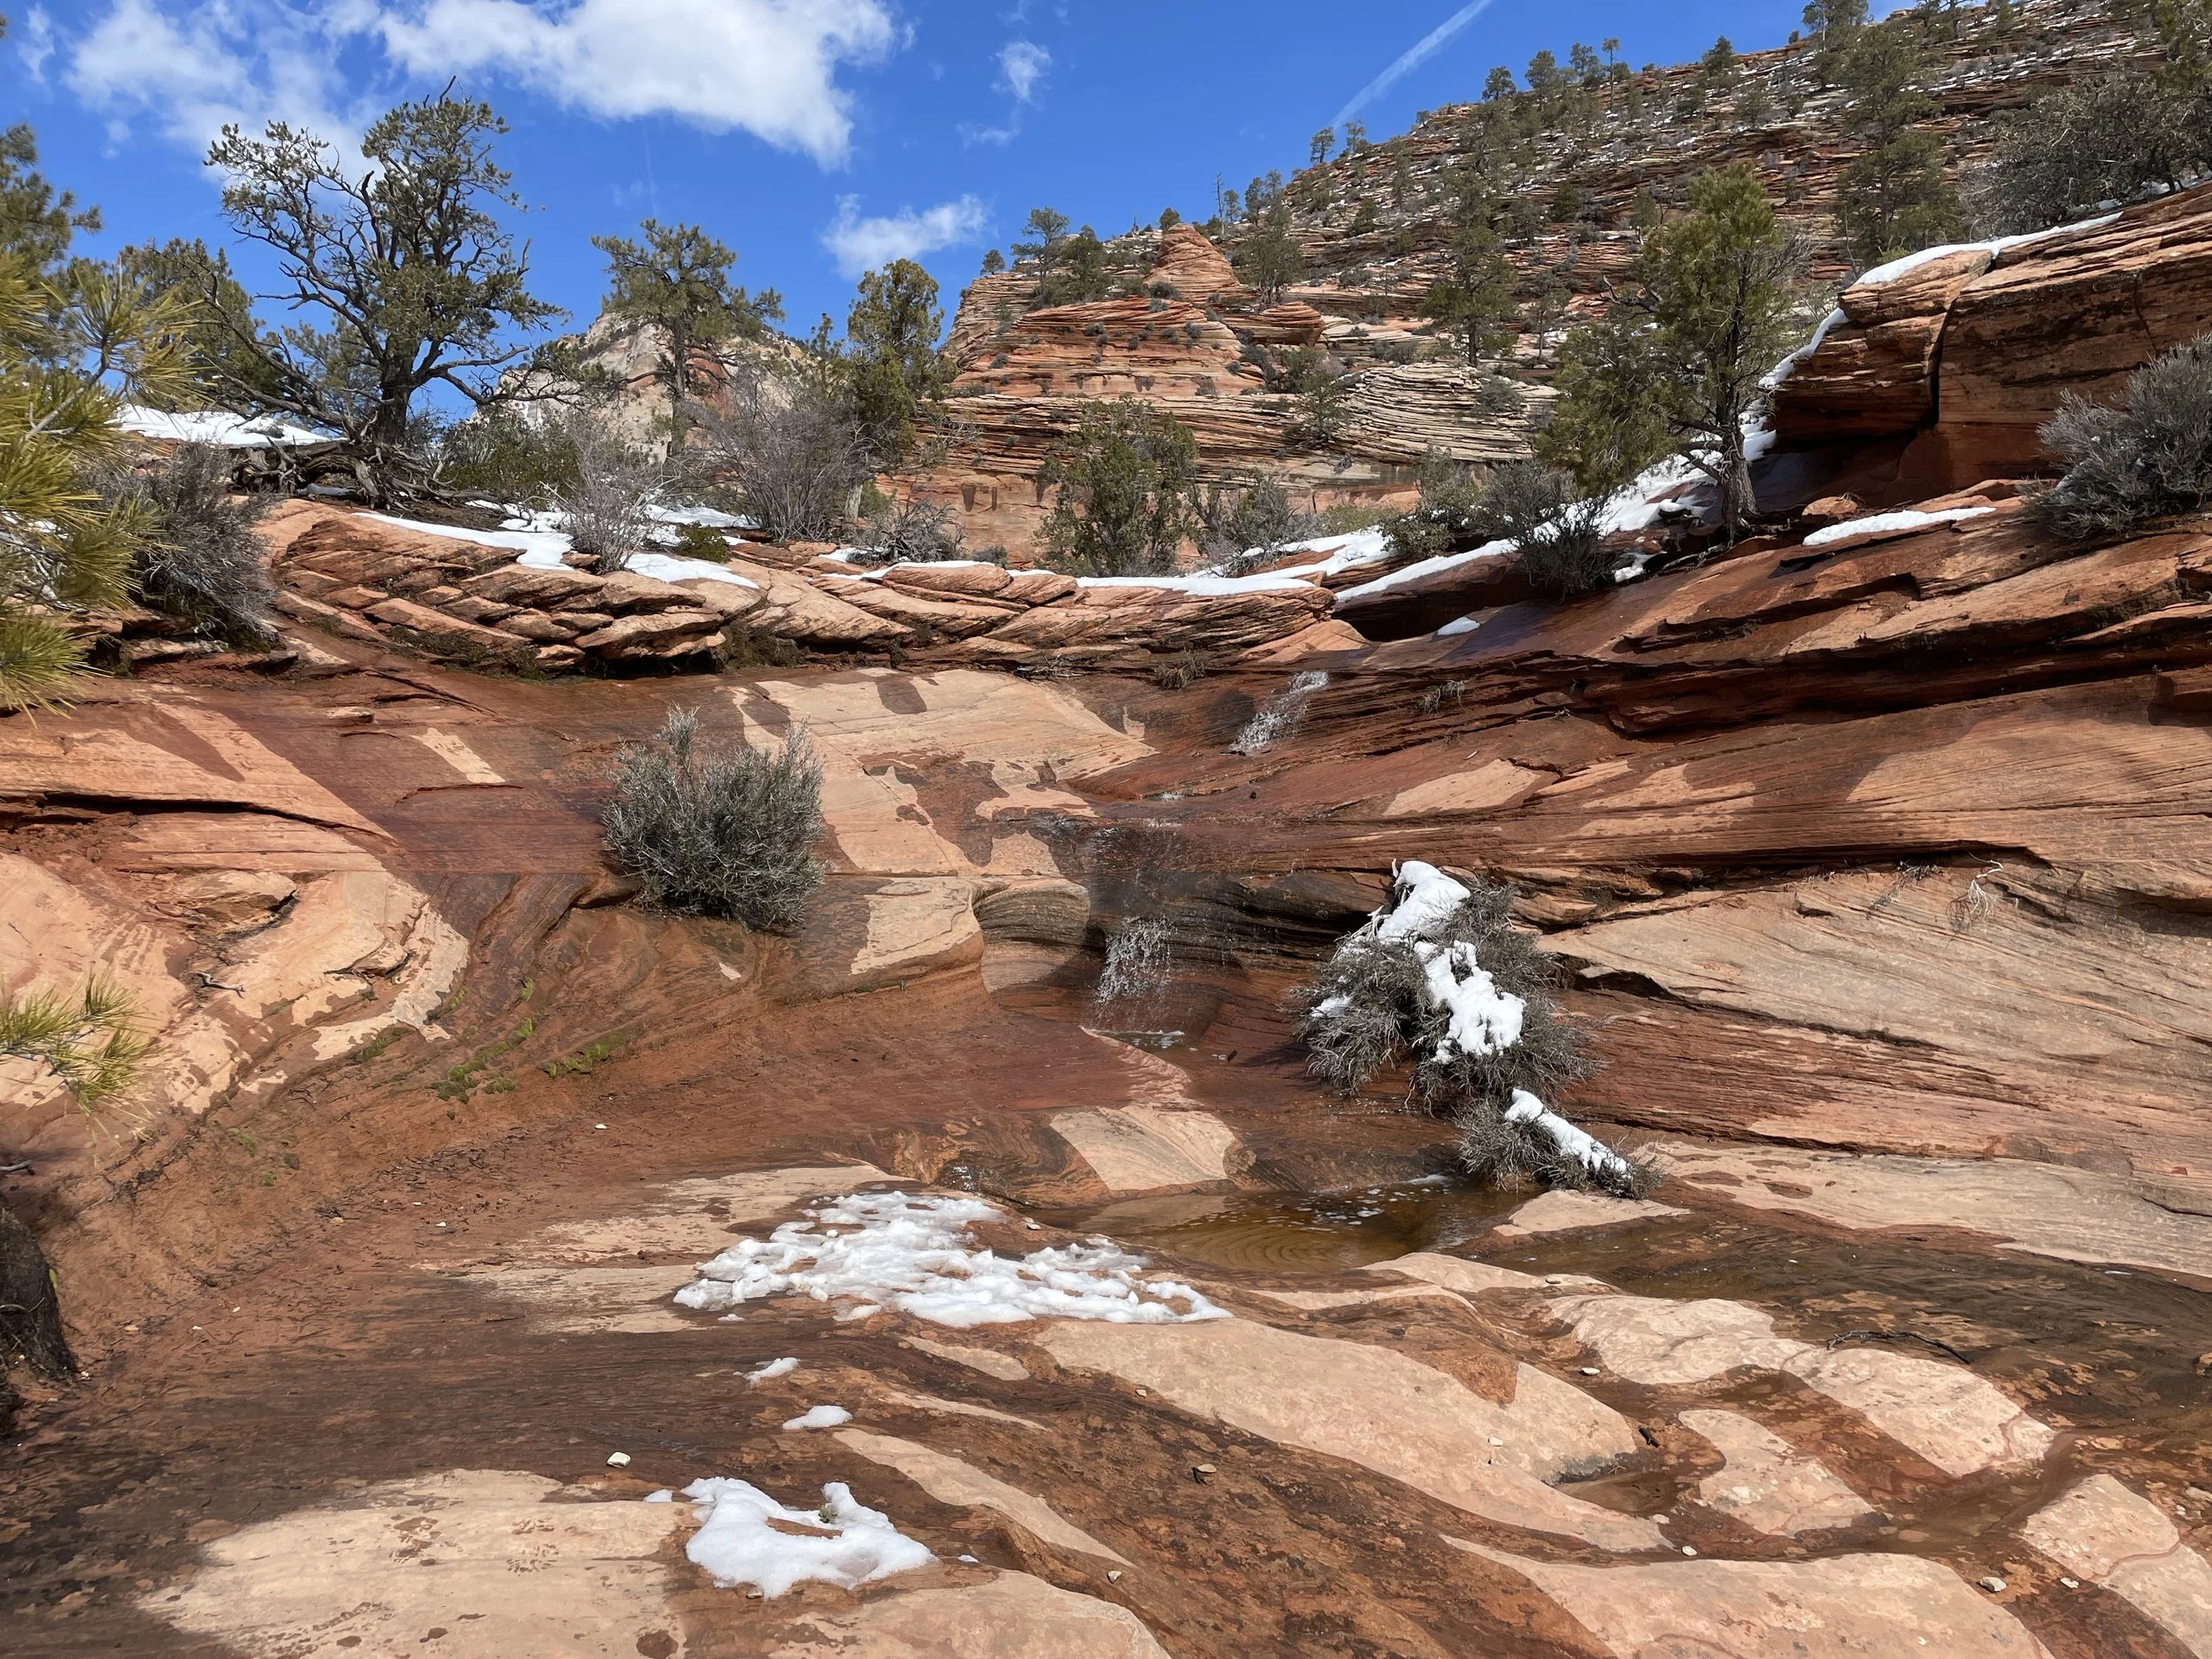
March 2023 - We enjoyed playing on the rocks next to the water, having fun breaking up the small shelf of ice on the top.
The recent snow was so pretty next to the red rocks. And the boys had fun playing with ice along the top of the water.
*Mom Tip - Let the kids get their feet wet. It’s so much more fun then trying to keep them dry. In the hotel, take the hair dryer and put it into their shoes. It doesn’t take too many minutes to get them nice and dry.
March 2023 - There were pretty waterfalls throughout this hike. The water was mostly coming from snow melt. I bet this is another pretty spot to checkout after a rainstorm.
March 2023 - More waterfalls along Cascade Falls (Many Pools)
This is another trail where you can explore as far as you want and then turn around. This was our turn around spot, so we would have enough time to find Petroglyph Canyon

March 2023 - View along Cascade Falls as we turned around to hike back to our car
21 - Petroglyph Canyon
Distance - 1.2 miles (out-and-back)
Elevation Gain - 180ft
Trailhead Location - There is a pullout about 1.4 miles east of the Zion-Mount Carmel Tunnel. The pullout is on the south side of the road. You can actually walk a short distance south and then cross the highway under it, through a tunnel / water culvert. The trail is north of the road. We explored south for a bit as well.

Map of Petroglyph Canyon
There is supposedly a slot canyon at the end of this trail. We found the petroglyphs, but not the slot canyon. This was my first real adventure in route-finding. My boys were still pretty young, and I was taking this trip solo due to my husband having a different week off for spring break than our boys, so I was pretty risk adverse. I’d love to go back here and try to find it.
March 2023 - My rental truck at the pullout for Petroglyph Canyon
We wandered south of the road for a bit, down to the water. It was just as pretty on the south side as it was on the north side of the road. We saw one group of hikers that were heading back to their car just as we were starting. We did not see anyone else on this hike.
March 2023 - On the south side of the highway, near Petroglyph Canyon
The east side of Zion is special - take care of it! Not having official trails does not mean make your own trails and cause erosion. Find the slickrock and stay on it. To do that on Petroglyph Canyon, walk south from your car, and follow the slick rock through a tunnel / water culvert under the highway. Stay on the slickrock and head north.
March 2023 - Tunnel under the Zion-Mount Carmel Highway that hikers will use to access the petroglyphs. Walking down the slope on the north side of the road will result in unnecessary erosion.
To find the petroglyphs, follow the creek north.
March 2023 - Follow the creek to find the Petroglyphs
There are several petroglyphs to find nearby.
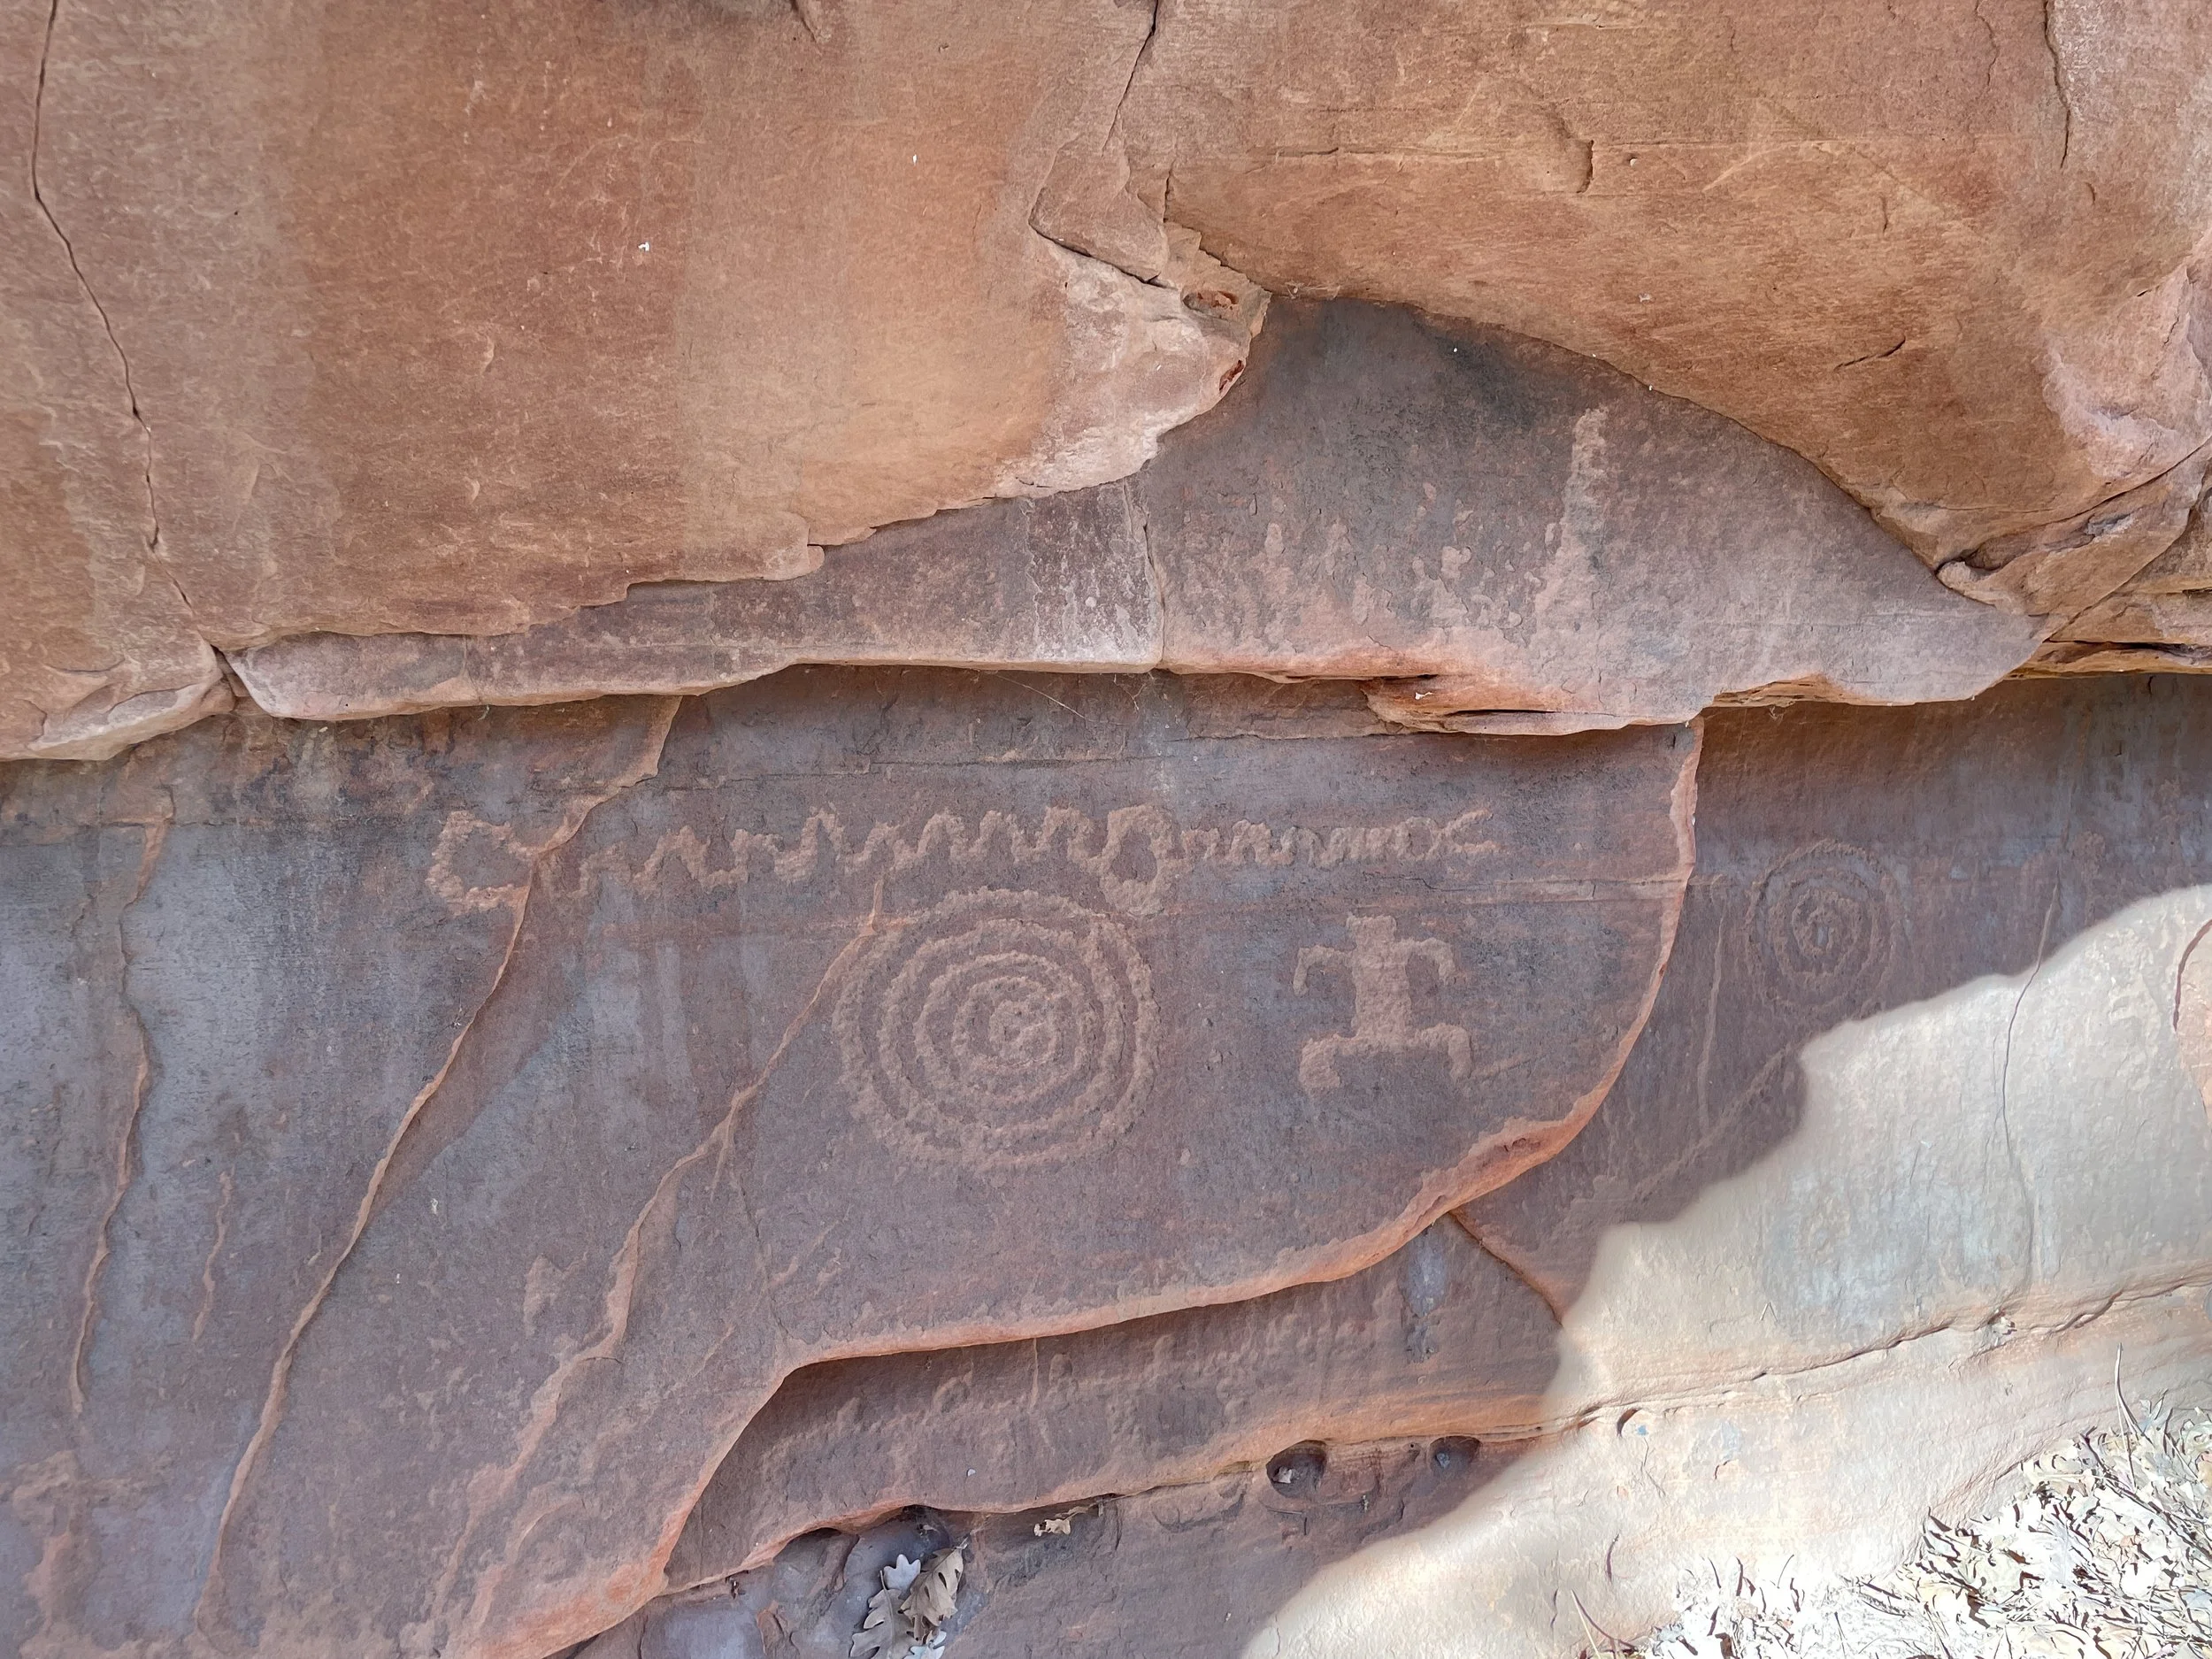
March 2023 - Petroglyph Canyon on the east side of Zion National Park
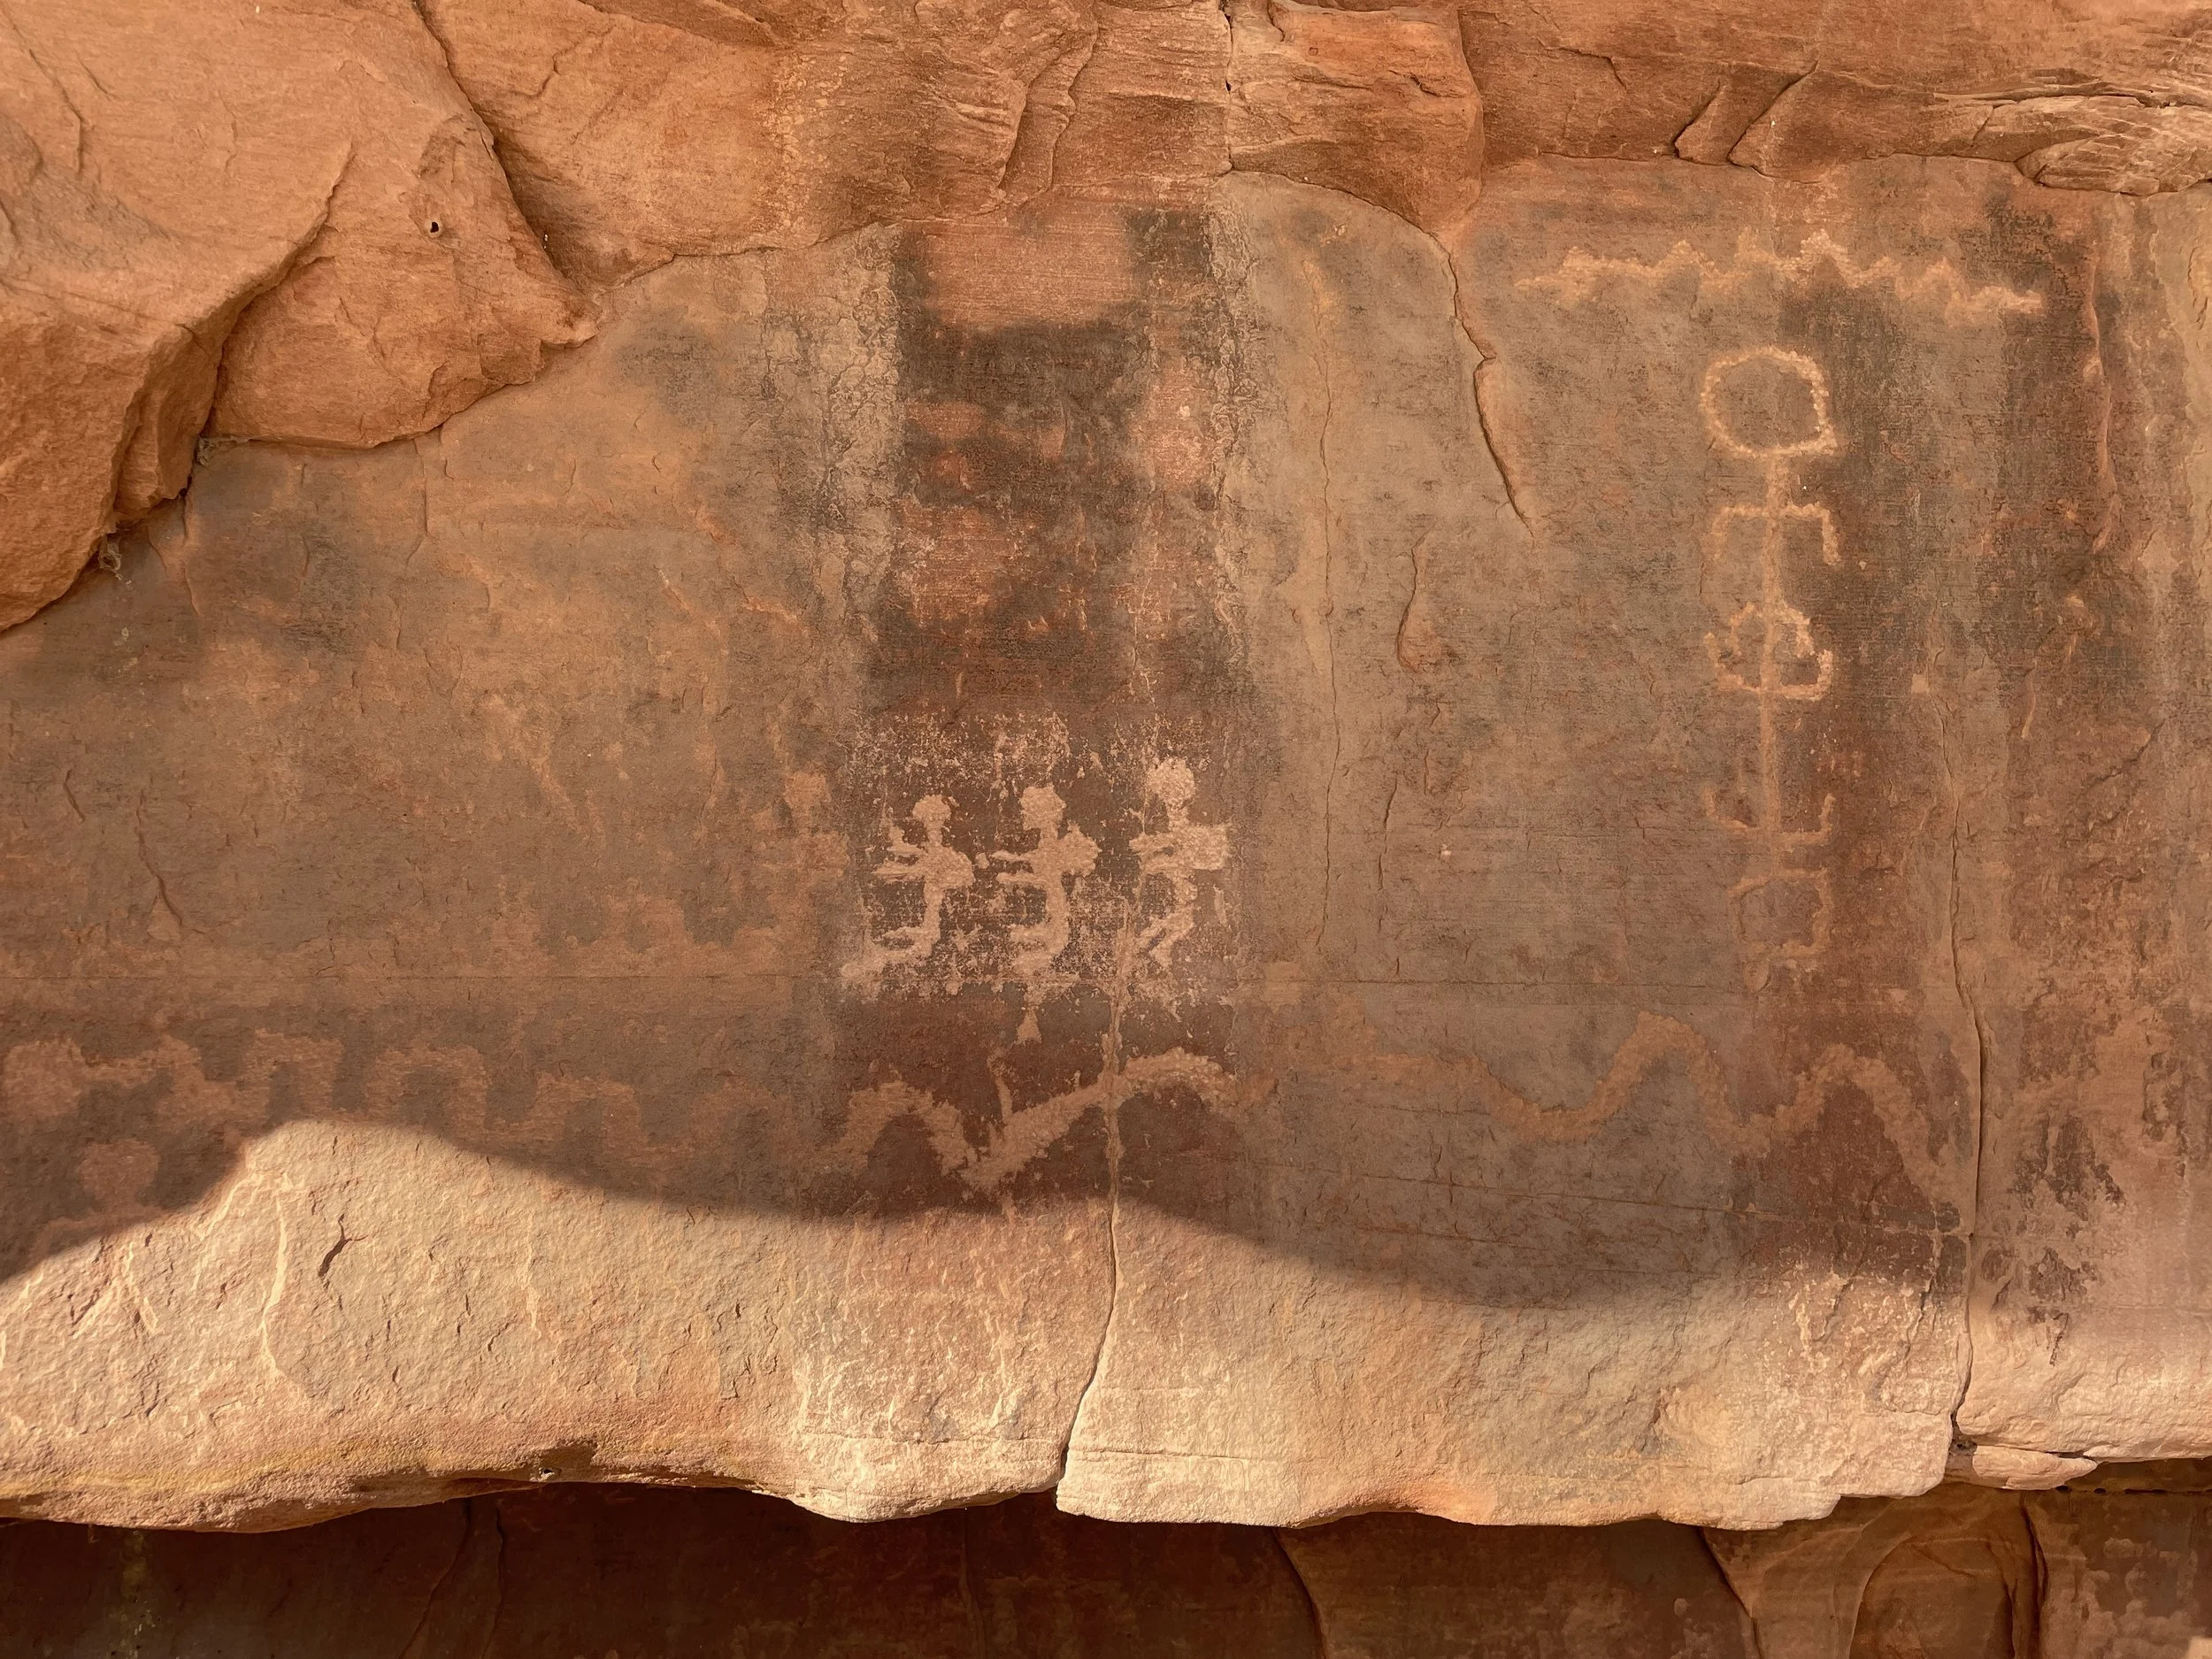
March 2023 - Petroglyphs at Zion National Park
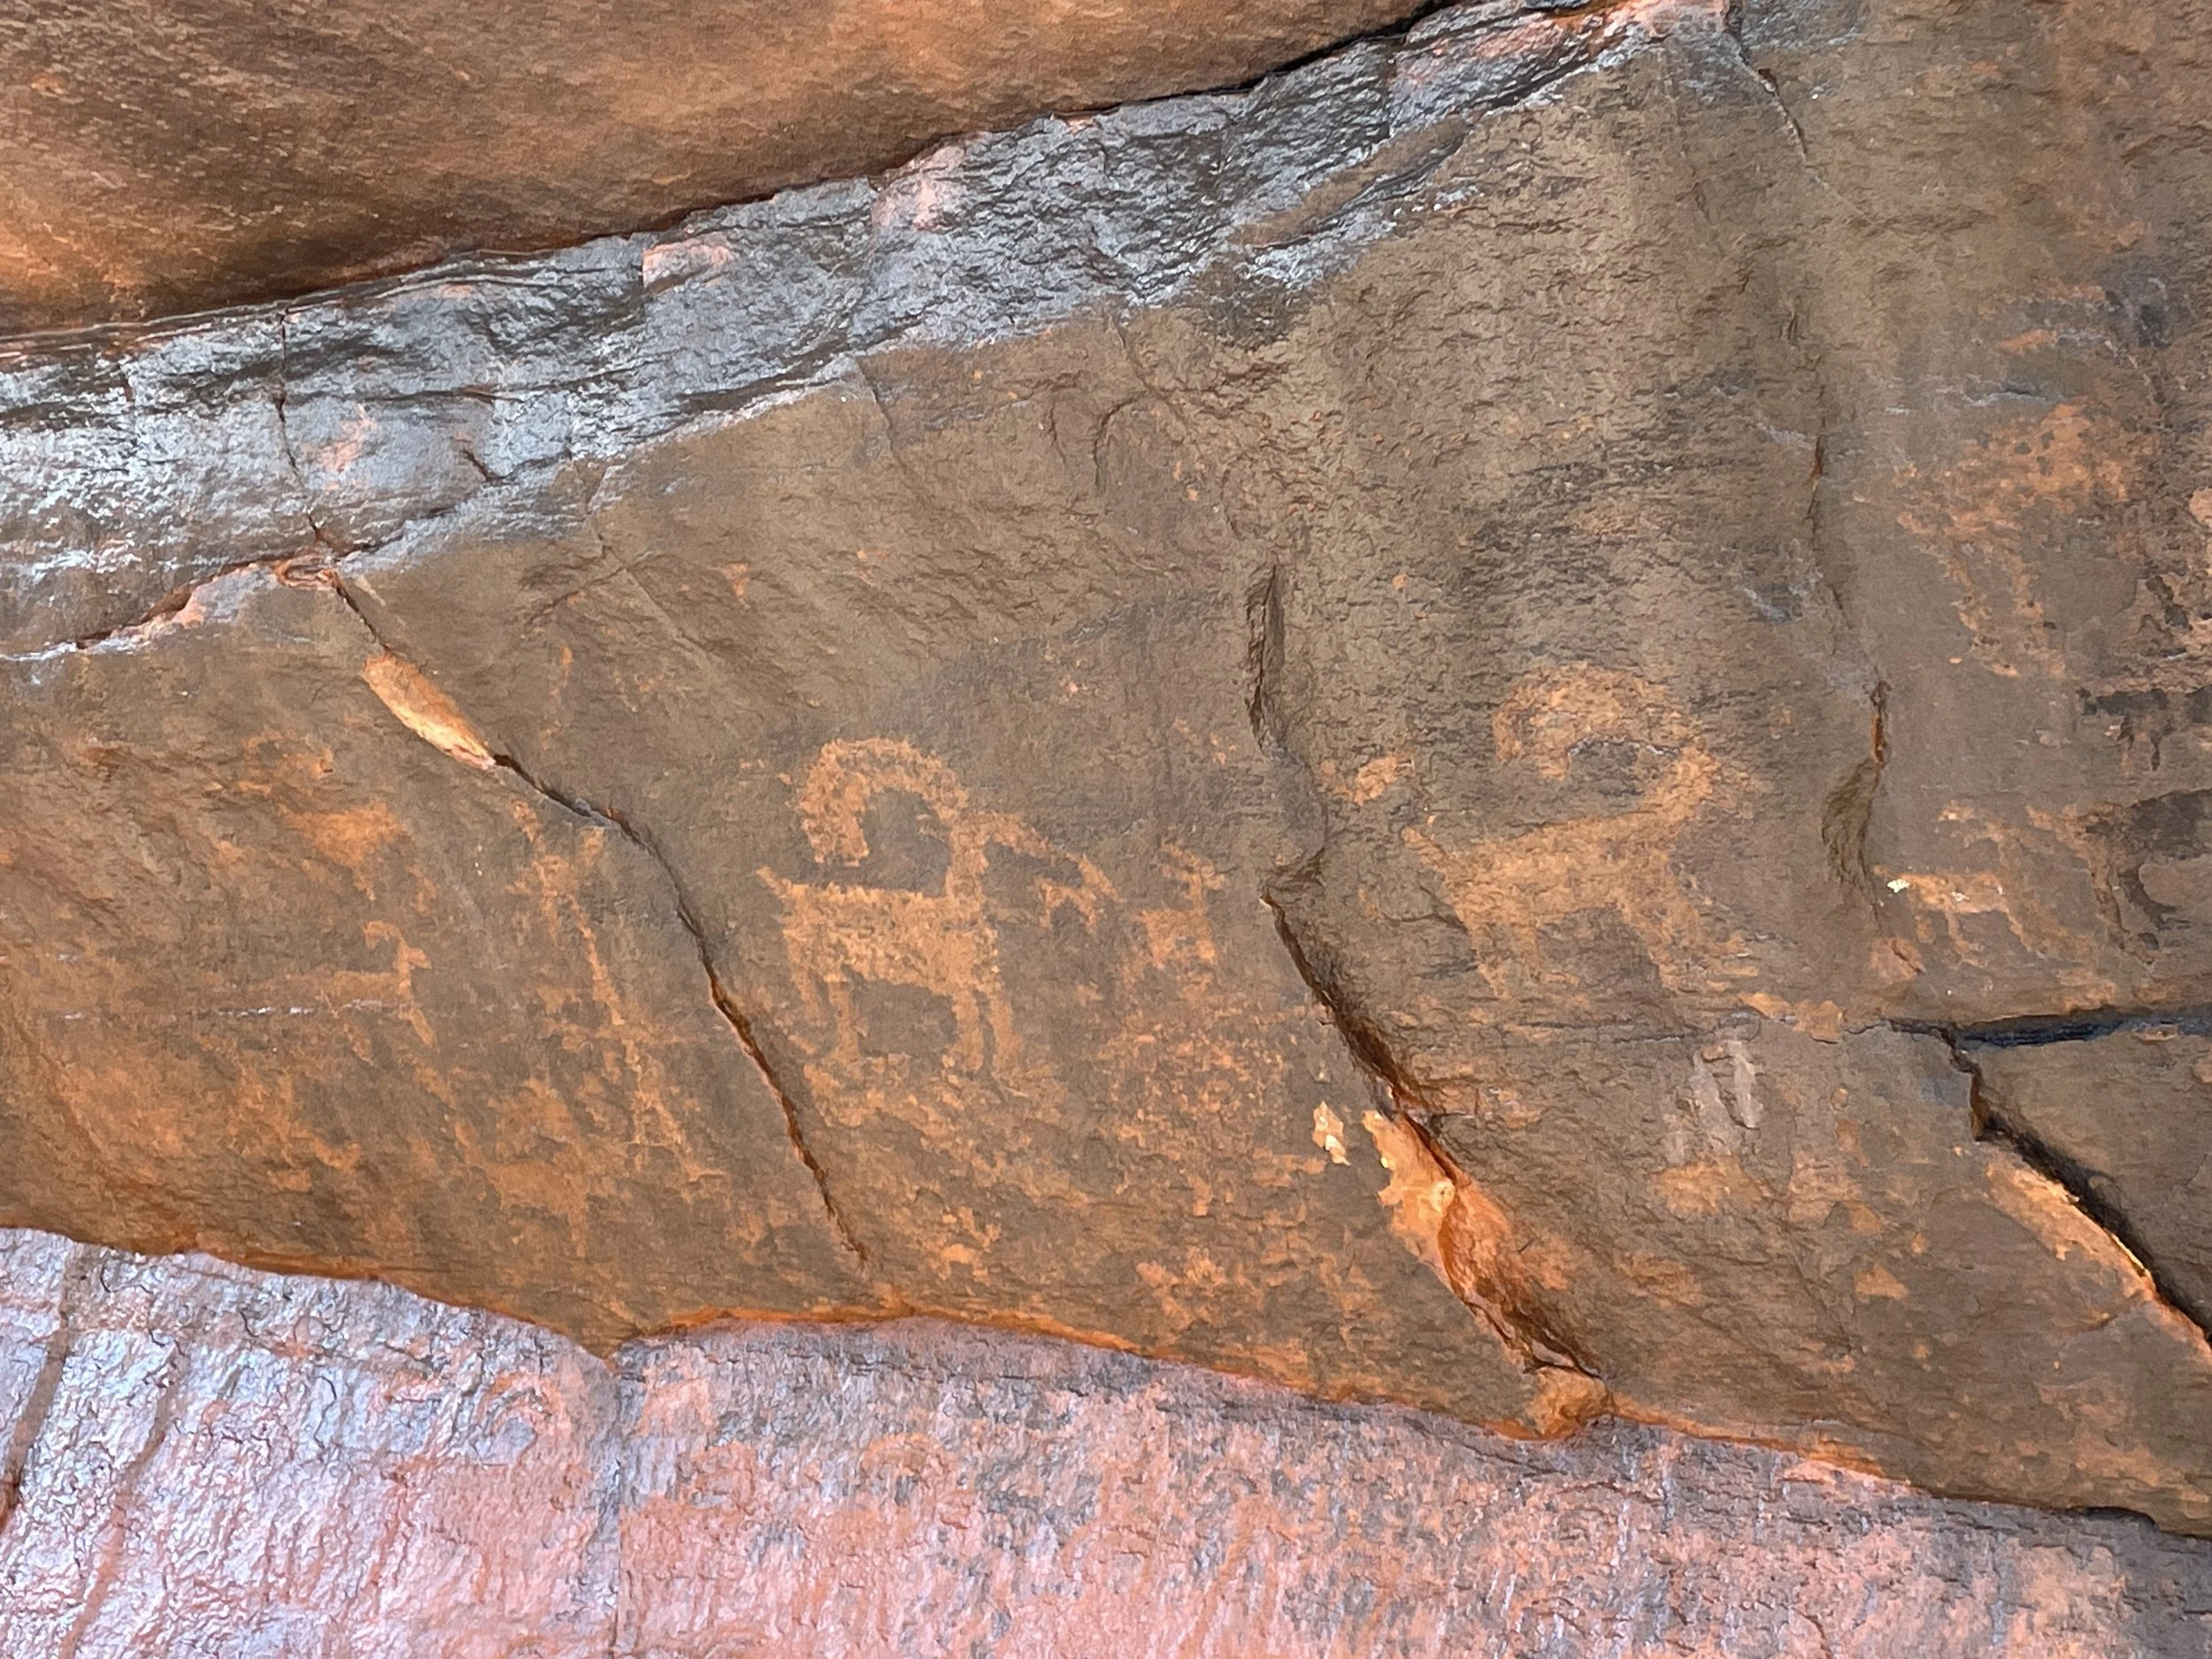
March 2023 - Petroglyph Canyon
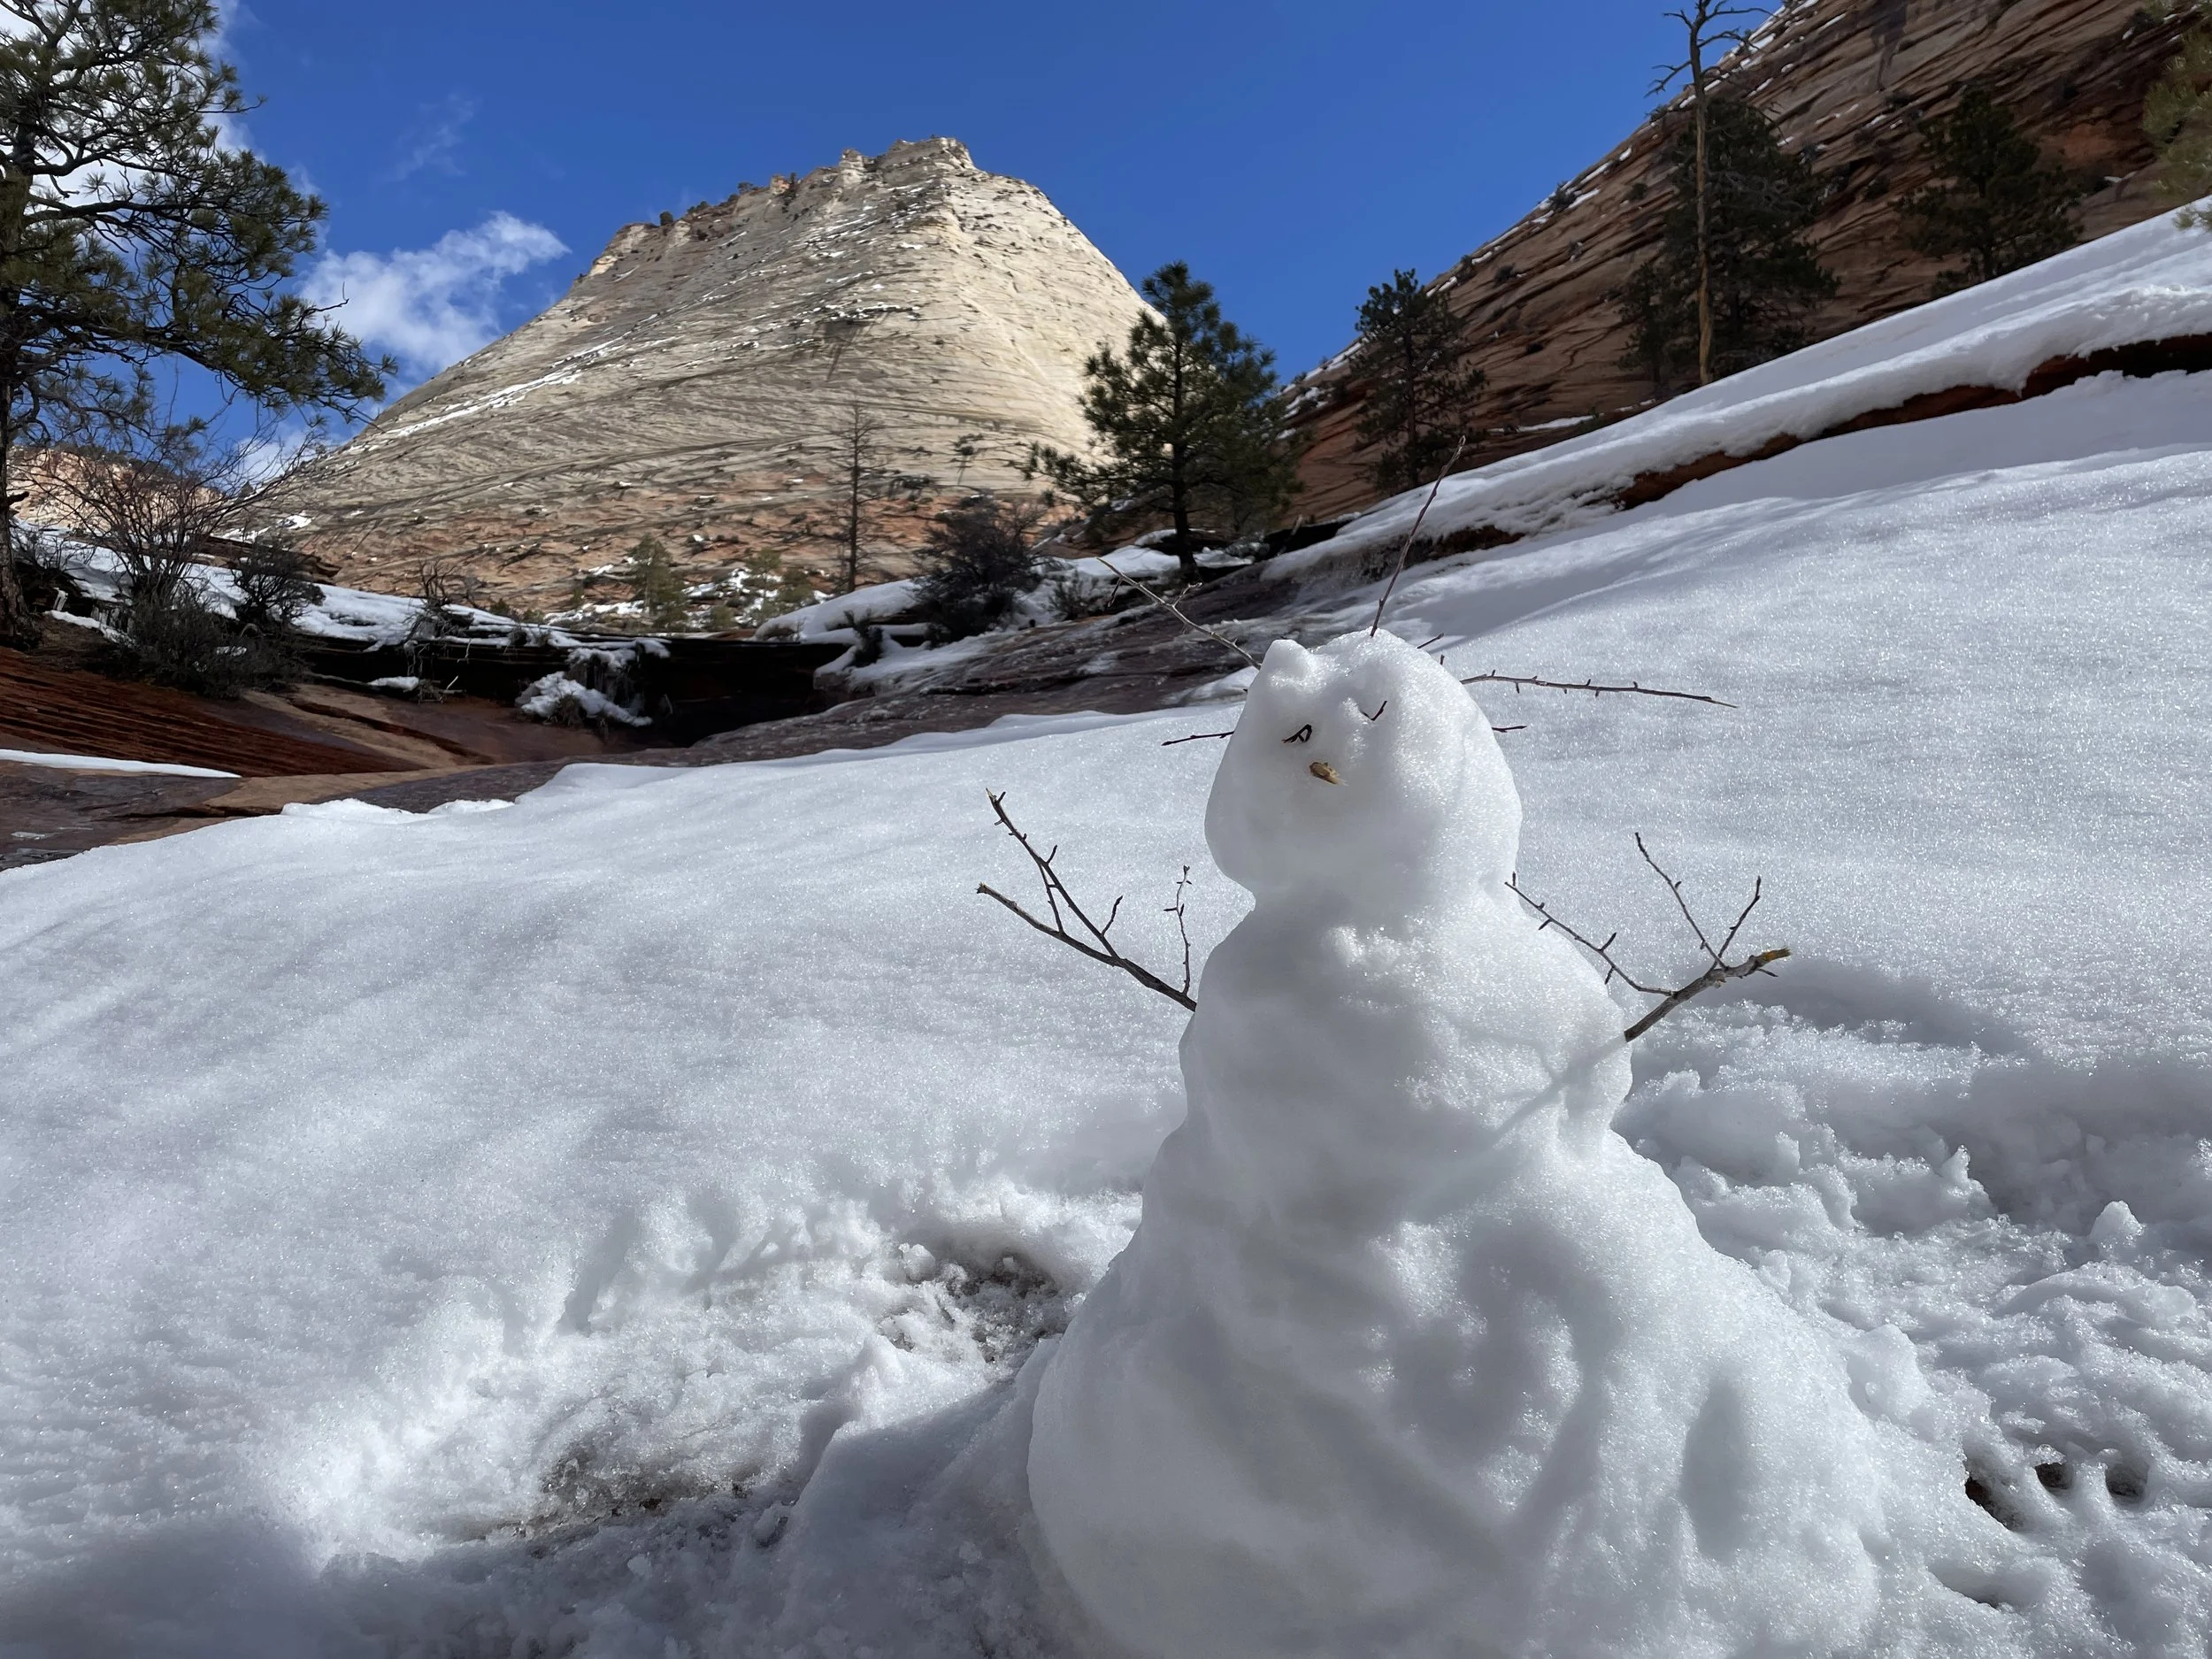
March 2023 - We had to stop and make a snowman…
As I mentioned, we did not find the slot canyon, but I didn’t really know what we were looking for as it isn’t marked, and I wasn’t yet too comfortable exploring off trail with my boys on my own. This picture makes me laugh, though. I’m 90% confident that I’m looking at the entrance to the slot canyon. We probably just needed a bit of courage to find a safe route to get down into the narrow section.
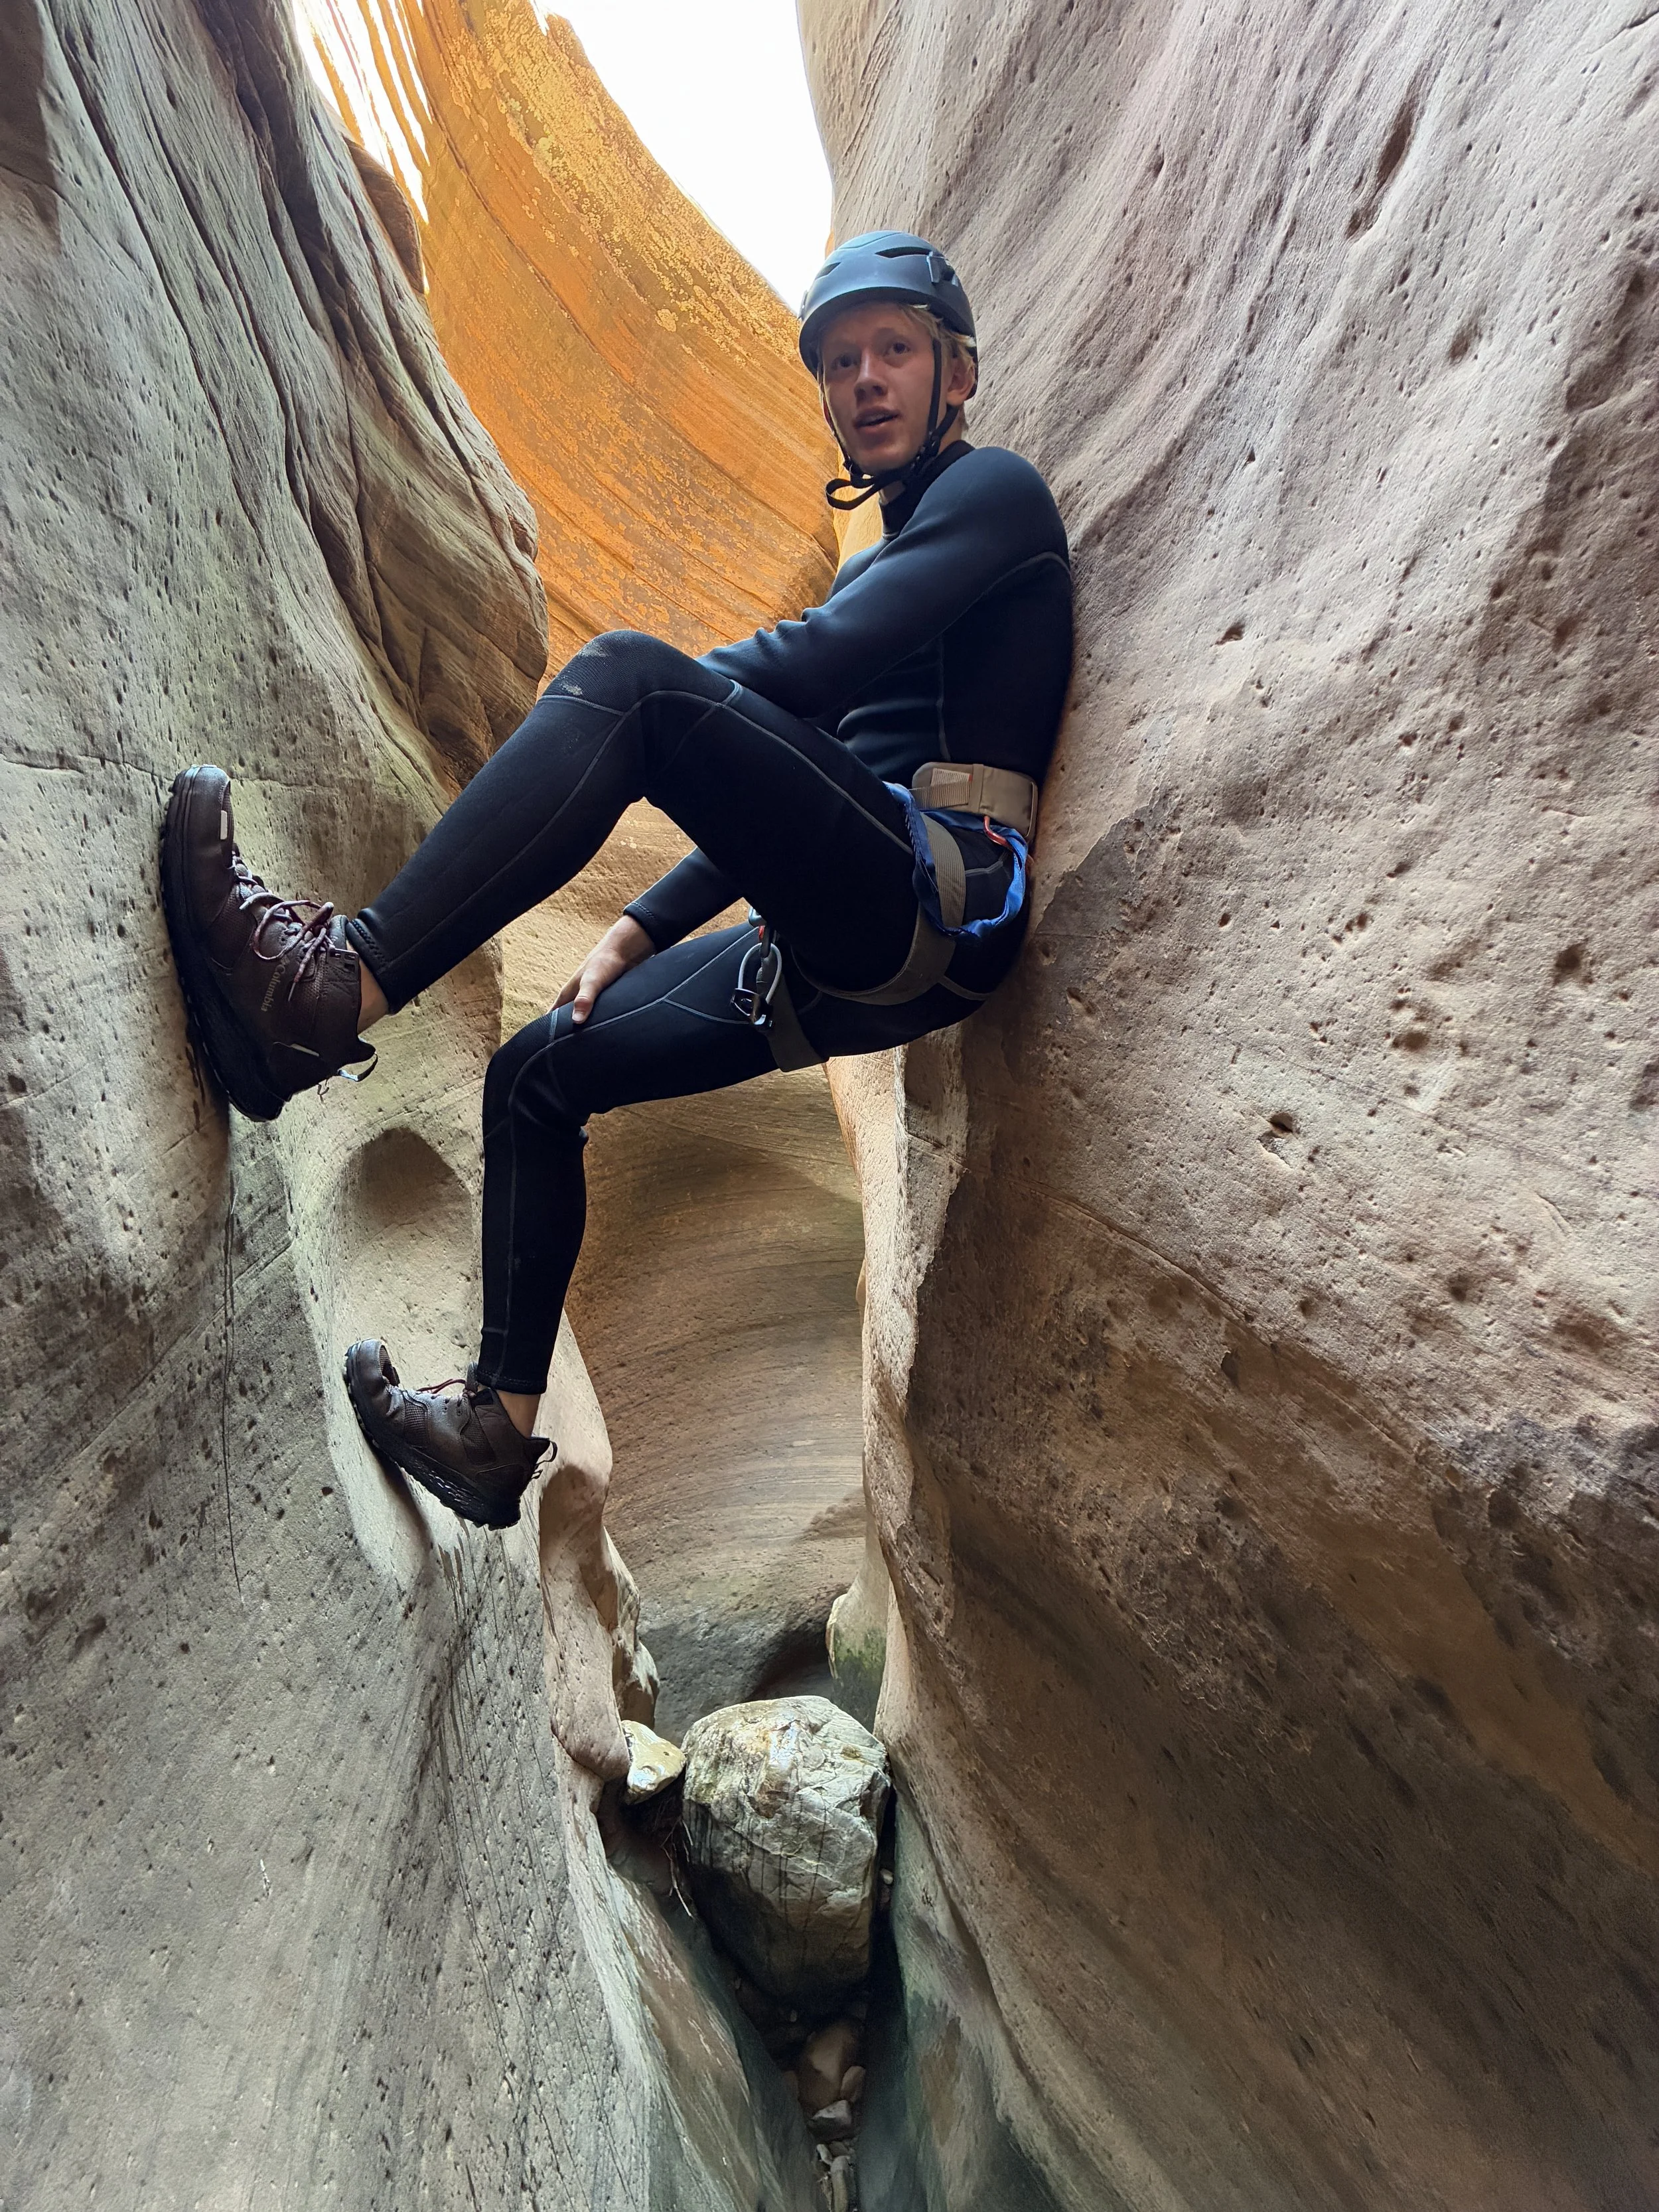
22 - Keyhole Canyon (Technical Canyoneering + Permits Required)
Distance - 0.7 miles roundtrip - Although this is a short distance, due to this being our first time rappelling on our own as a family, this hike took us 4.5 hours.
Trailhead Location - The pullout for Keyhole Canyon is about 1.8 miles east of the Zion - Mount Carmel Tunnel. This trail requires a permit, talking with a Park Ranger to pick up the permit, ropes and rappelling gear, and even on a hot summer day, although it seems ridiculous, bring a wetsuit.
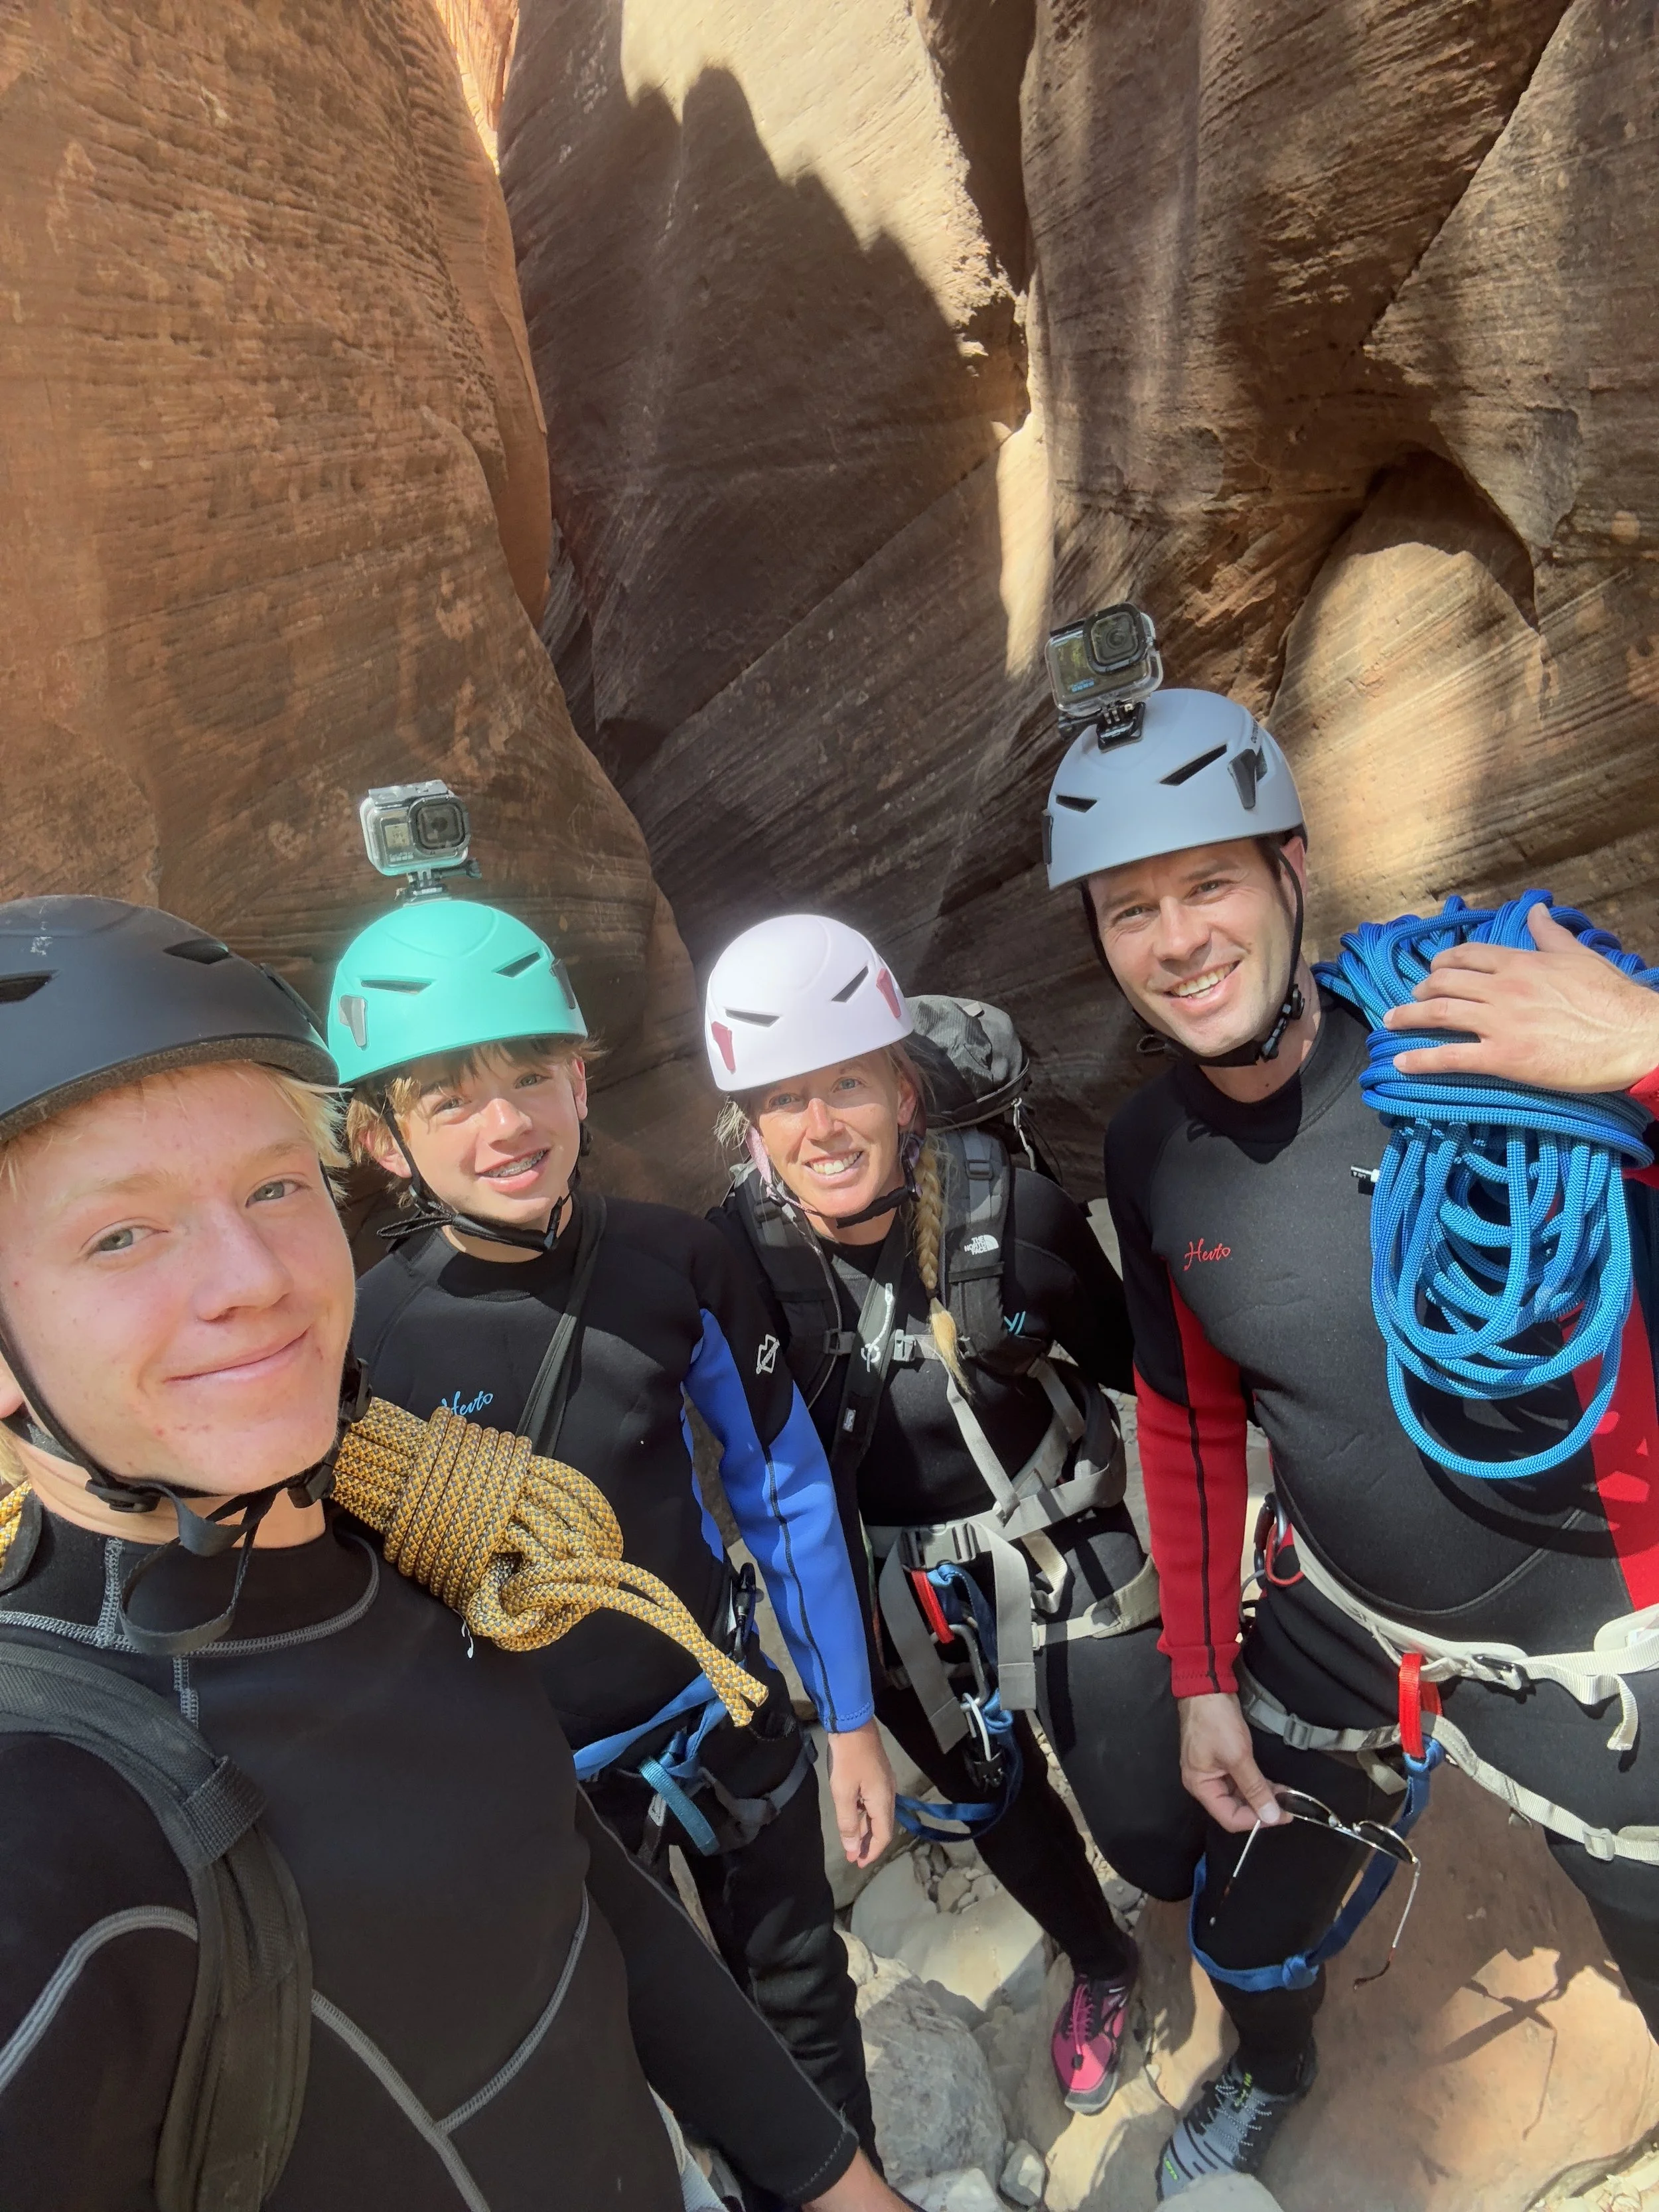
Because the majority of visitors to Zion National Park are not going to be trained or prepared to rappel into a canyon, I have a separate post on this canyon: Technical Canyoneering through Keyhole Canyon. Below are just a few pictures of our fun. See the linked post for more information.

June 2025 - Although the park reached 106 deg F, I’m cold by the end of this hike, despite being covered with neoprene
We got a bit turned around at the beginning and found the exit of the canyon, rather than the beginning. Once we were headed in the right direction, the trail was easy to follow. Keyhole Canyon was a great place to start canyoneering as relative beginners (note, we did take classes beforehand).

June 2025 - Hiking through Keyhole Canyon
This was such a fun day! It’s hard to find perfect vacations with teenagers, to keep them challenged, engaged, and having a good time with their family. Rappelling was a good challenge for us and required the right amount of family teamwork.
June 2025 - Keyhole Canyon

June 2025 - Rappelling through Keyhole Canyon

June 2025 - Belaying from above in Keyhole Canyon
23 - Observation Point via East Rim Trail
Distance - 8 miles (out-and-back)
Elevation Gain - 830ft
Trailhead Location - The shortest out-and-back option to Observation Point starts from a trailhead that is not accessed from the main part of Zion National Park. The trailhead is north, northwest of Zion Ponerosa Ranch Resort.
This is another hike still on my wish list. Once I cross it off, I’ll add pictures and more information for this hike.
Other Things to Do Nearby
There are so many great hikes within Zion National Park, but don’t forget about all of the other nearby places to visit. Below are additional places worthy of a stop that are within an hour’s drive from Zion’s three National Park entrances.
Kanarra Falls
The trailhead to Kanarra Falls is less than 15 minutes north of Zion’s Kolob Canyon Visitor Center, or an hour drive north of Zion’s main Springdale entrance. Kanarra Falls is a moderately difficult hike that travels through a slot canyon with four waterfalls. This trail goes through the water and feet and ankles will get wet. Permits are needed for this hike. Consider pre-purchasing as only 200 hikers are allowed in per day.
Red Reef Trail
The trailhead to Red Reef Trail is 30 minutes south of Zion’s Kolob Canyon Visitor Center, or an hour west of Zion’s main Springdale entrance. Red Reef Trail is a relatively easy 1.7-ish mile out-and-back hike along Quail Creek and a stunning canyon just outside of St. George. The Moqui steps require a bit of courage to cross. The trail continues upstream but will likely be underwater in the winter and spring months.
Yant Flat Candy Cliffs
The trailhead to the Yant Flat Candy Cliffs is about 45 minutes southwest of Zion’s Kolob Canyon Visitor Center, or 75 minutes west of Zion’s main Springdale entrance. The Yant Flat Candy Cliffs is a relatively short desert hike to a hidden and strangely beautiful display of geometric patterns cut into red-and-white-striped Navajo Sandstone surrounded by green brush-covered mountains. Use the road from Leeds - the road from St. George is not well maintained.
Sand Hollow State Park
Sand Hollow State Park is 40 minutes south of Zion’s Kolob Canyon Visitor Center, or 50 minutes west of Zion’s main Springdale entrance. Sand Hollow State Park includes a crystal clear reservoir, great for swimming and cliff jumping, and a fun place for families with older kids to cool off on a hot day. This park also has ATV trails that cross over sand dunes.
Pioneer Park
Pioneer Park is 30 minutes southwest of Zion’s Kolob Canyon Visitor Center, or an hour west of Zion’s main Springdale entrance. Pioneer Park is a free city park in St. George, UT. There are no playgrounds or swings, but there are arches, slot canyons, caverns, and Moki steps, and tons of rocks to scramble over, under, through, around, up, and down.
Snow Canyon State Park
Snow Canyon State Park is 50 minutes southwest of Zion’s Kolob Canyon Visitor Center, or 75 minutes west of Zion’s main Springdale entrance. Snow Canyon is a unique place to hike that has a short slot canyon and lava tube caves that can be explored, in addition to some beautiful hikes.
Belly of the Dragon
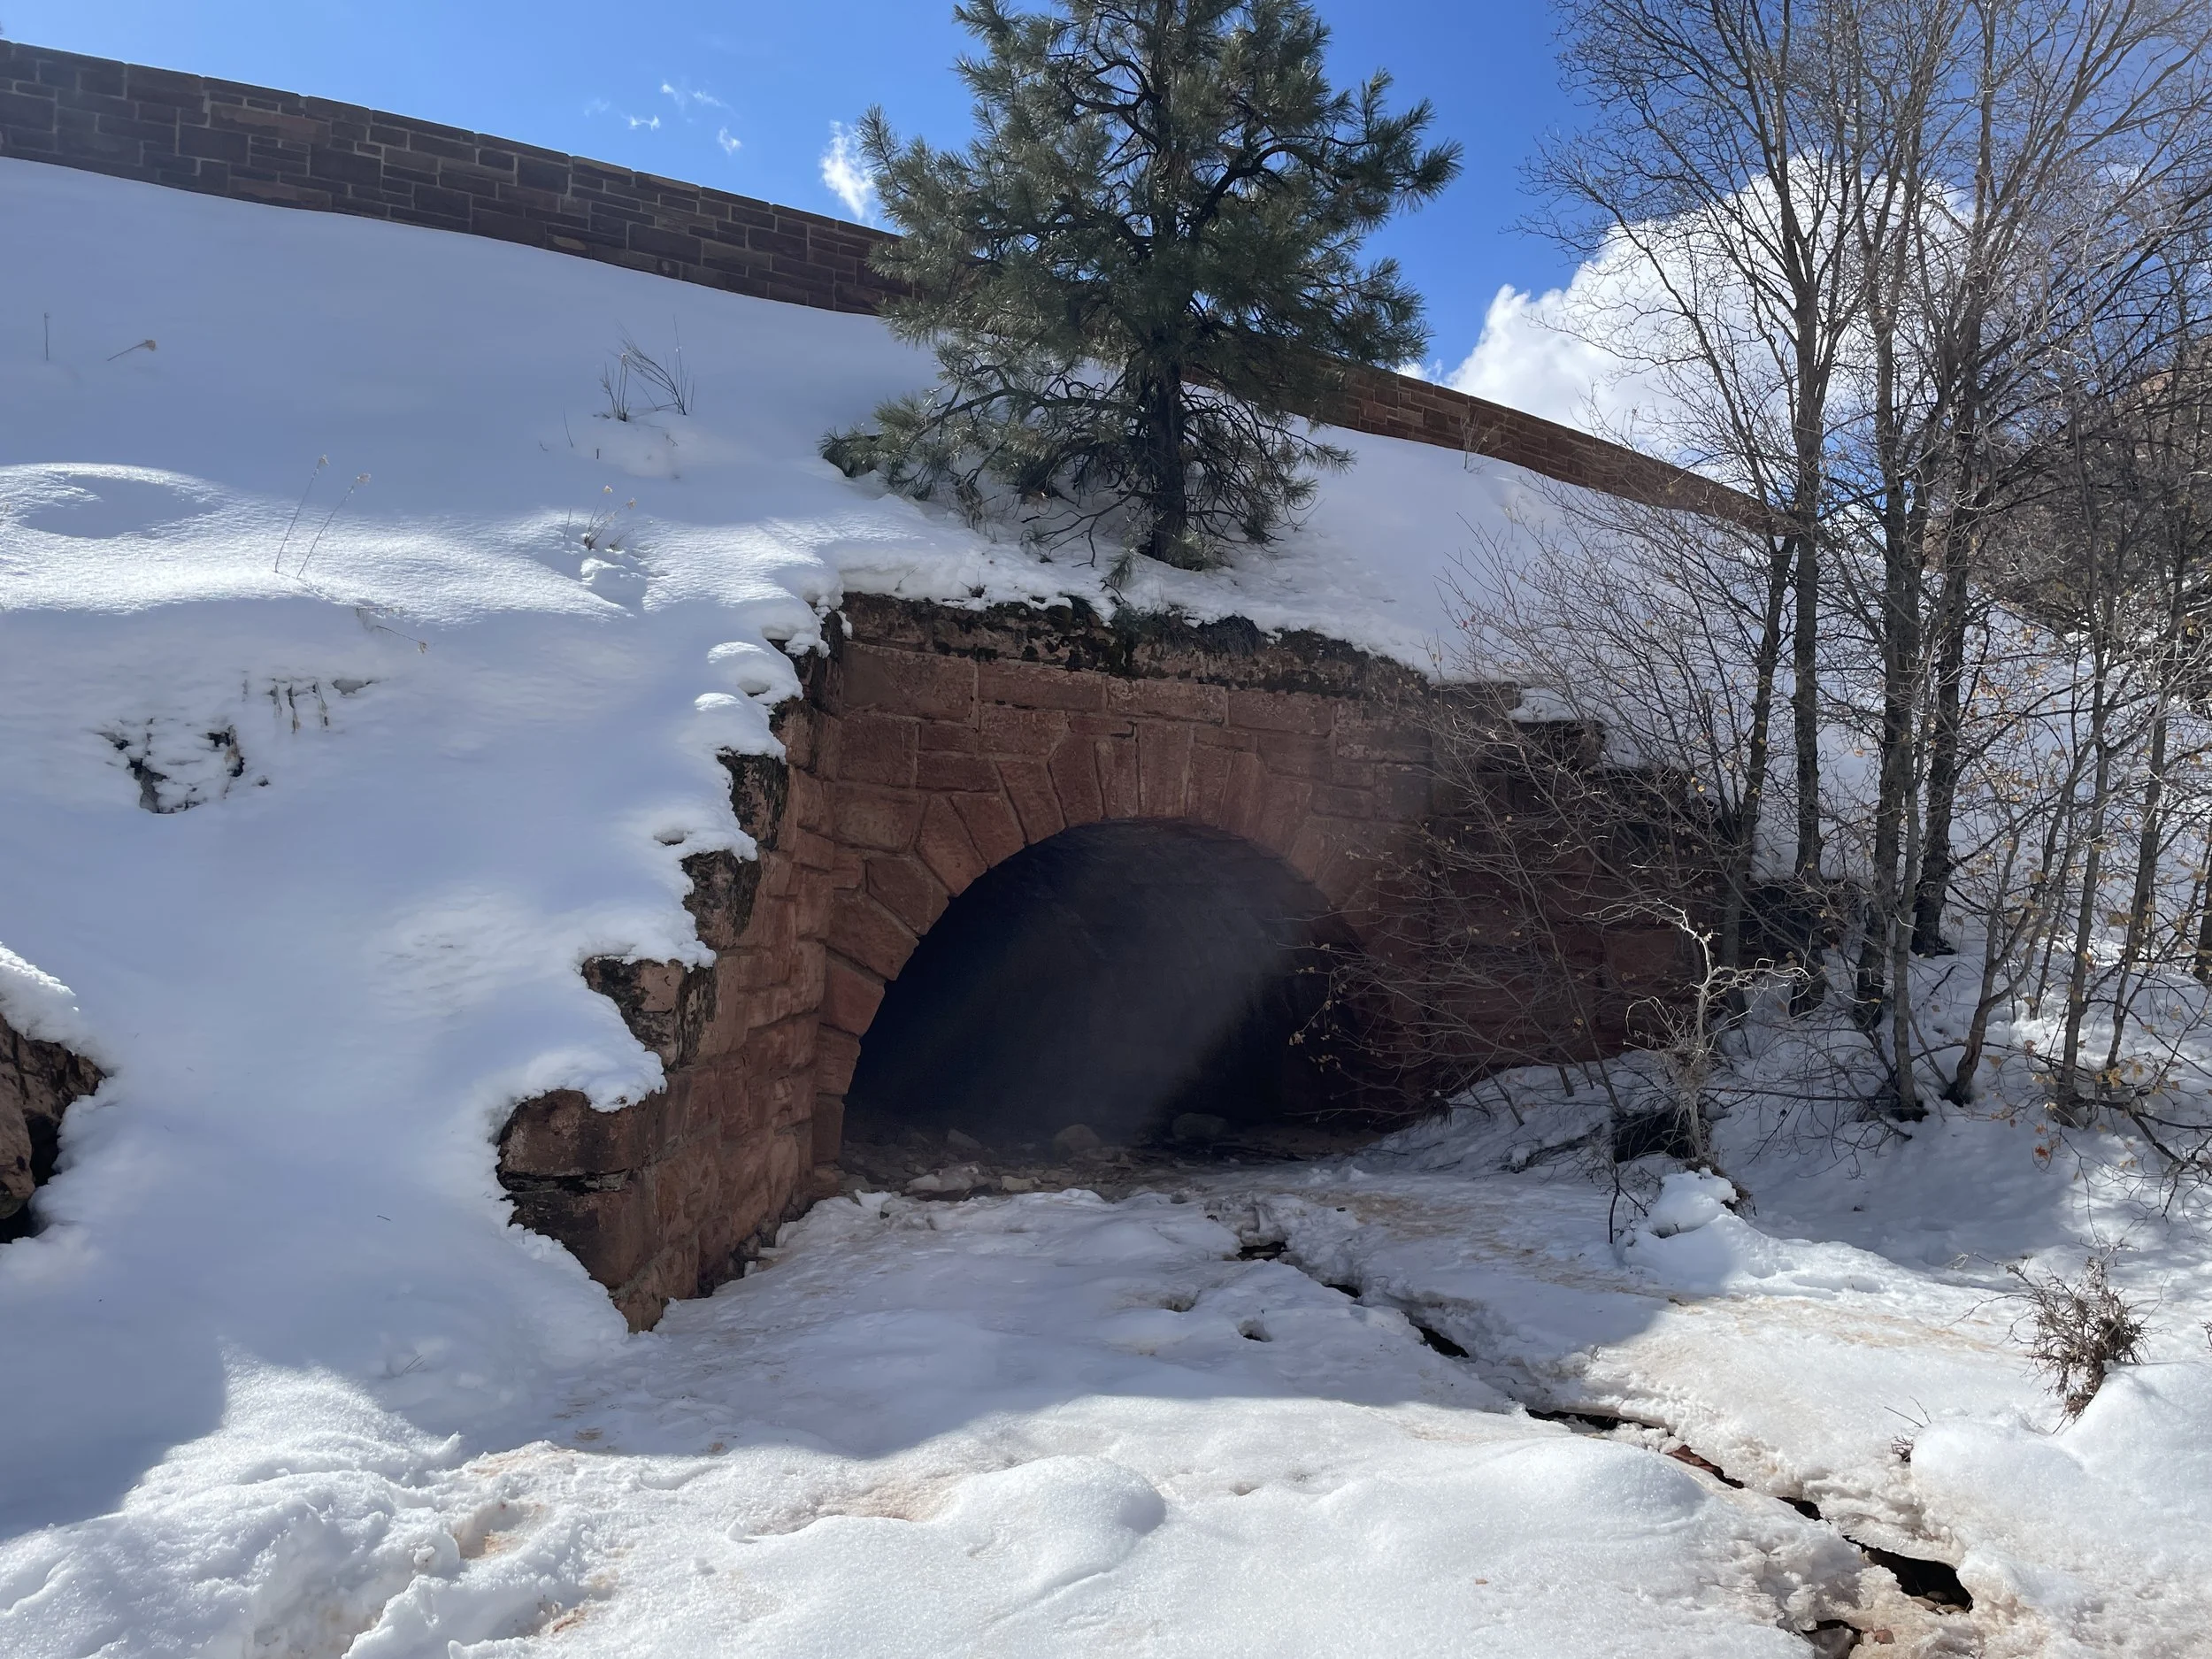
Belly of the Dragon is 20 minutes east of Zion’s east entrance. This is a cool place to stop for hikers of all ages. There’s a little cave that has been formed through the rock under US-89.
Moqui Caverns (Kanab Sand Caves)
The trailhead to Moqui Caverns (also known as Kanab Sand caves) is 30 minutes southeast of Zion’s east entrance. Moqui Caverns is a small man-made cave that can be explored with a short hike. Note that there is a steep scramble that’s needed to get up to the caverns.
Peekaboo Canyon (Kanab)
The off-road vehicle entrance to get to Peekaboo Slot Canyon is 30 minutes southeast of Zion’s east entrance. Peekaboo is a short beautiful slot canyon near Kanab (not to be confused with the Peekaboo Slot Canyon in Escalante). This canyon requires an off-road vehicle to get to the trailhead.
Coral Pink Sand Dunes
Coral Pink Sand Dunes State Park is located 40 minutes south of Zion’s east entrance. Coral Pink Sand Dunes State Park is a fun place to explore a sand dune habitat and play in the sand. Walk up a dune and have fun running down, sledding down, or rolling down. Repeat over and over.
Water Canyon
Water Canyon, managed the Bureau of Land Management, is a rugged, wild canyon about an hour south of Zion that has something for all adventurous souls. Enjoy a 2 mile out-and-back hike to the waterfall, a 6 mile out-and-back hike to White Dome or hike up into Water Canyon and rappel out.
More from www.NatureImpactsUs.com
In the map below, there are additional posts I’ve written attached to each pin. Use two fingers to move around within the map.